Author: homenode

  • Unmasking the Spy: Understanding Smart Home Security Risks

    How your internet-connected devices might be collecting data, and what you can do about it.

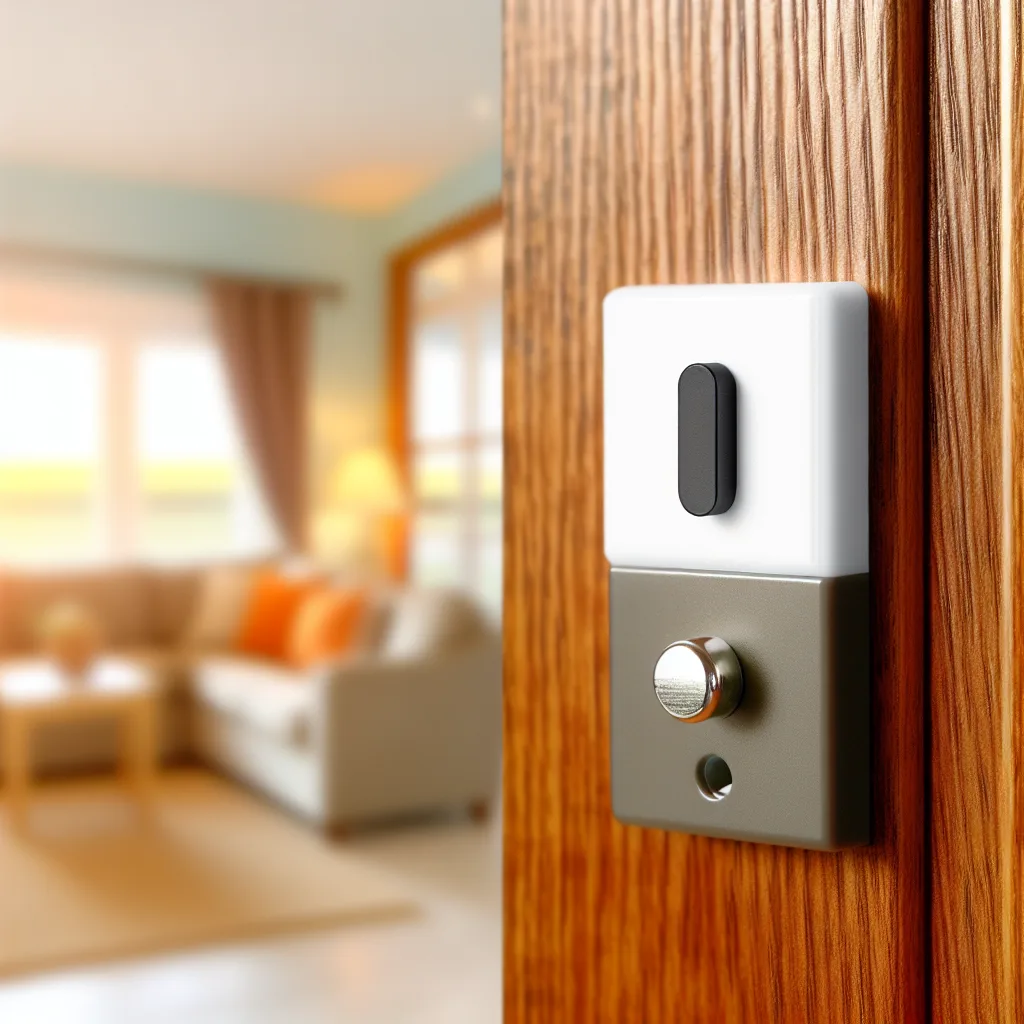
    Imagine the seamless convenience of a smart vacuum mapping your home, diligently cleaning while you focus on other tasks. Yet, what if that same device, designed to simplify your life, was secretly mapping more than just your floors – perhaps your entire digital footprint? This unsettling scenario recently unfolded for a tech blogger whose “smart” vacuum was caught constantly transmitting data overseas. When they attempted to regain control by blocking its telemetry, the device mysteriously ceased functioning, denied warranty support, and was later found to harbor remote-kill commands. This stark example brings into sharp focus the often-overlooked smart home security risks inherent in our increasingly interconnected lives, compelling us to consider who truly controls our devices and our data.

    The Hidden Lives of Your Smart Devices: Beyond Convenience

    Many smart home gadgets, from vacuums to thermostats, offer incredible features. However, their intelligence often relies on extensive data collection, sending information back to manufacturers for “service improvement” or, less transparently, for other purposes. Your smart vacuum might not just map your home layout; it could be logging movement patterns, identifying frequently used rooms, and even inferring your daily routines. This data, often aggregated and anonymized, can sometimes be shared with third parties, blurring the lines of personal privacy. Understanding data collection practices is crucial for every smart home owner. As the Federal Trade Commission (FTC) emphasizes, consumers should be aware of how their online activities and connected devices generate data, and how that data is used and protected. It’s a critical step in maintaining digital autonomy.

    Experts continually advise that “if a device is connected to the internet, it’s a potential vector for data collection or attack.” This underscores the inherent trade-off between convenience and privacy in the smart home ecosystem.

    Furthermore, different brands often share underlying technologies or cloud services, creating a vast, interconnected web where your data could traverse multiple entities. While companies promise enhanced user experiences, the sheer volume and granularity of collected data raise significant questions about potential misuse, targeted advertising, and the long-term implications for individual privacy. Therefore, scrutinizing privacy policies before purchasing any internet-connected device becomes a non-negotiable step.

    Unseen Controls: The Threat of Remote Access and Device Bricking

    Beyond data collection, a more alarming aspect of smart devices is the extent of manufacturer control. The case of the self-destructing smart vacuum highlights a critical vulnerability: the presence of remote-kill commands. This implies that manufacturers, or potentially malicious actors who gain access to their systems, could disable your device remotely, rendering it useless. This “bricking” capability, even if intended for legitimate purposes like security updates or recalls, represents a substantial threat to consumer ownership and control. It raises concerns about a future where your purchased devices might not truly belong to you.

    One cybersecurity researcher noted, “The ability for a manufacturer to remotely disable a device, even if intended for legitimate reasons, presents a powerful and concerning precedent for user control over their own property.”

    Moreover, the supply chain for smart devices is complex, often involving components and software from various global vendors. This complexity introduces numerous internet-connected device vulnerabilities that can be exploited. Malicious code could be injected at any stage, leading to backdoors, unauthorized access, or the deployment of spyware. The Cybersecurity & Infrastructure Security Agency (CISA) provides valuable resources on best practices for securing internet-connected devices, underscoring the importance of robust security measures from both manufacturers and users. Such risks underscore the importance of securing your smart home network and carefully vetting device origins.

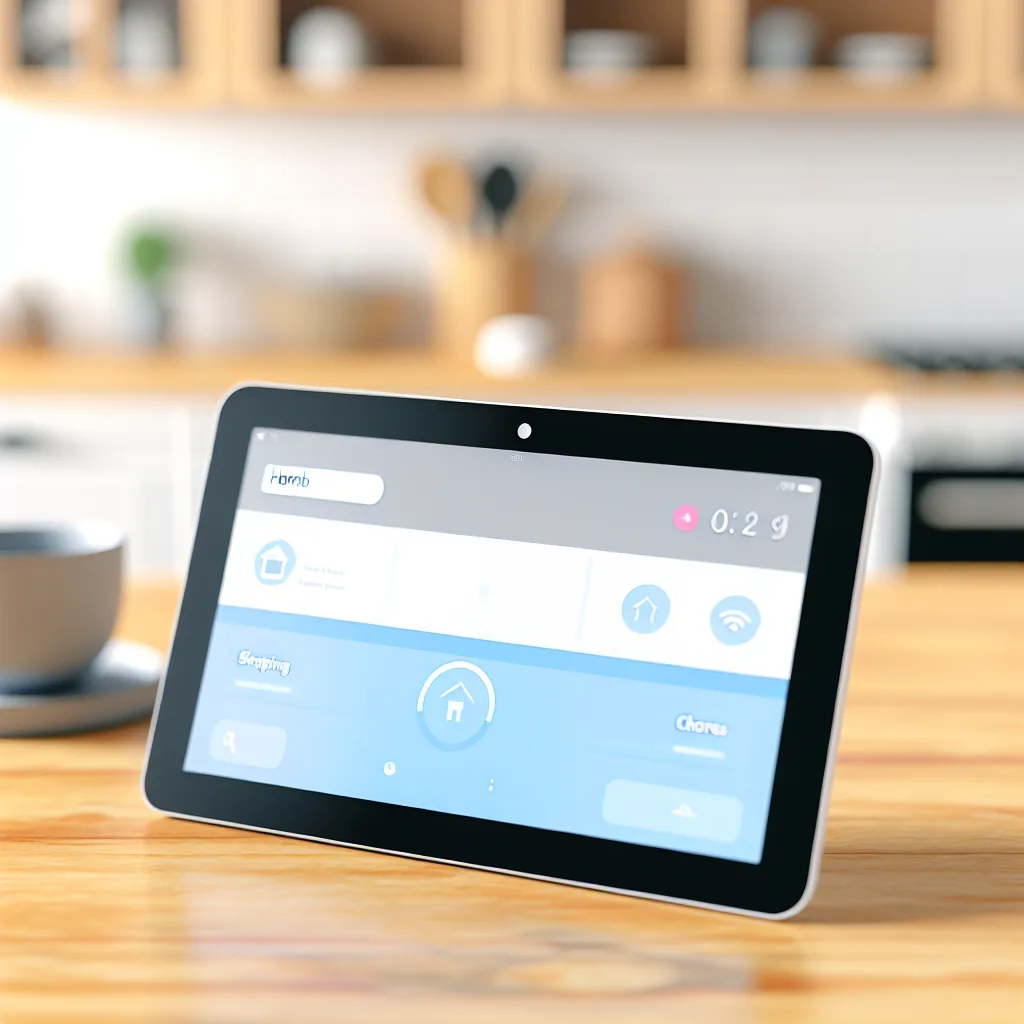
    A Practical Framework for Minimizing Smart Home Security Risks

    Taking proactive steps is essential to safeguard your privacy and digital assets against smart home security risks. Here’s a practical framework to enhance your device security:

    1. Network Segmentation: Isolate your smart devices on a separate network, such as a guest Wi-Fi network or a dedicated VLAN. This prevents compromised IoT devices from accessing your main computers and sensitive data.
    2. Strong Passwords & Multi-Factor Authentication (MFA): Use unique, complex passwords for every device and associated account. Enable MFA wherever possible to add an extra layer of security, making it significantly harder for unauthorized users to gain access.
    3. Regular Firmware Updates: Keep all your smart devices and router firmware up-to-date. Manufacturers frequently release patches to fix known security vulnerabilities. Neglecting updates leaves your devices exposed.
    4. Scrutinize Privacy Policies: Before purchasing or setting up a new device, read its privacy policy thoroughly. Understand what data it collects, how it’s used, and whether it’s shared with third parties. If a policy is opaque or too invasive, reconsider your purchase.
    5. Offline Operation (When Possible): For devices that don’t require constant internet connectivity to function (like the vacuum example), explore options to run them offline or with restricted network access. If a device has a “local-only” mode, utilize it.
    6. “Need-to-Connect” Principle: Connect only those devices to the internet that absolutely require it for their core functionality. The fewer devices exposed to the public internet, the smaller your attack surface.

    Implementing these steps requires a moderate initial effort but offers ongoing protection, transforming your smart home from a potential liability into a securely managed environment.

    Common Pitfalls in Smart Home Security

    Despite growing awareness, several common mistakes continue to expose users to smart home vulnerabilities:

    • Over-reliance on Convenience: Prioritizing ease of use over security, leading to shortcuts like reusing passwords or skipping updates.
    • Ignoring Firmware Updates: Believing that “set it and forget it” applies to smart devices, overlooking crucial security patches.
    • Using Default Passwords: Failing to change manufacturer-set default credentials, which are often publicly known or easily guessed.
    • Connecting Everything to the Main Network: Placing all IoT devices on the same network as sensitive computers, allowing for easy lateral movement by attackers.
    • Believing All “Smart” Means “Secure”: Assuming that because a device is new and high-tech, it automatically comes with robust security. This is often not the case.

    Many users unknowingly agree to extensive data sharing through lengthy terms of service. As one legal analyst stated, “The fine print often grants companies broad rights to aggregate, analyze, and even monetize your behavioral data.”

    Frequently Asked Questions About Smart Device Privacy

    Q1: Can my smart vacuum really spy on me?

    While a smart vacuum isn’t actively “spying” in the traditional sense, many models collect extensive data about your home’s layout, cleaning routines, and even movement patterns. This information, if not properly secured, could potentially reveal details about your daily life. The concern isn’t always about a direct visual spy, but rather the aggregation of seemingly innocuous data points that, when combined, can paint a surprisingly detailed picture of your habits and home environment. Always review a device’s privacy policy to understand what data is collected and how it is used.

    Q2: What’s the biggest threat to my smart home’s privacy?

    The biggest threat to your smart home’s privacy often comes from the sheer volume of data collected and the potential for that data to be mishandled, breached, or sold without your explicit, informed consent. Beyond data collection, insecure devices can also serve as entry points for hackers to gain access to your broader home network, potentially compromising more sensitive information on your computers or other devices. User negligence, such as weak passwords or ignoring updates, also significantly escalates this risk.

    Q3: How often should I update my smart devices?

    You should update your smart devices as soon as manufacturers release new firmware or software versions. Unlike traditional software, many smart devices don’t automatically prompt for updates, requiring you to manually check through their accompanying apps or web interfaces. It’s a good practice to check for updates monthly or at least quarterly. Keeping devices patched is vital, as updates often contain critical security fixes that protect against newly discovered vulnerabilities.

    Q4: Is it better to just avoid smart devices altogether?

    Not necessarily. While exercising caution is wise, you don’t have to completely forgo the convenience and innovation of smart devices. Instead, focus on making informed decisions. Choose reputable brands with strong privacy commitments, implement robust security measures like network segmentation and strong passwords, and stay informed about potential vulnerabilities. For many, the benefits of smart technology outweigh the risks, provided a proactive and secure approach is taken.

    Key Takeaways

    • Smart home security risks are real and extend beyond simple data collection to include manufacturer control and remote device manipulation.
    • Your internet-connected devices gather more data than you might realize; always scrutinize privacy policies before integrating them into your home.
    • Proactive measures, such as network segmentation, strong passwords, and regular updates, are crucial for mitigating potential vulnerabilities.
    • Beware of common pitfalls like using default credentials or ignoring firmware patches, which can leave your smart home exposed.
    • By adopting a security-first mindset, you can enjoy the benefits of smart technology while significantly reducing your exposure to privacy and security threats. Review your smart devices today and fortify your digital perimeter.
  • Proxmox vs. Incus: Which Hypervisor Should You Actually Use?

    Choosing between Proxmox and Incus? This simple guide breaks down the key differences to help you pick the right hypervisor for your lab or business.

    A friend of mine was in a pickle the other day. At his job, they’re looking to replace their old virtualization setup. He’s a fan of Proxmox, but his colleague is making a strong case for something called Incus.

    Their main job is to spin up virtual machines to test client products—firewalls, routers, all sorts of things—and then tear them down just as quickly. They don’t need clustering right now, but it’s something they might want down the road.

    He asked for my take, and it got me thinking. This isn’t just a simple feature-by-feature comparison. It’s about two different philosophies for how to get things done. So, if you’re in a similar boat, let’s talk it through.

    So, What’s Proxmox All About?

    Think of Proxmox as the well-established, all-in-one toolkit. It’s been around for years and has a huge community. It’s built on a solid Debian Linux foundation and bundles everything you need into a single package.

    With Proxmox, you get:
    * A powerful web interface: This is its main attraction. You can manage virtual machines (using KVM for full virtualization) and Linux containers (LXC) right from your browser. No command line needed for 99% of tasks.
    * Features galore: Clustering, high availability, various storage options, backups—it’s all built-in. You install it, and you have a complete, enterprise-ready platform.

    Proxmox is like a Swiss Army knife. It has a tool for almost every situation, all neatly folded into one handle. It’s reliable, powerful, and you can manage your entire virtual world from a single, graphical dashboard. It’s the safe, comfortable, and incredibly capable choice.

    And What’s the Deal with Incus?

    Incus is the new kid on the block, but with a familiar face. It’s a fork of LXD, which was developed by Canonical (the makers of Ubuntu). The project’s lead developer forked it to create a truly community-driven version, and Incus was born.

    Incus feels different. It’s leaner, faster, and more focused.
    * Command-line first: While there are third-party web UIs, Incus is designed to be controlled from the terminal. This makes it incredibly powerful for automation and scripting.
    * Blazing speed: Its reputation is built on speed, especially when creating and destroying system containers. It treats containers as first-class citizens, making them feel almost as lightweight as a regular process. It can also manage full virtual machines, just like Proxmox.

    If Proxmox is a Swiss Army knife, Incus is a set of high-quality, perfectly weighted chef’s knives. Each one is designed for a specific purpose, and in the hands of a pro, they’re faster and more precise. It’s less of a “platform in a box” and more of a powerful component that you build your workflow around.

    The Head-to-Head Breakdown

    Let’s get down to it. When should you choose one over the other?

    Management and Ease of Use

    This is the biggest difference. Do you want a graphical interface where you can see and click on everything? Go with Proxmox. Its web UI is fantastic and makes managing a handful of servers incredibly simple.

    Are you a developer or admin who lives in the terminal? Do you want to automate everything with scripts? You’ll probably love Incus. Its command-line client is clean, logical, and incredibly powerful.

    The Core Philosophy

    Proxmox gives you a complete, integrated solution. The experience is curated for you. This is great if you want something that just works out of the box without much fuss.

    Incus gives you a powerful, streamlined tool. You have more freedom to build the exact system you want, but you also have to make more decisions. It’s more modular.

    The Best Fit for the Job

    So, back to my friend’s problem: spinning up and tearing down test VMs and containers all day.

    For this specific task, Incus has a clear edge. Its speed is a massive advantage when you’re constantly creating and destroying instances. The clean command-line interface makes it trivial to write a simple script that says, “Create this VM with these specs, run my test, and then delete it.” It’s built for this kind of temporary, high-churn workload.

    But that doesn’t mean Proxmox is a bad choice. If my friend’s team is more comfortable with a GUI, or if they also have a number of long-running, “pet” servers to manage, Proxmox might be the better all-around tool for the team. Its integrated backup and high-availability features are also more mature and easier to set up for persistent workloads.

    My Final Take

    There’s no single winner here. It truly depends on you and your team’s workflow.

    • Choose Proxmox if: You value an all-in-one solution with a brilliant web UI and a rich, built-in feature set for a wide range of tasks.
    • Choose Incus if: Your priority is speed and automation, you’re comfortable on the command line, and you prefer a more focused, modular tool for high-frequency tasks.

    Honestly, the best way to decide is to try both. Set up a spare machine and install them. Spend a day creating, managing, and destroying a few VMs and containers. One of them will just feel right for the way you work. For my friend, the speed of Incus was tempting, but the team’s familiarity with graphical tools meant Proxmox was the path of least resistance. And sometimes, that’s the most important factor of all.

  • Upgrading to a PowerEdge T330: My Journey to a Local AI-Ready Home Server

    Upgrading to a PowerEdge T330: My Journey to a Local AI-Ready Home Server

    Discover how a free PowerEdge T330 transformed my home server setup and opened doors to local AI for Home Assistant.

    If you’ve ever toyed with the idea of upgrading your home tech, you might relate to my recent adventure with a home server setup. It all started when a friend gave me a PowerEdge T330 server — a solid machine, with 2 enterprise 1TB drives already installed. This was a big step up from my old, tired laptop that had been running Home Assistant.

    I know, some might raise an eyebrow about running a server on the carpet (yep, I get it, it’s not ideal), but hey, we’re all figuring this stuff out as we go. My previous experience was pretty limited—mainly just tinkering with Home Assistant on a low-power laptop. This PowerEdge gave me a chance to dive deeper into the world of servers.

    Why Upgrade Your Home Server Setup?

    Switching from a laptop to a dedicated home server setup like the PowerEdge T330 means more power, better reliability, and the ability to run more complex tasks. For me, it meant I could finally explore running local large language models (LLMs) or AI for Home Assistant voice commands — something I couldn’t even dream of on the old setup.

    Getting Hands-On: Flashing the RAID Controller

    One of the trickiest parts was flashing the server’s RAID controller firmware from H330 to HBA330 IT firmware. It took hours of trial, error, and coffee, but it was worth it. This step is crucial if you want your drives to behave as simple HBAs rather than RAID arrays, especially when using software like Proxmox for virtualization.

    If you want to learn more about flashing RAID controllers and what it entails, check out Broadcom’s official HBA330 documentation.

    Why Proxmox?

    I installed Proxmox as the hypervisor on this server because it’s free, stable, and well-suited for managing multiple virtual machines or containers. It makes running not just Home Assistant, but also other services like local AI models or media servers, much more manageable.

    If you’re new to Proxmox, the official Proxmox documentation is a fantastic resource.

    Exploring Local AI for Home Assistant

    With the new setup, I’m excited about running local AI models. Using local LLMs for voice commands can boost privacy (since data stays home) and reduce latency compared to cloud services. There’s a growing community experimenting with projects like Mycroft AI or even deploying smaller versions of open-source language models locally, which can be a fun challenge.

    Tips for Anyone Looking to Build a Similar Setup

    • Expect some learning curves: flashing firmware or setting up a hypervisor isn’t always straightforward.
    • Keep an eye on cooling: Servers aren’t always designed for home environments, so good airflow matters.
    • Don’t hesitate to tap into online forums and communities — there’s tons of shared wisdom out there.

    Upgrading your home server setup is rewarding. Whether it’s for smart home projects, local AI, or just having a dedicated box to experiment with, the PowerEdge T330 is a great platform once you get it running right. And for those of us stepping up from minimal setups, well, the journey’s half the fun.

    I’m looking forward to what I can build next — maybe a custom voice assistant that actually understands me!

  • Building a High-Availability k3s Cluster with Mac Minis

    Building a High-Availability k3s Cluster with Mac Minis

    How I set up a reliable k3s deployment using Mac mini M4 models and simple networking gear

    If you’ve ever thought about running your own Kubernetes cluster at home or a small office setting, a high-availability k3s cluster is a neat project to dive into. Recently, I embarked on building one myself using six Mac mini M4 base models — yes, those little powerhouse machines Apple released recently. Here’s how it went, and what I learned along the way.

    Why a High-Availability k3s Cluster?

    When it comes to Kubernetes, a high-availability (HA) setup means your cluster can keep running smoothly even if some nodes fail. For me, using lightweight Kubernetes distributions like k3s makes it much easier to manage this at home without massive servers. Plus, k3s is known for its simplicity and efficiency.

    The Hardware Setup: Mac Minis M4

    I chose six Mac mini M4 devices. Each came with 256GB of internal storage and 16GB of RAM — a solid base configuration. These machines are known for their powerful CPU and efficiency, which suits running container workloads well.

    To boost storage, I hooked each Mac mini up to a passive cooling enclosure that expanded their storage to 1TB. This extra space is quite handy, especially when running multiple containers or experimenting with different workloads.

    A crucial piece in this setup is networking. I connected all six Mac minis using a 10Gbps switch. The 10Gb Ethernet ports built into these Mac minis make a big difference. This high-speed connection helps keep communication between nodes fast and reliable, which is vital for HA clusters.

    Cluster Architecture: Controllers and Workers

    I split the Mac minis into two groups:

    • Controllers: Three Mac minis act as controller nodes. Initially, I also ran workloads on two of these controllers, which helped manage resources flexibly.
    • Workers: The other three Mac minis are dedicated worker nodes.

    This division helps maintain your cluster’s availability and stability. If one controller goes down, the others keep things running.

    Software Side: Lima with RedHat and k3s

    To run k3s on the Mac minis, I used Lima — a Linux VM manager designed for macOS. Inside each Lima instance, I ran a lightweight RedHat-based Linux distribution. This approach lets the Mac minis run Linux containers smoothly.

    From there, I deployed k3s on each node, configuring the cluster to work together across the network.

    Why This Setup Works Well

    • Efficient hardware: Mac minis offer a powerful, compact solution without the noise and power draw of traditional servers.
    • Storage expansion: Passive cooling enclosures with extra SSDs mean more room for containers.
    • Fast networking: 10Gb Ethernet ensures quick data exchange between nodes.
    • Simple but resilient architecture: Three controller nodes for HA, plus dedicated workers.
    • Flexible software: Running k3s on Linux inside macOS using Lima is a smart way to bridge platforms.

    Things to Consider

    • The Mac mini M4s with 10Gb Ethernet are a crucial foundation. Slower networking would bottleneck the cluster.
    • Running workloads on controller nodes is okay for this scale but might complicate things as the cluster grows.
    • Lima adds a virtualization layer, which might add a little overhead compared to native Linux nodes — but it’s a fair trade-off for macOS compatibility.

    Final Thoughts

    Building a high-availability k3s cluster using Mac minis is a rewarding exercise in mixing consumer hardware with cloud-native technologies. Whether you want to learn more about Kubernetes, experiment with edge computing, or just tinker with a smart home lab, this setup shows you can do a lot with small, accessible gear.

    If you’re curious to explore k3s further, their official documentation is a great place to start. For Mac mini specs, Apple’s official site has the detailed breakdown. And if you wonder about Lima, their GitHub page provides all the setup tips.

    Thanks for reading along my journey — maybe this inspires you to build your own high-availability k3s cluster!

  • Why Do Ring Door Sensors Sometimes Say the Door is Open When It’s Closed?

    Why Do Ring Door Sensors Sometimes Say the Door is Open When It’s Closed?

    Understanding Ring door sensor issues and how to troubleshoot them in your smart home setup

    If you’ve ever had a Ring door sensor tell you that your door is open when it’s actually closed, you’re not alone. I recently ran into this exact issue with my own Ring door sensors, and it got me digging into why this might be happening. In this post, I’ll share what I learned about Ring door sensors, what causes these intermittent failures, and what you can try to fix or avoid the problem.

    What Are Ring Door Sensors?

    Ring door sensors are small devices designed to detect whether a door or window is open or closed. They usually consist of two parts: one attached to the door itself and the other to the door frame. When the two parts are separated, the sensor registers the door as open; when they’re close, it sees it as closed. These sensors are popular because they integrate with smart home systems to alert you if someone opens a door or window.

    The Problem: Sensors Stuck in “Open” State

    A common issue I’ve noticed — and I’m guessing you’ve seen it too — is that sometimes these sensors get stuck signaling “open,” even though the door is clearly shut. That means your smart home system thinks the door’s open when it really isn’t. The frustrating part is you have to open and close the door several times before the sensor catches the correct status.

    What’s Causing This? Ring Door Sensors or Z-Wave Network?

    If you use a Z-Wave hub like Hubitat or others in conjunction with Home Assistant, you might wonder if the problem is with your Z-Wave setup or the Ring sensors themselves.

    Based on some experiments and common user experiences, here’s what I found:

    • If your other Z-Wave devices like blinds or light switches work fine, the network is likely solid.
    • Intermittent “open” signals are usually due to the sensor or how it’s mounted rather than signal strength.

    So, it’s probably more of a Ring sensor issue than your Z-Wave network.

    Possible Reasons for Sensor Failures

    • Placement and Alignment: Ring door sensors rely on the two parts being perfectly aligned. If the sensor or magnet has shifted slightly over time, it can cause false readings.
    • Battery Life: Low battery can make sensors behave erratically. It’s good to check and replace batteries if needed.
    • Interference or Distance: Even though Z-Wave signals are decent at passing through walls, too much distance or interference could disrupt the signal. But if other devices are fine, this is less likely.
    • Software or Firmware Bugs: Sometimes, sensors themselves have firmware quirks that cause intermittent failures.

    What You Can Do

    • Double-check the alignment of the sensor and magnet. Make sure they line up exactly as instructed in the manual.
    • Replace the battery to rule out power issues.
    • Try moving the sensor slightly or testing it on a different door to see if the problem persists.
    • Make sure your hub firmware and sensors are updated to the latest versions.

    When To Be Concerned

    If you’ve tried everything and the sensor still misreports, it might be worth contacting Ring support or considering another brand that uses the same Z-Wave technology but has better reliability reviews.

    Final Thoughts

    Ring door sensors add a nice layer of security and convenience, but like many smart home devices, they aren’t perfect. From what I’ve gathered, the “open” stuck state is more often a sensor or installation issue rather than your Z-Wave network being unreliable. By checking alignment, power, and firmware, you’ll usually solve or improve the issue. And if not, there are always other sensor options out there.

    If you want to dive deeper, check out the official Ring support site for troubleshooting tips and Z-Wave Alliance for more on the protocol behind these devices. Also, the Hubitat community is a great place to see how others solve sensor quirks.

    Hope this helps you get your smart door setup working smoothly again!

  • Tired of Family Chaos? I Found a Simple Dashboard We Actually Use.

    Tired of Family Chaos? I Found a Simple Dashboard We Actually Use.

    Meet HomeHub: The lightweight, private, self-hosted family dashboard that simplifies everything from shopping lists to chores.

    Let’s be honest, keeping a family organized can feel like herding cats. There’s the shopping list on a notepad, the chore chart on the fridge, reminders in one app, and shared notes in another. It’s a digital mess. What if you could have one central, private spot for all of it, right on your own home network? I stumbled upon a fantastic, no-fuss self-hosted family dashboard called HomeHub, and it’s quietly made our daily lives a lot smoother.

    It’s not some big, complicated software. It’s the opposite. It’s a simple, clean interface that combines a bunch of the little utilities my family uses all the time, and because it runs locally, it’s completely private.

    What is HomeHub? Your Own Private Command Center

    At its heart, HomeHub is a simple web page that runs on a machine in your house. You can run it on a Raspberry Pi, an old laptop, or basically any computer using Docker, which makes the setup process much simpler. The entire idea is to create a lightweight and private self-hosted family dashboard that does a few key things really, really well, without the bloat of enterprise-level software.

    The creator originally built it to run on an old Android device, which tells you just how lightweight it is. It’s designed for one purpose: to be a useful hub for your family, accessible from any browser on your home WiFi. No cloud servers, no data mining, no subscriptions. Just your data, in your home.

    The Features That Make This Self-Hosted Family Dashboard Shine

    HomeHub isn’t trying to compete with massive platforms like Notion or Asana. Its magic is in its simplicity and focus on common household needs.

    The Everyday Organizers

    This is the core of it for us. The dashboard includes three simple but essential tools that we now use daily:
    * Shared Notes: A simple place to jot down things everyone needs to see.
    * Shopping List: Anyone can add items. When you’re at the store, you just pull it up on your phone. It’s straightforward and it works.
    * To-Do/Chore Tracker: Assigning and tracking chores without needing a separate app or a physical whiteboard.

    The “Who’s Home?” Status Board

    This is one of those brilliantly simple features I didn’t know I needed. On the main page, there’s a small section that shows who is currently at home. It’s a small touch that adds to the feeling of a central family hub.

    Simple Expense Tracking That Makes Sense

    I’ve tried complex budget apps, and they never stick. HomeHub has a simple expense tracker that’s perfect for small, recurring household bills. I use it to track our weekly milk delivery and newspaper subscription—things that are easy to forget but add up over time. You can set expenses to recur daily, weekly, or monthly.

    A Few Extra, Handy Tools

    Beyond the main organization features, it bundles in a few surprisingly useful utilities:
    * A media downloader (it even works with Reddit videos)
    * A recipe book to save your favorite meals
    * An expiry tracker for pantry items
    * A URL shortener and QR code generator for your home network

    Getting Your Own Self-Hosted Family Dashboard Running

    The best part is that this isn’t some expensive subscription service. It’s a free, open-source project you can set up yourself. The whole thing lives on a platform called GitHub, and you can find it right here: HomeHub on GitHub.

    For those familiar with Docker, getting it running is incredibly straightforward. If you’re new to this world, the idea of “self-hosting” might sound intimidating, but it’s becoming more accessible than ever. It’s essentially about running your own software on your own hardware, giving you complete control and privacy. You can learn more about the basics of self-hosting here.

    Customization is done through a single, simple configuration file. In it, you can add your family members’ names, toggle features on or off, and even change the theme colors.

    Why Simplicity Wins

    We’ve all tried those all-in-one apps that promise to organize your entire life, only to abandon them because they’re too complicated. HomeHub skips the complexity. There are no individual user accounts to manage. You just define your family members in the configuration file, and they can select their name when they use it. You can add a single password for the whole dashboard or, if it’s only on your secure home network, run it without one.

    If you’re looking for a simple, private, and effective way to bring a little order to the family chaos, I’d really recommend checking out HomeHub. It’s a perfect weekend project that delivers real-world value every single day. It’s the kind of self-hosted family dashboard that proves you don’t need a complicated system to get organized—you just need the right one.

  • Building Your Perfect Homelab: A Friendly Guide to Diagramming Your Setup

    Building Your Perfect Homelab: A Friendly Guide to Diagramming Your Setup

    Explore essential tips and feedback for creating an effective homelab diagram that fits your needs

    If you’ve ever dabbled in IT projects at home, you’ve probably heard about the importance of having a solid homelab setup. Most of us tech enthusiasts will vouch for one critical tool to help keep things organized: a clear and well-thought-out homelab diagram. This little blueprint can make a huge difference, whether you’re a beginner or a seasoned expert.

    Why Create a Homelab Diagram?

    A homelab diagram helps you visualize your entire setup. It acts like a roadmap, showing how components connect and communicate. When you have a homelab diagram, troubleshooting network issues or planning upgrades becomes a breeze. Plus, it’s a way to showcase your setup to friends or the online community for advice.

    Starting Your Homelab Diagram: Keep It Simple

    When sketching your homelab diagram, simplicity is key. Begin by noting down all essential devices: servers, switches, routers, and storage units. Label each component and use clear lines to demonstrate connections. Avoid cluttering your diagram; instead, focus on readability. Tools like draw.io or Microsoft Visio offer user-friendly platforms to create your diagrams without fuss.

    Tips for Improving Your Homelab Diagram

    • Use Consistent Symbols: Pick icons or shapes that represent your devices consistently.
    • Color Code Connections: Differentiate cables or signals by color to understand data flow quickly.
    • Add Notes: Brief annotations can explain roles or settings without overwhelming visuals.
    • Update Regularly: As your homelab grows or changes, keep the diagram current.

    Why Feedback Matters

    Sharing your homelab diagram with others can give you valuable insights. Peers might spot missing links or suggest optimizations you hadn’t considered. Online communities like Spiceworks or Homelab subreddit are great places to get constructive feedback.

    Real-Life Example

    Let me share a quick story. When I first built my homelab, my initial diagram was messy and didn’t account for a backup power source. After sharing it with a user group, I realized I needed to include my UPS and a switch redundancy setup. Updating the diagram helped me avoid potential downtime during power hiccups.

    Final Thoughts

    A homelab diagram isn’t just a drawing—it’s a living document that grows with your setup. Whether you’re managing a few devices or a more complex network, spending a little time on a good diagram pays off in clarity and ease of maintenance. So grab your coffee, start sketching, and share your diagram for some fresh eyes to help you improve.

    For more detailed networking diagrams and advice, check out Cisco’s official network diagram guidelines or Netgate’s pfSense network diagram examples.

  • Are Xeon Processors Worth It for Your Home Lab?

    Are Xeon Processors Worth It for Your Home Lab?

    Breaking down whether a Xeon setup fits your Proxmox, NAS, and media server needs

    If you’re diving into the world of home lab setups, chances are you’ve wondered whether a home lab Xeon processor is really worth the investment. Maybe you’ve spotted some affordable servers with Xeons and decent RAM and thought, “Could this be my perfect build?” I’ve been there too, wondering if such a setup is practical, especially for running Proxmox, home automation (HA), and eventually some media server tasks. Let’s chat about what it all means and if it fits your needs.

    What Makes Xeon CPUs Popular in Home Labs?

    Xeon processors are server-grade CPUs known for stability, multi-core performance, and support for ECC RAM (which helps avoid data corruption). For many, these features feel like a natural fit for a home lab because they promise reliability and power. But that doesn’t automatically mean they’re always the best choice.

    If your goal is to run a Proxmox environment, which is a popular hypervisor with container support, having plenty of cores and threads is handy for managing multiple virtual machines or containers smoothly. Xeons typically shine here, especially the models designed for multi-threaded loads.

    How Does a Xeon Fare in a Home Lab Setup?

    Here’s the thing about using a typical Xeon server in your home lab:

    • Decent RAM is a plus: Most Xeon servers allow for lots of ECC RAM, so you get stability if your workloads need it.
    • Storage: You mentioned you already have plenty of HDDs, so storage isn’t an issue. Xeon servers usually come with onboard RAID support, which helps with data redundancy — great for NAS-like setups.
    • Transcoding without a GPU: This can be tricky. Xeon CPUs aren’t magic for video transcoding without a GPU. Software transcoding relies heavily on the CPU, and while some Xeons are powerful, they may struggle to keep up with multiple streams, especially high-definition content.

    When you add a GPU later for media server tasks (like Plex or Jellyfin), your setup will be much more efficient. GPUs handle transcoding much better, freeing up CPU resources and making your media streaming smooth.

    A Quick Look at Alternatives

    If your budget is tighter or you want a more general-purpose box, there are alternatives to Xeon you might consider, such as AMD Ryzen or Intel’s consumer-grade CPUs with many cores. They might lack ECC RAM support, but for certain home labs, that’s an acceptable trade-off.

    Still, the ruggedness and server focus of Xeon are comforting if uptime and reliability top your list.

    Is a Xeon-Based Home Lab Right for You?

    So, should you grab a Xeon for your home lab? Here’s a quick checklist to think about:

    • Proxmox and Virtualization: Yes, Xeons are well-suited here.
    • Media Server Usage: Great once paired with a GPU for transcoding.
    • Storage and NAS Needs: Excellent, given RAID and ECC support.
    • Budget: Generally pricier than consumer CPUs.
    • Power Consumption: Server CPUs can be more power-hungry.

    If you tick most of these boxes and want a stable, versatile setup, a home lab Xeon is likely worth it. Plus, there’s plenty of documentation and community support out there for running Proxmox and NAS on Xeon servers.

    Wrapping It Up

    In the end, the home lab Xeon choice depends on your specific use case. For virtualization, NAS, and eventual media server with GPU transcoding, Xeon offers a solid foundation. Just be mindful of the lack of GPU in the initial stage — transcoding will lean heavily on the CPU. Also, consider power costs and your budget.

    For more insights, you can check out Intel’s Xeon processor lineup and the Proxmox official site.

    If you’re curious about home lab setups in general and want some ideas, sites like ServeTheHome have tons of real-world builds and advice.

    Hopefully, this helps you get a better sense of whether the home lab Xeon path suits your plans. Feel free to reach out with any more questions about setting up your own little digital corner at home!

  • Turning an Old Dell PowerEdge T320 into a Home Server

    Turning an Old Dell PowerEdge T320 into a Home Server

    How I gave new life to an old server for storage, media, and more

    If you’re like me, you might have some older tech kicking around, wondering if it still has a use. I recently decided to bring a Dell PowerEdge T320 back into action as my home server setup—and it’s been smoother than I expected. This isn’t about the latest flashy gear. Instead, it’s a solid, thoughtful way to get a reliable setup without breaking the bank.

    Why Use a Dell PowerEdge T320 for Home Server Setup?

    The Dell PowerEdge T320 isn’t new, but it packs a punch with a Xeon E5-2403v2 processor and 48 GB of RAM. These specs give it plenty of muscle for handling storage, media streaming, virtualization, and more. Plus, it has plenty of bays and expansion slots, making upgrades easy down the line.

    I started with two SanDisk Plus 240 GB SSDs for the boot pool running TrueNAS Scale—a great open-source storage OS that’s user-friendly and robust. For bulk storage, I’ve got six WD Red 4 TB hard drives. These drives are known for reliability in NAS environments and keep my data safe.

    Planning My Home Server Setup Upgrades

    The beauty of a flexible server like this is that modifications are possible as needs evolve. Here’s what I have planned:

    • Disk Expansion: Adding a Chieftech 4-bay hot-swap cage to utilize the empty 5.25″ bays. This will make swapping drives easier and keep downtime minimal.
    • SSD Cache and Storage: Installing a 1TB WD Red SN700 SSD as a cache and a 2TB SN700 for Docker containers and virtual machines. This helps speed up access to frequently used apps and files.
    • Boot Pool Upgrade: Replacing the current SanDisk drives with two Intel DC S4500 240GB Enterprise SATA SSDs for increased durability and speed.
    • Massive Storage Capacity: Eventually filling 12 drive bays with WD Red Plus 12TB HDDs, giving me a whopping 144TB raw storage—perfect for media libraries or backups.
    • Networking Boost: Adding a Dell-branded Intel X520-DA2 10Gbit NIC to significantly improve network speeds.

    Why Go This Route?

    Using a server like this for a home server setup isn’t just about having tons of storage. It’s about control. I can run multiple containers and VMs, host media servers like Plex, or even experiment with new software without worrying about reliability. TrueNAS Scale’s support for ZFS delivers data integrity features that are great for peace of mind.

    It also helps that this is a quieter server than some older rack gear, making it manageable to keep in a living room without being distracting.

    Helpful Resources

    If you’re considering a home server, check out TrueNAS Scale’s official website for details on the OS I’m using. For hardware details and upgrade options, Dell’s official PowerEdge T320 support pages provide extensive specs. Lastly, Western Digital’s NAS drives info give a good overview of why WD Red drives are a solid choice for home servers.

    Setting up this Dell PowerEdge T320 as my home server has been a rewarding project that blends practicality with potential for growth. If you’ve got old hardware sitting around, maybe it’s time to think about a home server setup and what you could do with it.

  • Proxmox-GitOps: Simplifying Container Automation with IaC for Your Homelab

    Proxmox-GitOps: Simplifying Container Automation with IaC for Your Homelab

    Discover how Proxmox-GitOps streamlines container management using Infrastructure-as-Code and GitOps on Proxmox VE

    If you’ve ever dreamed of running a homelab that manages itself, you might want to hear about Proxmox-GitOps. It’s a tool that helps automate container management on Proxmox VE by using Infrastructure-as-Code (IaC) principles combined with a GitOps approach. Simply put, Proxmox-GitOps lets you provision, configure, and orchestrate Linux Containers (LXC) in a reproducible, version-controlled way, making your environment easier to manage and much more reliable.

    What is Proxmox-GitOps?

    Proxmox-GitOps is an extensible, self-bootstrapping GitOps environment designed for Proxmox VE (PVE). It aligns with Proxmox 9.0 and the latest Debian release (Debian Trixie) to create a solid base for your containers. The cool part is that you can bootstrap your entire setup with just a single command—from deploying on Docker to running containers in Proxmox recursively.

    At its core, it uses tools like Ansible for provisioning, and Chef (or Cinc, a community fork of Chef) for inside-container configuration. This combination ensures that your containers have consistent base configurations, including apps, users, keys, and tooling. Everything is managed through code, so your setups are deterministic and idempotent, which means they behave the same way every time.

    How Does the Pipeline Work?

    One of the unique things about Proxmox-GitOps is its recursive GitOps pipeline. Your entire container environment lives in a monorepository, with submodules for shared libraries and container-specific code. When you push changes, this triggers a continuous integration/continuous deployment (CI/CD) pipeline that updates containers automatically according to the desired state defined in your repository.

    This automated process includes:
    – Bootstrapping new containers
    – Applying configurations inside containers
    – Enforcing consistent states across all containers
    – Updating references and libraries recursively

    The automation communicates with Proxmox through its API, using Ansible for provisioning. Inside the containers, Chef manages app-specific configs. This setup allows you to manage your infrastructure much like you manage application code, making updates safer and more predictable.

    Why Use Proxmox-GitOps for Your Homelab?

    If you’re running a homelab or a small compute environment, managing containers by hand can quickly get messy. Proxmox-GitOps simplifies this by putting your entire container lifecycle under version control and automating the whole process. If something breaks or you want to roll back, it’s as easy as reverting a commit.

    Another benefit is that because the control plane itself runs inside containers provisioned by the same system, you get built-in verification of your infrastructure’s foundation. It’s kind of like the system checking its own work.

    Plus, it’s super extensible, so you can adapt it as your needs grow. Since this environment is actively developed, there might still be rough edges, but it’s already a solid starting point if you want a homelab-as-code experience.

    Getting Started and Resources

    Curious to explore or contribute? You can check out the project on GitHub where it’s openly maintained. For those new to IaC or GitOps, it might help to brush up on Ansible and Chef since they’re key to how this system manages everything.

    If you want to get a broad overview of Proxmox itself, the official Proxmox VE documentation is a great place to start.

    Final Thoughts

    Proxmox-GitOps is a neat way to bring modern DevOps practices right into your homelab or small server setup. It embraces Infrastructure-as-Code and GitOps principles, making container automation more manageable and less error-prone. By using familiar tools and a recursive pipeline, it offers a fresh approach to managing Linux containers on Proxmox VE.

    If you’re excited about automating your Proxmox containers with code and want a reproducible, version-controlled setup, Proxmox-GitOps is definitely worth exploring. And as you tinker, sharing feedback and experiences can help shape its future too!