Author: homenode

  • So You Got a New Computer. Now What?

    So You Got a New Computer. Now What?

    Got a spare computer? Turn it into a powerful home server! This guide walks you through setting up Proxmox, handling hardware, and remote access with WireGuard.

    So, you got a new computer.

    Maybe it’s a small, quiet box you found online, or maybe it’s an old desktop that was just collecting dust. It has that new-project energy. That “I could do something cool with this” feeling.

    But then comes the big question: What now?

    If you’re anything like me, your mind starts racing. Could it be a media center? A place to back up files? A laboratory for tech experiments? The answer is yes, to all of the above. You’re on the verge of building your first home server. And it’s way more fun and less intimidating than it sounds.

    Let’s walk through turning that box into the digital heart of your home.

    First, a Quick Look at the Hardware

    You might have popped it open and found some interesting parts inside. I recently heard about a machine that had a hybrid Intel Optane and NVMe SSD drive.

    If you’ve run into one of these, you might be scratching your head. What’s the Optane part for?

    Here’s the simple version: Intel Optane was designed as a cache to speed up slower, traditional hard drives (the spinning kind). It was a pretty neat idea at the time. But here’s the thing—it was meant to help a slow drive feel fast. Your NVMe SSD is already fast. Really fast.

    So, for a home server project in today’s world, that Optane portion is mostly useless. It adds a layer of complexity you just don’t need. My advice? Just ignore the Optane functionality. Treat the drive as a standard NVMe SSD. If the drive is too small for your ambitions, you might even consider swapping it out for a simple, larger NVMe or SATA SSD. Keep it simple.

    Giving Your Server Its Brain: Meet Proxmox

    Okay, hardware sorted. Now, what software do you run on this thing? You could just install Windows or a standard version of Linux, but if you want to unlock its true potential, you’ll want a “hypervisor.”

    Think of a hypervisor as a lightweight base camp for your server. It lets you run multiple, separate operating systems all on the same machine, all at the same time. It turns one computer into a dozen little computers.

    The best place to start? Proxmox.

    It’s free, incredibly powerful, and has a huge community behind it. You install Proxmox first, and from there, you can easily create “virtual machines” (VMs) and “containers” (LXCs).

    Don’t let the terms scare you. It’s basically like digital Lego. You can spin up a new container in seconds to try something out and then tear it down just as fast if you don’t like it.

    What can you build with these digital Legos? Here are a few ideas to get you started:
    * Ad-Blocker: Install Pi-hole to block ads across your entire home network. No more annoying banners on your phone or smart TV.
    * Media Server: Set up Jellyfin or Plex to organize your movies and TV shows into a beautiful, Netflix-style library you can stream anywhere.
    * Smart Home Hub: Run Home Assistant to finally unify all your random smart plugs, lights, and sensors into one amazing interface.
    * Personal Cloud: Use Nextcloud to create your very own private Google Drive or Dropbox for your files and photos.

    Suddenly, this little box is doing a lot of heavy lifting for you, and you’re learning a ton along the way.

    Accessing Your Lab from Anywhere

    Your server is humming along at home, but what if you’re at a coffee shop or traveling and want to check on it, grab a file, or show a friend your new media setup?

    This is where remote access comes in. It has two parts: connecting securely and then controlling the machine.

    For the secure connection, the best tool for the job right now is WireGuard. It’s a modern VPN (Virtual Private Network) that creates a super-fast and super-secure “tunnel” from your laptop or phone directly to your home network. It’s like having a very, very long Ethernet cable that follows you everywhere. Setting it up is a great weekend project, and once it’s running, you’ll wonder how you ever lived without it.

    Once you’re connected via WireGuard, you can control things. Proxmox has a great web interface that lets you manage all your virtual machines. And if you’ve set up a VM with a desktop (like Windows or Linux Mint), you can use standard Remote Desktop (RDP) or VNC software to see and use its desktop as if you were sitting right in front of it.

    It’s a Journey, Not a Destination

    And that’s really it. You start with a box. You install a powerful base like Proxmox. You start building things you find useful or fun. You figure out how to access it from anywhere.

    Don’t worry about getting it perfect on day one. The real fun of a home lab is the process itself. The tinkering, the problem-solving, and the “aha!” moment when your new service finally clicks on.

    So go ahead, plug it in, and start building. You’ve got this.

  • The Home Lab Trap: How a Simple Project Takes Over a Wall

    The Home Lab Trap: How a Simple Project Takes Over a Wall

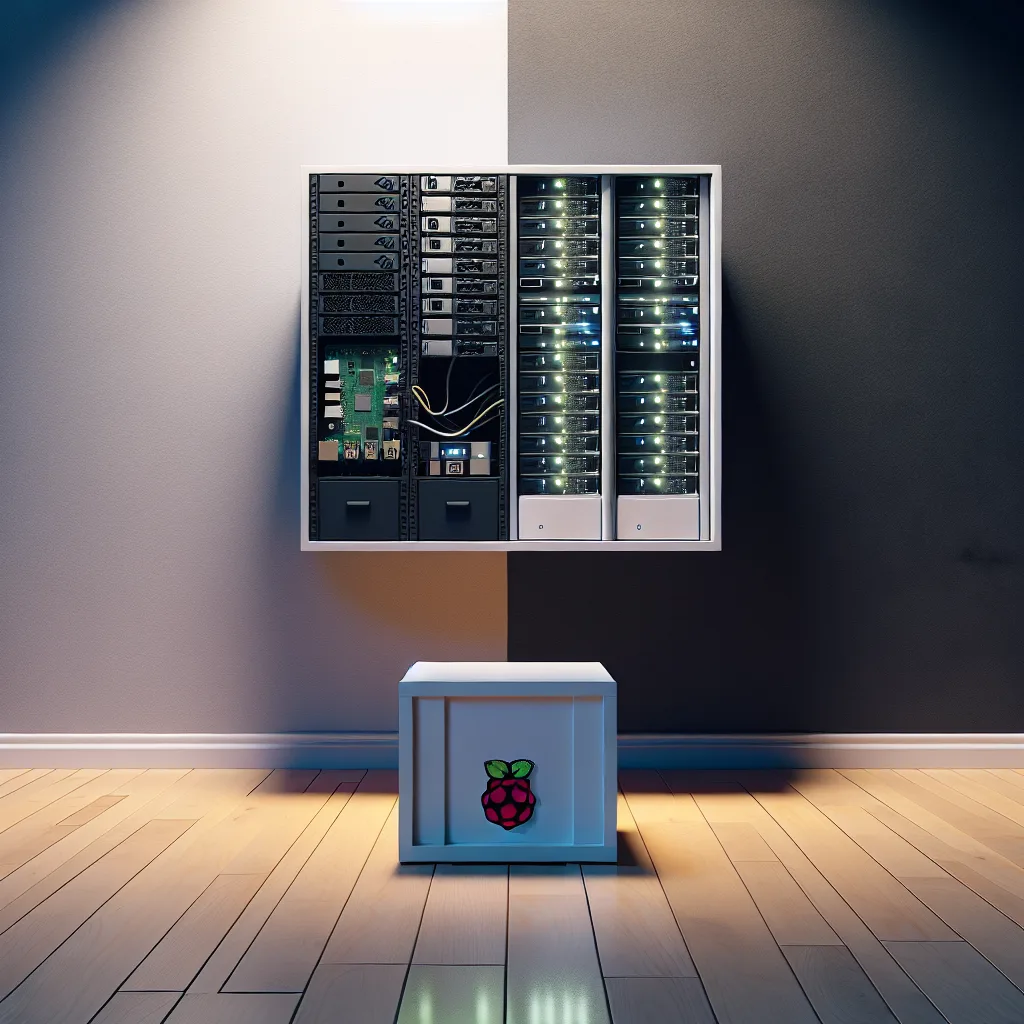
    Discover the common journey of a home lab enthusiast, from a simple IKEA cube setup to a full-blown wall-mounted server rack. It happens faster than you think.

    It always starts with something small.
    \n\nFor me, it was a single Raspberry Pi. For a friend, it was an old laptop he wanted to turn into a file server. It’s the little project you start on a whim. The one you think will be simple, clean, and tucked away in a corner.
    \n\nAnd often, it starts in an IKEA cube.
    \n\nIt’s the perfect beginning. It’s cheap, looks clean, and hides the mess. You set up your first device, run a few simple programs, and feel pretty good about it. Your own little slice of the cloud, right at home. But then, the itch begins.
    \n\n## The “What If?” Phase
    \n\nYou start thinking, “What if I added more storage?” or “What if I ran another service?”
    \n\nThat one little server was great, but now you want to run Plex for your movies, Home Assistant for your smart devices, and maybe a Pi-hole to block ads. That single IKEA cube starts to feel a little cramped.
    \n\nSo you get another one.
    \n\nNow you’ve got a stack. Two cubes. Maybe one for the server and one for the networking gear. The cables are starting to look a little more… creative. But it works. You’ve got more power, more storage, more grunt. You’re happy. For a while.
    \n\n## When Furniture Isn’t Enough
    \n\nThis is the tipping point. It’s the moment you realize you’ve outgrown your clever furniture solution.
    \n\nHeat becomes a problem. The back of those cubes doesn’t have great airflow, and your little machines are starting to run hot. Cable management goes from being a fun puzzle to a genuine nightmare. You need to unplug one thing and suddenly three other things get pulled out with it.
    \n\nYou start looking at what the “serious” people use. And you see them: wall-mounted server racks.
    \n\nSuddenly, you’re measuring wall space and looking for studs. What started as a small, contained hobby is now about to become a permanent fixture in your home. You’ve evolved. You’re no longer just hiding a computer in a box; you’re building a proper command center.
    \n\nGoing for a rack is a big step, but it solves a lot of problems:
    \n\n* Airflow: Racks are open and designed to keep things cool.
    * Space: You can fit more gear, neatly and securely.
    * Management: Everything is accessible. No more digging around in a dark cube.
    \n\nIt’s a beautiful, organized, and slightly terrifying evolution.
    \n\n## The Work Is Never Really Done
    \n\nHere’s the secret: you’re never really finished.
    \n\nOnce the rack is on the wall, you start thinking about the next upgrade. And if you’re running all this important stuff, you’ll quickly realize you need to protect it.
    \n\nThis leads to the next logical, and crucial, purchase: a UPS (Uninterruptible Power Supply).
    \n\nI’ve seen people use smart plugs to monitor power, and they live in constant fear of accidentally tapping the wrong button in an app and shutting everything down. It’s a terrifying thought. A UPS solves this. It’s a big battery that sits between your gear and the wall outlet. If the power goes out, it keeps everything running long enough for a safe shutdown. It also protects your expensive hardware from power surges. It’s not just a nice-to-have; it’s peace of mind.
    \n\nThis whole journey—from a single box to a wall of tech—is a familiar one. It’s a story of curiosity, of solving problems, and of a hobby that has a tendency to get delightfully out of hand. If you find yourself measuring your wall for a server rack, don’t worry. You’re just following a well-worn, and very rewarding, path.

  • My Homelab Is Finally (Almost) Complete

    A personal look at building a complete home lab, from securing a rare JetKVM to configuring a 10GbE network with Ubiquiti gear and a Mac mini.

    It’s a familiar feeling for anyone who builds things. You have a project—a home network, a workshop, a PC build—and it’s almost perfect. There’s just one missing piece that lives in the back of your mind. For me, that piece was a JetKVM.

    After weeks of searching, I finally found one. And yes, I paid way too much for it. The kind of price that makes you wince a little when you click “buy.” But when it arrived, I was immediately impressed. The thing is surprisingly heavy and feels incredibly well-built. It’s a neat little device that solves a very specific problem, and holding it, the sting of the price started to fade.

    Of course, the first thing I wished it had was Power over Ethernet (PoE). It’s the one feature that would have made it absolutely perfect. But nothing ever is, right? It works great, and that’s what matters. Getting the JetKVM was the final push I needed to call my home lab setup “mostly complete.”

    A Quick Tour of the Rack

    The whole system is built into a DeskPi Rackmate T2. It’s a compact and clever solution that keeps everything tidy. For now, there are a few 3D-printed blank panels filling the gaps while I figure out my final 10GbE NAS situation, but the core is solid.

    Here’s a quick rundown from top to bottom:

    • Connectivity & Core Switching: It all starts with a 2.5g fiber connection from my ISP, which runs into a Ubiquiti UCG Fiber gateway. From there, it hits the heart of the network: a USW Pro XG 8 PoE. This 10g switch acts as the core, routing everything and managing a couple of VLANs to keep my main devices, guests, and IoT gadgets safely separated.
    • Wiring & Patching: Everything is wired up with CAT6a cables running through two patch panels. Clean wiring is one of those things that takes time but is so worth it for troubleshooting and peace of mind.
    • The Mac Mini Workhorse: Tucked in the rack is an M4 Mac mini with 16GB of RAM. It’s a quiet, power-efficient little beast. Right now, it’s running a containerized version of Home Assistant, but I’ve got my eye on playing with container orchestration tools like Kubernetes or Docker Swarm down the line.
    • Secondary Switching: A smaller USW Flex 2.5g PoE switch branches off the core. This handles additional wired clients and will eventually support some UniFi Protect cameras I plan to add.

    How It All Works Together

    The 10g switch is really the star. It gives the whole network a massive amount of internal bandwidth, which is great for file transfers and ensures there are no bottlenecks. The VLANs are essential for security—I don’t necessarily want my smart toaster talking to my work computer, and this setup prevents that.

    The wireless side is just as important. I have two U7 Pro XGS access points, and they are ridiculously fast. I’ve clocked speeds around 1100Mbps over the 6GHz band. It’s the kind of performance that makes you forget you’re not plugged in with a cable.

    That “Mostly Complete” Feeling

    Is it finished? Not really. A home lab is never truly “finished.” There’s always something to tweak, a new service to spin up, or a better way to organize the rack. My next project is a proper 10GbE NAS to take full advantage of the network’s speed.

    But for now, it feels complete. It’s stable, powerful, and does everything I need it to, from running my smart home to delivering incredible Wi-Fi speeds. It was a journey to get here, capped off by overpaying for that one last piece. And honestly? It was worth it.

  • My DIY ‘Cloud’: How I Built a Little Server Closet at Home

    Curious about building a home server? See how a simple project turned into a full homelab for media, ad-blocking, smart home control, and more.

    So, I did a thing.

    It started with a simple thought: “I wonder if I can host my own movies?” I was tired of juggling streaming services and wanted my own little media library. That simple question led me down a rabbit hole, and now I have what the internet calls a “homelab” humming away in a closet.

    It sounds intense, but it’s really just a computer that’s always on, running things for me in the background. And honestly, it’s one of the most rewarding projects I’ve ever tackled.

    From Simple Storage to a Private Cloud

    My first goal was just media. I wanted my own personal Netflix. I got an old office computer, stuffed it with a couple of big hard drives, and installed Plex. Suddenly, I could stream my movies and shows to any TV or device in my house. It felt like magic.

    But then I started thinking… what else can this thing do?

    That’s when the real fun began. The old office PC became a proper server. I installed a piece of software called Proxmox, which is a bit like a magic filing cabinet for operating systems. It lets me run multiple “virtual” computers on one physical box, all separate from each other.

    This is where the homelab really came alive. Here’s a peek at what my little server closet is doing for me 24/7:

    • Blocking Ads for My Whole House: I run a service called Pi-hole. It’s a network-wide ad blocker. Instead of installing extensions on every browser, this thing filters out ads and trackers before they even reach my devices. The internet feels faster and so much cleaner.
    • Running My Smart Home: All my smart lights, plugs, and sensors used to talk to servers somewhere in another country. Now, they talk to Home Assistant, running right here in my house. It’s faster, more private, and I can create automations that commercial products just can’t handle.
    • Hosting My Own ‘Google Drive’: I set up a service called Nextcloud. It’s basically my own private cloud storage. I can sync files from my phone and laptop, and it automatically backs up all the photos I take. No more paying for extra cloud storage.
    • And Yes, My Personal Netflix: Plex is still there, chugging away. It’s better than ever, with a library of movies and shows that I actually own.

    Was It Hard? Is It Worth It?

    I’m not going to lie, there was a learning curve. I spent a fair few weekends watching YouTube videos and reading guides. There were moments of “Why isn’t this working?!” and the satisfaction of finally figuring it out.

    But it was absolutely worth it.

    It’s not just about the services I get. It’s about what I’ve learned. I understand how networks work now. I know my way around a Linux command line. I feel more in control of my digital life because I’m not just a consumer of services anymore; I’m running them myself.

    You don’t need a huge budget or a degree in computer science to start. My first server was a dusty old computer that was destined for the landfill. The key is to start with one problem you want to solve—like creating a media server or blocking ads—and build from there.

    My little server closet isn’t just a pile of hardware. It’s a project. It’s a source of learning. And it’s a surprisingly practical way to take back a little bit of control over your digital world.

  • I Built My First Homelab, and It’s Pretty Cool

    I Built My First Homelab, and It’s Pretty Cool

    Curious about homelabs? I share my journey of building my first one, the services I’m running, and why it might be your next favorite hobby.

    I’ve been playing around with something new for the last month, and I’m genuinely excited to share how it’s been going. I built my first homelab. And honestly, it’s been working surprisingly well.

    If you’re wondering what a homelab is, you’re not alone. I was in the same boat not too long ago. Think of it as a personal playground for tech stuff, right in your own home. It’s a space where you can experiment with servers, networking, and software without the risk of breaking anything important. For me, it started with a simple idea: I wanted more control over my digital life and a place to learn new skills.

    So, What’s in My Homelab?

    My setup is pretty modest. It’s not one of those giant server racks you see in movies. It’s basically a dedicated computer running a few services using Docker containers. If you haven’t heard of Docker, it’s a tool that lets you run applications in isolated environments called containers. It’s like having a bunch of mini-computers all running on one machine, which is perfect for a homelab.

    Here’s a peek at what I’m running:

    • A Media Server: This is probably the most-used service in my lab. I’m using Plex, which organizes all my movies and shows and lets me stream them to any device, whether I’m at home or on the go. It’s like having a personal Netflix, but with my own collection.
    • Network-Wide Ad Blocker: I set up Pi-hole, which blocks ads on every device connected to my home Wi-Fi. It’s amazing how much faster and cleaner web pages look without all the clutter. My phone, my laptop, even my smart TV—all ad-free.
    • Personal Cloud Storage: Instead of relying solely on Google Drive or Dropbox, I’m running Nextcloud. It gives me a private space to store files, photos, and documents. I can access them from anywhere, and I know exactly where my data is—on my own server.
    • A Monitoring Dashboard: To keep an eye on everything, I set up a dashboard with Grafana. It shows me how my server is performing, how much memory is being used, and whether all my services are running smoothly. It looks complicated, but it’s surprisingly straightforward to set up.

    Why Bother Building a Homelab?

    I get it. This might sound like a lot of work for things you can get from other services. And you’re not wrong. But for me, the process was the point.

    Building this little lab taught me so much. A month ago, I barely knew what a Docker container was. Now, I feel comfortable deploying new services and troubleshooting problems. It’s a practical way to learn about technologies that are used in the professional IT world.

    There’s also the privacy aspect. By self-hosting services like cloud storage and a media server, I have complete control over my data. I’m not handing it over to a big corporation, and I can customize everything exactly how I want it.

    And honestly, it’s just fun. It’s a hobby that’s both challenging and rewarding. There’s a real sense of accomplishment when you get a new service up and running perfectly.

    Thinking About Starting Your Own?

    If any of this sounds interesting, you might be a good candidate for starting a homelab. You don’t need a powerful, expensive server to begin. You can start with an old desktop computer or even a tiny Raspberry Pi.

    My advice? Start small. Pick one thing you want to do. Maybe you want to block ads with Pi-hole or set up a simple file server. Find a good tutorial, take your time, and don’t be afraid to break things. That’s how you learn.

    I’m still at the beginning of my journey. There are so many other services I want to try, like a password manager, a recipe organizer, or maybe even a home automation hub. The possibilities feel endless. If you have any ideas for services that could be a good addition, I’d love to hear them. Let me know what you’re running in your own lab!

  • I Used My Home as a VPN and Accidentally Moved My IP Address to Trinidad

    My personal VPN travel hack backfired. Learn how using a Tailscale exit node confused Google and made it think my Canadian IP was in Trinidad.

    I love a good travel hack. And recently, I thought I had the perfect one.

    I was visiting family in Trinidad, and I wanted a simple way to access my digital life back home in Canada. Specifically, I wanted to stream my region-specific shows and use my YouTube Premium account without the usual ad-supported, feature-limited experience you get abroad.

    The solution seemed brilliant: I used a tool called Tailscale to turn my home network into my own personal VPN. By setting my house as an “exit node,” all my internet traffic from Trinidad would route through my Canadian internet connection. It was like I was sitting on my own couch, digitally speaking.

    And you know what? It worked perfectly. For the whole trip, I had seamless access to everything. I felt pretty clever.

    Then I came home.

    The Strange Welcome Back

    The first sign something was wrong was subtle. I landed in Canada, got back to my apartment, and hopped on my laptop. It was a freshly reformatted machine, so I knew it was clean. I opened a browser and went to Google.

    In the bottom-left corner of the page, it said: “Trinidad and Tobago.”

    That’s weird, I thought. I typed “my IP” into the search bar, and Google confidently told me my location was “Chaguanas, Trinidad and Tobago”—the exact town where I had been staying.

    But I was in Toronto. My internet service provider is Canadian. I checked a few other IP-lookup websites, and they all correctly placed me in Toronto. It was only Google that was confused.

    This wasn’t just a weird quirk. It had real consequences:

    • YouTube Broke: My YouTube Premium account on my phone and tablet suddenly lost its best features, like background play. Why? Because YouTube, powered by Google’s location data, thought I was in a region where those features weren’t offered.
    • It Was Contagious: This wasn’t just my laptop. Every single device on my home network had the same problem. My phone, my smart TV, even devices that had never left the country were all suddenly located in Trinidad, according to Google.
    • Incognito Mode Didn’t Help: This wasn’t a cookie or cache issue. The problem persisted even in private browsing windows.

    Somehow, by using my home network as a VPN exit point from another country, I had seemingly convinced Google’s massive database that my Canadian IP address had permanently moved to the Caribbean. I had poisoned my own digital well.

    “Have You Tried Turning It Off and On Again?”

    My next step was to contact YouTube Premium support. I figured if I explained the situation clearly, they could escalate it and get someone to fix their database.

    I laid out all the evidence: the conflicting geolocation reports, the fact that it affected all my devices, the screenshots. I explained the Tailscale exit node setup.

    Their response? A series of emails asking me to:

    • Reboot my iPhone.
    • Reinstall the YouTube app.
    • Check that the “Background Play” toggle was switched on.

    It was maddening. I was dealing with a server-side, database-level problem, and the support script was built for someone who didn’t know how to use their phone. It was clear this path was a dead end.

    Taking Matters Into My Own Hands

    I knew there were two ways to fix this. Wait for Google to maybe, someday, fix their geolocation data for my IP. Or, I could just change my IP.

    Changing your public IP isn’t always straightforward. Your ISP usually assigns you one automatically, and it can “stick” to your router for a long time. Just rebooting the router often doesn’t do it.

    But my router runs on custom firmware (OpenWRT), which gives me more control. The trick is to change the MAC address of the router’s WAN port. The MAC address is a unique hardware identifier, and when your ISP sees a new, unrecognized MAC address asking for a connection, it typically assigns a fresh public IP address.

    So that’s what I did. I changed one character in the MAC address, rebooted the router, and voilà. Success.

    I immediately got a new Canadian IP address. Google showed my location as Toronto. YouTube Premium started working properly again. All was right with the world.

    It was a fascinating, frustrating, and ultimately educational experience. Tools like Tailscale are incredibly powerful, but the internet is a tangled web of systems. Sometimes, a clever solution in one area can cause a bizarre problem in another. I fixed it, but I can’t help but feel for the next person who gets assigned my old IP address. They might be in for a confusing time.

    As for me, I’m heading to the east coast later this summer. Maybe I’ll try it again and see if I can convince Google my home is in Halifax this time.

  • The Accidental Techie: When a Hobby Feels Like a Calling

    The Accidental Techie: When a Hobby Feels Like a Calling

    Started a home lab for fun and now wondering if it should be your career? Explore why it’s okay for your tech passion to just be a rewarding hobby.

    It often starts with a simple problem.

    “I wish I could share files more easily at home.” Or, “I’m tired of seeing ads everywhere.” So you get a Raspberry Pi or dust off an old computer you had in the closet. You follow a tutorial, type a few commands into a black screen, and suddenly, it works. You’ve created something.

    That feeling is powerful.

    So you do it again. You set up a media server. Then a network-wide ad blocker. Before you know it, you’re learning about Docker containers, networking, and firewalls. Your little project has snowballed into a full-blown home lab, a stack of blinking lights that hums quietly in the corner.

    It stops being just a hobby. It feels like you’ve stumbled into a whole new world. And that’s when the big, slightly scary question pops into your head: “Should I be doing this for a living?”

    The Hobbyist’s Dilemma

    If you’ve ever felt this way, you’re not alone. I’ve talked to a lot of people who get deep into home labs—people who are students, artists, engineers in completely unrelated fields, or retirees. They spend their nights and weekends learning skills that are directly transferable to a career in IT, DevOps, or network engineering.

    It’s a strange crossroads to be at. You’re passionate about what you’re building. You love the challenge, the problem-solving, and the endless learning. It feels more engaging than your actual day job or field of study.

    But then the doubt creeps in.

    You wonder what the job is really like. Is being a DevOps professional actually fun? Or is it a stressful grind of fixing other people’s problems? You imagine a world where you can’t just build what you want. Instead, you’re stuck maintaining a system someone else built a decade ago, navigating office politics, and hearing the dreaded phrase, “We can’t change that. It’s just how we’ve always done it.”

    The fear is that turning your passion into a paycheck might just kill the joy that got you started in the first place.

    It’s Okay If It’s Just for Fun

    So, here’s the simple answer: You don’t have to choose. It is perfectly fine—and incredibly common—to be a wildly passionate “amateur.”

    Think about it this way: plenty of people are amazing home cooks. They buy fancy knives, perfect their sourdough starter, and host incredible dinner parties. Does that mean they should all quit their jobs and open a restaurant? Of course not. The pressure of turning a profit, managing staff, and dealing with health inspectors would suck the joy out of it for many.

    Your home lab can be the exact same thing. It can be your kitchen, your workshop, your studio. It’s a place for you, by you.

    Here are a few reasons why keeping your tech passion as a hobby is a powerful choice:

    • You Have Total Freedom: You are the boss. You decide what services to run, what hardware to buy, and when to tear it all down and start over. There are no tickets, no deadlines, and no one telling you that your idea is out of scope.
    • The Learning is Pure: You learn because you’re curious. You can spend a whole weekend figuring out a complex networking problem just for the satisfaction of it, not because it’s a requirement for your job. This is learning in its purest form.
    • It Makes You Better at Everything: The skills you gain from running a home lab—critical thinking, project management, and deep-level problem-solving—are valuable in any field. A biomedical engineer who understands server infrastructure is a better engineer. A writer who can automate their own backups is a more efficient writer.

      Your Day Job Doesn’t Define You

      That little server rack in your closet doesn’t have to be a sign that you’re in the wrong career. It can just be a sign that you’re a curious person who loves to learn and build.

      Your home lab is your personal playground. A place to experiment without consequence. A creative and technical outlet that you control completely. It doesn’t need to be anything more than that.

      So whether you’re a student, a lawyer, a doctor, or a barista, your place in the world of tech is valid. You don’t need to be a professional to be passionate.

      What about you? What do you do for a living, and what does your personal tech playground look like?

  • My Homelab Story: From One NAS to a Full Server Rack

    My Homelab Story: From One NAS to a Full Server Rack

    Follow my personal journey of building a homelab, from a simple Synology NAS for files to a massive Proxmox server for virtualization and media.

    It’s funny how hobbies start. Sometimes it’s a deliberate choice, and other times you just sort of stumble into it. For me, my homelab journey was definitely the second one. It didn’t begin with a grand plan for a server rack and a wall of blinking lights. It began with a simple need: I had to store my school files.

    The Humble Beginning: One Simple NAS

    My first “homelab,” if you could even call it that, was a Synology NAS. It was a straightforward, reliable little box. Its main job was to make sure my schoolwork was safe and accessible. That’s it. No fancy media streaming, no complex virtual machines. Just files.

    For a while, that was enough. It did its job perfectly. But if you’ve ever tinkered with tech, you know that “enough” doesn’t always stay enough for long. The curiosity bug starts to bite.

    The First Real Upgrade: Getting Serious About Media

    The next step came when I wanted a better way to manage my media. That’s when I brought a Mac Mini into the mix. I set it up to run Plex for streaming and the “Arrs” (software like Sonarr and Radarr that help manage media collections).

    This was a solid setup. The Synology handled the files, and the Mac Mini had enough power to serve everything up smoothly. The two devices worked together well. My needs were met. But the itch was back. I started wondering, “What else could I do? What if I wanted more control? More power?”

    The Great Leap: Building a Proper Server

    In the last month, I decided to go all in. I moved from my simple consumer-grade setup to a full-blown enterprise server running Proxmox.

    For anyone new to this, Proxmox is a hypervisor. Think of it as an operating system for your server that lets you create and run multiple other operating systems inside it, all at the same time. These are called virtual machines, or VMs.

    My main storage is now a TrueNAS VM. This is where things get a little technical and, I think, really cool. I have two special storage controller cards (HBAs) in the server that I “pass through” directly to the TrueNAS virtual machine. This means the VM gets to talk to my hard drives directly, with no middleman, giving it full speed and control. It’s a powerful and efficient way to manage a huge amount of storage.

    The Mac Mini has a new job now, too. It’s a central backup station for all my family’s Apple devices using a great tool called iMazing.

    A Look Under the Hood

    So, what’s actually running this whole operation? I managed to get my hands on a decommissioned Nutanix server, which is built from Supermicro parts. It’s a beast.

    Here’s a quick rundown of the specs:

    • Server: Supermicro 2U Chassis (Model: CSE-829U)
    • CPU: 2x Intel Xeon Gold 6140 processors. That gives me a total of 36 cores and 72 threads.
    • Memory: 384GB of DDR4 ECC RAM. The “ECC” part is important—it stands for Error Correcting Code, which helps prevent data corruption.
    • Storage (OS/VMs): Two 2TB Samsung 990 PRO NVMe SSDs in a mirrored setup for speed and redundancy.
    • Storage (Main Pool): 12x 16TB Seagate drives managed by TrueNAS.
    • GPU: An NVIDIA RTX A2000 with 12GB of VRAM. This is fantastic for Plex, as it can handle multiple video transcodes without breaking a sweat.
    • Networking: A 10GbE NIC and a 10GbE switch to make sure data moves between devices lightning fast.
    • Power: Dual 1000W power supplies for redundancy and a CyberPower UPS to keep everything running safely if the power goes out.

    My 3-2-1 Backup Strategy

    Having a powerful server is great, but all that data is worthless if it’s not backed up properly. I follow the classic 3-2-1 rule: three copies of my data, on two different types of media, with one copy off-site.

    1. The Proxmox server and Apple device backups (from the Mac Mini) are first backed up to my old friend, the Synology NAS.
    2. The Synology NAS then uses a tool called HyperBackup to send an encrypted copy of everything to BackBlaze, an online cloud storage service.

    This way, even if my house and all my hardware were to disappear, my most important data would still be safe in the cloud.

    It’s been quite a journey, from a single NAS for school files to this powerhouse in a rack. It’s a hobby that’s always evolving, and I’m constantly learning. If you’re just starting out, don’t be intimidated by setups like this. Start small, solve a problem you have, and let your curiosity guide you. You might be surprised where you end up.

  • My Home Lab Went a Little Overboard

    Ever wondered why someone would run a data center in their house? A look inside a massive home lab and the surprising reasons behind the hardware.

    I have a small confession to make. My home lab might have gotten a little out of hand.

    What started as a simple hobby, a desire to tinker and learn, has quietly morphed into something… bigger. We’re not talking about an old desktop computer humming away in the corner. We’re talking about a stack of enterprise-grade servers. The kind of hardware you usually find in a dedicated data center, now living in my house.

    It’s a mix of Dell R730s, 630s, some Fujitsu Primergys, and even a few HP DL385 G10s. For those not deep into the server world, let’s just say it’s a lot of horsepower. We’re looking at a collective 3 terabytes of RAM for the main compute cluster. That’s more memory than you’ll find in a hundred typical laptops combined. And yes, it’s all connected with a speedy 10-gigabit network.

    So, the big question is… why? Why build something so ridiculously powerful at home?

    It’s a fair question. My friends sometimes joke that I could probably run a small country from my basement. And honestly, they might not be wrong.

    It’s Not Just About Power, It’s About the Playground

    The simple answer is: because I use it. All of it. This isn’t just about collecting impressive-looking machines. This setup is my personal playground, my workshop, and my classroom all rolled into one. It’s where I get to break things without consequence and learn how to put them back together.

    Think of it like this. A car enthusiast might have a project car they’re always tuning and tweaking in the garage. A woodworker has a shop full of tools for different jobs. My thing is technology. I love to see what’s possible when you remove the usual constraints.

    Here’s a taste of what’s actually running on these machines:

    * Virtualization is Key: I run a hypervisor, which is basically a system that lets me create dozens of smaller, virtual computers (VMs). One physical server can host 10, 20, or even more VMs, each with its own operating system and purpose.
    * A Media Server on Steroids: Sure, you can run a Plex server on a small little box. But have you ever tried transcoding multiple 4K streams for family and friends at the same time? My setup doesn’t even break a sweat.
    * Testing and Development: In my day job, I work in IT. Having a home lab that mirrors a corporate environment is incredibly valuable. I can spin up a new server, test a piece of software, or try out a new networking configuration without any risk to a live system. It’s the ultimate sandbox.
    * Self-Hosting Everything: Why rely on cloud services when you can host your own? I run my own cloud storage, password managers, project management tools, and more. It gives me complete control over my data and saves money in the long run (we won’t talk about the electricity bill just yet).

    Is It Overkill? Absolutely. And That’s the Point.

    Let’s be honest. For most people, this is complete and utter overkill. And I love that about it. It’s a hobby, and hobbies are allowed to be a little bit excessive. They’re supposed to be fun and push the limits of what you think is practical.

    Building and maintaining this lab has taught me more than any textbook ever could. I’ve learned about networking, server administration, cybersecurity, and automation. I’ve troubleshot cryptic error messages at 2 AM and felt the triumph of a complex system finally clicking into place.

    It’s a constant source of challenge and satisfaction. And while the hum of the server fans is a constant reminder of the power being used, it’s also the sound of learning. The sound of possibility.

    So yeah, maybe I went a little overboard. But I wouldn’t have it any other way.

  • My Homelab Started With One Small Rack. Now I’m Hooked.

    Thinking about starting a homelab? Follow one user’s journey from a simple Raspberry Pi rack to building a custom router and exploring uses for a powerful GPU.

    I spent years in the IT world, starting way back in the 90s. But about a decade ago, I traded my command line for a cap and gown, moving into university administration. I’m a Dean now, but I never quite managed to shake the tech bug. It’s a part of who I am.

    So, when Amazon Prime Day rolled around, I saw a deal on a little 4U server rack and thought, “Why not?” It seemed like the perfect home for my growing collection of Raspberry Pis.

    That was the start. It was a small, simple project. But if you’ve ever tinkered with tech, you know how this goes. One small project is never just one small project.

    From a Small Rack to a Bigger Plan

    That little 4U rack filled up faster than I expected. Soon, I was browsing eBay for micro PCs and upgrading to a bigger 8U rack. As the hardware grew, so did the complexity. I realized I needed a way to keep track of it all—what was connected to what, which IP addresses were assigned where, and what my future plans were.

    This led me down a completely different rabbit hole: Obsidian. It’s a note-taking app, but it’s so much more than that. I started using it to document my entire homelab. I created diagrams, network maps, and notes on every piece of hardware and software. It’s my single source of truth. If you’re starting a homelab, my best advice is to document your setup from day one. You’ll thank yourself later.

    My latest project? Ditching my ISP’s router. I have a 2Gbps internet plan from Xfinity, but the mesh router I was using just couldn’t keep up. It was bottlenecking my speeds, which is the kind of problem a good homelab is built to solve. So, I’ve got a new, dedicated machine on the way to build my own router using OPNsense, a powerful open-source firewall.

    The Big Question: What Do I Do With This GPU?

    In the middle of all this planning, I have one piece of hardware that feels like a beautiful, unsolved puzzle. My main server, a Dell Precision running Proxmox, is hosting my TrueNAS storage setup. And inside that machine is a beastly NVDIA RTX A5000 GPU.

    It’s powerful. Maybe a little too powerful for what I’m doing right now, which is… nothing. And that feels like a waste.

    So, what can you actually do with a high-end GPU in a home server? I’ve been digging into this, and it turns out, there are some pretty cool answers.

    • Media Server Transcoding: This is the most common use case. If you run a media server like Plex or Jellyfin, a GPU can handle video transcoding on the fly. That means if you’re streaming a 4K movie to your phone, the GPU can convert the file to a smaller format without breaking a sweat, leaving your main CPU free for other tasks.

    • Running AI Models: This is where things get really interesting. You can use a powerful GPU to run your own local AI and machine learning models. Think running a private version of a large language model (like ChatGPT) or setting up Stable Diffusion to generate AI images right from your own server. It’s a great way to experiment with AI without relying on cloud services.

    • GPU Passthrough for Virtual Machines: With Proxmox, I can dedicate the entire GPU to a specific virtual machine (VM). This would let me spin up a high-performance Windows or Linux VM and use it for things that need serious graphics power, like video editing, 3D rendering with software like Blender, or even cloud gaming. I could stream games from my server to any screen in the house.

    • Data Science and Computation: While I’m not a data scientist, a GPU like the A5000 is built for heavy-duty computation. It could be used for scientific research, complex simulations, or massive data analysis projects.

    For now, I’m leaning toward setting it up for Plex transcoding and starting to play around with some local AI models. It feels like the right mix of practical and experimental—which is what a homelab is all about. It’s a personal space to learn, build, and solve your own unique challenges. It all starts with one small project, and from there, the journey is up to you.