Author: homenode

  • The Quest for the Perfect Mini Plex Server: Decoding 4K Transcoding

    The Quest for the Perfect Mini Plex Server: Decoding 4K Transcoding

    Thinking of a mini PC for your Plex server? Learn if budget models can handle 4K Dolby Vision transcoding and what to look for in a powerful, compact setup.

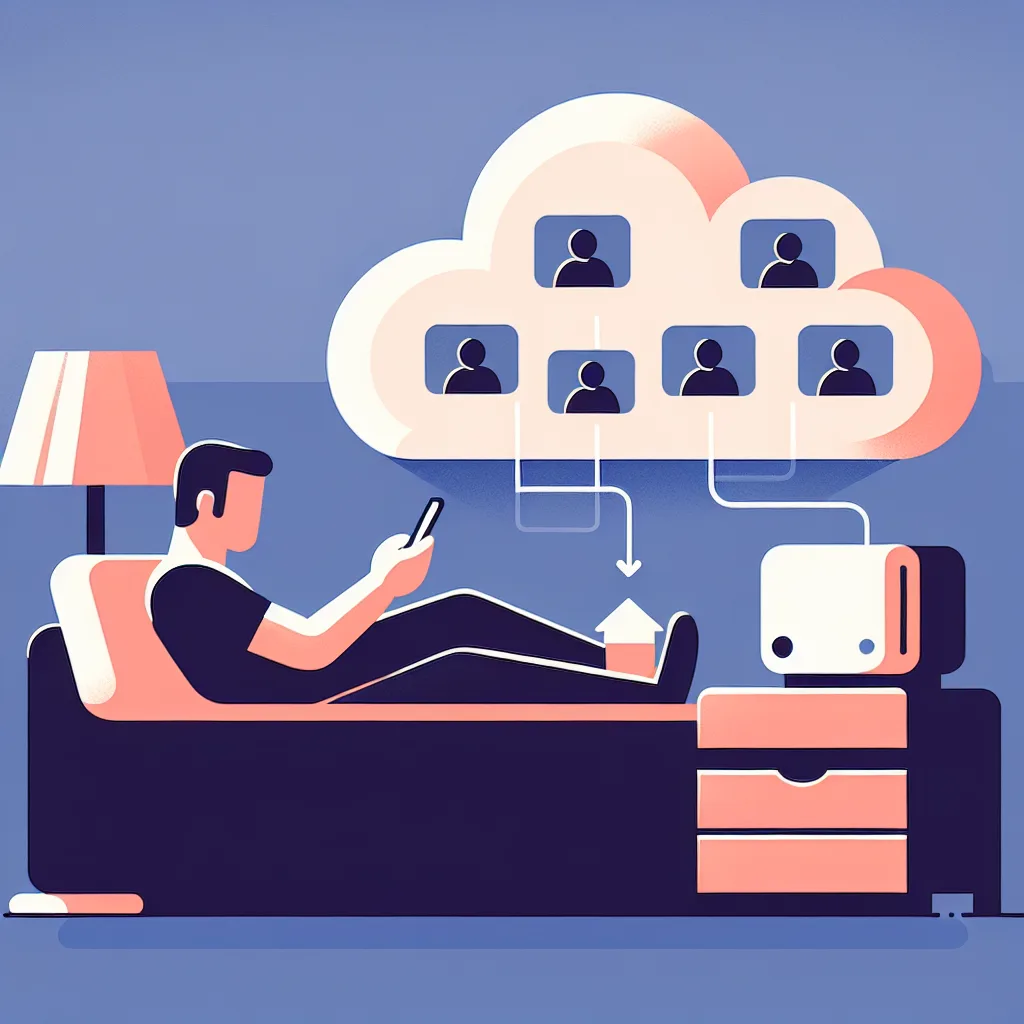
    So, you’ve finally done it. You’ve built a beautiful library of your favorite movies and shows, all saved as high-quality digital files on a network-attached storage (NAS) drive. The dream is to create your own personal Netflix—a slick, easy-to-use media server with Plex or Jellyfin that lets you stream your collection to any device, anywhere.

    You start looking for a small, quiet, power-efficient computer to run the server 24/7. And you quickly stumble upon the world of mini-PCs, like the super popular Beelink or Minisforum models. They seem perfect. They’re tiny, they sip power, and they’re surprisingly affordable.

    But then you hit a wall of technical jargon: “transcoding,” “hardware acceleration,” “Dolby Vision Profile 8.” Suddenly, the simple project feels complicated. The big question is, can one of these tiny, budget-friendly PCs actually handle the heavy lifting of streaming a pristine 4K movie file?

    I’ve been down this exact rabbit hole. Let’s break it down over a virtual coffee.

    What is “Transcoding” Anyway?

    Before we get into the hardware, let’s quickly demystify transcoding.

    Imagine your server has a huge, 80GB 4K movie file. You want to watch it on your phone while riding the bus. Your phone screen isn’t 4K, and your mobile connection definitely can’t handle streaming that much data.

    Transcoding is the process where your server, in real-time, converts that massive file into a smaller, more manageable version that’s perfect for your phone. It’s like having a personal video editor instantly resizing and compressing the movie just for you.

    When everything on your network is perfect—your TV supports the exact file format, your connection is fast—your server can “Direct Play” the file, which is easy. But the moment you need to convert it, your server’s processor has to do some serious work. And this is where 4K, especially with fancy formats like Dolby Vision, becomes a real challenge.

    The N100 Mini-PC: A Great Start, But Know Its Limits

    A lot of the popular, affordable mini-PCs right now use an Intel N100 processor. It’s a fantastic little chip that’s perfect for a lot of tasks. For a media server, it’s a champ at Direct Play and can even handle transcoding a couple of standard 1080p streams without breaking a sweat.

    But 4K is a different beast. And 4K with Dolby Vision (specifically Profile 7 or 8, the kind found on Blu-ray remuxes) is the final boss.

    Here’s the catch: The N100 relies on a built-in feature called Intel Quick Sync to handle video transcoding efficiently without maxing out the CPU. While it’s great for common formats, it often lacks the specific hardware support to properly transcode certain Dolby Vision profiles.

    When Plex or Jellyfin asks it to transcode a Dolby Vision Profile 8 file, the N100’s hardware acceleration can’t do it. So, it falls back to “software transcoding,” meaning the main CPU has to do all the work. And frankly, the N100 just isn’t powerful enough for that. You’ll likely see buffering, stuttering, or it might just fail completely, especially if you try to run two streams at once.

    So, can an N100-based mini-PC run a 4K media server? Yes, but only if you are 100% certain your devices will always Direct Play the files. If you need a reliable transcoding safety net, you’ll need something with a bit more muscle.

    Finding the Right Tool for 4K Transcoding

    If your goal is to reliably transcode one or two 4K streams, you don’t need a giant, power-hungry tower. You just need a mini-PC with a slightly better processor.

    The key isn’t necessarily getting a Core i7, but getting a processor with a more modern and capable integrated GPU. For Plex and Jellyfin, the recommendation is almost always an Intel CPU from the 8th generation or newer.

    Here are a few paths to consider:

    • The Value King: Refurbished Office PCs: Look for used or refurbished mini-PCs like a Dell OptiPlex Micro, HP EliteDesk/ProDesk Mini, or a Lenovo ThinkCentre Tiny. You can often find models with 8th, 9th, or 10th-gen Intel Core i3 or i5 processors for an incredible price. These CPUs have the Quick Sync muscle needed to handle multiple 4K transcodes smoothly.
    • The Modern Step-Up: If you want to buy new, look for mini-PCs with more modern Intel processors like the i3-N305 (a more powerful sibling to the N100) or any of the 12th-gen or newer Core i3 or i5 chips. These are more expensive than an N100 box but are basically guaranteed to handle anything you throw at them.
    • A Quick Hardware Checklist:
      • CPU: 8th-generation Intel Core series or newer.
      • RAM: 8GB is the minimum. 16GB is a comfortable and future-proof choice, especially if you want to run other applications on your server.
      • Storage: A 256GB or 500GB NVMe SSD is perfect for the operating system and your server software. It makes the whole system feel snappy. Your movie files can stay on your NAS.

    It’s About the Right Fit, Not Just Power

    Building a home server is a fun and rewarding project. It’s easy to get caught up in specs, but it’s really about finding the right balance for your specific needs and budget.

    That little N100 mini-PC is an amazing piece of tech and a perfect starting point for many. But if your library is full of high-bitrate 4K files, investing a little more in a PC with a more capable processor will save you a lot of headaches. You’ll get a silent, efficient, and powerful little server that just works, letting you get back to what really matters: enjoying your movie collection.
  • How to Find the Best CPU for Your Money (It’s Not Just About Price)

    How to Find the Best CPU for Your Money (It’s Not Just About Price)

    Learn how to measure CPU value beyond the sticker price. We explain price-to-performance and performance-per-watt to help you find the best deal on your next PC build.

    I was chatting with a friend the other day who’s looking to upgrade his computer. He was getting lost in a sea of specs, model numbers, and prices. It’s easy to do. You see a CPU for $500 and another for $250, and the simple math says the cheaper one saves you money.

    But that’s not the whole story.

    The real question isn’t just “what does it cost?” but “what do I get for what it costs?” This is the core idea behind a super useful concept: price-to-performance ratio.

    So, What Is Price-to-Performance?

    Think of it like buying a car. You wouldn’t just look at the price tag. You’d ask about its gas mileage, right? A cheap car that guzzles gas might cost you more over a few years than a slightly more expensive one that sips fuel.

    CPUs are the same. The sticker price is just the entry fee. The real cost includes the electricity it uses every single day. That’s where we get into an even more important metric: performance-per-watt.

    This number tells you how much processing power you get for every watt of electricity the chip burns. A chip with great performance-per-watt is efficient. It runs cooler, quieter (because the fan doesn’t have to scream), and, most importantly, keeps your power bill down.

    The Hidden Costs of “Cheap” Hardware

    This is especially true if you’re building a machine that will be on 24/7, like a home server for your files, a media center, or even just a PC that you never really shut down.

    I’ve seen people buy old, decommissioned server hardware for a bargain. On paper, it looks great—tons of cores for next to nothing! But then the power bill arrives. Those older chips were often built for raw power in a time when electricity costs weren’t as big of a concern for data centers. They can run hot and loud, and that “great deal” ends up costing hundreds in extra electricity over its life.

    A modern, entry-level processor might have fewer cores but can often be faster in everyday tasks and use a tiny fraction of the power. So, while it might cost more upfront, it’s the cheaper, smarter choice in the long run.

    Okay, How Do I Actually Figure This Out?

    You don’t have to do the complex math yourself. Thankfully, some real hardware nerds out there do it for us. If you’re looking to compare chips, here are a few places I’d look:

    • PassMark Software: They have a famous “CPU Value Chart” that literally plots performance against price. It’s one of the fastest ways to see which CPUs are a true bargain at any given moment.
    • Tech Review Sites: Websites like Tom’s Hardware, AnandTech, and Gamers Nexus do incredibly deep dives. When they review a CPU, they almost always include charts showing its power consumption under different loads (like idle, gaming, or heavy work).
    • Puget Systems: These folks build high-end workstations, and they publish tons of data on how different components perform in real-world professional software, along with power usage.

    When you’re looking at these charts, don’t just find the one with the highest benchmark score. Look for the sweet spot. Find a chip that performs well but has a surprisingly low power draw. That’s your winner.

    It’s Not About Being Stingy, It’s About Being Smart

    At the end of the day, this isn’t about pinching every penny. It’s about making an informed choice. It’s about building a machine that’s not just powerful, but also balanced and efficient. The most expensive, top-of-the-line CPU is rarely the best value. Often, the smartest buy is a step or two down the ladder—a chip that delivers 90% of the performance for 50% of the cost and power draw.

    So next time you’re upgrading, don’t just look at the price. Dig one level deeper. You’ll save money, run a quieter machine, and build something you can feel genuinely good about. Happy building!

  • Tired of Paying for Google Photos? Here’s How to Host Your Own

    Tired of Paying for Google Photos? Here’s How to Host Your Own

    Tired of Google Photos fees? Learn how to create your own private photo cloud with self-hosted alternatives like Immich, PhotoPrism, and Nextcloud.

    That little notification pops up when you least expect it: “Your account storage is almost full.”

    It’s happened to me, and it probably just happened to you or someone you know. My girlfriend got the alert last week, and it started a whole conversation. We love the convenience of Google Photos. You take a picture, and boom, it’s everywhere—safe, sound, and sorted. But that convenience comes with a catch: a monthly subscription that only ever seems to go up.

    So we started asking the same question you probably are: Is there another way? What if you could have all the convenience of a photo cloud without the endless fees and privacy trade-offs?

    It turns out, you can. It’s called self-hosting, and it’s basically like creating your own private, secure version of Google Photos right in your own home.

    So, What Does “Self-Hosting” Your Photos Even Mean?

    Let’s cut through the jargon. Self-hosting simply means running an application on your own hardware instead of on a tech company’s servers.

    Think of it like this: Instead of renting a storage unit from Google, you’re buying your own shed and putting it in your backyard. You have the only key. You decide how it’s organized. No one else can peek inside or change the rental terms on you.

    For photos, this means setting up a program on a computer you own—which could be an old desktop, a tiny Raspberry Pi, or a dedicated device called a NAS (Network Attached Storage). This program then serves your photos to an app on your phone, just like Google Photos does.

    You get the same experience: automatic uploads, a beautiful gallery, and access from anywhere. The big difference? Your pictures live with you, not on a server farm in another state.

    The Best Self-Hosted Alternatives to Google Photos

    The good news is that smart people have already built amazing, free software to do this. After looking into it, a few clear winners emerged that are perfect for someone leaving Google Photos.

    1. For the True Google Photos Experience: Immich

    If you want something that looks and feels almost identical to Google Photos, start with Immich. It’s a modern, fast, and beautiful platform that’s clearly inspired by Google’s design.

    • Familiar Interface: The timeline, album structure, and search feel incredibly intuitive if you’re used to Google Photos.
    • Great Mobile App: The Android and iOS apps are slick and handle automatic background uploads perfectly. This is a must.
    • Advanced Features: It’s not just a simple gallery. It has facial recognition for grouping people, object detection for searching (“show me photos of cars”), and a map view to see where your photos were taken.
    • Multi-User Support: Perfect for families. You can set up separate accounts for your partner or kids, all running on the same server.

    2. For the AI-Powered Organizer: PhotoPrism

    PhotoPrism is another fantastic choice, but it really shines for its powerful organization and tagging features. It’s a metadata machine.

    • Incredible AI Search: PhotoPrism automatically scans your photos and tags them with keywords, colors, locations, and more. You can find photos based on what’s in them with surprising accuracy.
    • Built for Big Libraries: It’s designed to handle massive photo collections (we’re talking 100,000+) without slowing down.
    • Maps and Stats: It offers detailed world maps of your photos and provides cool data about what cameras and lenses you use most often.
    • Less of a 1:1 Clone: The interface is clean but different from Google Photos. It feels more like a professional archival tool, which some people absolutely love.

    3. For the All-in-One Private Cloud: Nextcloud Memories

    What if you want to de-Google your life, not just your photos? That’s where Nextcloud comes in. Nextcloud is a full suite of apps you can host yourself—think of it as your own private Google Drive, Calendar, Contacts, and Photos all rolled into one. The “Memories” app is their photo solution.

    • Complete Ecosystem: If you also want to host your own files and documents, Nextcloud is the most efficient choice.
    • Solid Photo Features: The Memories app has a nice timeline view, automatic tagging, and albums.
    • Mature and Stable: Nextcloud is a massive open-source project and is incredibly robust and well-supported.

    Okay, What’s the Catch? A Quick Reality Check

    This all sounds great, but is it as easy as signing up for Google One? Honestly, no. It requires a little bit of a DIY spirit. But you don’t need to be a coding genius.

    Here’s what you’ll need:

    1. A Server: This is the computer that will run 24/7. An old laptop, a tiny and cheap Raspberry Pi, or a dedicated NAS from a brand like Synology or QNAP will work perfectly.
    2. Some Time for Setup: You’ll have to install the software. Most of these apps run on a platform called Docker, which makes installation much, much simpler. You’re basically just copying and pasting a few commands from an online guide. There are tons of step-by-step tutorials on YouTube for each of these apps.

    Is It Really Worth the Effort?

    For me, and for a growing number of people, the answer is a definite yes.

    The initial setup might take you an afternoon. But once it’s running, it’s mostly hands-off. You get a private, secure photo library that you control. There are no more monthly fees. No more worrying about a company changing its privacy policy. Your most precious memories are truly yours.

    It’s a pretty powerful feeling.

  • Your People Aren’t Going to Find You

    Your People Aren’t Going to Find You

    Feeling lonely? Here’s a no-fluff guide to intentionally building a meaningful support system as an adult. It’s easier than you think.

    I used to think a support system was something you just… had. That you’d trip over your people one day, like finding a twenty-dollar bill on the sidewalk. You leave school, you start your job, and the friendships just sort of happen, right?

    Turns out, not so much.

    As I’ve gotten older, I’ve realized something important: A real support system doesn’t just appear. You have to build it. Brick by brick. Conversation by conversation. It’s an act of intention, not luck. And it’s one of the most important projects you’ll ever work on.

    The Myth of “Finding Your Tribe”

    We love the idea of “finding your tribe.” It sounds so effortless. But it sets us up for disappointment. We wait around to be discovered, to be welcomed into a fully-formed group of best friends. When it doesn’t happen, we feel like we’re doing something wrong.

    But you’re not doing anything wrong. It’s just that adult life is different. There’s no built-in social structure like there was in school. Everyone is busy, schedules are a nightmare, and people are often wrapped up in their own little worlds of work, partners, and kids.

    If you want deep, meaningful connections, you have to be the architect.

    What Is a Support System, Anyway?

    It’s not just one person. A solid support system is a small, diverse network of people you can lean on for different things. It’s not about having a huge circle of friends; it’s about having the right kinds of support.

    I like to think of it in a few categories:

    • The Practical Pal: This is the person you can call when your car won’t start or you need help moving a couch. It’s support based on action and favors. You help them, they help you. It’s simple and incredibly valuable.
    • The Emotional Anchor: This is the friend who listens. The one you can text after a terrible day and say, “Do you have a minute to talk?” They don’t need to solve your problems. They just need to hold space for you to feel your feelings.
    • The Honest Advisor: We all need someone who will tell us the truth, even when it’s hard to hear. This is the friend who says, “I think you might be wrong here,” or “Are you sure that’s a good idea?” Their honesty is a gift, even if it stings a little.
    • The Fun Friend: This person is pure joy. They’re the one who pulls you out of a funk, makes you laugh, and reminds you not to take life so seriously. Their job is to help you forget your troubles for a little while.

    You won’t find all of these qualities in one person. And that’s the point. Building a network means you don’t have to put all of that pressure on a single relationship.

    So, How Do You Actually Build It?

    Okay, so you’re sold on the idea. But how do you go from feeling lonely to having a network? It’s a slow process, but it starts with small, deliberate actions.

    1. Start by Giving. The fastest way to build support is to be support. Offer to help a coworker with a project. Check in on a friend you haven’t heard from in a while. Be the person who listens without judgment. When you put that energy out there, it has a funny way of coming back to you.

    2. Revisit Your Interests. What do you actually like to do? Hiking, board games, pottery, learning a language? Go do those things. Consistently. Don’t go once with the goal of making a best friend. Go because you enjoy the activity. Friendships often bloom as a side effect of shared passions.

    3. Nurture Weak Ties. We all have “weak ties”—acquaintances, neighbors, that friendly person at the coffee shop. These are the seeds of potential friendships. Don’t dismiss them. Ask a follow-up question. Remember their name. The simple act of showing genuine interest can turn a casual connection into something more.

    4. Be the One to Make the Plan. This is the hardest part for most of us. We meet someone cool, we exchange numbers, and then… nothing. We wait for them to reach out. Don’t wait. Be the one who sends the text: “Hey, it was great talking to you. Want to grab coffee next week?” The worst they can say is no. But they’ll almost always be flattered that you made the effort.

    Building your people is a quiet, steady, and sometimes awkward process. It won’t happen overnight. But by shifting your mindset from finding to building, you take back control. You stop waiting and start creating the connections you need. And that’s a pretty powerful thing.

  • How Much NAS Do You Actually Need? A Guide for First-Time Buyers

    How Much NAS Do You Actually Need? A Guide for First-Time Buyers

    A friendly guide to choosing your first Network Attached Storage (NAS). Learn how to pick the right pre-built NAS for media, files, and apps without the DIY hassle.

    So, you’ve decided you need a NAS.

    Maybe you’re tired of juggling external hard drives. Maybe you want to create your own personal Netflix with Plex or Jellyfin. Or maybe, like a lot of creatives, you need a central, reliable spot to store massive design files.

    Whatever the reason, you’ve landed here. And if you’re feeling a little overwhelmed by the options, you’re not alone. The world of Network Attached Storage (NAS) can feel like a deep rabbit hole of technical specs, passionate forum debates, and a whole lot of acronyms.

    I’ve been there. You just want something that works. You don’t have a ton of cash to throw around, and you definitely aren’t interested in spending a weekend building a server from scratch.

    Let’s talk through it.

    What Do You Actually Need It For?

    Before you even look at a single product page, let’s get clear on the job you’re hiring this little box to do. For many people, it comes down to a few core tasks:

    • Streaming Media: This is a big one. Running a service like Jellyfin or Plex is fantastic, but it has one major technical catch: transcoding. If the device you’re watching on doesn’t support the video file’s format, the NAS has to convert it on the fly. This requires a decent amount of CPU power. If all your devices can “direct play” the files, the CPU doesn’t have to work as hard.
    • Running Small Apps: Things like a personal wiki (using Wiki.js, for example), a password manager, or running Docker containers are becoming super popular. These don’t usually require a ton of processing power, but they do appreciate a little extra RAM.
    • Storing Files: This is the most basic function of a NAS. For storing graphic design projects, photos, documents, or backups, the main thing you need is reliable storage, not a super-powered processor.

    The trick is that your choice of NAS will depend on which of these is your priority. If you’re a 4K video-transcoding power user, your needs are very different from someone who just needs a simple file repository.

    The “Appliance” vs. The “Flexible Box”

    For years, the pre-built NAS market has been dominated by two main players: Synology and QNAP. They sell you an “appliance.” The hardware and software are tightly integrated, and for the most part, it’s a very slick, user-friendly experience. Think of it like the Apple of the NAS world.

    But this comes with a trade-off. You’re locked into their ecosystem. Their hardware can sometimes be a little less powerful for the price you pay, and you can’t just wipe it and install a different operating system if you want to experiment down the line. For some, this proprietary nature is a deal-breaker.

    This is where a new wave of devices, from companies like UGREEN and others, is starting to make things interesting.

    They offer another path: a pre-built box with solid hardware that doesn’t lock you into a single OS. This is the sweet spot for a lot of people. You get the convenience of not having to build it yourself, but you gain the freedom to install something more open and powerful like TrueNAS or Unraid. It’s the best of both worlds if you’re a little adventurous but not a full-on DIYer.

    So, How Much Power Is “Enough”?

    This is the real question, isn’t it? You don’t want to overspend, but you don’t want a sluggish machine that can’t handle your needs a year from now.

    Let’s break it down based on the use cases we talked about.

    • For heavy media streaming (e.g., transcoding 4K Jellyfin streams): You’ll want to look for a NAS with a modern Intel processor that has Quick Sync Video. This feature is designed for video transcoding and does the job much more efficiently than the main CPU cores. An Intel Celeron N-series or Pentium chip found in many modern NAS units is surprisingly capable here.
    • For running a few apps and storing files: Honestly, you don’t need a beast. The same Celeron or Pentium processors are more than enough. Where you might want to invest is in RAM. While you can get by with 4GB, starting with 8GB gives you much more breathing room to run a few apps in the background without things slowing down.

    For most people looking for their first NAS for media, files, and a few projects, a 2-bay or 4-bay unit with a modern Intel N-series/Pentium CPU and 8GB of RAM is the absolute sweet spot. It provides enough power for today’s needs and a little headroom for tomorrow’s, without breaking the bank.

    Ultimately, choosing your first NAS isn’t about finding the most powerful box. It’s about finding the right one for you. It’s about being honest about your needs, your budget, and how much you want to tinker. And the good news is, today you have more “it just works” options than ever before—even if you want the freedom to make it your own.

  • This Tiny CPU Can Use Double the RAM Intel Says It Can

    Can the Intel N305 handle 64GB of RAM? I pushed this low-power CPU past its official 32GB limit to find out. Here’s what happened.

    I have a small, low-power computer that runs a few things for me 24/7. It’s one of those mini PCs with an Intel N305 processor—a quiet, efficient little chip that sips power. I love it, but I’ve always been a bit constrained by memory.

    Official documentation from Intel is pretty clear: the N305 processor supports a maximum of 32GB of RAM. And for a while, that’s exactly what I was running. It worked fine, but I always felt like I was bumping up against that ceiling. When you run a few services, maybe a virtual machine or two, 32GB can get eaten up surprisingly fast.

    So, I got curious.

    What if the official spec sheet was more of a… suggestion? A conservative, guaranteed-to-work number? I’d seen whispers online of people pushing hardware past the official limits, so I decided to try it myself.

    The Experiment: One Stick of RAM to Rule Them All?

    My plan was simple. I was going to take out my existing RAM and swap in a single 64GB DDR5 SODIMM stick. In my head, I figured one of two things would happen: the computer wouldn’t boot, or it would boot but only recognize 32GB of the available memory, ignoring the rest.

    I ordered the 64GB stick, and when it arrived, I shut down my little server, opened the case, and made the swap. It felt a little absurd putting a single module with that much memory into such a tiny machine.

    Then came the moment of truth. I plugged it back in, held my breath, and hit the power button.

    The Surprising Result

    It just… worked.

    The system booted up without any complaints. I immediately jumped into the system stats, half-expecting to see the number “32GB” staring back at me. But there it was, clear as day: 64GB of usable memory.

    I was honestly shocked. No special configuration, no BIOS hacks, nothing. It just recognized the full amount and got to work.

    Of course, recognizing the RAM is one thing. Being stable is another entirely. I let it run, putting it through its usual paces—running my services, moving files, the whole routine. I kept a close eye on it for the first few hours, then the first day, then the first few days.

    It’s been chugging along perfectly ever since. No crashes, no weird errors, no memory-related faults. It’s as stable as it was with 32GB, but now I have an enormous amount of headroom. My memory usage chart went from looking stressed to looking relaxed.

    So, What’s the Catch?

    Now for the important part. This is just my experience with my specific machine. It’s not a guarantee that this will work for every Intel N305 system out there. Hardware manufacturers can have their own limitations, and maybe I just got lucky with my combination of motherboard and RAM.

    I also can’t speak to the long-term effects. Will running double the “supported” RAM cause any degradation or weird issues six months from now? I have no idea. It’s a risk I was willing to take for my home lab, but you should definitely think it over before trying it on a critical system.

    But for now, this is a huge win. It means this little, power-efficient CPU is more capable than its spec sheet lets on. For anyone looking to build a beefy home server without a big, power-hungry machine, this is incredibly useful information. You might be able to get a lot more performance out of these tiny PCs than you think.

    If you were on the fence about one of these systems because you thought 32GB of RAM wasn’t enough, well, it turns out you might not have to settle. Just be prepared to be a bit of a guinea pig.

  • Have We Forgotten What a Real Server Can Do?

    Explore the debate between big homelab servers and mini PCs. Discover the pros and cons of each and find out which setup is right for your needs.

    I’ve noticed something interesting in the world of home servers lately. It seems like every time someone asks for advice on building their own lab, the answer is always the same: “Just get a mini PC.”

    And I get it. I really do. Mini PCs are small, quiet, and don’t use a lot of power. I even have one myself, a little HP Elitedesk that’s perfect for a few specific tasks. But I have to ask: have we forgotten what a real server can do?

    There was a time when building a homelab meant one thing: getting your hands on some serious hardware. We’re talking about 19-inch rack-mounted servers with powerful processors, tons of RAM, and enough storage to hold a small library. These machines were loud, power-hungry, and definitely not something you could hide behind a monitor. But they were also incredibly capable.

    My main server, for example, is a dual-socket beast with an E5-2660 v4 processor. It’s got more PCIe lanes than I know what to do with, supports ECC memory (a must for data integrity), and can hold a dozen hard drives. It’s the kind of machine that can run a dozen virtual machines, a Plex server, and a handful of game servers without breaking a sweat.

    And then there’s the GPU situation. I have another server that’s not on all the time, but it holds three GPUs for when I need to do some serious number crunching. Try doing that with a mini PC.

    But here’s the thing: I’m not saying that everyone needs a giant server in their basement. For a lot of people, a mini PC is more than enough. If you just want to run a Pi-hole, a small file server, or a handful of Docker containers, a mini PC is a great choice. They’re cheap, efficient, and get the job done.

    But if you’re like me, and you want to really experiment with technology, a mini PC is going to feel limiting very quickly. You’ll run out of storage, you’ll max out your RAM, and you’ll find yourself wishing you had more power.

    So what’s the answer? Is it big servers or mini PCs?

    I think the answer is both.

    There’s no reason to choose one over the other. In my own lab, I have a mix of both. My big server is the workhorse, handling all the heavy lifting. My mini PC, on the other hand, is perfect for smaller, more specialized tasks. It’s a great little machine, but it’s not a replacement for a real server.

    So next time you see someone asking for advice on building a homelab, don’t just tell them to buy a mini PC. Ask them what they want to do with it. Ask them what their goals are. And if they tell you they want to run a dozen virtual machines, a Plex server, and a handful of game servers, don’t be afraid to tell them the truth: they’re going to need a bigger boat.

  • My Home Server Does Everything. Is It Time for a Breakup?

    My Home Server Does Everything. Is It Time for a Breakup?

    Is your all-in-one home server becoming a single point of failure? Learn when and how to split services for a more reliable and manageable smart home setup.

    It’s a familiar story for anyone who loves to tinker. You start with a single, powerful PC. A real workhorse. You think, “I can run a few things on this.” Before you know it, that one machine is doing everything.

    It’s your media server, streaming movies to your family. It’s the brains of your smart home, turning lights on and off. It’s even managing your home network.

    And for a while, it works beautifully. It feels efficient. One machine to rule them all.

    But then, a little thought creeps in. A quiet question you start asking yourself late at night: “Is this getting too complicated? Am I putting too many eggs in one basket?”

    If you’re asking that question, you’re probably on the right track.

    The All-in-One Dream

    Let’s be honest, the all-in-one setup is amazing at first. I once had my entire digital life running on a single Ubuntu machine with a beefy processor and a ton of RAM. It was running:

    • Home Assistant in a Docker container for all my smart home stuff.
    • Plex, Sonarr, Radarr, and the whole media suite.
    • A Unifi controller to manage my Wi-Fi.
    • A massive 18TB RAID array for storage.

    It felt powerful. It felt simple. Why fire up multiple machines when one could handle the load? It saves electricity, it’s less hardware to manage, and it’s all right there in one place. But that single point of convenience is also its greatest weakness.

    When the Dream Becomes a Headache

    The main problem with an all-in-one server is that it becomes a single point of failure. And I mean total failure.

    Think about it.

    What happens when you need to reboot the machine to install a critical security update? Suddenly, it’s not just your server that’s down.

    • The Wi-Fi goes offline (because the Unifi controller is rebooting).
    • The smart lights stop responding (because Home Assistant is offline).
    • Your partner’s movie night comes to a screeching halt (because Plex is offline).

    A simple 5-minute reboot suddenly requires a household-wide announcement. You become a lot more hesitant to touch anything. That little software update you wanted to try? Maybe later. That experimental setting you wanted to tweak? Too risky.

    Your server becomes fragile. A single rogue process that eats up all the CPU could bring down every critical service in your home. Your desire to tinker is now at war with your need for stability.

    The Smart “Breakup”: How to Separate Your Services

    So, what’s the solution? It’s not about getting rid of your powerful PC. It’s about giving it a more focused job. The idea that’s probably rattling around in your head is the right one: it’s time to strategically separate your services.

    Step 1: Identify Your “Always-On” Services

    Look at your list of services and ask one question: “What absolutely cannot go down?”

    For most people, that list is surprisingly short:
    1. Home Automation (Home Assistant): This needs to be running 24/7. It’s the core of your home’s intelligence.
    2. Network Controller (Unifi): If this is down, your internet and Wi-Fi are down. It’s non-negotiable.

    These services are critical, but they’re also very lightweight. They don’t need a 16-core CPU to run smoothly.

    Step 2: Offload to a Mini PC

    This is where a small, power-efficient machine comes in. Something like a Beelink, an Intel NUC, or even a Raspberry Pi 4 is perfect for the job.

    Move your “always-on” services—Home Assistant and your Unifi Controller—to this dedicated mini PC.

    The benefits are immediate:
    * Rock-Solid Stability: This little machine will do its job quietly in a corner, sipping power and keeping your core home infrastructure online, no matter what.
    * Low Power Consumption: It’ll use a fraction of the energy your big server does, saving you money in the long run.

    Step 3: Refocus Your Main Server

    With the critical stuff moved, your big, powerful PC is now free to do what it does best: handle the heavy lifting.

    It can now be your dedicated NAS (Network Attached Storage) and Media Server.

    Let it manage the big RAID array, run the entire Plex media suite, handle video transcoding, and run any other resource-heavy applications you want to experiment with. Now, when you need to reboot it to update Plex or tinker with a new application, you won’t take the entire house down with you. The lights will stay on, and the Wi-Fi will keep working.

    Is It the Right Path?

    Yes. Moving from a single, do-it-all machine to a more distributed setup isn’t a step backward. It’s an evolution. It’s the natural path toward building a home network that is more resilient, more manageable, and ultimately, less stressful.

    You get the best of both worlds: the raw power of your main PC for heavy tasks and the quiet, reliable stability of a mini PC for the essentials. Your home will be smarter, and your life will be easier.

  • My DIY Homelab: A Peek Behind the Curtain

    My DIY Homelab: A Peek Behind the Curtain

    A friendly look inside a personal homelab build, from the Proxmox cluster and pFsense firewall to network storage and UPS backups. Your guide to DIY tech.

    Okay, let’s talk about my homelab.

    But first, a small confession. The wiring is a bit of a work in progress. If you peeked behind my desk, you wouldn’t see perfectly combed cables tied down in neat bundles. It’s a bit chaotic, but it’s an honest chaos. It’s the sign of something that’s actively being built, tweaked, and improved.

    And that’s what a homelab is all about, right? It’s a journey. But with that said, the core of my setup is finally humming along, and I wanted to share what I’ve put together.

    The Brains: A Three-Node Proxmox Cluster

    The heart of my entire setup is a high-availability (HA) cluster running Proxmox.

    So what does that mean in plain English? I have three separate mini-computers that all work together as one powerful, resilient machine. Proxmox is the software that lets me run all sorts of virtual machines (VMs) and containers. Think of it as having dozens of virtual computers for different tasks—a web server, a media server, a development environment—all running on this little trio of hardware.

    The “high-availability” part is the secret sauce. If one of the three machines fails or needs to be rebooted for an update, the other two automatically take over its workload. My services stay online without a hiccup. It’s a bit of enterprise-level magic for the home.

    Here’s the hardware that makes it happen:

    • 1 x M700 Business Mini PC (i5, 32GB RAM)
    • 2 x Gmtek Nucbox Mini PCs (i9, 64GB RAM each)

    I went with mini PCs because they’re incredible. They sip power compared to traditional rack servers, they’re quiet, and they take up almost no space. Yet, they have more than enough horsepower for anything I throw at them.

    The Gatekeeper: pFsense for Routing and Security

    I stopped using the router from my internet provider a long time ago. Instead, I built my own using pFsense.

    pFsense is a powerful, open-source firewall and router software. It gives me complete control over my network traffic. I can create advanced rules, monitor for threats, and segment my network to keep my lab projects separate from my main home network. It runs on its own dedicated N100 mini PC with 16GB of RAM, so it never becomes a bottleneck.

    This connects to a Netgear CM3000 modem, which is a simple, reliable workhorse that just handles the connection to the outside world.

    Storage, Wi-Fi, and a Safety Net

    A lab needs storage, and a home needs good Wi-Fi.

    For storage, I’m using a Netgear ReadyNas 214 with 24TB of space in a RAID-5 configuration. The RAID-5 setup is key. It means my data is spread across multiple drives in a way that protects me if one of them fails. I can lose an entire drive and not lose a single file. This is where I keep my backups, media, and larger project files.

    For wireless, a Netgear AX6000 Mesh system covers the house. A mesh network is great because it uses multiple nodes to blanket the entire home in a strong signal, killing any dead zones.

    Finally, none of this would be safe without a backup power plan. The entire setup is protected by two 1500VA Cyberpower UPS (Uninterruptible Power Supply) units. These are essentially giant batteries. If the power flickers or goes out, they kick in instantly, giving me plenty of time to shut everything down gracefully. It’s the single most important piece of gear for preventing data corruption and hardware damage.

    It’s a Process

    And that’s the setup. It’s a mix of consumer, prosumer, and enterprise ideas, all scaled down to fit in the corner of my office. It’s my personal cloud, my development playground, and my ongoing hobby.

    Is it perfect? Nope. I still want to clean up those wires. But it’s powerful, it’s resilient, and it’s mine. If you’ve been thinking about starting your own lab, just start. It doesn’t have to be perfect on day one. Just get one piece, learn it, and build from there. That’s half the fun.

  • My Server Closet Grew Up: A Homelab Story

    My Server Closet Grew Up: A Homelab Story

    A personal story of upgrading a simple closet server into a powerful, multi-drive homelab for Plex, storage, and tinkering. See the before and after.

    It all started in a closet.

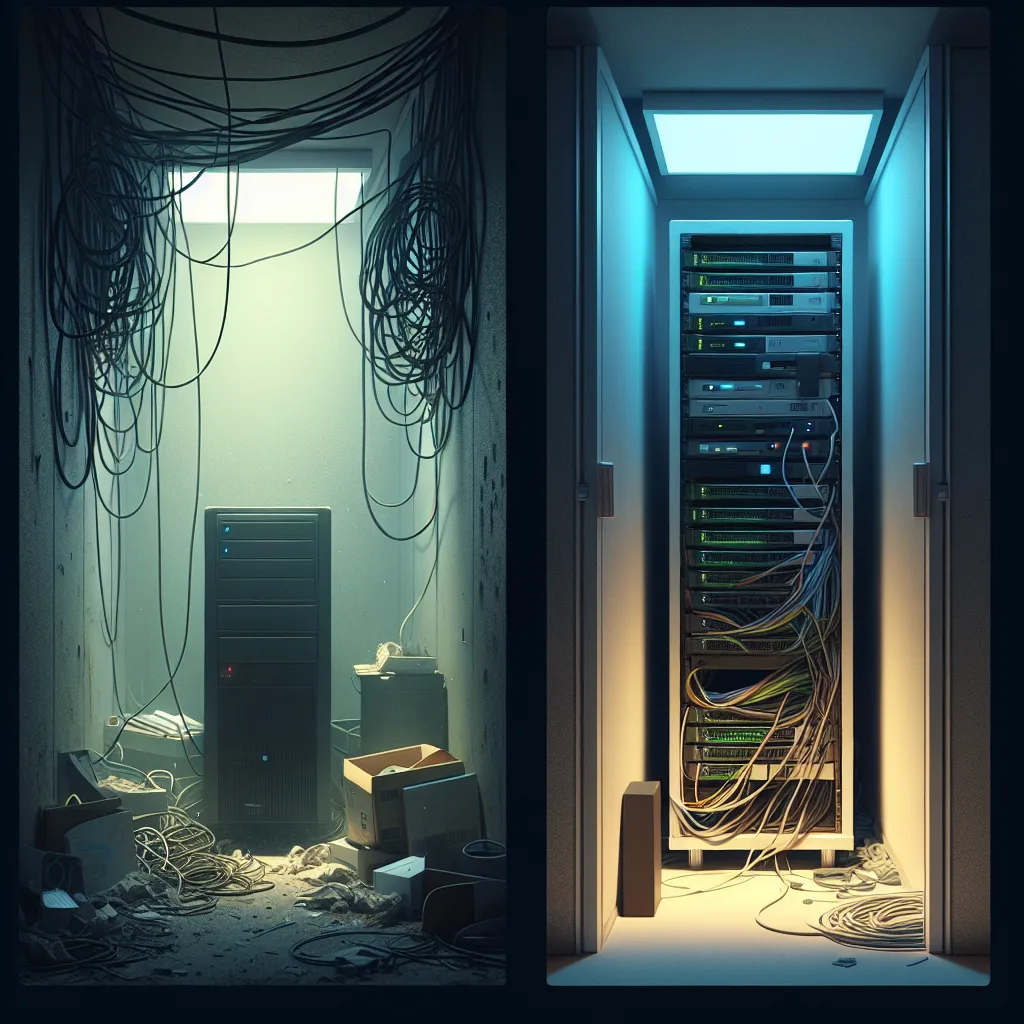
    That’s where the internet cable comes into the house, so it seemed like the logical place. I had an old Windows gaming PC that wasn’t doing much, so I loaded up Plex and called it a server. And for a while, it worked just fine. It was my first real “homelab,” even if it was just a single, dusty tower tucked away out of sight.

    But things change.

    That old PC was a power hog, and my electricity bill noticed. Plus, as the kids got older, their digital lives exploded. Suddenly, that makeshift server wasn’t just for my media—it needed to handle backups, photos, and all the digital odds and ends a family creates. The hardware was outdated, inefficient, and bursting at the seams. It was time for a real upgrade.

    The Spark for a Full Rebuild

    I knew I couldn’t just get a slightly newer PC. I wanted to do it right this time. I wanted something more powerful, more efficient, and much, much bigger in terms of storage. I also wanted a setup that I could tinker with and learn from.

    So, I started planning. My goal was to separate tasks onto dedicated machines for better performance and reliability. After a lot of research, I landed on a multi-device setup that felt like a huge leap forward.

    The New and Improved Homelab

    My little closet server has grown into a proper rack. It’s still in the closet, but it’s a world away from the single dusty tower I started with. Here’s a look at what’s running the show now.

    • The Brains: Mac Mini M4
      This little machine is the core of my setup. With its 10GbE network connection and a speedy 4TB SSD, it runs all my primary services. This includes Plex and Jellyfin for media streaming, Tautulli for server stats, a personal website, and a handful of other useful applications. Using a Mac Mini is a bit unconventional for a server, but it’s quiet, power-efficient, and surprisingly fun to build on.

    • The Storage Powerhouse: Aoostar WTR Max running Unraid
      This is where the serious storage lives. It’s a beast of a machine packed with six 22TB hard drives. That’s a whole lot of space for media, backups, and anything else I can think of. It’s all managed by Unraid, which is a flexible operating system for building a home NAS (Network Attached Storage). This was my first time using Unraid, and it’s been a fantastic learning experience. I also have a couple of NVMe drives inside for cache, which helps speed things up.

    • The Network Backbone: UniFi Gear
      To make sure all these devices can talk to each other at high speed, I invested in a proper network stack. A UniFi Cloud Gateway and a UniFi Pro Max switch handle all the traffic, including the PoE (Power over Ethernet) for my security cameras. It’s the glue that holds the entire system together.

    • Even More Storage: UNAS Pro
      Because you can never have too much storage, right? I also have a dedicated UNAS Pro chassis with another seven 18TB drives. This is mainly for long-term archives and secondary backups.

    A Work in Progress (As Always)

    Putting it all together was a project in itself. After getting the Aoostar box up and running, I had to completely reorganize the rack to make everything fit neatly. For the first time, it feels like a finished setup.

    Well, “finished” for now.

    Part of the fun of a homelab is the constant tinkering. I enjoyed building on the Mac, but I wanted a platform where I could really experiment with different operating systems and services. That’s why I went with the Aoostar build. I’m already debating if I should switch from Unraid to something like Proxmox to get even more flexibility.

    The journey from that one PC in a closet to this multi-machine rack has been a blast. It started as a simple solution to a simple problem and evolved into a genuine hobby. And if you’re thinking about starting your own, just remember: it’s okay to start small. You never know where it might lead.