Author: homenode

  • My First Homelab: From Curious Hobbyist to Self-Host Pro

    My First Homelab: From Curious Hobbyist to Self-Host Pro

    A personal journey into building a first homelab. See the hardware, software, and lessons learned from a beginner with no IT background.

    It Starts With a Spark of Curiosity

    I’ve always been a tinkerer, but I have zero professional IT background. For me, technology was a hobby, a way to solve little problems or just learn something new. So when I first stumbled upon the world of “homelabbing” and self-hosting, I was instantly hooked. The idea of building my own little data center at home felt like the ultimate DIY project.

    It was also a little intimidating. But I decided to dive in headfirst, learn as I went, and share what the experience is really like for a total beginner.

    My main goal was simple: build a home server that was stable, secure, and actually useful in my daily life. I didn’t want a rack of blinking lights that just sat there collecting dust and running up my power bill. I wanted it to earn its keep.

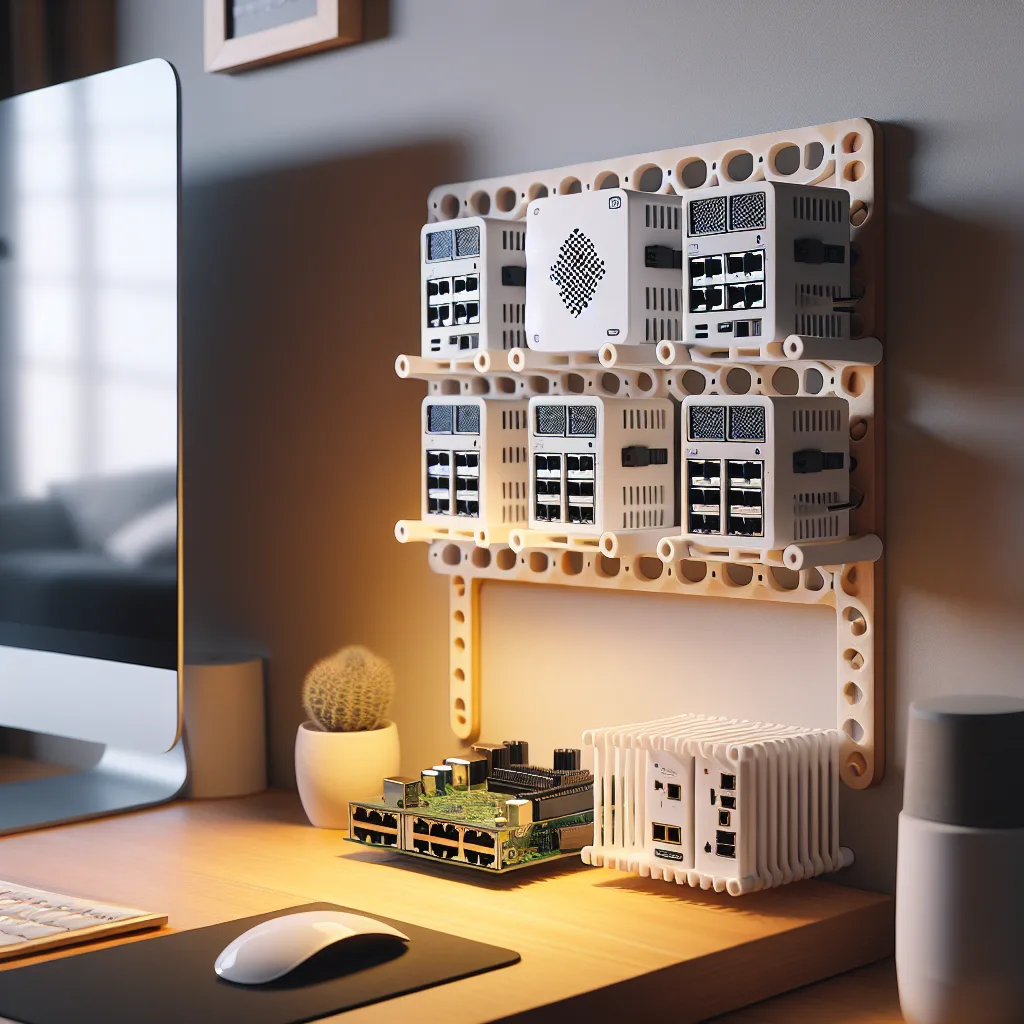
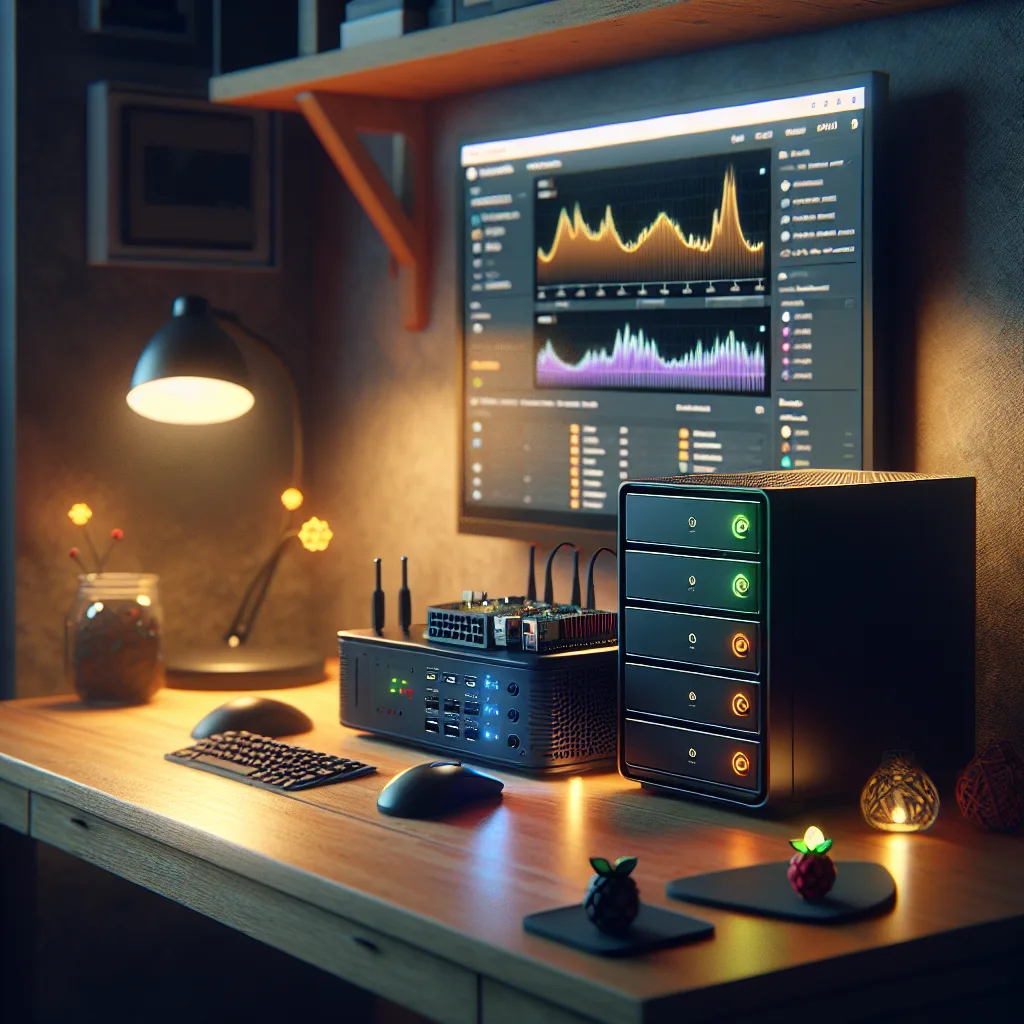
    The Hardware: My First Homelab Setup

    After a lot of reading, I landed on a setup that felt powerful but wouldn’t be overwhelming. I focused on small, efficient hardware instead of big, loud servers.

    Here’s a look at the core components:

    • Mini PCs (x2): These are the heart of the lab. I installed Proxmox on them, which is a fantastic piece of software that lets you run multiple virtual computers (VMs) and lightweight containers (LXCs) on a single physical machine. It’s like having a whole fleet of computers in two tiny boxes.
    • Synology NAS: This is my central storage hub. It holds all our family photos, documents, and media. But it’s also doing double duty—I’m running my backup server in a virtual machine right on the NAS.
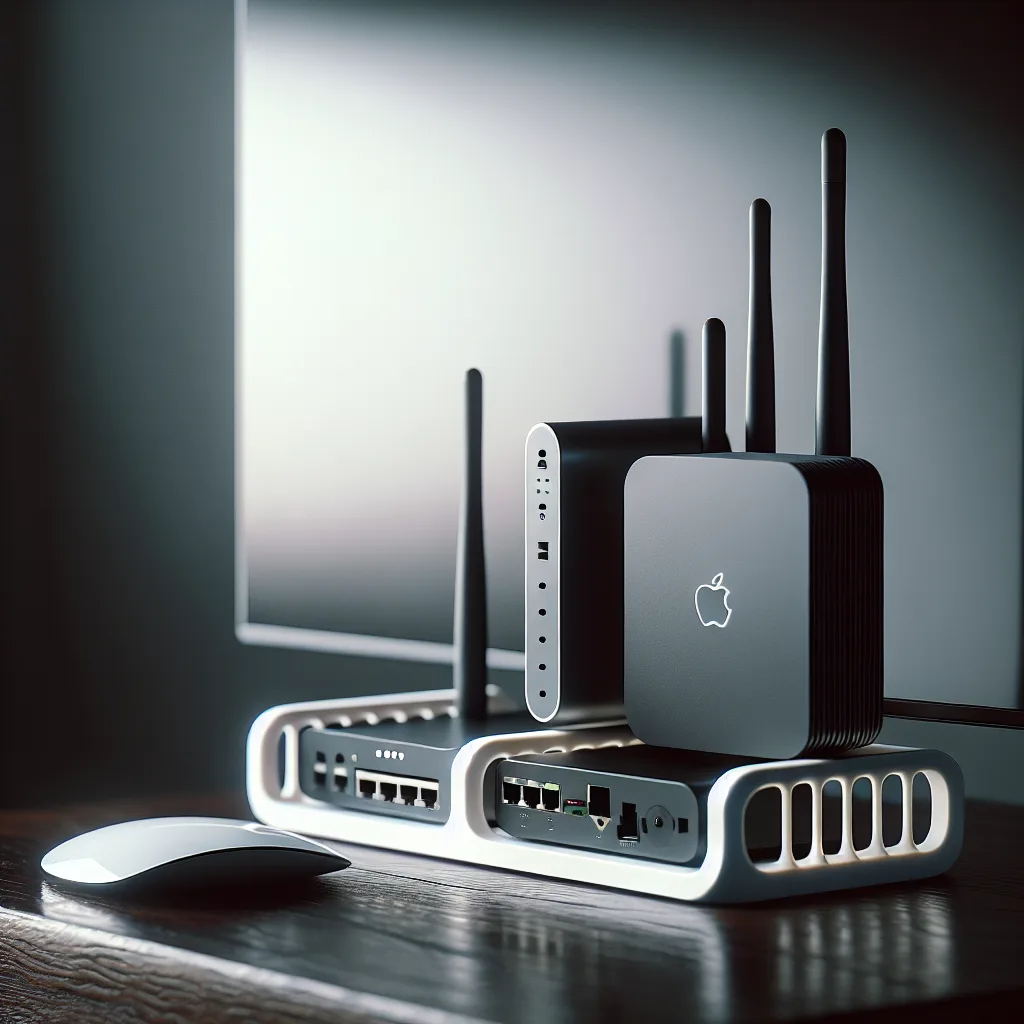
    • Firewalla Gold Pro: This replaced my old consumer-grade router. The difference is night and day. It gives me a crystal-clear view of what’s happening on my network and makes security much more straightforward.
    • Raspberry Pi 4B: A classic for a reason. This little guy runs smaller, dedicated tools and is perfect for experimenting.
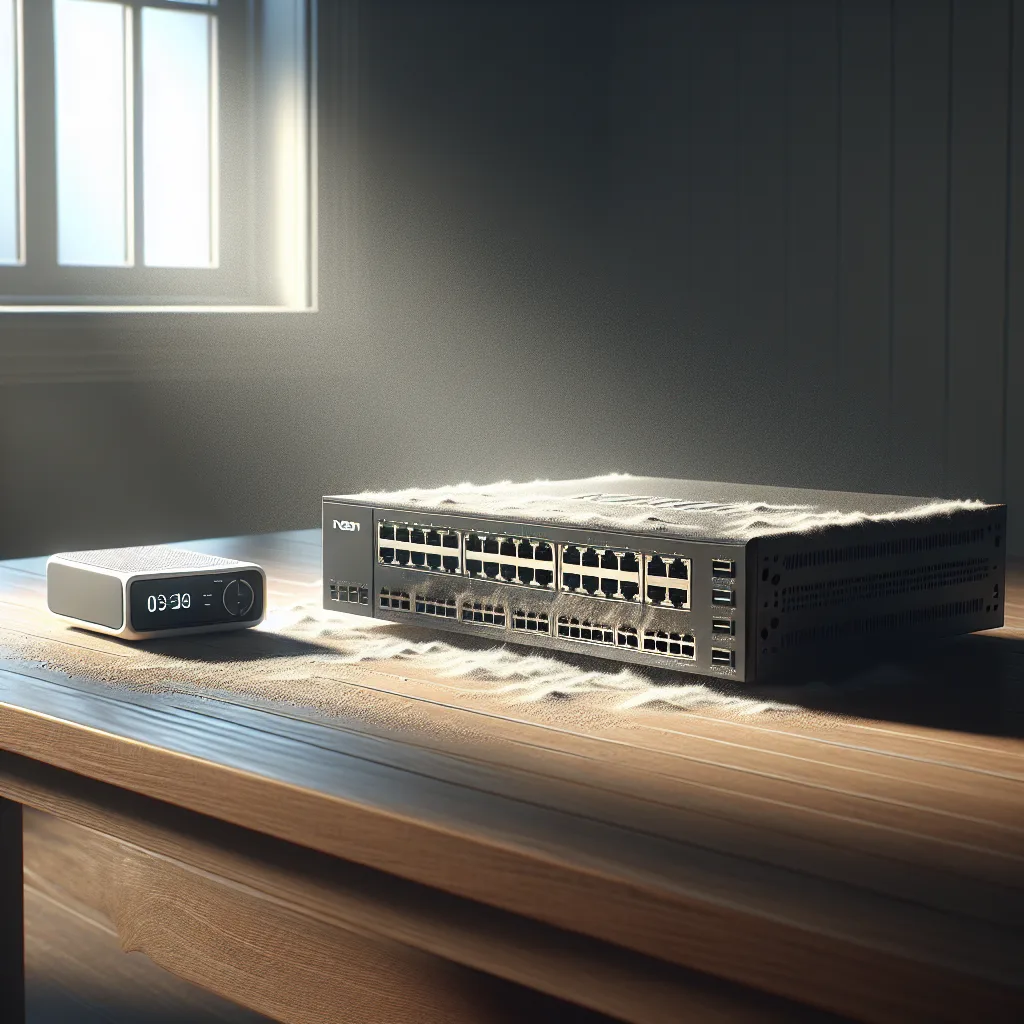
    • Networking Gear: A simple TP-Link PoE Switch powers everything, and a UniFi AP7 Access Point provides solid Wi-Fi 6 coverage throughout the house.

    The Software: Putting the Lab to Work

    Hardware is cool, but the software is where the magic happens. This is what turns a pile of electronics into a genuinely useful home server.

    I’m running a lot of different services, but a few have already become essential.

    1. A Smarter, More Private Home

    I use Home Assistant to connect all my smart devices. My favorite automation so far is one that checks the hourly price of electricity and adjusts my Nest thermostat accordingly. On hot days, it pre-cools the house when electricity is cheap and then lets the temperature drift up a bit when prices spike. It’s a small thing, but it’s a perfect example of making the server pay for itself.

    2. Taming the Paperwork

    I set up Paperless-ngx, an incredible open-source tool for managing documents. I can scan any piece of mail or a receipt, and it automatically digitizes, tags, and files it. The best part? I connected it to Ollama, a tool that lets me run a large language model (LLM) locally. This means my Paperless instance uses a private AI to make every single one of my documents fully searchable. No more digging through filing cabinets.

    3. Making Backups Effortless

    The golden rule of IT is to back everything up. I’m running Proxmox Backup Server to automatically back up all my virtual machines and containers every night. It gives me peace of mind knowing that if I mess something up (which happens!), I can restore it with a few clicks.

    The Bumps in the Road

    It hasn’t all been smooth sailing. My initial plan included a cool little LCD screen connected to a KVM switch so I could directly access the servers without a dedicated monitor. But I hit a wall. Proxmox, the operating system on my mini PCs, doesn’t play nicely with the screen without some complex GPU passthrough configurations.

    Is it frustrating? A little. But it’s also just part of the process. My next project might be to use that Raspberry Pi to display a Grafana dashboard on the screen instead—showing me real-time stats about my lab. Every problem is just a new opportunity to learn something.

    Was It Worth It?

    Absolutely.

    Starting this project with no formal experience has been one of the most rewarding things I’ve done. It’s a hobby that grows with you. You start with a simple goal, and before you know it, you’re learning about networking, virtualization, and even a little bit of AI.

    If you’re on the fence about starting your own homelab, my advice is to just begin. Start small. Pick one problem you want to solve—whether it’s blocking ads on your network, backing up your photos, or just tracking airplanes for fun (yes, I do that too with ADSB!).

    You don’t need to be an expert. You just need to be curious.

  • I 3D-Printed My Homelab, and It’s Better Than Anything I Could Buy

    I 3D-Printed My Homelab, and It’s Better Than Anything I Could Buy

    Discover how a 3D printer can transform your tech space. A personal story about building a custom, organized homelab with 3D-printed parts.

    My desk used to be what I’d call “organized chaos.” Piles of tech, tangled cables, and a general sense of things being almost in the right place. I had a little homelab setup—a few mini PCs, a network switch, and some hard drives. But none of it fit together nicely. The commercial stands and racks I found online were either too expensive, too big, or just… ugly.

    So, I looked at the 3D printer sitting in the corner of my room and had an idea. What if I just made the exact parts I needed?

    It wasn’t a grand, master plan at first. It started with a simple problem: I had three identical mini PCs for my server cluster, and they were just stacked on top of each other, getting warm and looking messy. I couldn’t find a simple, vertical rack for them anywhere.

    So I opened up some design software (you can even find pre-made files on sites like Printables or Thingiverse) and designed a basic, slotted stand. A few hours later, I had a physical object in my hand. It was a simple, white plastic holder that cost maybe two dollars in filament to print.

    And it fit. Perfectly.

    That’s when I knew I was onto something.

    From Digital File to Physical Part

    The first successful print was a spark. Suddenly, I wasn’t just looking at my messy desk; I was seeing a collection of design challenges.

    • The awkward network switch? I designed and printed a custom bracket that lets it hang neatly under my desk, completely out of sight but still accessible.
    • The external hard drive that always vibrated? I printed a snug little case for it with vibration-dampening feet.
    • Cable management? I stopped buying flimsy clips and printed my own. I made channels that screw into the underside of my desk, guiding every cable exactly where it needs to go.

    Slowly, piece by piece, I replaced the chaos with custom-built order. My setup started to look less like a pile of electronics and more like a thought-out system. Each component had its own purpose-built home. The best part? The total cost for all these custom parts was probably less than one fancy monitor arm.

    Why Print It Yourself?

    Look, you can definitely buy solutions for all these problems. But building it yourself with a printer has a few benefits that you just can’t buy off the shelf.

    1. A Perfect Fit, Every Time. Your space and your gear are unique. With a 3D printer, you’re not limited to one-size-fits-all products. You can measure your device down to the millimeter and create a mount or stand that feels like it was made for it. Because it was.

    2. It’s Surprisingly Affordable. A roll of filament, which can last for dozens of projects like this, costs about $20-$25. The cost of printing a single bracket or mount is often less than a cup of coffee. Compare that to the specialized racks and stands sold online, and the savings add up fast.

    3. It’s Incredibly Flexible. Technology changes. You get a new device, or you want to rearrange your setup. Instead of throwing out an old stand and buying a new one, you can just tweak your design and print an updated version. It’s a sustainable and adaptable way to manage your gear.

    4. The Satisfaction is Real. There’s something deeply rewarding about solving a problem with something you created yourself. It connects you to your setup in a different way. It’s not just a collection of products you bought; it’s a system you built.

    You Don’t Have to Be an Expert

    Getting started with this is easier than you might think. You don’t need to be a mechanical engineer. The online 3D printing community is huge and incredibly generous. Thousands of free models for things like cable clips, mini PC mounts, and headphone stands are available for anyone to download and print.

    If you have a 3D printer, or you’ve been thinking about getting one, I’d encourage you to look around your own workspace. Find one small thing that annoys you—a loose cable, a wobbly device—and see if you can find a printed solution for it.

    It’s a fun, practical hobby that can bring a whole new level of custom organization to your space. My desk is no longer chaotic. It’s calm, it’s functional, and it’s uniquely mine.

  • How to Install a Hard Drive in an HP EliteDesk Mini (When It Seems Impossible)

    How to Install a Hard Drive in an HP EliteDesk Mini (When It Seems Impossible)

    Struggling to install a 2.5-inch HDD or SSD in your HP EliteDesk 800 G3 Mini? This simple guide shows you the two essential parts you need to make it fit.

    So you got your hands on one of those awesome little PCs, like an HP EliteDesk 800 G3 Mini. They’re fantastic little workhorses—compact, quiet, and surprisingly powerful for their size. And like many of us, you probably have a spare laptop hard drive or a 2.5-inch SSD lying around, thinking, “Perfect! I’ll just pop this in for some extra storage.”

    You grab your screwdriver, slide off the sleek metal case with a satisfying click, and then… you stop. You stare at the beautifully engineered internals, a marvel of miniaturization, and you see absolutely nowhere to put your drive. There are no obvious brackets, no empty bays screaming “install drive here.” It feels like trying to solve a puzzle with a missing piece.

    If this is you, don’t worry. You’re not crazy, and you haven’t missed something obvious. I’ve been there myself. The truth is, you’re not missing a piece of the puzzle—you’re missing two very specific, very necessary parts.

    The Secret: It’s All About the Caddy and the Cable

    Unlike big, boxy tower PCs with standardized drive cages, these Small Form Factor (SFF) and Mini PCs from brands like HP, Dell, and Lenovo rely on proprietary parts to save space. To add a standard 2.5-inch drive (the size used in laptops), you can’t just screw it directly to the chassis. You need two things:

    1. A 2.5-inch Drive Caddy: This is a custom-molded plastic or metal bracket that your hard drive or SSD screws into first.
    2. A Proprietary SATA Cable: The motherboard doesn’t have the standard SATA power and data ports you’re used to seeing. Instead, it has a single, small connector that requires a special combo cable.

    Without these two parts, that extra drive is just a paperweight. But once you have them, the installation is a breeze. Here’s how you do it.

    Step 1: Get the Right Parts

    This is the most important step. You need the specific caddy and cable for your model. For the HP EliteDesk 800 G3 Mini, you’ll want to search online marketplaces like eBay or Amazon for:

    • HP EliteDesk G3 Mini 2.5 inch drive caddy (Part number is often 912328-001)
    • HP EliteDesk G3 Mini SATA cable (Part number is often 904494-001)

    It’s crucial to get the parts designed for the G3 model, as parts from other generations might not fit. You can often find them sold together as a kit. Expect to spend around $10-$20 for both.

    Step 2: Open Up Your EliteDesk

    This is the easy part. Make sure the computer is unplugged. There’s a single thumbscrew on the back of the PC. Loosen it, and the top cover will slide right off toward the back. Set it aside.

    Step 3: Locate the Drive Bay

    Now that you’re inside, look for the main cooling fan and heatsink assembly. It looks like a black plastic shroud covering a metal fin stack. This entire assembly is usually hinged. Gently lift it up and it will pivot, revealing the space underneath. That empty spot below is where your new drive is going to live.

    Step 4: Prepare Your Drive

    Take your 2.5-inch HDD or SSD and your new drive caddy. Place the drive into the caddy. You’ll see four small screw holes that line up with the screw holes on the side of your drive. Use the small screws that likely came with the caddy to secure the drive. Don’t overtighten them—just snug is good.

    Next, take your special SATA cable. One end has the standard L-shaped connectors for data and power that plug into your drive. The other end has a small, single white or black connector. Plug the standard end into your drive.

    Step 5: Install the Drive and Connect It

    With the drive now nestled in its caddy, it’s time to put it in the PC.

    1. Slide it in: The caddy is designed to slide perfectly into the bay you just uncovered. It should click or drop into place securely.
    2. Connect the cable: Take the small end of the SATA cable and find its matching port on the motherboard. It’s usually located near the drive bay and is often labeled SATA1 or something similar. It only fits one way, so don’t force it.

    Step 6: Close Up and Power On

    That’s pretty much it for the hardware part. Gently lower the fan assembly back into place until it clicks. Slide the top cover back on and tighten the thumbscrew.

    Plug everything back in and boot up your computer. Your PC’s BIOS/UEFI should automatically detect the new drive. Once you’re in your operating system (like Windows), you’ll need to initialize and format the drive before you can use it. Just search for “Disk Management” in the Start Menu, find your new drive (it’ll show as unallocated), right-click it, and follow the prompts to create a new simple volume.

    And there you have it. That seemingly impossible task is done. It’s one of those things that feels complicated until you know the secret. Now you can enjoy all that extra storage for your games, files, or media. Happy upgrading!

  • That Free Office Switch: A Gift or a Trap?

    That Free Office Switch: A Gift or a Trap?

    Is that old enterprise switch from the office a good deal for your homelab? We break down the pros and cons, from noise and power consumption to features.

    A friend of mine was recently offered a piece of old hardware from his office. They were about to send a big, beefy-looking network switch to be recycled, and the IT manager told him, “Hey, if you want it for your home setup, it’s yours.”

    It’s a tempting offer, right? Free enterprise-grade gear. It feels like a secret upgrade, a chance to get powerful equipment without spending a dime.

    But he hesitated, and for good reason. He’s currently running a simple, small Netgear switch that does the job. This free switch was a whole different beast. He asked me if it was worth taking. My answer? It’s complicated.

    This is a situation a lot of us who tinker with tech find ourselves in. An old server from a data center, a high-end firewall being decommissioned, or a managed switch like this one. The allure of “free” is strong, but “free” doesn’t always mean “no cost.”

    So, if you’re ever in this spot, here’s how I’d think about it.

    The Case for “Yes, Absolutely Take It!”

    Let’s start with the good stuff, because there’s a lot of it. The gear you find in a corporate environment is on another level compared to most consumer hardware.

    • Built to Last: Enterprise switches are absolute tanks. They’re designed to run 24/7 for years without a hiccup in a dusty, poorly ventilated closet. Your typical home switch is… not. This thing is likely made of metal, not plastic, and feels substantial for a reason.
    • Power and Features: This is the main attraction. A managed enterprise switch opens up a whole new world of networking. You can create VLANs to segment your network (keeping your IoT gadgets separate from your main computers, for example), use Link Aggregation for faster speeds to a NAS, and implement advanced security features. If you’re running a homelab, these are the kinds of tools that let you truly replicate a professional environment.
    • PoE (Power over Ethernet): Many of these switches come with PoE. This is incredibly useful for powering things like security cameras, wireless access points, or even a Raspberry Pi without needing a separate power adapter for each one. It just cleans everything up.

    For someone looking to learn about networking, a free enterprise switch is like being handed a textbook, a lab, and an engine all in one. You get to play with the kind of tech that powers actual businesses.

    The Hidden Costs of “Free”

    Okay, now for the reality check. That powerful, free switch comes with baggage. These are the things the IT manager probably won’t mention.

    • The Noise: This is the biggest deal-breaker for most people. Enterprise switches are designed for a server room, not your home office. They often have multiple small, high-RPM fans to keep them cool. And those fans are LOUD. Not like a desktop computer fan, but a persistent, high-pitched whine that will drive you crazy if it’s in the same room you work or relax in. Unless you have a basement, a garage, or a dedicated closet far away from your living space, the noise alone might make it unusable.
    • The Power Bill: An old enterprise switch can be shockingly power-hungry. It might draw 50, 70, or even over 100 watts just sitting there, doing nothing. Your small consumer switch probably uses less than 10 watts. That difference adds up. A “free” switch could easily cost you an extra $10-20 a month on your electricity bill. Suddenly, it’s not so free anymore. Over a year, you could have just bought a brand-new, silent, efficient switch with the money you spent on electricity.
    • The Complexity: Setting it up isn’t always plug-and-play. You might need to connect to it with a special console cable, learn a command-line interface (CLI), or navigate a web interface that looks like it was designed in 1998. Firmware updates can be hard to find, sometimes locked behind a corporate support contract. If you love a challenge, this is a fun project. If you just want your stuff to work, it’s a headache.

    So, What’s the Verdict?

    There’s no single right answer. It comes down to what kind of homelab you’re running and what your priorities are.

    Ask yourself these questions:

    1. Where will I put it? If you have a dedicated server rack in the basement, noise and size don’t matter. If it’s going under your desk, forget it.
    2. Am I okay with a higher power bill? Do the math. Is the functionality worth the recurring cost?
    3. Do I need these features? Are you actually going to set up VLANs and manage traffic, or do you just need more ports? Be honest with yourself. Sometimes a simple, “dumb” switch is the better tool for the job.
    4. Do I enjoy the process of tinkering? If your idea of fun is spending a weekend learning a new CLI and reading old technical manuals, then you’ll love it. If not, you’ll hate it.

    Ultimately, that “free” switch isn’t a simple gift. It’s a trade-off. You’re trading money for features, but you’re also trading peace and quiet for noise, and a low power bill for a higher one.

    For my friend, he decided to pass. He lives in a small apartment, and the noise and power draw just weren’t worth it for his simple setup. He’s better off with the little switch he already has. And that’s a perfectly smart decision.

  • So You Found a Super Cheap PC. Can It Become a Home Server?

    So You Found a Super Cheap PC. Can It Become a Home Server?

    Thinking of buying a cheap, used PC for a home server? Here’s an honest guide to know if it’s worth it for a NAS or Minecraft server.

    You’re scrolling through Facebook Marketplace, and you see it. An old office PC, listed for next to nothing. Maybe £40, maybe $50. The gears in your head start turning. You’ve been wanting to set up a small home server—something for storing files or maybe even hosting a private Minecraft world for you and your friends.

    This could be it. The perfect, cheap entry point.

    But then you hesitate. Is a machine that cheap actually any good? Or is it just a dusty box that will cause more headaches than it’s worth?

    I’ve been there, staring at that exact same kind of listing. It’s a tempting idea, but it’s smart to pause and ask if it’s the right move. So, let’s talk it through.

    The Dream vs. The Reality

    The dream is simple: you hand over a couple of notes, take the PC home, plug it in, and suddenly you have a capable server running 24/7. Your old laptop that buckled under the pressure of running a Minecraft server can finally retire.

    The reality is usually a bit more complicated.

    These super-cheap PCs are almost always old office desktops. Think Dell Optiplex or HP EliteDesk models from 5-10 years ago. They were built for running Word and browsing the internet, not for heavy lifting.

    So, what does that mean for your server plans?

    For a File Server (NAS):
    For a simple Network-Attached Storage (NAS) setup where you’re just storing and accessing files, one of these machines can actually work pretty well. The processor doesn’t need to be a powerhouse. As long as it can run a lightweight operating system (like TrueNAS or a simple Linux setup), you’re mostly good to go. The main bottleneck will be the hard drives, but we’ll get to that.

    For a Minecraft Server:
    This is where things get tricky. Minecraft, especially a server, relies heavily on single-core CPU performance. That means it needs one part of its brain to be really, really fast. Older office PCs often have CPUs with many cores that are all pretty slow.

    An underpowered CPU will lead to “tick lag,” where the game world slows down, blocks reappear after you break them, and the whole experience feels sluggish for everyone connected. It might be better than your old laptop, but it might not be the smooth experience you’re hoping for.

    The Real Cost of a “Cheap” PC

    That £40 price tag is just the entry fee. To make that old PC genuinely useful, you’ll almost certainly need to spend a bit more.

    Here are the two biggest upgrades to plan for:

    • RAM: These machines often come with a measly 4GB or 8GB of RAM. For a server doing more than one thing, you’ll want at least 16GB. Minecraft, in particular, loves to eat up RAM. You’ll need to check what kind of RAM it uses (likely older, slower DDR3) and find a compatible kit.
    • Storage: The single biggest upgrade you can make is swapping the old, slow hard disk drive (HDD) for a solid-state drive (SSD). The original hard drive is likely the slowest component in the entire system. Installing the operating system on an SSD will make the whole machine feel dramatically faster and more responsive. You can still use large, cheap HDDs for mass file storage, but the OS needs an SSD.

    Suddenly, your £40 project is closer to £100 or £120 after you buy more RAM and a new drive. It’s still not a bad deal, but it’s important to go in with your eyes open.

    So, Should You Buy It?

    Here’s my honest take.

    Yes, buy it if: You are a tinkerer at heart. If you enjoy the process of taking something old and making it useful, this is a fantastic project. It’s a low-cost way to learn about server hardware, networking, and operating systems like Linux. The satisfaction of getting it all working is a reward in itself. You’re not just buying a server; you’re buying an education.

    No, don’t buy it if: You just want something that works, right now, with minimal fuss. If your main goal is a reliable, performant Minecraft server and you get frustrated by technical troubleshooting, you might be better off saving a bit more. A slightly newer used PC (maybe a few generations younger) or a dedicated machine like an Intel NUC might cost more upfront but save you a lot of time and potential disappointment.

    A Quick Checklist Before You Buy

    If you decide to go for it, here’s what you should try to find out before handing over your cash:

    • What is the exact CPU model? This is the most important question. You can Google the model (e.g., “Intel Core i5-4570”) to see how old it is and get a rough idea of its performance.
    • How much RAM is in it? And what type (DDR3 or DDR4)? This will tell you how much you need to buy to upgrade it.
    • Does it have a hard drive? Ask if you can see it power on to make sure it’s not completely dead.
    • What’s the size? Some of these office PCs are “SFF” or Small Form Factor. They’re compact, which is nice, but they have very little room inside for extra hard drives.

    Ultimately, turning a cheap old PC into a server is a classic rite of passage for many tech enthusiasts. It’s a journey of discovery and a great lesson in the value of hardware. It won’t be a powerhouse, but it will be yours. And sometimes, that’s the whole point.

  • This Tiny Server Rack Is a Big Deal for Hands-On Learning

    This Tiny Server Rack Is a Big Deal for Hands-On Learning

    Discover how a small, 3D-printed 10-inch server rack is making complex tech concepts accessible and hands-on for students and hobbyists alike.

    I love stumbling upon simple ideas that solve a real problem. No fancy tech, no million-dollar budget. Just a clever solution that makes you think, “Wow, that’s smart.”

    And I saw a perfect example of this recently: a 3D-printed, 10-inch server rack.

    It’s not a full-sized, humming metal cabinet you’d see in a data center. It’s a miniature version, small enough to sit on a desk. And this particular one was built for a classroom, to help students learn about networking and IT infrastructure.

    I think that’s just brilliant.

    Making Tech Tangible

    Let’s be honest, a lot of modern technology is abstract. We talk about “the cloud,” “virtual machines,” and “networks,” but these are concepts that are hard to grasp because you can’t really see or touch them. It’s one thing to draw a network diagram on a whiteboard. It’s another thing entirely to physically plug a cable from a switch to a server.

    This is where a little rack makes a huge difference.

    Suddenly, students aren’t just reading about networking theory. They’re doing it. They can hold the components in their hands. They can mount a small device, like a Raspberry Pi or a network switch, into the rack. They can run the tiny ethernet cables and learn about cable management. They can see, with their own eyes, how the physical pieces connect to create a functioning system.

    This hands-on approach is so powerful for learning. It turns abstract ideas into concrete experiences. That’s how you create those “aha!” moments that stick with you for years.

    More Than Just a Plastic Box

    What I find most interesting is how this project bridges two different worlds: the digital and the physical.

    • On one hand, you have 3D printing. A student can literally download a file, send it to a printer, and create a physical object that solves a problem. It teaches design, patience (those prints can take a while!), and the incredible power of localized manufacturing. You don’t need to order a part from a factory thousands of miles away; you can make it right there in the classroom.
    • On the other hand, you have the fundamentals of IT. This little rack becomes the centerpiece for all sorts of lessons. You could build a tiny web server on a Raspberry Pi. You could set up a firewall. You could learn how to assign IP addresses. You could even link a few of these racks together to simulate a larger network.

    The rack itself isn’t the lesson. It’s the platform for dozens of lessons. It’s a tool that sparks curiosity and invites students to experiment. And because it’s so small and inexpensive, it’s not intimidating. No one is afraid of breaking a multi-thousand-dollar server. It’s a safe space to learn, tinker, and maybe even fail a little on the way to understanding.

    Why This Matters Outside the Classroom

    This isn’t just a great idea for schools. It’s a perfect example of a trend I’m seeing everywhere: the rise of the “homelab.”

    Tech enthusiasts are building these small-scale IT environments in their own homes to learn new skills, test software, or just have fun. That massive, noisy server rack from a decade ago is being replaced by quiet, low-power, and sometimes 3D-printed, solutions.

    It shows that you don’t need a huge budget or a dedicated room to start learning about enterprise-level tech. You can do it from your desk with a few Raspberry Pis and some creativity. It lowers the barrier to entry for everyone.

    So, while this little plastic rack might just look like a simple school project, it’s part of a much bigger idea. It’s about making technology more accessible, more hands-on, and more human. It’s a reminder that sometimes the most effective learning tools aren’t the most expensive ones, but the ones that you can build yourself.

  • My New Home Lab: A Look at the Hardware

    My New Home Lab: A Look at the Hardware

    A personal look at building a powerful home lab with a mix of new and used hardware. See the specs and the ‘why’ behind each machine. Perfect for tech enthusiasts.

    I’ve always been a tinkerer. It started with taking apart old radios and eventually graduated to building my own computers. For a while, a single, powerful desktop was enough. But my curiosity kept growing, and so did my project list. Soon, I found myself hitting the limits of what one machine could do.

    So, I decided it was time for a real upgrade. Not just a new computer, but a proper home lab. A place to experiment, learn, and build things without compromising my main workstation. It was a fun process, and I thought I’d share what I ended up with.

    The Goal: A Playground for Everything

    Before I started buying parts, I had to ask myself: what is this for?

    I wanted a setup that could handle serious virtualization. I’m talking about running multiple operating systems at once, creating isolated networks, and testing software in a safe environment. I also needed enough raw power for compiling code, running data-heavy simulations, and maybe even hosting a powerful media server for the house.

    The idea was to build a small-scale, personal cloud. A mix of new and used enterprise gear that gave me flexibility without an insane power bill.

    Here’s a look at the machines that make up the lab.

    Machine #1: The All-Rounder

    • CPU: AMD 5950x
    • RAM: 128GB DDR4 @ 3200MHz
    • Storage: 4TB SATA SSD

    This is my main workhorse and primary virtualization node. The AMD 5950x is a beast. It has a ton of cores for running multiple virtual machines, but those cores are also incredibly fast on their own. This is great for tasks that can’t be spread across many cores, like compiling certain types of code or running a game.

    With 128GB of RAM, I can comfortably spin up several VMs for development and testing without worrying about memory usage. It’s the perfect blend of a high-end desktop and a capable server.

    Machines #2 & #3: The Heavy-Lifting Twins

    • CPU: 2x Intel Gold 6144 (per machine)
    • RAM: 384GB DDR4 (per machine)
    • Storage: 8TB SAS SSD (per machine)

    These two are identical, and they are the core of the server setup. I managed to get my hands on some used enterprise hardware, which is a fantastic way to get incredible performance for a fraction of the original cost.

    Each of these machines has two CPUs, giving them a massive number of cores. This is perfect for tasks that can run in parallel, like running a whole cluster of containers or virtual machines. They form a small cluster, which means if one has an issue, the other can pick up the slack.

    And the memory? A combined 768GB of RAM between them is honestly a little absurd, but it opens up so many possibilities. I can run memory-hungry applications, large databases, or just an enormous number of services without ever thinking about limitations. The fast SAS SSDs ensure that storage is never a bottleneck.

    Machine #4: The Reliable Utility Player

    • CPU: Intel 7700K
    • RAM: 32GB DDR4
    • Storage: 4TB SATA SSD

    You might look at this one and think it’s a bit out of place. It’s definitely older than the others, but it plays a crucial role. This machine is my stable, low-power server for essential services.

    Think of it as the one that’s always on and just works. It could run a firewall, handle network-wide ad-blocking, or act as a lightweight backup server. It doesn’t need a ton of power, but it needs to be reliable. The 7700K is more than enough for these kinds of tasks, and it sips power compared to the bigger machines.

    Tying It All Together

    These machines don’t just exist in a vacuum. They’re all connected on a high-speed network, allowing them to talk to each other and move data around quickly.

    The result is a powerful, flexible, and surprisingly resilient home lab. It’s a place where I can learn about clustering, try out new operating systems, and host my own services without relying on big tech companies. It’s a project that’s never really “done,” and that’s what I love about it. It’s a constant source of learning and a ton of fun to manage. If you’ve been thinking about starting your own, I hope this gives you a few ideas.

  • My Home Lab Server Rack Thinks It’s a Saturn V Rocket

    My Home Lab Server Rack Thinks It’s a Saturn V Rocket

    See how a standard home lab server rack was transformed into a stunning tribute to the Saturn V rocket with a creative DIY paint job. A unique tech project.

    I have a confession to make. I’m a nerd.

    Actually, I’m a few different kinds of nerd. I’m a tech nerd, which is why I have a server rack in my house. It runs my media, stores my files, and lets me tinker with new software. It’s my little digital sandbox.

    But I’m also a space nerd. I grew up fascinated by the Apollo missions. The sheer audacity of strapping humans to a controlled explosion and sending them to another world? It still blows my mind. And at the heart of that effort was the Saturn V, the most powerful rocket ever built.

    For a long time, my server rack was just… a rack. A big, black, boring metal box tucked away in a corner. It was functional, sure, but it had zero personality. One day, I was looking at it and then saw a picture of the Saturn V, and a thought sparked.

    They’re both tall, cylindrical things. They’re both packed with power. What if… what if I made my server rack look like a Saturn V?

    The idea seemed a little crazy, but it wouldn’t leave me alone. So, I decided to just go for it.

    From Black Box to Launch Tower

    The project started with a standard server rack. Nothing special. The first step was the most important: the paint job.

    The Saturn V has such an iconic look. It’s not just random black and white patches. Each section, each color block, corresponds to a different stage of the rocket—the S-IC, S-II, and S-IVB. I wanted to get it right.

    So, I spent a good amount of time with masking tape and spray paint.

    1. The Prep: First, I emptied the rack. You can’t paint around servers. I gave the whole thing a good cleaning and a light sanding to help the new paint stick.
    2. The White Coat: The base of the rocket is mostly white, so I started there. Several thin coats of matte white spray paint gave me a nice, clean canvas to work with.
    3. The Masking: This was the hard part. I used photos of the real Saturn V as a reference, carefully masking off the sections that would remain white. The lines had to be crisp and straight. It took a lot of patience and a lot of tape.
    4. The Black Coat: With the white sections protected, I sprayed the rest of the rack with matte black. Again, a few light coats did the trick.

    Peeling off the masking tape was probably the most satisfying part of the whole project. Seeing those clean, perfect lines appear was a huge relief. It was starting to look like a rocket.

    It’s All in the Details

    A simple paint job was a good start, but the Saturn V’s character comes from the little things. To really sell the look, I had to add the details.

    • The “USA” Lettering: I used a stencil to paint the classic “U-S-A” down the side, just like on the real thing.
    • The American Flag: A small, high-quality flag decal went on, right where it should be.
    • The Roll Patterns: I even added the black roll patterns and umbilical connection points using black vinyl. These small geometric shapes make a massive difference.

    Once I started loading the servers and networking gear back in, the whole thing came to life. The blinking LEDs of the servers almost look like the complex instrument panels of a mission control center. It’s no longer a boring box of computer parts; it’s my own personal launch tower.

    It’s funny how a simple idea can totally transform something you see every day. My server rack is still a server rack. It still runs my media and stores my files. But now, it’s also a tribute to one of humanity’s greatest achievements. It’s a conversation starter. And every time I look at it, it makes me smile.

    It just goes to show you don’t need a massive budget or some revolutionary idea to make something cool. Sometimes, all you need is a couple of cans of spray paint and a nerdy obsession.

  • My Tiny Network: A Step-by-Step Home Lab Story

    My Tiny Network: A Step-by-Step Home Lab Story

    A personal journey of building a tiny, powerful home network using a Raspberry Pi, Firewalla, and VLANs. A step-by-step story for tech beginners.

    It’s funny how a small project can spiral into something more.

    It all started with a gift from a friend. I’d been getting more interested in my home network, wanting to understand how it all worked and maybe make it a bit better. So, for my birthday, a small box arrived with a Raspberry Pi 4B inside. I had a mission: set up Pi-hole to block ads across my entire network.

    And honestly, that first step was great. Seeing ads just disappear from websites on every device was a little taste of magic. It worked, and it made me curious. What else could I do?

    Stepping Up Security with a Firewall

    My friend, who is clearly an enabler of nerdy hobbies, sent another gift my way a few months later: a Firewalla Purple. If you haven’t heard of them, it’s a powerful little cybersecurity firewall packed into a tiny box. It promised better security, network monitoring, and more control than my standard internet provider’s router could ever offer.

    There was just one problem. To let the Firewalla do its job properly, it needs to be the main “gateway” for the whole network. This means my existing Wi-Fi router had to be switched into “bridge mode” or “AP mode,” essentially turning it into a simple antenna that just passes on the signal.

    Turns out, my router couldn’t do that. It was a basic model, and its features were locked down. So my powerful new firewall was sitting there, unable to use its best features.

    Finding the Right Router (and Unleashing the Nerd)

    The solution came in the mail, again, courtesy of my friend. This time it was an old but very capable gaming router. The key feature? It had the flexibility I needed. I could finally put the Firewalla in charge as the gateway and configure the new router to work in bridge mode, acting purely as a Wireless Access Point (WAP).

    This is where things started to feel like a real network.

    I wasn’t just using the all-in-one box my ISP gave me anymore. I had separate devices for separate jobs.

    • Firewalla Purple: The brain of the operation. It manages all the traffic, blocks ads and malicious sites, and lets me see what every device is doing.
    • Gaming Router (in Bridge Mode): The WAP. Its only job is to provide a strong, reliable Wi-Fi signal.

    This setup was already a huge improvement in security and control. But the project wasn’t quite finished.

    The Final Pieces: A Managed Switch and a Local Website

    The Raspberry Pi that started it all was about to get a new job. I decided I wanted to host a small, local website on it—just as a fun project. But I didn’t want the traffic coming to that website to be on the same network as my personal computer or phone.

    This is where the final two pieces of the puzzle came in: a managed switch and something called VLANs.

    A “managed switch” is just a device that lets you direct your network traffic more precisely. Think of it like a smart power strip for your internet cables. The magic it unlocks is the ability to create VLANs, or Virtual Local Area Networks.

    In simple terms, VLANs let you split one physical network into multiple separate, isolated networks. It’s a security best practice.

    With a little help, I set up two VLANs:
    1. A ‘Private’ VLAN: For all my trusted devices—my laptop, our phones, the smart TV. This is our secure home network.
    2. A ‘Public’ VLAN: Just for the Raspberry Pi website. It’s completely isolated, so any traffic coming to it can’t see or access anything on my private network.

    The final touch? The new switch was a POE (Power over Ethernet) model, which means it sends power through the ethernet cable itself. The Raspberry Pi was now being powered directly by the switch, eliminating an extra power adapter.

    To keep it all organized, I 3D-printed a simple, clean stand with built-in cable routing. The entire setup—firewall, switch, and Pi—is so small that it sits neatly on a speaker behind my TV.

    What started as a simple ad-blocking project slowly evolved, piece by piece, into a tiny but seriously capable home network. It’s faster, way more secure, and I learned a ton along the way. And it all fits in a space you’d never even notice. Sometimes the best projects are the ones you build one step at a time.

  • That Old Laptop in Your Closet? It Might Be Your Next Server.

    That Old Laptop in Your Closet? It Might Be Your Next Server.

    Thinking about a home server? Your old laptop might be all you need. Learn how a simple machine can run Plex, file sharing, and more.

    You see pictures of home servers online and they all look the same. Racks of humming machines. A web of perfectly managed cables. Blue and green lights blinking in a dark, cool room. It all seems so… serious. And expensive.

    I get it. It’s impressive. But it’s also intimidating. It creates this idea that if you want to run your own services at home, you need a degree in IT and a budget to match.

    I’m here to tell you that’s just not true.

    My friend’s home server? It’s an old Dell laptop from a few years back. The kind you’d buy for college or for your parents to browse the web. It has a modest Intel i3 processor and runs plain old Windows 10. And you know what? It works beautifully.

    The Humble Heart of the Operation

    Let’s be clear, this machine is not a powerhouse. It’s a Dell Inspiron 3593. It won’t be mining cryptocurrency or running a dozen virtual machines. But that’s not the point. The point is what it can do, with hardware that many of us already have gathering dust in a closet.

    Right now, that little laptop does two things, and it does them well:

    • It runs Plex. If you haven’t used Plex, it’s basically your own personal Netflix. You load it up with your movies and TV shows, and it organizes them into a beautiful library that you can stream to your TV, phone, or computer, wherever you are. This laptop is powerful enough to handle a couple of streams at once without breaking a sweat.
    • It’s a central file hub. All the family photos, important documents, and random downloads have a single, safe place to live. No more “Wait, is that photo on your laptop or my old desktop?” It’s all just there, accessible from any device on the home network.

    That’s it. It’s not running a global enterprise. It’s just making life a little more convenient.

    Why a Laptop Is a Surprisingly Great Server

    When you stop and think about it, a laptop is almost perfectly designed for this kind of light-duty server work.

    First, it’s incredibly power-efficient. Unlike a big desktop tower that’s always drawing a significant amount of power, a laptop sips electricity. It’s designed to run for hours on a small battery, after all. When it’s just sitting there, plugged in and serving files, it’s using a tiny fraction of the energy of a “proper” server. That’s a real, tangible saving on your electricity bill.

    Second, it has a built-in battery backup. If the power flickers or goes out for a few minutes, the laptop doesn’t care. It just keeps running on its battery. No need to buy a separate, expensive Uninterruptible Power Supply (UPS).

    And finally, it’s simple. You don’t have to learn a new, complicated operating system like Linux or TrueNAS if you don’t want to. It’s just Windows. You know how to use it. You set it to not go to sleep when you close the lid, install your software, and you’re done.

    But Is It Really Good Enough?

    Sure, there are downsides. An i3 processor will struggle if you ask it to stream a high-bitrate 4K movie to three people at once. The single hard drive means you need a separate backup plan (which you should have anyway!). And a dedicated server will always be more powerful and expandable.

    But that’s missing the forest for the trees.

    This isn’t about building the ultimate server. It’s about solving a problem with the tools you already have. It’s about demystifying the process and proving that you can get started with almost no investment.

    So before you go shopping for enterprise-grade hardware, take a look in your closet. That old laptop you replaced last year might just be the most practical, efficient, and budget-friendly home server you could ever ask for.