Author: homenode

  • I Found a Server on the Street. Here’s What I Did Next.

    I Found a Server on the Street. Here’s What I Did Next.

    Found an old Dell server on the street and turned it into a powerful home NAS. Here’s the story of my unexpected DIY tech project and why you might want one.

    It’s funny how a random walk can turn into a full-blown tech project.

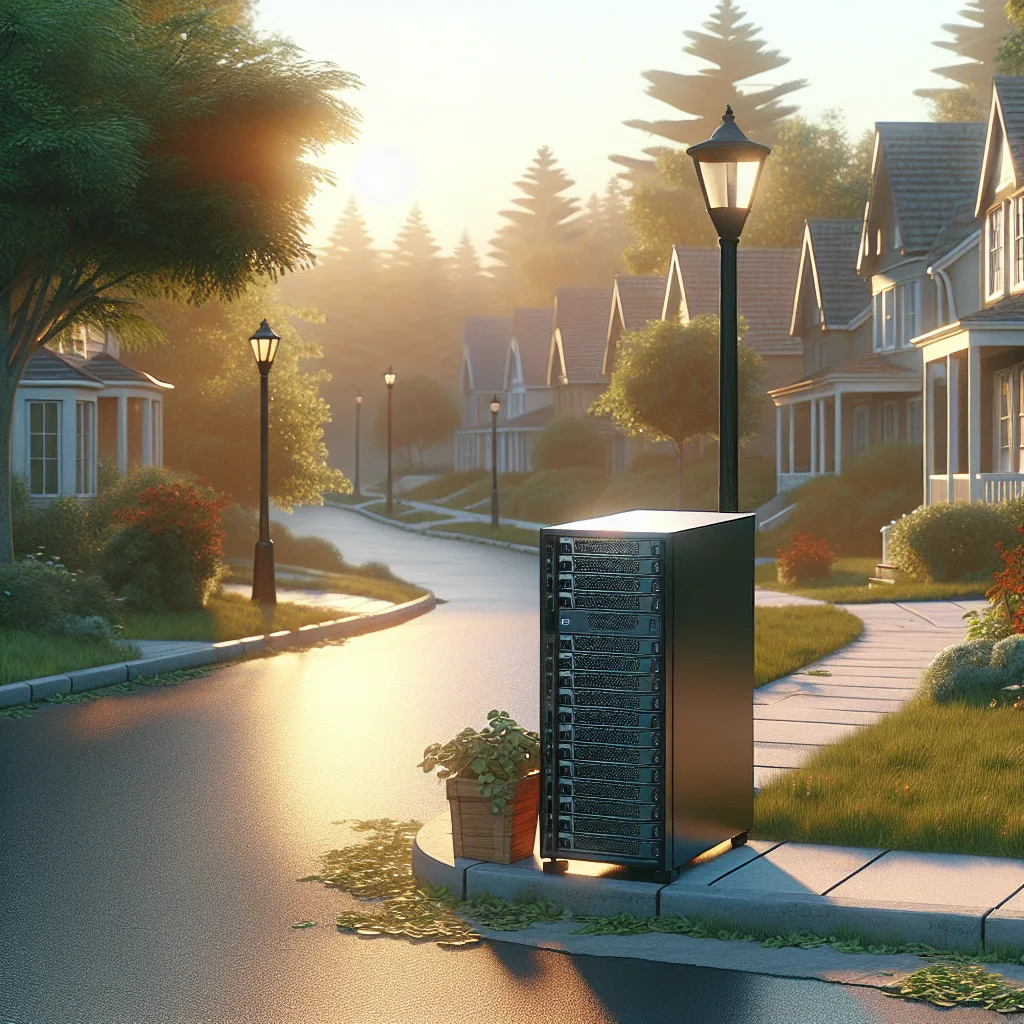
    I was just walking through my neighborhood the other day, minding my own business, when I saw it. Sitting right there on the curb, looking completely out of place, was a computer. But not just any computer. This was a beast. A tall, black tower that looked like it belonged in a data center, not next to someone’s recycling bin.

    My curiosity got the best of me. I walked over and saw the Dell logo. A quick search on my phone confirmed it: a PowerEdge T620. For those who don’t spend their time looking up enterprise hardware, that’s a serious piece of equipment. It’s a server that businesses use to run their entire operations. And it was just… sitting there.

    For a second, I thought it had to be broken. But it looked to be in decent shape, just a little dusty. The thought crossed my mind: “Can I just take this?” It felt like finding a treasure chest on the sidewalk. So, I did what any self-respecting nerd would do. I hauled it home.

    The “What Have I Done?” Moment

    Getting it into my apartment was a workout. These things are not light. Once I set it down, the reality of the situation hit me. What was I going to do with this thing?

    My first thought was to just boot it up and see what happened. After plugging it in, the fans spun up with the roar of a jet engine. This thing was loud. And I knew it would probably drink electricity like it was going out of style.

    For a moment, I considered just taking it to an e-waste facility. It seemed like more trouble than it was worth. But then, an idea started to form. I’d been thinking about getting a proper backup system for my files for a while. I have years of photos, important documents, and a growing collection of movies and shows scattered across various hard drives.

    Maybe this curbside find was the solution. Maybe I could turn this corporate workhorse into a personal home server. Specifically, a Network Attached Storage (NAS) device.

    So, What’s a NAS?

    Think of a NAS as your own private cloud. It’s a central box that holds a bunch of hard drives, and it’s connected to your home network. Instead of saving files to your laptop or a USB drive, you save them to the NAS.

    Here’s why that’s so useful:

    • All your files in one place. No more hunting for that one photo on that one old hard drive. Everything is organized and accessible from any device on your network.
    • Automatic backups. You can set it up to automatically back up your computers. If your laptop ever dies, you won’t lose a thing. It’s peace of mind in a box.
    • Your own media server. You can run software like Plex or Jellyfin on it. This organizes all your movies and TV shows into a beautiful, Netflix-style library that you can stream to your TV, tablet, or phone.
    • A playground for other projects. A home server can also run other cool stuff, like home automation software or a personal website.

    Suddenly, this loud, heavy box didn’t seem like a burden. It seemed like an opportunity.

    Giving Old Hardware a New Life

    The project began. First, a thorough cleaning. I opened it up and blew out years of accumulated dust. I checked the specs—it had a decent processor and a good amount of RAM. More than enough for what I had in mind.

    The biggest challenge was the noise and power. I spent some time in the server’s settings, tweaking fan speeds and power profiles. Enterprise servers are designed for performance, not quiet operation in a living room. But with a little work, I managed to get the noise down to a much more manageable hum.

    Next, I needed to install the software that would turn it into a NAS. There are some amazing free options out there, like TrueNAS Core. It’s a powerful operating system designed specifically for building storage systems. After a few YouTube tutorials and a bit of trial and error, I had it up and running.

    I loaded it up with a few hard drives I had lying around, and just like that, I had my own personal cloud.

    Was It Worth It?

    Absolutely.

    This project wasn’t just about getting more storage. It was about the satisfaction of taking something discarded and giving it a new purpose. It was a fantastic learning experience. I now have a ridiculously powerful backup and media server that would have cost a fortune to buy new, and I built it from something someone was throwing away.

    It’s a reminder that there’s a lot of value left in old technology. So next time you see an old piece of tech on the curb, don’t just walk by. You might be looking at your next favorite project.

  • Your Credit Card’s Secret Perk: Does It Cover Your Portable Power Station?

    Your Credit Card’s Secret Perk: Does It Cover Your Portable Power Station?

    Thinking of buying a portable power station? Find out if your credit card’s extended warranty will cover your expensive purchase before you buy. Learn how to check.

    I’ve been looking at portable power stations lately. You know, the big ones. The kind of units from brands like EcoFlow, Anker, or Bluetti that can run your fridge during a power outage or power a whole campsite for a weekend.

    They look amazing. But they also cost a small fortune.

    Dropping two or three thousand dollars on a piece of tech is a big decision. And it got me thinking about something that often gets overlooked: what happens if it breaks?

    Most of these units come with a decent manufacturer’s warranty, usually two or three years, sometimes five. But for something I expect to last a decade, that’s not a lot of time. It led me down a rabbit hole, and I ended up on a question I think a lot of people have but don’t ask: Will my credit card’s extended warranty cover a massive, expensive portable power station?

    It’s a fantastic question. After all, this is one of the best, most underused perks that comes with a premium credit card.

    The Secret Power of Extended Warranties

    If you’re not familiar with them, many credit cards offer an “extended warranty” benefit. In most cases, they add an extra year of coverage to a manufacturer’s warranty. So if your new gadget has a two-year warranty, your credit card effectively turns it into a three-year warranty.

    It’s an amazing perk. I’ve used it myself to replace a fancy coffee maker that died a month after its official warranty expired. The credit card company just refunded me the entire purchase price. No hassle.

    So, logically, you’d think this would apply to a portable power station, right? It’s just a big piece of electronics, after all.

    Well, it’s a little complicated.

    Where Things Get Murky

    The devil is always in the details, and in this case, the details are in a boring PDF document called your “Guide to Benefits.”

    Every credit card has one. And buried inside is a list of exclusions for the extended warranty program. This is where you might run into trouble.

    Most credit card benefits guides exclude a few common categories:
    * Boats, cars, airplanes, and other motorized vehicles.
    * Things bought for resale.
    * Computer software.
    * Items that become permanent fixtures of your home.

    That last one is interesting. But the most common point of confusion for a power station is the “motorized vehicles” clause. Some policies have broad language that excludes anything with a motor. Does the inverter or cooling fan in a power station count? Probably not, but it’s an ambiguity.

    More importantly, some of these high-end power stations, like the EcoFlow Delta Pro Ultra, are designed to be integrated directly into your home’s electrical panel with a transfer switch. At that point, does it stop being a “portable appliance” and become a “permanent fixture”?

    This is the gray area. For a smaller unit, like a Jackery 1000, I’d be shocked if it weren’t covered. It’s clearly an electronic device. But for a 150-pound beast that can be wired into your house? The answer is a solid “maybe.”

    The Only Way to Know for Sure

    So what’s the answer? It depends entirely on your specific credit card. There is no universal rule.

    But don’t worry, finding out is easier than you think. You just have to do a tiny bit of homework before you buy.

    1. Find Your “Guide to Benefits.” The easiest way is to just Google it. Search for “[Your Credit Card Name] Guide to Benefits.” For example, “Chase Sapphire Preferred Guide to Benefits.” You’ll usually find a direct link to the PDF. You can also find it by logging into your online banking portal.

    2. Search the Document. Once you have the PDF open, use the search function (Ctrl+F or Cmd+F) and look for the “Extended Warranty” section. Go straight to the list of exclusions. Read it carefully. Look for any language about power supplies, generators, motorized equipment, or items that attach to a building.

    3. If in Doubt, Call and Ask. If the language is vague, don’t guess. Call the number on the back of your credit card and ask to speak to a “benefits administrator.” They are the ones who handle these claims. Ask them directly: “I am planning to purchase an Anker SOLIX F3800 portable power station. Can you confirm if this type of product is eligible for the extended warranty benefit?”

    Getting a clear answer before you swipe your card is the smartest thing you can do.

    I actually did this for my own card. I pulled up the benefits guide and scanned the exclusions. It listed cars, boats, and medical equipment, but nothing that would clearly disqualify a portable power station. For my situation, it seems like I’d be covered.

    But your card could be different. Taking ten minutes to verify could literally save you thousands of dollars if your expensive new power station decides to give up the ghost in year three. It’s a small investment of time for some serious peace of mind.

  • The Search for Vanishing Tech: Hunting for a Vintage Smart Home Part

    The Search for Vanishing Tech: Hunting for a Vintage Smart Home Part

    Ever tried to find a part for an old smart home system? Join the hunt for vintage tech and discover why keeping older systems alive is worth the effort.

    I saw something the other day that got me thinking. It was a simple request, a message from someone looking for a specific, seemingly random piece of electronics: an Elan SS R1 IR sense relay module.

    I know, it doesn’t sound like much. It’s not the latest flashy gadget. It’s a small, black box that was probably installed in a closet or behind a TV two decades ago. But for someone out there, this little box is the key to keeping their entire system running.

    And it just reminded me how much of our technology, especially in the smart home world, has a hidden expiration date. Not because it will break, but because it will simply… vanish.

    What is This Thing, Anyway?

    So, what does a little box like the SS R1 even do?

    Think of it as a translator. It’s a simple but brilliant device. It senses an infrared (IR) signal—the same kind your old TV remote uses—and triggers an action.

    Maybe you press a button on your remote. The SS R1 sees that signal and tells your projector screen to lower. Or it tells the lights to dim. It’s a bridge between a simple command and a physical action. In its day, it was a rock-solid piece of the custom automation puzzle.

    These things were part of high-end home automation systems installed by professionals. They were built to last, wired carefully into the guts of a house, and designed to just work, day in and day out.

    The Problem of Discontinued Parts

    But here’s the catch. Elan, and every other company, moves on. Technology evolves. Today, we control things with Wi-Fi, with voice commands, with apps on our phones. The old-school IR-based systems, as reliable as they are, aren’t the new hotness.

    So, they stop making the parts.

    And suddenly, that little black box in the closet becomes incredibly important. If it fails, the whole chain breaks. Your screen doesn’t drop, your lights don’t dim. The seamless system you’ve relied on for years gets a crack in its foundation.

    You can’t just go to a big-box store and buy a new one. You can’t find it on Amazon. You’re left searching, hoping someone has one sitting in a dusty box in their garage.

    So, Why Bother? Why Not Just Upgrade?

    This is the question that always comes up. “Why not just rip it all out and install a new system?”

    There are a few really good reasons.

    First, these old systems were often built like tanks. They are incredibly reliable because they are, in many ways, much simpler than modern wireless systems. They were wired, robust, and professionally installed. If the core of the system still works perfectly, it feels wasteful and frustrating to tear it all out for one failed component.

    Second, the cost. A full rip-and-replace of a custom-installed home automation system can cost tens of thousands of dollars. It’s disruptive, messy, and a huge undertaking. Hunting down a replacement part, even a rare one, for $50 or $100 is a much, much better option.

    And finally, there’s the community. There’s a whole network of home theater enthusiasts, custom installers, and hobbyists who understand this struggle. They have forums, classifieds, and a shared knowledge base dedicated to keeping this “vintage” gear alive. They trade parts, offer advice, and help each other solve problems. Finding a part isn’t just a transaction; it’s plugging into a community of people who get it.

    The Hunt is Part of the Fun

    There’s something deeply satisfying about keeping good technology going. It’s a more sustainable way of thinking, a quiet rebellion against the endless upgrade cycle. It’s about valuing things that were built to last.

    So, if you’re ever in this boat, looking for a part that seems to have disappeared from the face of the earth, don’t give up.

    • Check the forums: Places like AVS Forum or even Reddit are full of experts and old-school installers.
    • Set up eBay alerts: Be patient. The part you need will eventually show up.
    • Talk to local installers: Find the veterans, the ones who were doing this 20 years ago. They might just have a box of old parts they’d be willing to sell.

    That search for the Elan SS R1 isn’t just about one person trying to fix their setup. It’s a story about the hidden world of legacy tech, the value of well-built hardware, and the communities that keep it all humming along, long after the rest of the world has moved on.

  • Just Switched From Home Assistant to Hubitat? Here’s What to Expect

    Just Switched From Home Assistant to Hubitat? Here’s What to Expect

    Thinking of moving from Home Assistant to Hubitat? This guide covers the key differences, what you’ll gain, what you’ll miss, and practical tips for a smooth transition.

    So, you’re thinking about making the jump from Home Assistant to Hubitat. Or maybe you’ve already got the little black box in your hands and you’re wondering, “What now?”

    I get it. It’s a move a lot of people in the smart home world consider. You’ve probably spent countless hours in YAML, tweaking dashboards, and dealing with the occasional SD card failure. Home Assistant is incredibly powerful, a tinkerer’s dream. But sometimes, you just want your automations to run without the constant maintenance.

    That’s where Hubitat comes in. It’s not about replacing Home Assistant with something “better.” It’s about choosing a different path—one that trades endless customization for appliance-like reliability.

    Let’s talk about what to expect.

    The Biggest Win: It’s All Local

    First, take a deep breath. The best part of your Home Assistant setup is likely still here: 100% local control. Hubitat is built from the ground up to keep everything inside your own network. Your lights will still turn on even if your internet goes down. This is the core philosophy of Hubitat, and it’s a big reason it feels like a natural next step for many HA users. You aren’t giving up your privacy or reliability.

    What Might Feel a Little… Different

    I’m not going to pretend the transition is all sunshine and rainbows. There are things you’ll probably miss.

    1. The User Interface (UI)

    Let’s be honest, Hubitat’s interface is functional, not beautiful. If you’ve spent ages perfecting a slick, custom Lovelace dashboard in Home Assistant, the default Hubitat dashboards will feel like a step back. They work, they’re fast, and they’re local. But they aren’t pretty. Many users end up using a third-party dashboard or just accept that the UI is for setup, not daily interaction.

    2. The Massive World of Integrations

    Home Assistant can connect to almost anything with a plug or a battery. Its library of community-built integrations is massive. Hubitat has a healthy number of built-in integrations and a fantastic community, but it doesn’t have everything. You might find that one obscure, cloud-connected device you loved in HA doesn’t have a dedicated driver for Hubitat. Always check for your essential devices first.

    What You’ll Learn to Love

    Now for the good stuff. You’re making this change for a reason, and here’s the payoff.

    1. Rock-Solid Stability

    This is the number one reason people switch. Hubitat is an appliance. You set it up, and it just… works. There are no operating system updates to worry about, no Python dependencies to break, and no SD cards to corrupt. It’s a dedicated piece of hardware running one thing: your home automation. You get your weekends back.

    2. Rule Machine: The Powerful Heart

    Instead of YAML files, your complex automations will be built in an app called Rule Machine. At first glance, it can look a little intimidating with all its dropdown menus. But once you get the hang of it, you’ll realize it’s incredibly powerful. You can create complex conditional logic (“IF the front door opens AND it’s after sunset AND my phone is away, THEN turn on the porch light”) without writing a single line of code.

    3. Simplicity for Simple Things

    While Rule Machine is for complexity, Hubitat also has built-in apps for simple tasks. The “Simple Automation Rules” app is perfect for basic “if this, then that” logic. The “Motion and Mode Lighting” app makes setting up motion-activated lights a breeze. You don’t always have to reach for the biggest tool in the box.

    Tips for a Smooth Start

    Ready to dive in? Here’s my advice for making the move as painless as possible.

    • Install the Hubitat Package Manager (HPM) First. This is the unofficial app store for Hubitat. It’s the easiest way to find and install community-built apps and drivers. Seriously, do this before anything else.
    • Start Small. Don’t try to migrate your entire smart home at once. You’ll just get frustrated. Pick one room or one type of device (like your Zigbee light bulbs) and get them working perfectly. Build your confidence and learn the system, then move on to the next thing.
    • Get Your Zigbee and Z-Wave Mesh Right. Hubitat has excellent radios. When you’re adding devices, start with the ones closest to the hub and work your way out. This helps build a strong, reliable mesh network from the start. Give it time to settle.
    • Embrace the Forums. The Hubitat community is one of its biggest assets. The official forums are filled with friendly, knowledgeable people who are happy to help new users. If you get stuck, there’s a good chance someone has already asked your question and gotten a detailed answer.

    Moving from Home Assistant to Hubitat is a trade-off. You give up a bit of freedom and aesthetic polish. In return, you get stability, simplicity, and a system that quietly hums along in the background, doing its job. For many, that’s a trade worth making.

    Welcome to the club.

  • The Car Key Trick: What If Your House Knew You Were Home?

    The Car Key Trick: What If Your House Knew You Were Home?

    Want your lights to turn on automatically when you get home? Explore how to use your keys as a trigger for your smart home, using NFC, Bluetooth, or your phone.

    I have a little obsession with making my home feel smarter, not just in a techy way, but in a way that’s actually, genuinely helpful. I want it to anticipate what I need without me having to ask.

    It’s a lot like the keyless entry on a modern car. You walk up, and the car just knows you’re there. The doors unlock. Maybe the interior lights fade on. It’s a small thing, but it feels seamless. It feels welcoming.

    So I got to thinking: why can’t my house do that?

    Specifically, I wanted to tie it to my keys. When my keys are home, I’m home. When they’re gone, I’m gone. It seems so simple. Lights on when I arrive, lights off when I leave. No fumbling for a switch with my hands full of groceries, and no more wondering if I left the living room lamp on all day.

    The goal is to make the house react to the presence of my keys. It turns out, there are a few clever ways to make this happen, ranging from a little DIY project to using tech you might already own.

    The “Tap-to-Enter” Method: Using an NFC Tag

    This is the most direct way to make your keys the trigger. It’s a fun little project if you like to tinker.

    NFC, or Near Field Communication, is the same technology that powers tap-to-pay with your phone or credit card. It works over a very short distance, which is perfect for a deliberate action like placing your keys down when you get home.

    Here’s the basic idea:

    1. Get an NFC Tag: You can buy a pack of tiny NFC sticker tags online for cheap. They’re small, passive (no battery needed), and you can stick one to your keychain, or even a specific key.
    2. Set Up an NFC Reader: This is the part that receives the signal. You’d place a small NFC reader right by your door—maybe on a little entryway table where you naturally drop your keys. The reader would be connected to a smart home hub.
    3. Create the Automation: You’d use a platform like Home Assistant, which is amazing for this kind of custom project. The logic is simple: “When the NFC reader detects my key tag, run the ‘I’m Home’ scene.” That scene could turn on the entryway light, the living room lamp, and maybe even start your favorite “welcome home” playlist.

    The beauty of this is how intentional it is. You’re not just passively entering a zone; you’re performing a physical action—placing your keys on the reader—that kicks off the automation. It’s incredibly reliable. When you leave, you grab your keys, and the reader losing contact can trigger the “I’m Away” scene, turning everything off.

    The downside? It’s not quite as magical as the car key experience. You have to physically tap your keys to the reader. But for reliability, it’s fantastic.

    The Wireless Way: Using a Bluetooth Beacon

    If you want something a bit more passive and automatic, a Bluetooth Low Energy (BLE) beacon is the way to go. This gets much closer to that “car key” feeling.

    Think of those little trackers you put on your keys to find them, like a Tile or Chipolo. Those are essentially BLE beacons. They constantly send out a tiny, low-energy Bluetooth signal that says, “I’m here!”

    Here’s how you could use one for your home:

    • Attach a Beacon: Just put a small BLE beacon on your keychain.
    • Set Up a Detector: Your smart home hub (again, Home Assistant is the king of this) needs a way to “hear” that signal. A simple Bluetooth adapter connected to the device running your hub is usually all it takes.
    • Automate Based on Presence: You then create an automation based on whether the hub can detect the beacon. When your keys (and you) get close to your house, the hub “sees” the beacon and triggers your “I’m Home” scene. When you drive away, the signal disappears, and it can trigger the “I’m Away” scene.

    This method feels a little more magical because you don’t have to do anything. You just approach your home, and things start happening.

    The trade-off is that it can be a bit less precise than NFC. Bluetooth signals can sometimes be affected by walls or interference, so it might take 30 seconds for your home to realize you’ve arrived. You also have to change the beacon’s battery once a year or so. But for pure convenience, it’s a great option.

    The Simple Way: Your Phone’s Location

    Let’s be honest, the first two methods are cool, but they require some setup. If you want the same result with almost no effort, the answer is probably already in your pocket.

    Your phone.

    Using your phone’s location (geofencing) is the most common way to trigger home and away automations. All major smart home platforms—Apple HomeKit, Google Home, Amazon Alexa—can do this right out of the box.

    You simply go into the app, define your home’s location on a map, and create an automation that says, “When I arrive home, turn on the lights.”

    It’s not tied to your keys, but for most of us, our phone is just as essential. We rarely leave home without it.

    • The Good: It’s incredibly easy to set up, requires no extra hardware, and is generally very reliable.
    • The Not-So-Good: If you leave your phone at home, your house will think you’re there all day. It also doesn’t account for other people. You’ll need to add your partner’s or roommate’s phones to the automation so the lights don’t turn off when you leave them at home.

    For me, the idea of using my actual keys as the trigger still feels special. It’s a tangible object that represents coming and going. But no matter which path you choose—a DIY tap of a key, the passive magic of Bluetooth, or the simple reliability of your phone—you can absolutely make your home feel a little more welcoming. And that’s a pretty great feeling to come home to.

  • My Ceiling Speakers Didn’t Fit. Here’s What I Did.

    My Ceiling Speakers Didn’t Fit. Here’s What I Did.

    Struggling with shallow ceiling cavities for your speakers? Learn how to find the best low-profile ceiling speakers that deliver great sound without needing deep holes.

    So, you’ve got this perfect spot picked out for ceiling speakers. You can already imagine the sound filling the room. You cut the hole, grab your brand new speakers, and… they don’t fit. The hole is deep enough, but there’s a ceiling joist, a pipe, or some other obstruction in the way. Suddenly, your weekend project just got a lot more complicated.

    I’ve been there. It’s a frustrating moment when you realize you only have a few inches of clearance to work with. My first thought was, “Well, so much for that idea.” I had a set of awesome Sonos speakers that needed a good 6 inches of depth, but my ceiling only offered about 4 inches before hitting a stubborn truss.

    But don’t give up and patch that hole just yet. It turns out this is a pretty common problem, especially in older homes or condos with complex construction. The good news is that manufacturers know this, and there’s a whole category of speakers made for this exact situation: low-profile or shallow-mount ceiling speakers.

    What to Look for in a Low-Profile Speaker

    Finding the right speaker isn’t just about depth. You’re trying to solve a space problem without creating a sound problem. Here’s what I learned to look for.

    1. Check the Mounting Depth (Obviously)

    This is the most critical spec. Speaker manufacturers will always list the required mounting depth. Don’t just look at the number; give yourself a little wiggle room. If you have exactly 4 inches of clearance, look for a speaker that needs 3.75 inches or less. This just makes the installation process smoother and less stressful. You don’t want to be fighting to squeeze it in.

    2. Don’t Sacrifice Sound Quality

    You might think a slimmer speaker means weaker sound. That can be true for some of the ultra-cheap options, but many reputable brands have put serious engineering into their low-profile models. They use clever designs, like offset woofers and high-quality materials, to produce rich sound from a compact form factor.

    Look for brands known for audio quality, not just their space-saving designs. Brands like Polk Audio, Klipsch, and Monitor Audio all offer excellent shallow-mount options that sound fantastic.

    3. Consider the Speaker Size

    You mentioned you were cutting holes for 8-inch speakers. That’s a great size for full-range sound. The challenge is that larger speakers often require more depth. However, you can still find 8-inch low-profile models.

    If you’re struggling to find an 8-inch that fits, consider a high-quality 6.5-inch speaker instead. A top-tier 6.5-inch speaker can often outperform a mediocre 8-inch one. You might lose a tiny bit on the low-end bass, but you can always supplement with a subwoofer later if you feel it’s missing.

    A Few Speaker Suggestions

    I’m not here to sell you on one specific model, but I can share a few that I came across in my own search that are known for their shallow designs:

    • Polk Audio RC60i or RC80i: These are popular for a reason. While not the absolute thinnest, they are known for fitting into tighter spaces than many competitors and delivering great sound for the price. Always double-check the specific depth requirements for the model you’re considering.
    • Monitor Audio Slim Series: Monitor Audio has a “Slim” or “CS” series specifically designed for shallow cavities. They are well-regarded for their audio fidelity.
    • Klipsch SlimLine Series: Klipsch is famous for its horn-loaded tweeters, which deliver crisp, clear highs. They have specific “SLM” (Slim) models that might be exactly what you need.

    The most important thing you can do is measure your space carefully, then head to an audio equipment website and use their filters. You can almost always filter by mounting depth, which makes finding the right fit a whole lot easier.

    So, don’t let a shallow ceiling stop you. The right speaker is out there. It just takes a little extra research to find the one that lets you have your cake and eat it too—great sound without having to tear out your ceiling.

  • Should You Make a List of Everything You Own?

    Should You Make a List of Everything You Own?

    Ever wonder if a home inventory app is worth the effort? We break down the real reasons you might want a digital list of all your stuff—for insurance, moving, and more.

    I was cleaning out my garage the other day and had a thought: If something happened to my house, could I actually remember everything I own?

    Not just the big stuff like the TV and the sofa. I’m talking about everything. The specific set of tools in the toolbox, the good plates we only use for holidays, the collection of books stacked on the nightstand.

    Honestly? No way. I’d forget half of it.

    That led me down a rabbit hole, and I ended up thinking about home inventory apps. It sounds a little obsessive, right? Cataloging every single thing in your home. But the more I thought about it, the more it started to make a weird kind of sense.

    So, is it actually worth the effort? Let’s talk about it.

    The Big Reason: Insurance

    This is the most obvious and maybe the most important reason. We all pay for homeowners or renters insurance, hoping we never have to use it. But if you do—say, after a fire, a flood, or a break-in—you have to file a claim.

    The insurance company is going to ask for a list of what was lost or damaged. And they’re not just looking for “a television.” They’re looking for “a Samsung 55-inch QLED TV, model number QN55Q80A, purchased in 2021.”

    Trying to create that list from memory after a disaster sounds like an absolute nightmare. Having a digital inventory with photos, receipts, and serial numbers already saved somewhere safe (like in the cloud) would be a lifesaver. You’d have proof of ownership and a clear, detailed record that could make the claims process faster and a lot less painful.

    Beyond the Worst-Case Scenario

    Okay, so insurance is the heavyweight champion of reasons. But there are other, everyday benefits that are surprisingly practical.

    • Moving: A move is organized chaos. An inventory list can help you keep track of what’s in which box. As you unpack, you can check items off your list, making it immediately obvious if that one box with all your kitchen knives went missing.
    • Organization and Decluttering: Seeing a list of everything you own can be an eye-opener. You might realize you have three coffee makers or a comical number of half-used cleaning supplies. It’s a powerful tool for decluttering because it forces you to confront what you actually have versus what you think you have.
    • Simple Memory: Where did you put those ski gloves from last winter? Are they in the attic? The garage? A quick search in your inventory app could tell you exactly where you stored them. It’s like a search engine for your own stuff.
    • Lending and Borrowing: If you’re the person in your friend group who always lends out your tools, books, or camping gear, an app can help you remember who has what. No more “Hey, did I ever get that power drill back from you?” conversations.

    How Hard Is It, Really?

    Let’s be honest. The initial setup is a project. Walking through your entire house, taking pictures of everything, and typing in details is not a five-minute task. It takes time.

    But you don’t have to do it all at once.

    You could tackle it one room at a time. Spend a Saturday afternoon doing the kitchen. Next weekend, do the living room. Or, start with just the most expensive items—electronics, jewelry, appliances—to get the biggest insurance benefit first.

    Once the initial work is done, maintenance is pretty easy. You just add new, significant purchases as you get them.

    So, Is It Worth It?

    I think for a lot of people, the answer is yes.

    It’s not about being materialistic or obsessively tracking your possessions. It’s about practicality and peace of mind. It’s a bit of work upfront for a system that can save you from a massive headache later.

    Think of it this way: You have smoke detectors and a fire extinguisher not because you expect a fire, but because you want to be prepared if one happens. A home inventory is the same kind of thing. It’s a “just in case” tool that also happens to make your life a little more organized.

    It’s not for everyone, but if the idea of trying to remember everything in your home sounds impossible, it might be worth looking into.

  • Your First Homelab Switch: A Simple Guide (No, You Don’t Need a $500 One)

    Your First Homelab Switch: A Simple Guide (No, You Don’t Need a $500 One)

    New to homelabbing and confused about network switches? Learn the simple difference between managed and unmanaged switches and find the right one for you.

    So, you’ve got the bug.

    It starts slowly. First, a Raspberry Pi for a fun little project. Then you get a hand-me-down PC from a friend, and a little spark goes off in your head: “I could turn this into a server.” Before you know it, you have a small stack of devices, a head full of ideas, and one nagging question:

    How do I connect all this stuff together?

    Your ISP-provided router only has four ports, and they’re already full. You’ve seen pictures of other people’s setups with these complex-looking boxes covered in blinking lights. You’ve heard them called switches. You’ve even heard people say they use them “to do switch things.”

    What does that even mean? Let’s talk about it.

    First Off, What is a Network Switch?

    Let’s keep it simple. A network switch is like a smart power strip for your internet connection.

    You plug one cable from your router into the switch, and suddenly you have 4, 8, 16, or even more ports to use. Each device you plug into that switch gets its own dedicated, stable connection. It’s the foundation of any network that has more than a couple of devices.

    For a homelab, this is essential. Your Raspberry Pi running Pi-hole, your PC running a media server, your future NAS—they all need a reliable, wired connection to talk to each other and the internet. A switch makes that happen.

    But the real question isn’t if you need a switch. It’s what kind of switch you need. This is where things can get confusing, but they don’t have to be. It really boils down to two main choices.

    The Two Flavors: Unmanaged vs. Managed

    This is the main fork in the road. Your choice here depends entirely on what you want to do with your homelab.

    1. The Unmanaged Switch: Plug It In and Forget It

    This is the simplest option. An unmanaged switch does one job and does it well: it gives you more Ethernet ports.

    There’s no setup. No software. No password to forget. You take it out of the box, plug in the power, connect it to your router, and start plugging in your devices. It just works.

    • Who is this for? This is for the person who says, “I just need more ports.” If your goal is to get your devices online quickly and you don’t want to mess with network settings, this is your answer. It’s cheap, reliable, and does exactly what it says on the tin.

    2. The Managed Switch: You’re in Control

    A managed switch is the “pro” option, but don’t let that scare you. “Managed” simply means you can log into the switch and configure it. You get control over how your network behaves.

    The single biggest reason to get a managed switch for a homelab is for something called VLANs (Virtual Local Area Networks).

    In simple terms, VLANs let you create separate, isolated networks using the same switch. Think of it like putting up digital walls between groups of devices.

    Why is this so cool?
    * Security: You can put all your “Internet of Things” (IoT) devices—like smart plugs or cameras—on their own VLAN. They can talk to the internet, but they can’t see or access your main computer or your NAS.
    * Organization: You can create a “lab” VLAN for all your experimental projects, keeping them separate from your “home” network that your family uses.
    * Learning: Setting up VLANs is a fundamental networking skill. If you’re building a homelab to learn, getting a managed switch is a fantastic way to dive into the world of networking.

    Many managed switches, often called “Smart” or “Web-Managed,” have a simple website-like interface. You don’t necessarily need to be a command-line wizard to use them.

    So, Which One Should You Actually Buy?

    Here’s the honest, no-fluff advice.

    If you are just starting your homelab journey, an 8-port unmanaged gigabit switch is probably all you need.

    Seriously. It will cost you about $20. It will solve your immediate problem (not enough ports) and let you focus on learning the other parts of your lab, like setting up your server or configuring your Raspberry Pis. You can always upgrade later. Don’t let the pursuit of the “perfect” switch stop you from making progress.

    However, if you’re the kind of person who loves to tinker, and the idea of creating separate virtual networks sounds more exciting than intimidating, then get a small, managed switch. It’s a foundational piece of gear that will grow with you. It’s an investment not just in your lab, but in your skills. You can find 8-port managed switches for a very reasonable price, and they are worth every penny if you plan on using the features.

    A quick side note: You might see switches that mention PoE (Power over Ethernet). This means the switch can send electrical power through the Ethernet cable to a compatible device. This is super handy for things like Wi-Fi access points or security cameras, as they won’t need a separate power adapter. It adds to the cost, so only get it if you know you have a use for it.

    Ultimately, the best switch is the one that gets your lab running. Start simple, see what you need, and don’t be afraid to upgrade down the road. Welcome to the rabbit hole.

  • My Next Game Server Might Be a Tiny PC

    My Next Game Server Might Be a Tiny PC

    Is a powerful mini PC the right choice for a home game server? Exploring the pros and cons of using a MINISFORUM BD795i SE to host games for friends.

    My old game server is starting to feel a little tired.

    It’s an older machine, built around a Ryzen 3200G, and for years it’s been the trusty workhorse for my friends and me. It’s hosted our late-night Minecraft worlds, our brutal adventures in Ark, and most recently, our scrambles for survival in Abiotic Factor.

    But lately, it’s been struggling.

    As more friends have joined in, the server has started to lag. You can feel it groaning under the pressure. So, I started looking for an upgrade. My first instinct was to build another tower, but then I stumbled down a rabbit hole that got me thinking: what if the next server wasn’t a big box, but a tiny one?

    The Mighty Mini PC

    I’ve been looking at these new high-performance mini PCs, and they seem almost too good to be true. Specifically, I’ve been eyeing a build around the MINISFORUM BD795i SE motherboard, which comes with a monster of a laptop CPU soldered right onto it: the AMD Ryzen 9 7945HX.

    On paper, this chip is a beast. It has 16 cores and 32 threads, which is a massive leap from the 4 cores in my old 3200G. For a game server, especially when you’re hosting for a growing group of friends, more cores are exactly what you need. Each core can handle different tasks, so the server can manage more players and more in-game chaos without breaking a sweat.

    My plan is to take this tiny motherboard and pair it with a whopping 96GB of RAM. It might sound like overkill, but games like Ark are notoriously RAM-hungry, and who knows what we’ll be playing next year. This feels like a good way to future-proof the setup.

    So, Is This a Good Idea?

    This is the big question I’ve been wrestling with. There are some serious pros and a few cons to consider.

    The Good Stuff:

    • Incredible Performance: The Ryzen 9 7945HX is a top-tier mobile processor that competes with many desktop CPUs. For running game servers, its high core count is perfect for handling multiple players and even running a few different game servers at once.
    • Power Efficiency: Since it’s a mobile CPU, it uses a lot less power than a comparable desktop chip. A server runs 24/7, so a lower electricity bill is a nice bonus.
    • Small Footprint: I love the idea of replacing a bulky tower with a tiny, quiet box that can sit discreetly on a shelf. It just feels cleaner and more modern.

    The Trade-Offs:

    • No CPU Upgrades: This is the main drawback. The CPU is soldered to the motherboard. If a new, must-have processor comes out in a few years, I can’t just swap it in. The entire board would need to be replaced. You have to be confident that the 7945HX will be powerful enough for years to come. (Honestly, with 16 cores, I think it will be.)
    • Cooling is Key: Cramming so much power into a small space means you have to be smart about cooling. I’ll need to make sure the case I choose has excellent airflow and that I pick a quality cooler to keep the CPU from getting too hot under sustained load. A hot CPU is an unhappy, underperforming CPU.

    My Final Verdict

    So, am I going for it? I think so.

    The idea of having that much power in such a small, efficient package is just too compelling to ignore. While the lack of upgradeability is a valid concern, the performance of the Ryzen 9 7945HX feels like a safe bet for the next five years, at least for my needs.

    It’s a different way of thinking about a home server. Instead of a big, power-hungry tower, the future might be small, efficient, and surprisingly powerful. For anyone out there whose friend-server is starting to show its age, maybe it’s time to think small, too.

  • If I Won the Lottery, This Would Be My Homelab

    If I Won the Lottery, This Would Be My Homelab

    Ever dream about your ultimate homelab with an unlimited budget? Explore a fantasy setup, from dual ISPs and fiber optics to redundant servers and massive storage.

    A friend and I were chatting the other day, and we got onto one of our favorite topics: the “what if” game. What if time and money were just… not a thing? What would we do? My answer was immediate: I’d build the ultimate homelab.

    It’s a fun thought experiment. Not just about buying the most expensive gear, but about designing a system from the ground up with no compromises. It would be a place to learn, to tinker, and to finally build all those cool projects that are rattling around in my head.

    So, I thought it would be fun to map out exactly what this dream setup would look like.

    The Foundation: A Purpose-Built Space

    First things first, you can’t build a world-class lab in a dusty corner of the basement. My dream starts with the house itself. I’m talking about a dedicated space, actually, two of them.

    • Dual Cooled Rooms: Two separate, climate-controlled rooms on opposite sides of the house. This provides physical redundancy. If one room has a cooling failure or a leak, the other side keeps humming along.
    • Dual ISPs: I’d have two separate fiber internet connections from different providers. No more worrying about an outage taking down my whole setup. One goes down? The other takes over seamlessly.
    • Solar and Battery Backup: The whole house would run on a solar roof with a significant battery array. This isn’t just about being green; it’s about clean, reliable power that’s independent of the grid.

    The Network: A Flawless Digital Nervous System

    With the physical foundation in place, the next layer is the network. I’m a big believer that a great lab is built on a great network.

    • Fiber Everywhere: Forget standard Ethernet cables. In this dream scenario, I’m running fiber optic cables to every key point in the house. It’s incredibly fast, reliable, and future-proof.
    • Ubiquiti Everything: I’d stick with Ubiquiti for my core networking gear. Their routers, switches, and access points offer a fantastic balance of power and usability.
    • Proper Segmentation: This is where I’d finally have the time to do things right. I would meticulously set up VLANs to separate different types of traffic. For example, my core servers would be on a different network from my smart home devices, and guests would be on their own isolated network. Adding RADIUS authentication would mean only authorized devices could even connect. It’s the pro-level security you always mean to set up.

    The Heart: Servers, Storage, and Redundancy

    Now for the fun part: the servers and storage that would power everything.

    • Redundant Proxmox Cluster: I use Proxmox to run my virtual machines, and in this lab, I’d have a high-availability cluster. That means if one server (or “node”) fails, the virtual machines automatically restart on another one. No downtime.
    • The Data Hoard: Let’s be honest, every lab enthusiast has a bit of a data-hoarding problem. I’d solve it with two massive Synology HD6500 network-attached storage (NAS) units, filled to the brim with the largest hard drives I can find. One would be in my primary server room, and the identical twin would live at my parents’ house, acting as a complete, off-site backup. All my family photos, media, and important documents would be safe from almost any disaster.
    • KVM Switches: A small but crucial detail. Instead of having a monitor and keyboard for every machine, a KVM switch would let me control any server in the rack from a single console. Clean and efficient.

    The Command Center and Playground

    What’s the point of having all this power if you can’t easily see what it’s doing and have some fun with it?

    • The Dashboard: I’d have a large TV on the wall in my office acting as a dedicated dashboard. Using software like Grafana, it would display real-time stats for everything: network speed, server temperatures, storage capacity, internet status. It’s functional, but let’s be real, it would also just look incredibly cool.
    • Raspberry Pi Cluster: I’ve always wanted to build a proper Raspberry Pi cluster. It’s not about raw power; it’s about having a dedicated, low-power environment to experiment with container orchestration like Kubernetes or just to run fun little scripts and services. It’s a sandbox for learning.
    • Graceful Shutdown: Both racks would be connected to large Uninterruptible Power Supplies (UPS). If the main power (and solar) somehow failed, the UPS would keep everything running for a while. More importantly, it would signal all the servers to shut down gracefully before the batteries run out, preventing any data corruption.

    Bringing it Back to Reality

    It’s fun to dream, right?

    But you don’t need two server rooms and a solar roof to have a great homelab. The spirit of a homelab isn’t about spending a fortune; it’s about the curiosity to learn, the satisfaction of building something yourself, and making the most of the gear you have. My first “server” was an old desktop computer, and I learned more from that than almost anything else.

    Still, a guy can dream. Now I’m curious—what would your ultimate homelab look like?