Author: homenode

  • Is This the Perfect 10GbE Switch for My Homelab?

    Is This the Perfect 10GbE Switch for My Homelab?

    Considering the FS S3260-10S for your homelab? A detailed look at my plan, the key questions, and whether it’s the right 10GbE switch for you.

    I think I’m ready for a network upgrade. My homelab has been running happily on 1GbE for a while, but with bigger files, faster servers, and more complex projects, the old network is starting to feel like a bottleneck.

    So, I’ve been hunting for a 10GbE switch that fits the bill: powerful enough for my needs, but not so loud it drives me out of the room. And honestly, it needs to be affordable.

    That search led me to the FS S3260-10S. On paper, it looks almost perfect. It has ten 10GbE SFP+ ports and a couple of standard 1GbE RJ45 ports for good measure. That mix of ports feels just right for what I have in mind.

    Here’s My Plan

    My setup is a mix of old and new gear, which is pretty common for a homelab. I need a switch that can bring it all together.

    Here’s the connection plan I’ve mapped out:

    • My Main Server: I have a Dell PowerEdge T360 with a 10GBase-T network card. I’d connect this using an SFP+ to 10GBase-T transceiver module in the switch. This server handles the heavy lifting, so it needs the full 10GbE speed.
    • My Compact Powerhouse: I also run a Minisforum MS-01. It’s a fantastic little machine with a native SFP+ port. For this one, a simple DAC (Direct Attach Copper) cable should do the trick. Quick, easy, and reliable.
    • The Backup Server: My trusty backup server is still on 1GbE for now. I’ll upgrade it to 10GbE eventually, but for now, I can just use one of the switch’s 1GbE RJ45 ports. No need to overcomplicate things.
    • The Uplink: Finally, I need to connect this new 10GbE switch back to my main core switch, a FortiSwitch 124F. I’ll use the other 1GbE port for that uplink.

    This setup seems solid. It gives my key servers the 10GbE speeds they need while still connecting to the rest of my network. But before I click “buy,” I have a few questions that I need to think through.

    The Big Questions on My Mind

    A spec sheet can only tell you so much. What I really want to know is how a piece of gear performs in the real world, especially in a home environment.

    1. Is it stable?
    This is the most important question. A network switch has to be reliable. If it crashes, the whole lab goes down. I need something I can set up and then forget about. I’m not looking for another device that needs constant babysitting.

    2. How loud is it, really?
    Homelabbers know the struggle. Enterprise gear is often powerful but sounds like a jet engine. My lab is in my office, not a dedicated server room. So, noise is a huge factor. The product page says it has “smart fans,” but that can mean a lot of things. Is it a quiet hum, or a distracting whine? This could be the dealbreaker.

    3. Will my gear play nice with it?
    I’m planning to use a mix of transceivers and cables. A DAC cable for one server, an SFP+ to RJ45 module for another. Some switches are notoriously picky about the modules you use, sometimes locking you into their own expensive brand. I need to know if the FS S3260-10S is flexible and will work well with third-party gear. Nobody has time to troubleshoot compatibility issues.

    4. Is the software decent?
    I don’t need a super-complex feature set, but I do need to handle the basics without pulling my hair out. I plan on setting up a few VLANs to keep my server traffic separate from my main network traffic. Is the FSOS web interface intuitive? Is the command-line interface (CLI) logical and easy to use for basic L2/L3 routing and VLAN tagging? A clunky interface can turn a simple task into a frustrating ordeal.

    My Final Thoughts

    After laying it all out, the FS S3260-10S still feels like a really strong contender. It has the right ports, a reasonable price, and the features I need for my homelab’s next chapter.

    But those lingering questions about reliability, noise, and usability are what I’m chewing on now. It’s one thing to read about a switch, and another to live with it. I’m going to do a bit more digging, but I have a feeling this might just be the switch that ties my whole 10GbE homelab upgrade together. If you’ve used one, I’d love to hear your thoughts.

  • My Server Kept Shutting Down. The Culprit Was Hiding in a PCIe Slot.

    My Server Kept Shutting Down. The Culprit Was Hiding in a PCIe Slot.

    Is your server randomly shutting down? The problem might be your M.2 SSDs overheating. Learn why it happens and the simple ways you can fix it for good.

    My server just wouldn’t stay on.

    It’s one of the most frustrating problems to have. You hit the power button, everything whirs to life, and then sometime later—maybe minutes, maybe an hour—it just gives up. No warning, no blue screen, just… silence.

    That was my reality for a few days. I was wracking my brain trying to figure it out. Was it a bad power supply? Faulty RAM? I spent hours digging through system logs, but nothing pointed to a clear cause. The server, a trusty HP ProLiant, wasn’t giving me any obvious clues. It just seemed to decide, “I’m done for now,” and would unceremoniously shut itself down.

    After what felt like an eternity of troubleshooting, I finally stumbled into the server’s deeper management interface. And there it was. A tiny alert I’d overlooked, buried in a sea of data: a temperature warning. But it wasn’t the CPU. The CPUs were sitting at a perfectly reasonable temperature. It was something else.

    The culprit? The brand new, lightning-fast M.2 NVMe drives I had just installed.

    The Hidden Heat Source

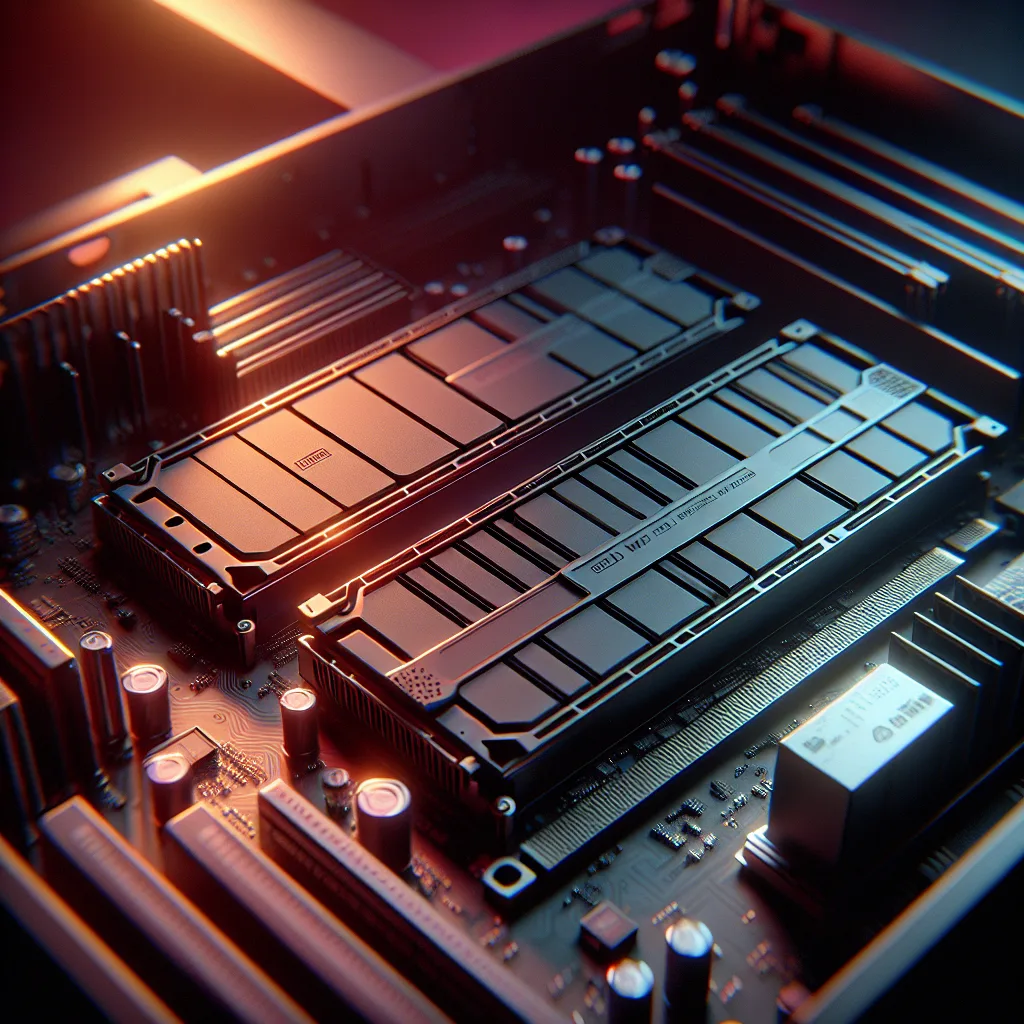
    I was so excited about these drives. I’d put them on a simple PCIe adapter card to add some high-speed storage to my setup. What I didn’t fully appreciate was just how much heat those little sticks of storage can generate.

    When I looked at the detailed sensor readings, my jaw dropped. One of the drives was idling at over 70°C (that’s about 160°F). Under any kind of load, it was likely getting even hotter, triggering the server’s emergency shutdown to protect itself from damage.

    But why was it happening? My server room is cool, and the server’s fans sound like a jet engine. Shouldn’t there be enough airflow?

    Well, here’s the lesson I learned the hard way.

    Enterprise servers, like my HP DL360, are marvels of thermal engineering. Every component, every fan, every plastic baffle is designed to work together to create precise tunnels of airflow. The air is meant to be pulled in from the front, shot across the drives, then over the CPUs and RAM, and finally exhausted out the back.

    My PCIe adapter card, however, was sitting in a thermal blind spot. The server’s powerful fans were doing their job, but the air was rushing right over the top of the card, completely missing the M.2 drives mounted on it. They were essentially sitting in a pocket of dead, hot air, slowly cooking themselves.

    How to Cool Down Your Drives

    So, if you’re thinking of adding M.2 drives to your own server, don’t let my story scare you off. It’s a fantastic upgrade. You just need to plan for the heat. Here are a few things that can solve the problem.

    • Get a Better Heatsink: Most M.2 drives come with a sticker on them and nothing else. Some PCIe adapters include flimsy, tiny aluminum heatsinks. Ditch them. You can buy much beefier, passive M.2 heatsinks online for a few bucks. They have more surface area and do a much better job of pulling heat away from the drive’s controller. This is the easiest first step.

    • Consider Active Cooling: If a passive heatsink isn’t enough, you might need to get some air moving directly over the card. Some high-end adapter cards come with their own built-in fans. Another option, popular in the homelab community, is to strategically place or 3D-print a mount for a small fan to blow air directly onto the PCIe card. It doesn’t have to be a hurricane; just a little bit of direct airflow can make a huge difference.

    • Check Your Fan Speeds: Most servers have different fan profiles in their BIOS or management settings (like “Optimal Cooling” vs. “Maximum Cooling”). You can manually set the fans to run at a higher RPM. This will increase noise and power consumption, so I see it as more of a temporary fix, but it can help you diagnose if airflow is truly the issue.

    • Mind the Baffles: Those weird plastic shrouds inside your server are incredibly important. They guide the air where it needs to go. Make sure they are all present and properly seated. If one is missing, it can completely disrupt the designed airflow path and create hot spots.

    In my case, a combination of a much larger heatsink and slightly increasing the server’s minimum fan speed did the trick. My drive temperatures dropped by nearly 20°C, and the random shutdowns stopped completely.

    It was a simple fix, but a valuable lesson. In the world of servers and high-performance parts, heat is always the enemy. Sometimes, it’s just hiding where you least expect it.

  • My Renovation Snowballed Into a Full-Blown Homelab

    My Renovation Snowballed Into a Full-Blown Homelab

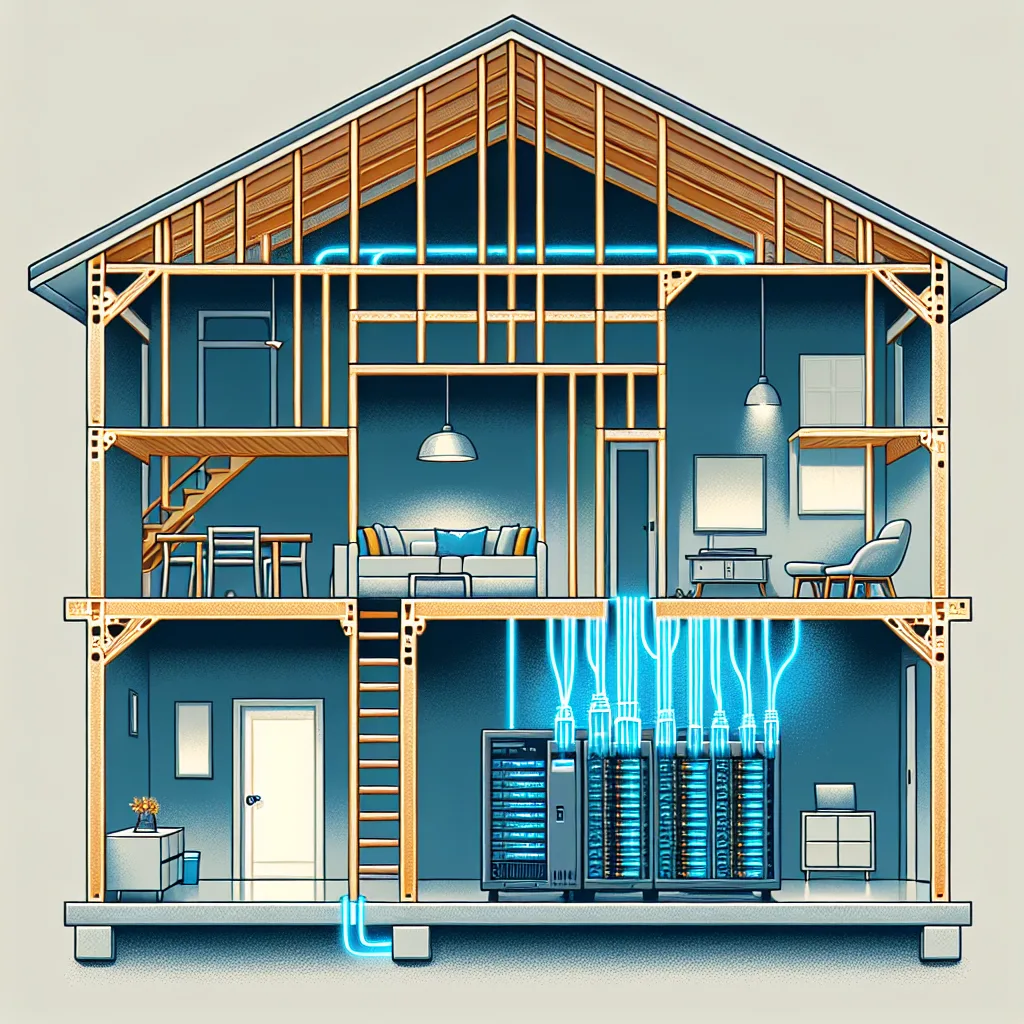
    Planning a home renovation? Don’t just think about paint colors. Learn why running ethernet and planning a central spot for your tech now is the best move.

    It started, as these things often do, with a simple idea. I’m in the middle of a massive home renovation—we’re talking walls-are-open, dust-everywhere kind of messy. And in a moment of organizational pride, I set up a neat little pegboard for my router. It looked good. Clean.

    Then the thought crept in: “You know, while the walls are open, I could run a few cables.”

    That’s when the snowball started rolling downhill.

    I had an old Optiplex computer lying around. Why not tuck it in there for some basic smart home stuff? A good idea, right? Then I remembered how much I disliked ads. “I should set up my own network-wide ad blocker,” I thought. While I’m at it, a personal media server for movies sounds pretty great, too.

    Suddenly, my little pegboard was a full-blown wall cabinet, and it was getting crowded. The house is still a construction zone, but the fiber internet is blazing, ten security cameras are wired up, the smart smoke alarms are online, and Wi-Fi access points are in the ceiling.

    Now I’m staring at a pile of networking gear I impulse-bought, wondering where a full server rack is supposed to go.

    If you’re nodding along, or if you’re at the start of your own renovation, let me share what I’ve learned. If your walls are open, you have a golden ticket. Don’t waste it.

    Run More Cable Than You Could Ever Imagine

    This is the biggest one. Seriously. Ethernet cable is cheap. Opening up drywall, patching it, and repainting it is not.

    Right now, you might only need one connection behind your TV. But in five years, you might have a new streaming box, a gaming console, and a soundbar that could all benefit from a stable, wired connection.

    My rule of thumb now is this: Run at least two Ethernet drops to every single spot you think you might need one.

    • Bedrooms? Two drops in at least two different walls.
    • Living Room? Four drops behind the TV, and two more elsewhere.
    • Office? At least four. You’ll use them.
    • Kitchen? Yes, even the kitchen. Smart displays and appliances are getting more common.
    • Weird spots? Run one to the garage, the attic, and maybe even the porch.

    The best-case scenario is you don’t use them all. The worst-case scenario is kicking yourself in a year because you have to tear open a brand-new wall to run a $1 cable. If you can, run the cables inside conduit. That way, if a new standard like Cat 8 becomes common, you can just pull new wires through without opening the walls.

    Give Your Tech a Home

    All those cables need to go somewhere. Don’t just have them all dangling in a messy bundle in your basement. Plan for a central “nerve center.” It doesn’t have to be a full server rack like the ones you see in data centers. It can be a simple wall-mounted cabinet in a utility room, a closet, or the basement.

    Think about a few things when picking the spot:

    • Ventilation: This gear can get warm. A closet with no airflow is a bad idea. Make sure there’s a way for hot air to get out.
    • Power: You’ll need a dedicated electrical circuit. Don’t put it on the same circuit as your freezer or a space heater.
    • Noise: While most basic home networking gear is quiet, if you start adding servers, they come with fans. Tucking it away in a basement is better than putting it in the coat closet by the front door.

    So, What Do You Actually Need to Wire For?

    It’s easy to get carried away. But while the walls are open, here are the things you should absolutely plan for.

    • Wi-Fi Access Points (APs): A single router sitting in your office is not going to give you great Wi-Fi across the whole house. The best way to get flawless coverage is with multiple Access Points. These are small devices that broadcast your Wi-Fi signal. They work best when they’re mounted on the ceiling, and they need an Ethernet cable for connection and power (this is called Power over Ethernet, or PoE). Pick a few central spots in your hallways on each floor and run a cable there.
    • Security Cameras: Wired security cameras are more reliable than their wireless-only cousins. They also use PoE, so you only need to run one cable for both data and electricity. Walk around your property and decide where you want cameras. Now is the time to run the wires.
    • The Obvious Stuff: Your main computer, your TV, your media streamer (Apple TV, Roku), and your gaming consoles will always perform better on a wire.

    It’s a slippery slope, this whole homelab thing. It starts with a simple desire for better organization and quickly spirals into something much bigger. But the planning part? That’s the foundation. Get the wiring right while the walls are open, and you can build out the fun stuff slowly over time.

    You don’t need to buy the server rack today. But it’s a really good idea to run the cables for it now. Trust me.

  • My Home Network Is a Time Machine

    My Home Network Is a Time Machine

    A personal look at a home network built over years to support a collection of vintage computers, game consoles, and other retro tech. It’s a fun project!

    My home network is a bit of a Frankenstein’s monster.

    It didn’t start this way, of course. Years ago, it was just a simple router blinking away in a corner, doing its job without any fuss. But over time, as my hobbies grew, so did the network. It spread and evolved, slowly turning into the complex web it is today.

    And what’s the hobby that demanded all this? I collect and restore vintage tech. I’m talking old computers, game consoles, handhelds, phones—you name it. And I don’t just let them sit on a shelf. I actively use them. This created a fascinating problem: How do you get a 40-year-old computer to talk to a modern, secure internet?

    That’s what my network is built for. It’s a bridge between eras.

    It All Started with a Simple Goal

    The whole thing began with a simple desire. I wanted to be able to download files from the internet directly onto my vintage machines. No more shuffling files around with floppy disks or weird adapters if I could help it. I wanted my Commodore 64, my old PowerPC Macs, and my classic game consoles to feel like first-class citizens in my home.

    This meant they needed a stable, friendly connection. The problem is, the security protocols on a brand-new iPhone are worlds away from what an old machine from the 90s can handle. Putting them all on the same Wi-Fi network felt like a bad idea. I needed a way to keep my modern, important stuff—like my work laptop and personal phone—separate from the old-timers.

    How It’s All Connected

    So, how did I solve this? I split my network into pieces. Think of it like having different zones in your house. You have the super-secure area for sensitive stuff, a general area for everyday things, and a workshop for your experimental projects.

    My network works the same way:

    • The Main Network: This is for my trusted devices. My partner and I use this for our laptops, phones, and the main TV. It’s fast, secure, and completely walled off from everything else.
    • The “Internet of Things” Network: I have another, separate network just for all those random smart devices. Things like smart plugs, a thermostat, and a few security cameras. These devices are useful, but I don’t fully trust their security, so they live on their own island where they can’t cause any trouble for my main devices.
    • The Retro Lab: This is where the magic happens. It’s a dedicated Wi-Fi and wired network specifically for my vintage collection. It’s designed to be as compatible as possible with old technology. It uses older, more basic security that a 20-year-old laptop can actually understand. This is the playground.

    The “brain” of this whole operation is a powerful router that can manage all these separate networks, making sure traffic from the retro lab can’t just wander over into my main, secure network.

    The Real Fun: Making It All Work

    Building this setup has been a slow and rewarding process. It’s been a puzzle, piecing it together one device at a time. I have a central home server that acts like a digital library for my old machines. It stores old software, game ROMs (for emulation), and digital copies of instruction manuals.

    So now, I can sit down at my 25-year-old Macintosh, connect to the retro network, and pull a file from the server just as easily as I would on my modern PC. I can use my collection of old handhelds to browse simple, text-based versions of websites that I host locally.

    It’s less about efficiency and more about the experience. There’s something deeply satisfying about seeing a piece of ancient technology do something it was never designed to do. Each new device I get online feels like a small victory.

    Was It Overkill? Absolutely. Was It Worth It? Yes.

    I’m sure some people would look at a diagram of my network and think it’s complete overkill. And they’d be right. Most people don’t need this. A single, simple network is perfectly fine.

    But for me, building this system has become part of the hobby itself. It’s a project that’s never truly finished. It’s a testament to years of collecting, tinkering, and problem-solving. It’s the invisible backbone that brings my entire collection of tech history to life.

    And honestly, it’s just plain fun.

  • Why Your Smart Air Conditioner Won’t Connect to Wi-Fi (and How to Actually Fix It)

    Why Your Smart Air Conditioner Won’t Connect to Wi-Fi (and How to Actually Fix It)

    Struggling to connect your smart air conditioner to Wi-Fi? Our simple, step-by-step troubleshooting guide helps you fix common connection issues.

    I was so excited. I’d just bought a new smart air conditioner, and I had visions of pure, automated bliss. I’d be able to turn it on from the office before heading home, arriving to a perfectly chilled apartment. I could tweak the temperature from the couch without having to get up. This was the future.

    Except, it wasn’t.

    Because my brand-new, top-of-the-line Frigidaire air conditioner would not connect to the Wi-Fi. No matter what I did. I followed the instructions. I uninstalled and reinstalled the app. I restarted my router. I typed in my password so slowly and carefully you’d think I was defusing a bomb.

    Nothing. Legit nothing. The little Wi-Fi light just kept blinking, mocking me.

    It’s one of the most maddening experiences of modern life. Your “smart” device ends up making you feel incredibly dumb. If you’re reading this, you’re probably in that exact spot. You’re frustrated, you’re on the verge of throwing something, and you’ve probably Googled yourself into a dead end.

    I get it. But before you give up, let’s walk through a few things I learned. It turns out, the problem is often surprisingly simple, and it’s usually not your fault.

    Let’s Get This Thing Connected

    Think of this as a checklist. Start at the top and work your way down. Don’t skip the “obvious” ones—trust me on this.

    1. The Super Obvious Stuff (Seriously, Do It Anyway)

    I know, I know. You’ve already done this. But let’s do it one more time, in a specific order. It’s like a magic ritual for electronics.

    • Unplug the Air Conditioner: Don’t just turn it off. Pull the plug from the wall. Let it sit for a full 60 seconds.
    • Reboot Your Router: While the AC is unplugged, do the same for your internet router. Unplug it, wait a minute, and plug it back in. Give it a few minutes to fully wake up.
    • Restart Your Phone: Yes, really. Turn your phone completely off and on again.

    Once everything is back on, try the connection process again from the very beginning. Sometimes, one of these devices just has a digital cobweb that a simple restart will clear out.

    2. Your Wi-Fi Might Be Too Fancy

    This is the big one. This is the issue that trips up almost everyone.

    Most of us now have routers that broadcast two different Wi-Fi signals (or “bands”): 2.4 GHz and 5 GHz.

    • 5 GHz is faster and great for streaming Netflix in 4K.
    • 2.4 GHz is a bit slower, but it has a much longer range and is better at getting through walls.

    Here’s the catch: The vast majority of smart home devices, including many air conditioners, can only connect to the 2.4 GHz band.

    If your phone is connected to the 5 GHz signal, the setup app might not be able to find the AC. Sometimes your router gives you two separate networks to choose from (e.g., “MyWifi” and “MyWifi-5G”). If so, make sure your phone is connected to the regular “MyWifi” (the 2.4 GHz one) before you start the setup.

    If your router combines both bands into a single network name, you might have to temporarily disable the 5 GHz band in your router’s settings. It sounds complicated, but a quick Google search for “how to disable 5 GHz on [Your Router’s Brand]” will usually give you a step-by-step guide.

    3. Check Your Wi-Fi Name and Password

    This is another weirdly common problem. Some smart devices are just… picky.

    • Keep it Simple: Does your Wi-Fi network name (the SSID) or password have any special characters like an ampersand (&), an asterisk (*), or a dollar sign ($)? If so, this could be the culprit. Some devices just can’t handle them.
    • No Emojis: I hope this goes without saying, but if you have an emoji in your Wi-Fi password, you are a beautiful, chaotic soul, and you need to change it immediately for this to work.

    Try temporarily changing your password to something simple (letters and numbers only) just to see if the AC connects. If it does, you’ve found your problem.

    4. Use the “WPS” Button

    Look on the back of your router. See a button labeled “WPS” (it sometimes has an icon of two circling arrows)? This is Wi-Fi Protected Setup, and it can be a lifesaver.

    It allows a device to connect to your network without needing a password. The process is usually something like this:

    1. Start the connection process in your AC’s app.
    2. When it asks for the password, look for an option that says “Connect using WPS.”
    3. Press the WPS button on your router.
    4. The app and the router should then find each other and connect automatically.

    It doesn’t always work, but when it does, it feels like magic.

    What If It Still Won’t Connect?

    If you’ve gone through all of this and that light is still blinking, take a deep breath. You’ve done your due diligence. You have officially tried everything a reasonable person would try.

    At this point, it’s time to contact customer support for the air conditioner brand. Don’t just email them—try to find a phone number. When you explain the situation, you can confidently tell them every single step you’ve already taken. This proves you’re not just missing a simple step and will hopefully get you past the first level of support and on to someone who can actually help.

    It might be a faulty unit. It might be a known issue with their app. But you’ve done your part. Now it’s their turn to make their “smart” product work the way it was supposed to. Good luck!

  • Feeling Lost in the World of Smart Locks? Let’s Figure It Out.

    Feeling Lost in the World of Smart Locks? Let’s Figure It Out.

    Overwhelmed by smart lock options? This friendly guide breaks down the choices, from full replacements to retrofits, to help you pick the perfect one for your home.

    So, you’re thinking about getting a smart lock.

    Maybe you’re like a friend of mine who recently decided to change all the locks on his new house. He walked into the hardware store, saw an entire wall of boxes, and his brain just… short-circuited. Keypads, Bluetooth, Wi-Fi, retrofits — it’s a lot. It’s easy to feel totally lost.

    If you’re standing in that same digital or physical aisle, take a breath. It’s not as complicated as it looks. Let’s talk it through, just you and me.

    First, Why Even Bother with a Smart Lock?

    Let’s get this out of the way. You don’t need a smart lock. Your old-fashioned key works just fine. But there are a few genuinely useful reasons people love them.

    • No More Keys: This is the big one. Imagine coming home with your arms full of groceries. Instead of doing that awkward hip-check-pat-down dance to find your keys, you just punch in a code or have the door unlock as you approach. It’s a small thing, but it’s nice.
    • Peace of Mind: Ever have that nagging feeling on your way to work? ”Did I lock the door?” With a smart lock, you can just pull out your phone and check. Or even set it to auto-lock after a few minutes. That little bit of reassurance is surprisingly calming.
    • Guest Access: This is my personal favorite. If you have a dog walker, a cleaner, or family staying over, you can give them their own temporary code. No more hiding a key under the mat or worrying about who has a copy. When they don’t need access anymore, you just delete the code. Simple.

    The Two Main Flavors of Smart Lock

    When you boil it all down, there are really just two main types to choose from.

    1. The Full Replacement

    This is exactly what it sounds like. You take out your entire deadbolt assembly — the keyed part on the outside and the thumb-turn on the inside — and replace it with a new, all-in-one smart unit.

    These usually feature a keypad or a fingerprint reader on the outside and a motorized thumb-turn on the inside. They look sleek and integrated. The downside? Installation is a bit more involved. It’s not crazy difficult, but you’ll need a screwdriver and maybe 30 minutes of focus.

    2. The Retrofit

    This is the clever, simpler option. A retrofit lock only replaces the inside part of your deadbolt (the thumb-turn). You get to keep your existing deadbolt and, most importantly, your original keys.

    The outside of your door looks exactly the same. But on the inside, a little motorized unit does the locking and unlocking for you. Installation is usually super easy — often just a couple of screws. This is a fantastic choice for renters, since you’re not changing the actual lock. The August Smart Lock is probably the most well-known example of this.

    A Few Things to Actually Think About

    Okay, you know the types. But before you click “buy,” here are the practical questions to ask.

    • How does it connect? Most locks use Bluetooth or Wi-Fi.
      • Bluetooth locks only work when your phone is nearby (within about 30 feet). This is great for unlocking as you approach, but you can’t check its status when you’re at the office.
      • Wi-Fi locks connect directly to your home network, so you can control them from anywhere in the world. The catch is that they use more battery. Many locks offer a separate Wi-Fi “bridge” or “hub” you plug into an outlet, which connects your Bluetooth lock to the internet. It’s an extra piece, but it works well.
    • What happens when the batteries die? This is the number one question people have. They’re almost always powered by standard AA batteries that last for months, sometimes over a year. Your app will warn you for weeks when they’re getting low. And if you ignore all the warnings? Most keypad models still have a physical keyway as a backup. Others have two little contacts on the bottom where you can press a 9-volt battery to give it a temporary jump-start so you can enter your code. You won’t get locked out.

    • Does it play nice with your other tech? If you already use Amazon Alexa, Google Home, or Apple HomeKit, check if the lock is compatible. It’s fun to be able to say, “Hey Google, lock the front door” as you’re heading to bed. Don’t just assume they all work with everything.

    So, Which One Should You Get?

    Honestly, there’s no single “best” one. It really depends on you.

    If you’re a homeowner and want a seamless, built-in look, a full replacement from a trusted brand like Schlage or Yale is a fantastic, reliable choice.

    If you’re a renter, or if the idea of changing a whole lock sounds like a pain, a retrofit model like the August is probably your best bet. It gives you all the smarts with none of the commitment.

    The best advice is to not get bogged down in a million features. Think about what problem you want to solve. Do you want to stop carrying keys? Do you need to let the plumber in while you’re at work? Start there.

    Choosing a smart lock is just about making your life a tiny bit easier. It’s not a life-or-death decision. You’ve got this.

  • The Quest for the Lowest Power Bill: Does Your Server CPU Matter at Idle?

    Wondering if a different CPU can lower your server’s idle power usage? Discover the truth about TDP, C-states, and how to pick the right processor.

    I have a confession. I love building out my homelab, but I have a constant, low-level anxiety about my power bill. Every time I add a new piece of gear, a little voice in the back of my head starts calculating the watts.

    Maybe you’ve been there too. You’re looking at a new-to-you server, like a trusty Dell PowerEdge R330, and you start wondering how to keep its power appetite in check. This often leads to a simple, but important, question: Does the CPU you choose actually change how much power the server uses when it’s just sitting there, doing nothing?

    Let’s say you’re looking at the list of compatible processors for the R330:

    • Intel Xeon E3-1200 v5 or v6 series
    • Intel Core i3 6100 series
    • Intel Pentium G4500 & G4600 series
    • Intel Celeron G3900 & G3930 series

    Assuming everything else—the RAM, the drives, the power supply—stays exactly the same, does swapping the CPU make a real difference to the idle power draw?

    The short answer is: Yes, it absolutely does. But the reasons why are probably not what you think.

    The Big Misconception: TDP Isn’t the Whole Story

    Most people’s first instinct is to look at a CPU’s TDP, or Thermal Design Power. It’s a number, measured in watts, that you see on every spec sheet. It feels like a direct measure of power consumption. A CPU with a 45W TDP must use less power than one with an 80W TDP, right?

    Well, not exactly.

    TDP is really a measure of heat output under load. It’s a guideline for choosing the right heatsink and cooling system to prevent the chip from overheating when it’s working hard. It’s not a direct measurement of electricity usage.

    While a lower TDP often correlates with lower power use under load, it tells you very little about what happens when the server is idle. And for a homelab server that might spend 95% of its time waiting for instructions, the idle number is what really matters for your electric bill.

    The Real Hero: Deeper Sleep with C-States

    The magic behind low idle power isn’t TDP; it’s C-states.

    Think of C-states as different levels of sleep for your processor. When your computer is doing nothing, it doesn’t just sit there running at full speed. It starts shutting down parts of the CPU to save power.

    • C0 is the “fully awake” state. The CPU is executing instructions.
    • C1, C2, C3… are progressively deeper sleep states.

    A shallow sleep state might just halt the CPU clock. But a really deep C-state, like C6 or C7, can turn off entire cores, flush the cache, and reduce the voltage to almost zero. It’s the difference between a light nap and a full-on, deep hibernation.

    This is where your choice of CPU becomes critical.

    Generally speaking, higher-end processors in a family (like the Xeon E3s) and newer generation processors (like a v6 vs a v5) have more advanced power management. They can enter these deeper sleep states more aggressively and more effectively than their lower-end or older counterparts.

    So, you might have a Celeron and a Xeon with a similar TDP. But at idle, the Xeon chip might be able to drop into a super-low-power C-state that the Celeron can’t access, resulting in a significantly lower power draw for the entire system.

    So, Which CPU Should You Choose?

    If your absolute priority is the lowest possible idle power for a machine like the Dell R330, you shouldn’t just grab the CPU with the lowest TDP.

    Instead, my advice would be:

    1. Favor Newer Generations: Given the choice between a Xeon E3 v5 and a Xeon E3 v6, go for the v6. The architectural improvements between generations almost always include better power management.
    2. Xeons Are Often a Good Bet: Intel’s Xeon line is built for servers that are on 24/7. They are often better optimized for low-power idle states compared to the desktop-class Core i3, Pentium, or Celeron chips.
    3. Look Beyond the Spec Sheet: Sometimes the best information comes from the community. Search forums for the specific CPU models you’re considering. You’ll often find posts from other homelabbers who have measured the real-world idle power draw.

    It’s a bit counter-intuitive, isn’t it? Choosing a more powerful and “power-hungry” Xeon might actually save you more money on electricity in the long run than a “weaker” Celeron, all because of how it behaves when it’s doing nothing at all. It’s not about how much work it can do, but how well it can sleep. And for a server that’s always on, that’s a feature worth paying attention to.

  • Proxmox vs. Incus: Which Hypervisor Should You Actually Use?

    Choosing between Proxmox and Incus? This simple guide breaks down the key differences to help you pick the right hypervisor for your lab or business.

    A friend of mine was in a pickle the other day. At his job, they’re looking to replace their old virtualization setup. He’s a fan of Proxmox, but his colleague is making a strong case for something called Incus.

    Their main job is to spin up virtual machines to test client products—firewalls, routers, all sorts of things—and then tear them down just as quickly. They don’t need clustering right now, but it’s something they might want down the road.

    He asked for my take, and it got me thinking. This isn’t just a simple feature-by-feature comparison. It’s about two different philosophies for how to get things done. So, if you’re in a similar boat, let’s talk it through.

    So, What’s Proxmox All About?

    Think of Proxmox as the well-established, all-in-one toolkit. It’s been around for years and has a huge community. It’s built on a solid Debian Linux foundation and bundles everything you need into a single package.

    With Proxmox, you get:
    * A powerful web interface: This is its main attraction. You can manage virtual machines (using KVM for full virtualization) and Linux containers (LXC) right from your browser. No command line needed for 99% of tasks.
    * Features galore: Clustering, high availability, various storage options, backups—it’s all built-in. You install it, and you have a complete, enterprise-ready platform.

    Proxmox is like a Swiss Army knife. It has a tool for almost every situation, all neatly folded into one handle. It’s reliable, powerful, and you can manage your entire virtual world from a single, graphical dashboard. It’s the safe, comfortable, and incredibly capable choice.

    And What’s the Deal with Incus?

    Incus is the new kid on the block, but with a familiar face. It’s a fork of LXD, which was developed by Canonical (the makers of Ubuntu). The project’s lead developer forked it to create a truly community-driven version, and Incus was born.

    Incus feels different. It’s leaner, faster, and more focused.
    * Command-line first: While there are third-party web UIs, Incus is designed to be controlled from the terminal. This makes it incredibly powerful for automation and scripting.
    * Blazing speed: Its reputation is built on speed, especially when creating and destroying system containers. It treats containers as first-class citizens, making them feel almost as lightweight as a regular process. It can also manage full virtual machines, just like Proxmox.

    If Proxmox is a Swiss Army knife, Incus is a set of high-quality, perfectly weighted chef’s knives. Each one is designed for a specific purpose, and in the hands of a pro, they’re faster and more precise. It’s less of a “platform in a box” and more of a powerful component that you build your workflow around.

    The Head-to-Head Breakdown

    Let’s get down to it. When should you choose one over the other?

    Management and Ease of Use

    This is the biggest difference. Do you want a graphical interface where you can see and click on everything? Go with Proxmox. Its web UI is fantastic and makes managing a handful of servers incredibly simple.

    Are you a developer or admin who lives in the terminal? Do you want to automate everything with scripts? You’ll probably love Incus. Its command-line client is clean, logical, and incredibly powerful.

    The Core Philosophy

    Proxmox gives you a complete, integrated solution. The experience is curated for you. This is great if you want something that just works out of the box without much fuss.

    Incus gives you a powerful, streamlined tool. You have more freedom to build the exact system you want, but you also have to make more decisions. It’s more modular.

    The Best Fit for the Job

    So, back to my friend’s problem: spinning up and tearing down test VMs and containers all day.

    For this specific task, Incus has a clear edge. Its speed is a massive advantage when you’re constantly creating and destroying instances. The clean command-line interface makes it trivial to write a simple script that says, “Create this VM with these specs, run my test, and then delete it.” It’s built for this kind of temporary, high-churn workload.

    But that doesn’t mean Proxmox is a bad choice. If my friend’s team is more comfortable with a GUI, or if they also have a number of long-running, “pet” servers to manage, Proxmox might be the better all-around tool for the team. Its integrated backup and high-availability features are also more mature and easier to set up for persistent workloads.

    My Final Take

    There’s no single winner here. It truly depends on you and your team’s workflow.

    • Choose Proxmox if: You value an all-in-one solution with a brilliant web UI and a rich, built-in feature set for a wide range of tasks.
    • Choose Incus if: Your priority is speed and automation, you’re comfortable on the command line, and you prefer a more focused, modular tool for high-frequency tasks.

    Honestly, the best way to decide is to try both. Set up a spare machine and install them. Spend a day creating, managing, and destroying a few VMs and containers. One of them will just feel right for the way you work. For my friend, the speed of Incus was tempting, but the team’s familiarity with graphical tools meant Proxmox was the path of least resistance. And sometimes, that’s the most important factor of all.

  • Your First Homelab: Should You Use Containers or Proxmox?

    Starting a homelab? We break down the pros and cons of using containers (Docker) vs. a hypervisor like Proxmox on your first server. Find the best path.

    You’ve got an old laptop gathering dust on a shelf. You know it’s still got some life in it, but you’re not sure what to do with it.

    Here’s an idea: Turn it into a homelab.

    A homelab is just a home server where you can run your own private services. Think of it as your own little corner of the internet. You can host a personal VPN, a password manager, game servers, a media center like Plex, and so much more. It’s a fantastic way to learn about tech and take back control of your data.

    But when you first start, you hit a fundamental question: How should you run all these things? This usually boils down to two popular choices: using containers directly or using a hypervisor like Proxmox.

    Let’s break down what that actually means.

    What We’re Trying to Run

    First, let’s get a picture of what a simple homelab might look like. Based on what most people want to start with, a typical list includes:

    • A VPN: To securely access your home network from anywhere.
    • A NAS (Network Attached Storage): A simple way to store and share files across your devices.
    • A password manager: Something like Vaultwarden to keep your passwords secure and synced.
    • Pi-hole: To block ads across your entire network.
    • Fun stuff: Private servers for games like Valheim or FoundryVTT.

    Down the line, you might want to add heavier hitters like a Plex or Jellyfin media server, or even a dedicated firewall like pfSense. The hardware in a typical 8th-gen i5 laptop with 16GB of RAM is more than enough to handle all of this.

    The real question isn’t about power, it’s about the right way to set it all up.

    Path #1: The Straight and Simple Docker Approach

    This is often the most direct route.

    Here’s how it works: You take your laptop, install a standard Linux operating system on it (like Ubuntu Server), and then you install Docker.

    Docker is a container platform. Think of containers as lightweight, mini-packages that hold a single application and everything it needs to run. You can have a container for Pi-hole, another for Vaultwarden, and so on. They all run on top of your single Ubuntu operating system.

    The Good:

    • It’s simple to grasp. You learn one OS (Ubuntu) and one tool (Docker).
    • It’s very popular. There are endless tutorials and guides for setting up just about anything with Docker.
    • It’s efficient. Containers have very little overhead, so they don’t waste your laptop’s resources.

    The Not-So-Good:

    • It can be limiting. Some software, particularly networking tools like the pfSense firewall, can’t run in a container. They need a full-blown Virtual Machine (VM). With this setup, you’re stuck.
    • It’s less isolated. All your containers share the same underlying OS kernel. If you make a mistake and mess up the core operating system, everything could come crashing down at once.

    This path is great for getting your feet wet, but you might hit a wall sooner than you think.

    Path #2: The Flexible Proxmox Approach

    Now for the other option. Proxmox VE is a bit different. It’s a specialized operating system built for one purpose: running other operating systems. It’s a “hypervisor.”

    You install Proxmox directly onto your bare laptop—it is the operating system. Then, from a handy web browser interface, you can create two kinds of things:

    1. LXC Containers: These are a lot like Docker containers. They are lightweight, fast, and perfect for running most of your services like Pi-hole or a game server.
    2. Full Virtual Machines (VMs): This is like having a complete, separate computer running inside your laptop. It has its own dedicated resources and its own full operating system. This is what you need for things like pfSense.

    The Good:

    • Ultimate Flexibility. You get the best of both worlds. You can use lightweight containers for most things and spin up a full VM whenever you need one. You’ll never hit a wall because a service requires a VM.
    • Amazing Isolation. Each container and VM is its own little sandbox. If one crashes or you break something while tinkering, it won’t affect anything else. This is a huge deal.
    • Snapshots are a Lifesaver. This is the killer feature. Before you try a risky update or a new configuration, you can take a “snapshot.” If something goes wrong, you can restore the container or VM to its previous state in a single click. It’s like a time machine for your server, and it makes learning so much less stressful.
    • Central Management. Everything is managed from a single, clean web interface. No need to SSH into a command line for every little thing (though you still can!).

    The Not-So-Good:

    • Slightly Steeper Learning Curve. Just slightly. You have to learn the Proxmox interface first, and then you learn how to set up your services inside it. It might take an extra afternoon to get comfortable.

    So, Which Path Should You Choose?

    For a beginner who is curious and wants a setup that can grow with them, I almost always recommend starting with Proxmox.

    While the direct Docker approach seems simpler at first, the benefits of Proxmox are impossible to ignore for a homelab. The “snapshot” feature alone is worth the price of admission (which is free, by the way). It gives you the confidence to experiment, break things, and learn without fear. We’ve all accidentally deleted a critical file or botched a configuration—Proxmox lets you undo that mistake instantly.

    The fear that it’s “too complex” is mostly unfounded. The installation is straightforward, and the web interface makes managing VMs and containers surprisingly intuitive.

    Starting with Proxmox from day one means you’re building on a foundation that won’t limit you in six months. When you suddenly decide you want to try out a new firewall or run a Windows-only server, you won’t have to start over. You’ll just click “Create VM,” and you’re on your way.

    So, dust off that laptop. Your perfect learning playground is waiting for you.

  • My Accidental Homelab: How a Tiny Project Took Over My Life

    From a simple college project to a full-blown home server. A personal story about building a homelab, surviving data scares, and the joy of DIY tech.

    It all started with a simple idea. I was in college, learning about IT, and I wanted to put some of that theory into practice. The plan was modest: set up a Proxmox server with a couple of virtual machines. Easy enough, right?

    Well, that’s where the rabbit hole began.

    A stubborn DNS issue sent me searching for answers, and one thing led to another. Before I knew it, I was at a recycling center buying a stack of used hard drives—five 4TB drives and two 1TB drives. My simple VM project was suddenly morphing into a full-blown backup server.

    Assembling the Beast from Scraps and Deals

    Most of the server is built from the bones of my old gaming PC. I found a bigger case for just $20, an Apevia Telstar Junior, which gave me a bit more room to work with. The heart of the machine is a Ryzen 7 5800X CPU with a whopping 96GB of DDR4 RAM.

    Here’s a little secret: the giant Thermaltake Assassin CPU cooler is held in place with zip ties. I lost the metal brackets during the build, but hey, it works. The CPU usage rarely even cracks 50%, so it’s more than enough.

    For networking, I wanted a fast connection between my main PC and the server, so I snagged two 10GbE network cards. My setup also includes a 2.5GbE card, but for some reason, I can’t get it to work. I think it might be because I have it in a 16x PCIe slot, but the lights on the switch tell me it’s connected. It’s one of those little mysteries I still need to solve.

    The server needed a GPU because the CPU doesn’t have integrated graphics. A cheap NVIDIA Quadro 4000 does the trick. It’s not for gaming, just for getting a picture on the screen. To handle all those hard drives, I added a dedicated SATA controller card, which I passed through to a TrueNAS virtual machine. This is where I store everything—1:1 copies of my PC’s drives and all my Blender projects.

    The Data Scare That Changed Everything

    I’m not a command-line wizard. I’m especially paranoid about using rsync after one particularly terrifying incident.

    I was trying to reformat my drives from NTFS to a new file system and needed to move all my data to the backup server first. I used rsync to copy everything over. The problem happened when I tried to move it all back. I typed the command wrong. In an instant, it looked like I had deleted my entire backup. All of it. Gone.

    My heart sank. I spent the rest of the day frantically trying to recover the files. I almost shelled out hundreds of dollars for professional recovery software.

    And then I found the problem. The files weren’t deleted at all. The rsync command had just completely messed up the file permissions. One simple chown command later, and everything was back. All my data was safe.

    After that scare, I switched to a tool called FreeFileSync. It does the same thing as rsync but with a graphical user interface, which makes it much harder to accidentally wipe out your entire digital life. It’s a lesson I won’t forget.

    What’s Next for the Homelab?

    This server has been an incredible learning experience, but I’m already hitting its limits. The case is cramped, and I want to add even more hard drives. The next big upgrade will be a proper server case and motherboard that can handle more storage. I also want to get drives with matching speeds to avoid any bottlenecks.

    Beyond just storage, I’m excited to explore more advanced topics. I want to set up my own proxy servers, mess with firewalls like pfSense, and build a media server for the house.

    The ultimate dream? Building a dedicated render server for my Blender projects. My current GPU does the job, but offloading those heavy renders to a separate machine would be amazing. I’m hoping to find a way to have it power on automatically when a render starts and shut down when it’s finished to save on the electricity bill.

    This whole journey started as a small college project, but it’s become a full-fledged hobby. Sixty percent of the time, I feel like I have no idea what I’m doing, but figuring things out—even through near-disasters—is what makes it so much fun. Every problem solved is a new skill learned. And it all started with one little server.