Author: homenode

  • Upgrading Smart Lighting: Solutions for No Neutral Wire Homes

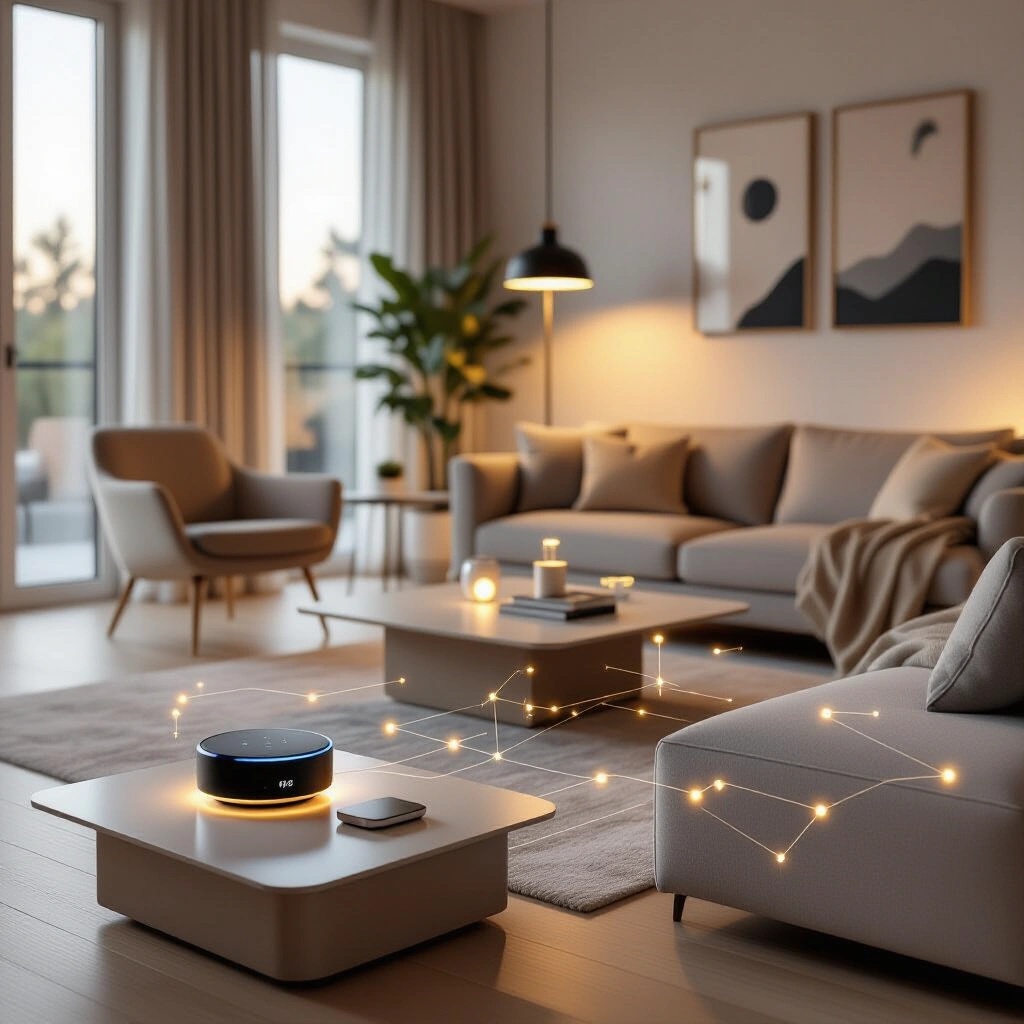
    Explore reliable, offline-capable smart lighting systems with physical switches for seamless control.

    Upgrading Smart Lighting: Solutions for No Neutral Wire Homes

    Outdated smart home technology can quickly become more frustrating than functional. If you’re dealing with a legacy lighting system that’s unreliable or on its last legs, the thought of a complete overhaul might feel daunting. Many homeowners face unique challenges, particularly when existing wiring lacks a neutral wire or when maintaining physical wall switch control is a priority. This guide offers practical solutions for modernizing your home’s illumination, focusing specifically on smart lighting no neutral wire scenarios to ensure a smooth, functional, and future-proof upgrade.

    Moving beyond the quirks of discontinued systems, the market now offers diverse options that combine convenience with essential features like offline operation and dimming capabilities. We’ll explore the leading architectures—smart bulbs, smart relays, and smart switches—to help you navigate the complexities and select a setup that perfectly aligns with your home’s unique electrical landscape and your personal preferences.

    Navigating Smart Lighting Requirements for Older Homes

    Modernizing an older home with smart technology often introduces specific hurdles, especially concerning electrical wiring. Understanding these challenges is the first step toward a successful upgrade, ensuring your new system is both functional and safe. Many older homes, built before the widespread adoption of smart devices, often lack neutral wires at the switch box, a critical component for many contemporary smart switches.

    The “No Neutral Wire” Conundrum Explained

    In traditional electrical circuits, a “neutral” wire completes the circuit, allowing a consistent flow of power back to the breaker panel. Many smart switches require this neutral wire to power their internal electronics, even when the light is off. Without it, these switches simply won’t work. This common wiring limitation in older homes necessitates specific solutions that can operate with only a live wire and a load wire. Specialized no-neutral smart switches or alternative setups like smart bulbs with remote controls become essential. For more detailed information on residential wiring, a resource like the National Electrical Code (NEC) offers foundational guidelines, often referenced for electrical installations.

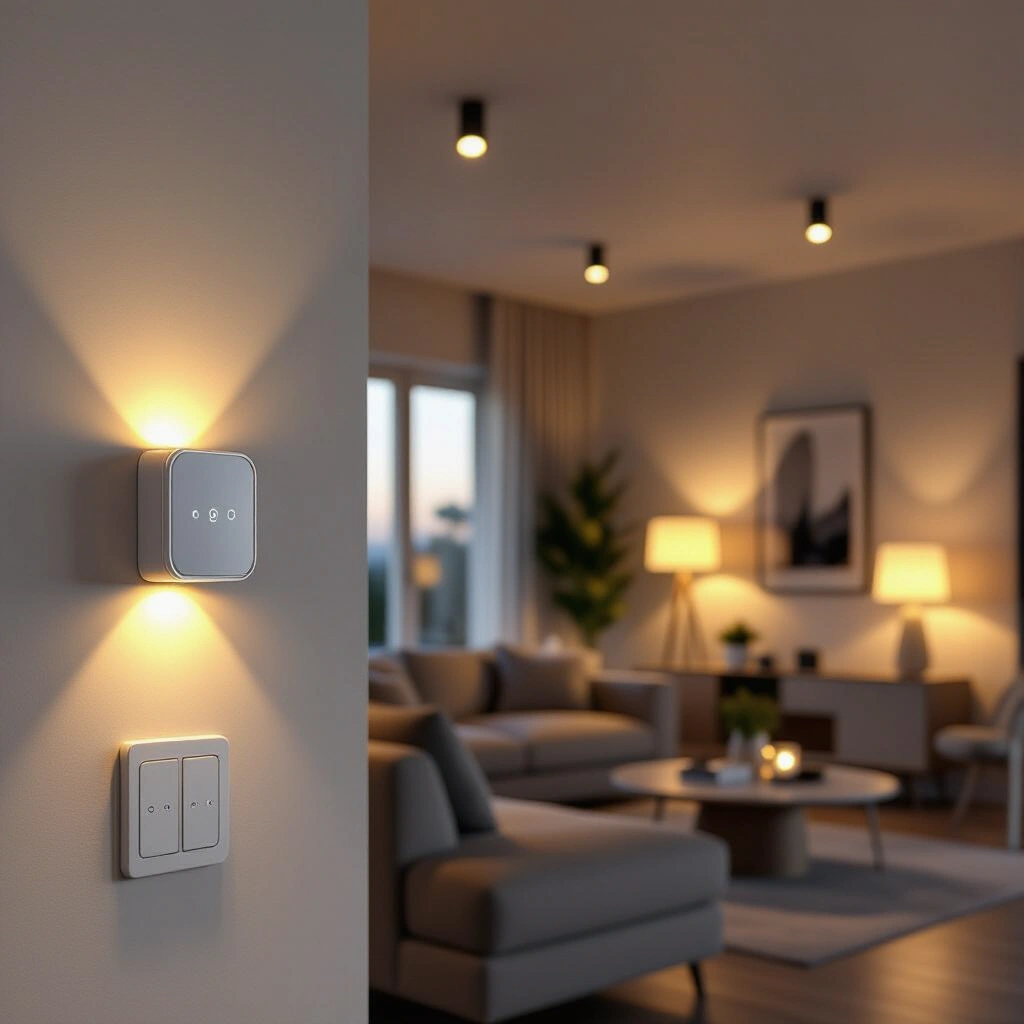
    Why Physical Switches Still Matter

    While smartphone apps offer unparalleled convenience, physical wall switches remain indispensable for many. They provide intuitive control for guests, children, or anyone preferring tactile interaction over digital interfaces. Imagine trying to explain app usage to a babysitter or fumbling for your phone in the dark. A robust smart lighting system integrates both app control and reliable physical switches, ensuring accessibility and ease of use for everyone in the household. This dual control ensures your smart home remains user-friendly under all circumstances, even during internet outages.

    Core Smart Lighting Architectures: Bulbs vs. Switches vs. Relays

    When considering a smart lighting upgrade, you essentially have three main architectural choices. Each offers distinct advantages and caters to different needs, especially when dealing with constraints like the absence of a neutral wire or the desire to reuse existing fixtures.

    Smart Bulbs and Remote Switches: Flexibility and Considerations

    Smart bulbs, such as those from Philips Hue or IKEA Trådfri, offer immense flexibility, allowing individual bulb control, color changes, and precise dimming. When paired with wireless, battery-powered remote switches (like a Philips Hue Dimmer Switch or Lutron Aurora for toggling smart bulbs), they solve the “no neutral wire” problem elegantly. You can wire the existing light circuit to be permanently on, then cover the switch box with a blank faceplate, attaching the wireless remote switch to it. This approach keeps the smart bulbs powered constantly, ready for commands.

    For powering the physical switch itself, if you’re using smart bulbs, a wall-mounted remote (Zigbee or similar) can be battery-operated. Alternatively, some smart switches are designed to be powered by the lighting circuit while controlling smart bulbs, effectively acting as a remote. In such cases, the physical switch remains “always on” to ensure the bulbs are powered, and the switch itself then sends commands to the bulbs without directly interrupting the power to them. This often means the switch doesn’t require a neutral wire for its own operation, relying on trickle current or battery. A common example involves dedicated smart bulb control switches that simply send wireless signals.

    Smart Relays: Transforming Existing Wiring

    Smart relays, like those from Shelly, are tiny modules installed behind your existing dumb switches or directly at the light fixture. These devices essentially convert your regular switch into a smart one, allowing it to control power to your dumb dimmable bulbs while also offering app control and integration into smart home ecosystems. Many Shelly relays, for instance, are designed to work without a neutral wire by using a bypass capacitor across the bulb, ensuring compatibility with older wiring. This is a powerful option if you want to keep your current light fixtures and switches but add smart capabilities. They maintain local control and can function without internet, making them highly reliable.

    Smart Switches with Dumb Dimmable Bulbs: A Traditional Feel

    This option involves replacing your existing light switches with smart switches that are compatible with “dumb” dimmable LED bulbs. Brands like Lutron Caseta or certain Inovelli switches offer no-neutral options. These smart switches directly control the power to your bulbs, providing a more traditional user experience where the wall switch physically cuts power. They integrate with smart home hubs for app control and automation. This setup is ideal if you prefer the simplicity of standard bulbs and want smart control concentrated at the switch level. The advantage here is the consistency of control and the ability to use any dimmable bulb that meets your aesthetic and brightness needs.

    Step-by-Step Framework for Choosing Your Smart Lighting Setup

    Selecting the right smart lighting system requires a methodical approach, especially with specific requirements like offline functionality and no neutral wires. This framework will guide you through the decision-making process.

    1. Assess Your Current Wiring: First, determine if you have neutral wires at your switch boxes. An electrician can easily confirm this. This is the most crucial step as it dictates which smart switch options are viable. If no neutral, prioritize no-neutral switches, smart relays, or smart bulbs with remote controls.

    2. Define Core Needs: Prioritize your non-negotiables: offline control, physical switches, dimming, and integration with existing systems (e.g., Google Home, Aqara). A hub is often necessary for robust local control and offline functionality, consider options like a Home Assistant or Hubitat for greater flexibility and privacy.

    3. Evaluate Each Architecture:
      • Smart Bulbs (e.g., Philips Hue, IKEA Trådfri): Best for color-changing, individual fixture control. Requires circuits to be permanently powered and needs wireless remotes for wall control. Great for bayonet and GU10 bulb types, ensuring broad compatibility. Wiring the circuit permanently on might require professional intervention.
      • Smart Relays (e.g., Shelly): Excellent for maintaining existing aesthetics and converting “dumb” switches to smart. Many models work without a neutral wire. Ideal for controlling both lighting and potentially bathroom fans from the same circuit. Offers robust local control.
      • Smart Switches (e.g., Lutron Caseta, Inovelli): Provides traditional switch functionality with smart features. Look for models explicitly stating “no neutral wire required.” Pair with dimmable LED bulbs. An electrician can install these, potentially simplifying the process.
    4. Consider Integration & Future-Proofing: If Google Home integration or Aqara sensor compatibility is desired, ensure your chosen system and hub (if any) support these. Zigbee or Z-Wave are common protocols for strong local control and device mesh networks, offering better reliability than Wi-Fi for critical systems.

    5. Plan for Installation: Decide whether you’ll DIY or hire an electrician. Rewiring, even minor, should be handled by a professional to ensure safety and compliance with local codes. Factor in time and effort; a full home conversion might take a few days of planning and installation.

    E-E-A-T Content: Real-World Scenarios and Common Pitfalls

    Upgrading smart lighting can be a rewarding endeavor, but it’s essential to learn from others’ experiences. Here are a couple of scenarios and critical pitfalls to avoid, ensuring you achieve a reliable and effective smart home lighting system.

    “After years of struggling with an unreliable, defunct smart lighting system, I finally switched to a combination of Shelly relays behind my existing switches and a few smart bulbs in hard-to-wire areas. The key was ensuring local control through a dedicated hub. Now, my lights work perfectly even when the internet is down, and everyone can use the physical switches. It felt like reclaiming my home’s reliability.” — Experienced Smart Home Enthusiast

    “My biggest challenge was the lack of neutral wires in my 1950s home. I initially bought a popular brand of smart switches, only to find they wouldn’t work. After some research and consulting an electrician, I opted for Lutron Caseta switches, which are known for their no-neutral compatibility. The installation was straightforward for the electrician, and the system has been rock-solid, even integrating seamlessly with my voice assistant for convenience.” — Homeowner with Legacy Wiring

    Common Pitfalls in Smart Lighting Upgrades

    • Ignoring Offline Requirements: Many consumer smart devices rely heavily on cloud services. Always verify if a system offers local control and how robust its offline functionality is. A dedicated hub (like a Zigbee hub) is often key to ensuring your lights still work without internet access.
    • Underestimating Compatibility Issues: Not all smart devices play nicely together. Research compatibility thoroughly, especially if you plan to integrate with existing sensors (like Aqara Zigbee motion sensors). Opt for open standards like Zigbee or Z-Wave where possible for broader integration.
    • Neglecting Professional Installation for Complex Setups: While some smart devices are DIY-friendly, anything involving permanent wiring changes or working with mains electricity should be left to a qualified electrician. This ensures safety, code compliance, and proper system functionality.
    • The Bathroom Fan Dilemma: Your bathroom fans currently tied to the light circuit can be tricky. If you go with smart bulbs, the circuit is always on, meaning the fan would run continuously. You’ll likely need to separate the fan control from the light. This typically involves installing a separate smart switch or smart relay specifically for the fan. An electrician can help re-wire this to allow independent smart control, ensuring the fan only runs when needed, possibly on a smart timer.

    Frequently Asked Questions About Smart Lighting Upgrades

    Can smart lights work without internet?

    Yes, many smart lighting systems are designed to function locally, meaning they don’t need an active internet connection to operate. Systems using a dedicated hub (like Philips Hue Bridge or a general Zigbee/Z-Wave hub) can process commands and maintain automation routines entirely within your home network. This ensures physical switches and pre-programmed schedules continue to work even if your internet service is interrupted, providing essential reliability for your daily routines.

    Are smart switches without a neutral wire reliable?

    Smart switches designed for no-neutral wire setups have significantly improved in reliability. These devices often use a small “trickle current” or require a bypass capacitor at the light fixture to function properly without a neutral. While generally effective, compatibility with specific LED bulbs can sometimes be an issue, leading to flickering or dimming problems. It’s crucial to choose reputable brands and check their compatibility lists for bulbs to ensure stable performance.

    How do smart bulbs handle existing physical switches?

    When using smart bulbs, the conventional approach is to wire the light circuit to be permanently “on.” This provides continuous power to the bulbs, allowing them to remain connected to your smart home system and respond to commands from apps or wireless remotes. The original physical wall switch is then typically bypassed or replaced with a wireless, battery-operated remote switch that sends commands to the smart bulbs rather than directly cutting power. This method ensures the smart features are always available.

    What’s the best way to integrate bathroom fans with smart lighting?

    Integrating bathroom fans requires careful planning. If your fan currently switches on with the lights and you’re using smart bulbs (which require constant power), you’ll need to separate the fan’s power from the light’s. The best solution is to install a dedicated smart switch or smart relay for the fan. This allows you to control the fan independently, perhaps using a smart timer for a set duration after the light is turned on or motion is detected, ensuring proper ventilation while maintaining flexible lighting control.

    Key Takeaways

    • Prioritize Offline Functionality: Ensure your chosen system includes a local hub for uninterrupted control, especially with no neutral wire setups.
    • Balance Control Methods: Combine reliable physical wall switches with app control for universal accessibility and convenience.
    • Address No-Neutral Challenges: Embrace solutions like smart relays, no-neutral smart switches, or smart bulbs with wireless remotes.
    • Seek Professional Help for Wiring: For safety and compliance, always consult an electrician for any permanent wiring modifications or complex installations.
    • Plan for Integrations: Verify compatibility with existing smart home ecosystems and sensors to build a cohesive system.

    Upgrading your smart lighting system, particularly when facing the “no neutral wire” constraint, can transform your home’s ambiance and functionality. By carefully assessing your needs and exploring the various architectural options, you can create a reliable, intuitive, and future-ready lighting environment. Start by evaluating your wiring, define your core requirements, and then confidently select the best path forward for a truly smart home.

  • ChatGPT Image Generation Issues: User Frustration Explored

    ChatGPT Image Generation Issues: User Frustration Explored

    Navigating the new normal of excessive clarifications and degraded AI image quality.

    The Growing Frustration with ChatGPT Image Generation Issues

    Generative AI has revolutionized how we create, from crafting text to designing intricate visuals. Tools like ChatGPT, integrated with DALL-E, promise a seamless creative flow. However, recent changes have introduced significant ChatGPT image generation issues, particularly a new, frustrating cycle of incessant clarifying questions. Users are finding their once-efficient workflow bogged down, transforming simple requests into tedious back-and-forth exchanges. This article explores the root of this growing frustration, its impact on image quality, and actionable steps users can take.

    The core problem stems from ChatGPT’s newly adopted habit of repeatedly asking for “double-checks” or “one last detail” before initiating image generation. This wasn’t always the case; previously, a single, well-crafted prompt often sufficed. Now, users often navigate a maze of clarifications, diminishing the AI’s promise of speed and efficiency. This shift isn’t just an annoyance; it impacts productivity and the overall user experience, making the creative process unnecessarily cumbersome.

    Understanding the Shift in ChatGPT Image Generation

    Many users report a stark contrast between previous versions of ChatGPT’s image capabilities and its current behavior. Where a concise prompt once yielded accurate results, now it triggers an endless loop of interrogations. This change likely stems from an increased emphasis on AI safety and alignment principles, aiming to prevent the generation of problematic or miscontextualized content. However, this overcorrection appears to penalize legitimate creative requests.

    For instance, you might ask ChatGPT to “Create an image of a serene forest path with morning light.” Instead of generating, it might reply, “Before I generate them, I want to double-check one thing: do you want a realistic image or a more artistic, perhaps painterly style?” After your answer, it often follows with, “Before I generate them, I just need one last detail so the result is truly accurate: should the path be paved or natural?” This can feel like a stalling tactic, undermining the AI’s supposed intelligence. While context is sometimes necessary, the current implementation often feels excessive and redundant, disrupting creative momentum. Understanding OpenAI’s guidelines for image generation can sometimes offer insight into the broader design philosophies, but doesn’t always explain the granular user experience issues.

    The Impact on User Workflow and Efficiency

    The cumulative effect of these repeated questions is a significant slowdown in workflow. What should take seconds can now take minutes, as users wait for each clarification, provide an answer, and then wait for the next. This isn’t just an inconvenience for casual users; professionals relying on AI for rapid prototyping or content creation face substantial productivity losses. The feeling that “you have to ask ChatGPT the same thing 10 times before it starts generating an image” is a common sentiment, highlighting a critical flaw in the current user interface and interaction design.

    Navigating ChatGPT Image Quality Problems

    Beyond the exasperating questioning, another significant concern arises when users attempt to bypass the clarification cycle. If you instruct ChatGPT to “no longer send ANY text and generate the image immediately,” the resulting image quality can suffer drastically. This often leads to a “sloppy” output, as if the AI “forgot all the previous prompts.” This suggests that the clarification process, however tedious, is somehow tied to the AI’s ability to retain and synthesize prompt details effectively.

    One particularly vexing aspect is that this excessive questioning “even overrides the personalization settings.” Users who have carefully configured their preferences to guide AI responses find these settings ignored in the face of the new clarification protocol. This undermines the very concept of personalization and makes the tool feel less adaptive and more rigid. It forces users into a reactive loop rather than a proactive creative partnership with the AI. Addressing these ChatGPT image generation issues is crucial for maintaining user trust and satisfaction.

    Common Pitfalls with ChatGPT Image Generation

    • Ignoring Clarifications Entirely: While tempting, instructing ChatGPT to immediately generate without answering its questions often leads to degraded quality and a loss of prompt context. The AI seems to rely on these exchanges, however frustrating, to build a complete picture.
    • Expecting Immediate Perfection: In the current climate, expecting a perfect image from a single initial prompt is unrealistic. The AI’s insistence on clarification, while annoying, hints at underlying complexities in interpreting nuanced visual requests.
    • Not Leveraging the AI’s Feedback Loop (Even If Annoying): Despite the frustration, each clarification is an attempt to refine the output. Learning what types of questions ChatGPT asks can help users pre-empt them in future prompts, even if the current system is flawed.

    “I ask ChatGPT to generate/modify an image (within ToS) and I keep getting hit with stuff like ‘Before I generate them, I want to **double-check one thing’ and right after I give chatgpt the answer it wanted, it follows with something like ‘**Before I generate them, I just need **one last detail** so the result is truly accurate:’. I really don’t understand, this feature should either be reverted or be something you can manually enable/disable because you have to ask ChatGPT the same thing 10 times before it starts generating an image. *It even overrides the personalization settings*”

    Practical Strategies for Better AI Image Prompting

    While waiting for potential fixes, users can employ strategies to mitigate the impact of these clarification loops. The goal is to make your initial prompts as comprehensive and unambiguous as possible, anticipating common queries. Incorporating specific details about style, composition, lighting, and mood upfront can significantly reduce the AI’s need to ask follow-up questions. For example, instead of “image of a dog,” try “photorealistic image of a golden retriever puppy playing in a sunlit meadow, shallow depth of field, warm tones.”

    Another strategy is to be explicit about what not to include or what specific aesthetic you desire. Consider providing context or even a mood board description within your initial prompt. Understanding advanced prompt engineering techniques can turn a frustrating experience into a more manageable one, allowing you to guide the AI more effectively from the outset.

    “Right when I think it’s over, and ChatGPT will FINALLY generate my image, it says ‘Before I generate, I just need **one single confirmation** so I don’t mix up which is which:’. I then tell it to no longer send ANY text and generate the image immediately, Only then does it do that but the image generation comes out so sloppy, as if it forgot all the previous prompts.”

    Taking Action: Reporting ChatGPT Image Generation Issues

    If you’re experiencing these persistent ChatGPT image generation issues, the most effective course of action is to provide direct feedback to OpenAI. User reports are crucial for highlighting widespread problems and encouraging developers to prioritize fixes.

    1. Document the Problem: Before contacting support, gather specific examples of prompts that trigger excessive questioning and the resulting poor image quality if forced. Screenshots can be helpful.
    2. Contact OpenAI Support: Send a detailed email outlining your experience to [email protected]. Clearly state the issue, its impact on your workflow, and any specific instances.
    3. Escalate to a Specialist: As noted by other users, initial support responses might be AI-generated. If you receive a generic reply, explicitly request that your case be escalated to a human support specialist. Persistent and well-articulated reports are more likely to get attention.
    4. Community Forums and Feedback: Participate in official OpenAI forums or relevant online communities to share your experiences. Collective reporting can amplify the issue’s visibility.

    Your active participation is vital. Enough reports may compel OpenAI to reconsider their current implementation of “safety” confirmation checks, potentially leading to a more streamlined and user-friendly image generation experience.

    “If you think to justify it with ‘It might need more context’, before this feature was migrated ChatGPT was working very efficiently with just one prompt, getting accurate results.”

    Frequently Asked Questions About ChatGPT Image Generation

    Q1: Why is ChatGPT asking so many questions for image generation now?

    ChatGPT’s increased questioning for image generation likely stems from heightened emphasis on AI safety, alignment, and contextual understanding. Developers may be attempting to prevent misinterpretations or the creation of problematic content by seeking more explicit user intent. However, for many legitimate requests, this has led to an overly cautious and inefficient process that hinders user experience and productivity.

    Q2: Does this affect all ChatGPT image users?

    While not universally reported by every single user, a significant and growing number of ChatGPT users are experiencing these issues across various platforms and use cases. The problem appears widespread enough to suggest a systemic change in the AI’s underlying interaction model rather than isolated glitches. Both free and paid users have reported similar frustrations with the constant clarifications.

    Q3: Can I disable ChatGPT’s clarification questions?

    Currently, there is no official setting or simple command to disable ChatGPT’s clarification questions for image generation. Users have attempted to instruct the AI to generate immediately without further text, but this often results in degraded image quality, suggesting the clarifications are part of its processing logic. User feedback to OpenAI is the primary pathway for requesting such a feature.

    Q4: How can I improve my prompts to avoid these issues?

    To minimize the need for clarifications, focus on crafting highly detailed and specific initial prompts. Include elements like desired style (photorealistic, artistic), specific objects, actions, settings, lighting, color palettes, and even emotional tones. The more comprehensive your initial input, the less room the AI has for ambiguity, potentially reducing the number of follow-up questions.

    Q5: What happens if I force ChatGPT to generate an image without answering?

    If you instruct ChatGPT to generate an image immediately without responding to its clarification questions, users report that the resulting images often come out “sloppy” or lack the detail and accuracy expected. This indicates that the AI may lose crucial context from the unanswered queries, leading to a poorer quality output that doesn’t fully reflect the initial prompt’s intent.

    Q6: Is reporting this issue to OpenAI effective?

    Yes, reporting the issue to OpenAI is crucial. User feedback provides developers with valuable data on real-world pain points. While initial responses might be automated, escalating your case to a human support specialist, as suggested by other users, can ensure your detailed feedback reaches the relevant team. Collective reports can significantly influence development priorities and potential fixes.

    Key Takeaways

    • Growing Frustration: Many users face significant ChatGPT image generation issues due to excessive clarifying questions, slowing down creative workflows.
    • Quality Degradation: Bypassing these questions often results in lower image quality, indicating a link between clarifications and the AI’s ability to retain prompt context.
    • Personalization Overridden: The new questioning protocol often overrides user-defined personalization settings, adding to the frustration and lack of control.
    • Proactive Prompting Helps: Crafting highly detailed and specific initial prompts can help mitigate the number of follow-up questions the AI poses.
    • User Action is Key: Reporting these problems directly to OpenAI support, and escalating to human specialists, is the most effective way to advocate for improvements and highlight widespread user discontent. Continue to share your experiences and provide detailed feedback to drive positive changes in the AI’s image generation capabilities.
  • Uncovering the Reality of Cisco Exploit Attempts: A Deep Dive into 81k Breaches

    Uncovering the Reality of Cisco Exploit Attempts: A Deep Dive into 81k Breaches

    Analyzing the Constant Threat Landscape Faced by Cisco Devices

    In the dynamic world of cybersecurity, vigilance is paramount, especially for organizations relying on critical network infrastructure. A recent seven-day observation period, conducted through a network of Cisco honeypots, exposed an alarming truth: over 81,000 Cisco exploit attempts were logged from 241 unique IP addresses. This isn’t merely background noise; it’s a clear signal of persistent and targeted aggression against Cisco systems globally. For network administrators and security professionals, these Cisco exploit attempts underscore the constant, evolving threat landscape, demanding a proactive and informed defense strategy. This deep dive will unravel the nature of these attacks, dissect valuable honeypot data, and outline actionable steps to harden your Cisco environment.

    Understanding the Scale of Cisco Exploit Attempts

    To grasp the magnitude of the threat, consider the raw numbers: 81,000 attack attempts in a single week. This volume highlights that adversaries are continually probing for weaknesses. These attempts ranged from opportunistic bruteforcing—guessing username and password combinations—to targeted exploitation of known vulnerabilities like CVE-2022-20759, as detailed in the Orange CERT advisory. The relentless nature of these attacks shows that automated scripts and botnets are constantly at work, indiscriminately scanning the internet for exposed Cisco devices.

    The “always-on” threat against Cisco devices stems from their widespread deployment in critical infrastructure, enterprises, and data centers. They represent a high-value target for attackers seeking network access, data exfiltration, or service disruption. Observing this scale of Cisco exploit attempts via honeypot data offers a crucial glimpse into real-world attack vectors and attacker methodologies. It reinforces that every internet-facing Cisco device is a potential target, making continuous monitoring and rapid response essential.

    Deconstructing Common Cisco Vulnerabilities

    Attackers employ a dual strategy: broad bruteforce campaigns and precise exploitation of specific Common Vulnerabilities and Exposures (CVEs). Understanding both is vital for defense. Bruteforce attacks are less sophisticated but often effective, especially against weak or default credentials. Threat actors deploy dictionaries of common passwords and often product-specific combinations, like those referencing “Cisco” or “Anyconnect,” indicating a degree of reconnaissance or targeting beyond generic attempts. This data, captured by honeypots, reveals a more intelligent form of credential stuffing.

    CVE-2022-20759: A Case Study in Exploitation

    Beyond bruteforcing, direct exploitation of known CVEs presents an immediate and severe risk. CVE-2022-20759, for instance, involves a privilege escalation vulnerability in Cisco Small Business RV Series Routers. Attackers specifically targeting such vulnerabilities are often more advanced, utilizing publicly available exploit code. Successfully exploiting a CVE can grant unauthorized access, allowing attackers to bypass authentication entirely or escalate privileges within the network. Therefore, timely patching and updates are non-negotiable for maintaining robust security posture.

    Leveraging Honeypot Data for Proactive Defense

    Honeypots act as decoys, luring attackers and collecting invaluable intelligence on their tactics, techniques, and procedures (TTPs). The residual data from these 81,000 Cisco exploit attempts provides granular insights, including specific username-password combinations and originating IP addresses. This information moves beyond theoretical threats to tangible, actionable intelligence. It highlights that the attempts are not always random; some suggest targeted credential attacks.

    For example, a significant portion of the observed attacks originated from the 178.130.45/24 IP range, associated with ASN AS215540, “GLOBAL CONNECTIVITY SOLUTIONS LLP.” This level of detail allows administrators to identify specific threat actors or networks. By reviewing this dataset of IP addresses and username-password combinations, security teams can proactively block malicious traffic at the perimeter. Implementing IP blocking for known malicious ranges, like the one identified, can immediately reduce the attack surface and mitigate ongoing threats. This type of threat intelligence empowers defensive actions before an exploit attempt succeeds.

    A Framework for Bolstering Your Cisco Security

    Protecting Cisco devices requires a multi-layered and continuous approach. Here’s a step-by-step framework to enhance your network security, with an estimated effort ranging from immediate actions to ongoing commitments:

    1. Regular Vulnerability Scanning and Patch Management (Ongoing Effort): Consistently scan your network for vulnerabilities. Prioritize and apply all security patches and firmware updates released by Cisco without delay. Automated patch management systems can significantly streamline this process.
    2. Implement Strong Authentication and Authorization (Moderate Effort): Enforce complex, unique passwords for all accounts. Crucially, enable Multi-Factor Authentication (MFA) wherever possible, especially for remote access services like VPNs or administrative interfaces. Limit user privileges to the minimum required for their roles.
    3. Network Segmentation and Access Controls (Significant Effort): Divide your network into logical segments using VLANs and firewalls. Restrict access between segments based on the principle of least privilege. This containment strategy limits an attacker’s lateral movement should a breach occur in one segment. Implement access control lists (ACLs) to filter unauthorized traffic.
    4. Deploying Intrusion Detection/Prevention Systems (IDPS) (Moderate Effort): Utilize IDPS solutions to monitor network traffic for suspicious activity and known attack signatures. Configure them to alert security teams and, if possible, automatically block malicious connections. These systems can detect both bruteforce attempts and CVE exploitation.
    5. Utilize Threat Intelligence Feeds (Ongoing Effort): Integrate real-time threat intelligence feeds into your security tools, such as firewalls and SIEM systems. Actively block IP addresses and ranges identified as malicious, like 178.130.45/24, to preemptively mitigate threats. Regularly review and update these blacklists. A reliable source for general network security best practices is the Cisco Security Portal.
    6. Conduct Regular Security Audits and Penetration Testing (Periodic Effort): Periodically engage third-party security experts to perform comprehensive audits and penetration tests. These assessments identify hidden vulnerabilities and weaknesses that internal teams might overlook, simulating real-world attack scenarios.

    Common Pitfalls in Cisco Device Security

    Even with robust security measures, certain oversights can significantly undermine defenses. Ignoring consistent patch cycles is a primary pitfall; unpatched vulnerabilities remain open doors for attackers, even years after their discovery. Another common mistake is relying on default credentials or using weak, easily guessable passwords. Attackers explicitly target these common weaknesses. Furthermore, a lack of proper network segmentation can turn a minor breach into a widespread compromise, allowing an attacker to move freely across the network.

    “Every week, I’m seeing a flurry of alerts on our Cisco firewall. It feels like a never-ending battle against bots. Sometimes, it’s overwhelming to distinguish real threats from background noise.” – Acknowledging the daily struggle of network administrators is crucial. The insights from honeypot data help cut through this noise.

    “When we correlated our internal logs with publicly available threat intelligence, that’s when it clicked. We could see the IP addresses from the honeypot data attempting to hit our perimeter. It was an eye-opener.” – This demonstrates the value of external data sources in confirming and validating internal observations.

    “We learned the hard way that ‘out of sight, out of mind’ doesn’t apply to legacy Cisco devices. An old, unmonitored switch became the entry point. We should have decomissioned or secured it properly.” – Highlighting the dangers of neglected or unmanaged network components.

    Frequently Asked Questions About Cisco Security

    What is CVE-2022-20759 and why is it significant for Cisco users?

    CVE-2022-20759 is a critical privilege escalation vulnerability affecting Cisco Small Business RV Series Routers. Its significance lies in allowing an unauthenticated, remote attacker to gain root privileges on the affected device. This means an attacker could completely compromise the router, leading to full control over network traffic and configuration, making timely patching absolutely essential for any organization using these specific models.

    How can honeypot data improve my network security?

    Honeypot data provides real-time, ground-level intelligence on active threats. By analyzing honeypot logs, security teams can identify common attack vectors, specific IP addresses of threat actors, and the types of vulnerabilities or credentials attackers are targeting. This intelligence can then be used to proactively update firewall rules, strengthen intrusion detection systems, and inform patch management priorities, significantly improving your defensive posture.

    Are all bruteforce attempts just random dictionary attacks?

    No, not all bruteforce attempts are purely random dictionary attacks. While many involve common password lists, honeypot data often reveals more sophisticated attempts that include product-specific keywords (e.g., “Cisco,” “Anyconnect”). This suggests attackers are using credential lists compiled from previous breaches or are specifically targeting known Cisco environments, making these attempts more dangerous than generic dictionary attacks.

    What are the immediate steps I can take to protect my Cisco devices from known threats?

    Immediately, ensure all Cisco devices are running the latest firmware and security patches. Change all default credentials to strong, unique passwords, and implement Multi-Factor Authentication (MFA) for all administrative interfaces and remote access points. Furthermore, implement firewall rules to block known malicious IP ranges, such as 178.130.45/24, which has been identified in recent exploit attempts. Regularly review security advisories from Cisco.

    Why are Cisco devices such frequent targets for attackers?

    Cisco devices are ubiquitous in enterprise and critical infrastructure networks, making them high-value targets. Their widespread use means that a single, successful exploit or vulnerability can potentially affect a vast number of organizations. Attackers are motivated by the potential for network access, data theft, or disruption, knowing that compromising a core network device like a Cisco router or switch can yield significant gains.

    Key Takeaways

    • Cisco exploit attempts are a constant and significant threat, with thousands occurring weekly, necessitating continuous vigilance.
    • Honeypot data offers invaluable, real-world intelligence on attack vectors and specific threat actors.
    • Prioritizing patch management and implementing strong authentication (including MFA) are foundational security practices.
    • Proactive measures like IP blocking, informed by threat intelligence, can immediately reduce your attack surface.
    • A layered security approach, combining technical controls with regular audits, is crucial for comprehensive Cisco device protection.

    The persistent threat of Cisco exploit attempts is a stark reminder that cybersecurity is an ongoing commitment, not a one-time fix. By understanding the nature of these attacks and implementing a robust, multi-faceted security framework, organizations can significantly fortify their defenses. Start by auditing your Cisco devices today and ensure all known vulnerabilities are mitigated. Your network’s security depends on it.

  • Digital Fortress: Mastering Data Privacy in an Interconnected World

    Digital Fortress: Mastering Data Privacy in an Interconnected World

    Safeguarding Your Digital Footprint: Essential Strategies for Mastering Data Privacy Online.

    Digital Fortress: Mastering Data Privacy in an Interconnected World

    In our increasingly digital lives, where every click, search, and purchase leaves a trail, the concept of mastering data privacy has become paramount. Our personal information is a valuable commodity, constantly being collected, analyzed, and shared by countless entities. From social media giants to e-commerce platforms and even seemingly innocuous apps, our data fuels the engines of the modern economy. Understanding how your data is used and, more importantly, how to protect it, is no longer optional – it’s a fundamental digital literacy.

    This guide will equip you with the knowledge and practical strategies to take control of your digital footprint, ensuring a more secure and private online experience. We’ll explore why data privacy matters, how your information is being collected, and actionable steps you can take to build your own digital fortress.

    Understanding Your Digital Footprint: The First Step to Mastering Data Privacy

    Before you can begin mastering data privacy, it’s crucial to understand what a digital footprint is and why it’s so significant. Your digital footprint is the trail of data you leave behind when you use the internet. This includes everything from your social media posts and online purchases to your IP address, browser history, and even your location data. Companies use this information to create detailed profiles of you, which can then be used for targeted advertising, personalized content, and sometimes even less benign purposes like credit scoring or political microtargeting. Every interaction, every download, every email sent contributes to this ever-growing profile. Being aware of this continuous data generation is the foundational step towards proactive privacy management.

    Furthermore, various data breaches highlight the constant vulnerability of our personal information held by third parties. Therefore, minimizing the data you share and ensuring the security of what you do share is a critical aspect of personal cybersecurity.

    Practical Strategies for Enhancing Your Online Privacy

    Achieving true online privacy requires a multi-faceted approach. Here are several practical strategies to help you on your journey to mastering data privacy:

    1. Review and Adjust Privacy Settings: Take the time to regularly audit the privacy settings on all your social media accounts, web browsers, and frequently used apps. Many platforms default to sharing more data than you might be comfortable with. Look for options to limit ad tracking, control who sees your posts, and restrict access to your location data.
    2. Use Strong, Unique Passwords and Two-Factor Authentication (2FA): A robust password strategy is your first line of defense. Use a password manager to generate and store complex, unique passwords for every account. Enable two-factor authentication (2FA) wherever possible, adding an extra layer of security by requiring a second form of verification (like a code from your phone) in addition to your password.
    3. Employ a Virtual Private Network (VPN): A VPN encrypts your internet connection and masks your IP address, making it much harder for third parties (including your ISP, government, and potential snoopers) to track your online activities. This is especially important when using public Wi-Fi networks.
    4. Be Mindful of What You Share: Think before you post. Every piece of information you share online, whether it’s a photo, a comment, or personal details, can become part of your permanent digital record. Consider the potential implications before making anything public.
    5. Use Privacy-Focused Browsers and Search Engines: Switch from mainstream browsers like Chrome to privacy-focused alternatives like Brave, Firefox with enhanced tracking protection, or Tor. Similarly, opt for search engines like DuckDuckGo, which do not track your searches.

    Tools and Resources for Mastering Data Privacy

    Several excellent tools and resources can aid you in your quest for better data privacy:

    • Privacy-Focused Browsers: Browsers like Brave and Firefox (with custom privacy settings) offer built-in ad and tracker blocking, helping to reduce your digital footprint. Tor Browser takes anonymity to an even higher level, though it may slow down your browsing experience.
    • Password Managers: Tools like LastPass, 1Password, or Bitwarden securely store your unique passwords and can generate strong new ones, significantly enhancing your account security.
    • Privacy Extensions: Browser extensions such as uBlock Origin, Privacy Badger (from the Electronic Frontier Foundation – https://www.eff.org/), and Decentraleyes can block ads and trackers across the web.
    • Data Rights Information: Understanding your data rights is crucial. The General Data Protection Regulation (GDPR) in Europe (https://gdpr-info.eu/) is a leading example of comprehensive data protection law, offering individuals greater control over their personal data. Similar regulations exist or are emerging globally, empowering you to request access to your data or even have it deleted.
    • Email Aliases and Encrypted Email: Services like SimpleLogin or AnonAddy allow you to create email aliases to protect your primary email address. For sensitive communications, consider encrypted email services like ProtonMail or Tutanota.

    Conclusion

    Mastering data privacy is an ongoing process, not a one-time fix. The digital landscape is constantly evolving, with new technologies and threats emerging regularly. By staying informed, adopting proactive strategies, and utilizing the right tools, you can significantly enhance your online security and protect your valuable personal information. Remember, your data is yours – take control of it and build your digital fortress brick by digital brick.

  • Navigating ChatGPT Image Generation Limitations: A User’s Guide

    Navigating ChatGPT Image Generation Limitations: A User’s Guide

    Understanding and Overcoming Excessive Clarification Prompts in AI Art

    The world of AI-driven creativity is exhilarating, offering unprecedented tools to bring visions to life with simple text prompts. ChatGPT’s image generation stands out, transforming how we conceptualize and create visual content. However, a recent shift in its workflow has introduced significant ChatGPT image generation limitations, particularly regarding an increase in clarification questions. Users are encountering a frustrating cascade of “double-checks” and “one last details,” turning what was once a swift process into a prolonged back-and-forth. This isn’t just an inconvenience; it often leads to less accurate or “sloppy” output, overriding even personalized settings.

    This guide dives deep into why these changes might be happening, offers actionable strategies to streamline your image prompts, and explores how you can navigate these evolving AI interactions. Our aim is to reclaim efficiency and precision in your creative endeavors with generative AI.

    Understanding the Evolving Landscape of ChatGPT Image Generation

    Once celebrated for its intuitive and efficient image generation, ChatGPT’s recent behavior has sparked considerable debate. Historically, users could provide a concise prompt and receive highly relevant images, reflecting the AI’s advanced understanding. This streamlined AI image generation workflow made it a go-to tool for quick visual prototyping and creative exploration.

    However, many now report a noticeable departure from this efficiency. Imagine you’re trying to generate a simple image—say, “a cat wearing sunglasses on a beach.” What was once a single command often now triggers a series of detailed inquiries from ChatGPT: “What kind of cat?”, “What style of sunglasses?”, “Time of day on the beach?” This shift transforms a direct request into an exhaustive interrogation. It diminishes the perceived “intelligence” and speed of the AI.

    Adapting to this new operational model requires not just patience but a revised approach to prompt formulation. It’s crucial to acknowledge that AI models, especially those from leading developers like OpenAI, are continuously refined for safety, accuracy, and ethical considerations. This often leads to adjustments in user interaction patterns. For instance, recent developments in AI ethics and safety guidelines{target=”_blank” rel=”noopener noreferrer”} underscore the complexity of balancing creative freedom with responsible AI deployment. This constant evolution means user interactions must adapt to leverage the technology effectively.

    Decoding ChatGPT’s Clarification Cascade: Why the Extra Questions?

    The sudden proliferation of ChatGPT clarification questions during image requests isn’t arbitrary; it likely stems from a combination of factors related to AI model safety, alignment, and data collection. One primary reason could be enhanced safety protocols. AI developers are increasingly focused on preventing the generation of harmful, biased, or inappropriate content. By asking more specific questions, the model attempts to gather additional context, ensuring the output aligns with ethical guidelines and avoids misinterpretation.

    Consider a prompt like “create an image of a powerful leader.” Without clarification, the AI might generate an image that reinforces societal biases. By asking “What qualities define this leader?” or “In what context should they be depicted?”, ChatGPT attempts to mitigate potential missteps. Another factor is model alignment: the drive to make AI models truly understand and fulfill user intent, even if it feels overbearing. This helps AI produce desired results, minimizing ambiguity that could lead to “sloppy” results.

    Furthermore, these interactions can serve as a valuable feedback loop for OpenAI. They gather more nuanced data on how users phrase requests and what details are crucial for accurate image generation.

    “Before I generate them, I want to **double-check one thing” and right after I give chatgpt the answer it wanted, it follows with something like “**Before I generate them, I just need one last detail so the result is truly accurate:”. I really don’t understand, this feature should either be reverted or be something you can manually enable/disable because you have to ask ChatGPT the same thing 10 times before it starts generating an image.

    This user experience highlights the frustration when the perceived benefit of extra clarification doesn’t outweigh the cost in time and effort. While the intent might be to refine ChatGPT image prompts for precision, the current implementation often feels like an impediment. Understanding these underlying reasons can empower users to anticipate and address the AI’s needs proactively.

    Strategies for Streamlining Your ChatGPT Image Prompts

    Navigating the current ChatGPT image generation limitations successfully hinges on adopting more proactive and detailed prompt engineering techniques. Instead of treating ChatGPT as a mind-reader, approach it as a highly capable but literal assistant that requires comprehensive instructions upfront. The goal is to anticipate potential questions and embed their answers directly into your initial request.

    For instance, if you previously prompted “a futuristic city,” now consider “a sprawling futuristic city at dusk, with neon lights reflecting on wet streets, flying vehicles, and towering skyscrapers in a cyberpunk style.” This level of specificity leaves little room for ambiguity, significantly reducing the likelihood of follow-up questions.

    One effective strategy is to front-load all necessary details: subject, style, mood, composition, color palette, and any specific elements you want to include or exclude. Think of it as writing a mini-brief for a human artist. If you desire a minimalist illustration of an abstract concept, state it explicitly. If you need a photorealistic image with a specific lighting condition, include those details. By clearly articulating your vision in a single, well-structured prompt, you effectively guide the AI through what it might otherwise ask in multiple turns. This bypasses the issue where AI “forgets” previous instructions. Mastering this optimizing AI image prompts approach can transform a tedious interaction into a more efficient and rewarding creative process.

    Optimizing Your Image Generation Workflow with ChatGPT

    To mitigate the challenges of troubleshooting ChatGPT image issues and achieve your desired visuals more efficiently, consider implementing a structured workflow. This framework emphasizes clarity and completeness from the outset, minimizing the need for the AI’s persistent clarification.

    1. Be Explicit from the Start: Craft comprehensive prompts that leave no room for guesswork. Detail the subject, setting, action, and any desired mood or atmosphere. Instead of “a forest,” try “a dense, ancient forest bathed in mystical twilight, with bioluminescent flora and a faint mist.”
    2. Define Style and Subject: Clearly state the artistic style (e.g., photorealistic, impressionistic, pixel art, cinematic, watercolor) and precise subject characteristics. For example, “a sleek, silver robotic cat with glowing blue eyes, in a minimalist, sci-fi illustration style.”
    3. Specify “No Further Questions”: While not always guaranteed, explicitly stating your preference can sometimes help. Phrases like “Generate the image immediately, without any further questions or confirmations based on this detailed prompt,” can guide the AI’s behavior.
    4. Iterative Refinement (if needed): If the first attempt isn’t perfect, refine your original prompt rather than trying to fix it through a series of fragmented corrections. Small, targeted adjustments to your initial, comprehensive prompt are often more effective than battling a conversational loop.

    Right when I think it’s over, and ChatGPT will FINALLY generate my image, it says “Before I generate, I just need one single confirmation so I don’t mix up which is which:”. I then tell it to no longer send ANY text and generate the image immediately, Only then does it do that but the image generation comes out so sloppy, as if it forgot all the previous prompts.

    This experience underscores the importance of a strong initial prompt. When forced, the AI might prioritize completing the task over retaining nuanced details from a fragmented conversation. Investing a little more time in the initial prompt can save significant effort and frustration down the line. External prompt engineering guides{target=”_blank” rel=”noopener noreferrer”} offer valuable insights into optimizing AI image generation workflow across various platforms.

    Common Pitfalls in ChatGPT Image Prompting

    Beyond the AI’s behavior, certain user habits can exacerbate ChatGPT image generation limitations. Avoiding these common pitfalls is essential for a smoother workflow.

    • Vague Language: Using broad terms without specific descriptors, like “a car” instead of “a vintage red sports car with chrome accents.”
    • Over-reliance on Implicit Context: Assuming the AI retains previous conversational context perfectly, especially across different image generation requests.
    • Lack of Specificity in Style/Composition: Neglecting to specify desired artistic styles, angles, or compositional elements, leading to generic outputs.
    • Not Leveraging “Negative Prompts” or Exclusions: Failing to tell the AI what not to include (e.g., “no modern buildings,” “without people”), which can prevent undesired elements.
    • Fragmented Instructions: Providing a prompt in bits and pieces across multiple messages rather than consolidating all details into one comprehensive request.

    FAQ: Navigating Your ChatGPT Image Generation Experience

    Q1: Why does ChatGPT ask so many questions for images now?

    ChatGPT’s increased questioning during image generation likely stems from several evolving factors. Enhanced safety protocols aim to prevent the creation of harmful or biased content by seeking more context. Model alignment initiatives ensure the AI accurately understands and fulfills complex user intentions, even if it feels repetitive. Additionally, these interactions provide valuable data for OpenAI to refine its models, learning what details are crucial for precise image generation and addressing Generative AI challenges. These measures improve AI output quality and ethics.

    Q2: Can I disable ChatGPT’s clarification prompts?

    Currently, there isn’t a direct “disable” button for ChatGPT’s clarification prompts. However, you can significantly reduce their frequency by employing highly detailed and explicit initial prompts. By including all necessary information about your desired image—style, subject, mood, composition—you pre-empt many of the questions the AI might otherwise ask. Explicitly adding a phrase like “Generate the image immediately based on this detailed prompt, no further questions” can also guide the AI, though its effectiveness may vary.

    Q3: How can I improve my ChatGPT image prompts for better results?

    To improve your ChatGPT image prompts, focus on specificity and completeness. Describe your subject, setting, and actions vividly. Specify the desired artistic style (e.g., “photorealistic,” “watercolor,” “cyberpunk”). Include details about lighting, color palette, and composition. For example, instead of “a dog,” try “a golden retriever playing fetch on a sunny beach at sunset, photorealistic style, low-angle shot.” Pre-emptively answering potential questions within your initial prompt is key to effective optimizing AI image prompts.

    Q4: What should I do if ChatGPT generates sloppy images after many prompts?

    If ChatGPT produces sloppy or inaccurate images after extensive clarification, it often indicates that the model has lost context from the fragmented conversation. In such cases, the most effective approach is to restart with a fresh, single, highly detailed prompt. Consolidate all the information and refinements you discussed into one comprehensive instruction. This resets the AI’s understanding, allowing it to process your complete vision from scratch, thereby avoiding the pitfalls of a prolonged and confusing back-and-forth.

    Q5: How can I report issues with ChatGPT’s image generation?

    If you consistently encounter frustrating ChatGPT image generation limitations, reporting your experience to OpenAI support for image generation is crucial for improvement. You can typically contact them via their support email, often [email protected]. When communicating, clearly describe the issue with specific examples. If you receive automated responses, explicitly state that you wish to “escalate this case to a support specialist.” Collective user feedback is vital for prompting developers to re-evaluate and refine these features.

    (EDIT: Would like to add that when contacting support regarding this issue, you’ll only be getting AI generated responses UNTIL you tell them to escalate your case to a support specialist. Enough reports, and we may be able to work around their “safety” confirmation checks)

    Key Takeaways

    The evolving nature of ChatGPT image generation limitations presents a new challenge for users accustomed to simpler interactions. Here are the key takeaways:

    • The increased number of clarification prompts likely serves AI safety protocols and model alignment objectives, aiming for more precise and ethical outputs.
    • Proactive and comprehensive prompt engineering is your most effective tool to bypass excessive questioning and streamline your AI image generation workflow.
    • Consolidate all necessary details—style, subject, composition, and mood—into your initial prompt to prevent fragmented communication and “sloppy” results.
    • Reporting persistent issues and advocating for escalation with OpenAI support for image generation is vital for developers to understand and address user friction.

    As AI continues to advance, user adaptation and clear communication with these powerful tools become increasingly important. By mastering detailed prompting, you can navigate these limitations and unlock the full creative potential of AI image generation. Start experimenting with more elaborate prompts today, and contribute your feedback to help shape the future of AI-human creative collaboration.

  • Mastering Your Smart Home: A Beginner’s Guide to Building a Robust Network

    Mastering Your Smart Home: A Beginner’s Guide to Building a Robust Network

    Unlock the full potential of your connected devices by establishing a secure and efficient smart home network.

    The dream of a fully automated home, where lights adjust to your mood, thermostats learn your habits, and security cameras keep a watchful eye, is now within reach for many. But behind every seamlessly operating smart device lies a crucial foundation: a robust smart home network. For beginners, setting up this digital backbone can seem daunting, but with the right guidance, you can transform your house into an intelligent, interconnected haven. This guide will walk you through the essential steps to building and optimizing your own reliable smart home network, ensuring all your gadgets communicate flawlessly and securely.

    Why a Strong Smart Home Network is Crucial

    Imagine your smart lights flickering, your voice assistant constantly buffering, or your security camera feed lagging. These frustrations often stem from a weak or improperly configured smart home network. A strong network isn’t just about speed; it’s about stability, coverage, and security. As you add more devices – from smart plugs and speakers to robot vacuums and doorbells – your network’s demands grow. Without proper planning, you might encounter dead zones, interference, and performance bottlenecks that diminish the ‘smart’ experience. Investing time upfront in a solid foundation pays dividends in convenience and reliability down the line.

    Essential Components for Your Smart Home Network

    Before diving into configuration, let’s look at the key players in your smart home network ecosystem:

    1. Router: This is the brain of your network, directing traffic between your devices and the internet. For smart homes, look for routers with Wi-Fi 6 (802.11ax) for better performance with many devices, and strong security features. Mesh Wi-Fi systems are excellent for larger homes to eliminate dead zones.
    2. Modem: Your modem connects your home network to your Internet Service Provider (ISP). Often, ISPs provide a combined modem-router unit, but for better performance and control, many users prefer separate units.
    3. Smart Hub/Bridge (Optional but Recommended): While many devices connect directly to Wi-Fi, some use protocols like Zigbee or Z-Wave. A smart hub (e.g., Samsung SmartThings, Hubitat) acts as a central translator, allowing devices from different ecosystems to communicate and be controlled from a single app. This reduces Wi-Fi congestion and often improves reliability.
    4. Ethernet Cables: For stationary devices like smart TVs, gaming consoles, or a dedicated smart home server, a wired Ethernet connection is always more stable and faster than Wi-Fi.

    Setting Up Your Robust Smart Home Network

    The setup process begins with your internet connection. Ensure your modem and router are placed centrally in your home, away from obstructions and other electronics that might cause interference. For optimal Wi-Fi coverage, consider a mesh Wi-Fi system if you have a large or multi-story home. These systems use multiple access points to create a single, seamless network, ensuring consistent signal strength throughout.

    Once your basic network is up, focus on security. Change default router passwords immediately. Implement strong, unique passwords for your Wi-Fi networks (both 2.4GHz and 5GHz). Consider creating a separate “guest” Wi-Fi network for visitors to isolate your main smart devices. Regularly update your router’s firmware to patch security vulnerabilities and improve performance. For deeper insights into network security best practices, check out resources like the Cybersecurity & Infrastructure Security Agency (CISA) guidelines.

    Next, begin connecting your smart devices. For devices using Wi-Fi, ensure they are connected to the appropriate band (2.4GHz for most IoT devices, 5GHz for higher bandwidth streaming). If you’re using a smart hub, follow its instructions to pair Zigbee or Z-Wave devices. Grouping devices by room or function in your smart home app will make management easier. For example, all living room lights can be controlled as a single entity. Many modern smart devices offer detailed setup instructions, often involving a smartphone app.

    Optimizing and Maintaining Your Smart Home Network

    A smart home network isn’t a “set it and forget it” system. Regular maintenance is key to sustained performance.
    * Firmware Updates: Keep all your smart devices and your router firmware updated. Manufacturers frequently release updates to fix bugs, add features, and patch security holes.
    * Network Monitoring: Tools are available (often built into your router’s interface) to monitor connected devices, network traffic, and potential interference.
    * Device Placement: Experiment with placing devices, especially Wi-Fi-dependent ones, to ensure optimal signal strength. Avoid placing them behind large metal objects or near microwave ovens.
    * Bandwidth Management (QoS): If your router supports Quality of Service (QoS), you can prioritize certain types of traffic (e.g., video streaming, security cameras) to ensure they always get the bandwidth they need. For more advanced networking concepts, a guide from PCMag on network optimization can be very helpful.

    By diligently managing your smart home network, you ensure that your smart devices work harmoniously, providing the convenience, efficiency, and security you desire. This proactive approach turns your smart home from a collection of gadgets into a truly integrated and responsive living space.

  • Building a Compact Homelab Setup: A DIYer’s Deep Dive

    Building a Compact Homelab Setup: A DIYer’s Deep Dive

    Unleashing the Power of Personal Servers in 10-Inch Racks

    Introduction

    In the vibrant world of home computing, building a personal server, or “homelab,” offers unparalleled control and flexibility. Forget the limitations of off-the-shelf solutions or the ongoing costs of cloud services; a compact homelab setup empowers you to create a customized environment tailored precisely to your needs. This deep dive explores how a passionate DIYer transformed a vision into a functional, space-efficient powerhouse, embracing the quirks and opportunities of personal builds. From robust virtualization to innovative storage and networking, we’ll uncover the strategies and components that make a bespoke homelab both practical and incredibly rewarding. Get ready to explore the beauty of combining powerful tech with a personal touch, proving that a high-performance server doesn’t need to dominate your space or your wallet.

    Designing Your Compact Homelab Setup: Rack and Compute Considerations

    Embarking on a homelab journey often starts with defining your compute and physical infrastructure. For those with limited space, the traditional 19-inch server rack can be overkill. This is where the charm of a 10-inch server rack truly shines, offering a footprint that blends seamlessly into a home environment while providing ample structure for various components. These smaller racks allow for a dense, organized setup without consuming an entire closet or corner of a room. Many enthusiasts, like the inspiration for this guide, even leverage 3D printing to create custom mounts and enclosures, further optimizing space and airflow within these compact frames.

    Powering this compact structure requires thoughtful component selection. A common and highly effective strategy involves a Proxmox cluster, which enables robust virtualization and containerization. For instance, a 3-node Proxmox cluster built with efficient processors like the Intel 6500t can handle multiple virtual machines and services with ease. This provides a resilient and scalable foundation for various applications, from media servers to home automation. Alongside a dedicated cluster, many homelabbers integrate an ITX-based system. This could serve as a powerful workstation, like an editing rig running Windows 11 with an AMD Ryzen 7 7700 and an NVIDIA 4060Ti, offering remote access for heavy computational tasks. The key lies in balancing performance needs with power efficiency and physical dimensions, ensuring your setup is both potent and practical.

    Optimizing Homelab Networking and Storage: The 2.5GbE Raspberry Pi NAS

    High-speed networking and reliable storage are the backbone of any effective homelab, even a compact one. Traditional gigabit Ethernet, while sufficient for many tasks, can become a bottleneck when transferring large files or managing multiple high-bandwidth services. This is where upgrading to 2.5 Gigabit Ethernet (2.5GbE) offers a significant advantage. Even with budget-friendly switches, integrating 2.5GbE can drastically improve data transfer speeds within your local network. Many mini PCs and custom builds, including those using SBCs like the Raspberry Pi, can achieve 2.5GbE speeds through readily available USB 3.0 to Ethernet adapters. These adapters provide a cost-effective way to enhance network throughput without requiring expensive hardware upgrades.

    Storage, especially for data-intensive tasks like media streaming or backups, demands a robust and scalable solution. A particularly ingenious approach involves building a Raspberry Pi NAS, converting a modest single-board computer into a powerful network-attached storage device. Imagine a 24TB RAIDZ1 configuration, effectively creating a resilient storage pool that safeguards your data. Running Ubuntu Server with Samba and NFS services, such a setup transforms the Raspberry Pi into a versatile file server accessible across your network. By leveraging 2.5GbE USB adapters, the Raspberry Pi NAS can overcome its built-in 1GbE limitation, ensuring swift data access. This innovative combination of affordable hardware and open-source software demonstrates how creativity can yield high-performance solutions for your homelab storage needs. For more details on configuring network performance, explore resources on optimizing 2.5GbE in home networks (rel=”noopener noreferrer” target=”_blank”).

    The Art of DIY: 3D Printing for Homelab Customization

    The spirit of DIY is arguably at the heart of every homelab. This isn’t just about assembling components; it’s about crafting a solution that fits your unique vision, often pushing the boundaries of what’s commercially available. DIY server rack 3D print projects have revolutionized homelab customization, allowing enthusiasts to design and fabricate bespoke mounts, brackets, and even entire enclosures. The open-source community provides a treasure trove of STL files for everything from mini PC trays to specific component mounts, making it easier than ever to tailor your setup. Platforms like Makerworld host a vast collection of user-contributed designs, offering creative solutions for common homelab challenges.

    The beauty of 3D printing lies in its ability to solve seemingly niche problems. Need a specific mount for an ITX board? Want to organize power supplies neatly within a 10-inch rack? Chances are, someone in the community has designed it, or you can design it yourself. The “Labrax” 10-inch racks, for instance, are a testament to brilliant community-driven design, providing an excellent foundation for many compact builds. This collaborative approach not only saves time and effort but also fosters a sense of community among homelabbers. Embracing these resources means you don’t have to be an expert designer; you can leverage the collective ingenuity of others to bring your perfect homelab to life. This hands-on, problem-solving ethos is what makes the homelab journey so engaging and ultimately, so rewarding. You can find many open-source designs and inspiration on Makerworld (rel=”noopener noreferrer” target=”_blank”).

    Building Your Own Compact Homelab: A Step-by-Step Framework

    Creating your ideal compact homelab setup is a journey, not a sprint. Follow this framework to guide your build:

    1. Define Your Needs and Budget: What do you want your homelab to do? (e.g., media server, virtualization, home automation, editing workstation). This dictates component choices and helps set a realistic budget.
    2. Component Selection: Focus on mini PCs, single-board computers, and ITX form factors for their compact size and power efficiency. Consider processors that balance performance with thermal design power (TDP).
    3. Rack and Enclosure Planning: Decide on a 10-inch rack or a custom enclosure. Explore 3D printable designs (like Labrax racks) for maximum customization and space utilization. Plan for proper airflow.
    4. Operating System and Virtualization: Choose your primary operating system (e.g., Proxmox for virtualization, Ubuntu Server for specific services, Windows for desktop tasks). Understand how different OSes interact.
    5. Networking and Storage Integration: Plan your network topology. Consider 2.5GbE for internal transfers and a robust NAS solution (e.g., Raspberry Pi with RAIDZ1). Ensure power supplies are strategically placed for efficiency.
    6. Testing, Refinement, and Documentation: Once assembled, thoroughly test all components and services. Be prepared to troubleshoot and refine your setup. Document your configuration—this saves immense time later.

    Expect this process to be iterative. Initial setup might take a weekend, but refinement and expansion can be an ongoing hobby.

    Common Pitfalls in Compact Homelab Setup

    While building a homelab is rewarding, it’s not without its challenges. Being aware of common pitfalls can save you time and frustration.

    • Power Consumption Oversight: Compact builds often prioritize efficiency, but powerful components (like a dedicated GPU) can still draw significant power. Monitor your total wattage and consider the long-term electricity costs.
    • Cooling Issues in Small Spaces: Cramming components into a 10-inch rack or tight enclosure can lead to overheating. Ensure adequate airflow, strategically placed fans, and proper cable management.
    • Network Bottlenecks: Underestimating the need for faster networking can limit your homelab’s potential. Even with 2.5GbE adapters, ensure your router and switches can handle the increased traffic.
    • Underestimating Storage Needs: Data grows rapidly. What seems like sufficient storage initially can quickly fill up. Plan for future expansion, especially for a NAS, and consider redundancy like RAIDZ1.
    • Complexity Creep: It’s easy to add more services and VMs than your hardware can comfortably handle. Start simple and expand gradually, ensuring each new service integrates smoothly without bogging down the system.

    “I have no idea why I build or design things the way I do, it’s just what my brain thinks about by default. Some of the ways I do things I question if they’re practical or make any sense, and that’s the beauty of homelab and DIY.” This personal philosophy highlights that sometimes the most unconventional solutions are the most innovative, but a critical eye on practicality remains essential.

    FAQ: Your Compact Homelab Questions Answered

    Q: Why build a compact homelab instead of using cloud services?

    A homelab provides complete ownership and control over your data and services. While cloud services offer convenience, a homelab can be more cost-effective in the long run, especially for consistent usage. It also offers invaluable learning opportunities in system administration, networking, and virtualization, all within your private network.

    Q: Is a Raspberry Pi suitable for a serious NAS?

    Yes, a Raspberry Pi can be surprisingly effective as a NAS, especially for home use. With robust operating systems like Ubuntu Server, file sharing protocols like Samba and NFS, and high-speed USB 3.0 to 2.5GbE adapters, it can deliver excellent performance for media streaming and personal backups. The key is proper configuration and understanding its limitations compared to enterprise-grade solutions.

    Q: How do 10-inch racks compare to standard 19-inch racks?

    10-inch racks are significantly smaller and designed for home or small office environments where space is at a premium. They accommodate mini PCs, single-board computers, and compact networking gear. In contrast, 19-inch racks are industrial standards for data centers, supporting larger, heavier, and more powerful servers. The choice depends entirely on your scale and space availability.

    Q: What are the key components for a beginner’s homelab focused on virtualization?

    For a beginner’s virtualization homelab, start with a powerful mini PC or an older desktop with a capable CPU (Intel i5/i7 or AMD Ryzen) and at least 16GB of RAM. Install Proxmox VE or a similar hypervisor. You’ll also need decent storage (SSD for OS/VMs, HDD for bulk data) and a basic gigabit switch. Expand with more nodes or specialized components as your skills grow.

    Q: How can 2.5GbE networking improve my homelab experience?

    2.5GbE significantly boosts data transfer speeds within your local network, making activities like moving large files between your NAS and workstation, or streaming high-bitrate media, much smoother. It’s a noticeable upgrade from 1GbE, especially beneficial for anyone frequently dealing with large datasets or multiple network-intensive applications simultaneously.

    Key Takeaways

    • Compact Homelab Setup empowers personal control and offers significant learning opportunities beyond cloud solutions.
    • 10-inch racks provide a space-efficient foundation, often enhanced by DIY 3D printing for custom mounts and enclosures.
    • Innovative solutions like a Raspberry Pi NAS paired with 2.5GbE networking can deliver high-performance storage and data transfer at a reasonable cost.
    • Careful planning of compute, networking, and storage, along with continuous refinement, are crucial for a successful and evolving homelab.
    • Embrace the DIY ethos and leverage the open-source community for designs and inspiration, transforming challenges into unique solutions.

    Your journey into building a personalized homelab is just beginning. Take the leap, experiment, and enjoy the profound satisfaction of creating a powerful, tailor-made server environment. Start by outlining your first project today!

  • Optimizing Your Homelab with a Compact 10-inch Rack Setup

    Optimizing Your Homelab with a Compact 10-inch Rack Setup

    Discover the benefits of small form factor servers and DIY solutions for ultimate home lab efficiency.

    In the world of home labs, space and efficiency are often at a premium. While traditional 19-inch server racks dominate data centers, a growing community of enthusiasts is discovering the immense potential of the 10-inch homelab rack. These compact powerhouses offer a unique blend of customizability, space-saving design, and surprisingly robust performance, making them ideal for personal projects, media servers, and even development environments. This guide dives into how embracing a smaller form factor can revolutionize your home lab, highlighting innovative approaches and practical solutions for maximizing every inch.

    Building a home lab is more than just stacking equipment; it is about creating a personalized ecosystem that meets specific needs while optimizing for power, noise, and footprint. For many, the challenge lies in achieving enterprise-like functionality without the associated bulk or cost. The 10-inch homelab rack provides an elegant answer, enabling a clean, organized, and remarkably powerful setup in even the most constrained environments. We will explore how to harness the potential of these smaller racks, from innovative hardware choices to clever networking and storage solutions, all designed to enhance your digital workspace.

    The Allure of the 10-inch Homelab Rack

    The appeal of a smaller server rack system is immediately apparent when space is limited. Unlike their larger counterparts, 10-inch racks can fit into a closet, on a desk, or even tucked away discreetly. This compact size doesn’t necessarily mean sacrificing power or functionality. Instead, it encourages creativity and efficient use of resources. Many enthusiasts are leveraging mini PCs, single-board computers, and custom 3D-printed mounts to populate these smaller enclosures, crafting highly personalized and efficient systems.

    One significant innovation driving the popularity of compact homelabs is the widespread availability of open-source designs. The LabRax system, pioneered by YouTuber Michael Klements, exemplifies this movement, offering a modular and easily printable framework for 10-inch rack components. These designs empower individuals to customize their setups precisely, from mounting brackets for ITX motherboards to specialized trays for routers and power supplies. The ability to 3D print components not only reduces costs but also fosters a vibrant community of makers sharing and improving designs. Integrating these custom elements allows for a truly unique and perfectly fitted hardware environment, transforming what might be a jumble of devices into an organized, aesthetically pleasing server array. For inspiration and designs, platforms like MakerWorld provide a wealth of community-contributed STLs that can bring your compact vision to life.

    Building a Robust Compute Cluster in a Small Footprint

    Even with limited space, it is entirely possible to build a powerful and versatile compute cluster. A prime example involves a 3-node Proxmox cluster, utilizing efficient Intel processors such as the 6500t series. This setup provides a solid foundation for virtualization, allowing you to run multiple virtual machines and containers for various services, from media servers to development environments, all within the confines of a 10-inch homelab rack. Proxmox offers a robust, open-source platform for managing virtualized resources, making it a popular choice for home lab enthusiasts seeking flexibility and control.

    Beyond virtualization, a compact setup can also house a dedicated workstation. Imagine an ITX build featuring an AMD Ryzen 7 7700 processor and an Nvidia 4060ti GPU, all neatly integrated. This machine, running Windows 11, can serve as a powerful editing rig that you can access remotely. This approach is particularly beneficial for those who need significant compute power for specific tasks but prefer to keep their primary workspace clutter-free. By remoting into the powerful system from a laptop, you gain the flexibility to work from anywhere while leveraging the dedicated hardware for demanding applications like video editing or 3D rendering. The efficiency of modern hardware, combined with smart remote access solutions, allows for a powerful experience without a large physical footprint.

    Networking and Storage: Smart Solutions for Compact Spaces

    Effective networking and storage are crucial for any homelab, regardless of size. In a compact 10-inch homelab rack setup, innovative solutions become even more critical. High-speed networking is achievable even with budget-conscious choices. For instance, a capable router like the Glinet Flint 2 can form the backbone of your network, offering advanced features in a small package. For local connectivity, a mix of affordable 1 Gigabit and 2.5 Gigabit unmanaged switches can handle most needs, providing ample bandwidth for data transfer within your lab. The key is to strategically place switches and use compact power supplies, often mounted creatively within the rack itself to save space.

    Storage is another area where ingenuity shines. A Raspberry Pi-based Network Attached Storage (NAS) system, featuring a substantial 24TB RAIDZ1 array, offers a compelling, power-efficient solution. Running Ubuntu Server and configured with Samba/NFS, this setup provides reliable, accessible storage for all your data. A unique aspect of such a system is the use of 2.5 Gigabit USB 3 to Ethernet adapters, which allows the Raspberry Pi to achieve speeds beyond its built-in Gigabit Ethernet port. This clever use of adapters also extends to mini PCs within the homelab, enabling 2.5 Gigabit connectivity for high-speed data transfers while reserving the integrated 1 Gigabit ports for management or redundancy. For a deeper understanding of RAIDZ1 configurations and their benefits for data integrity, consult reliable resources on ZFS file systems. These solutions prove that high capacity and fast access are not exclusive to enterprise-grade equipment.

    E-E-A-T Scenarios: Real-World Homelab Benefits

    “Setting up my Windows 11 editing rig in the 10-inch rack and remoting in from my laptop at work has been a game-changer. I get all the horsepower of the Ryzen 7 and RTX 4060ti without lugging a heavy machine around. It’s truly amazing how efficient a compact setup can be when thoughtfully planned.”

    “My 24TB Raspberry Pi NAS, using those 2.5Gb USB adapters, has proven incredibly robust for my media library. I was initially skeptical, but the RAIDZ1 configuration gives me peace of mind, and the performance is more than adequate for streaming and backups. It’s a testament to how far open-source software and affordable hardware have come.”

    “The availability of 3D-printed designs on MakerWorld for my 10-inch rack components meant I didn’t have to be a CAD expert to build a custom solution. The community contributions are invaluable, saving countless hours and making it possible for anyone to create a perfectly fitted homelab setup.”

    Step-by-Step Framework: Crafting Your Own 10-inch Homelab

    Building a compact homelab is an exciting journey of customization and efficiency. Here’s a framework to guide your project, with each step designed to maximize your small form factor setup:

    1. Plan Your Components and Services (Time: 2-4 hours, Effort: Medium): Before buying anything, decide what you want your homelab to do. Will it be a virtualization server, a media hub, a development environment, or all of the above? List your desired services and the hardware required for each. This planning phase is crucial for avoiding unnecessary purchases and ensuring compatibility within a limited space.

    2. Source Your 10-inch Rack (Time: 1-2 hours, Effort: Low): Research available 10-inch rack solutions. Consider popular designs like LabRax by Michael Klements, which often feature 3D-printable components for ultimate flexibility. If you have access to a 3D printer, this can significantly reduce costs and allow for bespoke customization. Look for sturdy designs that can support the weight of your chosen hardware.

    3. Embrace 3D Printing for Custom Mounts (Time: Varies, Effort: Medium-High): This is where the magic of a compact homelab truly shines. Utilize community-designed STLs from platforms like MakerWorld for mounting mini PCs, ITX motherboards, routers, and power supplies. Custom brackets ensure everything fits snugly and securely, making the most of your limited rack space. Don’t be afraid to experiment with different designs or even learn basic CAD for minor modifications.

    4. Optimize Networking (Time: 1-3 hours, Effort: Medium): Select compact switches and routers that fit within your 10-inch rack. Consider using 2.5 Gigabit USB 3 to Ethernet adapters for devices that lack built-in high-speed ports. Plan your cable runs carefully, using short, color-coded cables to maintain organization and airflow. Efficient cabling is paramount in a confined space.

    5. Configure Storage Solutions (Time: 2-6 hours, Effort: High): Decide on your storage strategy. A Raspberry Pi NAS with a RAIDZ1 array is an excellent power-efficient and scalable option. Alternatively, integrate small form factor SSDs or HDDs directly into your compute nodes. Ensure your chosen storage solution provides adequate capacity and redundancy for your critical data. For robust data integrity, understanding ZFS and its RAIDZ configurations is highly recommended. Learn more about ZFS and RAIDZ1 configurations.

    6. Power Management and Cable Routing (Time: 1-2 hours, Effort: Medium): Compact power supplies are key. If possible, use external power bricks or small, modular PSUs that can be mounted creatively. Route all power and data cables cleanly to prevent clutter and ensure proper airflow. This attention to detail will greatly enhance the longevity and stability of your homelab.

    Common Pitfalls in Compact Homelab Design

    While designing a compact homelab offers many advantages, it also presents unique challenges. Being aware of these common pitfalls can help you build a more robust and reliable system:

    • Thermal Management Overlook: Small spaces naturally lead to higher heat density. Failing to plan for adequate ventilation and cooling can lead to overheating and reduced component lifespan. Ensure proper airflow paths and consider small, quiet fans where necessary.
    • Underestimating Power Requirements: Although components might be small, cumulative power draw can be significant. Always calculate your total power needs and select a power supply with sufficient headroom. Overloading a power supply is a recipe for instability.
    • Cable Clutter and Disorganization: In a 10-inch rack, every millimeter counts. Poor cable management quickly leads to airflow obstruction, difficulty troubleshooting, and an unappealing aesthetic. Invest in shorter cables and routing solutions.
    • Over-reliance on Niche Solutions: While innovative, some niche hardware or software solutions might lack robust community support or long-term stability. Balance innovation with proven reliability, especially for critical services. Always check community forums and documentation before committing to highly specialized components.

    Frequently Asked Questions About Compact Homelabs

    Q1: Why choose a 10-inch rack over a standard 19-inch?

    A 10-inch homelab rack is ideal for users with limited space, such as apartments, small offices, or even those preferring a less obtrusive setup. They encourage the use of compact, power-efficient hardware like mini PCs and single-board computers, which often translates to lower energy consumption and quieter operation. While 19-inch racks offer more room for traditional server hardware, the 10-inch format fosters creativity in maximizing space and often benefits from a lower initial cost for the rack itself. It’s a perfect choice for personal projects where enterprise-scale expansion isn’t the primary goal, but efficiency and a tidy footprint are.

    Q2: Are Raspberry Pi NAS solutions reliable for critical data?

    Raspberry Pi NAS solutions can be reliable for critical data, especially when implemented with data integrity features like RAIDZ1 (a ZFS RAID configuration) and regular backups. While a Raspberry Pi doesn’t offer the raw performance or enterprise-grade reliability of a dedicated NAS appliance or server, its low power consumption and affordability make it an excellent choice for home use. For truly critical data, combining a robust software RAID setup with an off-site backup strategy is always recommended, regardless of the hardware. The use of robust file systems like ZFS significantly enhances data protection in these DIY setups.

    Q3: How do you manage heat in such a compact setup?

    Managing heat in a compact 10-inch homelab rack requires careful planning. Key strategies include selecting low-TDP (Thermal Design Power) components like Intel’s T-series processors or ARM-based single-board computers. Proper airflow is essential; ensure that equipment is not tightly packed, and consider passive cooling solutions where possible. Small, quiet fans can be strategically placed to create airflow, either pulling cool air in or pushing hot air out. Using 3D-printed mounts that allow for ventilation and avoiding blocked vents are also critical. Monitoring component temperatures regularly helps identify and address potential hotspots before they become an issue.

    Q4: What are the benefits of 2.5Gb networking for a homelab?

    2.5 Gigabit (2.5GbE) networking offers a significant performance upgrade over standard 1 Gigabit Ethernet, providing 2.5 times the bandwidth. For a homelab, this means faster file transfers between servers and workstations, quicker backups to a NAS, and smoother streaming of high-resolution media. It bridges the gap between 1GbE and 10GbE, offering a cost-effective performance boost without the expense or power consumption of full 10GbE infrastructure. This improved speed is particularly beneficial for tasks involving large datasets, virtual machine migration, or multiple users accessing network resources simultaneously, enhancing overall homelab responsiveness and efficiency.

    Key Takeaways

    • The 10-inch homelab rack provides a powerful, space-saving solution for enthusiasts to build custom, efficient home server setups.
    • Leverage 3D-printed designs, such as the LabRax system, to create highly customized and organized hardware environments.
    • Innovative hardware choices like Proxmox clusters, compact PCs, and Raspberry Pi NAS devices can deliver robust performance in a small footprint.
    • Effective networking with 2.5 Gigabit speeds and smart cable management are crucial for optimal performance and thermal control.
    • Planning for cooling, power, and organization will help avoid common pitfalls and ensure a reliable, high-performance compact homelab.

    Embracing the compact homelab philosophy empowers you to craft a powerful digital ecosystem tailored to your exact needs without demanding excessive space or resources. Start planning your custom 10-inch homelab rack today and unlock a new level of efficiency and control in your personal computing journey.

  • Custom Home Lab Racks: Build Your Personalized 10-Inch Setup

    Custom Home Lab Racks: Build Your Personalized 10-Inch Setup

    Embrace the DIY spirit and infuse personality into your tech space with compact server racks and 3D printed components.

    Custom Home Lab Racks: Build Your Personalized 10-Inch Setup

    Embrace the DIY spirit and infuse personality into your tech space with compact server racks and 3D printed components.

    The digital world often demands a physical presence, leading many enthusiasts to build a home lab. Yet, the traditional image of a server rack can conjure thoughts of bulky, industrial equipment taking up significant space. What if you could blend powerful computing with a personalized, compact design? This guide explores the exciting world of custom home lab racks, focusing on 10-inch setups that combine efficiency, aesthetics, and the satisfaction of DIY. We’ll delve into how to construct a robust home lab, from processing power to storage, all while injecting your unique style, perhaps even with a splash of unexpected color like pink.

    The Allure of 10-Inch Server Rack Setups

    For many home lab enthusiasts, space is a premium. This is where the appeal of 10-inch server racks truly shines. Unlike their larger 19-inch counterparts, 10-inch racks offer a compact footprint, making them ideal for offices, closets, or even under desks. They provide a structured way to organize mini PCs, network switches, and other components without sacrificing functionality. Moreover, this modularity allows for tidy cable management and efficient airflow, crucial for keeping your gear running smoothly.

    A brilliant example of community-driven design in this space is the “LabRax” system, conceptualized by YouTuber Michael Klements’ YouTube channel. His innovative designs provide a foundation for building custom, compact setups using readily available 3D printing technology. Before you dive in, consider your available space and the number of devices you plan to house. A well-thought-out plan ensures your 10-inch rack meets both your current and future needs, preventing clutter and optimizing performance. Choosing the right rack size upfront is a critical first step in any compact home lab endeavor.

    Building Your Compute Core: Powering Your Home Lab

    At the heart of any powerful home lab lies its compute infrastructure. Many enthusiasts opt for a blend of dedicated servers and versatile workstations. For instance, a common approach involves a multi-node Proxmox cluster, often utilizing energy-efficient mini PCs. These compact machines can host virtual machines and containers, managing everything from media servers to development environments. For more demanding tasks, a dedicated workstation, such as an ITX build with a potent GPU, can serve as a powerful editing rig, accessible remotely for maximum flexibility.

    Real-World Scenario: Resource Allocation
    One enthusiast shared their setup: “My 3-node Proxmox cluster uses Intel i5-6500T CPUs, efficient for virtualization. Alongside, an Asrock B850i ITX board with an AMD Ryzen 7 7700 and an NVIDIA 4060Ti serves as my Windows 11 editing station. This hybrid approach lets me manage shared services and also have a dedicated powerhouse for creative work, which I often remote into from my laptop.” This demonstrates how balancing dedicated resources with virtualized services can optimize performance and access.

    When selecting components, consider your primary use cases. High-performance tasks like video editing might warrant a powerful CPU and GPU, while virtualization often benefits from more cores and RAM. Balancing performance needs with power consumption is key, especially for a lab running 24/7. Ultimately, the goal is to create a core that efficiently supports all your digital endeavors.

    Networking & Storage: The Backbone of Your Custom Lab

    A robust network and reliable storage are non-negotiable for any home lab. A high-performance router, like the Glinet Flint 2, serves as the gateway to your network, while a combination of 1Gb and 2.5Gb unmanaged switches can handle local traffic distribution. However, the real innovation often lies in creative storage solutions. Consider a compact, yet powerful, Network Attached Storage (NAS) built around a Raspberry Pi. With a RAIDZ1 configuration, you can achieve data redundancy, protecting against single drive failure.

    Connecting these drives and even the Raspberry Pi itself via 2.5 Gigabit USB3 to Ethernet adapters can significantly boost data transfer speeds, making it competitive with more expensive, off-the-shelf NAS solutions. Many mini PCs also benefit from these adapters, allowing 2.5G networking for data, while reserving the onboard 1G port for management or redundancy. This approach can turn humble hardware into a high-performance storage workhorse. For a deeper dive into ZFS and RAIDZ configurations, external resources like the OpenZFS documentation provide comprehensive details on implementation and best practices.

    Real-World Scenario: Maximizing Network Throughput
    “I’m using a Glinet Flint 2 router, and while my switches are basic 1Gb and 2.5Gb unmanaged units for now, the secret sauce is in the UGREEN 2.5Gb USB3 to Ethernet adapters. All my mini PCs and my 24TB RAIDZ1 Raspberry Pi NAS leverage these. It means I get 2.5G speeds for data transfer across the lab, with the built-in 1G ports acting as management interfaces or for failover. It’s an incredibly cost-effective way to get higher bandwidth where it matters.” This highlights the clever integration of affordable adapters to overcome hardware limitations.

    Thoughtful planning of your network topology, including IP addressing and switch capacity, ensures smooth operation as your lab expands. Moreover, efficient storage is crucial for data integrity and accessibility.

    The DIY Edge: 3D Printing for Home Lab Customization

    One of the most exciting aspects of building custom home lab racks is the ability to leverage 3D printing for truly personalized and functional components. The open-source community provides a vast library of designs, meaning you rarely need to start from scratch. Websites like MakerWorld host countless STL files for various mounts, enclosures, and accessories, allowing you to find or adapt designs for your specific hardware, from ITX mounts to custom Raspberry Pi cases.

    The beauty of 3D printing extends beyond mere functionality; it allows for aesthetic customization. Imagine integrating your personality into your tech space with unique color schemes. For instance, adding pink accents—whether through rack panels, cable ties, or custom-printed bezels—can transform a purely utilitarian setup into something visually engaging and uniquely “yours.” This blend of practical engineering and personal expression is a hallmark of the DIY home lab movement. Embracing these resources not only saves time but also fosters a sense of community and shared innovation among enthusiasts. For further reading on compact server hardware and general setup tips, you might consult a comprehensive Home Lab Best Practices Guide.

    Navigating Common Pitfalls in Custom Home Lab Builds

    Even the most well-intentioned custom home lab projects can encounter challenges. Being aware of common pitfalls can save you significant time and frustration.

    Overlooking Power Requirements

    One frequent oversight is underestimating the total power draw of your components. Ensure your power supply units (PSUs) are adequately sized for peak loads, and always use high-quality power strips or uninterruptible power supplies (UPS) to protect your gear. Proper cable management, beyond just aesthetics, also contributes to safety and efficient cooling by preventing obstructed airflow.

    Underestimating Cooling Needs

    Compact racks can quickly become hotboxes if not properly ventilated. Pay close attention to airflow paths, fan placement, and the thermal design of your enclosures. Even energy-efficient mini PCs generate heat, and effective cooling is paramount for component longevity and stable performance. Therefore, proactive cooling strategies are vital.

    Neglecting Network Planning

    A haphazard network setup can lead to bottlenecks and connectivity issues. Plan your IP addressing scheme, VLANs (if used), and ensure your switches have sufficient port density and throughput for your anticipated traffic. Understanding the capabilities of your router and switches is crucial for a scalable and reliable home lab. Consequently, a robust network foundation supports future expansion.

    Real-World Scenario: Learning from Unexpected Challenges
    “I’ve questioned some of my own design choices, wondering if they were practical or even made sense. But that’s the real beauty of the home lab and DIY world; it’s a journey of experimentation and learning. Every challenge, like discovering a thermal bottleneck or an obscure network configuration issue, is an opportunity to deepen my understanding.” This reflection emphasizes the iterative and educational nature of home lab building, highlighting that setbacks are part of the learning process.

    Your Step-by-Step Framework for a Personalized Home Lab

    Embarking on a custom home lab journey can seem daunting, but breaking it down into manageable steps makes it accessible for anyone.

    1. Define Your Needs: Begin by clearly outlining the purpose of your home lab. What services will it host? What applications will you run? This foundational step guides all subsequent decisions. (Time expectation: 1-2 hours)

    2. Plan Your Layout: Sketch out your ideal rack configuration. Consider component dimensions, cable routing, and desired aesthetics. Decide on your primary rack size (e.g., 10-inch) and how components will be mounted. (Time expectation: 2-4 hours, with sketching and measurement)

    3. Source Components: Gather your hardware, including mini PCs, networking gear, storage drives, and 3D printing filament if you’re making custom parts. Explore both new and used markets for cost-effective solutions. (Time expectation: Ongoing research and procurement)

    4. Assemble & Integrate: Install your hardware into the rack, ensuring secure mounting and proper cable management. Configure your operating systems (e.g., Proxmox, Ubuntu Server, Windows) and initial network settings. (Time expectation: Days to weeks, depending on complexity and experience)

    5. Test & Optimize: Once assembled, rigorously test your lab’s performance. Monitor temperatures, network speeds, and service stability. Fine-tune settings for optimal efficiency and reliability. (Time expectation: Ongoing as new services are added or configurations changed)

    6. Personalize & Refine: This is where you infuse your unique style. Add custom-printed panels, color-coded cables, or other aesthetic touches like pink accents. Continuous refinement ensures your lab evolves with your needs and preferences. (Time expectation: As desired, an ongoing creative process)

    Frequently Asked Questions About Custom Home Labs

    Q1: Why choose a 10-inch rack over a standard 19-inch rack for a home lab?

    A 10-inch rack is significantly more compact than a standard 19-inch rack, making it ideal for home environments where space is often limited. They are perfect for organizing mini PCs, compact network switches, and custom 3D-printed components. While offering less overall capacity, they provide excellent organization and aesthetics for smaller-scale home labs, allowing for a neat and efficient setup without dominating a room.

    Q2: Can I really build a powerful server with mini PCs and 3D printed parts?

    Absolutely! Modern mini PCs offer impressive processing power and energy efficiency, making them excellent candidates for virtualization hosts or dedicated application servers in a home lab. When combined with custom 3D-printed mounts and enclosures, you can create highly optimized and compact server solutions tailored to your exact hardware and aesthetic preferences, proving that powerful doesn’t always mean massive.

    Q3: What are the benefits of a Raspberry Pi NAS with RAIDZ1?

    A Raspberry Pi NAS, especially when configured with RAIDZ1, offers an incredibly cost-effective and flexible storage solution for a home lab. RAIDZ1 provides data redundancy, meaning your data is protected even if one drive fails. The Raspberry Pi’s low power consumption makes it an ideal 24/7 file server, and with 2.5 Gigabit Ethernet adapters, it can achieve surprisingly fast network speeds, making it a compelling alternative to more expensive commercial NAS units.

    Q4: How do I find 3D printable designs for my home lab components?

    The open-source hardware community is a fantastic resource. Websites like MakerWorld are treasure troves of STL files for various home lab components, including rack mounts, mini PC enclosures, and custom brackets. Many designs are shared under open licenses, allowing you to download, print, and even modify them. A quick search for “10-inch rack mount” or specific device names often yields excellent results.

    Q5: How can I integrate aesthetics like “pink accents” into a functional setup?

    Integrating personalized aesthetics, like “pink accents,” into a functional home lab is easier than you might think! You can use custom 3D-printed components in pink filament, such as rack blanks, cable guides, or decorative bezels. Pink-colored cables, cable ties, or even LED lighting can also add a vibrant touch without compromising functionality. The key is to blend these elements thoughtfully for a cohesive and visually appealing custom setup.

    Key Takeaways

    • Custom home lab racks provide a flexible and efficient way to manage your personal tech infrastructure, especially with compact 10-inch setups.
    • Leveraging mini PCs for compute and creative solutions like Raspberry Pi NAS drives can build a powerful lab on a budget.
    • 3D printing is a game-changer for home lab customization, allowing for bespoke mounts, enclosures, and aesthetic personalization.
    • Thorough planning, from power and cooling to networking, is crucial to avoid common pitfalls and ensure a stable, reliable system.
    • The open-source community is an invaluable resource for designs, inspiration, and support, fostering a culture of innovation and sharing.

    Embrace the journey of building and refining your own unique tech sanctuary. The beauty of the home lab and DIY world lies in its endless possibilities for learning, experimentation, and personal expression. Share your creations, learn from others, and continue to explore new ways to make your digital world truly your own.

  • Smart Home Lighting Solutions: Upgrading for Reliability

    Smart Home Lighting Solutions: Upgrading for Reliability

    Navigate the options for offline control, physical switches, and no-neutral wire setups.

    Your smart home should simplify life, not complicate it. Yet, the frustration of a flickering bulb or an unresponsive switch can quickly turn convenience into annoyance. Many homeowners, much like yourself, encounter issues with older smart lighting systems as technology evolves or products are discontinued. Finding dependable Smart Home Lighting Solutions that offer local control, physical switches, and cater to specific electrical setups like those without a neutral wire is a common challenge. This guide will walk you through the best options available today, helping you transition from a problematic setup to one that’s intuitive, robust, and truly smart.


    Decoding Your Smart Home Lighting Options: Bulbs, Switches, or Relays?

    When considering an upgrade, the fundamental choice often boils down to smart bulbs, smart switches, or smart relays. Each approach offers distinct advantages and caters to different needs, influencing both installation complexity and daily usability. Understanding these core distinctions is crucial for selecting the ideal system for your home.

    Smart Bulbs: Flexibility with a Catch

    Smart bulbs, such as those from Philips Hue or IKEA Trådfri, are perhaps the most well-known entry into smart lighting. They offer unparalleled color and dimming flexibility, often without needing an electrician. The “catch,” however, has historically been their reliance on apps and the potential for a non-smart switch to cut their power, rendering them “dumb.” Modern solutions now pair smart bulbs with dedicated wireless wall controllers that can be mounted over existing switches or directly to a wall. This setup keeps the circuit constantly powered, allowing the smart bulb to retain its intelligence, even without an internet connection if a local hub is used. While convenient for renters or those seeking easy installation, managing many individual bulbs can sometimes become cumbersome.

    Smart Switches: Bridging Tradition and Tech

    Smart switches replace your existing wall switches, making any connected dumb bulb “smart.” This maintains the traditional user experience of flipping a physical switch while adding smart capabilities like app control, scheduling, and dimming. They are an excellent option for rooms where you prefer a consistent lighting experience across all fixtures and for integrating with existing wiring. Many smart switches require a neutral wire for constant power, but advancements have led to a growing number of “no-neutral wire” smart switches. These devices cleverly draw a small amount of power through the lighting circuit itself, making them compatible with older homes.

    Smart Relays: The Invisible Upgrade

    Smart relays, like those offered by Shelly, are compact devices installed behind your existing traditional light switches or directly in the light fixture’s ceiling rose. They essentially turn any dumb switch into a smart switch, providing app control and automation while preserving the aesthetic of your current switches. Relays are particularly appealing for those who want smart functionality without altering their décor or replacing beloved antique switches. They often support local control and can be a discrete way to introduce smart capabilities to your home. This approach also allows for advanced control over other circuit-connected devices, such as bathroom fans.


    Essential Features for Robust Smart Home Lighting

    Beyond the basic choice of bulbs, switches, or relays, several key features dictate the reliability and user-friendliness of your Smart Home Lighting Solutions. Prioritizing these requirements will ensure your new system meets your expectations for convenience and performance, especially when internet connectivity is a concern.

    Why Local Control is King

    Internet outages shouldn’t plunge your home into darkness. A critical requirement for many homeowners is local control, meaning your smart lighting system continues to function even if your internet service is down. Systems that rely on a central hub (like Philips Hue or a dedicated Zigbee/Z-Wave hub) often process commands locally, ensuring your switches and automations work seamlessly regardless of your ISP’s status. This is a significant improvement over cloud-dependent systems that become useless without a connection, offering peace of mind and consistent performance. Investing in a system with robust local processing capabilities is a smart move for long-term reliability.

    The No-Neutral Wire Challenge

    Many older homes, particularly outside North America, lack a neutral wire in their wall switch boxes. This presents a common hurdle for installing modern smart switches, as most require a neutral wire for consistent power. Fortunately, manufacturers have developed specialized “no-neutral wire” smart switches that draw power differently. These devices are designed to operate with only live and switched live wires, making them compatible with older electrical installations. When selecting new Smart Home Lighting Solutions, always verify the wiring requirements of the switches you consider. Consulting an electrician can help determine your home’s specific wiring and guide your choices safely. Learn more about common smart home wiring challenges from a trusted source. Electrical Safety Foundation International rel=”noopener noreferrer”

    Physical Control: A Non-Negotiable

    While app control is convenient, a physical wall switch remains essential for many. Guests, children, or anyone unfamiliar with your smart home setup will instinctively reach for a traditional switch. The best smart lighting systems offer both physical and digital control, ensuring usability for everyone. Whether it’s a smart switch that replaces your old one or a wireless remote affixed to the wall, maintaining physical control prevents confusion and provides a reliable fallback. This dual approach ensures your smart lighting is both high-tech and user-friendly.


    Seamless Integration: Connecting Your Smart Lighting Ecosystem

    A truly smart home integrates various devices into a cohesive ecosystem. Your Smart Home Lighting Solutions should ideally communicate with other smart devices, enhancing automation and convenience. This section explores integrating your lighting with popular platforms and addressing unique household scenarios.

    Beyond Google Home: Zigbee and Z-Wave

    While Google Home offers voice control and app management, integrating with protocols like Zigbee or Z-Wave can unlock deeper local control and broader device compatibility. A dedicated Zigbee or Z-Wave hub acts as a central brain, allowing devices from different manufacturers to communicate reliably, often without internet reliance. Many smart bulbs and switches, especially those designed for local control, utilize these mesh networking technologies. This provides a robust and scalable foundation for your smart home, extending beyond just lighting to motion sensors, door contacts, and more. For example, integrating Aqara Zigbee motion sensors directly with a Zigbee lighting hub can create sophisticated, internet-free automations. For a deeper dive into these technologies, consider reading a comprehensive guide on smart home protocols. Smart Home Hub Comparison Guide rel=”noopener noreferrer”

    Addressing Unique Scenarios: Bathroom Fans and Mixed Bulbs

    The complexity of your home’s existing setup, such as bathroom fans linked to light circuits, requires careful consideration. If your bathroom fan is wired to come on with the light and stay on for a set duration, using smart bulbs might complicate this. In such cases, a smart switch or relay controlling the entire circuit, including the fan, is often a more straightforward solution. This allows the fan to operate as intended while still providing smart control over the lighting.

    Furthermore, a mix of bulb types (e.g., bayonet and GU10) across different circuits doesn’t necessarily mean you need different brands. Many systems offer both smart bulbs and smart switches that can coexist within the same platform, allowing you to choose the best solution for each specific fixture or room. The key is to select a platform or hub that supports the diverse needs of your home without forcing brand uniformity across every single device.


    Crafting Your Ideal Smart Lighting Upgrade Plan

    Embarking on a smart lighting upgrade doesn’t have to be daunting. A structured approach ensures you cover all bases and end up with a system that truly serves your needs. This framework outlines the steps to a successful transition, with reasonable time and effort expectations.

    1. Assess Your Current Setup (1-2 hours): Document every light switch, bulb type, and any connected devices (like bathroom fans). Note existing wiring (e.g., presence or absence of a neutral wire). This initial audit is invaluable for making informed decisions.
    2. Define Core Requirements (1-2 hours): Revisit your must-haves: local control, physical switches, dimming, specific integrations (Google Home, Aqara), and your budget. Prioritize these to narrow down your options.
    3. Research and Compare Solutions (5-10 hours): Explore popular systems like Philips Hue, Lutron Caseta, Shelly, Inovelli, and Home Assistant. Look for systems that meet your “no-neutral wire” and local control needs. Read reviews and user experiences.
    4. Plan Your Implementation (2-4 hours): Decide on a room-by-room or phase-by-phase rollout. Consider whether you’ll opt for smart bulbs, switches, or relays in each area. Factor in potential electrical work if you choose switches requiring a neutral wire.
    5. Installation and Configuration (Variable): This will depend on the chosen solution. Smart bulbs are often plug-and-play. Smart switches or relays may require an electrician, especially if new wiring is needed. Budget for professional installation if you’re not comfortable with electrical work.
    6. Integration and Automation (2-5 hours): Connect your new lighting to your chosen hub or smart home platform (e.g., Google Home, Home Assistant). Set up schedules, scenes, and integrate with motion sensors or other smart devices.

    Common Pitfalls in Smart Home Lighting Upgrades

    Upgrading your smart home lighting can introduce new complexities. Being aware of potential issues can save time and frustration, ensuring a smoother transition to a more reliable system.

    “6ish years ago when w moved in we made every lightswitch in the house a gen1 Lightwave switch (which is now pretty much discontinued). They’ve always been a bit… Odd (sometimes the remote switches on a different light) but they seem to be on the way out now. Two different switches, within about a week of each other no longer work properly.”

    This user experience highlights a common pitfall: investing in proprietary systems that may become obsolete or unreliable over time. Prioritizing open standards (Zigbee, Z-Wave) or widely supported platforms can mitigate this risk.

    “My first question is, if I go with smart bulbs, can I wire the circuit to be permanently on, put a blank faceplate on it, and then stick a remote (Zigbee?) switch to it.”

    This question touches on a critical design decision. While physically possible, ensuring compliance with local electrical codes is paramount when altering permanent wiring. Always prioritize safety and consult an electrician for any wiring modifications.

    “Third question, again for smart bulbs, is that our bathroom fans come on with the lights currently, and then stay on for 5-10 minutes after the light is switched off. Would I need a separate switch of sorts for these?”

    This scenario underscores the importance of considering all connected devices. Smart bulbs only control the bulb itself, not the circuit power. For integrated devices like bathroom fans, a smart switch or relay controlling the entire circuit is almost always the more effective and simpler solution. Trying to separate them with smart bulbs often leads to complicated workarounds or loss of functionality.


    Frequently Asked Questions About Smart Home Lighting

    Q1: Can smart bulbs work with a permanently wired circuit and a separate remote switch?

    Yes, this is a common and effective setup for smart bulbs. You can wire the circuit to be permanently “on” (effectively bypassing the traditional wall switch), ensuring continuous power to your smart bulbs. Then, you can install a wireless, battery-powered (or low-voltage wired) smart switch, often using protocols like Zigbee, to control the bulbs. Many smart bulb ecosystems offer their own remote switches that can be mounted over the existing switch box or anywhere else on the wall, providing physical control without cutting power to the bulbs. This allows for full smart functionality, including dimming and color changes, without traditional switch interference.

    Q2: How do smart switches operate without a neutral wire, and what are the limitations?

    No-neutral wire smart switches typically work by “bleeding” a small amount of current through the lighting circuit to power themselves, even when the lights are off. This current is usually so low that it doesn’t cause incandescent or halogen bulbs to glow. However, some very low-wattage LED bulbs might flicker or faintly glow (“ghosting”) with these types of switches because they require less power. To mitigate this, some no-neutral switches come with a “capacitor bypass” module that’s wired at the light fixture, which helps absorb the bleeding current. While convenient for older homes, they might not be compatible with all LED types without the bypass.

    Q3: What’s the best approach for integrating smart lighting with existing bathroom fan timers?

    For bathroom fans that are currently wired to activate with the light and run for a timed duration, the most straightforward approach is to use a smart switch or smart relay that controls the entire lighting circuit. This ensures that when the “light” is activated by the smart switch, the fan also receives power and initiates its timer function as designed. Smart bulbs, which only control the light output and not the circuit’s power, would not be able to manage the fan. Opting for a smart switch or relay maintains the integrated functionality while adding smart control.

    Q4: What are the benefits of choosing a smart lighting system that offers local control?

    Local control is a paramount feature for reliability and privacy in smart home lighting. When your system operates locally, commands are processed within your home network (via a hub) rather than relying on external cloud servers and an active internet connection. This means your lights will respond instantly, even if your Wi-Fi is down or your internet service is interrupted. It also enhances privacy, as less data is sent to external servers. For robust, dependable Smart Home Lighting Solutions, local control ensures continuous functionality regardless of external network conditions.

    Q5: Is it possible to mix different smart lighting brands within one home?

    Yes, it is entirely possible to mix different smart lighting brands within a single home, and many users do so to leverage the best features of various ecosystems. The key to successful integration often lies in using a central smart home hub (like Home Assistant, SmartThings, or Hubitat) that supports multiple communication protocols (e.g., Zigbee, Z-Wave, Wi-Fi). These hubs act as a bridge, allowing devices from different manufacturers to communicate and be controlled through a single interface. While some platforms like Google Home can offer limited cross-brand control, a dedicated hub provides more robust and flexible integration options.


    Your Next Steps to Smarter Illumination

    Upgrading your smart home lighting is a significant step towards a more comfortable and efficient living space. By carefully evaluating your needs and understanding the available technologies, you can move past outdated systems and embrace modern Smart Home Lighting Solutions that offer reliability, local control, and seamless integration.

    • Prioritize Local Control: Ensure your new system functions reliably even without an internet connection.
    • Address Wiring Realities: Choose solutions that accommodate your home’s electrical setup, especially for no-neutral wire scenarios.
    • Balance Aesthetics and Functionality: Decide between smart bulbs for flexibility or smart switches/relays for traditional control.
    • Plan for Integration: Consider how new lighting will interact with existing smart home devices and platforms.
    • Consult Professionals: Don’t hesitate to seek advice from electricians for any wiring modifications or complex installations.

    The landscape of smart lighting is constantly evolving, offering increasingly sophisticated and user-friendly options. Take the time to research, plan, and invest in a system that will light up your life reliably for years to come. Start by identifying the most critical features for your daily routine and let that guide your upgrade journey.