Author: homenode

  • Your House’s Most Useless Space Is Its Best Kept Secret

    Your House’s Most Useless Space Is Its Best Kept Secret

    Discover how to turn an awkward, unused nook in your house into a functional and discreet closet server. A guide to finding the perfect spot for your DIY tech.

    Every house has one. You know what I’m talking about. That weird, useless space.

    Maybe it’s a shallow closet that can’t even fit a proper hanger. Maybe it’s that high-up ledge in the hallway you can’t reach without a ladder. For me, it was a strange, boxy alcove above my coat closet, a relic of some long-forgotten architectural choice. For years, I just ignored it. It was a dust collector. A nothing-space.

    Until one day, I was looking at it and a thought just popped into my head: What if I put something important there?

    It turns out, these forgotten corners are often the perfect place for a small home server.

    Wait, Why Would I Even Want a Home Server?

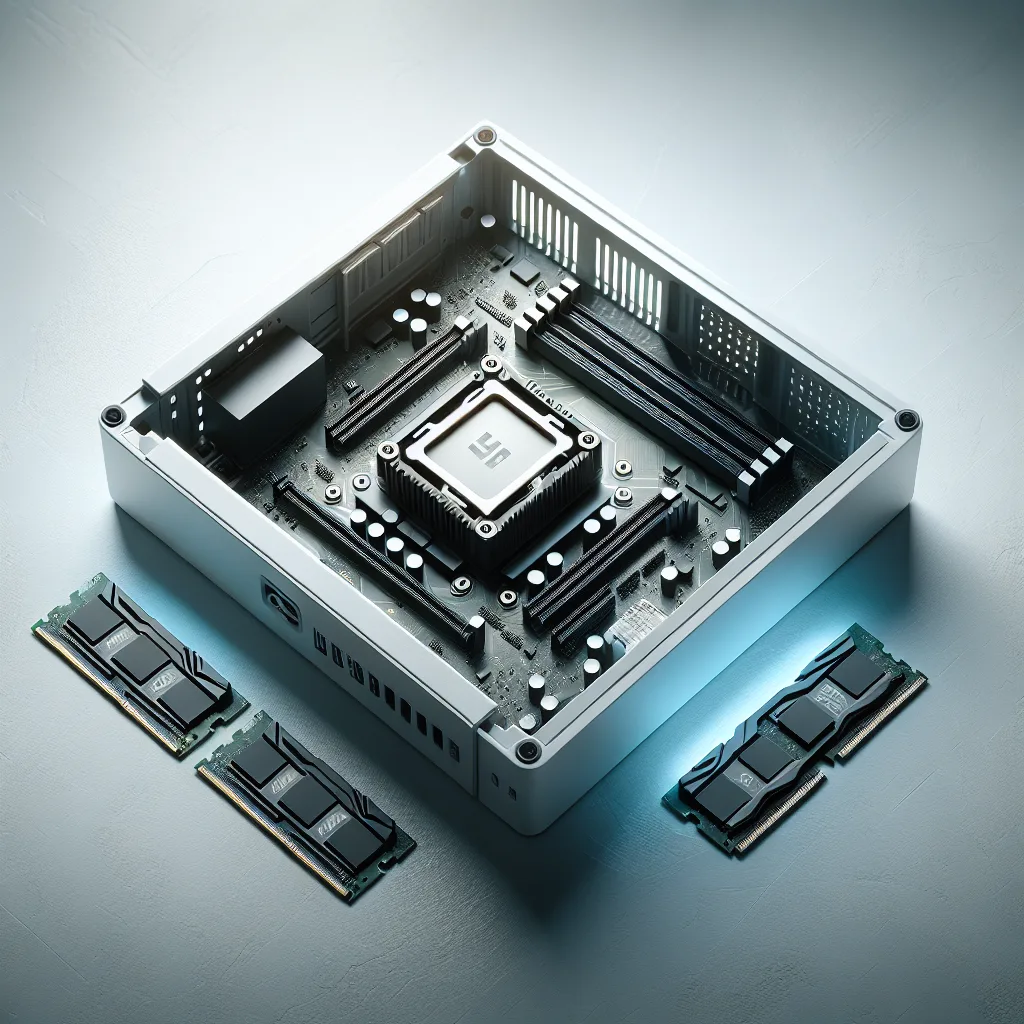
    I get it. The word “server” sounds intimidating. It conjures up images of giant, humming machines in a cold, dark room. But it doesn’t have to be like that. A home server can be as simple as a single, tiny computer.

    Think of it as the brain for your home. It’s a central hub for all your digital stuff. And once you have one, you’ll wonder how you lived without it.

    Here are a few things it can do, without getting too technical:

    • Your Personal Netflix: You can store all your movies and TV shows and stream them to any device in your house. No more relying on streaming services to keep your favorite film in their library.
    • A Private Cloud: Instead of paying for Dropbox or Google Drive, you can create your own. It’s perfect for backing up your family photos, important documents, and computer files automatically.
    • A Smarter Smart Home: If you have smart lights, plugs, or sensors, a server can tie them all together. This gives you more control and privacy than relying on big tech companies.
    • A Sandbox for Learning: Maybe you just want to tinker. A home server is an amazing place to learn about networking, coding, or just how computers really work.

    The best part is that you can tuck it away somewhere completely out of sight. And that brings me back to that awkward little nook.

    Finding Your Server’s New Home

    The idea really clicked when I saw how someone online had used a similar space. They took a spot most people would ignore and planned to put a small server rack in it. It was brilliant.

    Suddenly, I started seeing potential everywhere. That forgotten space isn’t useless; it’s an opportunity. It’s discreet, it’s out of the way, and it turns dead space into a functional part of your home.

    So, take a walk around your house. I bet you have a spot just like it.

    Look for:
    * The top shelf of a closet
    * The space under the stairs
    * A strangely deep kitchen cabinet
    * An unused corner in the basement or garage

    You’re looking for a place that’s out of the main flow of traffic. A spot that nobody would miss.

    A Few Things to Think About First

    Before you start running cables, there are a few practical things to consider. Putting a computer in a tiny, enclosed space requires a little planning.

    1. Airflow is Key
    Servers, even small ones, generate heat. You can’t just toss a computer in a sealed box and expect it to be happy. You’ll need some way for cool air to get in and warm air to get out. This could be as simple as drilling some vent holes or installing a tiny, quiet USB fan you can buy for a few dollars.

    2. You’ll Need Power
    This one’s obvious, but you need a power outlet nearby. If there isn’t one, you might need to think about running an extension cord or hiring an electrician for a cleaner installation.

    3. What About Noise?
    Some hardware can be noisy. While many modern, small devices are nearly silent, it’s still a good idea to choose a location where a little bit of fan hum won’t bother anyone, especially at night. A hallway closet is usually better than your bedroom closet.

    4. Can You Reach It?
    You won’t need to access it every day, but you will need to get to it for setup and occasional maintenance. Make sure the spot isn’t so clever that you can’t physically reach it when you need to.

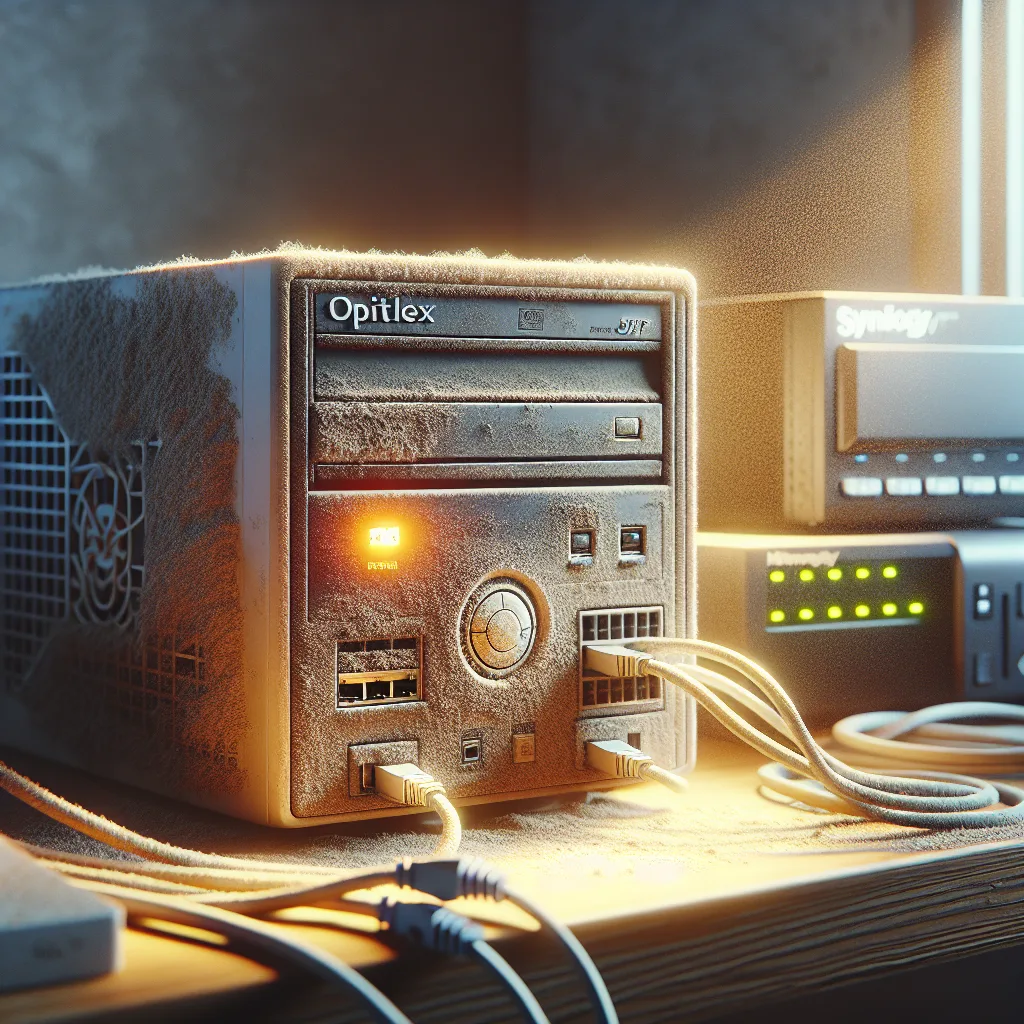
    The solution to keeping it all neat is often a small, wall-mounted rack. These are just simple metal frames that let you organize your gear vertically. It keeps things tidy, helps with airflow, and makes your little project look surprisingly professional.

    So next time you walk past that odd, forgotten corner of your home, give it a second look. It might not be useless space after all. It might just be the perfect home for your next project.

  • Do You Really Need a VPN for Your Home Server?

    Do You Really Need a VPN for Your Home Server?

    Are VPNs and complex firewalls always necessary for home servers? Exploring a balanced, practical approach to network security without the paranoia.

    I was scrolling through some online forums the other day, and a question caught my eye. A software engineer with decades of experience basically asked: are we all getting a little too paranoid about home network security?

    It’s a good question.

    Spend enough time in homelab or self-hosting communities, and you’ll see a constant stream of advice telling you to lock everything down. Hide your IP address behind Cloudflare. Only access your services through a VPN or Tailscale. Set up fail2ban with rules so strict a fly couldn’t get in.

    The general vibe is that if you expose a service directly to the internet, you’re just one zero-day vulnerability away from total disaster. But is that really the whole story?

    The “Fort Knox” Approach to Home Security

    First, let’s talk about why this advice exists. The core idea is that your home network is a much softer target than a professionally managed server in a data center. The logic goes something like this:

    • You’re the IT department: Unlike a business, you don’t have a dedicated security team. You’re the one responsible for every update, every patch, and every firewall rule.
    • Accidents happen: It’s easy to accidentally expose a sensitive dashboard or an old, unpatched service without realizing it. We’ve all done it.
    • Automated attacks are relentless: The moment you open a port, automated bots from all over the world start knocking. They’re not targeting you specifically; they’re just scanning for any known vulnerability.

    So, the common wisdom is to create a layered defense. A VPN, for example, acts like a secure, private tunnel into your network. No one on the outside can even see your services unless they’re on the VPN. It reduces your “attack surface,” as the security pros say.

    It makes a lot of sense. It’s the safest route. But is it the only route?

    A Different Perspective: Is It Overkill?

    The engineer who asked the original question had a great point. He’s been deploying services online for his entire career and has rarely run into major security issues. He wondered why we treat our home servers with so much more paranoia than a public-facing web server.

    His plan was simple: expose the standard web ports (80 for HTTP and 443 for HTTPS) and put them behind a solid reverse proxy like Caddy, which handles all the security certificates automatically. Then, use an authentication layer like Authentik to make sure only authorized users can access the services.

    So, why should he bother with a VPN?

    This is where the conversation gets interesting. For someone who understands the tech, this setup is actually pretty robust.

    • A good reverse proxy is a strong front door. Tools like Caddy, Nginx, or Traefik are built to handle the wild west of the internet. They are hardened and constantly updated.
    • Authentication is key. If every service requires a secure login before you can even see it, you’ve already blocked 99% of automated threats.
    • It’s just more convenient. Let’s be honest. Connecting to a VPN every time you want to check a service on your phone is a hassle. Sometimes you just want a simple, secure URL that works.

    The argument here is that if you have a well-configured, minimal setup, the risk is manageable. You aren’t exposing insecure protocols or forgotten, vulnerable applications. You’re just exposing a single, hardened entry point that then routes traffic internally.

    So, What’s the Right Answer?

    I think the reason for the conflicting advice comes down to two things: experience and risk.

    Is it possible that much of the hyper-cautious security advice is aimed at beginners? Absolutely. When you’re just starting out, it’s easy to misconfigure something or not fully grasp the risks. Recommending a VPN-only setup is a safe, one-size-fits-all solution that prevents a lot of common mistakes.

    But if you know what you’re doing—if you understand how to properly configure a reverse proxy, keep your software updated, and manage user authentication—then exposing a couple of ports directly isn’t necessarily reckless. It’s a calculated risk.

    You’re trading a little bit of theoretical security for a lot of practical convenience.

    For me, it’s about finding a balance. I use a VPN for sensitive things like my router’s admin page or my file server. But for less critical services that I want to access easily, I’m comfortable putting them behind a reverse proxy with strong authentication.

    The fear of being hacked is real, but maybe we don’t need to build a fortress when a solid, locked door will do. What matters is that you understand the lock.

  • My Mini PCs Needed a Home, But I Had No Space

    My Mini PCs Needed a Home, But I Had No Space

    Struggling to find a compact enclosure for your mini PC cluster? Explore clever, space-saving solutions beyond server racks and 3D printing for your homelab.

    So, you did it. You finally pulled the trigger on a few of those sleek, powerful mini PCs. Maybe you got a great deal, or maybe you, like me, just had that itch to build something new and dive deeper into the homelab world. You’ve got these little boxes of potential—a Proxmox cluster in the making—ready to replace your old, noisy desktop tower.

    It feels great, right? The hardware is sitting there, gleaming on your desk. But then comes the question that stops the project in its tracks: Where do you actually put them?

    This was exactly where I found myself recently. I had three shiny new Minisforum PCs, but my “office” is a converted pantry. Space is a luxury I don’t have. I needed a way to stack or organize them that wasn’t a giant, space-hogging server rack. And I don’t own a 3D printer, so printing a custom mount was out.

    I figured finding a simple case or stand would be easy. I was wrong. The search for the perfect, compact, non-rack enclosure for a mini PC cluster is surprisingly tough.

    The Problem: Finding a Home for Your Homelab

    Most of the solutions out there seem to fall into two camps: massive rackmounts or custom 3D-printed brackets.

    Rackmounts are fantastic if you have a dedicated server closet or a basement with plenty of room. But for those of us working out of a small corner, a 10-inch rack, let alone a full-sized one, just isn’t practical. It’s overkill and eats up precious desk or shelf space.

    The 3D printing community has come up with some brilliant designs, and if you have a printer, you’re golden. But for the rest of us, it feels like being left out of a club. You can see the perfect solution on Thingiverse, but you have no way to make it.

    So, what’s the alternative? How do you create a clean, organized, and space-efficient mini PC cluster without a rack or a 3D printer?

    Thinking Outside the (Server) Box

    After a lot of digging, I realized I needed to get creative. The perfect off-the-shelf product might not exist, but there are plenty of clever workarounds and niche vendors who can help.

    Here’s what I found.

    1. Vertical Stands and Desk Organizers

    This is the simplest and often cheapest solution. Instead of laying the mini PCs flat and stacking them (which can be bad for airflow), stand them on their sides.

    • Laptop Stands: A simple vertical laptop stand can often hold two or even three mini PCs snugly. Look for the adjustable kind that lets you set the width of the slots. It keeps them upright, separated for good airflow, and minimizes their footprint.
    • Metal File Sorters: Hear me out. A sturdy, metal mesh file sorter or letter organizer from an office supply store can work wonders. They are designed to hold heavy files, have built-in dividers, and offer fantastic ventilation. They’re cheap, easy to find, and surprisingly effective. I saw one person using a bamboo dish rack—it looked great and did the job perfectly.

    The key is to measure your mini PCs and check the dimensions of the organizer. As long as it’s stable and allows air to move, you’re good to go.

    2. Specialized Etsy and Small Vendor Mounts

    While mainstream sites might let you down, there’s a whole world of small businesses and individual makers who cater specifically to the homelab crowd. Etsy is a goldmine for this stuff.

    Many sellers on Etsy offer 3D printing services. You can find a design you like on a site like Thingiverse, and have an Etsy seller print and ship it to you. This gives you the customization of 3D printing without needing to own the hardware.

    There are also vendors who have designed their own mounting systems. I’ve seen small, laser-cut acrylic stands and metal brackets designed specifically for popular mini PC models from brands like Minisforum, Beelink, and Intel NUC. These are often made by fellow enthusiasts who ran into the same problem you are. A quick search for “[Your Mini PC Model] stand” or “NUC cluster mount” on Etsy or Tindie might just reveal the perfect product.

    3. The DIY (No 3D Printer) Approach

    If you’re even slightly handy, you can build something custom without any complex tools.

    • Wood or Acrylic: A small plank of wood and a few dowels can become a simple, effective vertical rack. Drill holes for the dowels, and you have a custom-sized rack that holds your PCs perfectly spaced for airflow. You can do the same with a sheet of acrylic for a more modern, transparent look.
    • Pegboard: A small pegboard mounted to the wall or even just propped up on your desk is incredibly versatile. You can use standard pegboard hooks and shelves to create a modular mounting system for your mini PCs, power bricks, and cables. It’s a great way to go vertical and keep your desk clear.

    My Final Setup

    In the end, I found a seller on Etsy who made a simple, elegant acrylic stand designed to hold three Minisforum PCs vertically. It cost a little more than a metal file sorter, but it was custom-made for my exact models and looks fantastic in my tiny pantry office. It keeps the PCs secure, airflow is great, and the footprint is smaller than a single textbook.

    The journey to find it was a bit frustrating, but it taught me that for homelabbers, sometimes the best solution isn’t the most obvious one. It’s about looking in the right places and thinking a little differently. Your perfect mini-cluster home is out there—it just might not be in a server rack.

  • Does a 25GbE NAS That Isn’t a DIY Project Even Exist?

    Does a 25GbE NAS That Isn’t a DIY Project Even Exist?

    Looking for a pre-built NAS or mini PC with 25GbE? Explore the best options for high-speed external storage for your VMware homelab using NFS or iSCSI.

    So, you’ve got a powerful homelab setup. Maybe a couple of ESXi hosts humming away, running all sorts of virtual machines. You’ve even upgraded your networking to screaming-fast 25GbE. But there’s a bottleneck, isn’t there? Your VM storage.

    You’re probably thinking about how to get all those VMs off the local drives and onto a shared storage solution that can keep up with your 25GbE speeds. The goal is simple: a centralized, fast repository for your virtual machines, probably using NFS or iSCSI.

    The first thought is often, “I’ll just build something.” A custom ITX build sounds fun, right? You get to pick every component, from the CPU to the exact 25GbE network card. But let’s be honest, that’s a project. It takes time, research, and dealing with the potential gremlins of component compatibility.

    What if you just want something that works? Are there any off-the-shelf options that give you that 25GbE goodness without the headache of a full custom build?

    The Pre-Built NAS Route

    When you think of network storage, you probably think of Synology or QNAP. These companies have built their reputations on creating user-friendly NAS appliances. For a long time, their focus was on the 1GbE and 10GbE world. But as 25GbE becomes more accessible for prosumers and small businesses, they’ve started to step up.

    • QNAP: These guys are often ahead of the curve when it comes to high-speed networking. They offer a range of tower and rackmount NAS units that either come with 25GbE ports built-in or have PCIe slots where you can easily add one of their own 25GbE network cards. Models in their TVS-h series, for example, are often a good place to start looking. They’re powerful enough to handle the demands of a virtualized environment and the ZFS-based QuTS hero operating system is solid for data integrity.

    • Synology: Synology has also been adding faster networking options to their higher-end models. You’ll typically be looking at their XS, SA, or UC series for native 25GbE or expansion capabilities. Their DiskStation Manager (DSM) software is famously easy to use, which is a huge plus if you want to set it and forget it. The trade-off is that they can sometimes be a bit pricier for the same level of hardware performance compared to QNAP or a custom build.

    The biggest advantage of going with a pre-built NAS is the ecosystem. The software is mature, the hardware is validated, and there’s a huge community and support system if you run into trouble. Setting up an iSCSI LUN or an NFS share for your ESXi hosts is usually just a few clicks in a friendly web interface.

    What About Mini PCs?

    The world of mini PCs is exploding. Brands like Minisforum, Beelink, and others are packing serious power into tiny boxes. The problem? Finding one with a 25GbE port is like finding a needle in a haystack.

    Most of these mini PCs top out at 2.5GbE or maybe 10GbE. The challenge is both physical space and cooling. A 25GbE NIC can run hot and requires a PCIe slot, which most ultra-compact mini PCs just don’t have.

    You might find some niche or industrial mini PCs that offer this, but they are often expensive and may not be optimized for use as a storage server. For now, if your heart is set on a small form factor, you’re likely better off looking at a custom build where you can control the chassis and component selection.

    The Verdict: Build vs. Buy

    So, where does that leave us?

    If your main goal is to get a reliable, high-speed storage solution up and running for your VMware lab with minimal fuss, a pre-built NAS from a reputable brand like QNAP or Synology is your best bet.

    1. Check the Specs: Look for models with at least a quad-core CPU (an Intel Xeon or AMD Ryzen is ideal) and make sure you can install enough RAM (16GB is a good starting point for virtualization).
    2. Verify the Slot: If it doesn’t have 25GbE built-in, confirm it has a free PCIe 3.0 x8 or x16 slot to accommodate a proper 25GbE card.
    3. Read the Reviews: See what other homelabbers or small business users are saying about using that specific model for iSCSI or NFS performance.

    Building a custom server is still a fantastic option if you want maximum performance for your dollar and enjoy the process of tinkering. But for a simple, stable, and performant external storage solution that just works? The appliance route has never been more appealing. You can unbox it, plug it in, and spend your valuable time managing your VMs, not wrestling with hardware.

  • My Synology NAS Died. Here’s How I Built a Free Replacement.

    My Synology NAS Died. Here’s How I Built a Free Replacement.

    My Synology NAS failed and I couldn’t afford a new one. Learn how I used an old PC with Proxmox to build a free, powerful replacement for my data.

    It started with a quiet, unsettling hum. Then, nothing. My Synology NAS, the little black box that dutifully held my digital life, was dead.

    I’m not going to lie, my first feeling was panic. The Synology wasn’t just a network drive; it was the central hub for my most important data. It hosted my password manager database and served as a private backup for all my family photos, running 24/7 in a closet.

    After the panic came the practical dread. I looked up the price of a new one, and my wallet immediately started sweating. A replacement was not in the budget. Not even close.

    So, there I was. A dead NAS, two hard drives full of data I couldn’t easily access, and no money for a shiny new box. It felt like a dead end. But then I remembered something.

    The Forgotten Hero in the Corner

    For a while now, I’d been tinkering with an old Dell OptiPlex computer I got for next to nothing. I had installed Proxmox on it—a free, open-source tool that turns a computer into a powerful virtualization server. It was quietly running a couple of small things, but it was mostly bored, waiting for a real job.

    Could this old office PC become my new NAS?

    The idea was exciting. Instead of a closed, proprietary box, I could build something custom. Something I controlled completely. And best of all, the cost would be zero. I already had the hardware.

    What is Proxmox, Anyway?

    Think of Proxmox as a manager for computers-within-a-computer. It lets you run multiple, isolated operating systems on a single physical machine. You can run full virtual machines (VMs), which are like entire separate computers, or something called LXC containers.

    LXC containers are incredibly lightweight. They share the host computer’s core (its kernel), so they use way fewer resources than a full VM. For something like a NAS, a container is perfect. It’s efficient, fast, and doesn’t waste power.

    My plan was simple: Set up a new LXC container on my Proxmox server and install a NAS operating system inside it.

    Finding a Synology-Like Experience for Free

    The best part of a Synology is its operating system, DSM. It’s clean, easy to use, and has a great app store. I needed something that came close to that experience without the price tag.

    After a bit of research, I landed on a few popular choices:

    • TrueNAS SCALE: It’s incredibly powerful and popular, but some people find it a bit complex for a first-time setup.
    • OpenMediaVault (OMV): This one hit the sweet spot. It’s known for being simple, stable, and easy to manage through a clean web interface. It felt like the perfect fit for someone who just wants things to work.

    I decided to go with OpenMediaVault. Setting it up in a Proxmox container was surprisingly straightforward. There are tons of great guides online that walk you through the process step-by-step. The key is “passthrough,” where you give the OMV container direct control over the hard drives.

    What About the Data on My Old Drives?

    This was the scariest part. My two hard drives were pulled from the dead Synology. How could I get my files off them? Synology uses a standard Linux-based file system, which is good news. It means your data isn’t trapped in some weird proprietary format.

    The solution was a USB-to-SATA adapter. I plugged one of the hard drives into my main computer (which runs Linux, but you can use a bootable Ubuntu USB stick on any PC). With a few simple commands in the terminal, I was able to mount the drive and see all my files. Everything was there. The relief was immense. I carefully copied everything over to a temporary drive before installing them into the Proxmox machine.

    The New, Improved Setup

    With my data safe and OpenMediaVault running, I started rebuilding my little data hub.

    First, I set up network shares so all the computers in my house could access the storage. Easy.

    Next, I tackled my photo backup. I’d been hearing a lot about Immich, which is basically a self-hosted Google Photos alternative. It automatically backs up photos from your phone, organizes them by date, and even has AI-powered search. I installed it using Docker (which OMV supports beautifully), and it’s been fantastic.

    Finally, I needed my password manager. The Synology was running my Bitwarden database. The open-source community has an amazing, lightweight alternative called Vaultwarden. It’s fully compatible with Bitwarden apps but uses far fewer resources. I got it running in another Docker container in minutes.

    It Started with a Failure, But Ended with a Win

    Losing my NAS was a headache I didn’t need. But it forced me to find a better way. My new “NAS” is an old computer that was gathering dust, but it’s more powerful and flexible than the expensive box it replaced.

    I’m not locked into one company’s ecosystem anymore. I can run whatever services I want. And because it’s all running on Proxmox, I can easily back up my entire NAS setup, experiment with new VMs, and have far more control.

    If you’re in a similar boat, or just want to take control of your own data without spending a fortune, don’t overlook the old hardware you might have lying around. A little bit of tinkering can save you a lot of money and leave you with something that’s truly your own.

  • Meet Nomad: The Offline Media Server on a USB Stick

    Meet Nomad: The Offline Media Server on a USB Stick

    Discover Nomad, a tiny, self-hosted media server on a USB stick. Stream movies, music, and books offline, directly to your devices. Perfect for homelab fans.

    I stumbled across a fascinating open-source project the other day, and it’s one of those ideas that’s so simple and smart, you can’t help but love it.

    Imagine having a personal, pocket-sized media server. Not just a storage drive, but a full-fledged server that can stream movies, music, and even books to your phone or laptop, all without needing an internet connection.

    That’s the whole idea behind a project called Nomad. It’s a tiny, self-contained media server built into a USB stick. It’s designed for anyone who loves tinkering with technology, especially folks in the homelab community, but its appeal is much broader. Think of it as your own private, offline Netflix and Spotify, ready to go wherever you are.

    So, How Does This Tiny Server Work?

    At its heart, Nomad is an ESP32-S3 board—a tiny, low-cost computer—housed in a USB drive form factor. You load up an SD card with your favorite media files—videos, songs, podcasts, ebooks—and plug it into the Nomad.

    When you power it on (by plugging it into any USB port), it works its magic. It automatically creates its own Wi-Fi network with a captive portal, just like the Wi-Fi at a hotel or coffee shop. You just connect your phone, tablet, or laptop to the Nomad’s Wi-Fi, and instantly, you have access to a simple web interface where all your files are neatly organized and ready to stream.

    No internet? No problem. No cloud subscriptions? Not needed. It’s a completely self-hosted, offline-first solution. It’s perfect for road trips, flights, or just using around the house without relying on your main network.

    It’s Getting Some Serious Upgrades

    The project is constantly evolving, and the creator has been working on an experimental version with some really practical new features. This is where Nomad goes from a cool novelty to a genuinely useful tool.

    Here are some of the highlights:

    • Better File Management: You can now manage your media files remotely through a web browser. That means you can upload, delete, or rename files over Wi-Fi. It also has a clever hardware button that switches it into a standard USB drive mode, so you can drag and drop files directly from your computer.
    • Plays Nice with Your Favorite Apps: Thanks to DLNA support, you can now stream your media directly to popular apps like VLC and Kodi, or even to compatible smart TVs. It generates a simple playlist URL, making it super easy to integrate with the media center software you already use.
    • A Book Lover’s Dream: For all the readers out there, the addition of OPDS support is fantastic. It allows e-book reader apps to connect directly to Nomad. You can browse your library and even track your reading progress right from your favorite reading app.
    • HD Video Streaming: While it wasn’t originally designed for it, the system can now handle streaming a 1080p HD movie, provided the file is well-encoded and you’re using a decent SD card. It’s pushing the limits of the hardware, but it’s impressive that it works.

    The Future of Nomad Looks Even Brighter

    The developer isn’t stopping there. A more powerful version, called Nomad Studio, is already in the works. This sounds like it will address some of the current hardware limitations and add some serious power.

    The plan for the “Studio” version includes dual-band Wi-Fi (including 5 GHz for much faster speeds), support for 4K video, and full auto-discovery on your network. It will also feature a “Home-Server Mode,” allowing it to seamlessly integrate into your existing home network alongside your other devices.

    From DIY Project to a Real Product?

    What started as a personal project has gained so much interest that the creator is considering producing a small run of pre-assembled units. The project will always remain open-source for the DIY community, but offering a plug-and-play version could help fund its development and make it accessible to more people.

    It’s a great example of a passion project growing into something more. It’s not trying to replace your massive, multi-terabyte home server. Instead, it’s carving out a unique niche for itself: a simple, reliable, and incredibly portable way to carry your digital world in your pocket. In an age of constant connectivity, there’s something wonderful about a device that proudly works offline.

  • What RAM Actually Works with the Aoostar WTR MAX?

    What RAM Actually Works with the Aoostar WTR MAX?

    Struggling to find compatible RAM for your Aoostar WTR MAX? This guide explains the specs and limitations to help you choose the right memory.

    So, you got your hands on the Aoostar WTR MAX. It’s a powerful little machine, but if you bought the barebones version, you might be scratching your head about one crucial component: the RAM.

    Finding the right memory for this mini-PC feels a bit like a treasure hunt, doesn’t it? The official information from Aoostar is… well, a little sparse. It leaves you wondering what memory sticks actually work.

    I found myself in the same boat. You know there are two RAM slots, and you know it can handle up to a whopping 128GB of memory. But the specifics? That’s where things get fuzzy.

    This post is my attempt to clear up the confusion. Think of it as a shared notebook for everyone who owns, or is thinking about buying, a WTR MAX.

    What We Know So Far

    Let’s start with the official details, however limited they may be. The Aoostar WTR MAX has two DDR5 SODIMM slots. It supports both ECC and non-ECC RAM.

    Here’s the important part:

    • Max Capacity: 128GB total.
    • ECC Support: Yes, it supports full ECC RAM. This is great for anyone building a serious home server who needs that extra layer of data integrity.
    • The Big Quirk: This is the main thing to watch out for. The manufacturer states it does not support two 48GB non-ECC sticks (for a total of 96GB). However, it does support two 48GB ECC sticks.

    It’s a strange limitation, right? It seems to be a key piece of the puzzle. It also highlights the difference between “On-die ECC,” which most DDR5 has and isn’t considered “true” ECC, and the full ECC UDIMM sticks you’d need for that 96GB setup.

    Let’s Solve This Together

    Since the official manual won’t give us a clear list of tested and compatible RAM modules, the next best thing is to create one ourselves. It’s frustrating to buy expensive hardware only to find out it doesn’t work.

    The goal here is simple: to build a community-driven list of what works and what doesn’t. If you have a WTR MAX up and running, you can help. By sharing the specific RAM you’re using, you could save someone else a major headache (and a restocking fee).

    Here’s what would be helpful to know:

    • Brand and Model: What’s the exact model number of your RAM? (e.g., Crucial CT2K16G56C46S5)
    • Capacity: What is the size of each stick and the total capacity? (e.g., 2 x 16GB for 32GB total)
    • Type: Is it ECC or non-ECC?
    • Did it Work? A simple yes or no.

    Sharing this info helps current and future owners make informed decisions. It turns a frustrating solo problem into a much easier group project. When official documentation fails us, the community is the best resource we have.

    So, if you’ve already found the perfect RAM for your WTR MAX, don’t keep it a secret! Drop a comment and let us know what you’re running. Let’s make this little machine as easy to set up as possible.

  • Feeling Lost in Your Files? Let’s Talk About Mounting and Access

    Feeling Lost in Your Files? Let’s Talk About Mounting and Access

    Confused by terms like ‘mounting’ and ‘file access’? This friendly guide breaks down these core computer concepts in a simple, easy-to-understand way.

    Ever felt like your computer is speaking a different language? You hear words like “mounting a drive” or “file access denied” and you just nod along, hoping no one asks you to explain. I’ve been there. It can feel a bit like everyone else got a secret manual for their computers, and you were out sick that day.

    But here’s the thing: these concepts aren’t as complicated as they sound. So, grab a coffee, get comfy, and let’s untangle this together.

    First off, why should you even care?

    Think about your digital life. You’ve got photos, documents, music, movies… all your important stuff. Knowing a little about how your computer organizes and controls access to these files is like knowing how the keys to your house work. It gives you control, keeps your stuff safe, and helps you get to what you need, when you need it.

    Good file management isn’t just for tech wizards. It’s a basic skill that can make your digital life so much easier.

    So, what’s this “mounting” thing all about?

    Okay, let’s start with “mounting.” It sounds so dramatic, doesn’t it? Like you’re preparing for a medieval battle.

    But really, mounting is a super simple idea.

    Think of it like this:

    You have a USB drive. When you plug it into your computer, a new icon pops up, and you can suddenly see all the files on it. That’s mounting! Your computer has “mounted” the USB drive, making its contents available to you. When you “eject” the drive safely, you’re “unmounting” it.

    So, mounting is simply the process of making a storage device (like a hard drive, a USB stick, or even a remote server) accessible to your computer’s operating system.

    It’s not just for physical things you plug in. Here are a few other times you might “mount” something:

    • Network Drives: At work, you might have a shared drive where your team keeps all its projects. Accessing that drive on your computer? You’re mounting it.
    • Cloud Storage: If you use a service like Dropbox or Google Drive through their desktop apps, they often work by mounting a virtual drive on your computer.
    • Disk Images: Sometimes you download a program and it comes as a .dmg file (on a Mac) or an .iso file (on a PC). When you open it, it acts like a temporary drive. You’ve just mounted a disk image.

    See? Not so scary. Mounting is just telling your computer, “Hey, I want to use the files on this thing right here.”

    And what about “access”?

    Now let’s talk about “access.” This one is a bit more straightforward. It’s all about permissions. Who gets to do what with a file or folder?

    Imagine you live in a shared house.

    • Your Room: You have full access. You can go in, rearrange the furniture, and even throw things out. That’s “read and write” access.
    • The Living Room: Everyone in the house can use it, sit on the couch, and watch TV. That’s a shared space with “read and write” access for all housemates.
    • Your Housemate’s Room: You probably can’t just walk in and start redecorating. You might not even have a key. That’s “no access” or “read-only access” (you can see the room from the hallway, but you can’t go in and change things).

    File access on your computer works in a very similar way. For any file or folder, you can set permissions:

    • Read: You can open and view the file, but you can’t change it.
    • Write: You can change, edit, or delete the file.
    • Execute: This is mostly for programs. It means you can run the application.

    These permissions are super important for security and organization. They stop you from accidentally deleting important system files, and they keep your personal documents private on a shared computer.

    A real-world example

    Let’s say you have a family computer. You create a folder called “Family Photos” and you want everyone to be able to see the pictures, but you’re the only one who can add new ones or delete old ones.

    • You would give everyone in the family read-only access.
    • You would give yourself read and write access.

    Simple as that.

    You’ve got this!

    So, there you have it. “Mounting” is just making your files available. “Access” is about who gets to do what with them.

    You don’t need to be a tech genius to understand these ideas. Just thinking about them in these simple ways can make you feel a lot more confident when you’re managing your digital world.

    Next time you plug in a hard drive or connect to a shared folder, you’ll know exactly what’s happening. You’re mounting it. And if you ever see an “access denied” message, you’ll have a much better idea of what it means.

    Welcome to the club. You’re officially in on the secret.

  • My Favorite Home Server Trick: The Mini PC + NAS Combo

    My Favorite Home Server Trick: The Mini PC + NAS Combo

    Want a powerful home server on a budget? Learn how to combine a new mini PC with your old computer as a NAS for the perfect, efficient setup.

    I have an old desktop computer sitting in my closet. You probably do, too. For me, it’s an old Dell tower that saw me through college. It’s slow, it’s big, and it feels wasteful to just throw it away. For a while, it was my makeshift home server, running Plex and a few other things. But it was noisy, power-hungry, and frankly, not very good at it anymore.

    Then I started looking at mini PCs. These little boxes are quiet, sip electricity, and pack a surprising punch. This led me to a thought: what if I could get the best of both worlds? What if I used a new mini PC for all the smart stuff, but kept my old computer around for one simple job: holding all my files?

    It turns out, this is a fantastic idea. You can absolutely pair a zippy new mini PC with a clunky old desktop, and it might just be the most budget-friendly, common-sense way to build a powerful home server.

    The Big Idea: Splitting Brains and Brawn

    Think of it like this: your home server does two main things. It runs applications (the “brains”), and it stores files (the “brawn”).

    • The Brains: This is stuff like Plex or Jellyfin (for your movie library), game servers, or backup software. These tasks need a decent processor (CPU) to work well, especially Plex when it has to transcode a video file for your phone or tablet. This is the perfect job for a modern mini PC.
    • The Brawn: This is just storage. It’s a bunch of hard drives holding your movie and music files. This task doesn’t require a fast processor at all. It just needs to be reliable and accessible. This is the perfect new job for your old computer.

    By splitting these jobs between two machines, you get some serious benefits. Your 24/7 server (the mini PC) uses way less electricity, and you get a much faster, smoother experience for your apps. All while reusing hardware you already own.

    So, How Does This Actually Work?

    The setup is simpler than you might think. We’re essentially turning the old PC into a Network Attached Storage, or NAS for short. A NAS is just a computer whose only job is to serve files to other devices on your home network.

    When you want to watch a movie, the process looks like this:

    1. You open Plex on your TV.
    2. Your TV tells your mini PC (where Plex is running) to play the file.
    3. The mini PC says, “Okay, I need that file.” It then requests it from your old PC over your home network.
    4. The old PC finds the movie file on its hard drive and sends it back to the mini PC.
    5. The mini PC streams it to your TV.

    The key to making this fast and seamless is your home network. You absolutely want to have both computers plugged directly into your router with Ethernet cables. Don’t try to do this over Wi-Fi. A standard gigabit wired network is more than fast enough to handle even high-quality 4K movie files.

    Your Two Paths to a DIY NAS

    Okay, you’re sold on the idea. How do you actually turn that old machine into a file-hoarding workhorse? You’ve got two main options.

    1. The Super Simple Way: A Windows Share

    This is the path of least resistance. You don’t have to install any new software on your old PC.

    • Just gather all your media files into a single main folder (e.g., D:\Media).
    • Right-click on that folder, go to “Properties,” then the “Sharing” tab, and set it up as a network share.
    • That’s it. Your mini PC can now see and access this folder over the network.

    2. The “Proper” Way: A Dedicated NAS Operating System

    This approach takes a little more work but gives you a much more powerful and robust solution. You’ll wipe the old computer and install a free operating system designed specifically for being a NAS.

    Two popular choices are TrueNAS CORE and OpenMediaVault (OMV).

    These tools give you a clean web interface to manage your drives, check on their health, and set up advanced features (like RAID, which protects you from a single hard drive failure). It’s the more professional route, and it’s what I’d recommend if you’re feeling a bit adventurous.

    Putting It All Together

    Once you have your old PC set up as a NAS (using either method), the final step is to make that storage easily accessible on your mini PC.

    On your mini PC (assuming it’s running Windows), you’ll want to “map” the network drive. This makes the storage on your old PC show up as if it were a local drive. You’d open File Explorer, go to “This PC,” and find the “Map network drive” option. You can assign it a letter like M: (for Media), and point it to the network share you created.

    Now, just tell your applications where to find everything. In Plex, you’ll add a new library and point it to your shiny new M: drive.

    And you’re done. You’ve successfully upgraded your home server, saved a bunch of money, and given that old computer a useful new lease on life. It’s a win-win-win.

  • So You Have Some Old Servers. Now What?

    So You Have Some Old Servers. Now What?

    Feeling curious about what’s possible with your own servers? This friendly guide helps you start your home lab journey and find cool, practical projects.

    So you’ve got that feeling.
    That little itch in the back of your brain that says, “I know how to use this stuff, but I don’t really get how it all works.”

    Maybe you’ve set up a home network. Maybe you’ve even got a couple of old servers from work sitting in a corner, waiting for a purpose. You see people online building these incredible digital playgrounds in their basements—home labs—and you want in. But you’re stuck on the first step: Where do you even begin?

    It’s easy to feel overwhelmed. You’re not just trying to follow a tutorial; you want to grasp the fundamentals. You want to move past copying and pasting commands and start truly understanding the logic behind them.

    If that sounds familiar, you’re in the right place. Let’s talk about how to get started on this journey.

    First, Forget “Mastery”

    The goal isn’t to become a master of everything overnight. That’s impossible and a sure path to burnout. The real goal is to build a foundation, one brick at a time. The best way to do that is to stop thinking about “learning networking” and start thinking about solving a problem.

    Your first project shouldn’t be some grand, abstract goal. It should be something tangible that makes your own life a little better or more interesting.

    Think about it:
    * Are you tired of ads on every device in your house?
    * Do you wish you had your own private cloud for files and photos, separate from Google or Apple?
    * Want to host a private Minecraft server for you and your friends?
    * Curious about automating your smart home devices?

    Pick one. That’s your starting point.

    Your Digital Workbench: The Hypervisor

    You mentioned having some servers, which is awesome. Old enterprise gear is perfect for a home lab. It’s built to run 24/7 and gives you tons of room to experiment.

    So, what’s the best way to set them up? My advice is to start with a hypervisor.

    Don’t let the name scare you. A hypervisor is just a lightweight operating system that’s designed to run other operating systems. Think of it like a digital workbench. Instead of installing one OS on your server, you install a hypervisor like Proxmox (it’s free and amazing for this).

    Once Proxmox is running, you can create Virtual Machines (VMs) and Containers (LXCs) with just a few clicks.

    • A Virtual Machine (VM) is exactly what it sounds like: a full, independent computer running inside your server. It has its own virtual hard drive, RAM, and network connection. This is perfect for when you need to run a completely separate OS, like Windows inside your Linux-based server.
    • A Container (LXC) is a more lightweight solution. Instead of virtualizing a whole computer, containers just wall off a piece of the main OS for a specific app. They’re faster, use fewer resources, and are perfect for running single applications like a web server or a database.

    Using a hypervisor is the key to a flexible lab. It lets you spin up a new VM to test an idea and tear it down if it doesn’t work, all without messing up your other projects. It’s the ultimate sandbox.

    Where to Find Cool Projects

    Okay, so you’ve picked a goal and set up your Proxmox workbench. Now for the fun part: finding amazing projects and the guides to get them running.

    The internet is overflowing with ideas, but here are a few places I always come back to:

    • Reddit Communities: The absolute best places for inspiration are subreddits like r/homelab and r/selfhosted. You’ll see what other people are building, the problems they’re running into, and the creative solutions they find. It’s a goldmine of real-world experience. r/datahoarder is another great one for storage nerds.
    • “Awesome” Lists on GitHub: Search GitHub for “awesome self-hosted” or “awesome-sysadmin.” You’ll find curated lists of incredible open-source software for almost any task you can imagine.
    • YouTube Tinkerers: Find creators who are actually doing the things you want to do. Channels like Techno Tim and Jeff Geerling (who you might already know) offer fantastic, step-by-step tutorials for specific projects.

    A Few Starter Project Ideas:

    • Block Ads Network-Wide: Install Pi-hole or AdGuard Home in a container. It’s a relatively simple project that provides an immediate, noticeable benefit.
    • Build Your Own Cloud: Set up Nextcloud. It’s like having your own private Google Drive, complete with photo backups, calendars, and contacts.
    • Stream Your Media: Install Plex or Jellyfin. You can load them up with your movies and TV shows and stream them to any device, anywhere.
    • Monitor Your Services: Run Uptime Kuma to get a cool dashboard that shows you if all your other services are online.

    The Real Secret: Just Start

    That’s it. That’s the secret.

    The difference between the person who dreams of a home lab and the person who has one is that the second person just started. They picked one small project, probably failed a few times, broke things, and learned something in the process.

    Your lab is a lab. It’s meant for experiments. Don’t be afraid to break it. With a hypervisor like Proxmox, the cost of failure is just a few clicks to delete a VM and start fresh. Every mistake is a lesson. Write down what you did, what went wrong, and what you learned.

    You don’t need the newest gear. You don’t need to know everything. You just need a little curiosity and the willingness to try. So go ahead, fire up that old server, and build something cool.