How I built a powerful, quiet, and efficient beginner home lab with just a couple of thin clients and a NAS.
If you spend any time on tech forums, you’ve probably seen them: towering server racks blinking with dozens of lights, packed with powerful hardware and tangled in a web of cables. It’s impressive, but also pretty intimidating. For a long time, I thought that’s what a “home lab” had to be. But I recently took my first steps, and I’m here to tell you that a beginner home lab can be simple, cheap, and surprisingly powerful.
It all started because I wanted more control over my digital life. I was tired of relying on big tech companies for services like photo backups and smart home control. I wanted a private, self-hosted solution. My goal wasn’t to run a massive data center from my closet, but to create a small, efficient setup to handle a few key tasks.
Why Even Bother with a Beginner Home Lab?
So, what’s the point? For me, it boils down to three things: learning, privacy, and convenience. By building your own little server setup, you learn a ton about networking, operating systems, and how the internet really works.
But the real magic is in the services you can run. Imagine having your own private cloud for files (like Dropbox but yours), a personal media server (like Netflix but for your own movies), and a smart home hub that doesn’t send your data to the cloud. That’s the promise of self-hosting, and it’s more accessible than ever.
My initial plan is to run:
* Home Assistant: To unify all my smart home gadgets.
* Nextcloud: For my own private file storage and syncing.
* Jellyfin or Plex: To stream my media library to any device.
* Immich: For a self-hosted Google Photos alternative.
A small list, but one that makes a huge difference in daily life.
The Core Components of My Beginner Home Lab
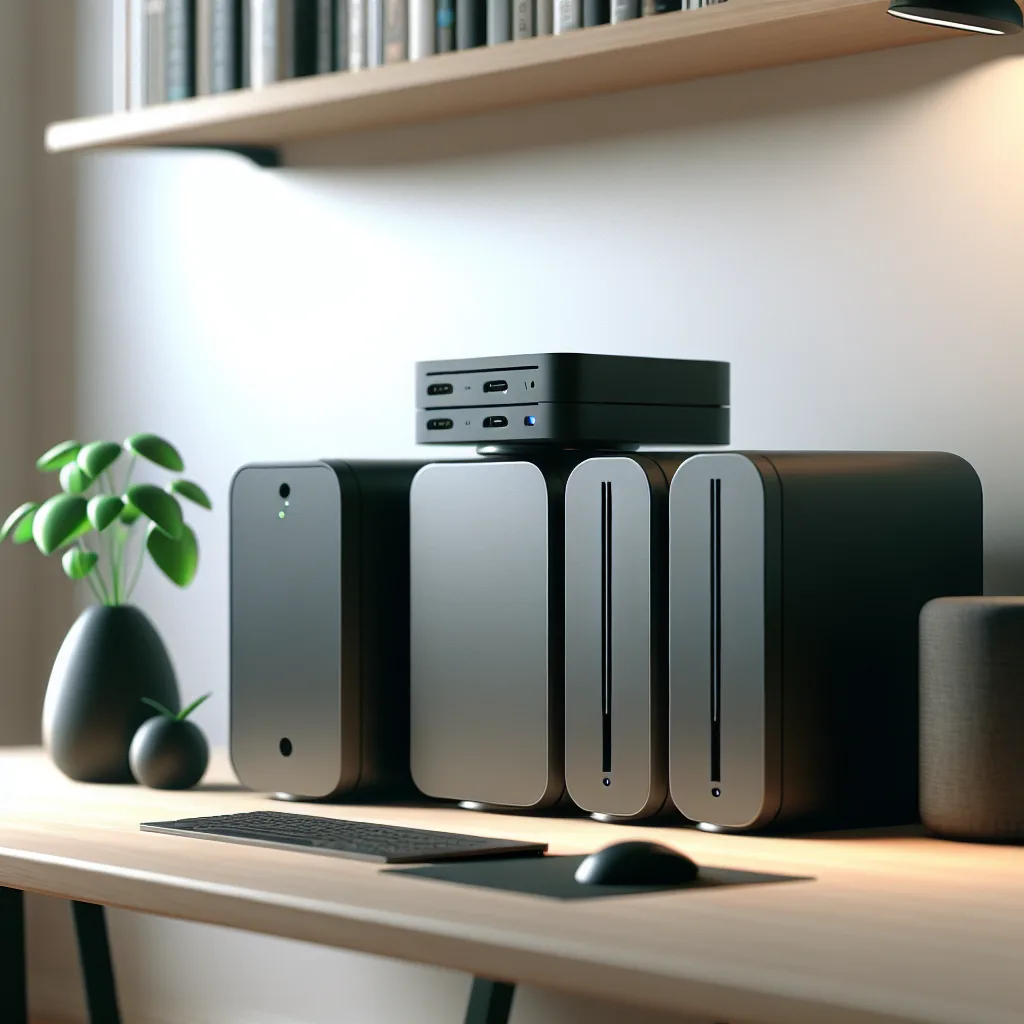
You don’t need a huge, power-hungry server. My entire setup consists of just two types of devices, chosen for their small size, low power consumption, and quiet operation.
1. The Brains: Fujitsu Thin Clients with Proxmox
Instead of a traditional server, I opted for two Fujitsu Esprimo Thin Clients. These are basically tiny, silent computers designed for office environments. They don’t have a lot of storage or beefy processors, but they have just enough power for what I need, and they sip electricity.
On these, I installed Proxmox VE (Virtual Environment), which is a fantastic, free piece of software. Think of Proxmox as an operating system for your servers. It lets me take one physical computer and slice it up into multiple virtual computers (VMs) or containers (a more lightweight type of virtualization). This means one thin client can run Home Assistant, Nextcloud, and other services all at the same time, each in its own isolated environment. It’s incredibly efficient.
2. The Storage: Ugreen NAS with TrueNAS
While the thin clients handle the thinking, I needed a dedicated place to store all my data—documents, photos, movies, and backups. For this, I picked up a Ugreen NAS. A NAS (Network Attached Storage) is a device that connects to your home network and provides centralized storage for all your other devices.
To manage the storage, I’m running TrueNAS CORE. It’s another free, open-source tool that’s legendary for its focus on data integrity. It uses a super-resilient filesystem called ZFS that helps protect against data corruption, which is exactly what you want for precious files like family photos.
My First Project: Taming the Smart Home
The first service I spun up was Home Assistant. If you have any smart lights, plugs, or sensors, you know how annoying it can be to juggle a half-dozen different apps. Home Assistant brings them all together under one roof.
Getting it running in a Proxmox VM was surprisingly straightforward. Now, all my smart home logic runs locally on my own hardware. It’s faster, more reliable, and completely private. It was the perfect first project to prove the value of this little lab.
What’s Next on the Horizon?
With Home Assistant humming along, I’m ready for the next steps. My plan is to add containers for Nextcloud, giving my family a private place to back up files from their phones and computers. After that, I’ll set up Jellyfin for our movie collection and Immich to finally get our photos organized and off of Google’s servers.
The best part about this beginner home lab is how scalable it is. It’s doing exactly what I need it to do right now, but there’s plenty of room to grow. And the whole thing is sitting quietly on a shelf, not making a sound or running up my power bill. If you’ve been curious about self-hosting but felt intimidated, maybe it’s time to look at some thin clients. Your first home lab might be closer than you think.