Category: AI

  • Building a Friendly IPMI Control Tool for Your Homelab

    Building a Friendly IPMI Control Tool for Your Homelab

    Dive into IPMI control software with hands-on tips for your homelab journey

    If you’re diving into the world of homelabs like I did, you quickly find there’s a lot to learn and manage, especially when it comes to controlling your servers. One aspect that caught my attention early on is the usefulness of IPMI control software. This handy tool lets you control your server hardware remotely, which is a lifesaver when your rack isn’t just a few feet away.

    I started with an R730XD, a solid piece of enterprise gear that’s exciting to tinker with—but man, those fans can sound like they’re taking off when the server revs to 100%. That’s when I knew I had to get smarter about managing these machines. That’s why I created my own IPMI control software, and I wanted to share a bit about how it helped me and how you might take a similar approach.

    What Is IPMI Control Software and Why Does It Matter?

    IPMI stands for Intelligent Platform Management Interface, a nifty set of tools built into most server motherboards that helps admins manage systems remotely, no matter if the OS is up or down. Having good IPMI control software means you can power cycle, check hardware status, and even access the BIOS remotely.

    This is especially helpful in homelabs where your server might be noisy or tucked away somewhere inconvenient. Instead of physically pressing buttons, you issue IPMI commands right from your desk. Plus, it’s a great skill to have if you’re aspiring to be a SysAdmin or aiming for roles like Site Reliability Engineer.

    Making My Own IPMI Control Software

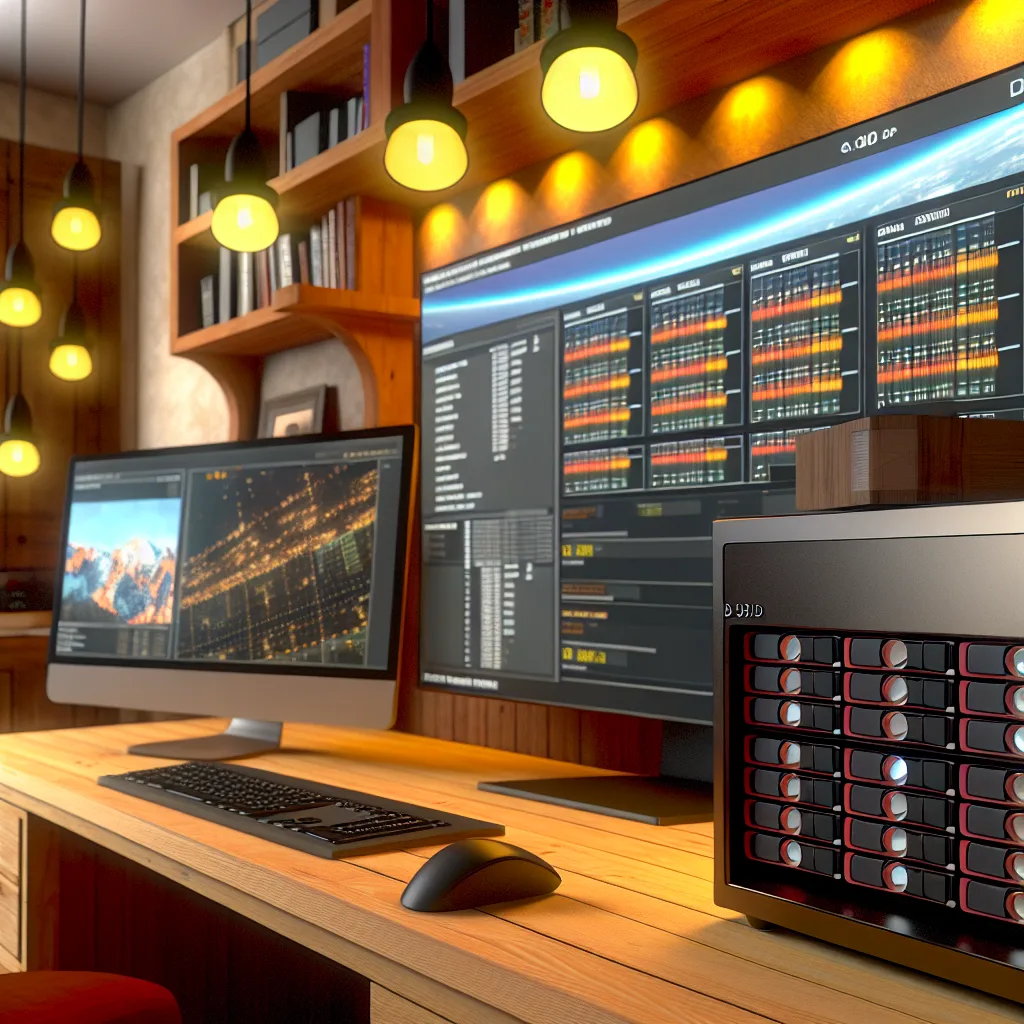
    Rather than just using existing tools, I took a stab at writing an IPMI control utility in Python tailored for my R730XD. I kept the interface simple—and gave it a quirky look that reminds me of Windows 95 just because it makes me smile. It’s not flashy, but it’s functional and gets the job done without adding confusion.

    If you want to get your hands dirty, I also put together a document with the raw IPMI commands in plain text for anyone who prefers issuing commands directly or wants to get a feel for what’s going on behind the scenes.

    A Word of Caution About IPMI

    Before you jump in, a quick reminder: IPMI isn’t the most secure protocol out there. I recommend placing your BMC (Baseboard Management Controller) on a dedicated management VLAN that doesn’t connect to the internet. Even though the tool doesn’t save your credentials permanently and IPMI encrypts command traffic, weak passwords and open exposure can lead to serious security risks.

    Learn more about BMC and IPMI best practices on Dell’s official IPMI guide and IPMI Security fundamentals on Red Hat.

    Sharing and Growing Together

    One of the best parts about building this tool for my lab is that it’s open-source. That means anyone can use it, give feedback, or even fork the project to support other server brands. There’s something satisfying about being part of a community project where we all learn and build together.

    If you find bugs, suggestions, or have ideas to improve the tool, it’s easy to report issues on GitHub. I’m still learning myself, so collaboration is key.

    Wrapping Up

    For anyone starting or deepening their homelab journey, getting comfortable with IPMI control software is a practical step to better managing your setup. Creating your own tool, even a simple one, can teach you a lot about systems management and Python programming.

    Want to explore the code or contribute? Check out the project repository and join the conversation. Who knows—maybe you’ll add the next cool feature or adapt it for your specific hardware.

    Happy homelabbing!


    External Links:
    Dell IPMI Guide
    Red Hat IPMI Security
    Python Official Documentation

  • My Home Lab Journey: From a Pile of Servers to a Purposeful Rack

    My Home Lab Journey: From a Pile of Servers to a Purposeful Rack

    From a pile of servers to a purposeful rack, here’s a look at the gear, the lessons, and the fun of building a home lab.

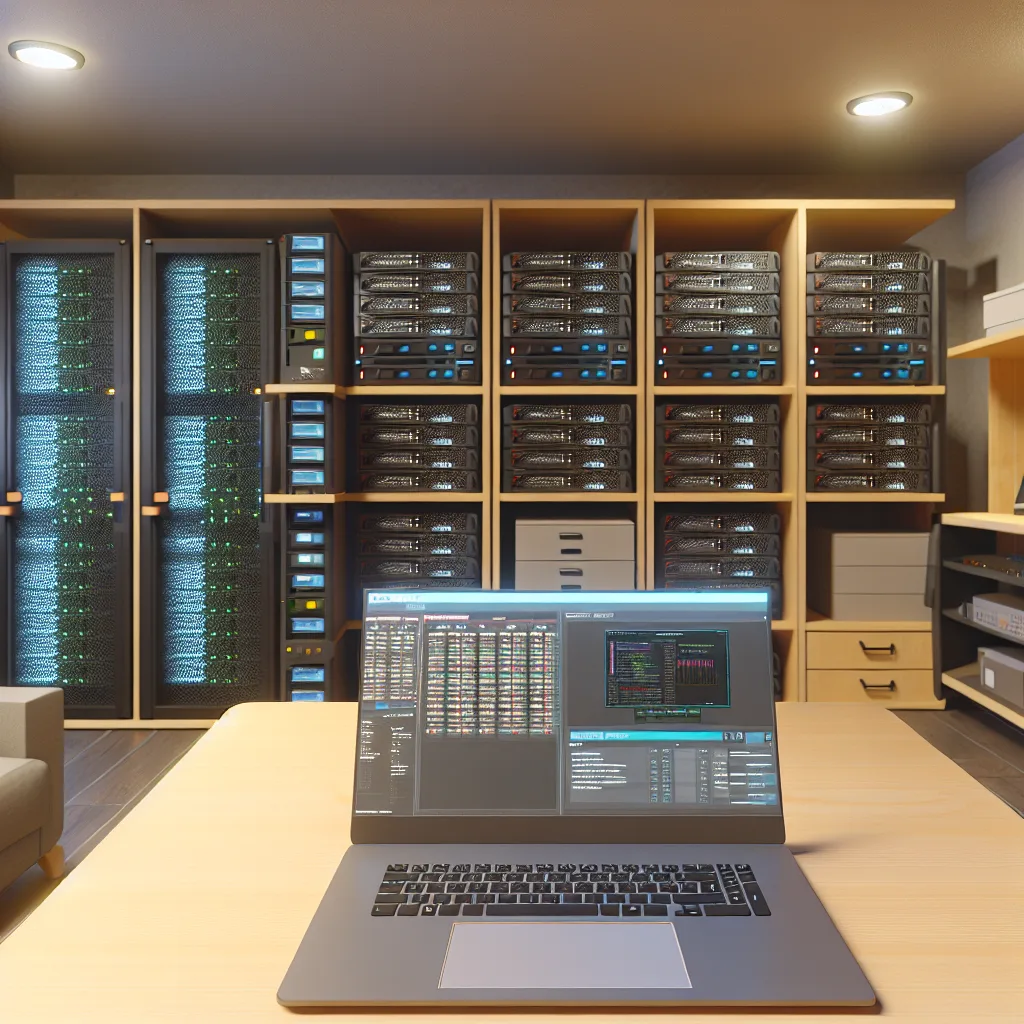
    It’s funny how a hobby can take on a life of its own. What started as a flicker of curiosity has turned into a full-blown 42U server rack humming away in my house. My home lab journey has been full of ups, downs, and a ton of learning. It’s not always pretty, and it definitely makes some heat, but building and managing it has been one of the most rewarding things I’ve done. If you’ve ever thought about diving into the world of self-hosting, maybe my story will give you that final push.

    This isn’t a perfect, sterile setup you’d see in a corporate blog post. It’s a real, evolving project. Some gear is running 24/7, some is sitting on the shelf waiting for a purpose, and some of it was rescued from the e-waste pile. And that’s the whole point, right? To tinker, to learn, and to build something that’s uniquely yours.

    The Heart of the Lab: What’s Deployed

    This is the gear that’s actually powered on and doing the work. It’s a mix of dedicated machines handling everything from my firewall to my family’s file storage.

    • The Gatekeeper (Dell PowerEdge R230): This little server runs OPNsense, a powerful open-source firewall. It’s the first line of defense for my entire network, and it’s been rock-solid.
    • The Brains (A Dell R420 Proxmox Cluster): I have two Dell R420s running as a Proxmox cluster. Think of Proxmox as a virtual apartment building for my apps and services. Instead of needing a separate physical server for every little thing, I can spin up virtual machines (VMs) for each task. On one node, I’m running things like Immich for photo management and Navidrome for music streaming. The other node handles my local Minecraft server for friends, Tailscale for secure remote access, and Pi-hole to block ads across my whole network.
    • The File Cabinet (Dell PowerEdge R720): This is the workhorse. It runs TrueNAS SCALE, which manages all of our storage. It’s the central NAS (Network Attached Storage) for both my PC and my mom’s, and it’s where we back up our phones and share files. Honestly, this server has been flawless. It just works, day in and day out.

    More Than a Hobby: My Real-World Home Lab Journey

    This whole setup has taught me so much more than I expected. When I first got this 42U rack, I laughed and thought I’d never fill it. Well, as of September 2025, I’m down to my last 2U of free space without having to remove the storage cabinet at the bottom.

    One of the first hard lessons was about heat. I initially had the rack in my bedroom, but once spring rolled around, it became an unbearable sauna. So, I had to find a new spot for it in the house. Lesson learned.

    The most painful lesson? The importance of a UPS (Uninterruptible Power Supply). A power flash earlier this year killed an old R620 because it wasn’t protected. Thankfully, the hard drives survived, but the server itself was toast. It was a harsh reminder that you can’t skimp on protecting your gear. A good UPS is non-negotiable if you value your hardware and data. You can learn more about why they’re so critical from resources like Eaton’s informational pages.

    The “Maybe Later” Pile: Future Plans and Spares

    A big part of any home lab journey is the collection of hardware you acquire along the way. Not everything has a job right away, but it’s great to have options.

    • The Question Marks: I’ve got a Dell R620 that I almost threw out because it wouldn’t power on for weeks, but it magically sprang back to life. I also have another R720 that I picked up for a measly $20. I have no idea what I’ll do with it yet—maybe experiment with hosting my own local LLMs? Who knows!
    • Networking Dreams: My Dell PowerConnect switch works, but it’s basic. I’m hoping to upgrade to something with faster 10Gb SFP+ ports eventually. I also have a couple of other switches on standby just in case.
    • The Waiting Game: I even have a KVM switch to control multiple servers with one keyboard and monitor, but the proprietary cables are so expensive that it’s been sitting there for months. For now, an old monitor and keyboard on a shelf do the trick.

    It’s this constant cycle of deploying, learning, and planning that makes it so engaging. Some days are frustrating when things break, but when you finally get a new service running or solve a tricky problem, the satisfaction is immense. It’s a fantastic learning environment, and the ability to host my own services is just a bonus. My lab is proof that you don’t need a massive budget or a master plan to get started—just a willingness to tinker and learn as you go.

  • When Your Server Won’t Boot: A Real-World Build Troubleshooting Story

    When Your Server Won’t Boot: A Real-World Build Troubleshooting Story

    Tackling power issues and no-post problems during a home server build

    If you’ve ever tried putting together a server from parts you’ve had lying around, you know it’s as exciting as it is nerve-wracking. Recently, I faced a tricky problem when my server wouldn’t boot after I powered it on. I thought I’d share my experience with server build troubleshooting, including what I tried and some tips that might help if you ever hit a similar snag.

    I was working with a pretty solid setup: a SuperMicro X10DRI-TRO13 motherboard, dual Xeon E5-2680v4 processors, and 64GB of DDR4 RAM running at 2133MHz. The whole thing was fully assembled before I started testing. When I flipped the PSU switch, the fans spun up, the green motherboard light glowed on, but—nothing else happened. No boot, no display on the monitor, and no beep codes. Even weirder, the PSU would power on immediately as soon as I flipped its switch, no matter if the case power switch was on or off.

    Understanding the Power Issue in Server Build Troubleshooting

    The first thing I figured out was that power could be the root of my problem. Normally, the PSU should only power up fully when the motherboard sends a “power on” signal, usually from pressing the case’s power button. The fact that the PSU powered on immediately after flipping the switch without any interaction from the motherboard suggests something unusual.

    Before diving deeper, check the PSU’s manual and motherboard manual for any quirks in the power signaling. Sometimes, specialized server-grade PSUs or motherboards behave differently. For example, here’s a guide from SuperMicro’s official docs that helped me understand power behavior better.

    No Boot, No Post, No Beep — What Now?

    When you get no post beep and no display, it often means the motherboard isn’t reaching its POST stage. Here’s what I considered:

    • Memory seating: Even if memory is installed, it can be slightly out of place. I reseated the RAM sticks firmly.
    • CPU seating: Double-check that both CPUs are correctly placed and locked down.
    • Peripheral disconnect: I unplugged everything non-essential — drives, additional PCIe cards — just to isolate the problem.
    • Speaker connection: Some boards require a speaker attached to hear beep codes. Without it, you won’t get POST beep signals.

    More troubleshooting tips can be found on sites like Tom’s Hardware which are invaluable for no post scenarios.

    A Quick Checklist for Server Build Troubleshooting

    • Verify the PSU switch is working as expected (try another PSU if possible).
    • Confirm the motherboard’s power connectors are fully hooked up.
    • Reseat memory and CPU.
    • Disconnect non-essential hardware.
    • Attach or check the front panel connectors (especially the power switch).
    • Connect a system speaker for beep codes.
    • Try clearing CMOS with the motherboard jumper or battery removal.

    Why Patience and Details Matter

    Building a server isn’t always plug-and-play. What helped me most during server build troubleshooting was stepping back, taking it slow, and verifying every connection. Sometimes it’s an easy fix—a loose cable or an overlooked jumper. Other times, it’s more complex, requiring systematic elimination of possible causes.

    If you’re stuck, don’t hesitate to consult the motherboard’s manual in detail or ask for advice on forums or from your manufacturer support. These resources often catch the little quirks specific to your hardware.

    Final Thoughts

    Server build troubleshooting can be daunting, but it’s also rewarding. It reminds me that behind every powerful machine is a lot of patience and problem-solving. If your server powers on but won’t boot like mine did, start with power insights and post troubleshooting basics. Sometimes, solutions are simpler than they seem.

    If you want detailed motherboard specs, check out SuperMicro’s site here: https://www.supermicro.com/products/motherboard/X10DRI-T+. For tips on handling RAM and CPU installation, the Intel Xeon documentation can offer guidance: https://www.intel.com/content/www/us/en/products/processors/xeon/processors-xeon-e5-v4-series.html

    Hopefully, sharing my story makes your server build troubleshooting a little easier. And remember, when in doubt, step back, breathe, and check those basics first. Happy building!

  • Turning an Old Dell PowerEdge T320 into a Home Server

    Turning an Old Dell PowerEdge T320 into a Home Server

    How I gave new life to an old server for storage, media, and more

    If you’re like me, you might have some older tech kicking around, wondering if it still has a use. I recently decided to bring a Dell PowerEdge T320 back into action as my home server setup—and it’s been smoother than I expected. This isn’t about the latest flashy gear. Instead, it’s a solid, thoughtful way to get a reliable setup without breaking the bank.

    Why Use a Dell PowerEdge T320 for Home Server Setup?

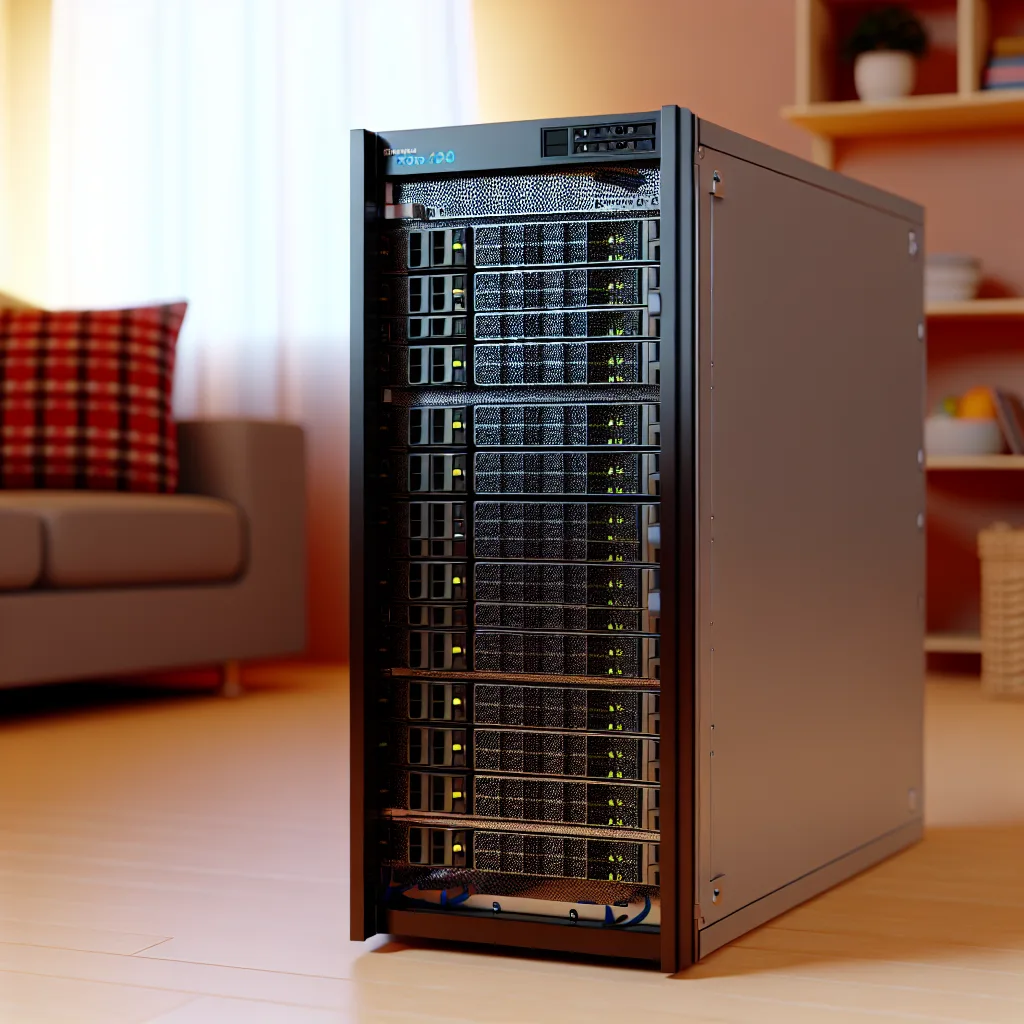
    The Dell PowerEdge T320 isn’t new, but it packs a punch with a Xeon E5-2403v2 processor and 48 GB of RAM. These specs give it plenty of muscle for handling storage, media streaming, virtualization, and more. Plus, it has plenty of bays and expansion slots, making upgrades easy down the line.

    I started with two SanDisk Plus 240 GB SSDs for the boot pool running TrueNAS Scale—a great open-source storage OS that’s user-friendly and robust. For bulk storage, I’ve got six WD Red 4 TB hard drives. These drives are known for reliability in NAS environments and keep my data safe.

    Planning My Home Server Setup Upgrades

    The beauty of a flexible server like this is that modifications are possible as needs evolve. Here’s what I have planned:

    • Disk Expansion: Adding a Chieftech 4-bay hot-swap cage to utilize the empty 5.25″ bays. This will make swapping drives easier and keep downtime minimal.
    • SSD Cache and Storage: Installing a 1TB WD Red SN700 SSD as a cache and a 2TB SN700 for Docker containers and virtual machines. This helps speed up access to frequently used apps and files.
    • Boot Pool Upgrade: Replacing the current SanDisk drives with two Intel DC S4500 240GB Enterprise SATA SSDs for increased durability and speed.
    • Massive Storage Capacity: Eventually filling 12 drive bays with WD Red Plus 12TB HDDs, giving me a whopping 144TB raw storage—perfect for media libraries or backups.
    • Networking Boost: Adding a Dell-branded Intel X520-DA2 10Gbit NIC to significantly improve network speeds.

    Why Go This Route?

    Using a server like this for a home server setup isn’t just about having tons of storage. It’s about control. I can run multiple containers and VMs, host media servers like Plex, or even experiment with new software without worrying about reliability. TrueNAS Scale’s support for ZFS delivers data integrity features that are great for peace of mind.

    It also helps that this is a quieter server than some older rack gear, making it manageable to keep in a living room without being distracting.

    Helpful Resources

    If you’re considering a home server, check out TrueNAS Scale’s official website for details on the OS I’m using. For hardware details and upgrade options, Dell’s official PowerEdge T320 support pages provide extensive specs. Lastly, Western Digital’s NAS drives info give a good overview of why WD Red drives are a solid choice for home servers.

    Setting up this Dell PowerEdge T320 as my home server has been a rewarding project that blends practicality with potential for growth. If you’ve got old hardware sitting around, maybe it’s time to think about a home server setup and what you could do with it.

  • Cleaning Up Your Home Server Setup: A Fresh Start with UPS Protection

    Cleaning Up Your Home Server Setup: A Fresh Start with UPS Protection

    How fixing simple issues and adding a UPS can improve your self-hosting experience

    If you’re like me and enjoy dabbling in a home server setup, you know that it’s never really “done.” You’re always tweaking things, fixing little annoyances, or upgrading your hardware to keep it running smoothly and reliably. Recently, I went through a bit of a refresh — moving my logo piece to the right place, finally ditching that noisy old printer, and adding a UPS to protect against power fluctuations. Here’s why these simple changes made a surprisingly big difference, and some thoughts on what you might consider next for your own setup.

    Why Tidying Up Your Home Server Setup Matters

    When I first put together my server, it was more of a trial-and-error project. Over time, little problems cropped up: cables in awkward spots, noisy equipment, and an occasional worry about sudden power outages knocking everything offline or frying my parts. Fixing the placement of my logo piece was a fun detail — something that just made the whole setup feel tidier and less haphazard. But getting rid of that printer was a relief; printers can be a pain and honestly weren’t adding value to my server space.

    The bigger upgrade was adding an Uninterruptible Power Supply (UPS). If you’re hosting at home, especially in areas prone to power outages or voltage drops, this is a must-have. It protects your server gear from spikes and sudden cuts in power. A reliable UPS gives you the peace of mind that your server won’t crash unexpectedly or get damaged, saving you from downtime and costly repairs.

    What’s Running Now?

    Currently, my home server setup is hosting a few personal favorites:
    – A Minecraft server for friends and family to connect and play
    – A media server to stream our vast collection of movies and music
    – Immich, an open-source photo and video backup solution that’s been fantastic for safeguarding memories

    Each of these runs quietly in the background, and I appreciate having control over my own space instead of relying solely on third-party services.

    Exploring New Possibilities: VLANs and Honey Pots

    Looking forward, I’m curious to experiment with VLANs (Virtual Local Area Networks). VLANs let you create separate networks within your home setup, which can help with security or managing different types of traffic. On top of that, I’m intrigued by the idea of setting up honey pots and honey files — basically traps to lure and detect unauthorized access attempts. It’s a practical way to learn more about network security in a hands-on, controlled environment.

    Suggestions for Expanding Your Home Server Setup

    If you’re considering growing your self-hosting skills, here are a few ideas to check out:
    – Try running a Nextcloud server for your own cloud storage and syncing needs Nextcloud Official
    – Look into Pi-hole, a network-wide ad blocker to improve privacy and browsing experience Pi-hole
    – Consider media automation tools like Plex or Jellyfin for managing and streaming content more efficiently
    – Experiment with container platforms like Docker to easily deploy and manage apps

    Every setup is unique, so try to pick software and tools that fit your lifestyle and tech level. And don’t forget backups — they’re lifesavers.

    Final Thoughts

    Tidying up my home server setup was more rewarding than I expected. Sometimes it’s the small things — like moving a logo piece or unplugging an old printer — that make your tech space feel more functional and welcoming. Adding a UPS was the smartest safety move I made, protecting everything from unpredictable power hiccups.

    If you’re tinkering with your own home server setup, take a moment to review what’s working and what could be improved. Sometimes a little cleanup, a bit of organization, and a smart hardware upgrade are all you need to move forward with confidence.

    For more info on UPS devices and power protection, you can explore resources like APC by Schneider Electric APC UPS and learn about VLANs and home networking from trusted tech sites like How-To Geek How-To Geek Networking.

    Hope this little journey through my home server refresh gives you some ideas and motivation for your own setup. Sometimes the best tech projects are the ones that quietly make your daily life easier.

  • Are Xeon Processors Worth It for Your Home Lab?

    Are Xeon Processors Worth It for Your Home Lab?

    Breaking down whether a Xeon setup fits your Proxmox, NAS, and media server needs

    If you’re diving into the world of home lab setups, chances are you’ve wondered whether a home lab Xeon processor is really worth the investment. Maybe you’ve spotted some affordable servers with Xeons and decent RAM and thought, “Could this be my perfect build?” I’ve been there too, wondering if such a setup is practical, especially for running Proxmox, home automation (HA), and eventually some media server tasks. Let’s chat about what it all means and if it fits your needs.

    What Makes Xeon CPUs Popular in Home Labs?

    Xeon processors are server-grade CPUs known for stability, multi-core performance, and support for ECC RAM (which helps avoid data corruption). For many, these features feel like a natural fit for a home lab because they promise reliability and power. But that doesn’t automatically mean they’re always the best choice.

    If your goal is to run a Proxmox environment, which is a popular hypervisor with container support, having plenty of cores and threads is handy for managing multiple virtual machines or containers smoothly. Xeons typically shine here, especially the models designed for multi-threaded loads.

    How Does a Xeon Fare in a Home Lab Setup?

    Here’s the thing about using a typical Xeon server in your home lab:

    • Decent RAM is a plus: Most Xeon servers allow for lots of ECC RAM, so you get stability if your workloads need it.
    • Storage: You mentioned you already have plenty of HDDs, so storage isn’t an issue. Xeon servers usually come with onboard RAID support, which helps with data redundancy — great for NAS-like setups.
    • Transcoding without a GPU: This can be tricky. Xeon CPUs aren’t magic for video transcoding without a GPU. Software transcoding relies heavily on the CPU, and while some Xeons are powerful, they may struggle to keep up with multiple streams, especially high-definition content.

    When you add a GPU later for media server tasks (like Plex or Jellyfin), your setup will be much more efficient. GPUs handle transcoding much better, freeing up CPU resources and making your media streaming smooth.

    A Quick Look at Alternatives

    If your budget is tighter or you want a more general-purpose box, there are alternatives to Xeon you might consider, such as AMD Ryzen or Intel’s consumer-grade CPUs with many cores. They might lack ECC RAM support, but for certain home labs, that’s an acceptable trade-off.

    Still, the ruggedness and server focus of Xeon are comforting if uptime and reliability top your list.

    Is a Xeon-Based Home Lab Right for You?

    So, should you grab a Xeon for your home lab? Here’s a quick checklist to think about:

    • Proxmox and Virtualization: Yes, Xeons are well-suited here.
    • Media Server Usage: Great once paired with a GPU for transcoding.
    • Storage and NAS Needs: Excellent, given RAID and ECC support.
    • Budget: Generally pricier than consumer CPUs.
    • Power Consumption: Server CPUs can be more power-hungry.

    If you tick most of these boxes and want a stable, versatile setup, a home lab Xeon is likely worth it. Plus, there’s plenty of documentation and community support out there for running Proxmox and NAS on Xeon servers.

    Wrapping It Up

    In the end, the home lab Xeon choice depends on your specific use case. For virtualization, NAS, and eventual media server with GPU transcoding, Xeon offers a solid foundation. Just be mindful of the lack of GPU in the initial stage — transcoding will lean heavily on the CPU. Also, consider power costs and your budget.

    For more insights, you can check out Intel’s Xeon processor lineup and the Proxmox official site.

    If you’re curious about home lab setups in general and want some ideas, sites like ServeTheHome have tons of real-world builds and advice.

    Hopefully, this helps you get a better sense of whether the home lab Xeon path suits your plans. Feel free to reach out with any more questions about setting up your own little digital corner at home!

  • Building Your Perfect Homelab: A Friendly Guide to Diagramming Your Setup

    Building Your Perfect Homelab: A Friendly Guide to Diagramming Your Setup

    Explore essential tips and feedback for creating an effective homelab diagram that fits your needs

    If you’ve ever dabbled in IT projects at home, you’ve probably heard about the importance of having a solid homelab setup. Most of us tech enthusiasts will vouch for one critical tool to help keep things organized: a clear and well-thought-out homelab diagram. This little blueprint can make a huge difference, whether you’re a beginner or a seasoned expert.

    Why Create a Homelab Diagram?

    A homelab diagram helps you visualize your entire setup. It acts like a roadmap, showing how components connect and communicate. When you have a homelab diagram, troubleshooting network issues or planning upgrades becomes a breeze. Plus, it’s a way to showcase your setup to friends or the online community for advice.

    Starting Your Homelab Diagram: Keep It Simple

    When sketching your homelab diagram, simplicity is key. Begin by noting down all essential devices: servers, switches, routers, and storage units. Label each component and use clear lines to demonstrate connections. Avoid cluttering your diagram; instead, focus on readability. Tools like draw.io or Microsoft Visio offer user-friendly platforms to create your diagrams without fuss.

    Tips for Improving Your Homelab Diagram

    • Use Consistent Symbols: Pick icons or shapes that represent your devices consistently.
    • Color Code Connections: Differentiate cables or signals by color to understand data flow quickly.
    • Add Notes: Brief annotations can explain roles or settings without overwhelming visuals.
    • Update Regularly: As your homelab grows or changes, keep the diagram current.

    Why Feedback Matters

    Sharing your homelab diagram with others can give you valuable insights. Peers might spot missing links or suggest optimizations you hadn’t considered. Online communities like Spiceworks or Homelab subreddit are great places to get constructive feedback.

    Real-Life Example

    Let me share a quick story. When I first built my homelab, my initial diagram was messy and didn’t account for a backup power source. After sharing it with a user group, I realized I needed to include my UPS and a switch redundancy setup. Updating the diagram helped me avoid potential downtime during power hiccups.

    Final Thoughts

    A homelab diagram isn’t just a drawing—it’s a living document that grows with your setup. Whether you’re managing a few devices or a more complex network, spending a little time on a good diagram pays off in clarity and ease of maintenance. So grab your coffee, start sketching, and share your diagram for some fresh eyes to help you improve.

    For more detailed networking diagrams and advice, check out Cisco’s official network diagram guidelines or Netgate’s pfSense network diagram examples.

  • My Server Rack Didn’t Fit in My House, So I Put It in the Crawlspace

    How a month-long DIY project led to the perfect, out-of-the-way home for my server gear.

    Anyone who loves building and running their own home server eventually hits the same wall. Or, more accurately, runs out of walls. In a busy house, finding a dedicated spot for a noisy, heat-generating server rack that isn’t in the middle of the living room or bothering everyone is a real challenge. I found myself in that exact spot, but the solution wasn’t in a closet or the garage—it was right under my feet. This is the story of my unconventional crawlspace home lab.

    Our house is a modest three-bedroom, and there was simply nowhere to put my growing collection of network gear without it being a major inconvenience. But we had just finished a massive DIY project: fully encapsulating our crawlspace. It was a month of backbreaking work, but by doing it ourselves, we saved a staggering $14,000. More importantly, we created a brand new, usable space that’s environmentally stable. With a dehumidifier running, it stays around 73°F and 45-50% humidity all year round.

    That’s when the lightbulb went on. Why not put the server rack down there?

    The Challenge: Creating a Secure Crawlspace Home Lab

    Putting expensive electronics in a crawlspace, even a clean one, sounds risky. My main concerns were moisture, pests, and physical security. The encapsulation and dehumidifier already solved the climate control problem, creating an environment safer than most garages or basements.

    Next, I sealed the heck out of the entire space. Every potential entry point was closed off, so I’m confident no pests are getting in there. But I didn’t want the rack sitting on the floor. Even with a vapor barrier, it just felt wrong. The solution? Look up.

    I decided to hang the entire server rack from the floor joists. Using heavy-duty chains and mounting hardware, I created a suspended setup that keeps everything off the ground. Each chain and its associated hardware is rated for 255 lbs, giving the whole system a weight capacity of over 1,000 lbs. My current setup weighs just a little over 200 lbs, so it’s massively over-engineered for safety and peace of mind. I even left extra links in the chains in case I need to add more gear later.

    My Hanging Server Rack and Future Plans

    The setup itself is pretty straightforward. The core is my Dell PowerVault, which I converted from an MD3200i to an MD1200 by flashing the backplane and swapping the EMMs. It’s a fantastic piece of hardware for a home setup. The hanging rack gives it plenty of airflow and keeps it completely out of the way.

    Of course, a project like this is never truly “done.” I have a few more things on the roadmap to make this crawlspace home lab perfect:

    • Uninterruptible Power Supply (UPS): This is the next big addition. I won’t hang the UPS due to its weight. Instead, I’ll place it on about six inches of high-density foam board directly underneath the rack. This will keep it off the concrete floor and protect it from any potential moisture while providing clean, battery-backed power. For anyone running a server, a good UPS from a brand like APC by Schneider Electric is non-negotiable.
    • Remote Monitoring: Since the lab is out of sight, it can’t be out of mind. I plan on installing a dedicated camera and a fire detector down there. This will let me keep an eye on things and provide an early warning if anything goes wrong.
    • Environmental Tracking: As you can see from my monitoring data, the temperature and humidity are incredibly stable. The small spikes you see are just from me being down there working. You can learn more about the importance of humidity control in IT environments from technology sites like TechTarget.

    This solution might not work for everyone, but it’s a perfect fit for my situation. It’s a reminder that sometimes the best answer to a tricky problem requires a little creativity and a willingness to look at the unused spaces in your home in a new light. If you’re out of room, maybe it’s time to see what’s hiding right beneath your floorboards.

  • Cutting the Cord: How I Switched to a Self-Hosted Media Setup

    Cutting the Cord: How I Switched to a Self-Hosted Media Setup

    Discover the freedom of a self-hosted media system with Plex and *arr stack solutions.

    If you’ve ever felt overwhelmed by the monthly charges for Disney+, Hulu, Netflix, HBO Max, and other streaming services, you’re not alone. I’ve been there too, and recently I made a decision that’s been quietly changing how I enjoy my media — I switched to a self-hosted media setup.

    Why I Chose a Self-Hosted Media Setup

    Like many, I was juggling multiple subscriptions, paying for services that offered overlapping content. It felt like I’d be paying forever just to watch the shows and movies I liked. That’s when I started looking into a self-hosted media setup. The idea is simple: instead of paying streaming services, you host your own media library at home and access it wherever you want.

    Setting Up Plex and the *arr Stack

    The journey began with Plex, an excellent media server that organizes your movies, shows, music, and photos into a neat, easy-to-use interface. But I didn’t stop there. I combined Plex with the *arr stack — tools like Sonarr, Radarr, and others — which automate the downloading and management of your media collection. Together, they create a well-oiled machine that keeps everything up to date without constant manual work.

    What made this even better was using Docker containers to run all these services efficiently and securely on my server. Plus, setting up an Nginx reverse proxy allowed me to share my Plex server safely with family members, no matter where they are.

    Investing in the Right Hardware: NAS and Storage

    With software ready to go, the next step was hardware. I found a QNAP Turbo NAS TS-664-4G at auction, a great device for managing large amounts of data. Paired with the three WD Red Pro 18TB drives I grabbed, this NAS will give me plenty of space to store all the movies and shows I want.

    If you’re considering a NAS, it’s important to have a plan for configuring and maintaining it to keep your data safe and accessible. While there are tons of guides out there, I found that the best advice is often shared in communities dedicated to home labs and media servers.

    The Benefits Beyond Savings

    Switching to a self-hosted media setup isn’t just about cutting costs. It’s about control and customization. You decide what to watch, when, and how. You’re not tied to what a streaming service decides to offer or removes.

    Moreover, there’s a robust community around home media setups. Sharing tips, software tweaks, and hardware recommendations turns the process into a fun, ongoing project.

    Ready to Make the Leap?

    If you’re curious, start small. Try setting up Plex on an old computer or NAS you already own. Explore tutorials on the *arr stack, Docker containers, and Nginx reverse proxies. Websites like Plex’s official site, QNAP’s product page, and communities like r/homelab offer tons of help.

    Making the switch to a self-hosted media setup can feel daunting at first, but it’s incredibly rewarding once it’s up and running. It’s like creating your very own personalized streaming world — without the heavy subscription bills.

    So, if you’re tired of the subscription treadmill, maybe it’s time to give a self-hosted media setup a shot. It’s a little bit of tech adventure with a lot of freedom at the end of the tunnel.

  • Starting Fresh: How I Rebuilt My Homelab From Scratch

    Starting Fresh: How I Rebuilt My Homelab From Scratch

    A personal journey into remodeling my homelab with practical tips for your own setup

    If you’ve ever felt like your homelab setup just needs a fresh start, you’re not alone. I recently decided to rebuild my homelab from the ground up, and the process was both challenging and rewarding. Starting fresh allowed me to rethink what I truly needed and improve my setup without the baggage of old, unused gear.

    Why I Chose to Rebuild My Homelab

    After years of adding gadgets and servers here and there, my homelab was cluttered and not as organized as I’d want. I wanted a clean slate to optimize performance, simplify management, and incorporate newer technology. Rebuilding a homelab means reconsidering everything—from the physical layout to the software stack.

    Planning the Rebuild Homelab Process

    Before pulling the plug on my old setup, I jot down a plan. What are my goals? Which services do I want to run? How much space and power will my new setup need? Are there new networking components to add? If you’re thinking about a similar project, start with an inventory of your current equipment and decide what deserves a second chance and what can be retired or upgraded.

    Picking The Right Hardware and Software

    One benefit of a rebuild homelab is that it gives you a chance to adopt newer, more efficient hardware. I chose a compact but powerful server that fits my space while supporting virtualization well. On the software side, I revisited my choice of operating systems and management tools. I leaned towards open-source solutions with strong community support that are flexible for experimentation. Popular options often used in homelabs include Proxmox for virtualization or Unraid for media servers.

    Setting up Your Network for the Rebuild Homelab

    Networking is the backbone of any homelab. I upgraded my switches and routers to support better speeds and improved VLAN functionality. Segregating traffic between management, storage, and guest networks helps keep things secure and organized. If you want to learn more about network setups and security, check out resources like Cisco’s Networking Basics or Ubiquiti’s community forums.

    Tips From My Rebuild Homelab Experience

    • Start with clear goals: Know what you want to achieve before buying or configuring.
    • Keep it simple: Avoid overcomplicating your setup.
    • Document everything: Taking notes on configurations saved me a lot of headaches.
    • Backup: Always have backups before making big changes.

    Rebuilding a homelab isn’t just about hardware; it’s about restoring your enthusiasm for the tech and learning more along the way. If you’re curious for ideas and inspiration, Tom’s Hardware offers great guides and reviews on homelab hardware and software.

    Wrapping Up My Rebuild Homelab Journey

    Taking the time to rebuild my homelab was a worthwhile project. It refreshed my interest in home IT projects, gave me a more streamlined, efficient setup, and it actually made me want to experiment more. If you’re feeling that your homelab has grown stale or unwieldy, a rebuild might be just the thing to bring it back to life.

    Feel free to reach out or share your own experiences on rebooting your setup. Sometimes, all it takes is a fresh start to make things work better.