Category: AI

  • OpenAI and Luxshare Precision: A New Pocket-Sized AI Device on the Horizon

    OpenAI and Luxshare Precision: A New Pocket-Sized AI Device on the Horizon

    Discover what the partnership between OpenAI and Luxshare Precision means for AI technology and everyday users.

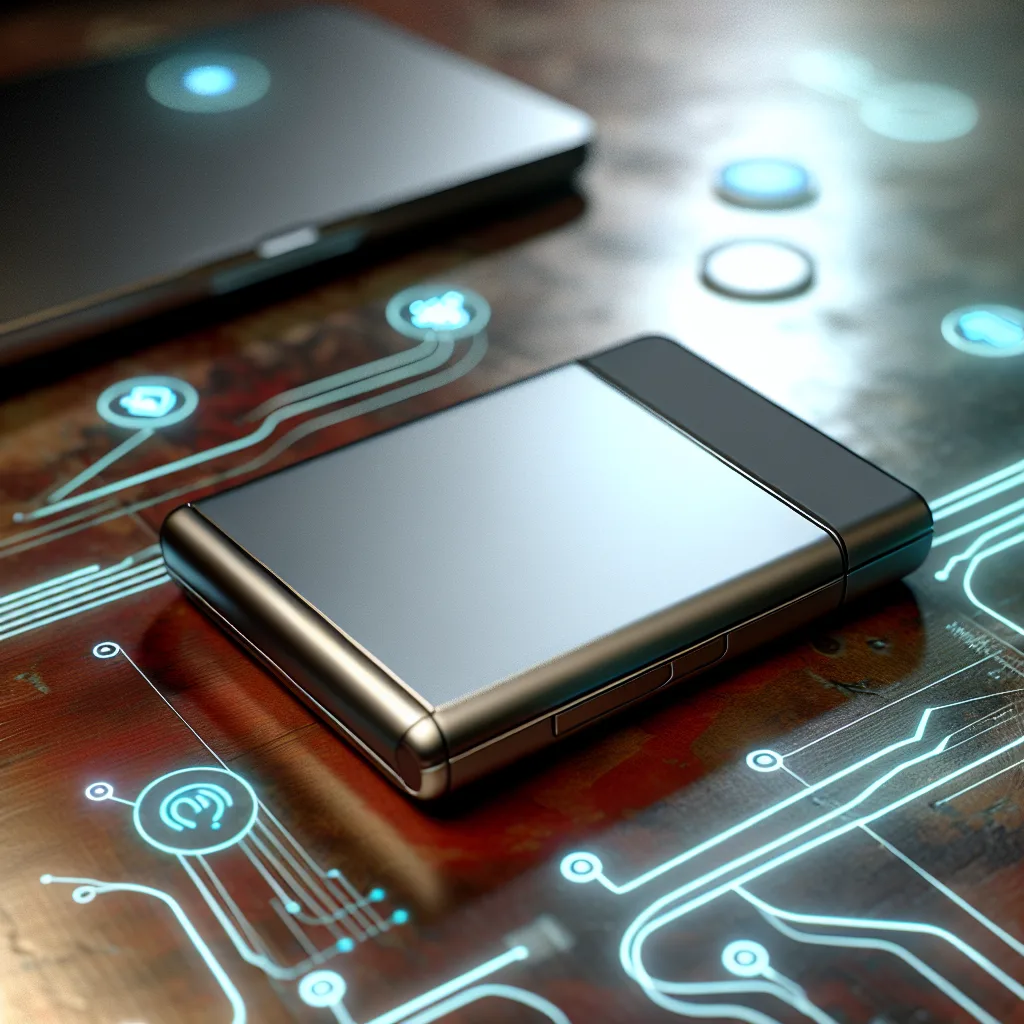
    Have you heard about the latest buzz in AI technology? The OpenAI partnership with Luxshare Precision caught my attention recently, and I thought I’d share what I found out. They’re teaming up to develop a pocket-sized AI device, which sounds pretty promising for anyone curious about how AI might fit into daily life on the go.

    What Is This OpenAI Partnership All About?

    OpenAI has been leading the way with AI creativity and intelligence, but hardware partnerships like this one with Luxshare Precision show how they’re looking to bridge powerful software with tangible devices. Luxshare Precision, known primarily for manufacturing high-quality electronics in China, brings the hardware expertise while OpenAI focuses on the AI side of things. It’s a collaboration that seems geared towards creating a sleek, portable gadget that could deliver AI capabilities right from your pocket.

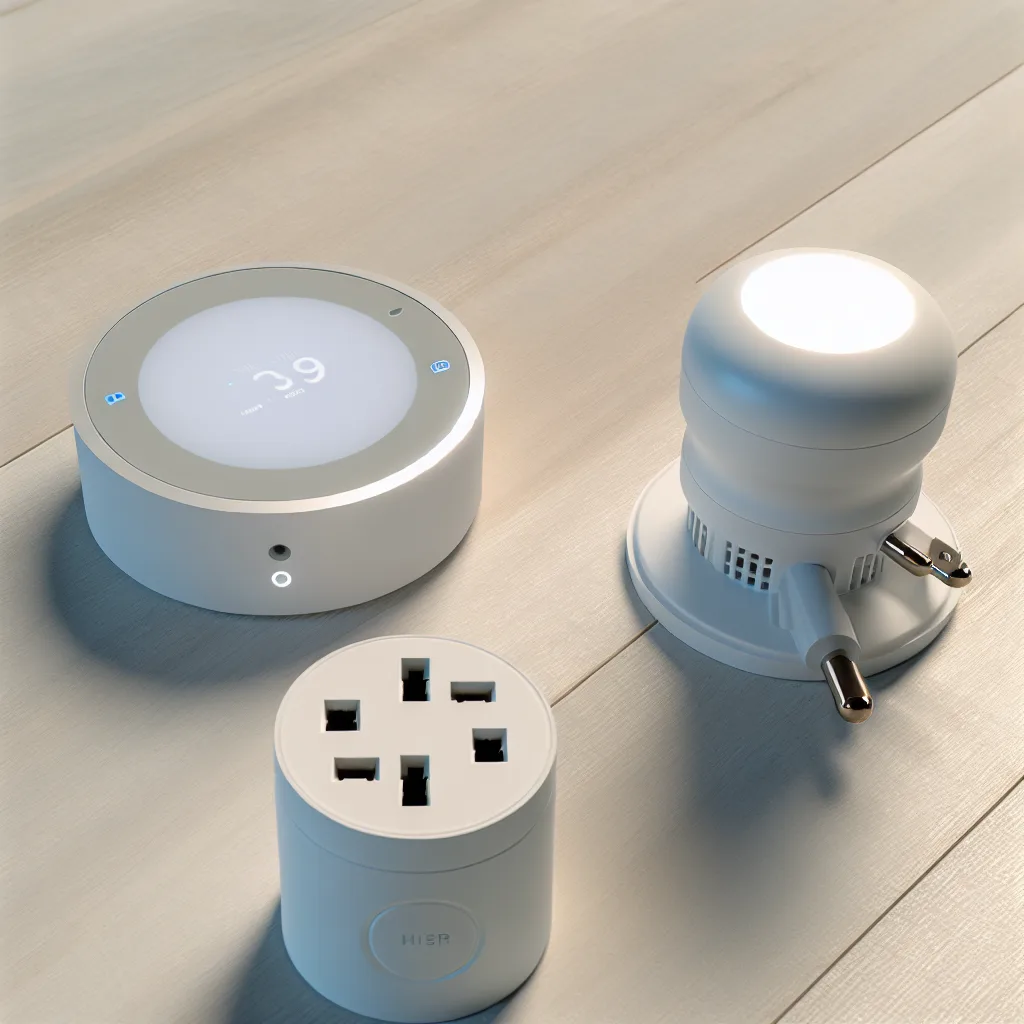
    Why a Pocket-Sized AI Device?

    You might wonder, why compact and pocket-sized? The idea is to make AI more personal and accessible without needing to fire up a computer or even a phone. Imagine having an AI assistant you can carry with you, available anytime for quick answers, translations, or maybe even creative brainstorming on the move. This kind of device could reshape how we interact with technology, especially in situations where pulling out a phone feels too distracting or slow.

    What Can We Expect From the Device?

    Details are still unfolding, but the partnership hints at a device with strong AI language understanding, possibly leveraging what OpenAI is known for—like advanced chat models that can provide conversational assistance. Since Luxshare Precision handles precision manufacturing and miniaturization, we’re probably looking at something that’s not just smart but also sleek and durable.

    The Bigger Picture of the OpenAI Partnership

    This isn’t just about one gadget. OpenAI teaming up with a hardware manufacturer like Luxshare could be a step towards more integrated AI devices across various forms. It aligns with ongoing tech trends where AI is moving closer to everyday consumer products. For more context on Luxshare Precision’s role in tech, their official website is a useful place to check: Luxshare Precision.

    And if you’re interested in OpenAI’s AI technology and ethos, their site is a great resource: OpenAI.

    Should You Be Excited?

    While it’s too early to know exactly when the device will hit the market or what the final product will look like, partnerships like this highlight how AI is becoming increasingly mainstream. It’s exciting to think about having AI tools literally at your fingertips. Plus, as we see more collaborations between AI developers and hardware makers, the options to choose from are likely to expand.

    Final Thoughts

    The OpenAI partnership with Luxshare Precision is an interesting development for anyone who’s been curious about the next steps for AI technology. A pocket-sized device means convenience and accessibility, bringing AI out of the realm of just apps and websites and into a new, portable form. Keep an eye out for updates; this could be the start of something quite handy for the tech-savvy and casual users alike.

    If you want to stay informed about how AI devices evolve, TechCrunch often covers the latest in AI hardware and partnerships.

    So, what do you think? Would a pocket-sized AI device be something you’d find useful in your daily life?

  • Will We Miss Life Before AI? A Look at Our New Normal

    Will We Miss Life Before AI? A Look at Our New Normal

    Exploring how the AI era has quietly become part of everyday internet life and what that means for us.

    I recently found myself thinking a lot about the days before AI really took over our daily online experiences. You know, that internet life where you could use search engines and not really wonder how much a machine was shaping your results? That got me wondering: will we miss the world before AI? It’s a question worth asking because, honestly, it feels like AI has quietly cemented itself into the fabric of our internet experience, making it impossible to take a real break from it.

    Life Before AI: A Quick Nostalgic Look

    If you think back just a few years, searching for information online was straightforward. You typed in your query, and you got results based on keywords and webpage rankings. There was a sense of randomness and discovery—you might stumble upon something unexpected because the engine wasn’t trying too hard to anticipate what you wanted.

    Nowadays, AI personalizes and filters results so much that it’s hard to tell what’s just out there and what’s being curated for you. All major search engines now incorporate AI to improve relevance, predict intent, and even generate answers. While that can be super convenient, it’s also worth recognizing how much control we’ve handed over to algorithms.

    Why It Feels Impossible to Take a Break from AI

    I once tried stepping away from AI tools because I noticed how they were influencing my thinking. But, surprise—AI is everywhere, not just in the obvious apps. Search engines, social media feeds, shopping recommendations, news curation—AI powers all of these now, and there’s no manual “off” switch.

    For instance, Google openly shares how AI helps improve search result quality Google AI. And social platforms like Facebook and Twitter use AI to tailor your feed to what you’re likely to engage with. This isn’t just convenience—it’s part of a whole ecosystem that’s learning from and adapting to your behavior, sometimes without you even realizing it.

    Will We Miss Life Before AI?

    Here’s the real question: do we actually miss life before AI? For me, it’s a mix. I sometimes miss the simplicity, the unpredictability of searching without an assistant trying to guess my needs. But I also appreciate how AI makes certain things easier—finding quick answers, personalized recommendations, and even creative ideas.

    The key is awareness. Understanding that AI’s influence is everywhere can help us make conscious choices about when and how to use it. Maybe we can strive for a balance where AI serves us without taking away the joy of discovery and human intuition.

    How to Navigate This AI-Driven World

    • Be mindful: Know when AI is shaping your experience and question its outputs.
    • Diversify your sources: Don’t rely on a single AI-powered platform for all your information.
    • Take intentional tech breaks: Even if you can’t avoid AI, stepping away from screens can refresh your mind.

    In the end, the world before AI might feel like a distant memory, but it’s one worth reflecting on. It helps us appreciate what’s changed and how we want to move forward with this technology.

    For more insights, you might find this article about AI’s impact on internet culture interesting Wired – AI and Internet. Also, if you’re curious about AI’s broader effects on society, this overview from MIT Technology Review is a solid read MIT Tech Review – AI Overview.

    So, will we miss the pre-AI world? Maybe. But understanding it helps us navigate the future with a clearer perspective.

  • The Smart Lock Puzzle: How to Make Your Security System Arm Itself… But Only When You Want

    Solving a surprisingly common Z-Wave lock automation challenge for smarter security.

    You’ve got your smart home set up. The lights turn on when you arrive, the thermostat knows when you’re away, and your smart lock means you never have to fumble for keys again. It’s a great feeling. But then you run into one of those little nagging problems that makes you realize you can go even deeper.

    Here’s the scenario: You leave the house and lock your door. You want your security system to automatically arm itself when you do. Simple enough, right? Most systems can do that. But what if you only want it to arm when you lock it with a specific user code, and not when you use the convenient one-touch lock button on the keypad? This is a surprisingly tricky Z-Wave lock automation challenge, but solving it is the key to a truly intelligent home.

    Why would you want this? Well, maybe you’re just stepping out to grab the mail or take the trash out. You tap the lock button on your way out, but you don’t need the entire house to go into armed lockdown mode. You’ll be back in 30 seconds. However, when you’re leaving for work or for the day, you use your personal code to lock the door. That’s the moment you want the system to arm itself. It’s a subtle difference, but it’s the kind of detail that separates a “smart” home from a “genius” one.

    The Big Question: A Code vs. a Button

    The core of this puzzle lies in how your smart lock talks to your home automation hub (like Alarm.com, Hubitat, or Home Assistant). When you lock the door, the lock sends a Z-Wave signal to the hub saying, “Hey, I’m locked!”

    Most automation rules are simple. They see that signal and trigger an action, like arming your system. The problem is, many locks send the same basic signal whether you locked it with a code or just tapped the button.

    But what if they could be different? What if a lock could send two distinct signals?
    * Signal A: “I was locked using a user code on the keypad.”
    * Signal B: “I was locked using the one-touch, no-code button.”

    If a lock can do that, you can build a much smarter automation rule. The rule would be: “When you receive Signal A, arm the security system. When you receive Signal B, do nothing.” This is the holy grail for this specific Z-Wave lock automation task.

    Understanding Z-Wave Commands for Lock Automation

    So, does a lock like this actually exist? The answer is a little complicated, but it’s yes, sort of. It’s less about the lock itself and more about the nitty-gritty details of the Z-Wave protocol.

    Z-Wave devices can send different “Notification Types” to the hub. A high-quality smart lock can distinguish between various events. For example, a lock like the Schlage BE469ZP Connect is known for providing more detailed feedback. It might report locking events differently depending on the method used:

    • Manual Lock: When you use the thumbturn on the inside.
    • Keypad Lock: When a valid user code is entered.
    • One-Touch Lock: When the exterior button is pressed without a code.

    The secret isn’t finding a lock with a special feature list, but finding a lock and a hub that can correctly interpret these different notification signals. Your home automation hub needs to be able to see the difference between “Keypad Lock” and other lock events to build the specific rule you want.

    How to Achieve This Smarter Z-Wave Lock Automation

    If you’re trying to set this up, here’s what you need to look into:

    1. Check Your Lock’s Capabilities: Start by researching your specific lock model. Look for technical documentation or community forum discussions (great places include the Hubitat or Home Assistant forums) to see if it sends different Z-Wave notifications for code-based locking versus one-touch locking.

    2. Dig Into Your Hub’s Settings: Your automation platform is the brain of the operation. You need to confirm if it can differentiate between these triggers. For platforms like Alarm.com (serviced by providers like Surety), this functionality is often built-in, but depends on the specific lock’s compatibility. You may need to look at the advanced rule-building options to see what triggers are available from your lock.

    3. Choose Your Hardware Wisely: If you’re starting from scratch, look for modern Z-Wave Plus (700 or 800 series) locks. These newer devices often provide more detailed and reliable reporting. The Z-Wave Alliance website is a great resource for finding and comparing certified devices that meet the latest standards.

    This level of detailed control is what makes home automation so powerful. It’s not just about making things happen automatically; it’s about making the right things happen at the right time. So yes, it’s a niche request, but it’s a perfect example of how a little digging can help you build a home that doesn’t just follow commands, but actually understands your intent.

  • Got an Extra Wiser Hub? Here’s What It’s Actually For

    Got an Extra Wiser Hub? Here’s What It’s Actually For

    Unpacking the purpose of the Wiser Hub 2nd Gen and how it transforms your smart heating into a full smart home system.

    So, you just got a new Wiser smart heating kit. You’re excited to get it all set up, but as you unpack the box, you find something a bit puzzling: an extra hub. You’ve already got the hub that connects to your boiler, so what is this second one for? If you’re scratching your head about the Wiser Hub 2nd Gen, you’re definitely not alone. It’s a common point of confusion, but the answer is actually pretty simple and opens up a lot of cool possibilities for your home.

    Let’s clear it up. The hub that wires into your boiler is specifically a Heat HubR. Its one job is to talk to your boiler and control your heating and hot water based on signals from your smart radiator valves and thermostats. But the Wiser system is designed to do more than just heating. That’s where the other hub comes in.

    Understanding the Wiser Hub 2nd Gen

    Think of the standard Wiser Hub 2nd Gen as the central brain for a broader smart home system. While the Heat HubR handles the heating, this second hub acts as the main gateway for all other Wiser smart devices. It connects to your Wi-Fi and creates a dedicated network (using Zigbee, a common smart home protocol) for these devices to communicate reliably without interfering with your Wi-Fi.

    So, if you got one as a freebie or in a bigger bundle, the seller essentially gave you an expansion pack for your smart home before you even knew you needed it. Its purpose is to take you from a smart heating setup to a fully-fledged smart home ecosystem.

    What Can You Connect to the Wiser Hub?

    This is where it gets interesting. The hub isn’t for controlling your boiler; it’s for adding a whole range of other smart devices to your setup. It bridges the gap between your phone and these gadgets, allowing you to control them all from the same Wiser Home app.

    Here’s a quick rundown of the kinds of devices you can add:

    • Wiser Smart Plugs: This is the most common use. You can plug any standard appliance—a lamp, a fan, a coffee maker—into a Wiser Smart Plug and control it remotely. You can set schedules, turn things on and off from your phone, and even link them to your heating schedule. You can check them out on the official Wiser site.
    • Wiser Electrical Heat Switch: If you have electric radiators, towel rails, or infrared heaters, this switch allows you to integrate them into your Wiser system for total home heating control.
    • Wiser Underfloor Heating Controller: For homes with hydronic underfloor heating, this controller connects it to the hub, letting you manage it right alongside your radiators.
    • Wiser Room Thermostats & Radiator Thermostats: While your Heat HubR also connects to these, the main Hub can also manage them, especially in larger homes or more complex setups.

    Essentially, that extra hub is the key to unlocking the full potential of the Drayton Wiser ecosystem.

    Do You Actually Need a Wiser Hub 2nd Gen?

    So, the big question: do you need it? The answer depends entirely on your goals.

    • If you only want smart heating: No. If your only plan is to use Wiser’s smart radiator valves and a room thermostat to control your boiler, the Heat HubR that came with your kit is all you need. The second hub can stay in the box.
    • If you want to build a smart home: Yes, absolutely. If the idea of controlling your lights, appliances, and other electronics from the same app as your heating appeals to you, then the Wiser Hub 2nd Gen is your starting point. It’s the foundation for adding more devices later on.

    It’s less of a replacement and more of an upgrade. It doesn’t control the boiler, but it controls nearly everything else. For many people, starting with heating and then realizing they can easily add smart plugs is a natural next step. If you have the hub already, you’re one step ahead of the game.

    So, don’t look at it as a spare part. Look at it as a free ticket to a smarter, more connected home.

  • Got No Light Switch? Here’s Your Simple Fix.

    Got No Light Switch? Here’s Your Simple Fix.

    A beginner’s guide to adding voice-controlled lights to any room, even without a wall switch.

    No Light Switch? No Problem.

    Ever stumbled into a dark room, fumbling around for that tiny, awkward switch right on the light fixture itself? It’s a classic feature in older apartments and homes, and let’s be honest, it’s a pain. If this sounds familiar, you’ve probably wondered if there’s a better way. Good news: there is, and you don’t need to be an electrician to fix it. A simple smart light setup is the perfect solution, turning your frustrating fixture into a voice-controlled convenience.

    I get it, the world of smart homes can feel intimidating. You hear about hubs, bridges, and complicated wiring, and it’s easy to feel lost. But for this specific problem, the solution is surprisingly simple. You don’t need a smart plug, which only works for things you plug into an outlet. Instead, the magic is all in the light bulb itself.

    Your First Smart Light Setup: What You Actually Need

    Forget the complex diagrams and technical jargon. To solve the “no wall switch” problem, you only need a couple of things. The goal is to replace your regular bulb with a smart bulb that has its own built-in Wi-Fi connection. This lets you control it from your phone or with your voice, completely bypassing the need to touch the fixture.

    Here’s a simple shopping list:

    • A Wi-Fi Smart Bulb: These are the key. Brands like Wyze, TP-Link Kasa, and Sengled make fantastic, affordable bulbs that connect directly to your Wi-Fi without needing any extra hardware. You just screw them in like a normal bulb.
    • Your Smartphone: You’ll need it to download the bulb’s companion app to get everything set up.
    • A Voice Assistant (Optional, but recommended!): If you want to use voice commands like “Hey Google, turn on the bathroom lights,” you’ll need a smart speaker or a phone with Google Assistant or Amazon Alexa.

    That’s it. No extra hubs, no wiring, no calling a professional.

    Why a Smart Bulb is the Perfect Fix

    A standard light fixture with a manual switch is a simple circuit. When you turn its little knob or pull its chain, you’re physically completing the circuit to let power flow to the bulb.

    A smart bulb works a bit differently. You leave that physical switch in the “on” position permanently. This means power is always flowing to the bulb, but the bulb itself is in a low-power standby mode. It’s waiting for a signal from your Wi-Fi network. When you say, “Alexa, turn on the light,” your command goes to the internet, then to the bulb, telling it to power on its LED. It’s a beautifully simple and effective workaround.

    For those who want to dive a bit deeper into the different types of smart lighting available, a great resource is The Verge’s beginner’s guide to smart lights, which breaks down the pros and cons of different systems.

    Putting Your Smart Light Setup Together: A 5-Minute Guide

    Ready to make it happen? Here’s how easy it is.

    1. Screw It In: Take your old bulb out and screw the new smart bulb in its place.
    2. Power It On (and Leave It On): Turn the physical switch on the light fixture to the “ON” position. This is the most important step! From now on, you’ll pretend this switch doesn’t exist.
    3. Download the App: Grab your phone and download the app for your bulb’s brand (e.g., the Wyze app, Kasa Smart app).
    4. Connect to Wi-Fi: Follow the simple on-screen instructions in the app. It will usually involve finding the bulb on your Wi-Fi network and giving it your password. This connects the bulb to the internet.
    5. Link Your Voice Assistant: Open your Amazon Alexa or Google Home app. Go to the “Devices” section and look for an option to add a new device or skill. Search for your bulb’s brand, link your accounts, and you’re done.

    Now for the fun part. Say the magic words: “Hey Google, turn on the bathroom light.” And just like that, you have light. No more fumbling in the dark.

    If you decide you want to build out a more robust system later, you can explore options like the Philips Hue ecosystem, which uses a central hub to control many lights and accessories with incredible reliability. But for starting with a single, switch-less fixture, a simple Wi-Fi bulb is all you need.

    So, don’t let quirky old wiring stop you from enjoying a little modern convenience. This easy smart light setup is a perfect weekend project that solves a real, everyday annoyance.

  • That One Annoying Light Switch: Your Simple, Hub-Free Solution

    That One Annoying Light Switch: Your Simple, Hub-Free Solution

    You don’t need a complicated smart home to fix one inconvenient light switch. Here’s how a no hub smart switch offers a simple, direct solution.

    We’ve all got one. The Phantom Switch. The one in the kitchen that’s inconveniently stuck behind the microwave. The one at the top of the basement stairs that’s only reachable after you’ve already stumbled down in the dark. It’s a small, daily annoyance that feels like it should have a simple fix. And thankfully, it does. You can solve this problem with a no hub smart switch, and the best part is, you don’t need to turn your home into a complex, voice-activated command center to do it.

    You just want a switch that works, but in a better spot. No apps, no voice commands, no extra gadgets cluttering your Wi-Fi network. You want the instant, reliable response of a standard “dumb” switch, just… relocated. I get it completely. The world of smart homes can feel overwhelming, but this specific problem has a wonderfully simple and direct solution.

    Why a No Hub Smart Switch is Your Best Bet

    Before we dive into the options, let’s quickly talk about what a “hub” even is. In many smart home setups, a hub (or bridge) acts as a central translator. It speaks to all your different smart devices (lights, plugs, sensors) and connects them to your home network. It’s powerful if you’re building a fully integrated system.

    But what if you’re not?

    For a simple task like relocating a switch, a hub is often overkill. It adds another layer of complexity, another device to plug in, and another potential point of failure. Choosing a no hub smart switch setup offers a few key advantages:

    • Simplicity: You’re dealing with fewer components. It’s a more direct line from the remote to the switch itself.
    • Lower Cost: No need to buy an extra piece of hardware.
    • Direct Control: Many hub-less options communicate directly, avoiding potential Wi-Fi lag for a faster, more reliable connection.

    Your Options for a Simple, Hub-less Solution

    When you strip away all the fancy features, you’re left with two main paths to get that direct, responsive control you’re looking for.

    1. RF (Radio Frequency) Switch Kits

    This is likely the purest solution for what you want. An RF switch kit is beautifully straightforward. It typically comes with two parts:

    • The Receiver: This is the part that gets wired into your wall, replacing your existing “dumb” switch.
    • The Remote: This is a wireless, battery-powered switch that you can mount literally anywhere you want with adhesive tape or screws.

    They talk to each other directly using a radio frequency, much like a garage door opener. There’s no Wi-Fi, no app, and no hub involved. When you press the remote, it sends a direct signal to the receiver. It’s fast, reliable, and incredibly simple to set up. It’s the closest you’ll get to the feel of a traditional wired switch. There are many great options available online that are specifically designed for this purpose.

    2. Wi-Fi Enabled Smart Switches

    Now, I know the goal is to avoid Wi-Fi routing, but it’s worth mentioning the most common type of no hub smart switch: the Wi-Fi switch. Brands like Leviton or TP-Link Kasa make switches that connect directly to your home’s Wi-Fi network.

    While these do use Wi-Fi, they don’t require a separate hub. The switch itself is the only “smart” component you need. You can then pair it with a wireless remote (often sold separately) or control it from your phone. For the simple goal of relocating a switch, the RF option is often more direct. However, if you think you might want the option to control the light with your phone occasionally, this is a great, simple entry point without committing to a full smart home ecosystem. For a deep dive into the different technologies, check out this great explainer on how smart devices communicate.

    A Few Things to Check Before You Buy

    Before you add anything to your cart, here are a couple of practical things to keep in mind:

    • Check for a Neutral Wire: Many smart switches require a neutral wire to power themselves. Older homes sometimes don’t have one in the switch box. It’s a good idea to safely turn off the power and check what’s behind your current switch plate first. There are plenty of guides online to help you identify a neutral wire.
    • Voltage and Regional Standards: As the original inspiration for this post came from someone in Armenia, it’s a critical reminder: electricity isn’t the same everywhere. Always confirm that the switch you’re buying is compatible with your region’s voltage (e.g., 120V in North America, 230V in Europe) and socket standards.
    • The Remote’s Form Factor: Think about where you’ll put the new remote. Do you want one that looks just like a regular wall switch? Or would a smaller, more discreet “pico” style remote be better?

    Ultimately, fixing that one annoying light switch doesn’t have to be a gateway to a smart home you don’t want. A simple, direct solution is out there, and it’s probably easier to install than you think. You can get the convenience you need without any of the extra baggage.

  • No PC? No Problem: Your Guide to the Best Phone-Controlled Security Cameras

    No PC? No Problem: Your Guide to the Best Phone-Controlled Security Cameras

    Let’s find the perfect phone controlled security camera system you can set up and manage entirely from your smartphone.

    So, you’re thinking about getting a security camera system but don’t want the hassle of hooking it up to a computer. I get it. The last thing anyone wants is another complicated device to manage. You just want something that works with the gadget you already use all day: your phone. The good news is, finding a great phone controlled security camera system is easier than ever. You absolutely do not need a PC to get a powerful, reliable setup.

    Let’s walk through what you need to know, cutting through the jargon to find the right fit for your home. It’s like we’re grabbing coffee and figuring this out together.

    First, Let’s Talk Wired vs. Wireless

    This is the first big question. The original person who inspired this post was leaning toward wired, and for good reason, but let’s break down the real-world differences when a PC isn’t in the picture.

    • Wired Systems (The Set-it-and-Forget-it Option): When we say “wired,” we’re usually talking about Power over Ethernet (PoE) systems. This sounds technical, but it just means one single cable to each camera provides both power and internet. The heart of the system is a box called an NVR (Network Video Recorder). Here’s the key part: The NVR does all the work. You connect it to your internet router, connect the cameras to the NVR, and that’s it. You use your phone to scan a QR code on the NVR, and the app does the rest.
      • Pros: Super reliable connection, no batteries to charge, video is stored locally on the NVR (no mandatory monthly fees).
      • Cons: You have to run cables, which can be a bit of a project.
    • Wireless Systems (The Quick and Easy Option): These cameras connect to your home’s Wi-Fi. Some are truly “wire-free” and run on rechargeable batteries, while others need to be plugged into a nearby power outlet.
      • Pros: Incredibly easy to install. You can place them almost anywhere.
      • Cons: You’re dependent on a strong Wi-Fi signal. Battery-powered ones need recharging every few months.

    For a phone-only setup, both are totally possible. Your choice just depends on how much work you want to put in up front.

    What Makes a Great Phone Controlled Security Camera?

    Once you’ve picked between wired and wireless, a few features really matter for a seamless, phone-only experience.

    • The App is Everything: Seriously. The hardware can be amazing, but if the app is clunky, you’ll hate using it. A good app should be intuitive, letting you view live feeds, watch recorded events, and change settings without a manual. Look for apps from brands that are known for good software, like Reolink or Eufy.

    • No Forced Subscriptions: Many brands push you toward a monthly cloud subscription to store your videos. A better option for many is a system with local storage. This could be a microSD card in the camera itself or, even better, an NVR with a big hard drive. You buy the hardware once and you’re done.

    • Smart Alerts That Don’t Drive You Crazy: Old systems sent you a notification every time a leaf blew by. Modern systems use AI to tell the difference between people, cars, and animals. This means you only get alerts for what actually matters, which is a huge benefit for a phone controlled security camera system.

    My Top Picks for a PC-Free System in 2025

    Okay, let’s get to the good stuff. If I were starting from scratch today and didn’t want to touch a computer, here’s what I’d be looking at.

    1. For the Wired Fan: Reolink PoE Systems

    This is my top recommendation if you’re okay with running some cables. A kit like the Reolink RLK8-820D4-A is fantastic. You get 4K cameras and an NVR with a built-in hard drive. The setup is genuinely PC-free. You plug the NVR into your router, download the Reolink app, scan the code, and you’re live. The app is robust and gives you full control over everything.

    2. For Ultimate Simplicity: EufyCam Series

    If you want to be up and running in 30 minutes, Eufy is the way to go. Their cameras, like the EufyCam 3, are battery-powered (the batteries last for months) and connect wirelessly to a central HomeBase. That HomeBase is the key—it stores your recordings locally, so again, no mandatory cloud fees. Their app is one of the most user-friendly on the market.

    3. For a Great Budget Start: Wyze Cam

    You can’t talk about simple, phone-friendly cameras without mentioning Wyze. A camera like the Wyze Cam OG is incredibly affordable and works great. The setup is entirely app-based and takes about five minutes. The main trade-off is that it relies on a microSD card for local recording or their very affordable cloud plan. It’s not a “system” like the others, but for covering one or two spots, it’s a perfect entry point.

    You’ve Got This

    Choosing a phone controlled security camera doesn’t have to be overwhelming. The technology has gotten so good that a PC is now completely optional.

    Just think about that wired vs. wireless question, prioritize a system with a great app and local storage, and you’ll have a sense of security that you can manage from the palm of your hand. No IT degree required.

  • Had It With Smart Relays? Here’s Why a Real Zigbee Light Switch is Your Next Best Upgrade

    Had It With Smart Relays? Here’s Why a Real Zigbee Light Switch is Your Next Best Upgrade

    Moving from clunky relays to a dedicated smart switch is one of the best upgrades you can make for a less frustrating, more reliable smart home.

    It’s a familiar story for anyone deep into the smart home world. You’ve spent months, maybe even years, carefully building your network. Everything is humming along perfectly, and then it happens. Maybe you upgrade a piece of core hardware, maybe there’s a power surge, or maybe the network just decides it’s time for a fresh start. Suddenly, you’re faced with the tedious task of re-pairing every single device. This is where you discover which gadgets are your true friends. And for many, the weakest link isn’t a fancy sensor or a smart plug; it’s the smart relay crammed behind a regular light switch. If you’re tired of that struggle, it might be time to consider a dedicated Zigbee light switch.

    I stumbled upon a story just like this recently. A user with a robust network of over 100 devices had to reset everything. Their smart plugs reconnected without a fuss, but the relays—oh, the relays were a nightmare. It’s a classic problem. Relays seem like a great, invisible solution at first, but they introduce a hidden layer of complexity and a major point of failure.

    The Hidden Headache of Smart Relays

    Let’s be honest, the idea of a smart relay is clever. You tuck a small device like a Sonoff relay into the electrical box behind your existing “dumb” switch, and voila—instant smarts. But the reality is often less elegant.

    • Cramped Quarters: Most electrical boxes in older homes were not designed to hold a bundle of wires plus an extra plastic box. It’s a tight squeeze that can lead to connection issues or just be a flat-out pain to install.
    • Pairing Mode Frustration: When a relay loses connection, how do you get it back into pairing mode? Often, it involves flipping the power at the circuit breaker or repeatedly flicking the light switch in a specific sequence that you can never remember. When you have dozens of them, it’s a recipe for a full day of frustration.
    • Overheating and Reliability: While generally safe, these devices are crammed into a tight, unventilated space. Over time, heat and connection issues can lead to unreliability, forcing you to pull the switch plate off yet again.

    So, what’s the alternative? Instead of adding a smart module behind the switch, you replace the switch itself.

    Why a Dedicated Zigbee Light Switch is a Better Choice

    Upgrading to a purpose-built Zigbee light switch is about more than just convenience; it’s about building a more resilient and user-friendly smart home. You’re moving from a DIY workaround to a proper, integrated solution.

    The core benefit is simplicity. These switches are designed to be both smart and manual from the ground up. They operate exactly like a normal light switch when you need them to—a crucial feature for guests or family members who aren’t interested in your home automation project. There’s no confusing sequence to learn; you just tap the paddle.

    Installation is also much cleaner. You’re simply replacing one switch with another, not trying to perform electrical origami inside the wall.

    Finding the Right Zigbee Light Switch for Your Home

    When you’re ready to make the upgrade, there are a few key things to look for. The biggest consideration is whether you have a neutral wire in your electrical box.

    • Neutral Wire vs. No-Neutral: Many modern smart switches require a neutral wire to maintain constant power for their internal Zigbee radio. Older homes sometimes lack this wire. The good news? Many brands now offer “no-neutral” versions that work in almost any home. Always check your wiring before you buy!
    • Dimmer or On/Off: Do you want to just turn lights on and off, or do you want to set the mood with dimming capabilities? Make sure the switch you choose matches your needs and that your light bulbs are dimmable.
    • Zigbee 3.0 Compatibility: For the best performance and future-proofing, look for switches that use the Zigbee 3.0 protocol. This ensures better compatibility and security across your network. You can learn more about the standard at the Connectivity Standards Alliance website.

    Several reputable brands offer fantastic Zigbee switches. Aqara is well-known for its reliable and affordable Zigbee devices, including a variety of light switches (with and without neutral wires). Another popular brand among enthusiasts is Inovelli, which is praised for its feature-rich switches that offer a ton of customization.

    Ultimately, moving away from relays and toward a dedicated Zigbee light switch is one of the best quality-of-life upgrades you can make for your smart home. It reduces hidden points of failure, simplifies installation, and makes your entire system more reliable and intuitive for everyone in the house. The next time your network needs a reset, you’ll thank yourself.

  • That Annoying Floodlight Problem: How to Finally Control Your Outdoor Lighting

    That Annoying Floodlight Problem: How to Finally Control Your Outdoor Lighting

    How a simple bulb swap can let you enjoy your patio in peace without sacrificing security.

    It’s one of those perfect evenings. The air is cool, you’ve got a comfortable chair on the patio, and maybe a drink in your hand. You shift your position slightly, and then—BAM! A thousand suns sear your retinas. The motion-sensor floodlight has struck again, turning your peaceful backyard into a high-security prison yard. If you’ve ever found yourself doing the slow-motion “Matrix” dodge to avoid triggering your own security light, you know exactly what I’m talking about. I was facing this exact dilemma, which led me down a rabbit hole searching for a simple solution. I needed a light that was smart enough to watch for my dogs, but polite enough to ignore me when I was just trying to relax. The answer was a surprisingly simple and affordable gadget: the remote control floodlight bulb.

    It sounds almost too good to be true, but it’s a real product that solves this incredibly common annoyance without needing an electrician or a whole new smart-home setup.

    The Problem with “One-Track Mind” Security Lights

    Standard motion-activated floodlights are great at their one job: detecting motion and blasting an area with light. This is perfect for deterring intruders or seeing what that strange noise was at 2 a.m. But they lack nuance. They can’t tell the difference between a raccoon, your dog going out for a late-night potty break, or you simply reaching for your glass of iced tea.

    For years, my solution was absurd. When I wanted to sit on the porch, I’d have to grab a wobbly chair, climb up, and unscrew the floodlight bulb just enough to break the connection. Then, I’d have to remember to screw it back in before going to bed so it would work for the dogs. It was inconvenient, a bit unsafe, and frankly, ridiculous. I needed a better way.

    Your Simple Upgrade: The Remote Control Floodlight Bulb

    This is where the magic happens. A remote control floodlight bulb is exactly what it sounds like: a standard-sized floodlight bulb (usually an E26 base, the most common type) that comes with a small remote control. You just swap out your old, “dumb” bulb for this new, smarter one.

    Here’s how it solves the patio problem:

    • Dual-Mode Functionality: This is the key. The bulb typically has at least two modes. The default mode is “Auto” or “Motion-Sensing,” where it works just like your old light. But with the press of a button on the remote, you can switch it to “On” (to keep it on constantly) or, more importantly, “Off.”
    • Total Control from Your Chair: When you head outside to relax, you just bring the little remote with you. Press the “Off” button, and the motion sensor is disabled. The light will not turn on, no matter how much you move around. You can enjoy the ambient light from your string lights or candles in peace.
    • Instant Security When You Need It: When you head back inside, you press the “Auto” button. The bulb is now re-armed and ready to light up the yard for any reason, whether it’s the dogs going out or an unexpected visitor. No more forgetting to screw the bulb back in.

    What to Look For in a Remote Control Floodlight Bulb

    Not all bulbs are created equal. If you’re ready to make this small but mighty upgrade, here are a few things to keep in mind. Many of these features are adjustable right from the remote, giving you even more control.

    • Brightness and Color: Look for lumens (brightness) and Kelvin (color temperature). A 1000-2000 lumen bulb is plenty bright for most backyards. For a cozier feel, look for a “warm white” (around 3000K) instead of a harsh, blue “daylight” (5000K+).
    • Remote Range: Check the effective range of the remote. Most offer plenty of range for a typical yard (50-100 feet), but it’s good to double-check.
    • Dusk-to-Dawn Sensor: Many of these bulbs also include a built-in photocell. This is a fantastic feature that prevents the motion sensor from activating during the day, saving energy and bulb life. It only arms itself when it gets dark.
    • Weatherproof Rating: Since this bulb will be outdoors, make sure it has an appropriate weatherproof rating (like IP65) to stand up to rain and humidity. You can find a huge variety of these bulbs at major retailers like The Home Depot or online.

    While there are more complex (and expensive) smart home solutions involving Wi-Fi hubs and apps, like the Philips Hue ecosystem, the beauty of the remote control floodlight bulb is its simplicity. For more on the world of smart lighting, check out this great guide from PCMag. But for this specific problem, the simple remote is often faster and more reliable than fumbling with an app.

    It’s a small change, but it completely transformed how I use my backyard in the evening. It’s about reclaiming your space and making your home’s technology work for you, not against you. So you can finally sit back, relax, and enjoy the evening without that sudden, blinding interruption.

  • My Quest for the Perfect Sunrise Alarm Bulb (That Stays Off All Night)

    My Quest for the Perfect Sunrise Alarm Bulb (That Stays Off All Night)

    I just wanted a smart light to wake me up gently. I didn’t realize most of them have to glow all night to do it.

    I thought I’d found the perfect little life hack. I bought a new smart bulb, excited about one feature in particular: the wake-up light. The idea is simple, right? Instead of a blaring alarm, the bulb slowly brightens, mimicking a natural sunrise to gently pull you out of sleep. But I quickly ran into a weird, annoying problem. For the sunrise alarm to work, the bulb had to be on all night, glowing in a dim “night light” mode. If I turned it completely off, the morning schedule just wouldn’t run. My mission for the perfect sunrise alarm bulb—one that could wake me up without glowing all night—had officially begun.

    It turns out this is a common issue with many Wi-Fi-connected smart bulbs. They’re great at following commands you send from your phone, but they aren’t always great at remembering things on their own.

    The Problem with a Always-On Sunrise Alarm Bulb

    When a simple Wi-Fi bulb is in its “off” state (meaning, it’s not emitting light but is still connected to power), it’s essentially in a deep sleep. It’s listening for a command from your Wi-Fi network, like “turn on” or “change color.” However, it doesn’t have a sophisticated internal clock or scheduler running.

    The wake-up routine isn’t stored on the bulb itself; it’s stored in the cloud. The app on your phone tells the cloud service, “At 6:30 AM, tell this bulb to start brightening.” For that to work, the bulb needs to be in a receptive state. That dim, night-light mode is just that—a low-power “on” state where it can receive the command. When it’s fully “off,” it misses the message, and you oversleep. This was exactly the opposite of what I wanted from a sunrise alarm bulb. I wanted a dark room for sleeping and a gentle light for waking.

    What Makes a Great Sunrise Alarm Bulb?

    So, what’s the alternative? How do you get a smart bulb that can pull off this magic trick? The secret lies in where the schedule is stored. You need a system where the schedule isn’t just floating in the cloud, but is managed by a more intelligent device or even stored on the bulb itself.

    This usually comes in one of two forms:

    • Hub-Based Systems: This is the most reliable solution. A smart home hub, like the Philips Hue Bridge, acts as the brain of your lighting system. You connect the hub to your router, and the bulbs talk directly to the hub. You set the wake-up schedule in the app, and the app saves it to the hub. At the designated time, the hub—which is always on—tells the bulb, “Hey, wake up and start glowing.” The bulb can be completely off (not emitting light) and the hub will still be able to wake it up.
    • Bulbs with Onboard Memory: Some higher-end Wi-Fi bulbs have enough internal smarts to store schedules directly on the device. When you set a schedule, the app saves it to the bulb’s memory. The bulb then uses its own internal clock to trigger the event. This is less common but very effective. Brands like LIFX are known for having this capability, allowing them to run schedules without constant cloud contact.

    Smart Lighting Solutions That Get It Right

    If you’re serious about creating a dark-room-friendly sunrise alarm, you’ll want to look at systems built to handle it.

    1. Philips Hue: This is the gold standard for a reason. The entire Philips Hue ecosystem is built around its Bridge. Routines and schedules are rock-solid. You can set a “Wake up” routine in the app, and it will work flawlessly every morning, starting from a completely dark bulb. I’ve used this myself, and it’s exactly the experience I was looking for. The lights gradually shift from a warm red to a bright, cool white, and it feels incredibly natural.

    2. LIFX: As mentioned, LIFX bulbs are powerful Wi-Fi bulbs that often have the ability to store schedules onboard. This makes them a great hub-free alternative. Their app allows for detailed scheduling, and because the bulb itself knows the plan, it can execute the wake-up sequence without needing to be in a “night light” mode.

    3. The DIY Smart Plug Method: If you’re not ready to invest in a new lighting system, there is a workaround. You could use a dimmable, non-smart LED bulb that has “memory”—meaning it turns on to its last brightness setting. Plug the lamp it’s in into a simple smart plug. Then, you can set a schedule for the smart plug to turn on at 6:30 AM. The bulb will snap on to its last dim setting, which is a bit jarring but better than nothing. It’s not the graceful, slow ramp-up of a true sunrise alarm bulb, but it’s a budget-friendly option.

    Ultimately, getting your smart lights to behave exactly how you want sometimes takes a bit more research. For me, the journey ended with a system that uses a hub. It just works. My bedroom stays perfectly dark all night, and my own personal sunrise arrives on schedule every single morning. And that’s a life hack I can finally get behind. For a deeper dive into the world of smart bulbs, tech sites like The Verge have excellent guides comparing the top brands.