Category: AI

  • My Old Server Has 768GB of RAM. Should I Bother Upgrading?

    My Old Server Has 768GB of RAM. Should I Bother Upgrading?

    Exploring the real-world used server value of a beastly Dell R820 in 2025.

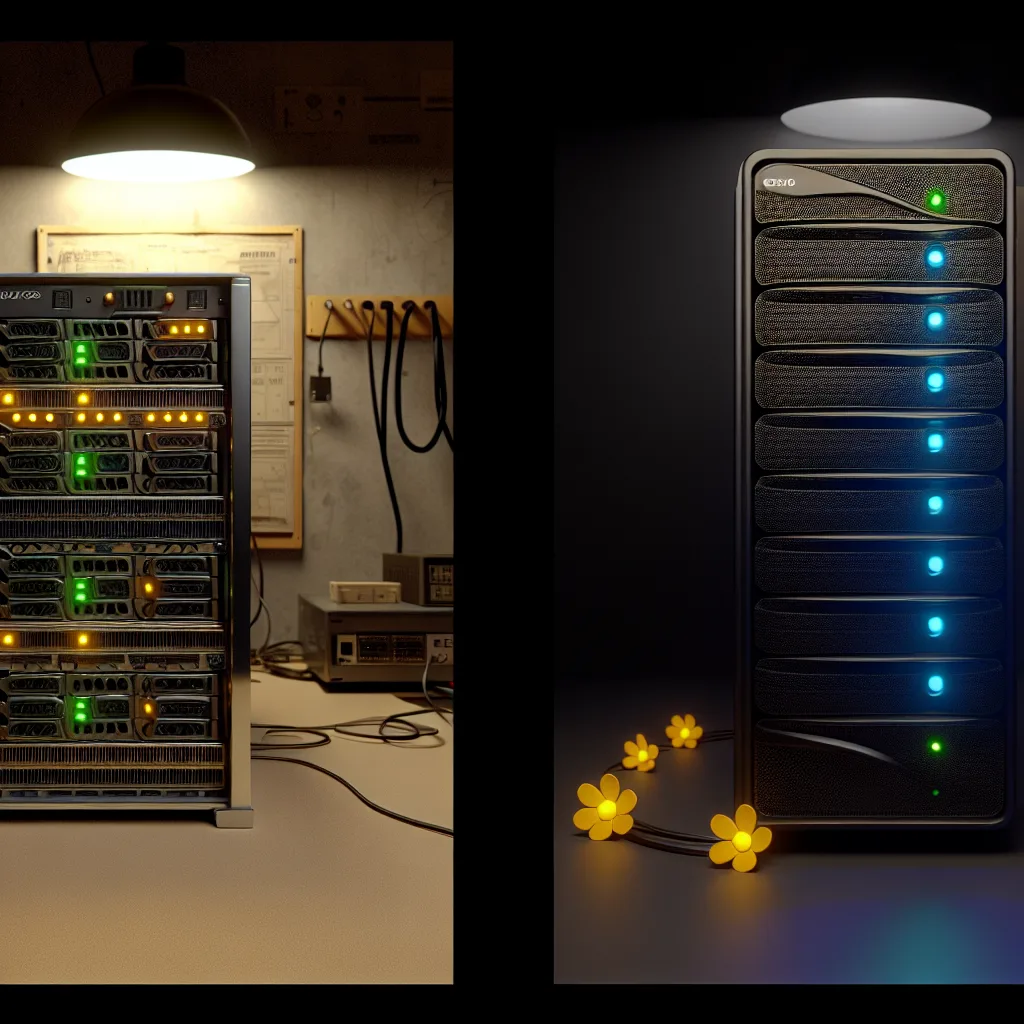
    I have a bit of a confession. In the corner of my home lab sits an absolute unit of a server: a Dell PowerEdge R820. It’s not just any server; this thing is fully populated with four CPUs and a staggering 768GB of RAM. It’s been my go-to for spinning up memory-hungry virtual machines without breaking a sweat. But as I look at it humming away in 2025, I have to ask myself a serious question about its used server value. Is this old beast still a practical choice, or am I just holding on for the “wow factor”?

    It’s a dilemma many of us in the home lab community face. Do you stick with older, powerhouse hardware that you can get for a steal, or do you invest in something newer, more efficient, but with a higher price tag? My R820 is a quad-socket system, and there’s a certain charm to that. It feels like owning a piece of enterprise history. But outside of vintage tech circles, charm doesn’t run your VMs or host a LAN party.

    So, I’ve been weighing my options, specifically looking at newer-generation Dell servers like the R730 or R630.

    Decoding the Used Server Value: R820 vs. R730

    At the heart of this debate is the trade-off between memory cost and processor efficiency. The Dell R820 is built on the Sandy Bridge/Ivy Bridge architecture and uses DDR3 RAM. The R730 and R630, on the other hand, use the newer Haswell/Broadwell CPUs and support DDR4 RAM.

    Here’s a quick breakdown of my thinking:

    • The Case for the R820 (and DDR3): The biggest advantage is cost. DDR3 server memory is incredibly cheap on the secondhand market. You can pack a machine with hundreds of gigabytes of RAM for a fraction of what it would cost to do the same with DDR4. For tasks that are purely memory-bound—like running dozens of Cisco lab VMs or a massive database—the R820 is an economic king. You just can’t beat that price-to-RAM ratio.
    • The Case for the R730/R630 (and DDR4): These newer machines bring significant advantages in performance per watt. The CPUs are more efficient, have more modern instruction sets, and generally offer better single-core performance. While DDR4 RAM costs more, it’s also faster and more power-efficient. Over time, the lower power bill could help offset the higher initial hardware cost. You can find detailed comparisons on how DDR4 improves on DDR3’s voltage and speed.

    So, what’s lost by moving from a quad-socket R820 to a dual-socket R730 with a high core count? Honestly, not much in terms of raw core numbers. You can easily find R730s with dual 18-core CPUs, giving you 36 cores and 72 threads of modern processing power. The main sacrifice is that massive, cheap RAM capacity.

    Finding the Sweet Spot in Used Server Value for Your Needs

    The “better” server really depends on the job. My use cases are split between running a lab and hosting LAN party events for friends.

    For my virtualization lab, where I’m constantly spinning up machines that need 64GB or 128GB of RAM, the R820 still feels incredibly relevant. The sheer amount of available memory lets me build out complex virtual networks without compromise. The performance from the older E5-4600 series CPUs is more than adequate for most lab scenarios. Sure, I could pop some v2 CPUs in there for a little more efficiency, but the core benefit remains the RAM.

    But for a LAN party? That’s different. Video game servers often rely more on single-thread CPU performance than on having 72 cores. A newer CPU from an R630 or R730 would likely provide a smoother experience for game hosting, even if the machine has less total RAM. It’s a classic battle of brute force versus modern, refined power. You can check out the official Dell PowerEdge R820 technical specifications to see just how much this machine was designed for raw memory and CPU density.

    Is It Time to Let Go?

    So, is anyone running an R820 for a specific reason over the alternatives today? I think so. If your primary need is a massive memory pool on a tight budget, and you’re not overly concerned about your power bill, the R820 remains a champion of used server value. It’s a specialized tool for a specific job.

    For a more general-purpose home lab that balances performance, power consumption, and future-proofing, a high-spec R630 or R730 is probably the more sensible long-term investment.

    For now, my R820 stays. The joy of having a 768GB RAM sandbox is too good to give up just yet. It might not be the most efficient machine on the block, but it’s a reminder of a time when enterprise hardware was built with pure, unadulterated power in mind. And sometimes, that’s just plain fun.
  • So, You’ve Run Out of Storage Ports on Your Motherboard. What’s Next?

    So, You’ve Run Out of Storage Ports on Your Motherboard. What’s Next?

    You’ve filled every M.2 and SATA port on your motherboard. Now what? Here’s how to add more drives without getting a new board.

    It happens to the best of us. You’ve planned the perfect PC build, maybe a powerful workstation or the ultimate home server. You’ve picked the CPU, the GPU, and a motherboard with what seems like tons of ports. But then, a year or two down the line, you hit a wall. Every M.2 slot is filled, every SATA port has a cable running from it, and you’re completely out of room. If you’re staring at your case wondering how to solve this puzzle, you’re in the right place to talk about motherboard storage expansion.

    I’ve been there. My main workstation is a beast, juggling virtual machines, a bit of gaming, and even some local AI experiments. It felt like I blinked and all my storage was saturated. The thought of having to choose what to delete, or starting over with a new motherboard, is frustrating. But what if you don’t have to?

    What if I told you those other long slots on your motherboard—the PCIe slots—are your secret weapon?

    The Magic of HBA Cards and PCIe Slots

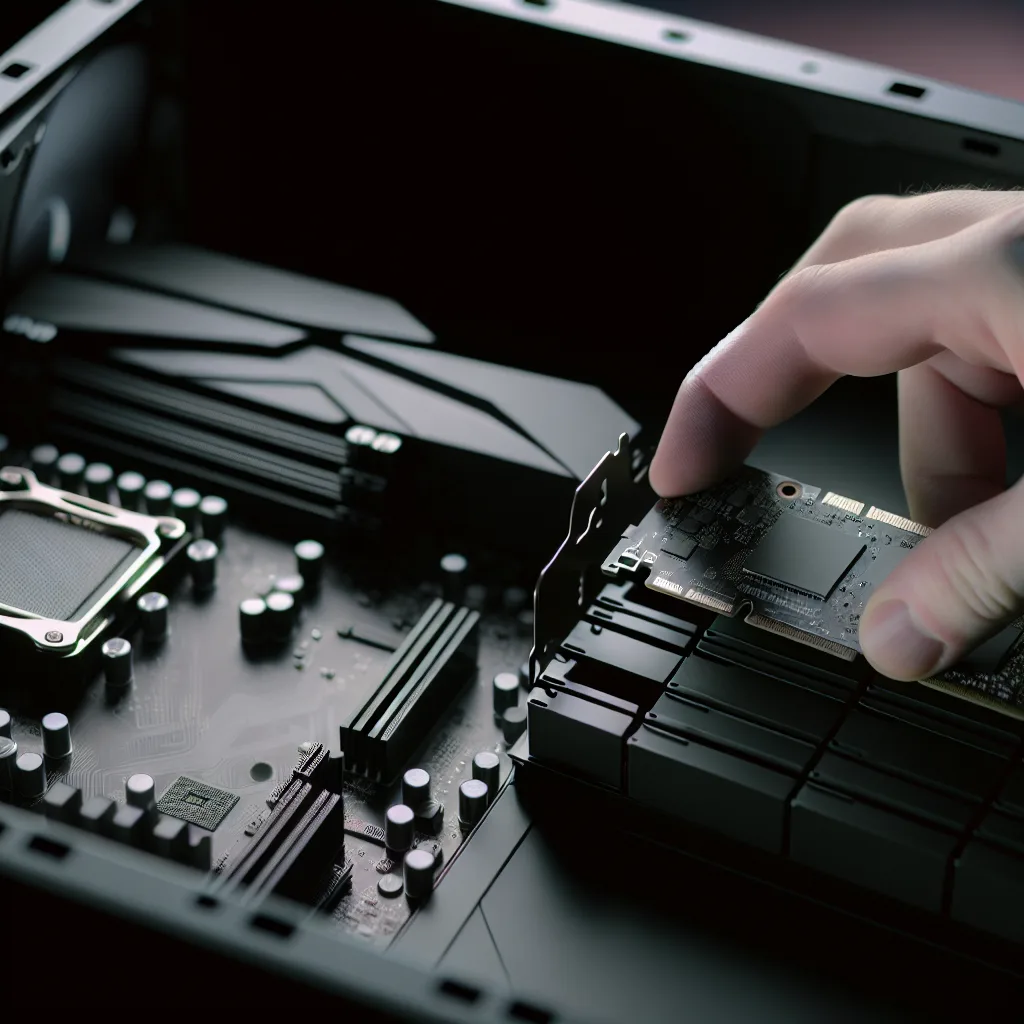
    When your built-in storage ports are maxed out, the next logical step is to expand using your motherboard’s PCI Express (PCIe) slots. These are the same slots you use for your graphics card, but they can do so much more.

    You can get a simple PCIe card that adds another 4, 6, or even 8 SATA ports. These are often called SATA expansion cards or, for more serious hardware, Host Bus Adapters (HBAs). They’re surprisingly affordable and can breathe new life into a storage-locked system.

    But here’s the catch, and it’s the question that stops most people in their tracks: Will adding a card to a PCIe slot disable something else?

    The Big Question: A Guide to Motherboard Storage Expansion and PCIe Bandwidth

    This is the core of the problem. Modern motherboards are complex, and they have a limited amount of high-speed connections, called “PCIe lanes,” to go around. Think of it like lanes on a highway. The CPU has a certain number of lanes (e.g., 16 or 20), and the motherboard’s chipset provides its own set.

    Everything—your super-fast M.2 NVMe drives, your graphics card, even some USB ports—needs a lane. To make it all work, manufacturers often have to make compromises.

    For example, on some boards:
    * Plugging an NVMe drive into the third M.2 slot might disable two of your SATA ports.
    * Using a specific PCIe slot might cut the available lanes to your main graphics card slot in half (from x16 to x8).

    So, how do you know if that bottom PCIe slot is safe to use for an HBA card without slowing down your GPU or knocking out an existing drive? The answer is simpler than you think.

    Your Motherboard Manual: The Key to Storage Expansion

    Your motherboard’s manual is the single most valuable resource you have. It’s not just for installation; it’s the definitive guide to exactly how your board allocates its resources. Don’t have the physical copy? Every manufacturer has them available online.

    Here’s what to look for:

    1. Find the Specifications Page: Head to your motherboard’s official product page online. For instance, the MSI PRO B650-A WIFI page has a detailed spec sheet.
    2. Look for Expansion Slots: In the specs, there will be a section detailing the PCIe slots. It will tell you which slots come from the CPU and which come from the chipset. Usually, the top x16 slot for your GPU is from the CPU, while lower slots are handled by the chipset.
    3. Read the Fine Print: This is crucial. Look for any footnotes or small text next to the descriptions of the M.2 slots, SATA ports, or PCIe slots. This is where the manufacturer tells you about shared bandwidth. You’ll see notes like, “SATA ports 5 & 6 will be disabled when an M.2 drive is installed in the M2_2 slot.”
    4. Check the Block Diagram: For a visual guide, the full manual (usually a downloadable PDF) often contains a “block diagram.” This is a flowchart that shows exactly how everything is connected. You can visually trace the PCIe lanes from the CPU and chipset to each port and slot. It’s the ultimate source of truth. You can typically find manuals on the manufacturer’s support site, like MSI’s support portal.

    In most modern consumer boards, the bottom x16-sized slot is often electrically only an x4 or even an x1 slot connected to the chipset. This is great news for storage expansion! It means it runs independently of your main GPU slot and usually doesn’t interfere with CPU-connected M.2 drives. So, popping an HBA card in there is often the perfect solution. For a deeper dive into how these lanes work, sites like TechSpot offer great explainers.

    So, before you give up on your current setup, grab a coffee and spend a few minutes with your motherboard’s manual. You’ll likely find that the path to massive motherboard storage expansion is just one simple, affordable card away. Happy building!

  • My New UniFi Switch Made Me Question My Entire Network

    Mixing a Fortigate Firewall with UniFi Switches? Let’s break down the pros and cons of this common Ubiquiti upgrade path.

    I just got that new-gadget buzz. You know the feeling: the satisfying rip of a box opening, the sleek feel of new tech in your hands. For me, it was a brand-new Ubiquiti UniFi switch, ready to replace an old 10/100 Cisco unit that had served its time. The speed boost alone was worth it, but it also got me thinking seriously about my network’s future. It’s a common question for anyone starting down this road: what is the right Ubiquiti upgrade path?

    That new switch integrated beautifully into my UniFi controller, giving me that clean “single pane of glass” view I love. But then, the itch started. My eyes drifted to my trusty Fortigate 500D firewall, an absolute beast doing all the heavy lifting at the edge of my network. The question popped into my head: should I go all-in and replace it with a UniFi Security Gateway (USG) to get the full ecosystem experience?

    It’s a classic tech dilemma: do you stick with a powerful, specialized tool you already have, or do you dive completely into a single, unified ecosystem for the sake of convenience? Let’s break it down.

    Considering Your Ubiquiti Upgrade Path: The Firewall Question

    First off, let’s be clear. A Fortigate 500D is an enterprise-grade firewall. It’s designed for serious business, with deep security features and incredible throughput. It’s the kind of hardware that gives you real peace of mind. If you already have one—or something similar from another top-tier brand—you’re starting from a position of strength.

    So, why would you even think about replacing it?

    The answer is the allure of the ecosystem. The main selling point of the Ubiquiti UniFi system is its central management. From one dashboard, you can see your switches, access points, and yes, your gateway/firewall. You get beautiful charts, deep packet inspection (DPI) that tells you exactly where your data is going, and a seamless configuration experience. It’s clean, it’s simple, and it’s very, very tempting.

    The Case for Sticking with the Fortigate

    Let’s talk reality. Swapping a high-end Fortigate for an older UniFi gateway like the USG-PRO is, from a pure performance and security standpoint, a downgrade. Here’s why keeping your powerful edge device makes sense:

    • Superior Security: Fortinet is a security-first company. The features for threat management, intrusion prevention, and advanced filtering on a FortiGate firewall are typically far more robust than what’s offered in an all-in-one prosumer device.
    • You Already Have It: This is the big one. You don’t need to spend more money on new hardware. The best gear is often the gear you already own and know how to use.
    • It Just Works: Your network is stable and secure. Why introduce a major change unless you have a compelling reason to?

    The only real “con” is that your firewall management lives in a different browser tab than your UniFi controller. You lose out on some of the integrated stats, but the core functionality of your network remains unchanged and, arguably, more secure.

    The UniFi Gateway and the All-in-One Dream

    So, when does it make sense to go with a UniFi gateway? The Ubiquiti upgrade path that includes a UniFi gateway is perfect for a few scenarios:

    • You’re Starting Fresh: If you have a basic ISP-provided router and are building a network from the ground up, jumping into the full UniFi stack makes a ton of sense. The simplicity is a massive win.
    • Convenience is Your #1 Priority: For many home lab and small business users, having everything in one place outweighs the need for enterprise-level security features. The unified dashboard is just that good.
    • You Want the “Full” Experience: There’s a satisfaction in seeing all your network devices light up green in one dashboard. The integrated data on traffic and clients is genuinely useful and well-presented.

    But it’s about trade-offs. You trade some raw power and advanced security for unparalleled ease of use and visibility across your network. For many, that’s a trade worth making. For someone with a Fortigate already in place? I’m not so sure.

    My Take: Don’t Chase the Ecosystem for Its Own Sake

    After weighing the options, I’m sticking with my Fortigate.

    The convenience of the UniFi gateway is undeniable, but it doesn’t solve a problem I currently have. My network is fast, stable, and incredibly secure. Sacrificing top-tier security for a prettier dashboard just doesn’t feel like the right move. The new UniFi switch is a fantastic addition, giving me the speed and local network management I wanted without forcing a compromise at the most critical point in my network—the edge.

    So if you’re like me, standing at a crossroads with a new piece of UniFi gear, take a moment. Enjoy the upgrade you just made. But don’t feel pressured to buy the next piece of the puzzle unless it truly serves a purpose. Sometimes, a “mixed” network using the best tool for each job is the smartest path of all.

  • So You Want to Build a Home Lab? Here’s Where to Start.

    So You Want to Build a Home Lab? Here’s Where to Start.

    A friendly guide to your first home lab setup, perfect for anyone starting their journey in networking and IT.

    So, you’ve landed a new job in tech—maybe in networking or systems support—and you’re starting to realize there’s a huge gap between the theory and the hands-on reality. You get the concepts, but you want to feel them, to break them and fix them yourself. If that sounds familiar, you’ve probably heard the advice: “You should build a home lab.”

    That’s where the fun begins, but also the confusion. It’s easy to get overwhelmed by pictures of massive server racks humming away in someone’s basement. But let’s be clear: setting up your first beginner home lab doesn’t have to be complicated or expensive. It’s about creating a small, personal playground to understand how things like networking and servers actually work under the hood. It’s your space to experiment without the fear of taking down your company’s entire network.

    This guide is for you. We’ll walk through what you actually need to get started, and some fun first projects that will genuinely teach you the skills you’re curious about, like DNS, VLANs, and even building your own personal cloud.

    Why Bother with a Home Lab, Anyway?

    Reading about how a DNS server resolves a name is one thing. Actually setting one up and watching it handle requests for your entire home network? That’s a whole different level of understanding. A home lab gives you three huge advantages:

    1. A Safe Sandbox: Want to see what happens when you misconfigure a firewall rule or mess up a network segment? Go for it. A lab is a safe space to fail, and failure is often the best teacher in tech.
    2. Practical, Tangible Skills: It turns abstract concepts into concrete skills. You won’t just know what a VLAN is; you’ll have configured one to keep your smart home gadgets separate from your personal laptop.
    3. Problem-Solving Muscle: The best way to learn is by solving a problem you actually have. Maybe your Wi-Fi is spotty, or you want to store your own files without paying a monthly fee. Your home lab can be the tool to solve those real-world puzzles.

    Your First Beginner Home Lab: The Gear

    Forget about buying a decommissioned enterprise server on eBay for now. You can start small and cheap. Seriously. The goal is to learn, not to replicate a data center.

    Here are a few paths you can take, from free to a modest investment:

    • The “Recycled Gear” Lab: Have an old laptop or desktop computer collecting dust? Perfect. You can install a free operating system like Ubuntu Server or a hypervisor like Proxmox on it. This allows you to run multiple virtual machines (VMs) on a single piece of hardware, which is an amazing way to experiment with different services without needing tons of physical boxes.
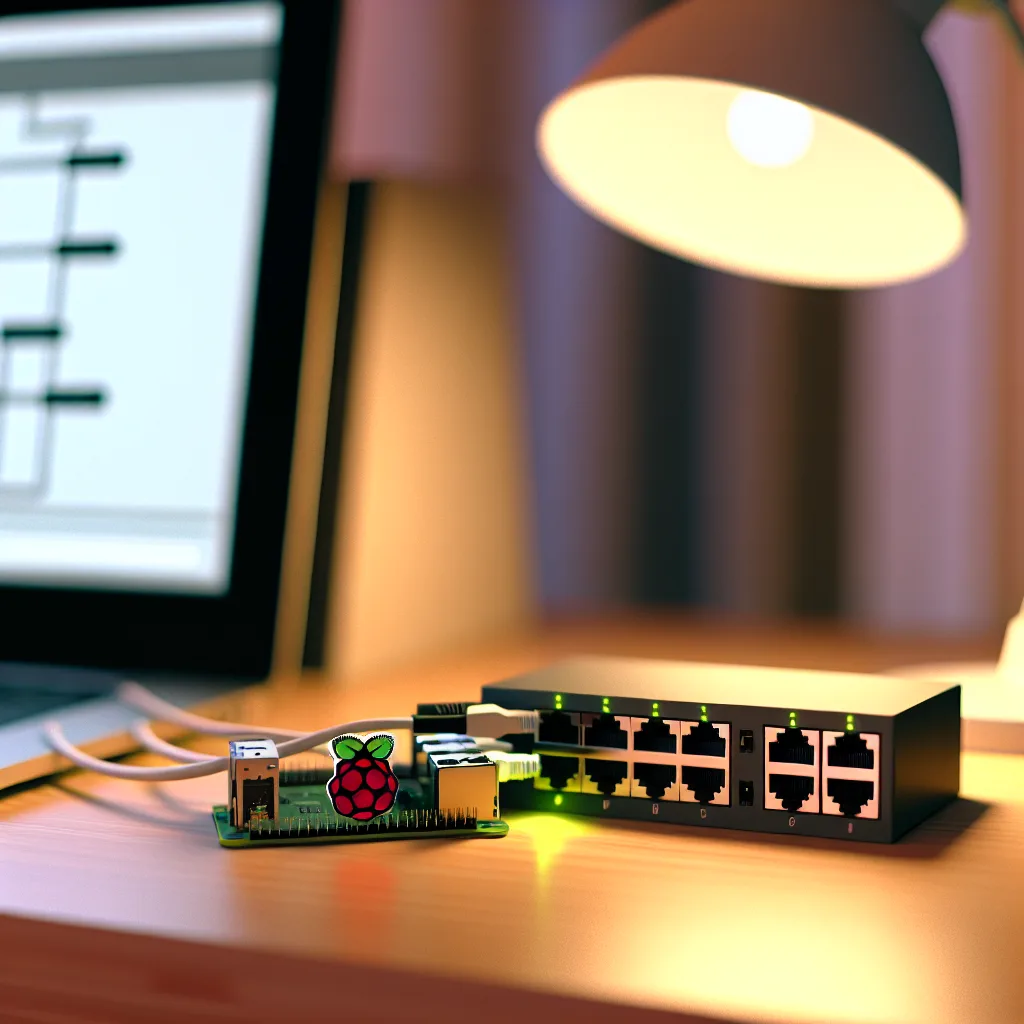
    • The “Mini PC” Lab: If you want something dedicated that won’t drive up your power bill, a mini-PC is your best friend. Think Raspberry Pi, an Intel NUC, or a used micro-desktop from Dell or HP. They are small, quiet, and powerful enough to run a handful of essential services. A Raspberry Pi 4 or 5 is a fantastic starting point for a beginner home lab.
    • The Key Networking Upgrade: While you can do a lot with just a computer, if you’re serious about learning networking concepts like VLANs, you’ll need a managed switch. You don’t need a giant 48-port beast. A simple 5-port or 8-port smart managed switch from a brand like TP-Link or Netgear can be found for under $50 and will unlock a world of networking fundamentals.

    Great First Projects for Your Beginner Home Lab

    Okay, you’ve got a machine running. Now what? The best projects are the ones that solve a personal problem or satisfy a curiosity.

    Project 1: Tame Your DNS with Pi-hole

    This is the perfect first project. Pi-hole is a network-wide ad and tracker blocker. You install it on your lab machine (a Raspberry Pi is famous for this), point your router’s DNS settings to it, and suddenly most ads on all the devices in your home just disappear.

    • What you’ll learn: This is the best crash course in DNS you could ask for. You’ll see DNS queries happening in real-time, understand what a DNS server does, and learn how to troubleshoot when things go wrong. It’s a practical, immediately useful introduction to a cornerstone of networking.

    Project 2: Build Your Own Personal Cloud

    Tired of paying for Google Drive or Dropbox? Want a central place to back up your family photos? Building a simple Network Attached Storage (NAS) server is a fantastic project. Using free software like TrueNAS CORE or OpenMediaVault, you can turn your lab machine and a couple of hard drives into your very own private cloud.

    • What you’ll learn: You’ll get hands-on with storage concepts, file sharing protocols like SMB (what Windows uses), user permissions, and the basics of server management. Plus, you get a genuinely useful service out of it.

    Project 3: Get Started with VLANs

    Once you have a managed switch, you can start dividing your home network into separate, isolated segments. This is called a VLAN (Virtual Local Area Network), and it’s a fundamental security and organization practice in professional networking.

    • What you’ll learn: Start by creating a separate VLAN just for your “Internet of Things” (IoT) devices—your smart speakers, cameras, and light bulbs. This way, if one of those devices has a security flaw, it can’t easily access your personal computers or phone. You’ll learn about IP addressing, subnetting, and how to configure switch ports and firewall rules to control traffic between networks.

    It all starts with one small step. Pick a project, grab some old hardware, and don’t be afraid to get your hands dirty. Your beginner home lab is your personal journey, and the best time to start is now. Good luck!

  • Did a macOS Update Break iDRAC in Safari? You’re Not Alone.

    Did a macOS Update Break iDRAC in Safari? You’re Not Alone.

    If the latest macOS update broke your Dell server’s virtual console in Safari, you’re not alone. Here’s a quick guide to understanding and fixing this common iDRAC Safari issue.

    You know that feeling, right? You run the latest software update on your Mac, everything feels a little snappier, and you get back to work. But then you try to launch a tool you rely on every day, and… nothing. That’s exactly what happened to me this week when I discovered a frustrating iDRAC Safari issue after updating macOS. My go-to method for accessing my Dell server’s virtual console suddenly stopped working in Safari, even though it worked perfectly the day before.

    If you’re a sysadmin or a home lab enthusiast who uses a Mac to manage Dell servers, you might have just hit the same wall. The virtual console simply refuses to launch from the iDRAC web interface in Safari, but when you switch over to Chrome or Firefox, it works just fine. It’s the kind of problem that can send you down a rabbit hole of disabling extensions and clearing caches, with nothing to show for it.

    So, what’s going on? And more importantly, how do you fix it?

    Understanding the iDRAC Safari Issue

    The root of this problem usually isn’t a “bug” in the traditional sense, but rather a clash of technologies. Apple is famously aggressive about security and phasing out older web technologies. For years, Dell’s iDRAC relied on technologies like Java and NPAPI plugins for its virtual console—the very things modern browsers like Safari have been systematically removing.

    While Dell has transitioned to a much more modern HTML5-based virtual console in newer versions of iDRAC (specifically iDRAC 7/8 and newer), sometimes the browser and the iDRAC interface don’t properly negotiate which version to launch. Safari, with its strict security-first approach, might be blocking the old Java-based launcher or a pop-up window it deems insecure, leading to the failure. Your recent macOS update likely just tightened those security protocols enough to finally break the connection.

    How to Fix the iDRAC Virtual Console in Safari

    Before you give up and keep a copy of Chrome around just for iDRAC, let’s try to get it working in Safari again. Here are a few steps, from simplest to most effective.

    1. Make Sure You’re Using the HTML5 Console

    This is the most common and effective solution. The old Java-based console is essentially dead in the water on modern browsers. Dell knows this, which is why they offer an HTML5 alternative.

    • Log in to your iDRAC web interface.
    • Navigate to Virtual Console.
    • Look for the launch settings or preferences. You should see an option for Plug-in Type or Console Type.
    • Change this setting from “Java” or “ActiveX” to “HTML5”.
    • Save the setting and try launching the virtual console again.

    For most people, this instantly solves the iDRAC Safari issue. The HTML5 console runs directly in the browser without any special plugins and is far more compatible with modern security standards.

    2. Check Safari’s Website Settings

    Sometimes, Safari is a little too protective and blocks the pop-up window that the virtual console needs to open in. You can tell Safari to be more lenient with your server’s iDRAC address.

    • With the iDRAC page open in Safari, go to the Safari menu > Settings…
    • Click on the Websites tab.
    • In the left-hand sidebar, scroll down and click on Pop-up Windows.
    • Find your iDRAC’s IP address or hostname in the list of currently open websites.
    • Change the setting next to it from “Block and Notify” to “Allow”.

    This tells Safari that you trust this specific site to open pop-up windows, which is essential for the virtual console to launch.

    3. The Workaround: Use Another Browser

    I know, I know. The goal is to fix it in Safari. But sometimes, you just need to get the job done. If the tips above don’t work—perhaps you’re on a much older version of iDRAC that has poor HTML5 support—the most pragmatic solution is to use a browser that is less restrictive. Both Google Chrome and Mozilla Firefox are generally more lenient with older web interfaces and are known to work well with iDRAC. It’s not a fix, but it’s a reliable backup plan.

    Keeping Your iDRAC and Safari Working Together

    To avoid future headaches, the best long-term strategy is to keep your server’s firmware updated. Dell regularly releases iDRAC firmware updates that improve performance, patch security holes, and enhance compatibility with modern browsers. You can find the latest firmware for your specific server model on the Dell Support website.

    By ensuring you’re using the HTML5 console and keeping your firmware current, you can make sure your server management workflow doesn’t get interrupted by the next macOS update. For a deeper dive into managing Dell servers, communities like ServeTheHome are fantastic resources for pros and hobbyists alike.

    Hopefully, this little guide helped you solve this annoying iDRAC Safari issue and saved you a bit of troubleshooting time. Now you can get back to managing your servers without a browser getting in the way.

  • This is Why the Homelab Community is So Great

    This is Why the Homelab Community is So Great

    A simple story about a few extra server shelves reveals the true spirit of today’s most collaborative tech hobby.

    I stumbled upon a small story online the other day that I can’t stop thinking about. It wasn’t a big news headline or a major tech breakthrough. It was just a simple, quiet example of what makes the homelab community so special.

    It started with a familiar scenario for anyone who loves building and tinkering with their own tech. Someone was upgrading their home server setup and ordered a new 1U rack shelf—a basic but essential piece of kit for keeping things organized. The kind of purchase you make, feel good about, and wait for by the door.

    But when the package arrived, it wasn’t one shelf. It was a box of five.

    Now, what do you do? Keep the extras for future projects that may or may not happen? Try to sell them online to make a few bucks? For this person, the first thought wasn’t about profit. It was about community. They immediately offered to give the four extra shelves away to anyone in their local area who needed one. For free.

    This little moment is the perfect snapshot of a culture that’s about so much more than just hardware.

    Why the Homelab Community is About People, Not Parts

    At its heart, a homelab is a personal playground for learning. It’s where you can experiment with networking, virtualization, and enterprise-grade software without the risks of a corporate environment. But doing it alone can be tough. That’s where the homelab community comes in.

    This story wasn’t just about free hardware. It was about eliminating a barrier for someone else. A single rack shelf isn’t wildly expensive, but for someone just starting, every dollar counts. That free shelf could be the one thing that helps a student or a fellow hobbyist finally get their project organized and running. It’s a small act of generosity that says, “Hey, I see you. Let me help you build something cool.”

    This spirit of collaboration is the unspoken rule. It’s a shared understanding that we all started somewhere, and the best way to grow is by sharing what we have—whether that’s an extra piece of gear, a bit of advice on a forum, or a helpful script on GitHub. For great primers and deep dives into this world, resources like the forums at ServeTheHome are invaluable hubs of shared knowledge.

    Your First Step into the Homelab Community

    Getting started with your own home lab can feel intimidating. You see these complex network diagrams and massive server racks, and it’s easy to think you need a huge budget or a computer science degree. But you really don’t.

    Your first “server” could be an old laptop or a Raspberry Pi. The goal isn’t to build a data center in your basement overnight; it’s to start learning. And the community is there to help you at every stage.

    Here are a few things you’ll find:
    * Endless Patience: People are genuinely happy to answer questions, no matter how basic.
    * Creative Solutions: You’ll find brilliant, low-cost solutions for common problems that you’d never find in a textbook.
    * Shared Excitement: When you finally get that tricky piece of software running, there’s a whole community of people who get why that’s a big deal.

    The physical hardware, like the rack shelves from the story, is just the foundation. You can find all sorts of shelves, rails, and components from manufacturers like StarTech who build the literal nuts and bolts of these setups. But the real magic is the human element that connects it all.

    So, maybe you don’t have a box of extra server shelves sitting around. But you probably have some knowledge, a bit of experience, or just an encouraging word. That’s the real currency of the homelab community. It’s about paying it forward, one answered question and one free shelf at a time. It’s a reminder that sometimes, the best things in tech aren’t about the tech at all.

  • Diving into OPNsense? Let’s Find the Perfect Hardware for You

    Diving into OPNsense? Let’s Find the Perfect Hardware for You

    Let’s break down the specs to find the perfect, power-efficient box for your new firewall without the confusing jargon.

    So, you’ve decided to level up your home network. You’re tired of the limitations of your ISP-provided router and you’ve heard whispers of something better, something more powerful and secure. That journey has likely led you to OPNsense, a fantastic open-source firewall, and now you’re asking the big question: what OPNsense hardware do I actually need to run it?

    I get it. The world of mini PCs, CPUs, and network ports can be overwhelming. You want to create separate, secure networks (VLANs) for your IoT gadgets, run a VPN, and maybe even block ads for your whole network. The good news is, getting started is easier and more affordable than you might think. Let’s walk through how to choose the perfect hardware for your new firewall without breaking the bank.

    Why Bother with a Custom Firewall Anyway?

    Before we dive into the specs, let’s quickly touch on why you’d want to do this. A dedicated firewall like OPNsense gives you control that your standard router just can’t match. You can:

    • Isolate Devices: Use VLANs to put your smart speakers, cameras, and other IoT devices on a separate network, preventing them from accessing your personal computers.
    • Enhance Security: Implement powerful Intrusion Detection and Prevention Systems (IDS/IPS) to monitor and block malicious traffic.
    • Create a VPN: Securely access your home network from anywhere in the world.
    • Block Ads Network-Wide: Run plugins like Pi-hole directly on your firewall to remove ads on every device.

    It’s the ultimate upgrade for anyone who takes their home network security seriously.

    Choosing Your OPNsense Hardware: The Core Components

    Finding the right box for OPNsense boils down to a few key decisions. As of late 2025, the market is filled with fantastic, power-efficient options that are perfect for the job.

    CPU: Is the Intel N100 Powerful Enough?

    This is the most common question, and for good reason. You’ll see a lot of mini PCs built for firewalls using Intel’s N-series chips, most often the N100 or the slightly beefier N305. For the vast majority of home users, the Intel N100 is more than powerful enough.

    This little chip is a modern marvel of efficiency. It can easily handle gigabit internet speeds, run an IDS/IPS, manage several VLANs, and handle a VPN client without breaking a sweat. You’ll only need to consider upgrading to an N305 if you have a multi-gigabit internet connection (over 2.5Gbps) and plan on running very heavy traffic through your VPN simultaneously. For most, the N100 is the perfect, power-sipping sweet spot. For more in-depth reviews on these types of processors, sites like ServeTheHome are a fantastic resource.

    RAM: Is 8GB Enough?

    Yes. For a dedicated OPNsense machine, 8GB of DDR4 or DDR5 RAM is plenty. The underlying operating system, FreeBSD, is incredibly efficient. You’d only need to upgrade to 16GB or more if you planned on running very memory-intensive services like a full web proxy with heavy caching, which is uncommon for a home setup. Stick with 8GB and save your money.

    Key Network Ports for Your OPNsense Hardware

    This is non-negotiable: you need at least two network ports. One for the “WAN” (the connection from your modem) and one for your “LAN” (the connection to your internal network switch).

    Today, the standard to aim for is 2.5GbE ports. This future-proofs your setup as faster internet plans become more common. Many purpose-built boxes also come with SFP+ 10G ports. While you might not need 10G speeds today, it’s an amazing bonus for connecting to a high-speed server or switch down the line.

    The Big Wi-Fi Question: Integrated or Separate?

    Many people wonder if they should get a firewall box with a Wi-Fi card built-in. My advice is simple: don’t.

    Firewall software like OPNsense is designed to be a world-class router and firewall, not a wireless access point. While you can make it work, it’s often complicated and the performance is rarely as good as a dedicated device.

    The best practice is to let your OPNsense box handle the routing and security, and connect it to a dedicated Wireless Access Point (AP) for your Wi-Fi. Companies like TP-Link and Ubiquiti make excellent, affordable APs that will give you far better speed, coverage, and reliability. This modular approach is the key to a stable and high-performance network.

    So, What Should You Buy?

    You’ll generally find two categories of hardware: cheap, general-purpose mini PCs and firewall appliances specifically designed for this task.

    While a generic mini PC from Amazon might seem tempting due to its low price, be cautious. They often come with only one network port, unreliable components, and potential driver headaches.

    For a hassle-free experience, I strongly recommend a purpose-built firewall appliance from a brand like CWWK, Protectli, or Qotom. These are compact, fanless, and come equipped with multiple high-quality Intel network ports. A model with an Intel N100 CPU, 8GB of RAM, and at least two 2.5GbE ports is the perfect starting point for building a powerful and secure home network that will last for years. It’s a small investment that pays huge dividends in control, security, and peace of mind.

  • Our Minds, Their Data: Is the Brain the Next Frontier for AI?

    Our Minds, Their Data: Is the Brain the Next Frontier for AI?

    AI is getting hungry, and the internet is no longer enough. The search for new information is leading to the last untapped resource: the human brain.

    I was scrolling through the internet the other day, and a fascinating thought popped into my head: AI is everywhere now, but what feeds it? We know these complex models need massive amounts of data to learn, but it feels like we’re reaching a limit. The big AI companies have already scraped most of the public internet, from Wikipedia to every blog post we’ve ever written. This brings up a huge problem they call “model collapse.” And as we search for solutions, the conversation is starting to drift from our keyboards to our craniums, focusing on a wild concept: neural interface data.

    It sounds like pure science fiction, but the logic behind it is surprisingly straightforward. Let’s break down the problem first.

    The Great Data Drought and AI Model Collapse

    Think of an AI model like a student. To learn what a “dog” is, it needs to see thousands of pictures of dogs. To learn how to write, it needs to read billions of sentences written by humans. For years, the internet was the perfect, all-you-can-eat buffet of human-generated information.

    But two things are happening now:

    1. The Buffet is Closing: We’ve basically run out of new, high-quality human data to feed these models. The well is running dry.
    2. The Food is Getting Weird: More and more of the content being published online is… generated by AI.

    This leads to the “model collapse” problem. It’s like making a photocopy of a photocopy. The first copy is pretty good, but the tenth is a blurry mess. When AI models start training on data created by other AIs, they lose the richness, nuance, and occasional weirdness of genuine human expression. They start to forget the very things they were trying to learn. A study published in Nature highlighted how this recursive learning can lead to models that “forget” less common data, amplifying biases and losing touch with reality.

    So, if the old data source is tainted, where do we find a new one?

    Why Neural Interface Data is the Sci-Fi Solution

    This is where things get interesting. If the problem is a lack of pure, unfiltered human data, the ultimate source is the human brain itself. Companies like Elon Musk’s Neuralink are already building brain-computer interfaces (BCIs), devices that can translate brain signals into digital commands.

    While the primary goal of this technology today is to help people with paralysis control devices with their thoughts, the long-term implications are staggering. What if these interfaces could do more than just send out commands? What if they could read the raw data of human experience?

    This is the core idea behind neural interface data. Instead of getting the finished product—the blog post, the photo, the tweet—an AI could get access to the source code. It could tap into the sensory, emotional, and conceptual information that forms our thoughts before we even put them into words.

    What Kind of Data Are We Talking About?

    This isn’t just about an AI reading your mind like a book. The potential data is far richer and more fundamental.

    • Sensory Data: Imagine an AI learning what a strawberry really tastes like, not from a million descriptions of strawberries, but from the direct neural signals of someone tasting one.
    • Emotional Data: We can write “the music was sad,” but an AI could access the raw, complex emotional response a person feels when listening to a moving piece of music.
    • Conceptual Data: How do we make intuitive leaps or connect two seemingly unrelated ideas? This abstract process is incredibly difficult for AI to replicate. Accessing the neural pathways of human creativity could be the key to building truly intelligent systems.

    The potential for creating more nuanced, creative, and capable AI is undeniable. But it also opens a Pandora’s box of ethical questions that we can’t ignore.

    The Obvious (and Terrifying) Questions

    As we venture into this territory, we have to pause and ask some serious questions. When your mind is the product, who owns it? The Ethical, Legal, and Social Implications of Neurotechnology are vast and complex.

    Privacy is the most obvious concern. If a company has access to your raw thoughts, that’s a level of surveillance we’ve never imagined. Could your unfiltered feelings or fleeting thoughts be used against you by advertisers, employers, or governments? What happens if that data is hacked?

    The line between human and machine starts to blur in a way that is both exciting and deeply unsettling. We’re still a long way from this being a reality, but the conversation is happening now. The technology is being built, and the demand for data is only growing.

    So, while we marvel at what AI can do today, it’s worth thinking about where it’s headed tomorrow. Is the human mind the ultimate untapped resource for AI, or is it a final frontier we should never cross?

  • AI is Coming for Charities. Are We Ready?

    AI is Coming for Charities. Are We Ready?

    A friendly guide to thinking about AI in the third sector, focusing on doing good without causing harm.

    I was chatting with a friend who works for a health charity the other day, and we landed on the topic of artificial intelligence. It’s everywhere, right? From the apps on our phones to the way we shop online. But it got me thinking: how does this new wave of technology fit into the world of non-profits? The conversation about AI in charities is one we need to have, not as a futuristic debate, but as a practical, right-now reality. The goal isn’t just to be innovative; it’s to ensure these powerful tools help, not hinder, the vital work being done for real people.

    It’s easy to see the appeal. Charities are often stretched thin, balancing tight budgets with huge missions. AI promises a helping hand, a way to automate the tedious stuff so more time can be spent on what truly matters. Imagine AI handling initial data analysis on fundraising campaigns, freeing up the team to connect with donors. Or a chatbot that provides instant access to reliable, accessible information 24/7, acting as a first port of call for a helpline. For UK charities, AI could help with everything from translating essential health advice into multiple languages to managing volunteer schedules. The potential to increase efficiency and extend reach is definitely there.

    A Practical Look at the Risks of AI in Charities

    But let’s be honest. With any powerful tool, there are risks. This isn’t about scaremongering; it’s about being responsible. When your mission is to support vulnerable people, you have to be extra careful. A for-profit company might risk a PR blunder, but for a charity, a mistake can erode public trust, which is the most valuable asset you have.

    So, what should be on our radar? Here are a few big ones:

    • Bias and Discrimination: AI models learn from the data they’re given. If that data reflects existing societal biases (and it almost always does), the AI can end up making unfair or discriminatory decisions. This is a huge concern, especially when dealing with services that must comply with standards like the UK’s Equality Act 2010.
    • Privacy and Security: Charities handle incredibly sensitive personal data. Using new AI tools means you have to be absolutely certain you know where that data is going, how it’s being used, and that it’s protected under GDPR regulations. A data breach isn’t just a technical problem; it’s a profound betrayal of trust.
    • Misinformation and Accuracy: For a health charity providing critical information, accuracy is everything. An AI tool that “hallucinates” or provides incorrect medical advice could cause serious harm. The “human in the loop” becomes non-negotiable here.
    • Losing the Human Touch: Can AI offer empathy? Can it replace a befriending service? Probably not. There’s a real danger of over-relying on automated systems and losing the genuine, human connection that is often the most important part of a charity’s work.

    Creating a Simple Governance Plan for AI in Charities

    Okay, so there are opportunities and there are risks. What now? The answer isn’t to run from AI, but to walk towards it with a clear, simple plan. You don’t need a 100-page document from day one. Start with a few core principles.

    1. Always Keep a Human in the Loop: This is the golden rule. For any important decision—especially those affecting a person’s support, health, or data—an AI can assist, but a human must make the final call. Fully autonomous systems should be off the table for most core services.

    2. Be Radically Transparent: If you’re using an AI-powered chatbot on your website, just say so! People are more accepting of technology when they understand what they’re interacting with. Transparency builds trust. Explain how you’re using AI and what safeguards you have in place.

    3. Test, Monitor, and Document: Before you roll out any new AI tool, test it thoroughly. Think about who it might exclude. Is it accessible to people with disabilities? Once it’s live, monitor its performance. And write down your process: What tool are you using? Why did you choose it? What risks did you identify, and how are you managing them?

    4. Invest in Your People: Your staff and volunteers are your greatest asset. They need training not just on how to use a new tool, but on its limitations and ethical implications. Empower them to raise concerns and give feedback.

    Ultimately, navigating AI in charities is less about being a tech expert and more about sticking to your core mission and values. It’s about asking the right questions. Does this tool genuinely help our beneficiaries? Does it align with our ethical commitments? Is it safe, fair, and transparent? By leading with these questions, we can make sure that as technology leaps forward, we’re bringing our humanity right along with it.

  • Your AI is a Generalist. What if It Was a Team of Specialists?

    Your AI is a Generalist. What if It Was a Team of Specialists?

    Why have one generalist AI when you can have a whole team of specialists? Let’s break down the Governed Multi-Expert (GME) approach.

    You’ve probably noticed something about the big AI language models we use today. They’re incredible, for sure, but they’re also… monolithic. They’re like one giant brain trying to be a poet, a scientist, a lawyer, and a comedian all at once. This jack-of-all-trades approach creates a constant tug-of-war between being smart, being safe, and being efficient. But what if there was a better way? What if, instead of one overworked brain, we could use a whole team of specialized AI expert models?

    That’s the core idea behind a fascinating new approach called Governed Multi-Expert (GME). It’s not about building more massive models, but about making one base model work smarter, like a collaborative team of specialists.

    The Problem with Today’s AI Generalists

    Think about how a company works. You don’t hire one person to do marketing, legal, engineering, and sales. That would be chaotic. Instead, you hire specialists who excel at their specific jobs. They all share the same company knowledge, but they apply their unique skills to different tasks.

    Most large language models (LLMs) today are like that one person trying to do everything. They’re good at a lot, but they’re not truly great at any one thing. A model fine-tuned to write legal contracts will probably stumble when asked to write a beautiful poem.

    The GME architecture changes this. It takes a single, powerful base model (like a Llama 3 70B, for instance) and uses lightweight adapters called LoRAs (Low-Rank Adaptation) to create a squad of experts. Think of these LoRAs as little “personality packs” that can be swapped in and out instantly, turning the generalist model into a specialist for a specific task.

    How These AI Expert Models Get the Job Done

    So, how does it actually work? Imagine a user sends in a complex request: “Write a short poem about a star, and then explain the physics of nuclear fusion in simple terms.”

    Instead of one model fumbling through both tasks, the GME system treats it like a project with two parts. The architecture is often described as a “River Network,” which is a great way to visualize the flow.

    1. The Planner: The Traffic Cop

    First, a small, super-fast model acts as a planner. It looks at the prompt and immediately recognizes it has two distinct parts: creative writing and science explanation. It flags the prompt, saying, “I need the ‘Creative Writer’ expert for the first part and the ‘Science Explainer’ expert for the second.” Then, it passes the request on.

    2. The Load Balancer: The Gatekeeper

    The request then goes to the load balancer. This component is crucial for efficiency. It manages all the incoming jobs and the available resources (the GPUs, or “rivers”). It sees the request needs the Creative Writer LoRA and finds a GPU stream that has that expert ready to go. This is a lot like the load balancing that websites use to manage traffic, ensuring no single server gets overwhelmed.

    3. The Overseer: The Quality Inspector

    As the Creative Writer expert starts generating the poem, another small, efficient model acts as an “Overseer.” It watches the output in real-time. Is the output actually a poem? Is it safe and appropriate?

    If the model starts generating nonsense or harmful content, the Overseer performs what’s called an “early ejection.” It stops the process right there, saving a ton of computing time and preventing a bad output from ever reaching the user. This proactive safety net is one of the most powerful features of this design.

    Assuming the poem is great, the process repeats. The prompt goes back to the planner and is routed to a river with the Science Explainer expert. The Overseer watches that output, too.

    Finally, the two validated pieces—the poem and the scientific explanation—are stitched together and sent back to the user as a single, high-quality response.

    The Big Deal: Why AI Expert Models Are the Future

    This might sound complex, but the benefits are incredibly practical. It’s not about some wild new AI discovery, but about using clever engineering to combine existing technologies in a more powerful way.

    • It’s Way More Efficient: Using small LoRA adapters is hundreds, if not thousands, of times cheaper and more energy-efficient than training and hosting dozens of separate, full-sized models.
    • It’s Faster and Can Handle More Users: The “river” system means multiple user requests can be handled in parallel. A request for legal advice doesn’t have to wait for a long creative writing task to finish.
    • It’s Safer by Design: The Overseer acts as a real-time safety check, killing bad outputs before they waste resources or cause problems.
    • The Quality is Higher: Specialists are always better than generalists. By routing tasks to finely-tuned experts, the final answer is more accurate, relevant, and well-crafted.
    • It’s More Resilient: If one GPU stream goes down or is busy, the load balancer just sends the task to another one with the same expert LoRA. No single point of failure.

    This Governed Multi-Expert approach offers a practical blueprint for the next generation of AI. It’s a shift from building bigger, more monolithic models to building smarter, more agile systems. It’s about creating not just a single AI brain, but a collaborative, efficient, and safe team of digital experts.