Category: AI

  • Why the Promise of ‘Superintelligence’ AI Fell Short—And What’s Next

    Why the Promise of ‘Superintelligence’ AI Fell Short—And What’s Next

    Understanding the Real Progress and Challenges in AI Beyond the Hype of GPT-5

    If you’ve been following the buzz around artificial intelligence lately, especially after the release of OpenAI’s GPT-5, you might have noticed something unexpected: the much-anticipated leap toward “superintelligence AI” didn’t quite show up.

    What exactly happened? And why does it matter to anyone curious about the future of AI? Let’s talk it through like we’re just two friends over coffee.

    The Hype Around Superintelligence AI

    When GPT-5 was announced, many believed it was going to be the AI that matches or even exceeds the smartest human experts in flexibility and understanding—what experts call artificial general intelligence (AGI). This idea of a “superintelligence AI” sparked a lot of excitement, investments, and bold predictions about how soon AI would become truly transformative.

    The Reality Check: GPT-5’s Performance

    But soon after GPT-5 was released, it became clear that while it’s an improvement over previous versions, it’s still far from perfect or “superintelligent.” Users and critics spotted all kinds of issues, from failing simple arithmetic tests to giving bizarre answers to common riddles. It even still hallucinates—that’s AI talk for confidently providing wrong information—although it happens less often than before.

    Some folks even wished for the older versions back because GPT-5 didn’t live up to their expectations. While it’s definitely a step forward, calling it an AI revolution would be premature.

    What This Means for AI Development

    This gap between expectations and reality has real consequences. Companies and investors who put big bets on a quick leap to superintelligence AI might need to rethink their strategies. Governments planning policies and funding based on these assumptions should be cautious too.

    An important takeaway is that just making AI bigger and more powerful isn’t necessarily the answer. According to cognitive science experts, looking at how humans learn and think could inspire smarter ways to train AI. Instead of just scaling up, AI development may need to focus on understanding how intelligence works at a deeper level.

    Why We Should Care About Superintelligence AI

    You might wonder why all this fuss about superintelligence AI matters in your daily life. The truth is AI tools affect everything from how we find information to automating complex jobs. Hype can push companies to rush products that aren’t fully ready, leaving people with technology that doesn’t always work as promised.

    Approaching AI development with realistic expectations helps avoid that. Plus, smarter approaches inspired by human cognition could lead to AI that’s more reliable and useful in the long run.

    Looking Ahead: What to Expect Next

    While the dream of superintelligence AI isn’t here yet, the field is still moving forward in meaningful ways. Researchers are learning from GPT-5’s limitations and exploring new methods to build smarter AI. The future probably won’t be a sudden leap but a series of thoughtful steps towards more capable, trustworthy systems.

    If you want to dive deeper into this conversation, check out the original guest essay by Gary Marcus in The New York Times Opinion section and explore more on OpenAI’s official blog. For a take grounded in cognitive science, you might find this overview by the Association for Computational Linguistics insightful.


    Understanding where AI really stands helps us appreciate the work ahead and keeps our expectations in check. For now, the promise of superintelligence AI is still a vision, not a reality. But it’s one worth watching as researchers find smarter, more human-like ways to teach machines.

  • When AI Interrupts Learning: A High Schooler’s Perspective

    When AI Interrupts Learning: A High Schooler’s Perspective

    How AI Tools Are Changing Education and What It Means for Students

    AI in education is becoming a reality that students can’t ignore. As a high school senior in New York, I’ve seen firsthand how these tools are neither just futuristic ideas nor rare exceptions—they’re everywhere. The changes AI brings to classrooms come with benefits but also challenges that reshape what learning really means.

    The New Normal: AI in Education

    Take a history class discussion on Frederick Douglass’s narrative. Instead of diving into personal reflections or sparking a real debate, some students now paste entire chapters into AI programs like ChatGPT. Out spills a ready-made annotation, which many submit and use during class discussions. What was supposed to be a deep exploration of history’s toughest themes turns into a shallow exchange of AI-generated summaries.

    In other classes like Algebra II, homework is quickly scanned and uploaded to AI tools that generate solutions in moments. The result? Assignments are done—but what’s lost is the struggle, the problem-solving process, and the satisfaction that comes from figuring things out yourself.

    The Impact on Student Experience

    Before AI, there was this shared feeling among students—you know, rushing to meet a deadline, all typing frantically just before 11:59 p.m. It wasn’t perfect, but there was a sense of urgency and camaraderie in those moments. Now, deadlines have lost some of their teeth. AI softens the pain of procrastination by offering instant answers, so many students skip the work altogether.

    This is more than just about cheating. It’s about a shift where completing assignments feels detached from learning. Students may get their grades, but they miss out on important lessons: discipline, critical thinking, and internal growth. Why put in the effort when a machine will do it for you and still get you an A?

    Balancing AI Use with Personal Growth

    AI tools, when used responsibly, can be powerful learning aids—offering new ways to explore concepts and help with tough problems. But if we rely on AI to do all the heavy lifting, the core purpose of education erodes. The real challenge is finding how to use AI to support—not replace—our thinking. We want to grow our skills, not outsource them.

    Teachers and students alike are realizing this balance is crucial. Some schools are rethinking assignments and tests to emphasize creativity, analysis, and personal insight where AI has less sway. That’s a hopeful sign.

    Why AI in Education Matters to Us All

    This isn’t just about students cheating or cutting corners. It’s about preserving the value of education in a world where instant answers are just a click away. AI in education changes the way we learn and connect with knowledge, and it calls for new approaches to keep students engaged and growing.

    For anyone curious about how AI is reshaping schooling, resources like The Atlantic’s coverage offer deep insight. To understand how AI tools like ChatGPT work, OpenAI’s official site is a great start, and for educators, EdTech Magazine shares practical tips on blending technology and teaching.

    AI in education is not going away. How we respond to it will decide if it helps us learn or if it simply makes learning easier but emptier.


    As someone navigating this world, I’m hopeful that we can use AI to enhance education without losing the human element that makes learning meaningful.

  • When AI Hires AI: The Surprising Bias in AI Recruiting

    When AI Hires AI: The Surprising Bias in AI Recruiting

    Why using the same AI to write and review resumes might give you the best shot at landing a job

    If you’ve ever wondered what happens when AI takes over parts of the hiring process, here’s an interesting twist for you: AI hiring bias might be a real thing, and it’s showing up strongly when AI itself reviews resumes.

    Imagine a scenario where the job applications get written by AI — and then reviewed by the very same kind of AI systems. It turns out, the AI systems tend to favor resumes written by AI, and the catch is, they seem to like the ones crafted by the same AI model they themselves use. This creates a kind of feedback loop, where using a particular AI to write your resume could give you a leg up if the employer also uses that AI for reviewing.

    What’s Going On With AI Hiring Bias?

    AI hiring bias happens when the automated systems that screen and rank candidates unintentionally favor certain applicants, sometimes based on the way the resumes are written. Since these AI systems learn patterns from existing data, they might end up preferring content produced in a very specific style — and that style often matches their own “language model” style.

    When an AI recruiter sees resumes generated or optimized by the same type of AI it uses, it’s more likely to rate those resumes higher. This means if your resume is written by an AI that mimics the recruiter’s AI, you have a better chance of making the cut.

    Why Does This Matter to Job Seekers?

    We all want to stand out in a stack of applications. If AI hiring bias is real, job seekers who use AI tools to craft their resumes might get an edge — especially if they match the AI style favored by recruiters. But this also raises questions about fairness. What about candidates who don’t use AI, or who use a different AI system? Could they be unfairly overlooked?

    This bias could limit diversity in hiring, unintentionally favoring people who know how to game the system with AI tools. It’s a new challenge that companies need to be aware of when implementing AI in recruitment.

    What Can Companies Do About It?

    Recruiting teams using AI need to be mindful of these biases. Regular reviews of AI screening tools might be necessary to ensure they aren’t just favoring AI-generated applications. Organizations can also combine AI insights with human judgment to create a more balanced approach.

    Implementing transparent AI systems and training these tools on diverse data sets can help reduce bias. Open discussions about AI hiring bias can push the industry toward fairer processes.

    What Should You Do If You’re Applying for Jobs?

    It might be worth experimenting with AI resume writing tools—but knowing which AI the employer uses could be tricky. Still, making your resume clear, tailored, and polished remains the best advice. Using AI to help you draft or improve your resume can be a handy tool—just don’t rely on it completely.

    In the end, AI hiring bias is a reminder that technology is only as good as the data and designs behind it. As AI takes a bigger role in hiring, staying informed and prepared will help you navigate this changing landscape.

    For more on AI and recruiting trends, check out The Register’s article on AI hiring bias, and learn about AI ethics and fairness from the Partnership on AI and AI Now Institute.

  • So, We’re Just Blaming AI for Everything Now?

    So, We’re Just Blaming AI for Everything Now?

    Forget ‘the dog ate my homework.’ The latest excuse for everything from viral videos to political gaffes involves pointing a finger at a mischievous algorithm.

    It feels like just yesterday the ultimate excuse for anything was, “Sorry, I have bad Wi-Fi.” But it seems we’ve officially entered a new era of creative blame-shifting. The new go-to? Blaming AI. And honestly, it’s already getting weirdly specific and surprisingly bold.

    I’m talking about a moment from this past week that felt like a scene straight out of a political satire. A video started making the rounds online showing a plain black trash bag being unceremoniously tossed out of a second-floor window of the White House. It was a bit odd, sure, but not exactly earth-shattering. When reporters asked former President Trump about it, his response wasn’t about spring cleaning or renovations.

    His answer? “That’s probably AI-generated.”

    Let that sink in. Not a contractor, not a staffer, but a rogue algorithm deciding to digitally create a video of flying rubbish. The excuse is almost more interesting than the event itself. It’s the digital equivalent of telling your teacher the dog ate your homework, except the dog is now a superintelligent computer.

    The Problem with Blaming AI

    The thing is, we already knew the real story. The New York Times had reported, and the White House itself had confirmed, that contractors were doing renovation work and were simply throwing out trash. It was mundane, logical, and completely non-AI-related.

    What makes the whole exchange even more bizarre is that Trump apparently doubled down on the claim. He insisted that the White House windows are bulletproof and can’t be opened—a statement made right after watching a video that clearly showed one of the windows, well, open.

    This is a perfect example of how blaming AI has become such a convenient, catch-all defense for anything you don’t like or want to explain. Because for most of us, AI is still a kind of mysterious black box. We know it’s powerful and capable of creating fake images and videos (often called “deepfakes“), but few of us understand exactly how it works. That lack of public understanding creates a perfect space for doubt. If you can’t say for sure that AI didn’t do it, then the excuse hangs in the air, just plausible enough to deflect.

    Is AI the New Scapegoat for Everything?

    This incident is funny, but it points to a much bigger, and slightly more concerning, trend. If a public figure can use “it was AI” to deny something as trivial as a trash bag video, where does it end?

    It’s easy to see this trickling down into our everyday lives.
    * At work: “I swear I sent that report. The company’s AI firewall must have eaten it.”
    * In social situations: “I didn’t leave you on read, my phone’s AI assistant decided you weren’t a priority contact.”
    * On social media: “I definitely didn’t tweet that at 3 AM. My account must have been hacked by ChatGPT.”

    When technology becomes a scapegoat, it slowly chips away at accountability. It blurs the line between reality and fiction, making it harder to agree on basic facts. In an age where digital literacy is more important than ever, learning to question these kinds of deflections is crucial. Organizations like the Poynter Institute have been champions of media literacy for years, but the rise of AI adds a whole new layer of complexity.

    So, while the flying White House trash bag might be a funny headline for September 2025, it’s also a little preview of our future. A future where “a robot did it” might become the most common, and most frustrating, excuse of them all.

    What’s the wildest thing you think someone will try to blame on AI next? I’m genuinely curious.

  • My First Smart Lighting Setup: Bulbs vs. Switches and What I Learned

    My First Smart Lighting Setup: Bulbs vs. Switches and What I Learned

    Thinking about upgrading your home’s lighting? Here’s a simple, no-jargon look at getting started with your first smart lighting setup.

    So, you’re thinking about diving into smart lighting. I get it. I’ve been circling the idea for months, picturing myself dimming the lights for a movie with a simple voice command. But every time I started researching, I’d get bogged down in technical jargon and a seemingly endless list of products. My initial excitement quickly turned into analysis paralysis. But I finally decided to jump in and figure out a smart lighting setup for my own place, and it turns out the biggest decision comes down to one simple question.

    It’s the question that seems to trip everyone up at first: Do you go with smart bulbs or smart switches?

    Let’s break it down in the simplest way possible, because honestly, it’s not as complicated as it sounds.

    The Great Debate: Smart Bulbs vs. Smart Switches

    At first, I thought, “Smart bulbs, obviously!” You just screw them in, and you’re done. And for some situations, that’s absolutely true.

    • Smart Bulbs: These are light bulbs with Wi-Fi or another radio built-in. You replace your existing bulbs with them.
      • Pros: Super easy to install. You can change colors (with RGB models), dim them, and control each bulb individually. Perfect for lamps.
      • Cons: Here’s the big one. If someone (or you, out of pure muscle memory) flips the wall switch off, the smart bulb loses power. It’s now just a “dumb” bulb until you flip the switch back on. This is a huge pain.
    • Smart Switches: These replace the actual light switch on your wall. The bulbs in the fixture can be regular, “dumb” bulbs.
      • Pros: Anyone can use the light just like a normal switch. It’s intuitive for family and guests. It controls the entire fixture, so if you have a ceiling fan with four bulbs, one switch handles them all. The power is never cut to the bulbs, so your smart controls always work.
      • Cons: Installation is more involved. You’ll need to be comfortable with some basic home wiring (or hire an electrician). You can’t change the color of the lights unless you also use smart bulbs.

    Why Smart Switches Are My Starting Point

    After thinking about how my house actually works, I’m leaning heavily toward starting with smart switches for most of my overhead lighting. The main reason is that “light switch muscle memory” is a real thing. I don’t want to have to train myself or my partner to stop using the switches on the wall.

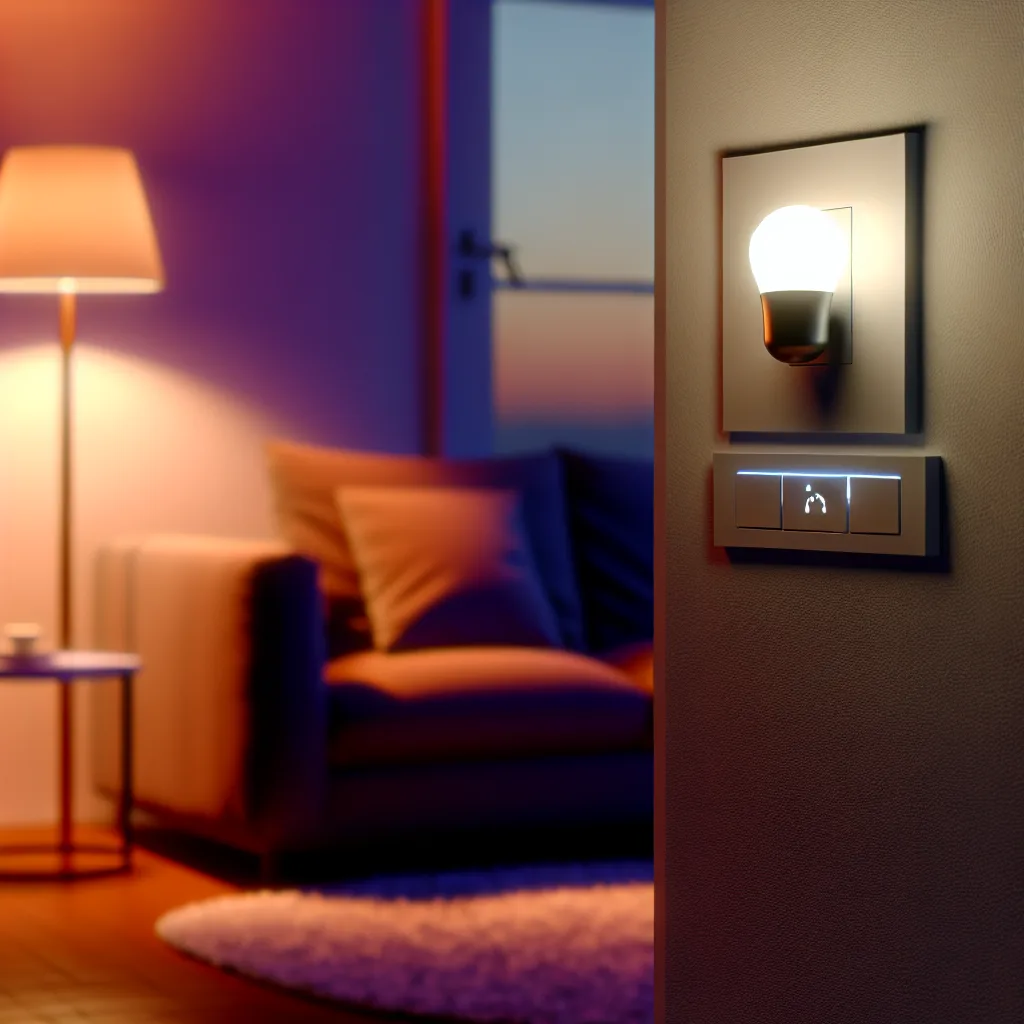
    I want the smart functionality to be an add-on, not a replacement for the basic function of a light. With a smart switch, the light still works like a light. You can tap it on or off. But you also get the ability to control it with your voice, set schedules, or manage it from your phone. For high-traffic areas like the kitchen or living room, this just makes sense. Brands like Lutron Caseta are incredibly popular for this because they are known to be rock-solid reliable.

    The Perfect Place for a Smart Bulb in Your Smart Lighting Setup

    But I’m not writing off smart bulbs entirely! They have a perfect place in a smart lighting setup, and that’s in lamps.

    Think about the floor lamp in the corner of your living room or the reading lamps on your nightstands. These are often not connected to a wall switch, and they’re the ideal candidates for a smart bulb. This is where the fun stuff, like changing colors, comes into play. Want to set a relaxing warm orange glow for reading? Done. Want to sync your lights to a movie for an immersive feel? A brand like Philips Hue has built an entire ecosystem around this kind of ambient lighting.

    So my plan is a hybrid approach:
    * Smart Switches: For the main, hardwired ceiling lights.
    * Smart Bulbs: For standalone lamps to add accent color and mood.

    A Quick Word on Hubs (Don’t Be Scared)

    You’ll hear terms like Wi-Fi, Zigbee, and Z-Wave. Here’s the simple version.

    • Wi-Fi: These devices connect directly to your router. It’s the easiest way to start, but if you add too many, they can slow down your Wi-Fi network.
    • Zigbee/Z-Wave: These are dedicated networks just for your smart home gadgets. They require a small device called a hub (some Amazon Echo devices have one built-in). Because they aren’t competing with your phone or Netflix stream, they are often faster and more reliable. For a deeper dive, tech sites like CNET have great explainers.

    For a beginner, starting with a few Wi-Fi devices is perfectly fine. Don’t let the hub conversation stop you from getting started. You can always add one later if you get more serious about your smart lighting setup.

    Ultimately, building a smart home is a marathon, not a sprint. Start with one room or even just one light. See what you like, what annoys you, and build from there. For me, that starting point is a single smart switch and a colorful smart bulb in a lamp. And I’m pretty excited about it.

  • Tired of Playing Doorman for Your Dog? An Automatic Door Opener for Your Home Might Be the Answer

    Tired of Playing Doorman for Your Dog? An Automatic Door Opener for Your Home Might Be the Answer

    From letting the pup out to boosting accessibility, here’s a real-world look at adding a remote-controlled door to your house.

    Tired of Playing Doorman for Your Dog? An Automatic Door Opener for Your Home Might Be the Answer

    It’s a familiar scene in my house. I’m settled on the couch, deep into a movie or halfway through a work call, and then I see it: The Look. My dog, standing by the patio door, staring intently, letting me know it’s time to go out. Again. I love him to bits, but sometimes I feel less like a pet owner and more like a full-time doorman. This exact thought process led me down a rabbit hole recently, exploring a surprisingly practical solution: installing an automatic door opener for home use.

    The idea is simple: what if you could open and close a hinged patio or back door with the press of a button, just like a garage door? It’s not science fiction. This technology has been common in commercial and accessible buildings for years, but it’s becoming increasingly popular for homeowners looking for a little more convenience—or a better way to let their furry friends in and out.

    So, What Exactly is an Automatic Door Opener for Home Use?

    Forget the sliding glass doors you see at the grocery store. We’re talking about a motorized arm that attaches to your existing hinged door. This device physically swings the door open and pulls it shut. Most systems come with a remote control, a wall-mounted push button, or can even be integrated into a smart home system for control via your phone.

    The core benefit is hands-free operation. Whether you’re carrying groceries, have mobility challenges, or are just tired of getting up every 20 minutes for the dog, it’s a huge convenience. The real magic happens when you pair it with a smart lock. Since you’ll already have a remote deadbolt or smart lock to handle the latch, the automatic opener’s only job is to do the swinging.

    The Big Challenge: Inswing vs. Outswing Doors

    Here’s where a little planning comes in. Many residential doors swing inward. But patios, decks, and storm doors often swing outward to save interior space. This is a key detail when you’re shopping for an automatic door opener for home installation.

    • Inswing Doors: These typically use a “pull-arm” or sliding track on the inside of the door. The installation is often more straightforward.
    • Outswing Doors: These require a “push-arm” mechanism. The motor unit is still mounted inside, but it uses a different style of arm to push the door open to the exterior.

    It’s not a dealbreaker, but you need to make sure the kit you buy is specifically designed for an outswing door. Reading the product description carefully is essential.

    Finding the Right Automatic Door Opener Solution

    Once you know what type of door you have, you can start looking at products. There are a few main categories to consider.

    One popular option is a residential kit from a specialized manufacturer. Companies like Olide Auto Door Systems offer complete packages designed for home use. These are often robust, reliable, and come with everything you need, including sensors and remotes. They are frequently marketed for accessibility, which means they’re built with safety and durability in mind.

    Another route is integrating with your smart home setup. While more of a DIY approach, you could use a powerful linear actuator controlled by a smart relay. This requires more technical know-how but offers ultimate customization. For most people, a dedicated kit is the simpler and safer choice.

    Key Things to Consider Before You Buy

    An automatic door opener is a fantastic upgrade, but it’s not a casual purchase. Here are a few things to think about before you click “buy”:

    • Safety First: This is non-negotiable, especially with pets and children. Look for a model with obstruction detection. If the door encounters resistance while opening or closing (like a dog’s tail or a misplaced toy), it should stop and reverse automatically.
    • Power Source: Most units need to be plugged into a standard wall outlet. Make sure you have one nearby or are prepared to have an electrician install one.
    • Security Integration: An automatic opener doesn’t lock your door. You’ll still need a separate lock. Pairing it with a smart lock like a Schlage Encode is the perfect combination. You can unlock the deadbolt with your phone, then press another button to swing the door open.
    • Noise Level: These units have a motor, so they aren’t silent. Check reviews or product videos to get a sense of how loud a particular model is.
    • Installation: Are you comfortable with a weekend DIY project? Many kits are designed for homeowner installation. If you’re not confident in your skills, especially with wiring and alignment, it’s wise to budget for a professional installer.

    Ultimately, adding an automatic opener is a brilliant way to make your home work better for you and your four-legged family members. It’s a step beyond the basic smart home gadget and into the realm of true, helpful home automation. My days as a doorman might just be numbered.

  • The Magic Trick for Your PC: Setting Up Wake on LAN Over WiFi

    The Magic Trick for Your PC: Setting Up Wake on LAN Over WiFi

    It’s like a remote starter for your computer, and it’s surprisingly easy to set up Wake on LAN WiFi.

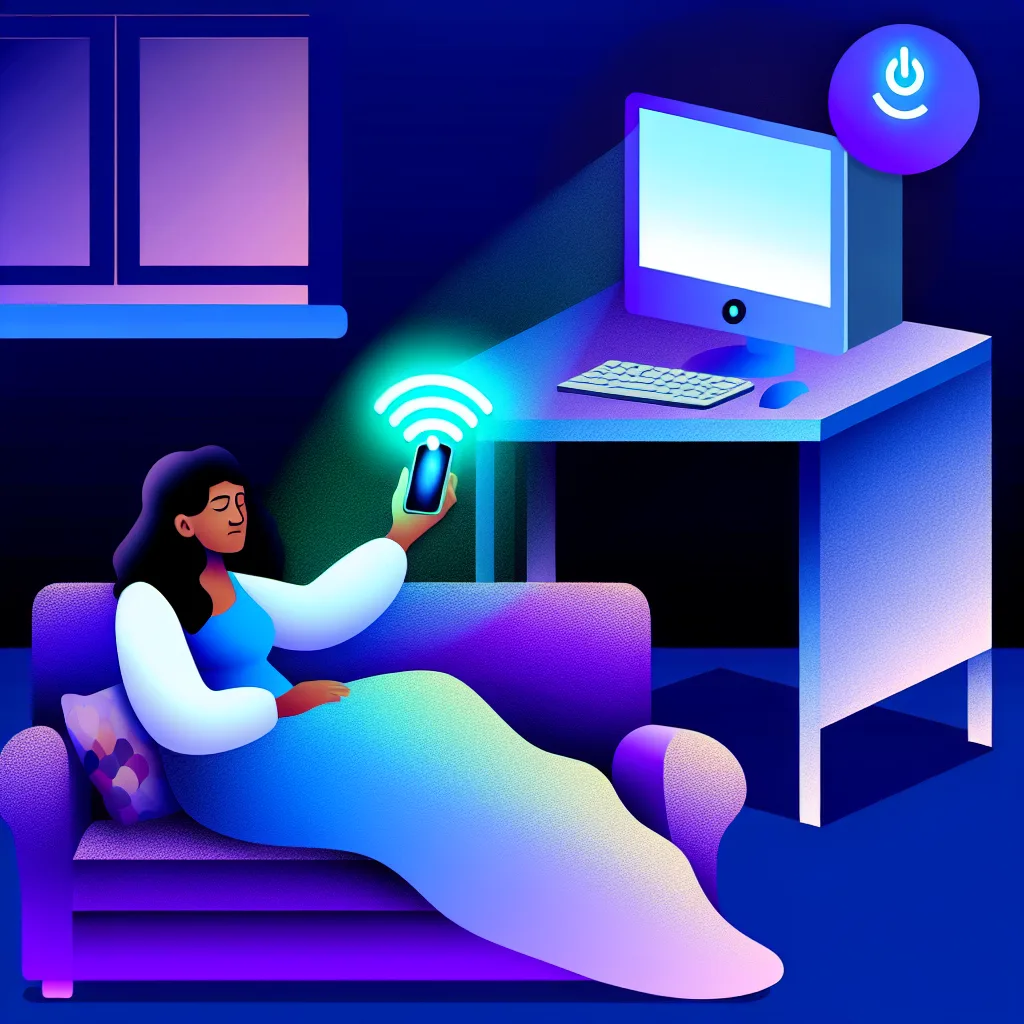
    Have you ever been settled on the couch, or maybe already at the office, and realized you need a file from your desktop PC? The one that’s currently sitting upstairs, fast asleep. The old solution was to sigh, get up, and press the power button. But what if you could wake it up remotely, right from your phone or laptop, without a single cable in sight? That’s the magic of setting up Wake on LAN WiFi, and it’s a lot easier to pull off than you might think.

    I used to think Wake on LAN was strictly for nerdy network admins with Ethernet cables running through their walls. The idea of doing it wirelessly seemed like some next-level tech wizardry. But it turns out, most modern computers are perfectly capable of it. We just have to know which settings to tweak.

    So, let’s grab a coffee and walk through how to give your PC a wireless remote starter.

    First Things First: What Do You Need for Wake on LAN WiFi?

    Before we start diving into settings menus, let’s make sure you have the right gear. It’s pretty basic, and you likely already have it:

    • A Compatible Motherboard and BIOS/UEFI: Almost any computer made in the last decade should have this. It’s the foundational setting that allows a computer to respond to a “wake up” call even when it’s off or asleep.
    • A WiFi Card That Supports the Feature: This is the key ingredient. Not all wireless network adapters are created equal. The feature is technically called Wake on Wireless LAN (WoWLAN), and your card needs to support it. Most modern internal cards (especially Intel ones) do.
    • A Little Bit of Patience: We’ll be navigating a couple of different settings menus. None of it is difficult, but it can take a few minutes to find the right checkboxes.

    Step 1: Diving Into Your PC’s BIOS/UEFI

    Our first stop is your computer’s fundamental control panel: the BIOS (or UEFI on newer systems). This is the software that runs when you first boot up your PC, before Windows even starts.

    1. Restart your computer.
    2. As it boots up, press the key to enter setup. It’s usually DEL, F2, F10, or F12. The screen will flash a message telling you which key to press.
    3. Once you’re in, you’ll need to look for settings related to power management or onboard devices. Every BIOS looks different, so you might have to hunt around.
    4. Look for an option named something like “Power On By PCI-E” or “Wake on LAN.”

    You might be thinking, “But I’m using WiFi, not a PCI-E device!” That’s true, but your internal WiFi card is connected via a PCI-E slot on the motherboard, so enabling this setting is often the first step to allowing it to wake the system. Enable it, then save your changes and exit the BIOS. Your computer will restart.

    Step 2: Configuring Your Wake on LAN WiFi Settings in Windows

    With the BIOS ready, it’s time to tell Windows that it’s okay for your WiFi card to wake up the computer.

    1. Right-click the Start button and select “Device Manager.”
    2. Expand the “Network adapters” section.
    3. Find your wireless adapter in the list, right-click it, and choose “Properties.”

    Now, you’ll be looking in two different tabs here.

    First, click the “Power Management” tab. You should see a few checkboxes. Make sure these two are checked:
    * Allow this device to wake the computer.
    * Only allow a magic packet to wake the computer.

    The “magic packet” is the special network signal your phone or another computer will send to wake up the PC. Ticking this box prevents random network traffic from waking it up accidentally.

    Next, head over to the “Advanced” tab. This is a long list of properties. Scroll through it and look for anything named “Wake on Magic Packet” or “WoWLAN.” If you find it, make sure its value is set to “Enabled.” This is the most important step! If you don’t see this option, your network card may not support WoWLAN. For more technical details on these properties, Microsoft’s official documentation is a great resource.

    Step 3: Finding Your MAC Address and Sending the Packet

    Your PC is now ready to receive a wake-up call. To send it, you need one crucial piece of information: your WiFi card’s MAC address. Think of it as a unique, permanent mailing address for your network adapter.

    Here’s the easiest way to find it:
    1. Press the Windows key and type cmd to open the Command Prompt.
    2. Type ipconfig /all and press Enter.
    3. Scroll through the results until you find your “Wireless LAN adapter Wi-Fi.”
    4. Look for the “Physical Address” line. It will be a string of six pairs of letters and numbers, like A1-B2-C3-D4-E5-F6. That’s your MAC address. Copy it down.

    Now, you just need an app to send the magic packet. There are dozens of free options for your phone (like Wake On LAN for Android or Mocha WOL for iOS) or other computers. In the app, you’ll create a new profile for your PC, enter the MAC address you just found, and that’s it.

    Put your PC to sleep, tap the button in your app, and watch it come to life. No cables required. It’s a simple trick, but it’s one of those little conveniences that makes you feel like you’re living in the future.
    For a deeper dive into what MAC addresses are and how they work, check out this excellent explainer from How-To Geek.

  • Is Your Old Thermostat Too Weird for a Smart Upgrade?

    Is Your Old Thermostat Too Weird for a Smart Upgrade?

    Before you buy a Nest or Ecobee, let’s figure out if your old thermostat’s wiring can handle a modern upgrade.

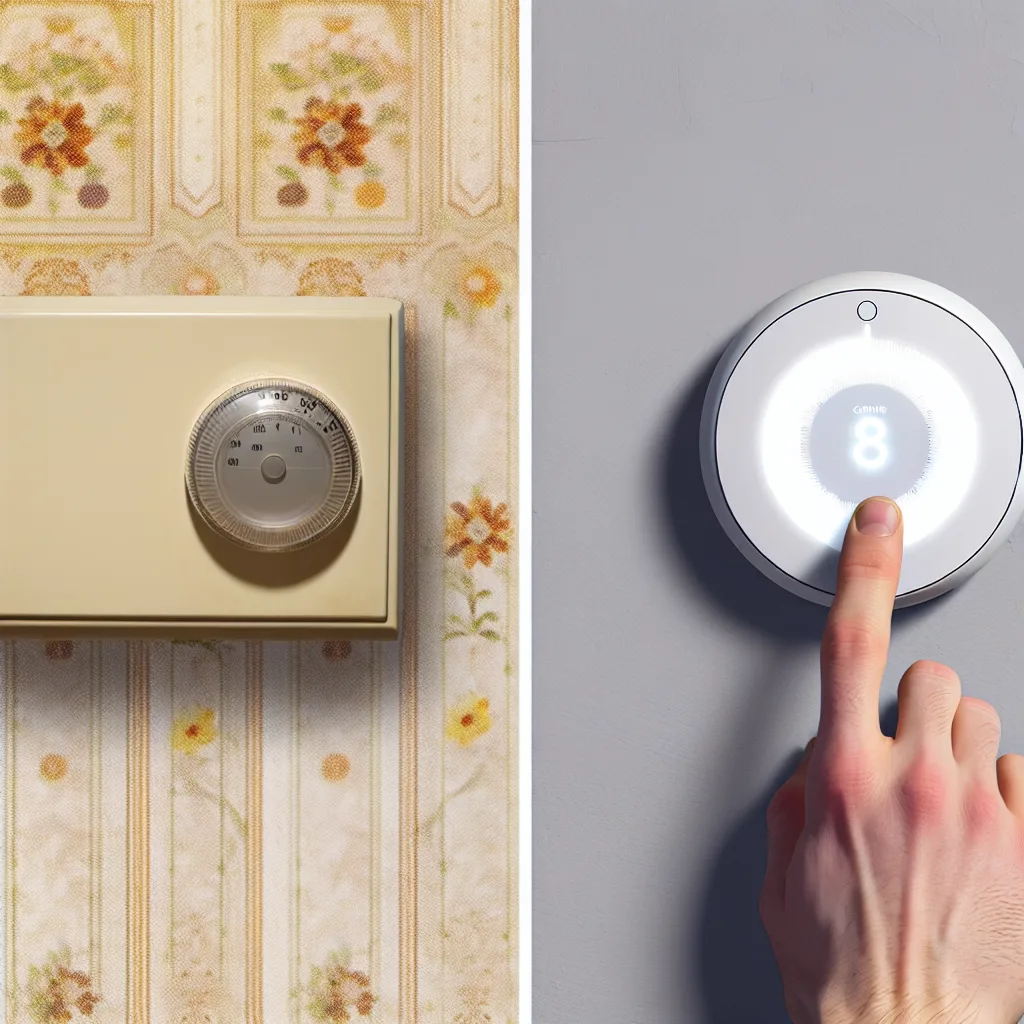
    So you’re standing there, staring at that beige or faux-wood plastic box on your wall. It might have a little dial, a tiny mercury tube, or a digital display that looks like it came off a 1980s calculator. And you’re wondering, “Can I actually replace this thing with a sleek, smart thermostat?” It’s a common question, and figuring out your smart thermostat compatibility can feel a little intimidating, but it’s usually simpler than you think.

    I’ve been there. You see all the cool things a Google Nest or Ecobee can do—saving you money, learning your schedule, letting you change the temperature from your phone—and you want in. But then you look at your old thermostat and worry that the wiring is some ancient, forgotten language.

    Good news: most of the time, you can make the swap. You just need to check a few things first before you click “buy.”

    Is Your System Low Voltage or High Voltage?

    First, let’s figure out what kind of heating and cooling system you have. The vast majority of homes in the U.S. have a central HVAC system that uses a low-voltage (24V) thermostat. This is the kind that Nest, Ecobee, and most other smart thermostats are designed for.

    You might have a high-voltage (or line-voltage) system if your heat comes from electric baseboard heaters or radiant floors. A quick way to get a hint is to look at the thermostat itself.

    • Low-voltage thermostats usually have a bundle of thin, colorful wires connected to screw terminals.
    • High-voltage thermostats often have just two or four thick wires connected with wire nuts and may have a warning label about the risk of electric shock (120V or 240V).

    If you suspect you have a high-voltage system, your options for a smart thermostat are more limited, but they do exist! Ecobee and a few other brands make specific models for these systems. But for this guide, we’ll focus on the much more common low-voltage setup.

    Solving the Great C-Wire Mystery

    If you’ve done any research on smart thermostat compatibility, you’ve probably heard about the “C-wire,” or “common wire.” It sounds technical, but its job is simple: it provides a continuous flow of 24V power to the thermostat.

    Your old thermostat probably didn’t need this, as it likely ran on batteries or a tiny bit of power siphoned from the heating/cooling controls. But a smart thermostat needs constant, reliable power to run its Wi-Fi connection, bright screen, and all its fancy software.

    How to check for a C-wire:

    1. Turn off the power to your HVAC system at your breaker box. Safety first!
    2. Gently pull the face of your old thermostat off its baseplate. It should just pop off.
    3. Look at the wires connected to the terminals. You’ll see letters like R, G, Y, and W. If you see a wire connected to a terminal labeled “C,” you’re in luck. You have a C-wire!

    What If I Don’t Have a C-Wire?

    Don’t panic! This is a very common situation in older homes. You still have great options:

    • Use a Power Extender Kit (PEK): Many smart thermostats, like those from Ecobee, come with a small adapter kit in the box. This clever device is installed down at your furnace control board and uses your existing wires to create a “virtual” C-wire. The installation is pretty straightforward if you’re comfortable following instructions.
    • Google Nest’s Power Connector: Similarly, Google offers a Nest Power Connector that achieves the same goal for its thermostats.
    • Run a New Wire: If you’re comfortable with a bit more DIY or are having an HVAC technician out for service anyway, you can have a new thermostat wire with more conductors run from the furnace to the thermostat.

    The Easiest Way to Check Smart Thermostat Compatibility

    Before you do anything else, the absolute best first step is to use the online compatibility checkers provided by the manufacturers themselves. These tools walk you through the exact process of popping off your old thermostat and identifying the wires you have.

    Take a picture of your current wiring before you disconnect anything. This is your cheat sheet! The online tools will ask you which wires are connected to which terminals (R, W, G, Y, C, etc.) and give you a definitive “yes” or “no” on whether their product will work with your system, along with a custom wiring diagram.

    When to Call a Professional

    Look, there’s no shame in calling for backup. If you open up your thermostat and see a confusing mess of unlabeled wires, or if you have a more complex system with heat pumps or multiple zones, an HVAC professional can sort it out in no time. It’s better to pay a little for an expert installation than to risk damaging your HVAC system.

    So, take a deep breath. That old box on your wall isn’t as mysterious as it looks. With a few simple checks, you can figure out your smart thermostat compatibility and be on your way to a smarter, more efficient home.

  • This Light Fixture Tracks the Sun and Moon—Here’s How It Works

    This Light Fixture Tracks the Sun and Moon—Here’s How It Works

    Build a custom light fixture that brings the sky indoors, even on the cloudiest days.

    I live in a city where grey, overcast skies are the norm. It’s easy to go days without seeing the sun, and sometimes you just miss knowing it’s even there. So when I stumbled upon a brilliant DIY sun tracker project someone built to solve this exact problem, I was immediately hooked. The idea is simple but so clever: a custom light fixture that visually represents the real-time positions of the sun and moon in the sky. It’s like having a little mechanical window to the cosmos right on your wall.

    It doesn’t just tell you the time; it gives you a tangible connection to the world outside, even when you’re stuck indoors.

    The Concept: A Simple, Smart Celestial Map

    Imagine a simple light fixture with multiple bulbs arranged in an arc. Now, what if two of those bulbs could turn on and off to represent the sun and moon, tracking their journey across our sky? That’s the core of this project.

    When the sun rises, a “sun” bulb lights up. As it moves across the sky, different bulbs in the arc light up to show its position. When it sets, the bulb turns off. The same thing happens for the moon on a separate track. It’s a dynamic, ambient piece of data visualization that you can actually live with.

    The beauty is in its simplicity. You don’t need a complex screen or a digital display. You just need:

    • A multi-bulb light fixture (you can find cool, minimalist ones on Etsy or even build one yourself).
    • A set of smart bulbs, like the Philips Hue Edison-style bulbs, which give off a great vintage, warm glow.
    • A central smart home hub to act as the brain.

    Building Your Own DIY Sun Tracker

    While the concept is simple, making it work requires a little bit of smart home magic. The original creator used a popular open-source platform, and it’s the perfect brain for a custom project like this.

    The “brain” behind this operation is Home Assistant, a powerful and private platform for home automation. It’s perfect for custom projects because it gives you the flexibility to connect almost any device and write your own rules.

    To get the astronomical data, the project uses a bit of Python code. Specifically, a script leverages a library called ephem, which is fantastic for computing the positions of celestial bodies. You can check out the PyEphem library on PyPI to see how it works. The script basically does this:

    1. Calculates the current position (azimuth and altitude) of the sun and moon based on your home’s location.
    2. Maps those positions to the specific bulbs in your light fixture.
    3. Tells Home Assistant which “sun” bulb and which “moon” bulb to turn on.

    This script can be set to run automatically every few minutes using an add-on like AppDaemon, so your celestial display is always up-to-date. The result is a silent, beautiful representation of the sky above you.

    Why Bother With a DIY Sun Tracker?

    So, why go through the trouble? You could just look up the sun’s position on your phone. But this isn’t about raw data; it’s about feeling.

    In places with persistent cloud cover, this project brings a piece of the outdoors inside. It’s a quiet reminder of the natural rhythms happening beyond your ceiling. It’s also an incredible conversation piece. It’s subtle enough to blend in as a cool light fixture, but the story behind what it’s actually doing is what makes it special.

    This whole project is a fantastic example of what makes smart homes so compelling. It’s not just about convenience—it’s about creating a more personal, connected, and even poetic living space. It uses technology not to distract, but to connect us more deeply to the world around us. And you can do it all with some off-the-shelf Philips Hue bulbs and a little bit of curiosity. It’s a reminder that the best smart home projects are often the ones that solve a uniquely human problem. In this case, it’s for anyone who just misses seeing the sun.

  • Beyond the Big Brands: How to Create Your Own Custom Matter Buttons

    Beyond the Big Brands: How to Create Your Own Custom Matter Buttons

    Tired of the same old smart buttons? Let’s explore the DIY world of custom Matter buttons and bring your unique ideas to life.

    I was having coffee the other day and found myself staring at a beautiful, old-school toggle switch on a vintage lamp. I love the satisfying click it makes. And it got me thinking: why do our smart homes have to be filled with generic white plastic buttons? What if we could make any button, switch, or trigger smart? That’s the exciting idea behind creating custom Matter buttons, and it’s a conversation that’s bubbling up in DIY smart home circles.

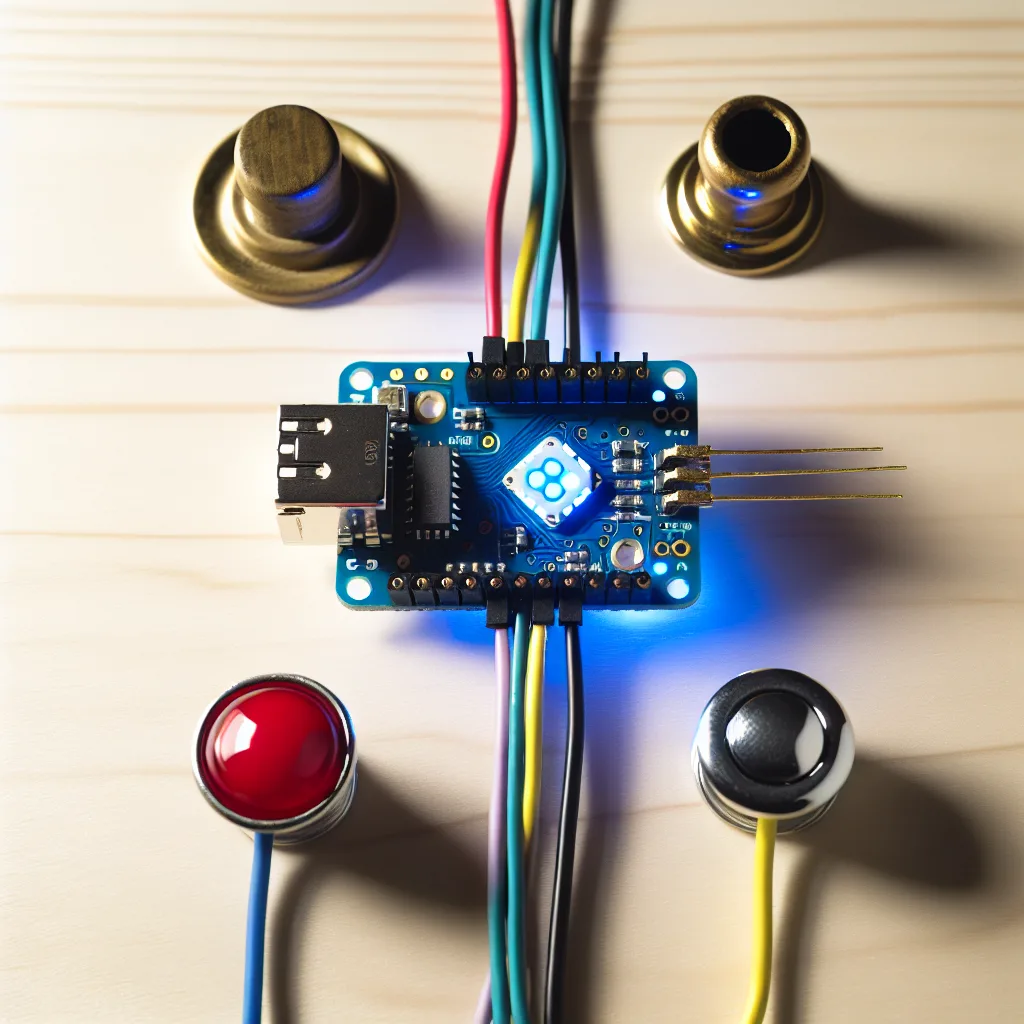
    The core idea is simple yet powerful: bridging the gap between simple, physical buttons and the sophisticated, unified Matter smart home ecosystem. Imagine a device, something like a “Matter GPIO board,” that acts as a central brain. You could connect any number of simple switches or buttons to it, and this brain would assign each one a unique identity within your Matter network.

    This means that old-school toggle switch, a big red arcade button, or even a custom-built foot pedal could suddenly control your smart lights, music, or anything else in your home. It’s about taking the smarts we love and applying them to hardware that has character and fits our specific needs.

    Why Bother with Custom Matter Buttons?

    So, why would you want to go through the trouble? We have plenty of smart buttons on the market from major brands. But the DIY route offers a level of freedom and personalization that you just can’t buy off the shelf.

    • Ultimate Personalization: You can use any button you can imagine. Want to launch your “Movie Night” scene by pressing a giant red panic button? You can do that. Want to integrate a beautiful brass light switch into your smart lighting setup? Totally possible.
    • Consolidated Control: Instead of having five different smart buttons on a counter, you could build a single, elegant panel with multiple physical buttons, each triggering a different routine or device. Think of a dedicated control panel for your home office or kitchen.
    • It Can Be Cost-Effective: A single microcontroller and a handful of buttons can be significantly cheaper than buying multiple name-brand smart buttons, especially if you need several triggers in one location.
    • The Fun of DIY: For many of us, the satisfaction of building something ourselves is the biggest reward. It’s a great way to learn more about electronics and how your smart home actually works under the hood.

    Making Your Own Custom Matter Buttons Today

    While a simple, plug-and-play “Matter GPIO board” isn’t quite a mainstream product just yet, the tools to build your own are absolutely within reach for the determined hobbyist. The key is a powerful little piece of hardware called a microcontroller.

    The most popular choice for this kind of project is the ESP32. It’s an inexpensive, versatile, and powerful chip with built-in Wi-Fi and Bluetooth. More importantly, it’s officially supported by the Connectivity Standards Alliance (CSA), the organization behind Matter. You can find extensive documentation and resources on their developer portal.

    So, how do you get from a bare ESP32 chip to a functioning smart button?

    1. The Hardware: You’ll need an ESP32 development board, the push-buttons or switches of your choice, and some simple jumper wires to connect them.
    2. The Software (The Magic): This is where a platform like ESPHome comes in. ESPHome is an amazing open-source project that lets you configure your ESP32 using simple configuration files instead of complex code. As of September 3, 2025, ESPHome has integrated experimental support for Matter, which is exactly what we need. You can define a button in your configuration, link it to a specific GPIO pin on the ESP32, and tell ESPHome to expose it to your network as a Matter device. It dramatically lowers the barrier to entry. For anyone new to this, the ESPHome Getting Started guide is an excellent place to begin.

    What’s Next for DIY Matter Devices?

    The smart home world moves fast. While today it requires a bit of a DIY spirit, we’re on the cusp of seeing more accessible hardware for these kinds of projects. I fully expect to see more “Matter-native” development boards and kits hitting the market soon, designed specifically for hobbyists who want to create custom devices without a steep learning curve.

    Until then, the path forward is clear for those of us who like to tinker. By combining a simple ESP32 with the power of ESPHome, the dream of creating custom Matter buttons is already a reality. It’s your chance to add a personal, tactile, and truly unique touch to your smart home. So go ahead, find a cool button and make it smart!