Category: AI

  • My Fan Remote Stopped Working. Here’s How I Fixed It.

    My Fan Remote Stopped Working. Here’s How I Fixed It.

    A simple guide to fan remote pairing, even when there are no buttons or switches.

    It’s one of those small, modern-day mysteries. You walk into a room, point the remote at your ceiling fan, and press the button. The light might turn on, but the blades refuse to spin. You try again. Nothing. It’s frustrating, right? One minute everything is working perfectly, and the next, you’ve lost control of the breeze. If you’re struggling with a stubborn fan, you’re not alone. I recently ran into this exact issue and discovered that the fix is often surprisingly simple, especially when it comes to the tricky business of fan remote pairing.

    This isn’t like the old days with tiny, confusing DIP switches you had to match on the remote and the fan unit. Many new fans, especially the stylish “fandeliers” that combine a chandelier and a fan, have no visible pairing buttons at all. So, what do you do when the remote and fan stop talking to each other? The answer usually lies in a simple power-cycling trick.

    Why Your Fan Remote Pairing Suddenly Fails

    Before we get to the fix, it helps to know why this happens. It’s rarely a sign that your fan is broken. More often than not, the remote and the receiver inside the fan have simply lost their connection. This can be caused by a few things:

    • A Power Surge: A brief outage or flicker in your home’s electricity can be enough to reset the fan’s receiver, making it forget its paired remote.
    • Battery Issues: This is the most obvious one. The batteries in your remote might be too weak to send the fan signal, even if they have enough juice to operate the less-demanding light function.
    • Signal Interference: Other wireless devices in your home can sometimes interfere with the signal between the remote and the fan.

    For most modern fans, the solution to re-establishing this connection is to force the fan’s receiver into a “learning” mode.

    The Universal Guide to Fan Remote Pairing

    This process should work for a majority of modern ceiling fans that don’t have DIP switches. Think of it as a hard reset for your fan’s brain.

    Step 1: Cut the Power

    Go to your wall switch and turn off the power to the ceiling fan. Don’t just turn the fan off with the remote—that won’t work. If you have multiple switches controlling the fan, make sure they are all in the “off” position. For good measure, you can also flip the corresponding circuit breaker in your home’s electrical panel.

    Step 2: Wait for 30 Seconds

    Leave the power off for at least 30 seconds. This gives the receiver in the fan’s canopy enough time to fully discharge and reset its internal memory. This is the most crucial step, so don’t rush it!

    Step 3: Restore Power and Act Fast

    Now, turn the power back on at the wall switch or breaker. As soon as you do, you have a small window—usually about 30-60 seconds—to re-pair the remote.

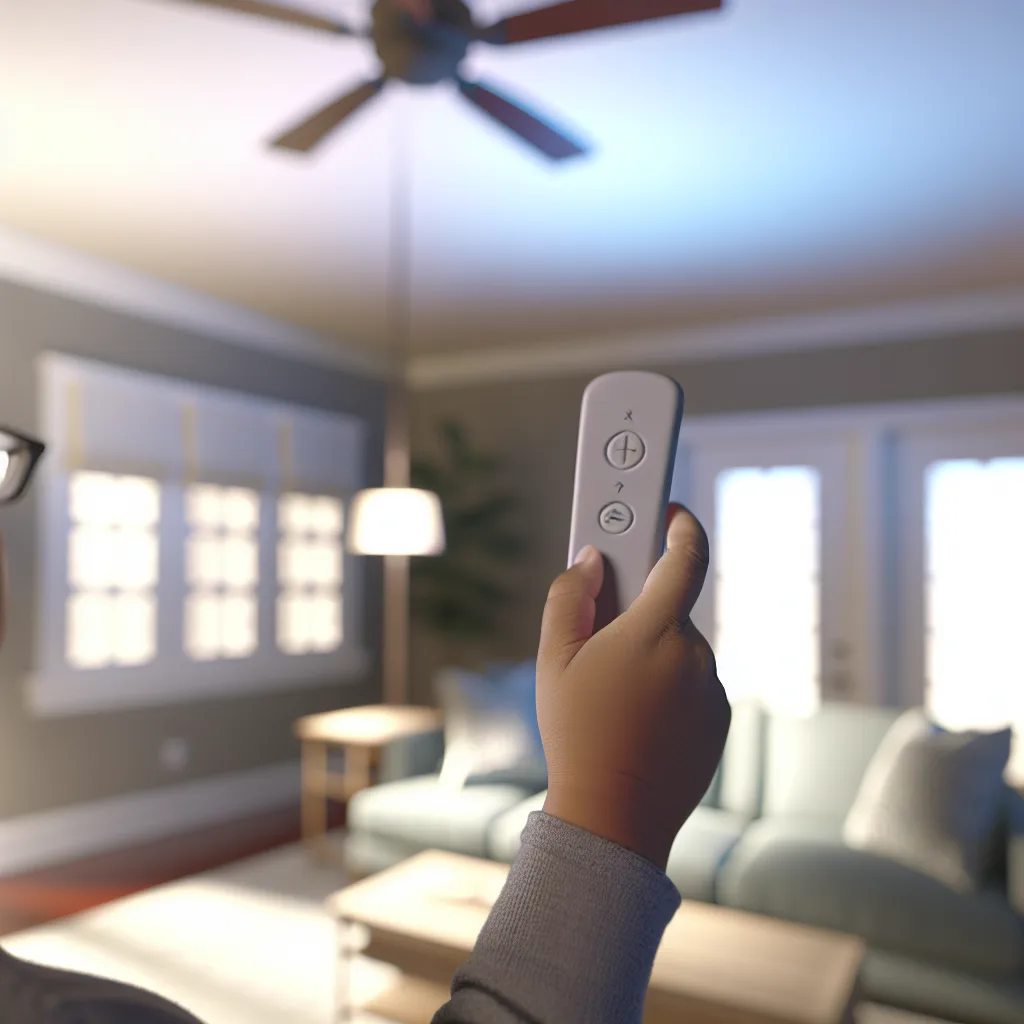
    Step 4: Press and Hold the Pairing Button

    Immediately pick up your remote and press and hold the button designated for pairing. Here’s the tricky part: it’s not always labeled “Pair” or “Learn.” On many remotes, you need to press and hold the “Fan On/Off,” “Power,” or sometimes a fan speed button for about 10-15 seconds.

    You should hear a beep or see the fan’s light flash. This is the confirmation that the remote and receiver are successfully paired. Test it out by trying to change the fan speed. It should work! If it doesn’t, try the process again, perhaps holding a different button this time. For specific models, you can often find guidance on manufacturer websites, like this troubleshooting page from Hunter Fan Company.

    Advanced Fan Remote Pairing Troubleshooting

    What if the power-cycle trick doesn’t work after a few tries? Don’t despair. There are a couple of other things to check.

    First, double-check for interference. Do you have new smart bulbs, a new Wi-Fi router, or another remote-controlled device near the fan? Try temporarily turning these devices off and attempting the pairing process again.

    Second, the issue could be the receiver unit itself. With the power cut at the breaker, you can check the wiring in the fan’s canopy to ensure the receiver hasn’t come loose. If you’re not comfortable with electrical work, this is a job for an electrician.

    If all else fails, it might be time for a new remote and receiver. You can buy a universal ceiling fan remote kit online or at most home improvement stores. They are relatively inexpensive and come with clear instructions for installation and pairing.

    Ultimately, getting your fan and remote to communicate again is usually a quick fix. That simple power-cycling trick is the secret handshake for modern fan remote pairing. Hopefully, these steps help you get your breeze back on without breaking a sweat.
    – Published on: 2025-09-03

  • My New Schlage Lock Was Just Beeping At Me. Here’s The Fix.

    My New Schlage Lock Was Just Beeping At Me. Here’s The Fix.

    Hearing three frustrating beeps from your new Schlage smart lock? Don’t panic. Here’s how to fix the most common setup issue and get your lock working in minutes.

    There’s nothing quite like the small thrill of upgrading a piece of your home. For me, it was swapping out my old, clunky front door lock for a sleek Schlage Encode Plus. I was picturing the seamless entries, the convenience of using my phone, and ditching my house key for good. The installation went surprisingly smoothly, the app connected, and everything seemed perfect.

    Until it wasn’t.

    When I tried to use the keypad for the first time—nothing. Just three long, frustrating beeps. I tried the app. Same thing. Three beeps. It was a clear sign that my new smart lock was not happy. So began my journey into Schlage lock troubleshooting, and if you’re here, you might be hearing those same annoying beeps. Don’t panic. It’s likely a very fixable problem.

    The Mystery of the Open Box

    I have a small confession: I bought an open-box model. The price was right, and all the parts were in the box, so I figured, why not? This is often where the trouble starts. Returned electronics, especially smart devices, often aren’t properly reset before being put back on the shelf.

    The previous owner might have partially completed the setup or connected it to their own Wi-Fi and accounts. When you come along and try to set it up, the lock gets confused. It’s stuck between its old life and a new one. Those three beeps are its way of telling you something is fundamentally wrong in its little electronic brain. But even if your lock was brand new, this issue can still pop up.

    Your First Step in Schlage Lock Troubleshooting: The Factory Reset

    Before you start unscrewing things or spending an hour on hold with customer support, the very first step in any good Schlage lock troubleshooting plan is a full factory reset. This wipes the slate clean, erasing any previous network settings, user codes, and app pairings. It’s the most effective way to solve the three-beep error.

    Here’s how to do it properly. It’s simple, but you have to follow the steps exactly.

    1. Disconnect the Battery: Open the inside cover of your lock (the part on the interior of your door). Unplug the battery connector.
    2. Press and Hold the Button: Find the black, circular button on the inside of the lock housing. Press and hold this button down.
    3. Reconnect While Holding: While still holding the button down, reconnect the battery. You should see the inside indicator light up.
    4. Release the Button: Once the light appears, release the button.

    The lock will then perform its setup routine. You’ll see the bolt extend and retract as it determines the orientation of your door. This process is critical. If the bolt doesn’t move, you may have a physical installation issue, but more often than not, this reset is the magic fix.

    For a visual guide and model-specific instructions, I highly recommend checking out the official Schlage Support Center. They have detailed videos and guides for every model.

    Advanced Schlage Lock Troubleshooting Tips

    What if the factory reset doesn’t solve it? While the reset is the most common solution, a few other things could be causing the issue.

    • Check the Physical Installation: Is the deadbolt smoothly extending and retracting? If it gets stuck or has to work too hard, the lock will throw an error. Make sure the hole in your door frame is deep enough and properly aligned.
    • Fresh Batteries are a Must: Smart locks use more power than you’d think, especially during setup. The batteries included in the box might not be at full strength. I always recommend starting with a fresh set of high-quality alkaline batteries (avoid rechargeable ones, as many smart locks advise against them).
    • Follow the App Setup Carefully: After a factory reset, you have to re-add the lock to your Schlage Home app or Apple Home. Follow the on-screen instructions precisely. Rushing through the Wi-Fi or HomeKit setup can cause connection failures that result in… you guessed it, more beeps. As tech sites like CNET often point out in their reviews, a smooth user experience is entirely dependent on a flawless setup process.

    Knowing When to Call It Quits

    I was lucky. The factory reset solved my problem instantly. The beeps vanished, and the lock has worked perfectly ever since. But if you’ve gone through all these steps and your lock is still just beeping at you, it might be time to seek help.

    If you bought it from a major retailer, especially if it was an open-box item, returning or exchanging it is your easiest option. If it was brand new, contacting Schlage’s customer service is the next logical step. A faulty unit is rare, but it can happen.

    The good news is that the dreaded three-beep error is usually just a sign of a confused lock, not a broken one. With a little patience and a proper reset, you can get back to that initial excitement and enjoy the convenience of your new smart home gadget.

  • Why Your New Smart Lock Won’t Fit Your Old Door (and What to Do About It)

    Why Your New Smart Lock Won’t Fit Your Old Door (and What to Do About It)

    Your new smart lock doesn’t fit your vintage door? You’re not alone. Here’s a friendly guide to understanding the problem and finding the right solution.

    So, you just bought a shiny new smart lock. You’re dreaming of a keyless life—no more fumbling for keys in the rain, the ability to grant guest access from your phone, and that satisfying little whirr sound as your door unlocks automatically. But then, you hit a snag. You go to install it on your beautiful, character-filled older door, and… it doesn’t fit. The holes don’t line up, the mechanism is completely different, and the instructions suddenly feel like they’re written in another language. If this sounds familiar, you’re not alone. Figuring out how to install a smart lock on an old door can be a real head-scratcher, but don’t worry, you’ve got options.

    It’s a common problem in homes with a bit of history. Most modern smart locks are designed for doors with a standard deadbolt—a simple cylindrical lock that’s separate from the doorknob or handle. Older doors, however, often feature a completely different system called a mortise lock.

    First, What Kind of Lock Do You Have?

    Before we dive into solutions, let’s identify the likely culprit. A mortise lock is a large, rectangular lock body that fits into a deep pocket (or “mortise”) cut into the edge of the door. The handle, latch, and deadbolt are often integrated into one single, formidable piece of hardware. They’re built like tanks, which is great for security, but not so great for compatibility with off-the-shelf tech from Best Buy.

    If your lock looks like a single, tall unit inside the door with a combined latch and deadbolt, you probably have a mortise lock. And that’s why your standard smart lock won’t work. But don’t give up on your smart home dreams just yet.

    Your Options for a Smart Lock on an Old Door

    You have a few paths you can take, ranging from a simple addition to a full replacement. It all depends on your budget, your DIY comfort level, and how much you want to alter your vintage door.

    1. The Easy Way: A Retrofit Smart Lock

    This is often the best starting point. A retrofit lock, like the excellent August Wi-Fi Smart Lock, doesn’t replace your entire locking mechanism. Instead, it only replaces the thumbturn on the inside of your door.

    • How it works: You keep your existing lock, your handle, and your keys. The August lock attaches over your deadbolt’s interior thumbturn and physically turns it for you. From the outside, your door looks exactly the same.
    • The Big Caveat: This only works if your mortise lock has a separate deadbolt with a standard thumbturn on the inside. If your lock is a single mechanism where the key and handle do all the work, this option is likely out.
    • Pros: Super easy to install (often just a screwdriver and 15 minutes), maintains the vintage look, and you can still use your original keys.
    • Cons: Only controls the deadbolt, not the handle’s latch, and compatibility isn’t guaranteed with every mortise lock.

    2. The Full Swap: A Smart Mortise Lock

    Yes, they exist! Companies have started making dedicated smart locks for mortise doors. These are all-in-one units that replace your entire existing lockset, handle and all.

    • How it works: You remove your old mortise lock completely and install one of these high-tech replacements. They often come with keypads, fingerprint scanners, and all the smart features you’d expect. A great example of a modern, full-featured option is the Aqara A100 Pro.
    • Pros: A seamless, fully integrated smart solution that looks sleek and modern.
    • Cons: Can be very expensive. The installation is also much more complex and will likely require a professional locksmith to ensure it’s done correctly, especially if the new lock’s dimensions don’t perfectly match the old one.

    How to Choose the Right Smart Lock for Your Old Door

    Feeling a little overwhelmed? Let’s break it down. Here are the questions to ask yourself before you buy anything.

    • Can you retrofit? Look at the inside of your door. Do you have a separate deadbolt that you can lock and unlock with a little knob (a thumbturn)? If yes, a retrofit lock is your simplest path forward.
    • What are your door’s measurements? If you’re considering a full replacement, you need to be meticulous. Measure the thickness of your door, the “backset” (the distance from the edge of the door to the center of the lock), and the dimensions of the existing mortise pocket. Compare these carefully to the specs of any potential new lock.
    • Are you willing to modify the door? Sometimes, the most practical solution is to call a locksmith and have them drill a new, standard deadbolt hole above your existing handle. This opens up your options to almost any smart lock on the market. It permanently alters your door, but it might be the most reliable long-term solution.
    • Which smart ecosystem do you use? Whether you go for a retrofit or a full replacement, make sure it’s compatible with your preferred system—Apple HomeKit, Google Assistant, or Amazon Alexa. Trusted tech sites like CNET regularly test and review locks for their smart home compatibility.

    Ultimately, putting a smart lock on an old door is a balancing act between preserving charm and embracing convenience. It might take a bit more research than a standard installation, but it’s absolutely achievable. Take a close look at your door, weigh your options, and you’ll be enjoying that keyless life in no time.

    (Updated: September 3, 2025)

  • The ‘Invisible’ Smart Home: My Simple Trick to Hide DIY Tech in Plain Sight

    The ‘Invisible’ Smart Home: My Simple Trick to Hide DIY Tech in Plain Sight

    How I’m using a simple enclosure to finally hide smart home devices and make my setup look clean.

    I love building things for my smart home. There’s a special kind of satisfaction in setting up a tiny ESP32 board to solve a real problem, like improving Bluetooth tracking or knowing who’s in what room. But let’s be honest: a circuit board with a blinking LED taped to the wall isn’t exactly a design statement. For a long time, I’ve struggled with the final step of any DIY project: how to hide smart home devices without sacrificing their functionality.

    My house was starting to get littered with these little technological marvels. An ESPHome Bluetooth proxy here, an ESPresense node there. They worked great, but they looked messy and temporary. The “spouse approval factor” was dropping fast. I needed a solution that was clean, simple, and didn’t involve stuffing everything into a closet where it wouldn’t work as well.

    Then, I had one of those ‘aha!’ moments. The best way to hide something isn’t always to lock it away—it’s to put it right out in the open, disguised as something boring.

    The Perfect Disguise: Hiding Smart Home Devices in Plain Sight

    The idea is simple: a small, clean-looking plastic enclosure that mounts on the ceiling or high up on a wall. Think about the humble smoke detector. You probably have several in your home, and you never, ever notice them. They just blend into the background.

    That’s the goal here. By creating a similar, nondescript housing for my ESPHome devices, I could make them functionally invisible. People’s eyes just slide right past them. It solves the problem of needing to place Bluetooth proxies and presence detectors in central locations for the best coverage, without having to look at a bare circuit board every day.

    For me, this meant firing up the 3D printer. You can find tons of project files on sites like Printables or Thingiverse for “ESPHome cases” or “sensor enclosures.” Many are designed to be minimal and clean, perfect for this kind of project. You can print them in a color that matches your walls or ceiling, and suddenly, that messy project board becomes a discreet, professional-looking sensor.

    More Than Just a Pretty Case

    Once I started thinking about creating a custom enclosure, I realized I could do more than just hide the device. The enclosure wasn’t just a box; it was an opportunity to add more features. Why stop at just a Bluetooth proxy when a little more effort could turn it into a multi-purpose smart home hub?

    Here are a couple of ideas I’m playing with for my next build:

    • A Built-in Night Light: Adding a single addressable LED is incredibly simple. You can program it to cast a soft, downward glow at night, making it a perfect automatic night light for a hallway or bathroom. It’s subtle, useful, and runs on the same board that’s already there.
    • An All-in-One Sensor Suite: Many ESP32 boards have extra pins just waiting to be used. I’m thinking of adding a port for Grove-compatible sensors. This opens the door to easily adding sensors for temperature, humidity, air quality, or motion without running more wires or having more devices cluttering up the room.
    • Perfecting Presence Detection: This is especially great for ESPresense nodes. They need a clear line of sight to accurately detect phones or smartwatches. Mounting them on the ceiling in an unobtrusive case gives them a perfect vantage point of the entire room, making presence detection faster and more reliable.

    Your Path to a Cleaner Smart Home

    You don’t need to be an electrical engineer to pull this off. The smart home community has already done most of the hard work. If you’re tired of looking at exposed electronics, this is a really rewarding weekend project.

    The heart of it all is a simple ESP32 board, which you can get for just a few dollars. From there, the official ESPHome website has fantastic documentation to get you started with the software. It’s all configured with straightforward YAML files, so you don’t need to be a coding genius.

    This approach has genuinely changed how I feel about my DIY projects. It’s taken them from feeling like temporary experiments to permanent, polished parts of my home. It proves that you don’t have to choose between a powerful, customized smart home and one that looks clean and uncluttered. You can absolutely have both.

  • The Frustrating Hunt for a Good G9 Smart Bulb

    The Frustrating Hunt for a Good G9 Smart Bulb

    The hunt for a tiny smart bulb is often frustrating. Here’s why—and what you should do instead.

    You’ve got your smart home dialed in. The living room lights fade up for movie night, the kitchen colors shift to a cool white when you’re cooking, and everything responds to your voice. It’s seamless. But then there’s that one lamp—that really cool, modern fixture you love—that’s stuck in the dark ages. It’s powered by a tiny G9 bulb, and your hunt for a G9 smart bulb has likely led you down a frustrating rabbit hole of confusing listings and bad reviews. If you’re wondering why you can’t just buy one from a major brand, you’re not alone.

    I went on this exact search myself, and it turns out there’s a good reason these little bulbs are so hard to find. It’s not that companies don’t want your money; it’s a genuine engineering headache.

    Why is a Good G9 Smart Bulb So Elusive?

    The biggest culprit is size. A G9 bulb is incredibly small, designed to fit into compact and stylish fixtures. But inside a smart bulb, you need more than just an LED. You need a chip for Wi-Fi or Zigbee connectivity, controllers, and components to handle power conversion. Squeezing all of that hardware into a tiny G9 capsule without it overheating is a massive challenge.

    Heat is the enemy of electronics, and smart components generate a fair bit of it. Larger bulbs, like the standard A19, have enough surface area and internal volume to dissipate that heat effectively. A tiny G9, however, can quickly cook its own smarts, leading to flickering, poor performance, and a short lifespan. This is why the big players in smart lighting, like Philips Hue, haven’t touched this format. The technology just isn’t there yet to meet their quality and reliability standards in such a small package.

    The Wild West of Online Listings: What to Expect from a G9 Smart Bulb

    So, what about the ones you can find on Amazon or other online marketplaces? These are typically from lesser-known brands and often come with a few trade-offs. If you decide to try one, here’s what you need to keep an eye on.

    • Connectivity Issues: This is the most common complaint in user reviews. Many of these bulbs use Wi-Fi, and the tiny internal antenna can be weak, leading to frequent disconnects from your network. Others use Zigbee, which can be more stable, but you’ll need a compatible hub. For more on that, the Connectivity Standards Alliance explains how this mesh network technology works.
    • Questionable Color and Brightness: The spec sheets for these bulbs are often sparse. Key metrics like the Color Rendering Index (CRI), which measures how accurately colors appear under the light, are usually missing. The RGB colors can also be much dimmer than the white light, or you might see poor color separation, where the light looks patchy and uneven.
    • Size May Be an Issue: Even if it’s a G9 base, the “bulb” part might be larger than a standard halogen G9 to accommodate the smart components. Always double-check the dimensions to make sure it will physically fit in your fixture.

    Better Alternatives for Your G9 Fixtures

    Honestly, after looking at the available options, I’ve concluded that forcing a mediocre G9 smart bulb into your setup might not be the best solution. The good news is there are much more reliable ways to bring that G9 fixture into your smart home ecosystem.

    The best solution, by far, is to upgrade the switch on the wall. A smart light switch controls the entire fixture, so it doesn’t matter what kind of bulb is in it. You can keep the beautiful, high-quality light from a standard “dumb” G9 bulb while getting all the smart control you want—scheduling, voice commands, and remote access. Brands like Lutron, Leviton, and TP-Link Kasa make fantastic, reliable options. Reputable sites like CNET have great roundups to help you choose the right one for your home.

    If your G9 fixture is a plug-in lamp, the solution is even simpler: a smart plug. You just plug the lamp into the smart plug, and the plug goes into the wall outlet. It’s a cheap, incredibly easy, and rock-solid way to add on/off smart control.

    So while the dream of a perfect, tiny G9 smart bulb isn’t quite a reality for most of us yet, you don’t have to leave your favorite fixtures behind. By shifting your focus from the bulb to the control method, you can get the seamless smart home experience you’re looking for without the headache.

  • Feeling Trapped by Your Smart Home? It’s Time for a Control4 Alternative.

    Feeling Trapped by Your Smart Home? It’s Time for a Control4 Alternative.

    Tired of dealer-only changes and expensive hardware? Here’s how to migrate from a closed system to a flexible, open-source smart home you truly control.

    It’s a familiar story. A decade ago, you built or moved into a new home and wanted the best in smart home tech. Back then, systems like Control4 were the gold standard, offering a seamless, professionally installed experience. But fast forward to today, and that seamless system can start to feel more like a gilded cage. If you’re looking for a Control4 alternative because you’re tired of calling a dealer for every minor tweak, you are absolutely not alone.

    That feeling of being “locked in” is real. You have this powerful network of devices, but you don’t have the keys. Want to change how a light switch scene works? That’s a call to the dealer. Worried about your main controller failing and facing a multi-thousand-dollar replacement? It’s a valid fear that keeps many people stuck in an ecosystem that no longer serves them.

    But here’s the good news: the smart home world has changed dramatically. Open-source platforms and DIY-friendly devices have matured, giving you the power to build a system that’s more capable, flexible, and affordable than ever before. Let’s walk through how you can migrate away from a closed system and build a smart home that you truly own and control.

    The First Big Question: Keep the Switches or Start Fresh?

    Your light switches are the most immediate hurdle. They’re numerous, expensive, and physically wired into your home. The temptation is to find a way to integrate your existing Control4 switches into a new system, like Home Assistant.

    On the surface, it makes sense. You save a lot of money upfront. But it’s a short-term fix that doesn’t solve the long-term problem. By keeping the C4 switches, you’re still entirely dependent on the Control4 controller (like an EA series model) to make them function. If that controller dies, your smart lighting is dead in the water, and you’re right back to facing an expensive, dealer-required replacement.

    Breaking free means truly breaking free. Replacing the switches is a bigger investment, but it’s the only way to fully move to an open platform and eliminate that dependency for good.

    Finding the Best Control4 Alternative for Lighting

    Once you decide to replace the hardware, you have some fantastic options that play nicely with open platforms. The two most common paths forward are worlds apart in price but are both excellent choices.

    The Budget-Friendly DIY Path: Shelly Relays

    If you’re comfortable with a bit of wiring, Shelly is an incredible solution. These are tiny Wi-Fi relays that you install behind your existing (or new “dumb”) light switches.

    • How it works: The Shelly device wires into the electrical box, and your physical switch wires into the Shelly. This means your light switch still works normally even if your Wi-Fi is down, but the Shelly gives you the “smart” control.
    • The Pros:
      • Inexpensive: Shelly devices are a fraction of the cost of C4 or Lutron switches.
      • Flexible: You can use any style of wall switch you want, from toggle to decora to momentary push-buttons.
      • Powerful: They integrate flawlessly with platforms like Home Assistant, giving you total local control.
    • The Cons: It requires a bit more knowledge of home wiring and setup.

    The Premium Reliability Path: Lutron

    If you want the same rock-solid reliability and premium feel of a professionally installed system but with open integration, Lutron is the answer. Specifically, their Caséta or RadioRA lines.

    • How it works: Lutron uses its own proprietary wireless protocol called Clear Connect, which is legendary for its reliability. It never goes down. You replace your C4 switches with Lutron dimmers/switches and connect them to a Lutron Smart Bridge.
    • The Pros:
      • Unbeatable Reliability: It just works. All the time.
      • Premium Quality: The hardware looks and feels high-end.
      • Excellent Integration: The Smart Bridge integrates perfectly with Home Assistant, allowing for local control of all your Lutron devices.
    • The Cons: This is a much more expensive option, though still generally cheaper than a full C4 overhaul. Check out their offerings at the Lutron website.

    The New Brains: Why Home Assistant is the Ultimate Control4 Alternative

    No matter which hardware you choose—Shelly, Lutron, or a mix of dozens of other brands—the magic that ties it all together is Home Assistant. This is the open-source software that acts as the central hub, or “brain,” of your new smart home.

    Think of it this way: Control4 forced you to use their hardware and their software. With Home Assistant, you are free to pick the best hardware for the job, and it will bring it all together under one roof.

    • Local First: Unlike many cloud-based systems, Home Assistant runs on a small computer in your own home (like a Raspberry Pi or an old laptop). Your data stays private, and your home works even if the internet goes out.
    • Endless Integrations: From lighting and security cameras to robot vacuums and weather services, Home Assistant can connect to thousands of different devices and services.
    • Powerful Automations: This is where you can truly create magic. Dim the lights when a movie starts, flash the porch light when your pizza is delivered, or create custom lighting scenes that run on a schedule. You are only limited by your imagination, not by what a dealer can program for you.

    Making the leap from a closed system like Control4 is a big decision, but it’s a step toward freedom, flexibility, and future-proofing your home. It might feel daunting, but by starting with a clear plan for your lighting and choosing Home Assistant as your central controller, you can build a truly personal and powerful smart home for 2025 and beyond.

  • Tired of Family Chaos? It’s Time for a Digital Command Center.

    Tired of Family Chaos? It’s Time for a Digital Command Center.

    From simple smart displays to powerful DIY projects, let’s find the perfect command center to organize your family’s busy life.

    Remember the days of the overflowing kitchen corkboard? The one covered in school notices, appointment cards, and hastily scribbled to-do lists that were already out of date? My family tried everything—shared calendars that nobody updated, group chats that got too noisy, and a fridge door that looked like a modern art project. We needed a central command center, a single source of truth to tame the chaos. What we were really searching for was the perfect family dashboard.

    If you’re feeling that same pull towards a more organized life, you’re in the right place. A family dashboard is essentially a digital hub, often on a tablet or dedicated screen, that displays all your family’s essential information at a glance. But with so many options out there, from simple smart displays to full-blown DIY projects, where do you even begin? Let’s break it down and find the right fit for you.

    What to Look For in a Great Family Dashboard

    Before diving into specific products, it’s helpful to know what you actually need. While every family is different, a good dashboard usually covers these bases:

    • Shared Calendar: The heart of the system. The ability to see everyone’s schedule, and maybe even filter by family member, is a must.
    • To-Do & Reminder Lists: For everything from “Buy milk” to “Pay the electricity bill.”
    • Weather Forecast: So you know whether to grab a jacket on your way out the door.
    • Meal Planning: What’s for dinner tonight? What about the rest of the week? This can be a lifesaver.
    • Smart Home Controls: If you have smart lights or thermostats, being able to control them from your dashboard is incredibly convenient.
    • Mobile Access: Life happens on the go. You and your partner need an easy way to add appointments or grocery items from your phones.

    Think about your own family’s needs. Are you big on meal prep? Do you have a ton of smart gadgets? Knowing your priorities will make choosing a system much easier.

    Option 1: The “Plug-and-Play” Family Dashboard

    If you want something that just works right out of the box with minimal setup, this is your category. You don’t want to code, you just want to organize.

    Google Nest Hub / Amazon Echo Show:
    These smart displays are probably the most accessible entry point. They’re relatively inexpensive and do a decent job of showing your calendar (especially if you’re in the Google or Amazon ecosystem), weather, and reminders. You can ask them questions, control smart devices with your voice, and use them for video calls.

    • The Good: Super easy to set up, voice-controlled, and integrates well with their respective ecosystems.
    • The Not-So-Good: Customization is very limited. You can’t really change the layout or add unique widgets. You get what they give you.

    Option 2: The “Guided Customization” Approach

    This is the middle ground. These options offer more flexibility than a standard smart display but don’t require you to build everything from scratch.

    DAKboard:
    DAKboard is a fantastic service that lets you design a beautiful, custom digital wall display. You create your layout online by adding and arranging blocks for your calendar, weather, news feeds, photos, and more. Then, you can display it on any device with a web browser—like an old tablet or a Raspberry Pi connected to a monitor. They even sell pre-built screens.

    • The Good: Highly customizable layout. Integrates with a ton of services (Google Calendar, Apple Calendar, Todoist, etc.). Can run on hardware you might already have.
    • The Not-So-Good: It’s a subscription service, so there’s a recurring cost for the best features.

    Cozyla:
    This is a dedicated device that aims to be the perfect digital family hub from the start. It’s built specifically for this purpose, with a clean interface and features tailored to family life. It’s a great choice if you like the idea of DAKboard but want the hardware and software all in one clean package.

    Option 3: The Ultimate DIY Family Dashboard

    Okay, so you like to tinker. The idea of building something completely your own is exciting, even if you don’t have the time to go all-in right now. Welcome to the world of Home Assistant.

    Home Assistant is an open-source home automation platform that puts you in complete control. You can run it on a small computer like a Raspberry Pi or an old laptop. While its main purpose is automating your home, its dashboard capabilities are incredibly powerful. You can design a screen that shows anything—from your family calendar and local weather to the moisture level of your garden soil or the current status of your 3D printer.

    • The Good: Limitless customization. Seriously, if you can dream it, you can probably build it. It’s free, private, and supported by a huge community.
    • The Not-So-Good: There is a learning curve. It’s not a “set it and forget it” solution. You’ll be spending some time in settings menus and configuration files. But for many, that’s part of the fun.

    So, Where Should You Start?

    Finding the right family dashboard is about balancing convenience with control. My advice? Start simple.

    If you have an old tablet lying around, try setting it up with DAKboard’s free tier to see if you like the digital dashboard life. If you’re already using Google or Amazon services heavily, a Nest Hub or Echo Show could be an easy win.

    But if you have that little voice in the back of your head that loves a good project, download Home Assistant and just start playing. You don’t have to build the perfect system overnight. Start by just displaying your calendar and the weather. As you get more comfortable, you can add new features and integrations over time.

    Ultimately, the goal is to create a system that genuinely makes your family’s life a little bit easier. Start there, and you can’t go wrong.

  • My PC to NAS Conversion: Giving My Old Computer a New Life

    My PC to NAS Conversion: Giving My Old Computer a New Life

    How to turn that old desktop computer into a powerful home server for your photos, media, and backups. It’s easier than you think.

    It starts with a simple thought. Maybe you’re staring at a “Storage Full” notification from Google Photos, or maybe you’re just tired of paying monthly subscription fees to access your own files. For me, it was the desire to build a private, reliable home for my family’s photos and our weekend movie collection. That’s what led me down the rewarding path of a PC to NAS conversion, turning a perfectly good computer I already owned into a powerful home server.

    If you have an old or even a current desktop PC gathering dust, you might be sitting on the perfect foundation for your own private cloud. It can feel like a huge project, but let’s break it down. It’s probably easier than you think.

    Is My Old PC Good Enough for a NAS?

    This is the first question everyone asks. You might be surprised by the answer. Let’s look at the core components based on a pretty standard gaming PC build.

    • CPU: A modern processor like an AMD Ryzen 5 3600 or a similar Intel Core i5 is more than powerful enough for a home NAS. Most of the time, your server will just be sitting there, serving files, which doesn’t take much power at all. The real test comes with video transcoding—converting a video file on-the-fly to play on your phone or TV. A chip like the Ryzen 5 can handle a couple of 4K streams without breaking a sweat.
    • RAM: For a basic file server, 8GB of RAM is fine. But since we’re looking to run cool applications like Immich (for photos) and Jellyfin (for media), starting with 16GB is a fantastic idea. It gives you plenty of headroom to run multiple services at once without things slowing down.
    • Motherboard & Case: The main thing to check here is how many SATA ports your motherboard has. Each hard drive you add will need one. Your case just needs enough physical space to hold the drives. A standard mid-tower case is perfect.
    • Power Supply (PSU): An efficient, high-quality PSU (like an 80+ Gold rated one) is a huge plus. Since your server will likely be running 24/7, an efficient power supply will save you money on your electricity bill in the long run.
    • Video Card (GPU): Here’s the fun part—you barely need one! For a “headless” server (one you access over the network), a basic GPU like a GeForce GT 1030 is only needed for the initial setup. After that, it won’t be doing much. However, if you plan to do a lot of 4K video transcoding with Jellyfin, a GPU can be a massive help. Features like Intel’s Quick Sync or NVIDIA’s NVENC offload the work from your CPU. You can learn more about this on the official Jellyfin hardware acceleration page.

    Planning Your PC to NAS Conversion Storage

    Okay, so the computer itself is good to go. Now, let’s talk about the most important part: the hard drives.

    Your first step is to figure out how much space you actually need. I estimated about 3-4 TB for my growing photo library and another 2-3 TB for media. It’s always a good idea to aim for more than you need right now.

    But you can’t just throw one big drive in and call it a day. What happens if it fails? You lose everything. That’s where parity comes in.

    Think of parity as insurance for your data. You’ll use one hard drive in your array to hold parity information. If any other single drive fails, this parity drive can be used to completely rebuild the lost data on a replacement drive. It’s a lifesaver. This means if you want 6TB of usable space, you might buy three 3TB drives—two for storage and one for parity.

    When buying drives, I strongly recommend getting ones designed for NAS use, like the Western Digital Red Plus or Seagate IronWolf series. They are built to run 24/7 and handle the vibrations of being next to other drives.

    The Software: Bringing Your Home Server to Life

    With your hardware sorted, you need an operating system. You could just install a standard Linux distribution like Ubuntu Server, but I’d recommend a dedicated NAS OS to make life easier.

    • TrueNAS SCALE: A powerful, open-source option with tons of features. It’s incredibly robust and based on Linux, so it has great app support.
    • Unraid: A very popular, user-friendly choice that’s great for beginners. It’s not free, but many find the license fee is well worth the convenience.

    Once your OS is running, you can install applications. This is where the magic happens.
    * Immich: This is your self-hosted Google Photos. It automatically backs up photos from your phone, organizes them by date, and even uses machine learning to identify people and objects. It’s fantastic.
    * Jellyfin: This is your personal Netflix. Point it to your movie and TV show folders, and it creates a beautiful, browsable library that you can stream to any device, anywhere.

    Don’t Forget the Golden Rule: Backups!

    Remember, parity and RAID are not backups. They protect you from a single drive failure, but not from accidental deletion, file corruption, or a disaster like a fire.

    A great strategy is the 3-2-1 Backup Rule.
    * 3 Copies of your data.
    * 2 Different types of media (e.g., your NAS and an external hard drive).
    * 1 Copy kept off-site.

    My plan involves using a couple of external hard drives to back up the most critical data (family photos) and keeping one of them at my office. It’s a simple and effective way to ensure my most precious files are safe. You can read a great breakdown of this rule from the pros at Backblaze.

    Embarking on a PC to NAS conversion is a journey, but it’s one that puts you in complete control of your digital life. It saves you money, protects your privacy, and, honestly, it’s a really fun project. Your old PC has more life in it than you think.

  • My Accidental Rack-Mount Adventure: A Beginner Home Lab Story

    My Accidental Rack-Mount Adventure: A Beginner Home Lab Story

    Why I tore apart my perfectly good home server for a problem that’s a year away.

    You ever get an idea in your head for a tech project that seems brilliant at 2 a.m., but feels a little silly in the light of day? That was me last week. I decided to tear apart my perfectly functional home server and move it into a rack-mount case, all to solve a problem I won’t even have for another year. This is the story of my latest adventure on my beginner home lab journey.

    It all started with a simple thought: I’m planning to move out of my parents’ place next year, and I want my tech gear to be as easy to transport as possible. My current setup, a collection of standard PC cases and mini computers, wasn’t exactly “grab and go.” The idea of a neat, contained server rack started to sound very appealing. So, I jumped in headfirst.

    My First Rack-Mount Project: A Beginner Home Lab Story

    My primary machine is a TrueNAS server I built myself. It’s the heart of my digital life, handling backups for my family using Immich and serving up movies and shows through Jellyfin. It was running happily in a standard gaming PC case, built around a Ryzen 5 5600 processor. It’s not the most power-efficient chip for a 24/7 server, but it’s what I had, and it’s powerful enough to handle anything I throw at it.

    But the seed was planted. I bought a rack-mount chassis and decided to migrate everything over, just to see what the process was like. It felt a bit like a dress rehearsal for a play that wasn’t opening for a year. Part of me felt like a bit of a dumbass for creating work for myself, but the other part—the tinkerer part—was excited for the challenge.

    The migration itself was straightforward, just like building a PC but in a different-shaped box. But it was a great learning experience. I got a feel for how components fit, how airflow works differently, and how to plan for cabling in a more compact, horizontal space. If you’re considering a similar move, the official TrueNAS website is an invaluable resource for ensuring your software and hardware configurations play nicely together.

    The Evolving Setup: More Than Just One Box

    This server isn’t my entire setup. It’s part of a growing ecosystem I’ve been piecing together. My current iteration of the lab lives in a small 10-inch rack, which is where the new server case will eventually live.

    Right now, that rack is home to a cluster of tiny, power-efficient computers:
    * A Lenovo M920q
    * A Dell Wyse 5070
    * An HP EliteDesk 705 G2

    They all run Proxmox, creating a mini-cloud where I can spin up virtual machines (VMs) and containers to experiment with. I use it for things like media trackers and a Tailscale container for secure remote access to my network. It’s a fantastic way to learn about virtualization without a huge hardware investment.

    My network is managed by a dedicated MiniITX board with an N100 processor running OPNsense, a powerful open-source firewall. It gives me incredible control over my network traffic, something you just can’t get from an off-the-shelf router.

    The Reality Check of a Beginner Home Lab

    Here’s the part they don’t always show in those pristine home lab tours on YouTube: the reality. Lately, we’ve been hit with a massive surge in electricity prices here in Romania. Because of that, my little Proxmox cluster is mostly powered down. I only spin up the machines when I have time to actively tinker. A beginner home lab often involves balancing your passion for tech with practical things, like the monthly power bill.

    And the cable management? Let’s just say it’s a work in progress. I did my best for now, but I’m waiting on some new fans to arrive before I tie everything down perfectly. It’s a reminder that a home lab is never truly “finished.” It’s a constantly evolving project.

    So, was it silly to change the case a year before I needed to? Maybe. But I learned a ton, and now I’m one step closer to the organized, portable setup I was dreaming of. It’s all part of the fun of building things yourself, learning from the process, and creating a lab that perfectly fits your own needs—even the future ones.

  • That Old Laptop in Your Closet? It’s Your Next Server.

    That Old Laptop in Your Closet? It’s Your Next Server.

    A friendly guide to the essential home server software you need to bring that dusty machine back to life.

    I have a confession. For the longest time, I had an old laptop shoved in a closet, gathering dust. You know the one—a bit slow, a battery that barely holds a charge, maybe a key or two is missing. It felt wasteful to throw it out, but it wasn’t practical for daily use anymore. Then, I had an idea: what if I turned it into a home server? It turned out to be one of the most rewarding tech projects I’ve ever done. If you’re in the same boat, you’re probably wondering what home server software you actually need to get started.

    Don’t worry, it’s easier than it sounds. You don’t need to be a system administrator to do this. The journey from dusty laptop to a capable home server is surprisingly straightforward, and it’s a fantastic, low-cost way to create your first home lab.

    One of the best things about using a laptop is that it has a built-in uninterruptible power supply (UPS) thanks to its battery. If the power flickers, your server stays on. Plus, they’re designed to be low-power, so it won’t send your electricity bill through the roof.

    So, let’s grab a coffee and talk about the essentials.

    First Step: Choosing Your Base Operating System

    Before you can do anything cool, you need to install a server operating system (OS). Wiping the old Windows or macOS install is the first step. You want something lightweight, stable, and built to run 24/7.

    My recommendation? Start with a user-friendly Linux distribution.

    • Ubuntu Server: This is probably the most popular choice for beginners, and for good reason. It has a massive community, tons of tutorials, and excellent hardware support, which is great for older laptops. The installation is guided and pretty simple. You can download Ubuntu Server here and follow their clear instructions.
    • Debian: If you want something even more lightweight and famously stable, Debian is the rock upon which Ubuntu is built. It’s a fantastic, no-frills choice, but might require a tiny bit more learning if you’re completely new to Linux.

    For this guide, let’s assume you’re going with Ubuntu Server. It’s the path of least resistance and will get you up and running quickly.

    Essential Home Server Software for File Storage & Backups

    One of the most common uses for a home server is creating your own personal cloud. Think of it like a private Google Drive or Dropbox, where you control your data completely. This is perfect for storing important files, backing up your computers, and sharing photos with family.

    The best tool for this job, hands down, is Nextcloud.

    Nextcloud is an open-source software suite that gives you a beautiful web interface for your files. You can access them from any browser, and there are desktop and mobile apps to sync files automatically across all your devices. It’s packed with features:

    • File Sync & Share: The core function. Works just like you’d expect.
    • Photo Galleries: A great replacement for Google Photos.
    • Calendars & Contacts: Sync them across your devices without giving your data to a big tech company.
    • App Store: You can add tons of extra features, like a cookbook, a password manager, or collaborative document editing.

    Getting Nextcloud running is the perfect first project for your new server.

    Powering Your Projects with This Home Server Software

    Okay, so file storage is handled. But what about running other things, like a media server, a personal blog, or even experimenting with machine learning models? This is where the real fun begins, and the key piece of home server software you need to learn about is Docker.

    Don’t be intimidated by the name. Here’s the simple explanation: Docker lets you run applications in neat little packages called “containers.”

    Imagine you want to run Nextcloud and a media server. Without Docker, you’d have to install them both on your OS directly. They might have conflicting requirements or be complicated to set up. With Docker, each application runs in its own isolated container. It’s clean, organized, and makes installing and removing software incredibly simple.

    You can find pre-built containers for almost anything on the Docker Hub. Want to run a blog with Ghost? There’s a container for that. Want to experiment with a Jupyter Notebook for some data science? There’s a container for that, too.

    To make managing Docker even easier, I highly recommend Portainer. It’s a web-based graphical user interface (GUI) for Docker. Instead of typing commands in a terminal, you can manage your containers with a few clicks. It’s a lifesaver for beginners.

    Your Simple Starter Stack

    So, to recap, here’s the game plan for turning that old laptop into a powerhouse:

    1. Install the OS: Start with Ubuntu Server for a smooth experience.
    2. Install Docker & Portainer: This will be the foundation for running all your apps.
    3. Deploy Your First Container: Use Portainer to deploy Nextcloud for your own personal cloud storage.

    Once you’re comfortable with that workflow, a whole world of self-hosting opens up. You’ve now got a low-power, reliable server ready for almost any project you can dream of. That old laptop isn’t just taking up space anymore—it’s become the heart of your very own home lab. Welcome to the club.