Category: AI

  • My Powerful, Pint-Sized Home Lab Setup

    My Powerful, Pint-Sized Home Lab Setup

    Why I chose Ubiquiti, FortiGate, and a Mini PC for my small home lab.

    I’ve always been fascinated by the idea of having a home lab. A little digital sandbox to experiment with new software, beef up my network security, and just… tinker. But the image of a full-size server rack humming away in a basement, sucking down electricity, always felt like a bit much for me. I wanted something powerful, but also quiet, efficient, and compact. That’s what led me to my current small home lab setup.

    It’s a system built around a few carefully chosen pieces of gear that work together beautifully, without taking over a room. If you’re curious about building a lab that balances performance with practicality, I think you’ll find my journey interesting.

    Why I Chose This Small Home Lab Gear

    My goal was simple: get as much performance and security as possible into the smallest, most energy-efficient footprint. I didn’t want to just buy the most powerful stuff; I wanted the right stuff. This meant finding hardware that was reliable for 24/7 operation but wouldn’t send my power bill through the roof.

    I ended up with a core combination of networking gear from Ubiquiti, a serious firewall from FortiGate, and a surprisingly capable mini PC to run all my services. Each piece plays a critical role.

    The Network Core: Ubiquiti UniFi

    The foundation of any good lab is the network. It has to be fast, reliable, and easy to manage.

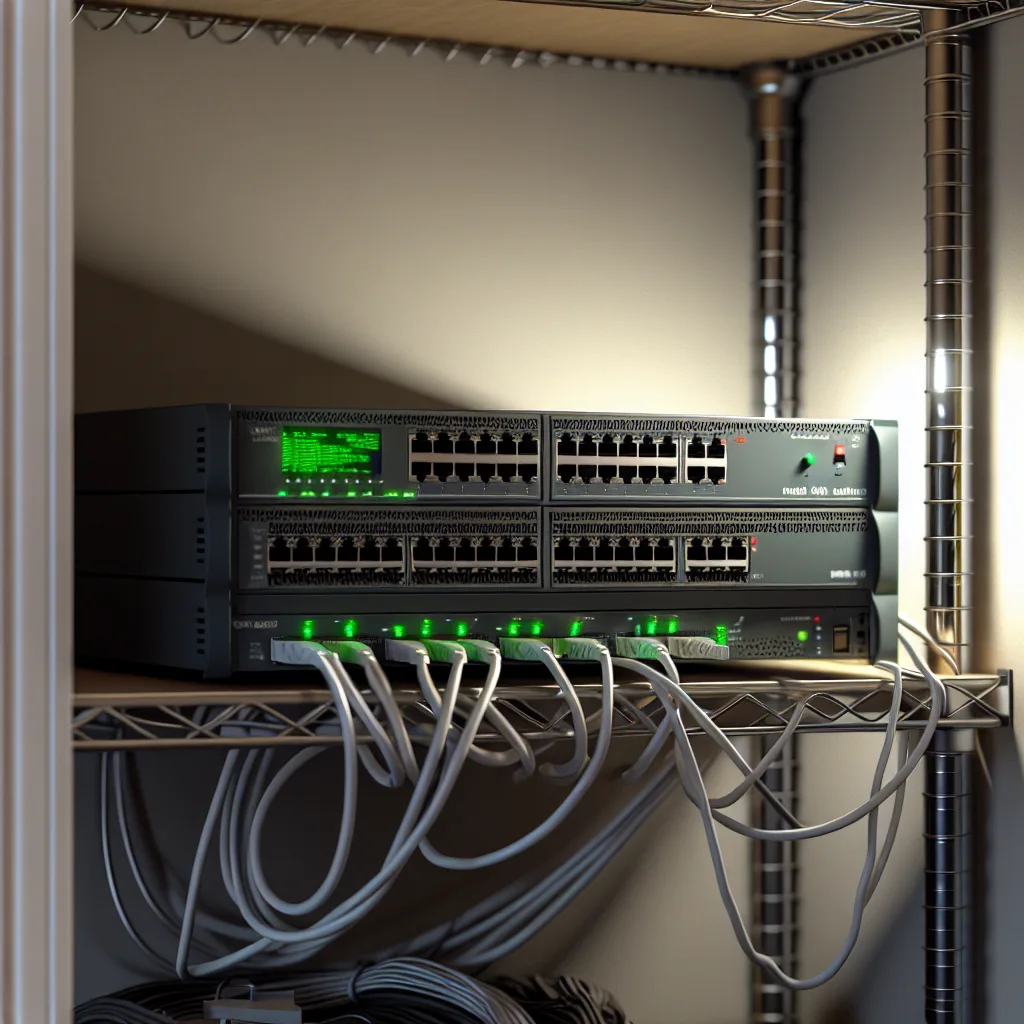
    • Ubiquiti Pro Max 16 Switch: This is the central hub for everything wired. It’s a PoE++ switch, meaning it can power devices like security cameras or access points directly over the Ethernet cable, which keeps things tidy. It has plenty of ports for a small setup and gives me the high-speed connections I need for moving large files around.

    • Ubiquiti U7 Pro: For wireless, I went with the U7 Pro. It’s a Wi-Fi 7 access point, which might seem like overkill for August 2025, but it’s all about future-proofing. As more devices start supporting the new standard, my network will be ready. It delivers incredibly fast and stable Wi-Fi, which is great for everything from my work laptop to streaming media. You can learn more about the tech on the official Ubiquiti website.

    The Security Brains of This Small Home Lab

    This is where things get really interesting. Instead of just using the basic router from my internet provider, I opted for a dedicated, enterprise-grade firewall.

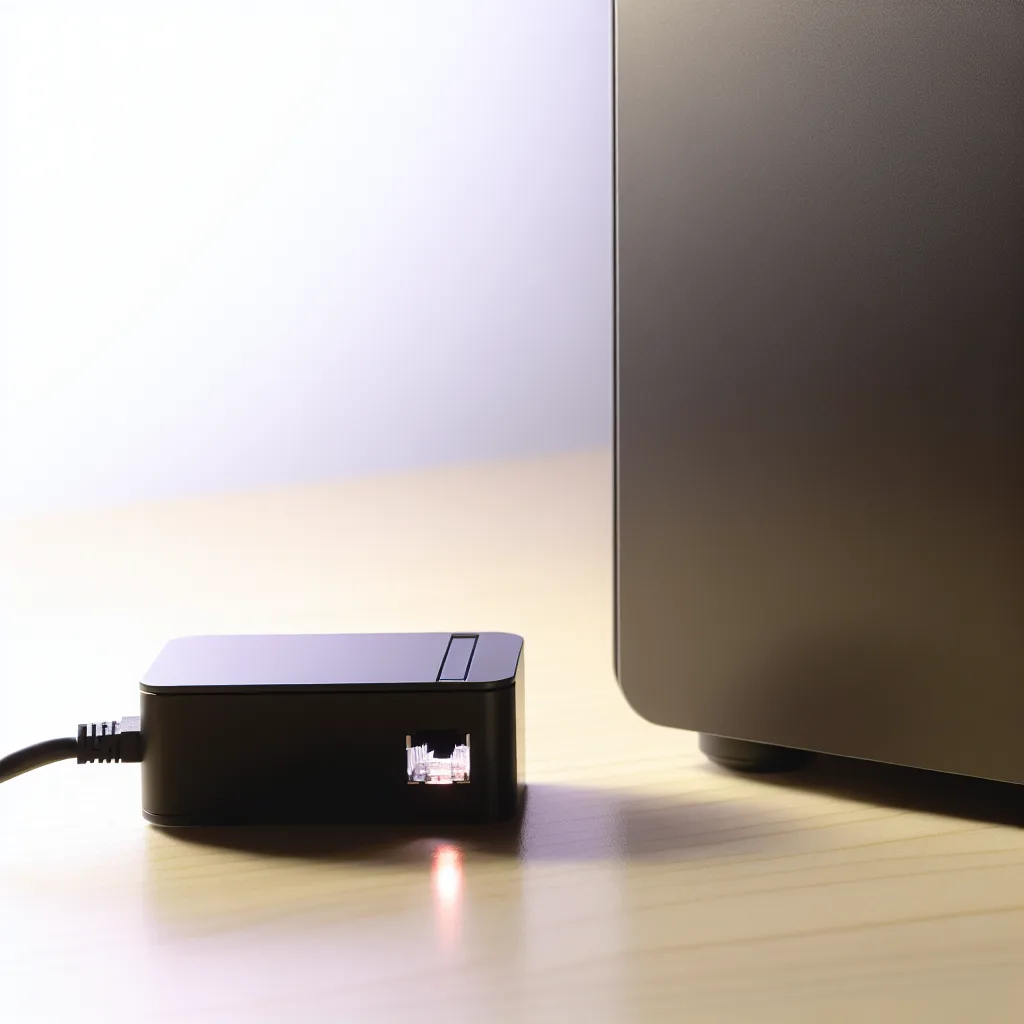
    • FortiGate 40F: This little box is the security guard for my entire network. It sits between my internet connection and my switch, inspecting all the traffic coming in and out. It lets me create separate, isolated networks (VLANs). For example, my home lab experiments are on a completely different network from my personal computers and smart home devices. So if I accidentally download something sketchy in the lab, it can’t spread to my important stuff. It’s a piece of mind you just don’t get with consumer-grade gear. Fortinet has great resources on their product page if you want to dive deep.
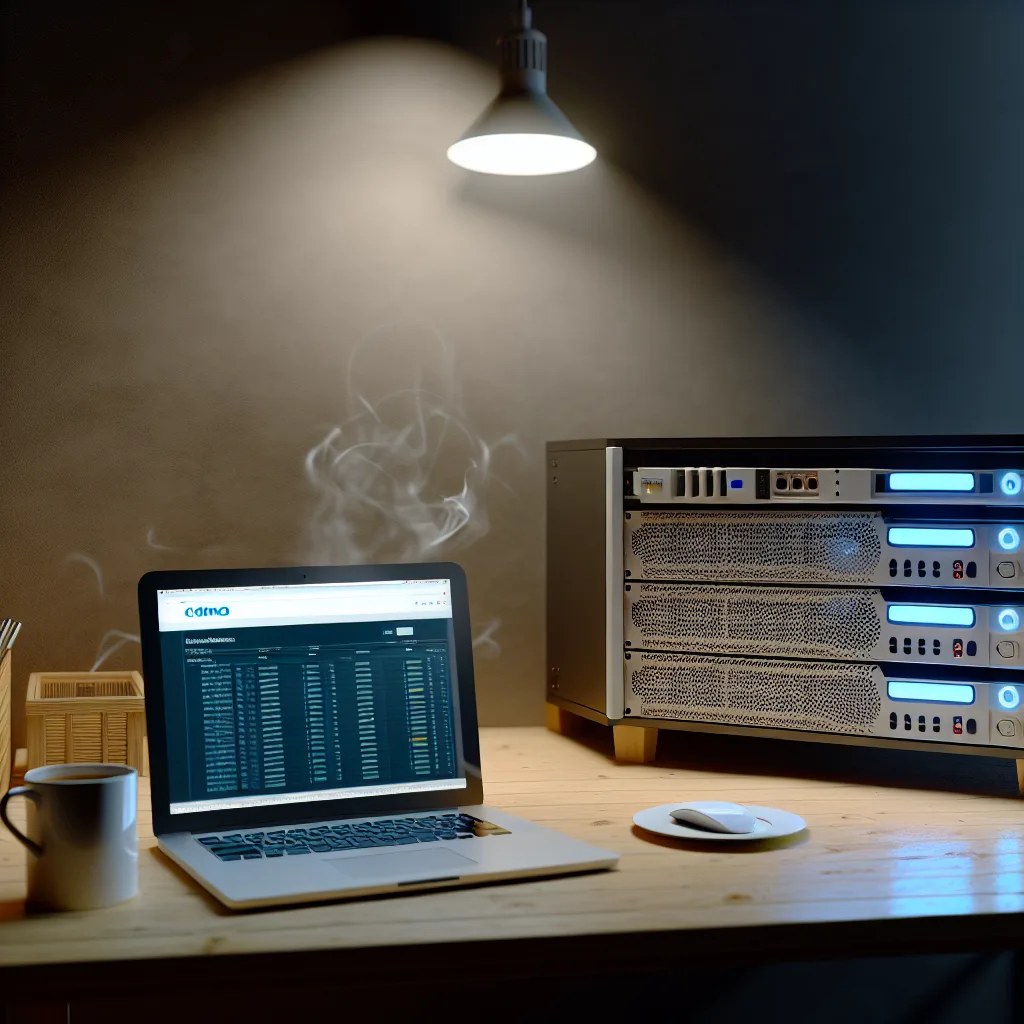
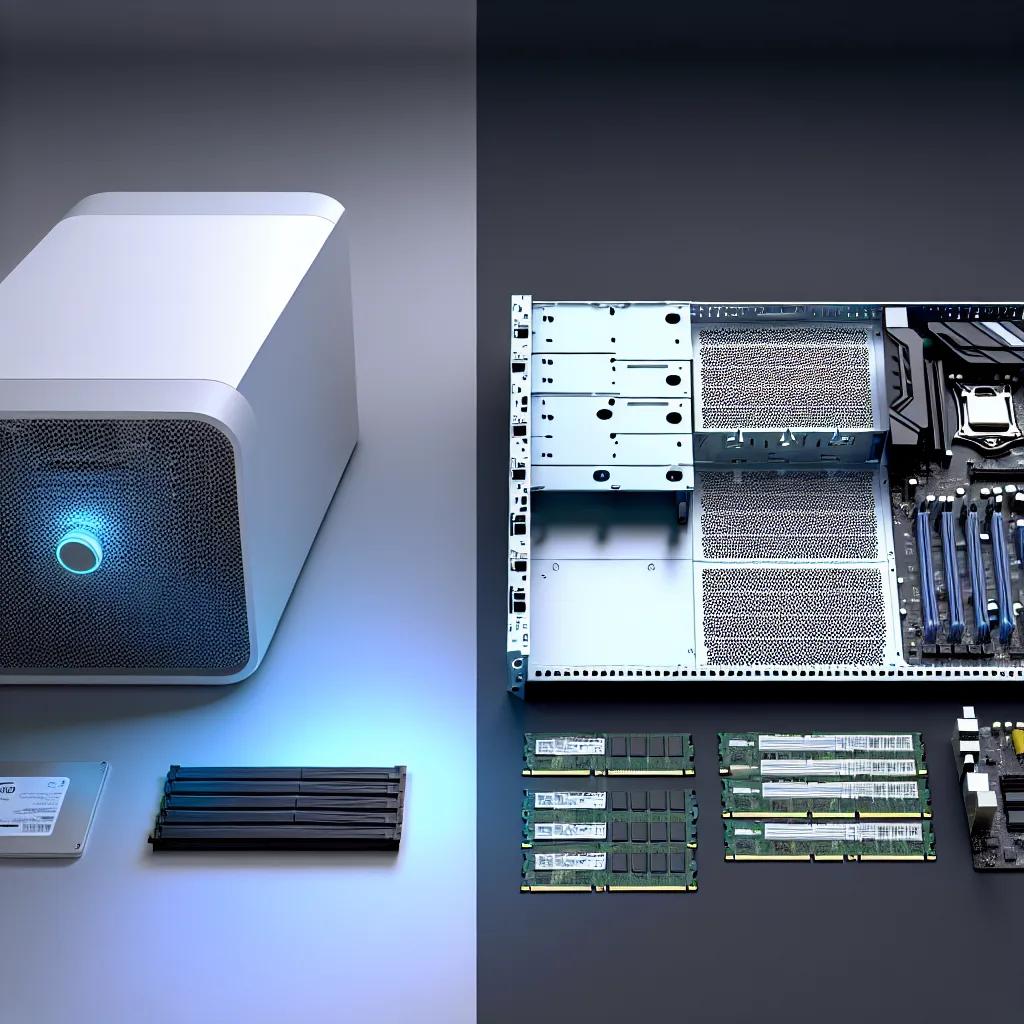
    • GMKtec Mini PC: This is the server. I was tempted to get a big, rack-mounted machine, but these mini PCs are incredible. Mine is tiny, silent, and sips power, yet it has enough processing power to run a hypervisor like Proxmox. On top of that, I can run multiple virtual machines and Docker containers for things like a Pi-hole for ad-blocking, a media server, or testing new code. It’s the heart of the “lab” part of my home lab. There are tons of great brands, but you can see what they’re all about over at the GMKtec site.

    How It All Works Together

    So, how does it all connect? It’s pretty straightforward.

    1. The internet comes into the FortiGate 40F firewall.
    2. The FortiGate plugs into the Ubiquiti Pro Max 16 switch.
    3. The GMKtec mini PC and the U7 Pro access point both plug into the switch.

    This setup gives me a clean, organized, and powerful small home lab. I can experiment freely on the mini PC knowing my main network is protected by the FortiGate. My wireless devices get blazing-fast speeds from the U7 Pro, and the switch handles all the wired traffic without breaking a sweat.

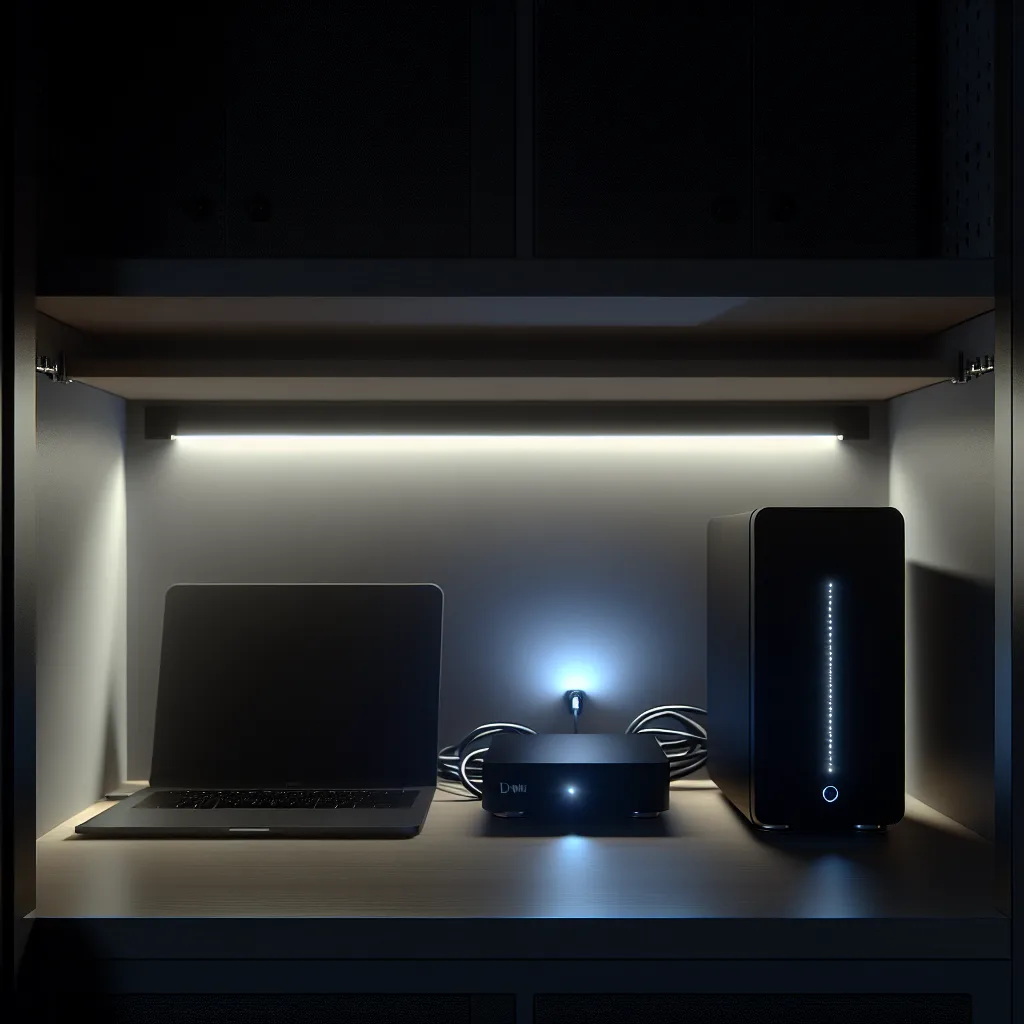
    Building a home lab doesn’t mean you need a dedicated room and a huge budget. By choosing smart, efficient components, you can create an incredibly capable setup that fits on a single shelf. It’s the perfect way to learn, explore, and take control of your digital world.

  • Are USB Ethernet Adapters Still Unreliable in 2025?

    Are USB Ethernet Adapters Still Unreliable in 2025?

    Let’s settle the USB vs. PCIe network stability debate once and for all.

    I found myself in a familiar spot the other day. I was tinkering with a new small form-factor (SFF) PC for my homelab, a compact little box of potential. The problem? I needed another network port, but with no free PCIe slots, I was stuck. The immediate thought was to grab a USB-to-Ethernet dongle, but a little voice in the back of my head whispered the old warnings about stability. It’s a common question we see: are USB Ethernet adapters reliable, or are they just a temporary fix waiting to fail? Let’s talk about it.

    It’s August 2025, and technology has marched on, but the reputation of these handy little adapters still lags behind. If you’ve been in the tech world for a while, you probably remember the “bad old days” of USB networking. And honestly, that reputation was earned.

    The Old Story: Why We Didn’t Trust USB Adapters

    Back then, using a USB network adapter felt like a gamble. You’d plug it in, and maybe it would work perfectly, or maybe you’d spend the next hour hunting for obscure drivers. The issues were pretty consistent:

    • Dropped Connections: They were notorious for randomly disconnecting, especially under heavy load.
    • High CPU Usage: The computer’s processor had to do a lot more work, which could slow everything else down.
    • Driver Nightmares: Compatibility was hit-or-miss, with many generic adapters requiring specific, often outdated, drivers to function.
    • Slow Speeds: Most of these were limited by the USB 2.0 standard, which has a theoretical max of 480 Mbps—a far cry from the gigabit speeds we expect today.

    So, if you’ve been avoiding them based on past experiences, I don’t blame you. But the hardware landscape looks completely different now.

    What’s Changed with Modern USB Ethernet Adapters?

    The core technologies that caused all those old problems have improved dramatically. The difference between a USB adapter from ten years ago and one you’d buy today is night and day.

    First, the USB standard itself is worlds better. We’ve moved from the shaky ground of USB 2.0 to the solid foundation of USB 3.x and USB4/Thunderbolt. These new standards offer way more bandwidth than even a 10 Gbps network connection needs, and they provide more stable, consistent power. You can learn more about the specifics of the latest standards directly from the USB Implementers Forum (USB-IF).

    Second, the chipsets inside these adapters are more mature and powerful. Companies like Realtek, Aquantia, and Intel are making highly efficient chips that are often the same ones you’d find on a motherboard’s built-in Ethernet port. This also means driver support is way better. Modern operating systems—Windows, macOS, and most Linux distros—recognize these chipsets instantly. It’s usually a true plug-and-play experience.

    Performance Check: Are USB Ethernet Adapters Fast Enough?

    Okay, so they’re more stable, but can they keep up? For most common speeds, absolutely.

    • 1 Gbps & 2.5 Gbps: For these speeds, a quality USB 3.0 adapter is rock-solid. You will not notice a difference in performance for everyday tasks, streaming, or file transfers compared to a PCIe card.
    • 5 Gbps & 10 Gbps: This is where it gets more interesting. High-quality USB-C or Thunderbolt adapters can and do hit these speeds reliably. However, they are more sensitive to the quality of the port you plug them into and can use a bit more CPU power than their PCIe counterparts. For a deep dive into high-speed networking hardware, sites like ServeTheHome are an incredible resource for detailed reviews and benchmarks.

    The bottom line is that for a homelab, a workstation, or even just adding a wired connection to a laptop, a modern adapter is more than capable. I’m using a 2.5 Gbps USB adapter on my SFF server right now, and it’s been humming along flawlessly.

    Final Verdict: Should You Use One?

    So, has the myth of the unstable USB adapter been busted? I’d say a resounding “yes.”

    While a dedicated PCIe card, like one from Intel’s lineup, will always have a slight technical edge in latency and CPU overhead, the practical difference for 95% of users is negligible.

    If you’re building a top-tier router that handles immense traffic or a system where every microsecond of latency counts, stick with PCIe. For everyone else? Don’t hesitate. If you need an extra port and USB is your only option, grab a well-reviewed, modern adapter and get connected. The convenience is undeniable, and the stability is finally there to back it up.

  • My New Home Lab Heart: First Impressions of the Cisco 3850 Switch

    My New Home Lab Heart: First Impressions of the Cisco 3850 Switch

    Putting an enterprise-grade Cisco switch in my closet came with a few surprises. Here’s what I learned.

    It’s a familiar story for any home lab enthusiast: the endless search for the perfect piece of gear. You’re looking for that sweet spot—powerful enough to handle your projects, reliable enough that you don’t have to reboot it daily, and affordable enough that you don’t have to survive on instant noodles for a month. My latest quest was for a network switch, and it led me to an interesting place: a Cisco 3850 home lab setup. I needed something managed, with multi-gigabit ports and Power over Ethernet (PoE), from a brand I could trust. After a lot of searching, the Cisco C3850 came out on top as the most budget-friendly option that ticked all the boxes.

    So, I pulled the trigger. The box arrived, and I got to work on the “temporary” install. And let me tell you, putting enterprise-grade hardware in a home closet comes with a few surprises.

    My First Big Surprise with a Cisco 3850 Home Lab: This Thing is Deep

    The first thing you notice about enterprise hardware is that it’s built for data centers, not spare bedrooms. When I went to mount the C3850 in my Vevor wall-mount rack, I hit my first snag. This switch is deep.

    I pushed it in as far as it would go, and the back of the chassis was hitting the rear of the rack. It couldn’t go any deeper. To make it fit, I had to completely remove one of the redundant Power Supply Units (PSUs). For a home lab, running on a single PSU isn’t a huge deal, but it’s one of those little compromises you make. If you’re planning a similar Cisco 3850 home lab setup, break out the measuring tape first. Check your rack depth against the switch’s spec sheet—you’ll thank me later. It’s a classic example of how dimensions that are standard in a data center don’t always translate to a home environment.

    Power Draw and Noise Levels

    Two of the biggest concerns with running used enterprise gear at home are power consumption and noise. These things are designed for performance, not necessarily for quiet, energy-sipping operation in a living space.

    So, what’s the verdict on the Cisco 3850?

    • Power: With one PoE device (a Wi-Fi access point) plugged in and a few other ports active, the switch is currently pulling about 100 watts. Honestly, that’s not bad at all. I was expecting a much higher idle draw. For a switch this capable, I can definitely live with that.
    • Noise: At this light load, the fan noise is surprisingly reasonable. With the closet door closed, I can’t really hear it in the next room. It’s not silent, by any means, but it’s not the jet engine I feared. If you’re planning on putting this in an open office or living room, you might feel differently, but for a closet or basement setup, it’s perfectly manageable.

    This is often the trade-off. You get incredible features like multi-gig speeds and robust management capabilities, which you can learn more about on Cisco’s official product page, for a fraction of the original cost. The price you pay is in power and a few decibels.

    Getting the Licensing Right on a Cisco 3850 Home Lab

    If you’ve ever dealt with second-hand Cisco equipment, you know that licensing can sometimes be a headache. It’s a common topic on forums and communities like ServeTheHome, where people share tips on navigating the complexities. Thankfully, this part was relatively straightforward. A bit of research led me to the correct IOS (Internetwork Operating System) version, and after a quick update, the switch was running with a permanent license. No subscriptions, no features locked behind a paywall. It’s just working.

    Final Thoughts on the Temporary Setup

    Right now, the whole thing is a bit of a mess while I wait to redo my patch panel with some better quality keystone couplers. But even in its “temporary” state, I’m incredibly happy with this switch.

    It’s a powerful core for my home network that offers room to grow. The multi-gig ports mean I’m ready for faster internet speeds and high-performance devices, and the PoE simplifies wiring for things like cameras and access points.

    Was it worth the minor hassles of the depth and the initial software setup? Absolutely. If you’re a home labber looking to step up your networking game without completely emptying your wallet, taking a look at a used Cisco 3850 home lab setup might be one of your best moves. Just make sure you measure your rack first.

  • Is Someone Knocking on Your Home Lab’s Door? A Guide to Peace of Mind

    Is Someone Knocking on Your Home Lab’s Door? A Guide to Peace of Mind

    A friendly, no-nonsense guide to monitoring, preventing, and securing your self-hosted services from unwanted attention.

    So, you’ve done it. You’ve spun up your own corner of the internet, a home lab filled with useful services like Vaultwarden, Plex, or Nextcloud. It’s an amazing feeling, being in control of your own data. But then, a little thought might start to creep into the back of your mind, especially late at night: “Is anyone trying to break in?” If you’re wondering how to improve your home lab security, you’re asking the right question at the right time. It’s not about being paranoid; it’s about being prepared.

    Let’s talk, friend to friend, about how you can get some peace of mind. You don’t need a degree in cybersecurity to put some powerful, simple protections in place. We’ll walk through how to see who’s knocking on your digital door and how to make sure that door is properly locked.

    Step One: Improving Your Home Lab Security with Logs

    Before you can stop unwanted guests, you need to know they’re there. This is where logs come in. Think of them as the security camera footage for your server. Every time someone (or something) tries to access a service, it gets written down.

    Most of us access our services through a reverse proxy like Nginx Proxy Manager, Traefik, or Caddy. This is great because it centralizes all incoming traffic into one place, which also means it centralizes all the logs. Skimming these logs can tell you a lot. Are you seeing repeated login attempts from an IP address in a country you have no connection to? That’s a red flag.

    But who wants to read raw log files all day? Nobody. That’s why the first tool in your arsenal should be Fail2ban.

    • What it is: Fail2ban is a brilliant little bouncer for your server. It actively scans your log files for patterns—like too many failed login attempts in a short period.
    • What it does: When it finds a malicious IP address, it automatically blocks it at the firewall level for a set amount of time. It’s an automated way to say, “Nope, you’ve had too many chances, you’re out.”
    • Why it’s great: It’s lightweight, highly effective, and once you set it up, it just works. You can point it at your SSH logs, your Vaultwarden logs (via something like Caddy), and more. It’s one of the best first steps in proactive home lab security. You can learn more straight from the source at the Fail2ban official website.

    Beyond Logs: Proactive Defense Measures

    Watching for intruders is smart, but building a bigger wall is even smarter. A few proactive changes can drastically reduce the number of knocks you get on your door in the first place.

    The Power of a VPN

    Instead of exposing a service directly to the wild internet, why not keep it completely private? A Virtual Private Network (VPN) creates a secure, encrypted tunnel directly to your home network. Only devices with the right key can even see your services exist.

    Tools like WireGuard and Tailscale have made this incredibly easy.
    * WireGuard: It’s a modern, fast, and simple VPN protocol. You can set it up on a Raspberry Pi or a virtual machine, and it gives you a secure way to access your entire network from your phone or laptop, wherever you are. Check out the details on their website.
    * Tailscale: This service is built on top of WireGuard and makes the process even simpler, especially for beginners. It handles all the complex networking stuff for you, creating a seamless private network between your devices.

    For highly sensitive services like your password manager or file server, putting them behind a VPN is the gold standard.

    Embracing Zero Trust

    Here’s a modern approach to security: trust nothing by default. This is called a “Zero Trust” model. Instead of just opening a port on your router and pointing it to your server, you use a service that acts as a secure intermediary.

    Cloudflare Tunnels are a fantastic—and often free—way to do this. The tunnel creates a secure outbound connection from your server to Cloudflare’s network. When you want to access your service, you go through Cloudflare, which handles authentication and protection before the request ever even reaches your home network. This means you don’t have to open any ports on your firewall, completely hiding your home IP address and services from the public internet. It’s a powerful layer of protection and you can learn more at Cloudflare’s site.

    A Practical Home Lab Security Strategy

    Feeling a little overwhelmed? Don’t be. Here’s a simple, actionable strategy to get started today.

    1. Start with Fail2ban: Install it and point it at the logs for your most exposed services, like your reverse proxy or SSH. This is your quick win.
    2. Review What’s Public: Look at every service you have exposed to the internet. Does it really need to be public?
    3. Deploy a VPN: For anything sensitive, set up WireGuard or Tailscale. Get into the habit of connecting to your VPN to manage your passwords or access personal files. It’s a small extra step for a massive security gain.
    4. Explore Cloudflare Tunnels: If you want to keep a service accessible but hide it from the open internet, a tunnel is your best friend.

    Your home lab is a personal space for learning and experimenting. Securing it is just part of that journey. You don’t need to build an impenetrable digital Fort Knox overnight. By adding a few simple layers—monitoring with logs, blocking with Fail2ban, and hiding with a VPN—you can be confident that your digital home is safe and sound. Happy hosting!


    Published on August 29, 2025

  • My Home Lab Journey: The Story of v3

    My Home Lab Journey: The Story of v3

    From a dusty old PC to a proper server, here’s the story and specs of my third home lab setup.

    It all starts with that little itch. You know the one. It begins with a simple thought: “Could I host my own files instead of using Dropbox?” Before you know it, you’re looking at an old desktop computer in the corner and wondering, “What if?” That’s how my journey began, and I’ve just finished my third complete overhaul. This is the story of my version 3.0 home lab setup.

    For me, building a home lab is the ultimate tinkerer’s playground. It’s a space to learn about networking, servers, and software without the risk of breaking something at work. My first two versions were humble. Version 1.0 was literally an old gaming PC I saved from the recycling bin. It was loud, inefficient, and not very powerful, but it was mine. Version 2.0 was a step up—a dedicated consumer desktop build. It was quieter and ran a few things well, but I quickly hit its limits. I wanted to run more virtual machines, experiment with containers, and have something a bit more robust.

    It was time for a real server.

    Why a New Home Lab Setup?

    So, why tear everything down and start over for a third time? A few reasons.

    • Noise and Power: My v2 setup, while better than the first, was still a collection of consumer parts that weren’t designed for 24/7 operation. The power consumption was higher than I liked, and the fan noise was noticeable.
    • Performance Bottlenecks: With only a few virtual machines running, the CPU on my old desktop would start to struggle. I wanted to run a media server, a network ad-blocker, a home automation hub, and still have room to spin up new things to test without everything slowing to a crawl.
    • Reliability: I was starting to rely on the services I was hosting. When my cobbled-together server went down, the whole house knew about it (the Wi-Fi-connected lights don’t work so well without Home Assistant). I needed something more dependable.

    The Heart of the v3 Home Lab Setup: The Hardware

    After weeks of research, I decided to dive into the world of used enterprise gear. You can get incredible performance for a fraction of the original cost. It’s a bit of a treasure hunt, but the payoff is huge. Here’s what my new build looks like:

    • Server: A Dell PowerEdge R720. I found this on a local marketplace. It’s a rack server, which is a big step up for me. It’s quiet for its class and has dual power supplies for redundancy.
    • CPU: It came with two Intel Xeon E5-2650 v2 processors. That gives me a total of 16 cores and 32 threads to play with. It’s more than enough for anything I can throw at it right now.
    • Memory: 128GB of DDR3 ECC RAM. The “ECC” part is important—it stands for Error Correcting Code, which helps prevent data corruption. It’s a feature you don’t typically find in consumer hardware.
    • Storage: This was a big upgrade. I’m using a mix of drives:
      • Two 512GB SSDs in a RAID 1 configuration for the operating system and virtual machines. This means one drive is an exact mirror of the other, so if one fails, I don’t lose anything.
      • Four 4TB HDDs for mass storage, mostly for my media server.

    The Software: Making It All Work

    Hardware is only half the battle. The software is what brings your home lab setup to life. I landed on a stack that is powerful, free, and has a massive community for support.

    My operating system of choice is Proxmox VE. It’s a fantastic open-source virtualization platform. It lets me easily create and manage both virtual machines (VMs) and containers from a simple web interface. It’s incredibly powerful but surprisingly easy to get started with.

    Inside Proxmox, I’m running a handful of services that have become central to my home network:

    • Plex: For organizing and streaming my movies and music.
    • Home Assistant: To control all my smart home gadgets.
    • Pi-hole: For blocking ads across my entire network.
    • Docker: I have one large VM dedicated to running Docker, which I use to experiment with dozens of smaller applications and services without needing to spin up a full new VM for each one.

    This new setup is a dream come true. It’s quiet, surprisingly power-efficient for what it is, and has so much headroom for future projects. Diving into the world of used enterprise gear can be intimidating, but sites like LabGopher can help you search eBay for servers that fit your budget and needs.

    If you’ve got that tinkerer’s itch, I can’t recommend building a home lab enough. It doesn’t have to be a big, expensive server rack. Start small, with an old computer or a Raspberry Pi. The journey of learning and building is the best part. This v3 build feels like a real milestone, but I’m already thinking about what v4 might look like.

  • My Home Server Dilemma: To Build from Scratch or Buy Prebuilt?

    My Home Server Dilemma: To Build from Scratch or Buy Prebuilt?

    A personal breakdown of the costs, benefits, and headaches of building a custom media server versus buying a prebuilt NAS for Plex.

    My old media server is bursting at the seams. It’s an ancient Optiplex desktop with about five different external hard drives plugged into it, looking like some kind of tech octopus. It’s worked, but it’s messy, and I’m ready for a real storage solution. This sent me down a rabbit hole trying to figure out the best approach for a DIY home server setup without breaking the bank. The big question I keep coming back to is: should I build a server from scratch or buy a prebuilt NAS and a mini PC?

    It feels like a classic tech dilemma. One path offers total control and power, while the other promises simplicity and a polished experience. Let’s break it down.

    The Case for a DIY Home Server

    At first glance, building your own server seems like the obvious choice for any enthusiast. You get to pick every single component, from the CPU to the case. This means you can build a machine with some serious muscle, which is perfect if you’re running a busy Plex server and need to handle multiple video transcodes at once.

    I priced out a potential build just to see what it would look like, and it was surprisingly reasonable.

    • CPU/Motherboard/RAM: You can often find great bundles. A Core i7-12700K with a Z790 motherboard and 16GB of DDR4 RAM can be had for around $300. That CPU is more than enough to handle several 4K transcodes.
    • Storage (for OS): A simple 512GB M.2 SSD is all you need for the operating system, and those are incredibly cheap now, around $30-$40.
    • Case, Power Supply, Cooler: The rest of the essentials—a solid case with plenty of drive bays, a reliable power supply, and a CPU cooler—would run you about another $130.

    All in, you’re looking at a total of around $460 before you even add the storage drives. For that price, you get a powerful, flexible machine that you can upgrade and tinker with to your heart’s content.

    Is a Prebuilt NAS the Simpler Choice?

    The alternative path is to buy a dedicated Network Attached Storage (NAS) box from a company like Synology or QNAP. These are appliances designed to do one thing really well: store your files and make them available on your network.

    The biggest advantage here is simplicity. The software is user-friendly, the setup is straightforward, and they are typically designed to be quiet and energy-efficient.

    But there’s a catch. The cheaper 4-bay NAS units, which run about $300-$400, usually have very weak processors. They are fantastic for direct-playing files, but if your Plex server needs to transcode a video file for a specific device, they will choke.

    The common workaround is to pair the NAS with a separate mini PC, like an Intel NUC. The NAS handles the storage, and the mini PC (which you can get for about $150) runs Plex and handles all the heavy lifting.

    DIY Home Server vs. Prebuilt: The Real Cost

    This is where things get interesting. When I added it all up, the costs were surprisingly similar.

    • DIY Home Server: Around $460 + your time to build and configure it.
    • Prebuilt Combo (NAS + Mini PC): Around $450 – $550 ($300-400 for the NAS, $150 for the NUC).

    A potential savings of $100 (or less) on the DIY route suddenly doesn’t seem as compelling when you factor in the time and potential headaches of building it yourself. The hard drives are going to be the most expensive part of the project either way. So, if the cost is basically a wash, how do you decide?

    It really comes down to what you value more: power and flexibility or convenience and simplicity.

    If you enjoy the process of building, want a machine that can do more than just serve files (like run virtual machines or other applications), and want the absolute best performance for your money, the DIY home server is the clear winner. You can use tools like PC Part Picker to plan your build and ensure compatibility.

    However, if you want a set-it-and-forget-it solution that is quiet, power-efficient, and has polished, easy-to-use software, the prebuilt NAS and mini PC combo is tough to beat. You get dedicated hardware for storage and dedicated hardware for processing, which is a clean and simple way to manage your setup.

    For me, the decision is still up in theair. The tinkerer in me loves the idea of a custom build, but the pragmatist sees the elegance of the prebuilt solution. There’s no single right answer, just the right answer for your needs and your budget.

    Published on August 29, 2025

  • Forget The Cloud, I Built a Mini Data Center in My Closet

    Forget The Cloud, I Built a Mini Data Center in My Closet

    My journey into creating a powerful, headless homelab for coding, machine learning, and more, using just a laptop and some smart software.

    I love my MacBook. It’s light, the battery lasts forever, and it’s my go-to for writing and everyday tasks. But for the heavy-duty stuff—machine learning models, CUDA development, and the occasional 3D render—it just doesn’t have the muscle. For years, I juggled multiple machines, but I recently decided to build my own mini data center at home, and honestly, it’s been fantastic. The idea is simple: keep the powerful, noisy hardware tucked away in a closet and use my MacBook as a sleek, silent window into that power.

    It’s a “headless homelab,” where the workhorse computers don’t have monitors or keyboards attached. They just sit there, ready to take on any task I throw at them, while I enjoy a clean, quiet desk with just my laptop.

    The Blueprint for My Mini Data Center

    So, what does this setup actually look like? It’s surprisingly simple and breaks down into a few key parts. Think of it as a backend doing all the hard work and a frontend for access.

    The Backend (In the Closet):

    • GPU Workstation: This is the star of the show. I’m using a Windows laptop with an NVIDIA RTX 3060. It’s a beast for any GPU-intensive tasks like training machine learning models or rendering. It just sits on a shelf, plugged in and ready to go.
    • Network Attached Storage (NAS): This is the central library for all my files. Code, datasets, documents, backups—everything lives here, accessible from any device on my network.
    • The Essentials: A good router and, crucially, an Uninterruptible Power Supply (UPS). The UPS is a battery backup that keeps everything running smoothly during a power flicker, preventing data corruption or a ruined ML training run.

    The Frontend (At My Desk):

    • Thin Client: My MacBook Air is the primary way I connect to my backend. Sometimes, I even use my iPad. It doesn’t do any heavy processing itself; it’s just a beautiful, high-resolution screen for accessing the powerful hardware in the other room.

    The Magic Glue (The Software):

    This is where it all comes together. A few key pieces of software create a seamless experience:

    • Tailscale: This is a networking tool that creates a secure, private network over the internet. It makes my laptop in the closet and my MacBook at the coffee shop feel like they’re sitting right next to each other on the same local network. It’s incredibly easy to set up.
    • Sunshine + Moonlight: This duo is what lets me stream my Windows desktop to my Mac with incredibly low latency. Sunshine runs on the Windows GPU machine, and Moonlight is the client I run on my MacBook or iPad. The result is a silky-smooth remote desktop experience that’s good enough for coding and even some light gaming.
    • SSH & File Shares: For command-line access, a simple SSH connection (which can also run over Tailscale) is all I need. For files, standard SMB shares from my NAS mean I can access all my projects directly in Finder on my Mac.

    Key Decisions for Your Own Mini Data Center

    When I was planning this, I ran into a few big questions. If you’re thinking about a similar mini data center setup, you’ll probably face them, too.

    The Great NAS Debate: Synology vs. DIY TrueNAS

    One of the first hurdles is choosing a NAS. Do you buy an off-the-shelf solution or build your own?

    • Synology: These devices are the definition of “it just works.” They are simple to set up, energy-efficient, and have a very user-friendly interface. If you want a hassle-free file server and backup solution, a Synology is a fantastic choice. You can learn more on the official Synology website.
    • DIY with TrueNAS: On the other hand, maybe you have an old PC lying around. Installing an open-source OS like TrueNAS SCALE gives you incredible flexibility. You can add more drives, run custom applications using Docker, and have total control over the hardware. It takes more work, but the power and expandability can be worth it.

    I had an old PC case from 2007, so I leaned towards a DIY build. The ability to run Docker containers for various services was a huge plus for me.

    Performance: Does Remote Access Actually Feel Good?

    This was my biggest worry. Would a streamed desktop feel laggy and frustrating? I’m happy to report that for development, coding, and data analysis, the latency with Moonlight and Tailscale is practically unnoticeable. I get a smooth, full-resolution stream of my Windows desktop on my Mac’s Retina display.

    It’s responsive enough that I often forget I’m not working directly on the machine. While a pro gamer might notice the milliseconds of delay, for my ML and rendering workflows, it’s flawless.

    Final Thoughts

    Building this headless homelab has been one of the best tech decisions I’ve made. My workspace is now dead silent, free of fan noise and heat. All the power is centralized, backed up, and accessible from anywhere I have an internet connection.

    If you’re someone who needs a powerful machine for specific tasks but loves the portability and silence of a laptop, creating your own mini data center might be the perfect solution. It’s a practical way to get the best of both worlds: massive power when you need it, and minimalist calm when you don’t.

  • Project Athena: When a Standard PC Case Becomes the Ultimate Custom NAS

    Project Athena: When a Standard PC Case Becomes the Ultimate Custom NAS

    Sometimes, the perfect solution doesn’t exist. So you have to build it. Here’s a look at an incredible custom NAS build.

    Have you ever had a project in mind, but you just can’t find that one perfect piece of hardware to make it happen? You search and search, but nothing on the market quite fits the vision in your head. It’s a common story for anyone building a serious home server, especially when it comes to planning a custom NAS build. You either have to compromise on your dream setup or, like one resourceful builder, take matters into your own hands.

    I stumbled across an inspiring project that perfectly captures this spirit. The goal was simple but ambitious: build a new Network Attached Storage (NAS) device with a ton of drive space, but keep it in a clean, standard-sized PC case. The problem? No off-the-shelf case could handle the sheer number of hard drives required.

    The Challenge of High-Density Home Storage

    When you start planning a NAS, you quickly realize that most consumer PC cases are designed for a completely different purpose. They have great airflow for a hot graphics card, fancy RGB lighting, and space for maybe two or four hard drives. That’s great for a gaming PC, but it’s not going to cut it when you want to build a serious media server or a backup hub for your entire digital life.

    Your options usually are:

    • Buy a dedicated server chassis: These are often expensive, loud, and look more at home in a data center than in your office.
    • Get a pre-built NAS: Brands like Synology or QNAP are fantastic, but they can be pricey and less flexible if you want to run your own custom software.
    • Compromise: Just build something smaller than you originally wanted.

    But there’s a fourth option: modify something to perfectly suit your needs.

    Thinking Outside the Box: A Custom NAS Build Called ‘Athena’

    This is where the project, dubbed “Project Athena,” gets really interesting. Instead of settling, the creator picked up a popular, minimalist PC case—the be quiet! Pure Base 500—and decided to make it do something it was never designed for.

    After a lot of careful planning and modification, the case was transformed into a storage monster. With some clever 3D-printed brackets, it can now hold an incredible number of drives.

    Here’s what the modified case can fit:
    * 9 x 3.5″ drives and 7 x 2.5″ drives simultaneously.
    * OR, a whopping 25 x 2.5″ drives (if you’re going all-in on SSDs).

    All of this fits while still supporting a standard ATX motherboard and power supply. You get the clean, quiet aesthetic of a modern PC case with the storage capacity of a dedicated server. It’s the best of both worlds, and it’s a brilliant solution to a problem many home lab enthusiasts face.

    The Power of 3D Printing in a Custom NAS Build

    So, how was this feat of engineering accomplished? The secret sauce is 3D printing. The creator designed and printed custom drive cages that mount securely inside the Pure Base 500 chassis, making efficient use of every square inch of space.

    And in the true spirit of the maker community, they made the 3D files available for free. You can find them on the Project Athena GitHub page if you’re feeling inspired to try a similar build yourself. This is what makes the DIY community so powerful—people solving problems and sharing their solutions for everyone to benefit from.

    (As a little side note, the builder also mentioned the colorful internal cables are for a PiKVM, which is a fantastic open-source project that lets you remotely manage servers. It’s a sign of a truly serious home lab setup!)

    This project is more than just a cool PC mod. It’s a reminder that you don’t always have to be limited by what you can buy. Sometimes, the most rewarding projects are the ones where you have to get creative, learn a new skill, and build the exact thing you need. It turns a simple hardware upgrade into a unique, personal creation.

    What’s the most creative solution you’ve come up with for a tech project?

  • Giving Old Tech New Life: My Project to Repurpose Enterprise GPUs

    How I built a custom cooler to tame retired server hardware for modern AI and compute tasks at home.

    There’s something incredibly satisfying about taking old, discarded tech and giving it a new purpose. My latest project has been a deep dive into exactly that, focused on a fascinating challenge: how to repurpose enterprise GPUs for modern, heavy-duty tasks right here in my home lab. I’m talking about those powerhouse NVIDIA Tesla cards that were once the heart of data centers. They’re amazingly powerful for their age, but there’s one big catch—they were never designed to cool themselves.

    Enterprise cards are built to live in server racks with jet-engine-level fans forcing massive amounts of air over them 24/7. Take them out of that environment, and they’ll overheat in minutes. So, my goal became creating an “Endgame EOL’d GPU Box” — a machine that could put this cast-off gear to work on modern AI and compute loads. And the biggest hurdle? Building a totally custom air cooler from scratch.

    The Challenge: Why You Can’t Just Repurpose Enterprise GPUs

    When you get your hands on a card like a Tesla M40 or P100, the first thing you notice is the lack of fans. It’s just a massive heatsink. My first few attempts at cooling were, let’s say, learning experiences. It quickly became clear that a standard off-the-shelf cooler wasn’t going to cut it. I had to design and build my own.

    After several iterations, I’ve finally landed on a prototype cooler that I think can handle the thermal load. It’s not the prettiest thing in the world, but it’s built for one thing: performance. Now that the hardware puzzle is mostly solved, the real fun begins: benchmarking. How does this old-school hardware stack up against modern demands?

    The Hardware Gauntlet: My Benchmarking Plan

    To see what this setup is really capable of, I’ve put together a collection of GPUs to test with my new cooler. The idea is to see how performance scales, not just with single cards, but with multiple GPUs working together.

    My GPU Lineup Includes:

    • NVIDIA Tesla K80s (an older, interesting dual-GPU card)
    • A mix of the “Maxwell” generation: M10, M40, and M60
    • The “Pascal” powerhouses: the P40 and P100
    • A modern beast for comparison: the “Volta” V100

    I’ll be running tests with single cards, and also in multi-GPU configurations, like four P100s at once. One thing to keep in mind here is PCIe bandwidth. Cramming that many GPUs into a system can force the motherboard to downgrade connection speeds to some of the cards, which can create bottlenecks. Part of the test is to see how much that really matters. For more on how that works, AnandTech has a great explainer on PCIe lanes.

    To make sure the GPUs are the star of the show, I’ll be running these tests on two different, but very capable, Intel Xeon CPUs (an E5-2687W v4 and an E5-1680 v4) to see how the processor choice influences the results.

    The Software Gauntlet: Real-World Tests for these Repurposed Enterprise GPUs

    A pile of hardware is useless without the right software to push it. I want to test these cards on tasks that people are actually running today, especially in the AI and scientific computing worlds.

    My testing playbook will run a series of benchmarks automatically:

    1. AI Language Models: I’ll be testing throughput using vLLM, a popular library for running large language models, loaded with the Llama 3 8B model. This is a perfect test of modern AI inference performance.
    2. Scientific Computing: I’ll have the GPUs contribute to distributed computing projects like Folding@Home. It’s a great way to test sustained load while also contributing to scientific research. I’ll also throw some other BIONIC and Einstein@Home workloads at them.
    3. General AI Benchmarks: I’ll run a few standard suites like ai-benchmark.com and llama-bench to get some standardized numbers that are easy to compare.

    This project has been a ton of fun, blending hardware fabrication with deep-dive software testing. It’s a quest to see if I can give this powerful, forgotten hardware a second life. The next step is to run the gauntlet and see what the numbers say. I’ll be sure to share the results once they’re in. It’s amazing what you can build with a little curiosity and a pile of old server parts.

  • My 2025 Home Lab: A Peek Behind the Curtain of My Mini-PC Setup

    My 2025 Home Lab: A Peek Behind the Curtain of My Mini-PC Setup

    From Gaming to Cybersecurity: A Deep Dive into My Personal Home Lab Setup.

    It’s funny how a passion project can grow. What started as a simple desire to learn more about networking and servers has slowly evolved into the command center of my digital life. If you’ve ever been curious about what a modern, compact, and powerful home lab setup looks like in 2025, you’ve come to the right place. I thought it would be fun to pull back the curtain on my current rig, breaking down the hardware I use and what each piece of the puzzle actually does.

    My goal was to build something powerful but also energy-efficient and quiet. That’s why I’ve fallen in love with mini-PCs. They’re small, they sip power, but they pack a serious punch. Let’s dive in.

    The Brains: My Proxmox Virtualization Server

    Every good home lab setup needs a core, and mine is a Lenovo ThinkCentre M70q mini-PC. This tiny machine is the undisputed heavyweight champion of my network.

    • Model: Lenovo ThinkCentre M70q
    • CPU: Intel Core i5-10400T
    • RAM: 64GB G.SKILL DDR4
    • Storage: 1TB Samsung 970 EVO NVMe SSD

    I run Proxmox on this machine, which is an open-source virtualization platform. Think of it like a digital apartment building. Instead of having one computer run one operating system, Proxmox lets me run many “virtual” computers (VMs) all on this single piece of hardware. It’s incredibly efficient.

    Right now, it’s dedicated to my cybersecurity practice lab. I’m running Ludus and GOAD (Game of Active Directory) environments to sharpen my skills in a safe, sandboxed space. Because this machine has so much RAM, I have plenty of room to spin up new VMs whenever I get a new idea or want to test something out without messing up my main systems.

    Fun and Games: The Dedicated Game Server

    While I could run game servers on my Proxmox machine, I like to keep things separate. For hosting games for a small group of friends, I have a dedicated HP ProDesk 600 G3 Mini.

    • Model: HP ProDesk 600 G3 Mini
    • CPU: Intel Core i5-7500T
    • RAM: 32GB Corsair DDR4
    • Storage: 500GB Samsung EVO NVMe SSD

    This one runs Ubuntu Server, a lightweight and super stable version of Linux. It’s perfect for hosting game worlds for titles like Valheim or Minecraft. It just runs in the background, doing its job without any fuss.

    So, how do my friends connect to it securely? That’s where Tailscale comes in. It creates a secure private network over the internet, so my friends can easily access the game servers as if they were on my local network, but without me having to expose my home IP address to the world. It’s incredibly easy to set up and works like magic.

    My Synology NAS: The Ultimate Filing Cabinet

    A proper home lab setup isn’t complete without a solid storage and backup solution. For this, I rely on a Synology DS220+ NAS (Network Attached Storage).

    • Model: Synology DS220+
    • RAM: 2GB (stock)
    • Storage: 2x 4TB Seagate IronWolf NAS Hard Drives

    You might look at the 2GB of RAM and think it’s underpowered, but for what it does, it’s perfect. This little box is the unsung hero of my network, handling several critical jobs 24/7:

    • Plex Server: It stores all my movies and TV shows and streams them to any of my devices, wherever I am.
    • Pi-hole: It blocks ads across my entire home network. No more annoying pop-ups or trackers.
    • Nextcloud: This is my personal Google Drive. It gives me a private cloud for my files, photos, and documents, all hosted right here at home.
    • Backups: Most importantly, it automatically backs up all the important data from my family’s computers.

    The Mobile Command Center

    Finally, there’s my personal laptop: a Lenovo Thinkpad T480. It’s a classic for a reason—rock-solid, reliable, with a fantastic keyboard. I run Kali Linux on it, which is a specialized operating system for cybersecurity and penetration testing. It’s the perfect tool for when I’m on the go and want to connect back to my lab or do some security research.

    Putting It All Together

    And that’s the tour! This home lab setup gives me a powerful platform for learning, a reliable server for gaming with friends, and a private, secure way to manage my own data. It’s a project that’s always evolving, but for now, I’m thrilled with how this compact and efficient system performs. If you’re thinking of starting your own lab, remember you can start small—even an old laptop or a Raspberry Pi can be the beginning of an amazing journey.