Category: AI

  • Stop Clicking Around: Why Terraform and Ansible Are the Perfect Pair for Your Proxmox Lab

    Stop Clicking Around: Why Terraform and Ansible Are the Perfect Pair for Your Proxmox Lab

    How to combine the power of Infrastructure as Code and Configuration Management to automate your Proxmox home lab, one VM at a time.

    I was scrolling through my home lab feeds the other day and saw a question that I’ve asked myself a dozen times: “What’s the best way to automate my Proxmox setup?” If you’re like me, you love tinkering, but manually creating and configuring every single virtual machine or container gets old, fast. That’s when you stumble into the powerful world of Infrastructure as Code (IaC), and two names pop up constantly: Terraform and Ansible. But how do they work together, and is it the right combo for you?

    The short answer is yes, it’s a fantastic combination. Think of it like building and furnishing a house. Terraform is your architect and construction crew. It reads the blueprints (your code) and builds the actual structure—the VM, the container, the network settings. It’s brilliant at provisioning resources and managing their state. But once the house is built, it’s just an empty shell.

    That’s where Ansible comes in. Ansible is your interior designer and setup crew. It comes into the house Terraform built and does all the configuration. It installs software, updates packages, sets up user accounts, copies over configuration files, and gets everything ready for you to “move in.” This separation of duties is what makes the combination so powerful.

    Why Use Terraform and Ansible Together?

    You might find examples online where people use only Ansible to do everything, including creating the VMs. You can do that, but it’s not what Ansible was primarily designed for. Using both tools lets each one play to its strengths.

    • Terraform for Provisioning: Terraform is declarative. You define the end state you want—”I want one Ubuntu VM with 2 cores, 4GB of RAM, and a 50GB disk”—and Terraform figures out how to make it happen. It also keeps a “state file” to track your resources, making it easy to update or destroy them later. It’s built for creating the “things.”
    • Ansible for Configuration: Ansible is procedural. It follows a playbook of tasks you define in order. It’s perfect for the step-by-step process of configuring a machine that already exists. It excels at managing the software and state inside the “things.”

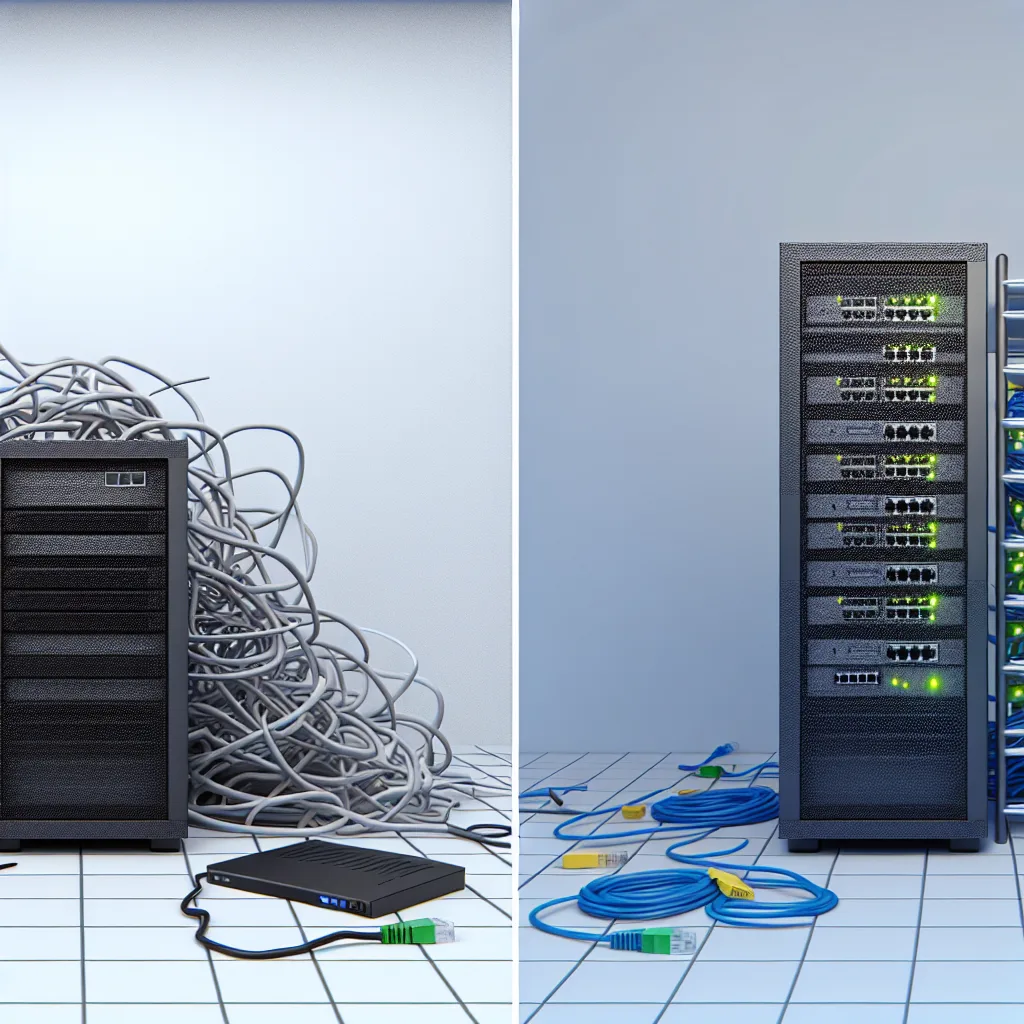
    By combining them, you get a clean, repeatable, and version-controlled workflow. You can check your entire infrastructure definition into a Git repository and rebuild your whole lab from scratch with just a few commands. That’s the real magic of IaC.

    A Simple Workflow for Proxmox Automation

    So, what does this actually look like in practice? Once you have Terraform and Ansible installed, the workflow for automating your Proxmox setup is surprisingly straightforward.

    1. Define Your VM in Terraform: You’ll start by writing a .tf file. In this file, you’ll specify the Proxmox provider and define the resources you want to create. You can find fantastic documentation and examples for the Proxmox provider on the official Terraform Registry. You’ll define things like the VM’s name, its operating system template, CPU, memory, and network.
    2. Run Terraform: You run terraform plan to see what changes will be made, and then terraform apply to create the VM. Terraform will connect to your Proxmox API and build the machine.
    3. Create an Ansible Playbook: Next, you’ll write a simple YAML file called a playbook. This playbook will contain the tasks you want to run on the new VM. For example: “update all apt packages,” “install Docker,” “create a new user.” The official Ansible documentation is an excellent resource for learning how to write these.
    4. Run Ansible: You then run your playbook and point it at the IP address of the VM that Terraform just created. Ansible will SSH into the machine and execute your tasks one by one.

    Before you know it, you have a fully provisioned and configured virtual machine, all from code.

    Finding Good Terraform and Ansible Examples

    One of the hardest parts of starting is finding clear, simple examples to learn from. The person who inspired this post was looking for a good GitHub project, and it’s a common struggle. Many examples are either too complex for a beginner or use older, outdated methods.

    My advice is to start small. Don’t try to automate your entire 20-service stack on day one.
    Focus on One Thing: Pick one service. Maybe it’s a Pi-hole container or a simple Ubuntu VM for testing.
    Separate Your Code: Keep your Terraform files in one directory and your Ansible files in another. This helps keep the logic clean.
    Read the Docs: While it sounds boring, spending ten minutes reading the official documentation for the Terraform Proxmox provider can save you hours of frustration. The official docs often include simple, working examples that are the best starting point.

    Jumping into the world of Terraform and Ansible can feel a bit intimidating, but it’s one of the most rewarding skills you can learn for managing a home lab or even for your career. It turns tedious, manual tasks into a reliable, automated process. So grab a coffee, pick one small thing to automate, and give it a try. You’ll be surprised at how quickly it clicks.

  • Forget the Perfect Rack: Your Messy Home Lab is Awesome

    Forget the Perfect Rack: Your Messy Home Lab is Awesome

    You don’t need a perfect server rack to start learning. Here’s why embracing the mess is the best way to build your first beginner home lab.

    You’ve seen them. The stunning, immaculate home server racks that pop up on social media. They’re beautiful, with perfectly managed cables, blinking rack-mounted servers, and a clean, professional aesthetic that’s hard not to admire. It’s easy to look at those and think, “I could never build that.” But I’m here to tell you a secret: you don’t have to. Your first beginner home lab doesn’t need a rack, a dedicated room, or a four-figure budget. It just needs to work.

    Let’s be honest, the pressure to create a picture-perfect setup can be a huge barrier. You spend more time planning the rack than learning the software. You worry about the cost before you’ve even decided what services you want to run.

    So, let’s embrace a different approach. The functional, sometimes messy, “it just works” method. It’s about starting small, using what you have, and focusing on the fun part: learning and experimenting.

    The Case for a “Messy” Beginner Home Lab Setup

    The whole point of a home lab is that it’s a lab. It’s a place for testing, tinkering, and occasionally, breaking things. It’s not a data center or a showroom. When you shift your focus from aesthetics to function, you free yourself up to actually get started.

    What do you want to do with your lab?
    * Run a media server like Plex or Jellyfin?
    * Block ads on your entire network with Pi-hole?
    * Host your own cloud storage with Nextcloud?
    * Automate your home with Home Assistant?

    You can do all of this with a single old computer sitting on a bookshelf. The success of your project isn’t measured by how clean your cables are; it’s measured by whether it works and you learned something along the way. A functional beginner home lab is infinitely better than a perfectly planned one that never gets built.

    The Practical Perks of a Rackless Approach

    Going rackless isn’t just about lowering your standards; it has real, tangible benefits, especially when you’re starting out.

    • It’s Cheaper: Server racks can be expensive. So is the specialized rack-mounted equipment. You can start a lab for free with an old desktop or laptop you already own. Your “rack” can be an IKEA bookshelf, a corner of your desk, or a shelf in a closet.
    • It’s Quieter: Let’s be real, enterprise-grade servers are LOUD. They’re designed for server rooms with dedicated cooling, not your home office or living room. By using consumer-grade hardware like a mini-PC or an old laptop, your lab can run silently in the background.
    • It’s Flexible: Without a rack, your setup is modular. You can easily swap out a machine, move it to a different room, or add a new device without needing special tools or mounting hardware. It’s a simple, adaptable system that grows with you.

    What Your First Beginner Home Lab Actually Needs

    So, what hardware should you start with? It’s simpler than you think. You don’t need a powerful server. You just need a few key components.

    1. A Brain: This is the computer that will run your services. You have tons of options here, and you might already own one.
      • An Old Laptop or Desktop: Don’t underestimate that old machine gathering dust. It’s more than powerful enough to run dozens of services.
      • A Mini-PC: Devices like the Intel NUC, Beelink, or Minisforum PCs are tiny, power-efficient, and surprisingly powerful. They are a fantastic starting point.
      • A Single-Board Computer: The Raspberry Pi is a famous example. It’s cheap, uses almost no power, and has a huge community for support. It’s perfect for running one or two simple services.
    2. Storage: You’ll need a place to store your media, files, and backups. An off-the-shelf Network Attached Storage (NAS) from a brand like Synology or QNAP is a great, user-friendly option. Or, you can just plug a couple of large USB external drives into your computer.

    3. Networking: You already have a router from your internet provider, and that’s enough to start. If you need more ports, a simple, unmanaged 5-port or 8-port switch costs less than a pizza. You can find great resources on basic home networking from trusted sites like Wirecutter.

    Don’t let perfect be the enemy of good. The goal is to start, learn, and build from there. Your home lab journey begins the moment you install your first service, not when you buy your first server rack. So grab that old laptop, find a spare shelf, and start building something awesome today. The perfectly managed cables can wait.

  • Why I Built a Server for My Home (and You Should Too)

    Why I Built a Server for My Home (and You Should Too)

    It’s easier than you think to build a home for your data. Here’s a peek into my setup and why it’s one of the best projects I’ve ever done.

    I have a confession to make. For years, my digital life was a mess. Photos were scattered across old laptops, important documents lived in a dozen different cloud services, and my media collection? Let’s just say it was “creatively organized.” I got tired of paying monthly fees for storage I didn’t control and wanted a central place for everything. That’s what led me down the rewarding rabbit hole of creating my own personal server setup. And honestly, it’s one of the best tech projects I’ve ever tackled.

    It sounds intimidating, right? The word “server” brings up images of huge, noisy machines in a freezing-cold data center. But it doesn’t have to be that way. A home server is just a computer that’s always on, ready to serve you and your family’s data and applications. Think of it as your own private cloud.

    What Can You Do With a Personal Server Setup?

    So, what’s the point? Why have a computer running 24/7 in your house? For me, it boils down to a few amazing benefits:

    • Your Own Media Hub: This is the big one for many. By installing software like Plex or Jellyfin, you can organize all your movies, TV shows, and music into a beautiful, Netflix-style library that you can stream to any device, anywhere. No more searching for that one movie on five different streaming services.
    • Centralized File Storage & Backups: This is the “Network Attached Storage” or NAS part. All my important files now live in one safe place. My wife and I can access them from our laptops or phones, and I have it set up to automatically back up our computers every night. It’s peace of mind, self-hosted.
    • A Playground for Learning: A home server is an incredible learning tool. You can host websites, run game servers for you and your friends, or experiment with virtual machines. It’s a sandbox where you can learn about networking, operating systems, and security without any real-world consequences.

    My First Personal Server Setup: The Hardware

    You don’t need to break the bank to get started. Many people begin by repurposing an old desktop computer or buying a used office PC. My goal was something small, quiet, and power-efficient.

    I ended up building a small machine using a simple tower case that fits neatly on a shelf. Inside, I have a modern but low-power Intel Core i3 processor, 16GB of RAM (which is plenty to start), and a few large hard drives for storage. The most important thing wasn’t raw power, but reliability and low energy use. You don’t need a super-powered gaming CPU for most server tasks. The whole thing is quieter than my fridge.

    Diving into the Software

    Hardware is only half the story. The software is where the magic happens. Instead of installing Windows, I opted for a specialized server operating system called Proxmox. It’s a free, open-source platform that lets you run multiple “virtual machines” (VMs) and “containers” on a single physical computer.

    This sounds complicated, but think of it like this: Proxmox is the foundation, and on top of it, I can easily install and manage different applications that are completely isolated from one another.

    My setup includes:
    * A TrueNAS VM: This handles all the file storage, making my hard drives available on the network like a professional NAS device.
    * A Plex Container: This runs my media library. It’s lightweight and uses very few resources.
    * A Home Assistant Container: This is for my smart home devices, allowing me to automate lights and routines without relying on Google or Amazon’s cloud.

    It took a weekend of watching tutorials and reading guides, but the feeling of getting it all working was amazing. You slowly build up your digital kingdom, one service at a time. It’s incredibly empowering to know that you are in control of your own data. If you’re looking for inspiration on different builds, communities and tech sites are full of great examples for every budget.

    So, if you’re feeling curious and want more control over your digital life, I can’t recommend a personal server setup enough. It’s a project that grows with you, teaching you valuable skills while decluttering your digital world for good.

  • So You Got a Free Server. Now What?

    So You Got a Free Server. Now What?

    A ton of fun and practical home server ideas for your new machine.

    A friend of mine recently sent me a picture of a brand-new server, still in the box. He got it from his company for free—an HPE ProLiant ML350 Gen10, a seriously powerful machine. His message was simple: “This is amazing. But… what should I actually do with it?”

    It’s a fantastic problem to have. Getting your hands on a dedicated server opens up a world of possibilities beyond just your desktop computer. But if you’re new to this, the sheer number of options can feel overwhelming. So, if you’ve found yourself with a new piece of hardware and are looking for some great home server ideas, you’ve come to the right place. Let’s walk through some fun and genuinely useful projects you can start today.

    First, Pick Your Server’s “Brain”

    Before you can start hosting cool applications, you need to install an operating system on your server. But we’re not talking about Windows or macOS. You’ll want something called a “hypervisor,” which is a special OS that lets you run multiple virtual machines (VMs) or containers on a single physical machine.

    Think of it like this: the hypervisor is the foundation of your apartment building, and each VM is a separate apartment, each with its own purpose.

    For someone just starting, I almost always recommend Proxmox Virtual Environment. Why?

    • It’s free: There are no licensing fees or hidden costs for the core product.
    • It’s powerful: It’s a complete, enterprise-grade tool that can handle almost anything you throw at it.
    • It has a great community: If you get stuck, there are tons of forums and tutorials to help you out.

    Installing Proxmox is the first real step into building your home lab. Once that’s done, the real fun begins.

    Practical and Powerful Home Server Ideas

    Let’s start with projects that can genuinely make your digital life better, more private, and more convenient. These are some of the most popular home server ideas for a reason.

    • Build Your Own Network Attached Storage (NAS): This is ground zero for most home labs. A NAS is a central place to store all your important files, photos, and documents. Instead of having files scattered across a dozen different computers and external drives, everything lives in one safe place. You can set up automatic backups for all your family’s computers. For this, TrueNAS CORE is an incredible, free, and robust option you can run in its own VM.

    • Create a Media Streaming Powerhouse: Tired of paying for a half-dozen streaming services? With Plex or Jellyfin, you can create your own personal Netflix. You point the software at your collection of movies and TV shows, and it organizes everything into a beautiful, easy-to-use interface that you can access from your TV, phone, or tablet, anywhere in the world.

    • Block Ads Across Your Entire Network: This is one of those things that, once you have it, you can’t imagine living without. A tool like Pi-hole or AdGuard Home runs on your server and filters out ads before they even reach your devices. That means no more ads on websites, in mobile apps, or even on your smart TV. It’s magical.

    • Unify Your Smart Home: If you have smart lights, plugs, or thermostats from different brands, you know how annoying it can be to juggle multiple apps. Home Assistant is an open-source platform that brings all your smart devices together under one roof. You can create powerful automations, like having your lights turn on automatically when you arrive home.

    Level Up: More Fun Home Server Ideas

    Once you’ve got the basics down, you can branch out into more specialized projects. These are less about pure utility and more about learning, tinkering, and fun.

    • Host Your Own Game Servers: Why rent a server for you and your friends when you can host it yourself? You can easily spin up dedicated servers for games like Minecraft, Valheim, Factorio, and many more. You get full control over the world, mods, and performance.
    • Run a Personal “Cloud” Drive: Services like Google Drive and Dropbox are convenient, but you’re handing your data over to a third party. With Nextcloud, you can host your own cloud storage service. It gives you all the same features—file syncing, calendars, contacts, and online document editing—but on hardware you control.

    • Secure Your Passwords: A self-hosted password manager like Vaultwarden (which is fully compatible with Bitwarden apps) is the ultimate step in digital security. Your encrypted password vault lives on your server, not on a company’s server, giving you complete ownership.

    The server my friend got, that HPE ProLiant ML350 Gen10, is an absolute beast. It’s quiet enough for a home office but powerful enough to run every single one of these services at the same time without breaking a sweat. You definitely don’t need something that powerful to get started, but it’s amazing what you can do with enterprise gear.

    The best way to start is to just pick one thing from this list that sounds interesting and try it. The journey of setting up a home server is all about learning and exploring. Don’t be afraid to break things and start over. That’s half the fun. Good luck!

  • My Home Lab Was a Mess. Here’s My Plan to Fix It.

    My Home Lab Was a Mess. Here’s My Plan to Fix It.

    Embarking on a serious home lab upgrade to solve my biggest networking headache.

    It’s funny how these things start. My home lab began as a single, unassuming desktop tower, an HP ProDesk 600 G2 that I crammed with 64GB of RAM. It was supposed to be a simple server for tinkering. But as anyone who’s gone down this rabbit hole knows, “simple” doesn’t last long. Now, I’m staring at the blueprint for a major home lab upgrade, moving from a simple all-in-one box to something a bit more serious.

    My little HP ProDesk has been a real workhorse. It runs Proxmox VE, a fantastic hypervisor that lets me slice up that i7-6700 processor and all that RAM into a bunch of virtual machines. Inside, it’s a whole universe of services:

    • pfSense: This handles my entire network, acting as my main router and firewall.
    • Pi-hole: To keep ads off my network.
    • TrueNAS: Managing a couple of 4TB hard drives in a RAID configuration for storage.
    • Docker VMs: Running the usual suspects like the “arr” stack for media, Emby, a Homarr dashboard, and Nginx for proxying.

    It’s an efficient setup, all running on one machine. So what’s the problem?

    The Pain Point: Why I Need This Home Lab Upgrade

    The biggest headache is my network. Or rather, the lack of a real one. My 2Gbps fiber connection comes into the ProDesk, and the LAN side goes out to a dumb, unmanaged 2.5G switch. From there, it connects to my desktop, a Wi-Fi access point, and everything else.

    A while back, I had pfSense set up with multiple VLANs to create separate, isolated networks. I wanted one for my main computers, another for my work-from-home PC, and a third for all the random IoT junk that I don’t fully trust. But here’s the catch: a “dumb” switch doesn’t understand VLANs. It just passes all the traffic along to everyone.

    So, all my network separation was basically an illusion. My work computer, my personal desktop, and that weird smart plug from a company I’ve never heard of are all chatting on the same subnet. Even with firewall rules in pfSense, it just feels… naked. It’s a security mess waiting to happen, and it’s not going to scale as I add more devices.

    My Home Lab Upgrade Shopping List

    I finally decided to pull the trigger and do something about it. I’ve been scouring forums and online marketplaces, and I’ve put together a plan to completely overhaul my network backbone.

    1. A Dedicated pfSense Router: The first step is to free pfSense from the ProDesk. I bought a fanless mini-PC with an Intel i226 chip, giving me four 2.5G network ports. It’s got 8GB of DDR5 RAM and a small NVMe drive, which is more than enough to run a dedicated firewall. Moving pfSense to its own box means my network won’t go down if I need to reboot my main Proxmox server. This is a huge win for stability. You can learn more about pfSense Plus software here.

    2. A Proper Managed Switch: This is the heart of the upgrade. I found an incredible deal on a used MikroTik CRS328-24P-4S+RM for just $150. This thing is a beast. It has 24 PoE ports (Power over Ethernet), which is perfect for security cameras or access points, and four 10G SFP+ ports for high-speed uplinks to my server and desktop. Most importantly, it’s a fully managed switch, which means I can finally use VLANs properly and truly segment my network.

    3. Future-Proofing: This is just the beginning. I’m already planning to get another box just for running network simulations in Eve-NG. My current TP-Link access point also doesn’t support VLANs, so that’s next on the replacement list.

    Next Steps: Racking and Stacking

    Right now, my “lab” is more of a pile. The ProDesk sits on the floor, and cables are everywhere. The long-term vision is to get a proper 16U or 18U server rack.

    I want to do it right: with a power distribution unit (PDU), patch panels for clean cable runs, and brush panels to keep the dust out. A tidy, well-managed rack isn’t just about looks; it makes troubleshooting and future upgrades so much easier. Taking this mess of wires and organizing it into a clean, professional setup is the final piece of the puzzle.

    It’s a big project, but I’m excited to finally build a home network that’s secure, robust, and ready for whatever I throw at it next. If you’ve ever used a MikroTik switch like the CRS328 in your own home lab, I’d love to hear if there are any gotchas I should know about!

  • This “ThinkLab” Server Has One Feature I’m Stealing for My Next Build

    This “ThinkLab” Server Has One Feature I’m Stealing for My Next Build

    Sometimes the coolest upgrades aren’t about more power—they’re about smarter ideas. This custom ‘ThinkLab’ server with an ESP32 monitor is a perfect example.

    I was scrolling through some online communities the other day and stumbled upon a project that made me stop and say, “Okay, I need to do that.” It wasn’t a multi-thousand-dollar rack server or a super-powered gaming rig. It was a clean, clever, and incredibly thoughtful DIY home server build that someone had nicknamed the “ThinkLab.” And it had one little feature that made it stand out from everything else I’ve seen.

    It’s easy to go down the rabbit hole of building your own server. You start with an old PC, add a few hard drives, and before you know it, you’re looking at network diagrams and debating file systems. But this project reminded me that the most satisfying builds aren’t always about raw power. They’re about creativity and solving little problems in smart ways.

    So, What’s Special About This DIY Home Server Build?

    At first glance, the “ThinkLab” is a tidy, 6-bay server. The name is a nod to the classic, no-nonsense design of Lenovo’s ThinkPad laptops—matte black everything, with a few subtle red accents. It’s a look that says “I mean business,” and it’s a perfect aesthetic for a home server that just quietly does its job in a corner.

    But the real magic isn’t the case. It’s a small, separate module connected to the server: an ESP32 microcontroller with a tiny screen.

    This little device acts as a dedicated, external system monitor. Instead of having to log into the server’s operating system to check on temperatures, fan speeds, or system load, the builder can just glance at the screen. It’s a simple idea, but it’s brilliant. It turns the server from a mysterious black box into something that gives you immediate, useful feedback.

    The ESP32 Controller: Your Server’s New Best Friend

    If you’re not familiar, an ESP32 is a tiny, low-cost microcontroller with built-in Wi-Fi and Bluetooth. You can buy one for just a few dollars. They’re popular in the DIY electronics world for everything from weather stations to home automation sensors. You can learn more about them on the official Espressif Systems website.

    So why use one for your DIY home server build?

    • At-a-Glance Info: The most obvious benefit is having a persistent, low-power display showing you key stats. Is the server running hot? Are the fans spinning correctly? You know in a second, without touching a keyboard.
    • Independent Control: Because the ESP32 is a separate computer, it can run independently of your server’s main OS. This means you could program it to manage fan speeds based on its own temperature sensors. If your server’s OS ever crashes, the ESP32 could keep the fans running to prevent overheating or even send you an alert.
    • The “Wow” Factor: Let’s be honest—it’s just cool. It adds a layer of customization that you’d never get from an off-the-shelf NAS. It makes the machine truly yours.

    Thinking About Your Own DIY Home Server Build Upgrade?

    Seeing this project got my own gears turning. How could I add something similar to my setup? It turns out, it’s a pretty accessible project, even if you’re not a coding genius.

    The basic idea involves connecting a few components:
    1. An ESP32 Board: These are widely available and cheap.
    2. Sensors: You’d likely want a temperature sensor (like a DS18B20) to place near your hard drives or CPU heatsink.
    3. A Display: A small OLED or LCD screen to show the data.
    4. Software: You can program the ESP32 using the Arduino IDE, which is very beginner-friendly, or use platforms like ESPHome that integrate with home automation software.

    The server would send its data (CPU temp, load, etc.) over the local network or a USB serial connection to the ESP32. The ESP32 then takes that data and puts it on the display. It’s a simple, elegant solution.

    This is the kind of project that defines the home lab community. It’s not about spending a ton of money; it’s about being creative, learning a new skill, and building something that’s uniquely suited to your own needs. For more inspiration on projects like this, communities and sites like ServeTheHome are fantastic resources for seeing what others are building.

    So, if you’re sketching out your next DIY home server build, maybe think beyond just the specs. Think about how you interact with it. A small, thoughtful addition like an external monitor might just be the most satisfying part of the entire project. I know it’s going on my list.

  • Got a Weird Nook? 5 Awkward Alcove Ideas to Transform Your Space

    Got a Weird Nook? 5 Awkward Alcove Ideas to Transform Your Space

    Stop staring at that strange, empty corner. Here are five practical and stylish awkward alcove ideas to finally make it useful.

    You know that one weird spot in your house? The one you just don’t know what to do with? Maybe it’s a shallow recess in the hallway, an odd corner by the fireplace, or a leftover space from a past renovation. We all seem to have one. For years, I just let mine collect dust. But that strange little nook is actually an opportunity. With a little creativity, you can find some truly great awkward alcove ideas that not only solve a design problem but also add a ton of personality and function to your home.

    It’s tempting to just put a lonely plant there and call it a day, but I think we can do better. The key is to stop seeing it as a problem space and start seeing it as a bonus space—a blank canvas ready for a specific purpose. Let’s walk through a few ideas, from super simple to a little more involved.

    Creative and Practical Awkward Alcove Ideas

    The best solution for your nook depends on its size, location, and what you actually need. Do you need more storage? A quiet place to unwind? A spot to pour a drink? Think about what your home is missing, and that weird alcove might just be the answer.

    • The Classic Reading Nook: This is probably the most popular option for a reason—it’s cozy, inviting, and adds a touch of charm. If your alcove is deep enough, you can install a built-in bench with a comfy cushion and some pillows. If it’s on the smaller side, a single, comfortable armchair tucked inside works just as well. Add a small wall sconce or a slim floor lamp for light, and install a few floating shelves for books and a cup of tea. It instantly becomes the best seat in the house.

    • The Mini Home Office: In the age of remote work, finding a dedicated workspace can be tough, especially in a smaller home. An unused alcove can become the perfect micro-office. Find a narrow desk that fits the space, or even have a piece of wood cut to size for a floating desk. Use the vertical space above for shelving to hold supplies, papers, and maybe a small printer. It gives you a designated spot to focus that you can walk away from at the end of the day. For some great examples of how to maximize small office spaces, check out the home office section on a site like Crate & Barrel.

    More Ambitious Alcove Solutions

    If you’re up for a bit more of a project, you can integrate the alcove into your home’s architecture in a more permanent and impactful way.

    • Stylish Built-In Shelving: This is my personal favorite of all the awkward alcove ideas. Custom built-in shelving looks intentional, expensive, and solves all sorts of storage problems. You can use it as a mini-library for books, a display for art and collectibles, or even as a media unit for a small TV. While you can hire a carpenter, there are tons of DIY tutorials online that show you how to get a professional look. This Old House has a fantastic guide that breaks down the process. It’s a weekend project that adds permanent value to your home.
    • The Concealed Coffee or Cocktail Bar: Turn your alcove into a destination for drinks. For a coffee bar, add a small cabinet or countertop to hold your coffee maker, grinder, and mugs. For a cocktail bar, you can do the same but add a wine rack, glassware, and your favorite spirits. It feels like a little luxury and is amazing for when you have guests over. It keeps everything contained in one spot instead of cluttering your kitchen counters.

    • A Dedicated Pet Paradise: Don’t forget about your furry friends! An alcove, especially one near the main living area, can be the perfect spot for a pet station. Tuck a cozy dog or cat bed in there, with hooks on the wall for leashes and storage bins for toys. It gives them their own little den and keeps their stuff from being scattered all over the floor.

    So, take another look at that strange little space. It’s not an awkward problem—it’s a blank slate. Whether you turn it into a quiet reading corner or a stylish bar, giving it a purpose will make your whole room feel more complete and thoughtfully designed.

  • My First Home Lab: An Unfinished (But Awesome) Journey

    My First Home Lab: An Unfinished (But Awesome) Journey

    Diving into my first home lab setup, one piece at a time. It’s not finished, but it’s solving real problems, from photo backups to secure remote access.

    I’ve been a tech nerd for as long as I can remember, but I’ve always stayed on the consumer side of things. The idea of a home server felt like something for a big-shot IT pro, not me. But recently, I decided to dive in and build my first beginner home lab. It’s not finished, it’s not perfect, but it’s mine, and I wanted to share the journey.

    So why now? The main push was simple: I needed a better way to back up my stuff. My wife and I had years of photos scattered across our phones, and I wanted a central, private place to store them. Plus, I needed a reliable backup solution for our two laptops. Relying on a single cloud provider felt a little risky, and I loved the idea of having a local copy of everything that I control.

    My Beginner Home Lab Hardware

    I started by picking up a simple 12U enclosed server rack. It’s nothing fancy, just a 17-inch deep box with a cooling fan, but it gives everything a home. To make it easy to move around, I just sat the whole thing on a small furniture mover dolly. Genius, right?

    Here’s a look at the core components I’m starting with:

    • The “Servers”: I’m using three HP EliteDesk 800 G2 small form factor (SFF) PCs. You can find these refurbished for a great price, and they have enough power for what I need right now. They’re small, quiet, and sip power. I’ve only got one racked so far, but the other two are waiting in the wings.
    • The Storage: Inside the first HP EliteDesk, I have two 4TB IronWolf NAS hard drives set up in a mirror configuration (RAID 1). This means if one drive fails, the data is still safe on the other. A separate 256GB SSD runs the operating system to keep things speedy.
    • The Network: To get faster-than-gigabit speeds between my devices, I added an 8-port 2.5GbE unmanaged switch. My laptops connect to it using simple USB-C to Ethernet adapters, giving me a zippy connection to the server.
    • The Control: A simple USB 3.0 KVM switch lets me control both my laptop and the server using the same 32-inch curved monitor, keyboard, and mouse. It’s a small thing that makes managing everything so much easier.

    The Software: What’s Running This Beginner Home Lab?

    Hardware is only half the battle. The software is what really brings a home lab to life. I decided to go with TrueNAS SCALE as my server’s operating system. It’s incredibly powerful, based on Linux, and has great support for applications (their version of Docker containers).

    Here are the key apps I’m running so far:

    • Immich: This is my self-hosted Google Photos alternative. It automatically backs up and syncs photos from our phones to the server. It’s private, and I’m not paying a monthly fee to store my own memories.
    • Veeam Agent: I use the Veeam agent on our laptops to handle full system backups to the NAS. It’s robust, reliable, and gives me peace of mind.
    • Tailscale: This creates a secure network that lets me access my home lab from anywhere. It was surprisingly easy to set up and just works.
    • Draw.io: I host my own instance of this diagramming tool, which is useful for mapping out my network and future plans.

    Right now, my main backup strategy is local-first. Everything syncs to the NAS. From there, I have a script that backs up all the critical data to my Google One account. It’s a simple 3-2-1 backup strategy: 3 copies, 2 local (on the original device and the NAS), and 1 offsite (in the cloud).

    The Journey Is Just Beginning

    This setup is far from complete, and that’s the fun part. My next immediate step is to get the other two HP EliteDesk PCs online. I also have a 1U CyberPower UPS (uninterruptible power supply) to install, which will keep everything running safely during a power flicker.

    For my offsite backup, I’m strongly considering Backblaze B2. Their pricing is very reasonable, and it would give me a true, separate offsite copy of my most important files, completely independent of my Google account.

    Building this beginner home lab has been an awesome learning experience. It might look like a pile of parts to some, but to me, it’s a powerful tool that’s already solving real-world problems for my family. If you’ve been on the fence, I hope this shows you that you don’t need a perfect, finished rack to get started. Just jump in.

  • Is That Used Server Rack Worth It? A Guide for Your First Homelab

    Is That Used Server Rack Worth It? A Guide for Your First Homelab

    Before you haul a giant metal box into your house, let’s figure out if you actually need it.

    It’s a classic scenario for anyone getting into building their own tech setup at home. You’re scrolling through a marketplace or get a text from a friend: “Hey, my buddy is selling a server rack for cheap. You interested?” Suddenly, you’re faced with a decision you didn’t even know you had to make. Is it a good deal? Do you even need it? If you’re starting to build out a more serious setup, the question of a home lab server rack is bound to come up sooner or later.

    I found myself in this exact spot a while back. A friend of a friend was moving and offered me a 38U rack for $90. My mind immediately started racing. I could finally get my networking gear, my media server, and that old PC I planned to turn into a firewall all organized in one professional-looking place. But then, reality set in. A 38U rack is big. Like, really big. Before you jump on a seemingly great deal, let’s walk through how to decide if it’s a bargain or just a giant piece of metal that will end up collecting dust in your garage.

    So, What Exactly is a Home Lab Server Rack?

    First things first, let’s clarify what we’re talking about. A server rack is a standardized frame designed to hold various pieces of IT equipment, from servers and network switches to patch panels and power distribution units (PDUs). The “standardized” part is key. It means you can buy gear from different manufacturers and it will all fit perfectly.

    The height of these racks is measured in “Rack Units,” or “U.” One U is 1.75 inches. So when someone offers you a 38U rack, they’re talking about a cabinet that has about 66.5 inches of usable vertical space. The rack itself is usually over six feet tall. This is professional-grade stuff, the kind you see in data centers.

    The $90 Question: Is This Used Rack a Good Deal?

    Short answer: From a purely financial standpoint, yes, $90 for a 38U rack is an amazing deal. New racks of that size from brands like StarTech.com can easily cost anywhere from $400 to over $1,000, depending on the features like doors, side panels, and cooling fans.

    However, the price is only one part of the equation. The real question is about value. Is it valuable to you? A free piano is a terrible deal if you live in a studio apartment and don’t know how to play. The same logic applies here.

    Before You Buy: Key Questions for Your Home Lab Server Rack

    Instead of just looking at the price tag, ask yourself these crucial questions. Your answers will tell you if you should jump on that deal or politely pass.

    • Where in the world will I put this?
      A 38U rack isn’t something you can tuck away in a closet. It’s a significant piece of furniture. You need a spot with a solid floor (they get heavy when loaded), enough clearance in front and behind for access, and good ventilation. For most people, this means a basement or a garage. Get out a tape measure and map out the exact footprint before you commit.

    • Can I handle the noise and heat?
      Centralizing all your equipment means you’re also centralizing all the noise and heat it generates. Server fans are not quiet. They’re designed for performance, not peace. If your only available space is a corner of your home office, a full-size rack might quickly become an annoying roommate.

    • What am I actually putting in it?
      Be honest with yourself. Do you have rack-mountable gear right now, or plans to buy it soon? If your “homelab” is a Raspberry Pi, a Synology NAS, and your internet provider’s router, you absolutely do not need a rack. They can all sit happily on a shelf. But if you have or are planning to get rack-mount servers, switches, and patch panels, then a rack becomes essential for organization and airflow.

    • What about the “Partner Acceptance Factor”?
      This is a real thing. It’s the unofficial, but critical, metric of how happy your significant other, roommate, or family will be with your new hobby taking up a huge chunk of physical space. A six-foot-tall metal cabinet appearing in the house can be a tough negotiation.

    Smart Alternatives to a Giant Home Lab Server Rack

    If you’ve read this far and realized a 38U behemoth is overkill, don’t worry! You can still get your gear organized without turning your home into a mini data center.

    • Small Racks (6U to 12U): These are fantastic. You can get small racks that sit on a desk or even mount to a wall. They’re perfect for holding a switch, a patch panel, and maybe a small shelf for a modem or a mini-PC.
    • Shelving Units: A simple, sturdy metal or wood shelf can work wonders. It keeps things neat, provides good airflow, and costs a fraction of a dedicated rack.
    • The IKEA Lack Table: A legendary, budget-friendly option in the homelab community. The distance between the legs of the small Lack table is almost exactly 19 inches—the standard width of a rack. People often stack them to create a makeshift, open-air rack.

    Ultimately, building a homelab is a journey. For excellent examples and deep dives into all kinds of setups, from the simple to the complex, communities like ServeTheHome are an invaluable resource.

    So, should you buy that $90 rack? If you have the space, a clear need for it, and a plan for managing the logistics, then you’ve stumbled upon a fantastic deal that could serve you for years. But if you’re just starting out, your money and space might be better spent on the gear itself, letting it live on a simple shelf until your ambitions grow.

  • I Bought My Dream Firewall. It Was a Nightmare.

    I bought my dream firewall to future-proof my home network. It turned into a nightmare because of one line in the spec sheet.

    I was so excited. I was finally doing it—a complete, top-to-bottom upgrade of my home network. With a new 5Gbps fiber connection on the horizon, my old gear just wasn’t going to cut it. I spent weeks researching, planning, and trying to build something that would be “future-proof” for years to come. The centerpiece was a powerful new firewall, and I thought I’d found the perfect one. It was a costly lesson, but it all came down to a single, easily missed line in the tech specs about its PCIe lane configuration.

    It’s a story I’m sharing so you don’t have to live through it.

    The Hunt for a Future-Proof Firewall

    My goal was simple: get a box that could handle 5Gbps WAN and still have plenty of high-speed ports for my internal network. I stumbled upon a slick-looking mini-PC with a 13th Gen Core i7 processor. It looked like a beast. Best of all, it had options for multiple 10G SFP+ ports.

    At first, I figured two 10G ports were enough. But then the “future-proof” voice in my head chimed in. What if I add a 10G switch later? Or a NAS with a 10G connection? So, I decided to go all-in and get the version with four 10G SFP+ ports. It felt like the smart, responsible choice.

    The spec sheet seemed to back me up. It listed the network card as an “Intel X710-DA4 4*10G SFP+ module.” Perfect. It also mentioned the expansion slot:

    “1*PCle x8 expansion slot PCIE3.0x4 signal”

    I probably read that line five times. But my brain just skimmed over the last part. “PCIE3.0x4 signal.” What did that even mean? I saw “x8 expansion slot” and assumed everything was fine. After all, why would a company design and sell a product with a fancy 4-port card if it wasn’t designed to work?

    Unboxing Day: A Deceptive First Impression

    When the box arrived, I was thrilled. It was a solid piece of kit. The chassis was well-built, and the four SFP+ ports were neatly integrated into the back. I opened it up and saw the Intel X710 card sitting on a PCIe riser, all fitting together perfectly. It looked clean and professional.

    Then I tried to set it up.

    I installed my firewall OS, and the built-in 2.5G ethernet ports showed up immediately. No problem there. But the four SFP+ ports? They were nowhere to be found. Not in the BIOS, not in the operating system, not anywhere. It was like they didn’t exist.

    My heart sank. I spent the next few hours digging through forums and documentation, getting more and more confused.

    The Hard Truth About PCIe Lane Configuration

    That’s when I went back to the spec sheet and stared at that one confusing line again.

    “1*PCle x8 expansion slot PCIE3.0x4 signal”

    After some frantic searching, the horrible truth finally clicked. This spec means the motherboard has a physical x8 slot—the long plastic connector that an x8 card fits into perfectly. But it only has the electrical wiring for four PCIe lanes.

    So, what are PCIe lanes? Think of them as tiny data highways between a component (like a network card) and the CPU. A card designed for eight lanes (x8) needs all eight highways to function. The Intel X710-DA4 is a PCIe 3.0 x8 card. It physically fits in the slot, but when it tries to communicate, it finds that half of its data highways are dead ends. The card simply can’t initialize or be recognized by the system because it’s not getting the connection it requires.

    For a deeper dive into how this all works, sites like Gamers Nexus have excellent explainers that are worth a read. But the short version is: a physical slot and its electrical wiring are two different things, and this mismatch is a fatal design flaw.

    A Frustrating Lesson in Hardware Compatibility

    The company designed a case to fit four SFP+ ports. They built a mounting bracket for the Intel card. They sold it as a complete, working unit. Yet, it was physically impossible for it to ever work as advertised.

    I contacted the seller, explaining that the SFP+ module wasn’t being detected. Their reply was short and utterly unsatisfying:

    “Thank you for your patient feedback. We have contacted our engineers and found that the adapter board of this device is not recognized by the system.”

    That was it. No apology. No “we messed up.” No offer of a refund. Just a clinical confirmation that the thing they sold me doesn’t work.

    So, let my frustrating experience be a lesson for you. When you’re buying new hardware, especially for something as critical as your network, read every single character on the spec sheet. Understand what it means. The difference between a physical slot and its PCIe lane configuration can be the difference between a triumphant upgrade and a very expensive paperweight. Don’t assume a manufacturer has tested their own configurations—trust the specs, and if something looks weird, ask questions before you click “buy.”