Category: AI

  • Installing an HPE Rail Kit in Your Server Rack: A Simple Guide

    Installing an HPE Rail Kit in Your Server Rack: A Simple Guide

    Understanding the HPE Rail Kit 7462839-04 installation in mixed-use server racks

    If you’re like me, tackling hardware installation for the first time can feel a little overwhelming, especially when you’re dealing with something specific like the HPE rail kit installation for your server rack. Recently, I had to figure out how to fit the HPE Rail Kit 7462839-04 into a server rack that was being used both as a communications rack and for servers. I want to share some insights that might help you if you’re struggling with the same.

    What’s the HPE Rail Kit and Why Does Installation Matter?

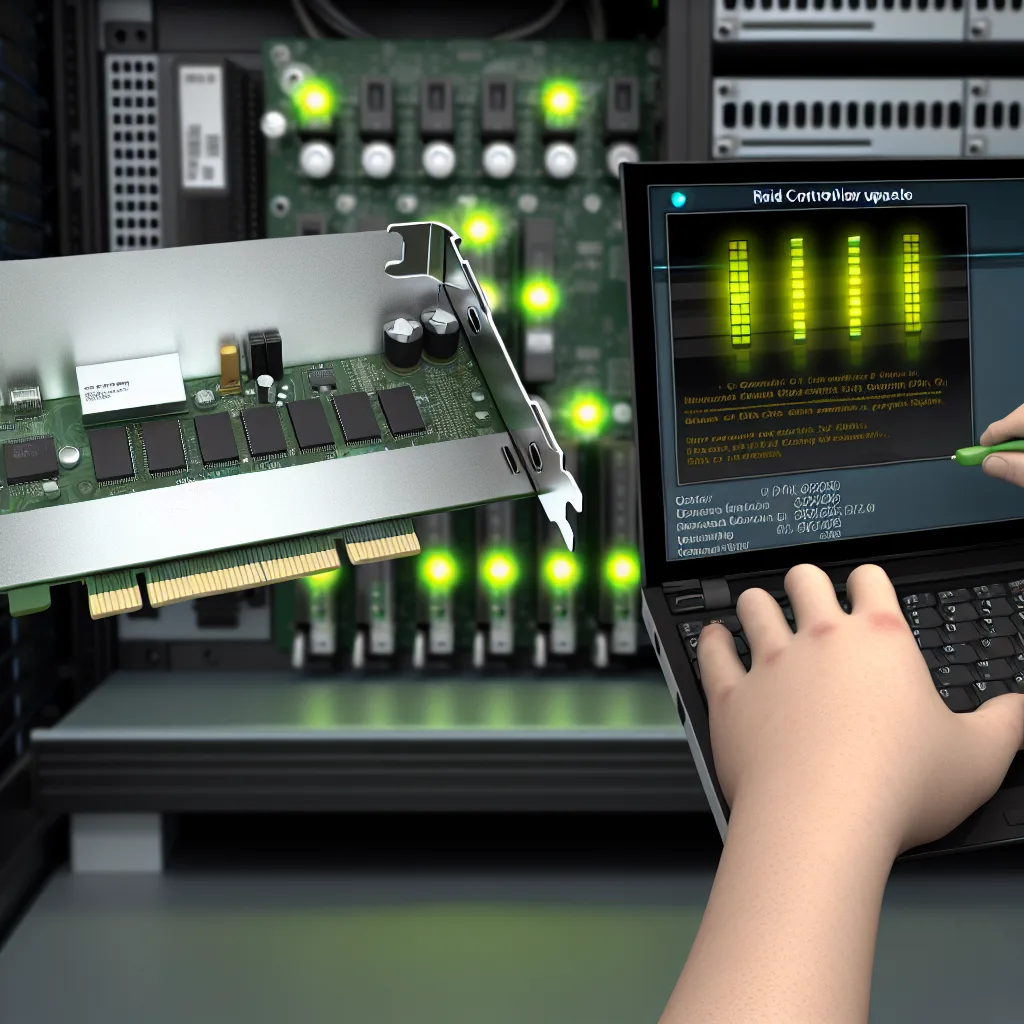
    The HPE Rail Kit 7462839-04 is designed to support specific storage arrays like the MSA60 within your server rack, ensuring they’re mounted securely and can slide in and out easily for maintenance. But not all server racks are created equal. Some racks might have unique features, like a metal sheet behind the front row of holes, which can cause confusion during installation.

    Facing the Metal Sheet Challenge

    One of the confusing parts during the installation was the metal sheet behind the front row of holes in the rack. It made me wonder if the rail kit was even compatible with that rack. Turns out, it’s not uncommon for some rail kits not to line up perfectly if the rack was originally designed for different purposes—like a mix between a communications rack and a server rack.

    If you have a similar rack, it’s a good idea to:
    – Double-check the specifications of your rack and the rail kit.
    – Look for any additional brackets or adjustments included with your kit or available separately.
    – Review any installation guides from HPE or resources online.

    Step-by-Step for Installing the HPE Rail Kit 7462839-04

    1. Inspect Your Rack: Identify if any obstructions like the metal panel exist and how they affect mounting holes.
    2. Match Rail Kit Parts: Confirm that all pieces from the kit match your specific server model and rack.
    3. Mount the Rails: Typically, the rail kit should attach to the vertical mounting rails in your server rack. Use screws provided and make sure the rails slide smoothly.
    4. Test Compatibility: Before securing the server fully, slide it in and out gently to make sure the rails work as expected.

    If you encounter unusual obstacles, reaching out to HPE support or checking forums dedicated to your hardware model can offer helpful advice. Sometimes you might need to improvise with additional hardware to ensure a secure fit.

    Tips for Success

    • Take clear photos during your installation process; they’ll come in handy if you need help.
    • Keep your screws and parts organized.
    • Don’t force anything. If something doesn’t fit, it might be the kit or rack isn’t 100% compatible.

    Helpful Resources

    For detailed product info and manuals, the official HPE website is your best friend: HPE Support. Also, you can learn more about server rack standards and fittings on sites like TechTarget’s Server Rack Guide or RackSolutions.

    Installing hardware like the HPE rail kit doesn’t have to be intimidating. With a bit of patience and these tips on hand, you’ll have your gear mounted reliably and ready to run without fuss. Remember, it’s all about understanding your equipment and not being shy to ask or look up help when you hit a snag.

  • Best Hosting for Laravel Projects + Affordable Domain Tips

    Best Hosting for Laravel Projects + Affordable Domain Tips

    Your friendly guide to finding reliable Laravel hosting and budget-friendly domains

    If you’re diving into deploying your Laravel project for the first time, you’re probably wondering where to host it and how to snag a domain without breaking the bank. Choosing the right Laravel hosting and affordable domain registrar can feel overwhelming, but I’m here to walk you through some straightforward, beginner-friendly options that won’t make your wallet cry.

    Why Laravel Hosting Matters

    When you’re working with Laravel, it’s important to pick a hosting provider that supports the necessary PHP version, has good performance, and offers a hassle-free deployment process. Laravel hosting isn’t just about finding any web host—it’s about finding one that fits your framework’s requirements and makes your life easier.

    Reliable Laravel Hosting Providers

    Here are some solid options I’ve found great for Laravel projects, especially if you’re new to deployment:

    • Shared Hosting Providers:
      • SiteGround: Known for great customer support, lets you run Laravel smoothly with SSH access.
      • A2 Hosting: Offers Laravel-ready servers, good speed, and is affordable.
    • Cloud Hosting & VPS:
      • DigitalOcean: Perfect if you want to control your environment and don’t mind a slight learning curve. They offer Laravel-specific tutorials.
      • Linode: Similar to DigitalOcean with competitive pricing and solid performance.
      • Amazon Lightsail: Easier to manage than full AWS; good for small to medium Laravel apps.
    • PaaS (Platform as a Service):
      • Laravel Forge: Not a host itself, but it automates deployment on providers like DigitalOcean. It’s great once you’re comfortable managing servers.
      • Heroku: Handy for quick app deployment and scaling, but can be pricier as you grow.

    If you prefer a super simple set up, shared hosting is a good start. If you want more control and scalability, cloud hosting or PaaS options are better.

    Affordable Domain Registrars

    Now, for domains, snagging a website address that’s both memorable and affordable is key. Here are some budget-friendly places I recommend:

    • Namecheap: Great prices, free WHOIS privacy protection on most domains.
    • Google Domains: Slightly pricier but super reliable, easy integration with Google services.
    • Dynadot: Competitive pricing and simple domain management interface.

    A quick tip: Be cautious about extremely cheap deals that might come with hidden fees or poor support.

    A Quick Deployment Starter Tip

    If you’re new to deployment, it’s worth starting with providers that offer clear documentation or community support for Laravel. For example, DigitalOcean has a fantastic Laravel deployment tutorial (DigitalOcean Laravel Tutorial) which can guide you step-by-step.

    Wrapping Up

    Choosing the right Laravel hosting and kind domain registrar doesn’t have to be stressful. Think about your project size, budget, and how much control you want over the hosting environment. Starting with shared hosting and a reputable domain registrar like Namecheap can get you up and running quickly on your Laravel project.

    Remember, your hosting can grow with your app. So don’t worry too much about having the “perfect” setup right away. The important part is to get your app live and learn as you go. Happy deploying!

    For more on Laravel hosting requirements, check out the official Laravel documentation Laravel Docs. Also, bookmarking web hosting review sites like HostingAdvice can help you keep up with the best current options.

  • Saying Goodbye to My Trusted HyperV Server: A Lesson in Resilience

    Saying Goodbye to My Trusted HyperV Server: A Lesson in Resilience

    Coping with hardware failure and what to do when your home server goes offline

    If you’ve ever run a home server, you know there’s a special connection to the hardware that quietly keeps everything humming in the background. Recently, I faced that sinking feeling when my home server failure caught me off guard — my trusty HyperV server, a Dell r730xd, simply refused to boot. Seeing that system board failure and CPU voltage error message was like watching a close friend take an unexpected nap.

    This server wasn’t just any machine; it was a powerhouse crammed with 24 2TB SSDs, my digital vault and workhorse for the past four years. It’s funny how we get attached to tech objects that quietly shoulder so much of our digital life, isn’t it?

    What Does Home Server Failure Really Mean?

    Home server failure can come unexpectedly and usually signals a hardware fault that stops your system from booting or functioning correctly. In my case, the system board and CPU voltage errors pointed right at critical hardware malfunctions. These are serious issues, often requiring parts replacement or even a full system overhaul.

    But don’t panic. If it happens to you, here’s what you should remember:

    • Diagnose carefully: Error messages can guide you to the exact piece that’s failed. Here, it was the system board.
    • Backup is your best friend: Regular backups save you from messes when failures occur.
    • Parts replacement: Sometimes, like me, you might need to replace key components like the motherboard to bring your server back to life.

    The Emotional Side of Home Server Failure

    When your server goes down, it’s not just data that’s inaccessible — it’s your peace of mind. I couldn’t access or transfer my virtual machines (VMs) during the downtime, which was a major headache. It’s a stark reminder to keep your data safely backed up somewhere else and not rely on one machine alone.

    Bringing Your Server Back From the Ashes

    Replacing the motherboard is costly and a bit nerve-racking, but it can be done. I’m hopeful this repair will bring my beloved server back. If you’re in the same boat, here are pointers:

    • Use manufacturer resources: Dell’s official support site is a good place to start (Dell Support).
    • Community forums and tech sites like Tom’s Hardware can offer advice and troubleshooting tips.
    • Keep detailed notes when troubleshooting to track what works and what doesn’t, especially with complex setups like HyperV.

    What to Do While Your Server is Offline

    Besides waiting for parts, try to access essential files via backups or cloud storage. Don’t leave things to chance. Consider setting up a secondary backup system or even a temporary cloud solution to keep critical data available.

    Home server failure sucks, no sugarcoating it. But it also teaches you about resilience, planning, and respect for that silent guardian behind your digital world.

    If you’re running a home server, maybe take a minute to appreciate it and double-check your backups — you never know when you might need them.


    For more on home server maintenance and troubleshooting, check out Microsoft’s official documentation on HyperV (Microsoft Docs Hyper-V) and community insights on server hardware management.

    Remember, hardware can fail, but being prepared helps you bounce back quickly and safely.

  • Upgrading Your Home Network: A Friendly Guide to 10G Setup

    How to future-proof your home lab with 10G upgrades and keep your internet speeds flowing

    If you’ve been enjoying fast internet at home but found yourself stuck at 1 Gbps speeds, even though your internet plan promises more, you might be looking into upgrading to a 10G home network. Let me walk you through what I’ve learned about stepping up your game from a gigabit setup to something future-proof that can handle 10 gigs per second and beyond.

    Why Upgrade to a 10G Home Network?

    When I first moved into my house about five years ago, the wiring was set up for Cat6 Ethernet, and the home lab in the basement closet was great for 1 Gbps speeds. However, with internet providers now offering plans with speeds like 3 Gbps, that 1 Gbps limitation means you’re actually not experiencing your internet’s full potential anywhere in your home.

    Upgrading to a 10G home network allows you to tap into faster speeds, but it’s not just about internet — it’s also about local data transfers. If you’re like me and work with large files, or have multiple users streaming or gaming, the jump to 10G gear can really smooth things out.

    Choosing the Right Equipment for Your 10G Home Network

    Most of the current setups are backward compatible, meaning the 10G equipment will also work with 2.5G and 5G speeds. This flexibility is great because it means you don’t have to overhaul everything at once.

    Should You Use SFP?

    SFP, or Small Form-factor Pluggable, modules are often recommended for 10G setups, but they might not always be the best fit for every home. Usually, SFP ports are found on more enterprise-grade switches and require specific transceivers and cabling.

    If your use case doesn’t involve fiber optics or complicated enterprise networking, sticking with 10GBase-T ports (the usual RJ45 ethernet ports but for 10G speeds) might be easier and more cost-effective.

    Recommended Hardware Types

    • 10G Ethernet Switches: Look for managed switches with ports that support 10G and also 2.5G/5G for backward compatibility.
    • Network Interface Cards (NICs): For your PC or server, a 10G NIC ensures your device can talk at 10G speeds.
    • Cat6a or Cat7 Cabling: Although Cat6 is decent, Cat6a or Cat7 cables are better for stable 10G connections over longer distances.

    Installing and Managing Your New Setup

    Stepping into managed hardware can feel a little intimidating if you’ve only used plug-and-play gear. Managed switches give you control over traffic, security, and quality of service but require some configuration.

    Start simple: most manufacturers provide user-friendly web interfaces and manuals. It helps to watch tutorial videos or read setup guides online to get a grasp on VLANs, QoS settings, and link aggregation if you need it.

    Helpful Resources:
    – Check out Ubiquiti’s guide to managed switches if you like the idea of easy-to-use, managed networking gear.
    – For a solid foundation in understanding 10G network hardware options, TechTarget’s overview on 10G Ethernet is a great read.

    Final Thoughts

    Upgrading to a 10G home network isn’t just about speed for today; it’s about future-proofing your setup. With the right gear and a little bit of patience learning managed devices, you can enjoy faster, smoother connections that keep up with your internet plan and all your devices.

    Feel free to reach out or comment if you want specific gear recommendations or help troubleshooting your setup. Happy upgrading!

  • Setting Up My All-in-One Homelab: What I Learned and What Matters Most

    Setting Up My All-in-One Homelab: What I Learned and What Matters Most

    Planning and optimizing a one-server homelab setup for media, virtualization, and smart home needs

    If you’re thinking about creating a one-server homelab, I’m right there with you, parked at the starting line with a plan and a lot of questions. After running homelabs for a few years, I’m finally moving mine into a dedicated technical room, and the setup I’m planning aims to pack a lot into a single server box.

    Why the focus on a one-server homelab? It’s about efficiency and simplicity—having everything from media streaming to IoT control and virtualization all in one neat package. But pulling that off takes a bit of thought. Here’s a breakdown of my setup, my goals, and some tips I picked up along the way.

    My One-Server Homelab Setup

    Here’s what I’m starting with hardware-wise:
    CPU: AMD Ryzen 9 5900X with 12 cores — solid multi-tasking power.
    RAM: 2 × 16 GB DDR4 at 3000 MHz — enough to handle multiple virtual machines.
    Boot/OS Drives: 2 × 1 TB M.2 NVMe in ZFS RAID 1 — fast and fault-tolerant.
    Storage: 4 × 14 TB HDDs, 7200 RPM, in ZFS RAID 10 — plenty of space with redundancy.
    GPU: Intel Arc A310 4 GB dedicated for Jellyfin media streaming.

    As part of the house renovation, I opted to lay CAT 7 cables for my TVs and IP cameras. Might be overkill for cameras, but I wanted the extra bandwidth and shielding.

    Goals for the One-Server Homelab

    What I want from this all-in-one server:
    – Run Jellyfin as a media server to stream 4K content smoothly to at least three users at once.
    – Host a reliable IP camera recording system that’s always on.
    – Virtualize everything — virtual machines and containers — so I can experiment with different services without clutter.
    – Self-managed services for smart home IoT stuff, using PoE dongles that support modern Thread/Matter standards.
    – And, crucially, add a UPS that keeps the whole system running for at least an hour for graceful shutdowns during power outages.

    What Should You Know When Building a One-Server Homelab?

    If you’re considering a similar setup, here are some things I learned planning mine:

    1. Hardware Balance Matters

    You want power, but also balance. For example, the Ryzen 9 CPU handles multitasking well, but don’t skimp on enough RAM if you plan to virtualize many services simultaneously. Storage configured with ZFS RAID adds both speed and protection—great for data integrity.

    2. Network Infrastructure Isn’t Just About Speed

    Running CAT 7 cables gave me future-proofing with better shielding and bandwidth headroom. Even if your devices don’t need that level, it helps with reliability and less interference — especially important for 24/7 IP cameras.

    3. UPS is Your Insurance Policy

    A UPS isn’t optional if you care about data and uptime. Even an hour of backup power can save your server and data during those unexpected outages. Check out APC UPS for reliable options.

    4. Virtualization Flexibility

    With chances to run VMs and containers, using something like Proxmox or VMware ESXi makes juggling services easier. It also keeps your media server and smart home services separated but on the same hardware.

    5. Don’t Overlook Cooling and Power

    A server running all day needs good cooling. Plan for adequate airflow and maybe quiet fans if noise is a concern. Also, make sure your power supply is efficient enough for the load and UPS.

    Helpful Resources

    For those diving into similar homelab ventures, here are a few good references:
    AMD Ryzen 5000 Series CPUs
    ZFS on Linux — for setting up storage with redundancy.
    Jellyfin Media Server — open source media streaming with 4K support.

    Final Thoughts on My One-Server Homelab

    Building a functional one-server homelab is about getting the right components, solid network setup, and planning for power reliability. It’s a satisfying challenge that can give you a powerful hub for media, smart devices, and learning all in one box. Whether you’re starting your own setup or just curious, keeping these basics in mind will save you headaches down the road.

    Feel free to share your thoughts or ask questions if you’re thinking about building something similar. It’s fun to tweak and improve along the way — just don’t forget the UPS!

  • How I Soft-Bricked My Fujitsu RAID Controller and What I Learned

    How I Soft-Bricked My Fujitsu RAID Controller and What I Learned

    Dealing with the “No Valid NVDATA Image” error on a Fujitsu PRAID EP400i (LSI3108)

    If you ever find yourself staring at a RAID controller that suddenly refuses to show your drives, you’re not alone. I recently ran into a frustrating issue while trying to switch my Fujitsu PRAID EP400i (based on the LSI3108 chipset) from RAID mode to JBOD mode, hoping to use ZFS with my drives. Instead, I ended up soft-bricking the controller with the dreaded “no valid NVDATA image” error.

    What Happened?

    My setup involved a Fujitsu PRIMERGY RX2540 M2 server and a PRAID EP400i controller. Everything was humming along fine with a RAID6 configuration until I decided to switch the controller’s personality mode to JBOD. That’s when trouble started. After rebooting, my server greeted me with the message:

    “Firmware did not find valid NVDATA image. Please program valid NVDATA image and restart your system.”

    The drives stopped showing up entirely, and although the controller wasn’t totally dead—it let me into the MegaRAID BIOS Config Utility (MRBCU) and the StorCLI preboot CLI—none of the drives or virtual disks appeared.

    Understanding the “No Valid NVDATA Image” Error

    NVDATA (Non-Volatile Data) is crucial for your RAID controller’s operation—it stores configuration and state information. Without a valid NVDATA image, the controller can’t properly identify or manage your drives. This became a blocker for me.

    What I Tried to Fix It

    1. Factory Resets and Resets: I dumped MRBCU’s factory defaults and also tried StorCLI commands like /c0 set factory defaults, flasherase, flushcache, restart, and even deleting NVRAM. None brought back the drives.

    2. Firmware Flashing: Using Ubuntu Live USB and StorCLI, I flashed both official Fujitsu firmware versions available — 24.21.0-0151 and 24.21.0-0076. The firmware updated successfully, but no luck with the drives.

    3. Megarec Tool: I tried Megarec on FreeDOS to detect the controller, but it couldn’t find it at all.

    The Current State

    • I can access the MRBCU and StorCLI tools.
    • MRBCU shows “Unknown” under VD Management and no drives under PD Management.
    • Controller status reported as “Optimal” in StorCLI, but Cachevault and Battery Backup Unit (BBU) info is missing even though BBU hardware is present.
    • Changing controller properties leads to operation errors.

    What If You Need to Force HBA / IT Mode?

    Flashing the controller into IT mode (which forces it to behave as a Host Bus Adapter) is often suggested when RAID functions won’t come back. It’s a way to bypass RAID management and let the controller behave like a simple drive interface.

    However, doing this requires careful handling of firmware and utilities specific to your LSI3108-based card. This step isn’t for the faint of heart, but if your priority is just to get your drives recognized rather than RAID functionality, it’s worth considering.

    Lessons Learned and Tips

    • Always back up your controller’s configuration if possible before changing modes.
    • Be cautious switching controller personalities—especially with older or less common hardware.
    • Keep records of original firmware versions; sometimes older versions aren’t easily found but might be necessary.
    • Check official firmware and utility tools from Fujitsu and Broadcom (who own LSI tech).

    Helpful Resources

    Final Thoughts

    Dealing with RAID controller issues like the “no valid NVDATA image” error can be maddening, but don’t lose hope. Having access to utilities like MRBCU and StorCLI helps a lot. If you’re stuck, reaching out to community forums or tech support can provide new insights.

    If you’re comfortable experimenting, flashing to IT mode might be your last resort to breathe life back into the card—especially when data recovery isn’t a concern.

    If this has happened to you or you’re exploring similar upgrades, hopefully, my experience helps you avoid the same pitfalls or guides you back if you’re caught in the same spot. Hardware quirks can be tough, but persistence and a bit of digging can pay off.

    Good luck, and here’s to hoping your RAID controller troubles stay in the past!

  • Quieting Your Netgear GS728TP: What to Do About That Fan Noise

    Quieting Your Netgear GS728TP: What to Do About That Fan Noise

    Understanding fan noise on your Netgear GS728TP and simple tips to manage it effectively

    If you’ve ever owned a Netgear GS728TP switch, you might have noticed a somewhat annoying ticking noise coming from its fans. The “Netgear GS728TP fan noise” can be distracting in a quiet home office or a small workspace. I recently spent some time figuring out why my switch fans were making this sound and what I could do about it — so I thought I’d share what I found with you.

    What’s Up with the Netgear GS728TP Fan Noise?

    The GS728TP comes with built-in fans designed to keep the switch cool, especially when many devices are plugged in or under heavy power over Ethernet (PoE) load. However, even with only a few devices connected—and none drawing PoE power—the fans might tick and make odd noises. This ticking is usually due to the fan blades hitting a tiny imbalance or some internal mechanical noise as the fans spin up.

    Is It Safe to Disconnect or Disable the Fans?

    One question that popped up is whether it’s okay to unplug the fans when you’re not using PoE devices or have just a few devices plugged in. The short answer: It depends.

    In my experience, after disconnecting the fans, the switch didn’t feel hot at all during light use. Disabling PoE on all ports definitely helps reduce the switch’s heat output, making the fans less critical when there’s little load. However, manufacturers like Netgear don’t recommend running the switch without fans as it can risk overheating if the load suddenly increases.

    Here’s a good practice:

    • Keep an eye on the device temperature. If it’s cool, temporary fan disconnect might be okay.
    • When you plan to connect more devices or enable PoE, plug the fans back in.
    • Consider monitoring network device temps remotely if your switch supports it.

    Replacing Fans with Quieter Options

    If the ticking noise really bothers you, replacing the original fans with quieter ones can be worthwhile. Many users have successfully swapped their GS728TP fans with low-noise or high-quality silent fans. Just be sure to confirm the fan size and specifications match your switch’s requirements. This helps maintain proper cooling without the irritating ticks.

    For specifics on fan replacement, check the official Netgear support site or related community forums where folks share their mods.

    Additional Tips for Reducing Fan Noise

    • Place the switch on a soft surface or use anti-vibration pads to dampen sound.
    • Keep the switch in a cool, well-ventilated area to reduce fan speed need.
    • Regularly clean the fans to prevent dust buildup causing extra noise.

    Learning More About Your Switch

    Understanding your Netgear GS728TP’s airflow and cooling system can help you maintain a quieter setup without compromising safety. For deeper insights about switch cooling design and best practices, visiting a trusted tech resource like How-To Geek or reading manufacturer documentation is a great idea.

    Final Thoughts

    The Netgear GS728TP fan noise issue is usually not a serious problem, but it can be annoying. Temporarily unplugging the fans is okay with light device usage and no PoE load, but always watch the device temperature and be ready to reconnect the fans when needed. If the ticking drives you nuts, replacing the fans with quieter models is a practical solution.

    I hope this helps you enjoy a quieter network setup without overheating worries!


    References:
    Netgear Support
    How-To Geek Networking Tips

    Feel free to ask if you want more tips on managing tech noise or network gear!

  • Setting Up Your Home Server: What You Need to Know

    Setting Up Your Home Server: What You Need to Know

    A friendly guide to home server setup basics and considerations

    If you’ve ever thought about diving into tech a bit deeper, you might have come across the idea of a home server setup. It’s one of those projects that sound complicated but can actually be a really useful addition to your home tech ecosystem. Whether it’s for keeping your files organized, running media servers, or even hosting your own website, setting up a home server can be both fun and practical.

    What Exactly Is a Home Server Setup?

    In simple terms, a home server setup is a dedicated computer or device that stores and manages data and services for multiple devices connected via your home network. Think of it as your personal cloud that lives right in your house. Instead of relying on external services to store your photos, stream your media, or back up your important files, you manage everything on your own turf.

    Why Consider a Home Server Setup?

    There are quite a few reasons why setting up a home server could be a good move:

    • Privacy and Control: You’re not handing your data over to third parties.
    • Customization: Tailor your server exactly to your needs.
    • Learning Opportunity: Great for anyone interested in networking and IT.
    • Cost-Effective: Over time, it might save costs compared to subscription services.

    For many, the first question is about the hardware needed, but don’t worry, you don’t need to build a supercomputer. Even older PCs or a Raspberry Pi can be started with, depending on your needs. For advice and ideas about hardware, checking the official Raspberry Pi website is a good place to start.

    Essential Considerations Before Setting Up Your Home Server

    There are a few things I think you should keep in mind before jumping in:

    • Purpose: Define what you’ll use the server for and how much performance it needs.
    • Storage: Estimate your storage needs, including future growth. SSDs and HDDs have different pros and cons.
    • Network: A good, stable internet connection and reliable router make a big difference.
    • Power Consumption: Running a server 24/7 will add to your electric bill.
    • Security: This is crucial. Servers expose your data and services and need proper firewalls and updates.

    Setting Up and Maintaining Your Home Server Setup

    Once you’ve planned out your goals and picked hardware, it’s time to get everything running. Popular home server operating systems like FreeNAS or Ubuntu Server provide friendly ways to guide you through setup and maintenance.

    Don’t be surprised if you run into issues at first — networks and servers have their quirks. It’s part of the learning.

    A few quick maintenance tips:

    • Regularly back up your data.
    • Keep your software up to date.
    • Monitor your network for unusual activity.

    Final Thoughts on Home Server Setup

    Setting up a home server isn’t just for tech pros. With a bit of curiosity and patience, it can be a rewarding project. It gives you a chance to take control of your data and learn more about how your digital world works. And who knows? It might just inspire you to explore even more in the world of personal tech.

    If you decide to take the plunge, there’s a wealth of community forums and tutorials out there to help you along. Just remember, a home server setup is a journey more than a one-time project — enjoy the process and the benefits that come with it!

  • Setting Up My First Mini Lab: A Beginner’s Journey

    Setting Up My First Mini Lab: A Beginner’s Journey

    Discover the joys and lessons of building a beginner home lab from scratch

    If you’ve ever thought about diving into the world of tech projects or just wanted a playground to try out new software, setting up a beginner home lab is a fantastic way to start. I recently took the plunge and built my first mini lab, and I want to share the experience with you — what I learned, why it’s worth the effort, and how you can do it too.

    What is a Beginner Home Lab?

    A beginner home lab is essentially a small, personal environment where you can experiment with software, servers, networking, and more without any risk to your everyday devices. Think of it as your own tech sandbox. Mine started with the goal to learn hands-on, and it truly turned into a rewarding experience.

    Why Build a Beginner Home Lab?

    The biggest draw for me was curiosity and the need to learn. With a beginner home lab, you can try out different setups, run virtual machines, and practice skills like network configuration and server management. It’s a safe space to make mistakes and grow.

    Getting Started: My Setup

    I wanted something compact but capable. I picked up some affordable, second-hand hardware—a small desktop and a couple of hard drives were all it took. For the software, I started with free and open-source tools like Proxmox for virtualization and Ubuntu Server for the operating system. Both have great support communities which made the learning curve smoother.

    Tips for Your Beginner Home Lab

    • Start small: Don’t overbuy. Begin with just one machine or even a virtual environment.
    • Plan your goals: Knowing what you want to learn (e.g., networking, storage, or Linux skills) helps guide your setup.
    • Use open-source: Free tools are perfect for beginners and widely supported.
    • Document your work: Keeping notes on your setup and experiments makes troubleshooting easier.

    Overcoming Challenges

    Like any new project, there were hiccups. Network misconfigurations and software bugs tested my patience. But each challenge was a lesson that improved my understanding and skills.

    Where to Learn More

    If you’re curious to explore more, websites like Tom’s Hardware and How-To Geek offer great tutorials. Also, the Proxmox community is friendly and helpful.

    Final Thoughts

    Building a beginner home lab was surprisingly fulfilling. It’s not about having the most expensive gear but about experimenting and learning in a low-pressure environment. Whether you’re a hobbyist or looking to upskill, a beginner home lab can be a smart and enjoyable project.

    So, what are you waiting for? Grab some parts, fire up your first virtual machine, and start exploring!

  • When Lightning Strikes: How to Handle a Fried WAP and Switch

    When Lightning Strikes: How to Handle a Fried WAP and Switch

    Learn what to do if your Power Over Ethernet devices go silent after a storm

    Lightning storms can be beautiful but also terribly destructive, especially when your home network gear gets caught in the crossfire. Recently, my house was struck by lightning, and it seemed to have fried my WAP (Wireless Access Point) and switch. If you’re dealing with a similar chaos of silent devices, here’s a straightforward take on what I went through and some tips on what you can do.

    What Happened to My Fried WAP and Switch?

    My WAP is powered by PoE (Power Over Ethernet), meaning it got its electricity right through the network cable connected to the switch. After the strike, my WAP wouldn’t power on at all. I tried swapping cables and ports on the switch without any luck. Plugging the WAP directly into the router also didn’t help—it just wouldn’t power on.

    On top of that, the switch itself showed no signs of life. No lights at the RJ45 ports, even after switching power cables and outlets. I carefully inspected all the cables for damage or burn marks, but visually everything looked fine. Despite this, it was clear something fried inside.

    Signs That Your WAP and Switch Might Be Fried

    • No power lights on the switch or WAP.
    • Tried multiple cables and ports with no success.
    • No visible damage on cables, but devices still don’t work.

    This usually means the internal circuits of your WAP and switch got damaged from the lightning’s power surge. PoE devices can be particularly vulnerable since power comes through the network cable.

    What to Do Next?

    1. Don’t just assume cables are fine – Even if cables don’t show damage, they could still be compromised. Try using known-good cables.

    2. Test devices individually – Try powering your switch and WAP from different power sources and ports.

    3. Consider surge protectors or UPS – To prevent future damage, use surge protectors or uninterruptible power supplies, especially for sensitive networking gear.

    4. Consult the manufacturer — Check the official support pages for your specific WAP and switch. Some manufacturers detail how to run diagnostics or repair options. For example, Cisco’s support site or Ubiquiti’s help center can offer precise guidance.

    5. Know when to replace — Sadly, internal damage from lightning often means it’s time to replace your devices. Attempting to fix them without the right skills can be risky.

    Lightning and Network Devices: What You Should Know

    Lightning causes massive voltage surges that can fry electronics instantly. Network gear, especially PoE devices, are susceptible because power and data share a line. Without proper protection, damage can be extensive.

    For more on lightning protection, the National Weather Service offers excellent safety tips and technical info about surge protection.

    Wrapping It Up

    Dealing with a fried WAP and switch after a lightning strike is frustrating but, unfortunately, not uncommon. Test everything carefully, use good cables, and don’t hesitate to reach out to manufacturer support. And to save yourself from heartbreak in the future, invest in proper surge protection for your home network.

    If you want to dig deeper into PoE and network device troubleshooting, this guide from Network World has some great insights.

    Remember, technology can fail, but a little preparedness and know-how can save you time and stress. Stay safe and keep those devices protected!