Category: AI

  • Is SSH Tunneling Enough? A Simple Take on Securing Your HomeLab

    Is SSH Tunneling Enough? A Simple Take on Securing Your HomeLab

    Why sticking to SSH tunneling might be the security sweet spot for your HomeLab setup

    Setting up a home lab can feel a bit overwhelming, especially when it comes to security. If you’ve been wondering about home lab security and how to keep things simple without opening too many doors to the internet, you’re in good company. Today, I want to share some thoughts on why using SSH tunneling to access your home lab might be enough — without diving into complex reverse proxies and DNS configurations.

    Why Focus on Home Lab Security?

    Your home lab is your personal tech playground, but it’s also a potential target if you leave it wide open. The primary concern is preventing unauthorized access while still being able to connect remotely when you need to. A lot of people get caught up in fancy setups, but sometimes simplicity wins.

    The Basics of SSH Tunneling for Home Lab Security

    One straightforward method is to keep your public IP address limited in what it exposes. Rather than opening several ports to the internet, why not open only SSH? From there, you tunnel the ports you need through that single secure SSH connection.

    This approach has some perks:

    • Strong passwords and brute-force protection: A strong password combined with a tool or script that blocks IP addresses after a few failed attempts (in this case, just two tries and a 30-minute block) is a solid first line of defense.
    • Fewer open ports: Reducing the number of visible open ports decreases the attack surface, which means fewer opportunities for attackers to find a vulnerability.
    • No need for complicated reverse proxies or DNS configurations: This means less setup time and fewer things that could go wrong during setup.

    If you configure your SSH properly, it can be a tremendously secure way to access your home lab remotely without the hassle of additional services. For those wanting to dive deeper, the official SSH documentation is a great place to start.

    Are There Downsides to This Setup?

    Sure, it’s not perfect. Here are a couple of things to watch out for:

    • SSH brute-force attacks are common: So your brute-force blocking setup is vital. Make sure your blocking tool or firewall rules are reliable and test them occasionally.
    • Strong authentication methods help: Beyond strong passwords, consider using SSH key pairs for authentication, which are much more secure and convenient.
    • Monitoring is key: Keep an eye on your logs for any suspicious activity. Tools like Fail2Ban can automate blocking offenders.

    When Should You Consider More Complex Solutions?

    If you start running multiple services that need public access, or you require web interfaces and want them accessible via nice URLs, then a reverse proxy and DNS setup might be worth the effort. Services like Nginx or Traefik can help manage traffic securely and cleanly.

    But if your main goal is remote access for a small number of services, tunneling through SSH remains a clean and effective method.

    My Takeaway on Home Lab Security

    I often find that many newcomers to home labs stress about security and overcomplicate things, which can slow down learning and experimentation. Starting with a secure SSH tunnel approach balances accessibility with solid protection.

    Just remember to:

    • Use strong, unique passwords or SSH key authentication.
    • Employ brute-force protections to lock out repeated offenders.
    • Regularly review your server logs and tweak your firewall rules.

    If you cover those basics, your home lab security is in a good place without needing to dive into more complex network setups right away.


    If you want to learn more about securing your home lab efficiently, the Home Lab Security Guide is a helpful resource. And for a deep dive into SSH and tunneling, check the Linuxize SSH Tunneling tutorial.

    Final Thought

    In the end, it’s about what makes you feel confident and works for your setup. Keep it simple, stay safe, and enjoy tinkering with your home lab!

  • Mastering Ethernet Crimping: Tips and Tricks That Actually Help

    Mastering Ethernet Crimping: Tips and Tricks That Actually Help

    Ethernet crimping made simple with practical advice and fewer frustrations

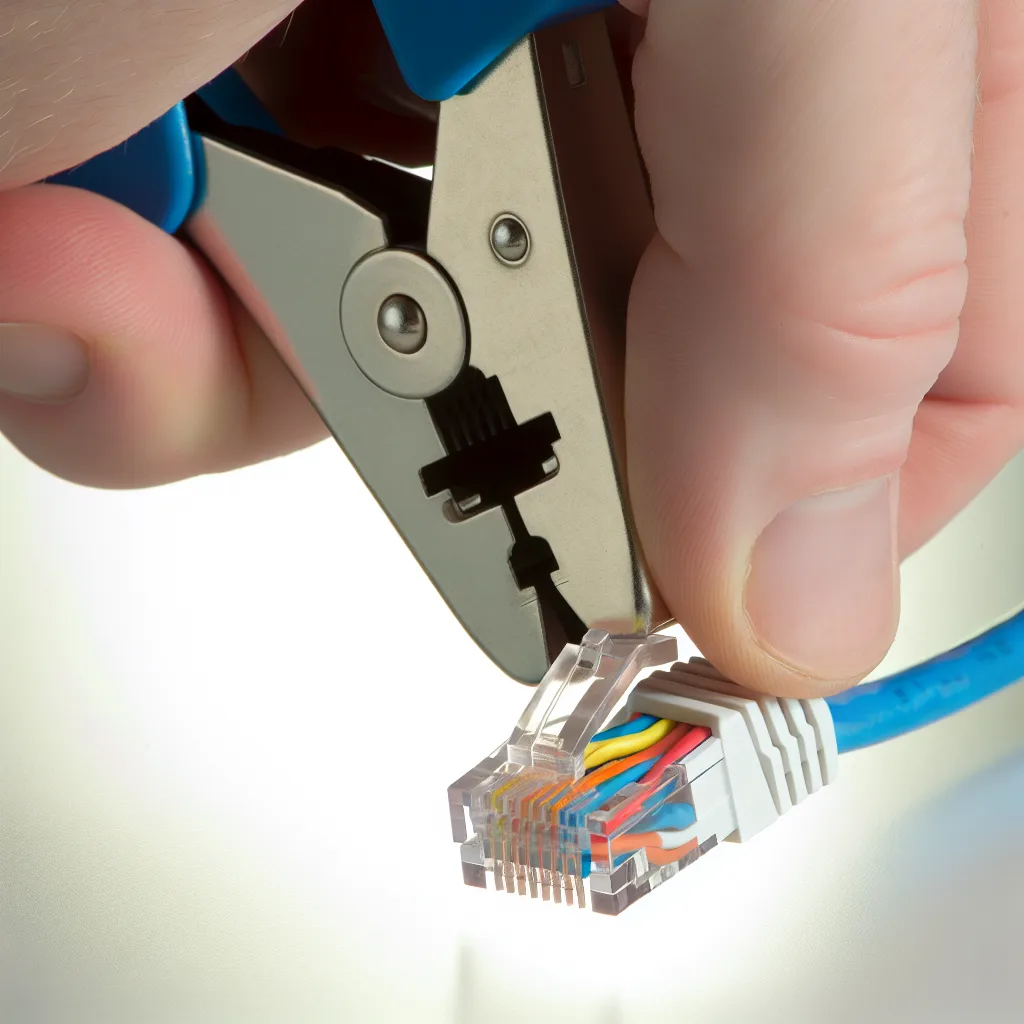
    If you’ve ever tried your hand at ethernet crimping, you probably know the struggle firsthand. Those tiny RJ45 connectors and wires can be surprisingly tricky. Ethernet crimping isn’t just about pushing wires into a plug; it’s an art that, when done right, makes your network connections reliable and tidy.

    What Is Ethernet Crimping?

    Ethernet crimping is the process of attaching an RJ45 connector to the end of a twisted-pair cable so that it can be plugged into a network device. This is essential for creating custom-length cables or repairing damaged ones. But if you don’t get it right, you end up with cables that won’t work, or worse, intermittent connections that drive you crazy.

    Why Does Ethernet Crimping Throw People Off?

    Honestly, it kicks my ass sometimes too! The wires are so small and need to be perfectly lined up and fully inserted before crimping. Even when you think you got it right, the little metal pins inside the connector have to make flawless contact with the wire strands.

    Here are a few common issues:
    Wires not fully inserted: If a wire isn’t pushed all the way into the connector, it won’t make a good connection.
    Wrong wire order: Wiring standards like T568A and T568B have specific color orders; mixing them up results in a non-functional cable.
    Poor crimping tool: Cheap or worn-out crimpers don’t apply even pressure and can damage your connectors.

    Tips for Better Ethernet Crimping

    1. Get the Right Tools – Invest in a decent quality crimping tool that also trims and strips cable. This makes your life so much easier.

    2. Use a Cable Stripper – Don’t try to strip wires with your fingernail or a knife. A cable stripper lets you peel back the jacket cleanly without damaging the wires.

    3. Follow the Color Code – Before you start, choose between T568A or T568B wiring standards. Usually, T568B is more common in the US. Be consistent!

    4. Double-Check Wire Lengths – Make sure all wires are trimmed evenly and reach the end of the connector.

    5. Test Your Cables – Use a cable tester right after you crimp. It saves a lot of trial and error and frustration later on.

    Learning from Mistakes

    I remember the first time I tried crimping an ethernet cable; it was a mess. I had twisted wires, connectors half-crimped, and no internet to show for it. It took a bit of patience and a lot of YouTube tutorials to figure out the nuances.

    Alright, so maybe it’s a bit finicky at first. But once you get the hang of it, making your own ethernet cables is satisfying and can actually save you money. Plus, you get that little boost of pride when your custom cable works perfectly on the first try!

    Further Resources

    If you want to dive deeper, check out the official Ethernet standards documentation to understand cable and connector types better. You can also find reliable guides from manufacturers like Fluke Networks which offer some great tutorials and cable testers.

    Doing ethernet crimping yourself means you’re no longer stuck with pre-made cables that don’t quite fit your needs. With a bit of practice and the right tools, you can build cables tailored to your space and setup. So go on, give it a shot—you might surprise yourself!


    Whether you’re setting up your home network or just fixing a broken cable, mastering ethernet crimping can be rewarding and useful. Don’t let those little crimps kick your ass anymore. With these tips, you’ll be on your way to clean, reliable wired connections.

  • Why I Still Love Mikrotik and Their Tool “The Dude” for Network Monitoring

    Why I Still Love Mikrotik and Their Tool “The Dude” for Network Monitoring

    Exploring Mikrotik’s network gear and how “The Dude” simplifies monitoring

    If you’ve ever dabbled in network management, you might already know how important it is to have reliable tools to keep an eye on everything. For me, Mikrotik network monitoring stands out as a straightforward and powerful way to manage network setups without pulling out too much hair. I first got hands-on experience with Mikrotik gear while working tech support for an ISP during my high school days. Since then, I’ve stuck with them, and one tool that really sticks out is Mikrotik’s monitoring server, “The Dude.”

    What is The Dude, and Why Should You Care?

    The Dude is a free network monitoring application from Mikrotik designed to keep tabs on your network. It maps your network automatically, showing how devices connect and highlighting any issues. Imagine having a real-time map of your network, showing all the connections, the type of links, and whether something’s acting up. That’s exactly what The Dude does.

    When I fired up The Dude on my setup, I was amazed at how it instantly showed the network topology. It even differentiates connection types: gigabit Ethernet, fiber, typical Ethernet, point-to-point links, and wireless connections visually distinct with colors and icons. This kind of clarity is a blessing when managing a complex network, especially when you’re juggling various client devices or troubleshooting.

    Mikrotik Network Monitoring in Action

    Since Mikrotik equipment is robust and affordable, it’s a popular choice for both small and medium-sized networks. Pairing it with The Dude feels natural because you get an integrated system ready to monitor itself. The interface isn’t flashy, but it’s clean and effective. What I like most about this setup is how quickly I can spot trouble. If a cable drops or a device goes offline, The Dude flags it, which means fewer surprises.

    Here’s a little legend to help you understand the maps you’ll see in The Dude:
    Black lines: Gigabit Ethernet connections
    Blue lines: 10 Gigabit Fiber links
    Orange lines: Standard 10/100 Ethernet
    Dashed lines: Point-to-point wireless links
    Lightning bolt icons: Wireless connections

    Why Choose Mikrotik for Network Monitoring?

    If you’re setting up a home lab or running a small ISP, Mikrotik offers value that’s hard to beat. The combination of affordable hardware and useful software tools like The Dude means you don’t have to rely on expensive solutions to get a clear feel for your network. You can configure, monitor, and troubleshoot all from a single dashboard.

    If you want to know more about Mikrotik and The Dude, check out the official Mikrotik website for hardware details and The Dude software page. For a broader perspective on network monitoring tools, Network World’s guide to best network monitoring tools is a solid resource.

    Wrapping Up

    Back when I was learning the ropes in ISP tech support, Mikrotik and The Dude were my reliable tools. Even now, it’s nice to have a clear, simple way to monitor my network without fuss. If you’re looking for a straightforward network monitoring solution, give Mikrotik network monitoring a shot—you might find it as useful as I do. It’s not flashy, but it works exactly as you need.

    And hey, if you get The Dude up and running, you’ll appreciate seeing your network all mapped out like a living, breathing diagram. It’s kind of satisfying, really!

  • When Should You Really Restart Your Home Server?

    When Should You Really Restart Your Home Server?

    Finding the right balance in rebooting your home server setup

    If you’re anything like me, you probably wonder from time to time, “When’s the right moment to restart my home server?” It’s a question that came up recently after my machine had been running for 230 days straight without a reboot. The decision to restart isn’t always straightforward, especially with a home server that powers things like file sharing, VPNs, and smart home systems. In this post, let’s unpack the thought process behind when to restart your home server and why it matters.

    Why Restart Your Home Server?

    Restarting a home server isn’t just about clearing the air or squeezing out a bit more speed. It’s often tied to updates, especially major ones like kernel upgrades. These updates can include crucial security patches or performance improvements that require a reboot to properly apply. But if your server is just humming along, untouched, and everything’s working fine, the dilemma is wondering when or if to interrupt that.

    The Gut Feeling and the Risks

    For me, after a surprisingly long 230 days up-time, the urge to restart was more a gut feeling than a calculated decision. The thing is, my server runs some vital services — from VPN to home automation — which means restarting it temporarily takes a chunk out of my home’s daily rhythm. If something goes wrong during the reboot, it can quickly turn into a headache. Sure, I have backups and even a second machine ready to step in, but that means added work I’d rather avoid.

    This kind of scenario is why many people just look for solid reasons to reboot rather than on a fixed schedule. For home setups, unless you’re hitting specific errors or need to implement a major update, you might find that frequent reboots aren’t necessary.

    How Often Should You Restart Your Home Server?

    There’s no one-size-fits-all answer here. However, a good rule of thumb is to reboot after major updates, especially kernel updates if you’re running Linux. These updates often fix security vulnerabilities or bugs that can’t fully take effect until after a restart. For home users running relatively stable server functions, this might mean a few times a year rather than monthly.

    Other reasons to consider a restart:
    – Feeling sluggish performance or unexplained issues
    – After installing new software that requires reboot
    – Before making big configuration changes, just in case

    Practical Tips for Rebooting Your Home Server

    • Backup first: Always make sure your data is backed up, even if the reboot “should” be smooth.
    • Schedule downtime: Pick a time when your home automation or other services being offline is least disruptive.
    • Keep a recovery plan: Knowing how to restore or spin up a backup machine can save a lot of stress.

    Wrapping Up

    So, when do you get the itch to restart your home server? For me, it’s mainly when updates pile up or when my gut says it’s time to refresh. There’s really no need to reboot on a set schedule if everything is running smoothly. Just stay aware, keep backups, and reboot when it makes sense.

    If you want to dig deeper into server maintenance and understanding kernel updates, The Linux Kernel Archives is a reliable resource. Also, DigitalOcean offers great tutorials on server maintenance that can help you get a more technical perspective.

    Remember, the best reboot strategy is the one that fits your comfort and keeps your home server humming without headaches. What’s your current restart routine? Feel free to share your thoughts and tips!

  • Building a Massive NAS: Where to Start When You Have 100 Drives

    Building a Massive NAS: Where to Start When You Have 100 Drives

    A simple guide on handling large NAS builds with dozens of HDDs and SSDs

    If you’ve ever thought about building your own NAS (Network Attached Storage), you might usually picture a device with just a handful of drives. But what happens when you’re looking at a large NAS build, something with 47 HDDs and 50 SSDs? That’s exactly the kind of project that feels both exciting and overwhelming. I recently faced this very situation, and here’s what I learned along the way.

    Understanding the Scale of a Large NAS Build

    First off, it’s important to realize how big and complex a large NAS build can get. With nearly 100 drives, you’re not just plugging in hard drives randomly; you’re dealing with significant power, cooling, data management, and physical space challenges. This isn’t just a ‘‘plug and play’’ kind of setup.

    The primary keyphrase “large NAS build” is crucial from the start because it sets the tone for all the planning decisions to come.

    Step 1: Assess the Needs and Purpose

    Before diving in, make a solid list of what the NAS will be used for. Is it primarily for video editing storage? Backup? Long-term archival? Different workloads may demand different configurations. For example, SSDs can be excellent for quick access and scratch space, while HDDs work well for sheer storage volume.

    Step 2: Choosing the Right Hardware

    • Chassis: You’ll need a chassis or multiple chassis with enough bays. Enterprise-grade storage enclosures from brands like Supermicro or Norco can handle 45+ drives per unit. You might end up stacking a couple of these.
    • Motherboard & CPU: Since the workload might be intensive, choose a reliable motherboard with enough PCIe slots for additional RAID cards or HBAs (Host Bus Adapters), and a CPU that can handle multiple threads efficiently. A server-grade CPU could be the way to go.
    • Power Supply: Powering 100 drives is no joke. Consider high-wattage, redundant power supplies.
    • Cooling: Proper airflow is critical. Drives generate heat, especially when packed tightly.

    Step 3: Storage Controllers and Connectivity

    Since you can’t connect 100 drives directly to your motherboard, you’ll need HBAs or RAID controllers. These cards manage connections between your drives and your system. It’s worth researching the compatibility of controllers with your setup. Technologies like SAS expanders can increase the number of drives you can connect through a single controller.

    Step 4: Decide on the File System and RAID

    When dealing with so much data, safety and performance are key. Consider RAID configurations or ZFS pools that offer excellent redundancy and performance. ZFS, for example, is renowned for data integrity and can handle large arrays, although it has hardware requirements.

    Step 5: Plan for Backup and Maintenance

    Even the best NAS can fail. Have a backup solution in place for critical data. Also, monitor drive health regularly. Automated alerts and tools can help keep the system running smoothly.

    A Few Helpful Resources

    Final Thoughts

    Building a large NAS is a challenge, but breaking it down into manageable steps makes it doable. Start with understanding the purpose, pick the right hardware, and carefully plan your software setup. With almost 100 drives involved, patience and planning are your best friends. Before you know it, you’ll have a storage giant ready to tackle any workload your editor or yourself throw at it.

    Don’t be afraid to ask for help from communities or professionals. Hardware choices and configurations can be tricky, but sharing your goals usually brings great advice. Now, who’s ready to build a large NAS build of their own?

  • Taking the Leap: My First Beginner Home Lab Experience

    Taking the Leap: My First Beginner Home Lab Experience

    Discover the joys and lessons of setting up a beginner home lab to boost your tech skills

    If you’ve ever been curious about playing around with computer networking, servers, or learning more about systems administration, setting up a beginner home lab is an awesome way to dive in. I recently decided to create my own, and honestly, it was both an exciting and educational journey.

    Why Start a Beginner Home Lab?

    Starting a beginner home lab isn’t about having fancy equipment or complex setups. It’s about getting hands-on experience and understanding how different technologies interact. It’s like your own little tech playground where you control everything.

    When I started, I had no idea how to configure network switches or manage virtual machines. Setting up a beginner home lab helped me learn all of that gradually, and in a safe space where mistakes are just part of the learning process.

    What Did I Use?

    For my beginner home lab, I kept it simple. I repurposed an old desktop with decent specs and added some virtualization software. Virtual machines allowed me to experiment without needing a lot of fancy hardware. I also got a basic network switch to simulate real-world network configurations.

    There are plenty of free resources to help with this. I found the VMware Workstation Player and VirtualBox great for virtualization (VMware Workstation Player, Oracle VirtualBox). For networking gear, even a modest switch from brands like Netgear or TP-Link was enough (Netgear Switches).

    Lessons Learned From My Beginner Home Lab

    1. Start small and build up: It’s tempting to want everything all at once, but getting comfortable with one thing at a time makes a big difference.
    2. Documentation is your friend: Taking notes and following guides helped me avoid frustration.
    3. Don’t fear failure: Broken configs? No problem — just reset and try again.
    4. Ask the community: There are countless online forums, blogs, and tutorials that can help when you get stuck.

    Benefits Beyond Just Learning

    Having my beginner home lab didn’t just teach me how to set up servers or tweak my network. It boosted my confidence to handle real technical problems. And it made me comfortable troubleshooting issues without panicking.

    Plus, it’s genuinely fun! Whether you’re a hobbyist or someone looking to break into IT, it’s rewarding to see your setup grow and work the way you want.

    Ready to Start Your Own Beginner Home Lab?

    If you’re thinking about starting your own, keep it simple at first. Use what you have. Focus on learning and enjoy the process. The internet is packed with tutorials, hardware options, and forums full of folks ready to help.

    For more reading on starting a home lab, check out this beginner guide from ServeTheHome, and for super clear virtualization tutorials, Linode’s documentation offers great insights.

    Setting up a beginner home lab is not about having the flashiest gear, but about making technology work for you. Give it a shot—you might be surprised how much you learn and enjoy along the way.

  • Building a 3D Printed 10″ Server Rack for Your First Homelab

    Building a 3D Printed 10″ Server Rack for Your First Homelab

    How a compact, budget-friendly homelab can get you started with storage and more

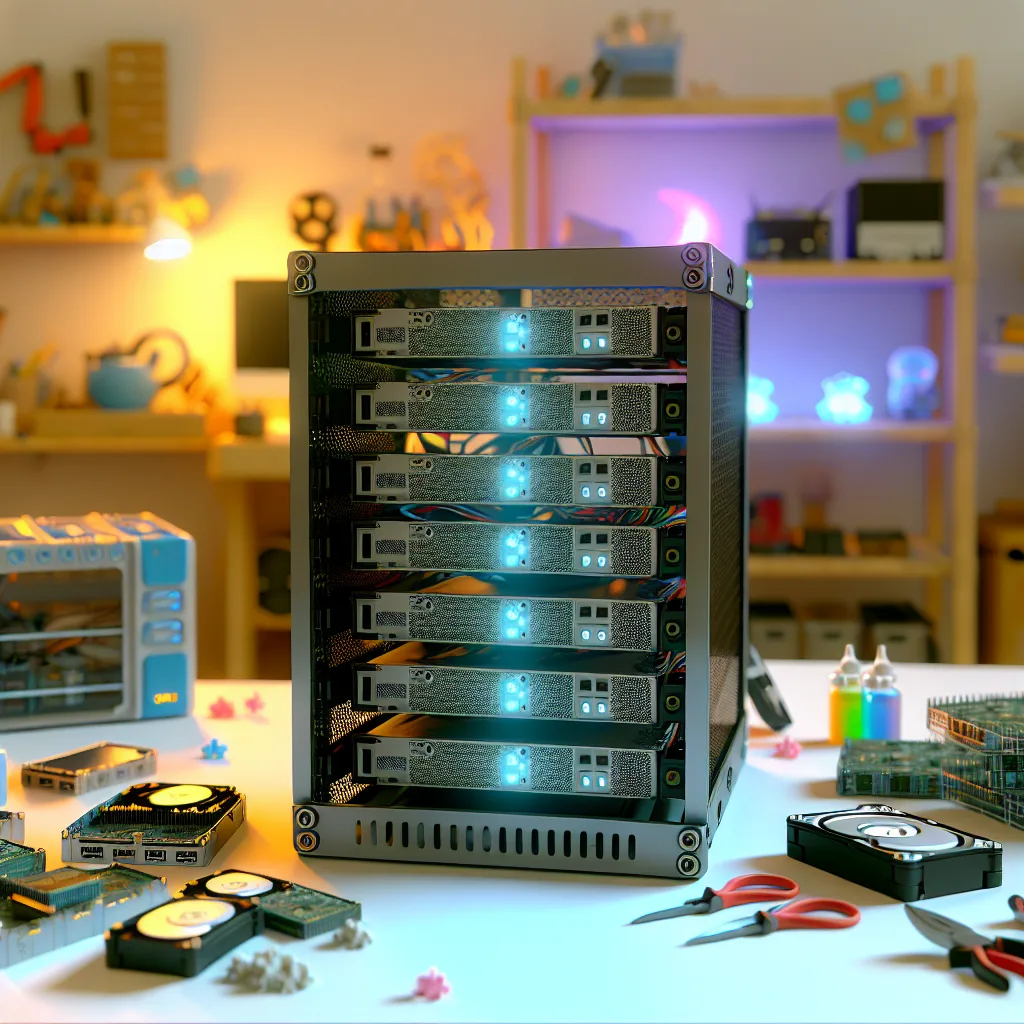
    If you’ve been curious about diving into home servers but don’t want to start with something huge or overwhelming, I want to share a neat idea that’s both compact and budget-friendly: a first homelab setup built inside a fully 3D printed 10″ server rack. It’s an awesome way to tinker with servers without breaking the bank or needing tons of space.

    Why Try a First Homelab Setup In a 3D Printed Rack?

    The idea of building a homelab might sound intimidating, but using a 3D printed server rack changes the game a bit. Instead of hunting for custom racks or expensive cases, you can create a personalized rack that fits your gear perfectly. This setup I’m talking about holds a bunch of devices and storage in a tidy frame that’s both cool looking and practical.

    With a tiny 10″ 8U frame, there’s enough space to pack in some solid gear without overwhelming your desk or room. Plus, the customization of a 3D printed chassis means you can adapt it for your exact needs — even if that means adding adapters, risers, or unconventional hardware arrangements.

    What’s Inside a Budget-Friendly First Homelab?

    Here’s a breakdown of what I’d pack into this kind of build:

    • HP Compaq 8200 Elite USDT: An i5-2400s processor with 16GB RAM. Solid for general tasks and virtualization.
    • HP 260 G1 Mini: Running an i3-4030U with 16GB RAM, great for lighter virtual machines or apps.
    • Gigabyte Brix Pro: This one packs an i7-4770R paired with 16GB RAM, perfect for your more demanding workloads.
    • GL.iNet GL-MT3000: A handy device running Tailscale and AdGuard to keep your network smooth and ad-free.
    • 8-Port Gigabit Switch: To keep all your devices chatting fast and reliably.
    • Dell Inspiron Mini 9: Not doing much work, but adds some charm and a little monitoring function.
    • Storage: About 26TB of mixed drives (1TB, 2TB, 3TB, and 4TB varieties), connected via an HBA to the Brix.

    All powered by a 460W supply with adapters and risers to fit the storage and nodes neatly into the printed chassis.

    What About Power and Costs?

    The whole build costs roughly $492, which is pretty reasonable for a functioning multi-node lab with decent storage. And it’s surprisingly efficient: it pulls about 109 watts at idle. That works out to around $27 per month in electricity at $0.35 per kWh, which isn’t too shabby if you’re mindful about power usage.

    Software Setup and Use Cases

    The three PCs run Proxmox in a 3-node cluster, so they work smoothly together for virtualization. Common use cases include:

    • Storage management: A TrueNAS VM handles storage tasks.
    • Personal apps: Running various lightweight apps for everyday needs.
    • Learning and experimentation: For anyone who likes hardware, 3D printing, or playing with software clusters, this is a fantastic project.

    Tips For Building Your Own

    • Start small and work up: Don’t feel pressured to fill the rack immediately. Piece it together slowly.
    • Look for second-hand and e-waste: You can find capable hardware on eBay or from recycling.
    • Be ready to adapt: Using risers, adapters, and creative casing helps fit everything into the small 3D-printed rack.

    This kind of homelab is perfect for folks wanting to learn about home servers, storage, and virtualization without needing a full data center in their basement.

    If you’re interested in 3D printing your own rack or checking out similar tiny server projects, you can explore communities like Thingiverse for rack designs and Proxmox for virtualization software. And if you’re considering TrueNAS for your storage, the official TrueNAS documentation is a great place to start.

    In the end, combining the tech geek in me with some 3D printing magic made this first homelab setup fun and functional. Maybe it’ll inspire you to try something similar in your corner of the world!

  • Rethinking Containerization: Using Micro PCs for Better Separation and Power Savings

    Rethinking Containerization: Using Micro PCs for Better Separation and Power Savings

    Why running each service on its own mini PC can boost security and lower energy use

    If you’ve been tinkering with servers and containerization, you’ve probably noticed one catch: your main servers can get pretty power-hungry when running multiple containers. I recently stumbled on a different containerization approach that’s been a bit of an eye-opener. Instead of cramming multiple containers into a single server, why not run each service on its own micro PC? It sounds a bit old school, but the results are surprisingly decent.

    Why rethink your containerization approach?

    The idea with containerization is to efficiently use your hardware by running isolated services within one server. But in practice, having all those containers running on your main servers can increase power consumption more than you’d expect. In my case, I found that one micro PC running a service uses less power than adding another container to a big server. By offloading each service to a tiny, dedicated machine, the overall power consumption dropped by about 15%. That’s nothing to sneeze at, especially if you’re thinking green or trying to cut costs.

    Better separation means better security

    One of the biggest benefits I’ve seen with this approach is improved security through physical separation. Virtual separation helps, but if one container is compromised, there’s still some risk it might affect others on the same host. When each service runs on its own machine, that risk falls away. Your network attack surface gets sliced up physically. It’s a simple yet effective way to isolate critical apps.

    You might wonder if clustering all those micro PCs would be complicated. Sure, it’s a bit more setup work compared to a single server running multiple containers. But for small setups or services where security and power efficiency matter, the tradeoff feels worth it. Plus, micro PCs these days are pretty affordable and surprisingly capable.

    Getting started with distributed containers on micro PCs

    If you want to try this approach, start with your most critical or power-hungry containers. Pick a micro PC for each that fits the performance requirements (devices like Intel NUCs or Raspberry Pi 4s can do the job depending on your needs). Then isolate your services by assigning each to a dedicated micro PC. You might even find that administration becomes simpler since each device only runs one service.

    This isn’t the typical containerization story you hear, but that’s kind of the point. Sometimes, going back to basics with a twist can uncover unexpected benefits like energy savings and security improvements.

    Resources to explore

    Trying this different containerization approach might not fit everyone’s needs, but if you’re curious about balancing power consumption with built-in security, it’s worth a shot. And hey, sometimes the simplest setups can surprise you with their efficiency and control.

  • Building a Companion Cube NAS Server: A Fun and Functional DIY Project

    Building a Companion Cube NAS Server: A Fun and Functional DIY Project

    How a Companion Cube Inspired My Home Server Setup

    If you’ve ever wanted a unique and personal touch to your home server setup, building a Companion Cube NAS could be the perfect project for you. The idea of incorporating a beloved gaming icon into a functional network-attached storage (NAS) or home server setup is both creative and practical. Today, I’ll walk you through what makes a Companion Cube NAS a cool project and why you might want to consider building one yourself.

    What’s a Companion Cube NAS?

    The Companion Cube NAS is a customized home server that uses the design motif of the Companion Cube from the game Portal. This isn’t just about aesthetics — it’s about having a system that organizes your files, streams media, and serves backups all in one adorable box. What started as a fun idea can quickly become an essential hub for your digital life.

    Why Build a Companion Cube NAS?

    A lot of us are moving towards having our own server systems to manage personal data safely at home. Commercial NAS devices are great but can be a bit boring and lack personality. By building a Companion Cube NAS, you get something that looks cool and fits your style, plus you learn a lot about server hardware and software along the way.

    How I Made My Own Companion Cube NAS

    Building this server was fairly straightforward. I started with a basic mini PC case that could fit multiple hard drives. Then, I customized the exterior with the Companion Cube design — this meant painting the iconic heart symbol and the distinctive panel patterns on the casing.

    Inside, I installed a power-efficient motherboard with enough SATA ports to connect several drives. For the operating system, I chose a popular NAS software like TrueNAS, which is free and widely recommended for home servers. Setting up the drives in RAID configuration helped me balance speed and redundancy, ensuring my data stays safe.

    Benefits of Your Own Companion Cube NAS

    • Personalization: Nobody else will have a setup like yours. It stands out, and it’s a conversation starter.
    • Centralized Storage: Keep all your photos, videos, and documents in one place.
    • Media Streaming: Serve movies and music to all your devices without relying on the cloud.
    • Learning Experience: Gain hands-on knowledge about networking, storage, and system administration.

    Getting Started on Your Own

    If you’re interested in building a Companion Cube NAS, here are a few resources to check out:
    TrueNAS for NAS software and setup guides.
    Western Digital for reliable hard drives suited for NAS use.
    Intel NUC as a compact hardware option.

    Building a Companion Cube NAS combines geeky fun with practical tech. It’s definitely a project that feels rewarding both in the process and the result. Plus, it brings a little bit of Portal-inspired charm to your tech setup. Maybe give it a try and see where your creativity and technical skills take you!

  • Why Betting on Cheap AI Inference Is a Risky Bet for Today’s LLM Startups

    Why Betting on Cheap AI Inference Is a Risky Bet for Today’s LLM Startups

    Exploring the challenges and realities of inference costs in the evolving AI landscape

    Let’s talk about cheap AI inference. It sounds like a great deal, right? Imagine the cost of running artificial intelligence models dropping so low it barely matters. For startups building new apps or interfaces on top of large language models (LLMs), this idea is tempting. They often use third-party AI models and try to make a profit reselling them, figuring the costs will keep dropping. But is that a reliable plan?

    In my experience watching the AI space, cheap AI inference might not be as straightforward as it seems. Sure, for small tasks like quick queries or short document summaries, the costs can drop over time. But users quickly want more. They start expecting AI to do much bigger, heavier lifting — writing theses, making podcasts, designing business strategies, or even creating movies and video games. Advanced AI agents will be diving into longer tasks that involve processing billions of data tokens in a single go.

    So, will inference costs actually get cheap enough to be a non-issue? There are two main possibilities:

    • The cost of AI inference becomes so low it’s practically negligible.
    • Or AI apps will always require a certain amount of compute power to stay sharp and competitive, which carries ongoing costs.

    History reminds us to be cautious here. About 70 years ago, leaders predicted nuclear power would be “too cheap to meter.” That didn’t happen — and sometimes tech dreams don’t meet reality. If cheap inference were right around the corner, every time a new AI model launched, providers’ servers wouldn’t be stretched so thin.

    A concept called Jevons Paradox might explain this. When something becomes cheaper to use, people end up using it more — in fact, often so much more that total resource use actually rises. Even if inference costs drop, soaring demand and increasingly complex applications like autonomous cars or industrial simulations will keep data centers buzzing and chips running hard.

    This doesn’t mean cheaper inference isn’t helpful. If your startup is running AI on expensive cloud services or overpaying for GPUs, you could get edged out by competitors who find ways to cut costs. That’s why companies like Google have invested heavily in building their own custom AI processors rather than relying on costly third-party compute resources.

    For AI startups and investors, the takeaway is to be realistic. Betting that inference costs will crash drastically might be risky. The demand for compute usually keeps pace with efficiency gains, creating a balancing act rather than a crash.

    Want to dive deeper? Check out resources like OpenAI’s API pricing and NVIDIA’s AI computing platforms.

    In the end, cheap AI inference is appealing — but the real story is more nuanced. It’s one to watch carefully if you’re building or backing AI-powered businesses.