Category: AI

  • Inside My Home Lab: A Simple Yet Reliable Setup

    Inside My Home Lab: A Simple Yet Reliable Setup

    A casual look at my home network and server setup with a focus on simplicity and reliability

    Let me take you on a quick tour of my home lab setup. It’s nothing fancy or extravagant, but it’s steady and does just what I need it to do. If you’re curious about setting up your own home lab, or just like hearing about how others piece together their digital spaces, this might be a nice little peek.

    The Heart of My Home Lab Setup

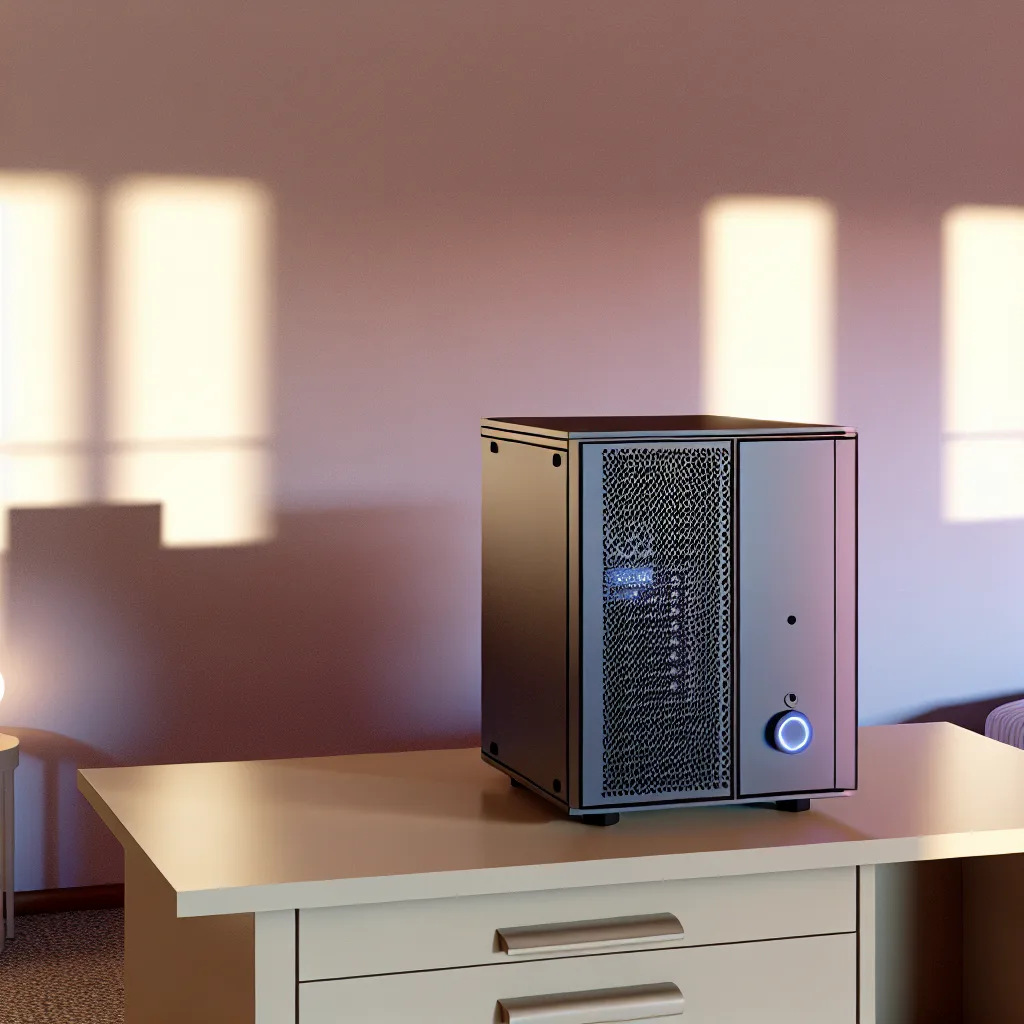
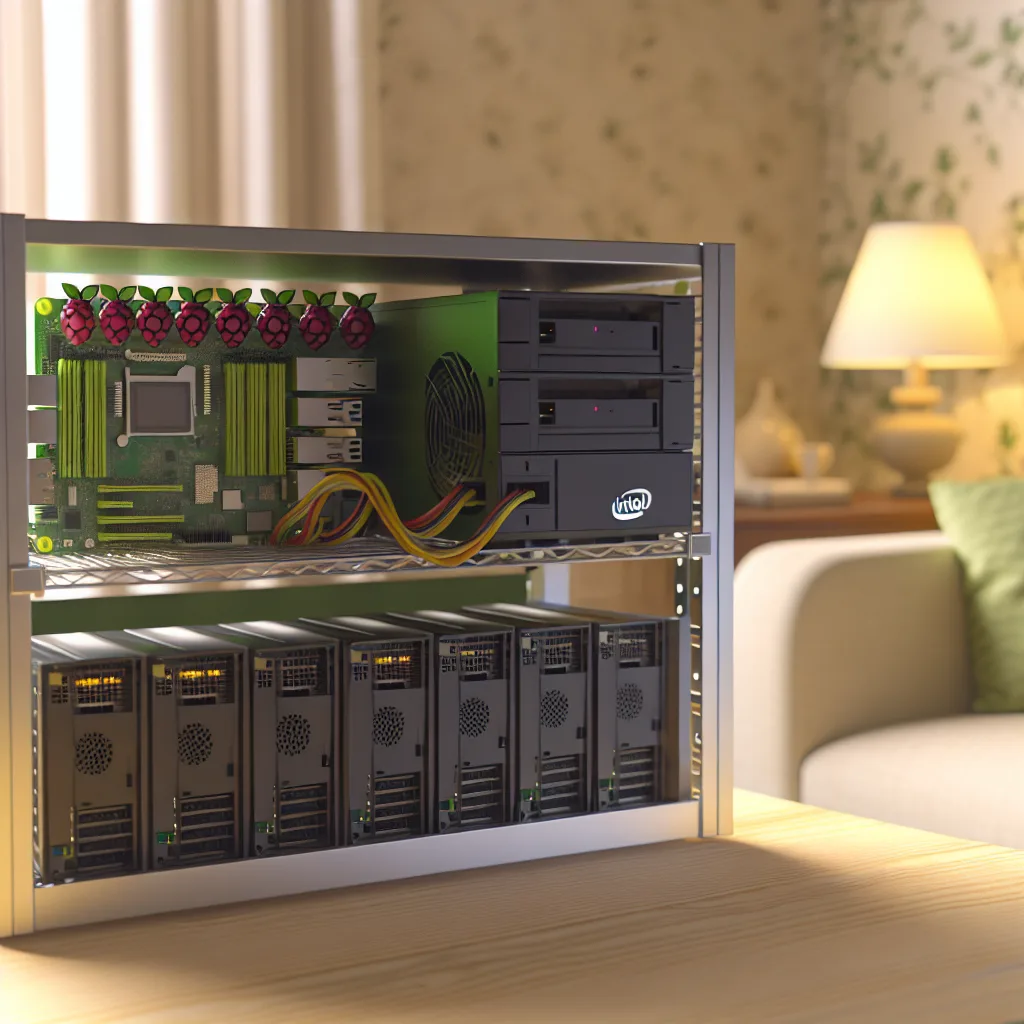
    At the core, the TerraStation is my old but trusty network storage device—it’s been running solidly without much fuss. I like to think of it as the backbone of my network. Alongside it, I have a Protectli device running OPNSense. It’s a compact firewall/router that keeps things running smoothly and securely. If you want to dive into firewall options, OPNSense is a solid open-source choice you can explore on their official site.

    More Devices, More Functionality

    There’s a fairly bulky fiber modem that’s kind of a beast in size and shape. It’s sitting there with all its antennas still attached because I’m too nervous to mess with it and risk breaking something. Sometimes, old tech like that just sticks around because it works, and messing with it feels risky.

    For running services, I use a Lenovo ThinkCentre, an old but reliable machine running Ubuntu. This is where I’ve set up PiHole, a network-wide ad blocker, and a WireGuard endpoint, which lets me securely connect back to my home network from anywhere. If you’re considering PiHole, which can make your internet experience cleaner and faster, check out the official PiHole documentation.

    I also keep a Raspberry Pi as a backup PiHole. It’s nice to have redundancy in case something else goes down—it’s a small but important part of the setup.

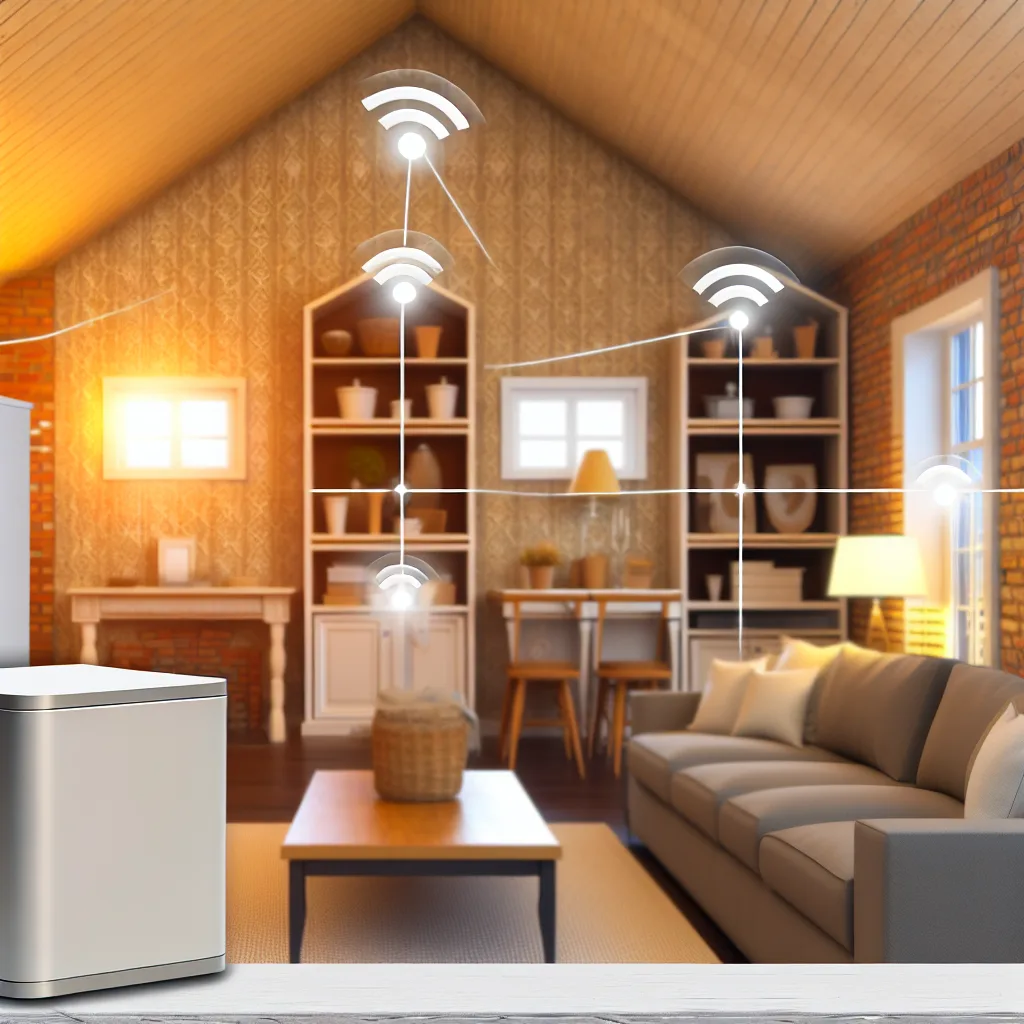
    WiFi Coverage and Network Organization

    To handle wireless coverage, I have a trio of EERO units around the house. All three are connected through wired backhaul to a network switch, which helps keep the WiFi faster and more reliable than if they were communicating wirelessly.

    The Future of My Home Lab Setup

    Honestly, I’ve been tidying up this setup recently—what you see now is way better organized than before. One day I’d like to get into self-hosting more interesting services, things beyond PiHole and WireGuard, but life gets busy, and time is always limited.

    Why Keep It Simple?

    My home lab setup is a good reminder that you don’t always need flashy, cutting-edge gear to have a functional and dependable home network. Each piece plays its role, and together they create a comfortable digital space that just works. For anyone thinking of starting out, remember: a straightforward home lab setup that fits your needs is better than a complicated one you never finish tweaking.

    Helpful Links for Your Own Home Lab Setup

    Thanks for letting me share my little corner of tech. Whether you’re a seasoned techie or just starting, I hope this inspires you to look at your own home lab setup with fresh eyes!

  • From Bare Walls to Total Coverage: My Journey with Home Network Expansion

    From Bare Walls to Total Coverage: My Journey with Home Network Expansion

    How upgrading my Wi-Fi and storage systems transformed everyday internet into seamless connectivity

    If you’ve ever struggled with spotty Wi-Fi coverage in your home, you’re not alone. I remember when my home network setup was a simple affair—just a single router mounted high up near the ceiling, trying its best to reach every corner of the house. That was about two years ago, and frankly, it was a bit of a patchy experience. But today, things look very different, and I wanted to share how my home network evolved to meet my growing needs.

    Starting Small with My Home Network Setup

    In the beginning, I had only one router. To maximize its reach, I mounted it close to the ceiling, hoping the signal would travel better and cover the whole place. But even with the best placement, I found dead zones—places where the Wi-Fi just wouldn’t connect or got frustratingly slow. This was especially true in the basement and the backyard.

    Besides the Wi-Fi, my storage was basic. I kept most files on an old tower PC that was doing double duty. It was okay for a while but didn’t feel efficient or safe for my growing data needs.

    The Big Upgrade: Expanding Wi-Fi Coverage

    The biggest game-changer was switching from a single router to multiple access points spread out through the house. Now, there are access points in the basement, upstairs, the backyard, and even the garage. This setup gives me seamless, total coverage—no more dead zones, and the signal strength is consistent everywhere.

    If you’re curious about doing something similar, manufacturers like Ubiquiti and Netgear offer access points and mesh systems that are user-friendly for non-experts. They also provide detailed setup guides so you can get everything up and running with minimal fuss.

    Storage Explosion: Meeting My Backup Needs

    On the storage side, I invested in a Synology NAS, which has now grown to an impressive 97TB capacity. It’s a network-attached storage solution that acts like a personal cloud at home. I also have a UGREEN external backup device with another 20TB of space, so I feel more secure knowing my data is backed up in multiple places.

    The old tower? It’s mostly retired but still hanging around for certain tasks. The shift to dedicated NAS storage gives me easier access to my files across devices, better data management, and most importantly, peace of mind.

    Learn more about NAS options and why they’re great for home storage at Synology’s official site.

    Lessons Learned in Home Network Setup

    • Placement matters: Position your Wi-Fi devices wisely to avoid dead spots.
    • Consider scalability: Start small but plan for growth. Expanding with access points or mesh Wi-Fi can make a big difference.
    • Backup is crucial: Investing in reliable storage solutions protects your data.
    • Take time to learn: Modern networking gear often comes with surprisingly straightforward setup processes.

    Overall, upgrading my home network setup has made a noticeable difference in everyday life. From streaming movies effortlessly anywhere in the house to quick file access and backups, it’s more than just convenience—it’s about making technology work reliably for you.

    For anyone feeling frustrated with their internet setup or looking to improve their home storage, I highly recommend exploring multi-access point Wi-Fi and NAS solutions. It might seem like a lot at first, but the results are well worth the effort.

    For a deeper dive into improving your home Wi-Fi, check out resources like CNET’s Wi-Fi tips. Happy networking!

  • Upgrading Your Home Studio Network to 10Gb: What You Need to Know

    Upgrading Your Home Studio Network to 10Gb: What You Need to Know

    A friendly guide to choosing between RJ45 and SFP+ for your small video studio upgrade

    If you’re running a small video studio like me, where animation and editing work demand smooth and fast file transfers, you’ve probably thought about a 10gb network upgrade. I recently went through the process of upgrading my home setup, and if you’re wondering whether it’s worth diving in, let me share some insights that might help.

    Why Consider a 10gb Network Upgrade?

    My studio has two workstations connected to a Synology NAS with a RAID5 setup. At first, the NAS was just plugged into the router, and my main PC connected via a Cat6 cable, while the second workstation ran over Wi-Fi. It worked, but editing directly from the NAS was slower than I wanted, prompting the need for a faster connection.

    Upgrading to a 10gb network means you can edit files directly from your NAS without lag. This not only speeds up your workflow but reduces the hassle of constantly copying files back and forth.

    Planning the Upgrade: What Equipment Do You Need?

    The plan to upgrade my system involved getting a 10gb PCIe network card for the NAS, two 10gb PCIe cards for the PCs, and a 4-port 10gb switch. This setup ensures all devices communicate at high speed. I initially thought about sticking to RJ45 connections because my router used those, and I already had a 2.5gb port on one workstation.

    Here’s what I looked at:

    • Synology 10Gb Ethernet Adapter with 1 RJ45 Port (approximately $201 CAD)
    • Two TP-Link 10GB PCIe Network Cards (roughly $110 CAD each)
    • Ubiquiti UniFi Flex XG 4-port switch (about $410 CAD)
    • A few short Cat6 cables for connections

    RJ45 vs. SFP+: Which One Should You Choose?

    A big question I faced was whether to use RJ45 or the SFP+ system for the 10gb upgrade. SFP+ is common in many professional setups because of its compact size and ability to handle high data rates efficiently, typically via fiber optics or DAC cables. But since my studio is small, in one room, and heat levels are already high with heavy graphics cards running, I leaned toward RJ45 for simplicity and practicality.

    RJ45 cabling is easier to manage, fits my existing router connections, and keeps things straightforward. If you have the room and want ultimate flexibility or plan to scale, SFP+ could be a smart choice, but for small, cozy studios, RJ45 is just fine.

    A Quick Word on Heat and Space

    Running dual heavy graphics cards in a small room means it’s already on the warm side. Adding more components like a switch or network cards with additional heat output is something to keep in mind. RJ45 switches and cards generally run cooler compared to some SFP+ equipment, but always check the specs and maybe add extra cooling if needed.

    Wrapping Up: How to Proceed

    If you’re thinking about a 10gb network upgrade for a small studio, start by evaluating your current gear and consider the convenience of RJ45 versus the advanced features of SFP+. For my setup, the RJ45 path gave me a neat, efficient, and cost-effective upgrade.

    Remember to get compatible hardware — for example, Synology’s dedicated 10Gb Ethernet adapters work well with their NAS devices, and TP-Link offers budget-friendly 10gb PCIe cards. A reliable 4-port switch like Ubiquiti’s UniFi Flex XG lets you connect all your devices seamlessly.

    If you want to dive deeper into specs or need setup guides, check out these resources:
    Synology’s 10GbE Adapter overview
    TP-Link 10GbE PCIe card details
    Ubiquiti UniFi Flex XG product page

    Going 10gb isn’t just about speed, it’s about enhancing your workflow without the hassle. So take a good look at your space, budget, and future needs before making the jump — and keep your studio comfy while you do it!

  • Keeping Your Home Network Secure: Simple Ways to Monitor and Protect

    Keeping Your Home Network Secure: Simple Ways to Monitor and Protect

    Explore easy tips and tools for effective network monitoring and security in your home lab

    If you’re diving into the world of home networking, especially with a few public services exposed, understanding network monitoring is key to keeping your setup safe. I’ve been there too—wondering how to know if someone is poking around my services without jumping headfirst into complex setups like VPNs or VLANs.

    Let’s talk through network monitoring basics and what you can do to watch over your network security without making it a full-time job.

    What is Network Monitoring Anyway?

    Network monitoring is simply keeping an eye on the traffic coming in and out of your network and checking that nothing fishy is going on. Think of it as a home security camera but for your digital doors.

    When you expose services like media servers or cloud storage (like Jellyfin, Nextcloud, or similar apps), it’s normal to get hit by bots scanning the internet for weak spots. But how do you spot those attempts early?

    First Steps: Setting Up Basic Alerts and Logs

    You don’t have to be a security pro to track suspicious activity. Start by enabling logs on your router and the services you expose. Logs record who’s trying to connect and when.

    Many routers offer basic tools to see connection attempts. For example, the OpenWrt project has solid documentation and tools for network logs and monitoring if you’re using compatible hardware. For typical consumer routers, the dashboard might show failed login attempts or unusual traffic spikes.

    Adding a reverse proxy like Nginx Proxy Manager (NPM) helps too. NPM lets you centralize and control access routes to your apps and provides logs that you can review to spot strange patterns.

    Help from Tools: Intrusion Detection and Network Analysis

    As you get comfortable, using tools like Suricata (an open-source intrusion detection system) or Wireshark to analyze traffic can be eye-opening. These tools highlight unexpected packets or connections and can alert you about potential threats.

    For those looking for something user-friendly, there are also network monitoring systems like PRTG Network Monitor or Zabbix which offer dashboards and alerting capabilities.

    Beyond Monitoring: What Else Can You Do?

    • Regular Updates: Always keep your apps, proxies, and router firmware updated. Patching known vulnerabilities is your first line of defense.
    • Segment Your Network: While you might not want to set up VLANs, consider at least separating guest devices from your main network to reduce risk.
    • Use Strong Passwords: Even without additional authentication layers like Authentik, strong, unique passwords for every service help a lot.
    • Limit Service Exposure: Only publish services that need to be public. If it doesn’t have to be accessed from outside, keep it internal.

    How to Know When You’re Under Attack

    With network monitoring in place, you’ll notice:
    – Sudden spikes in traffic or connection attempts
    – Multiple failed login attempts in logs
    – Unknown IPs trying to connect repeatedly

    Some tools can alert you as these events happen so you can react quickly.

    Wrapping Up

    Network monitoring doesn’t have to be complicated. Starting with logs and basic router tools is a great way to stay aware. As you learn more, dipping into IDS tools and dedicated monitoring apps might make sense.

    Remember, the goal isn’t to block every single threat but to be informed and prepared. Keep your services updated, watch your logs, and don’t hesitate to tighten security when you spot something off.

    If you want to explore more, check out the official Nginx Proxy Manager docs, the Suricata user guide, and Wireshark tutorials. You can build your security confidence step by step.

    Happy monitoring!

  • Is a Passively Cooled i7 1165G7 a Good Fit for Your First Home Lab?

    Is a Passively Cooled i7 1165G7 a Good Fit for Your First Home Lab?

    Exploring quiet, efficient Proxmox hosts with an i7 1165G7 and what to expect for everyday use

    If you’re dipping your toes into setting up a home lab, you might be weighing the idea of a passively cooled i7 1165G7 server. The question is simple: can this silent, fanless setup really handle 24/7 operation with multiple virtual machines humming away? I looked into this scenario since it’s a neat option for folks living in smaller spaces, like apartments or dorm rooms, where noise can be a dealbreaker.

    What’s Under the Hood?

    The i7 1165G7 is a quad-core, eight-thread processor from Intel’s Tiger Lake lineup—desktop performance in a low-power CPU. A typical build I’ve seen floating around includes some nice specs: 64GB RAM, a 1TB Intel Optane SSD, and a handful of fast NICs (4 x 2.5 Gb/s). For around $300, this setup is quite tempting, especially as a first home lab for students or anyone new to virtualization and networking.

    Why Consider a Passively Cooled i7 1165G7?

    If you’re stacking up VMs for things like OPNSense (network firewall), Pi-hole (ad blocking), or WireGuard (VPN), the i7 1165G7 is powerful enough without breaking a sweat. Plus, the passive cooling means no fans generating noise—pretty much a must if the server lives in your bedroom or shared living space. Passive cooling works by dissipating heat naturally through the case and heatsinks instead of blowing hot air out with a fan.

    But, what about reliability? Running the server 24/7 sounds stressful for a fanless setup, right?

    Can Passive Cooling Handle 24/7 Operation?

    Passive cooling demands a good chassis design and a cool environment to keep the CPU temp manageable. The i7 1165G7 is a power-efficient CPU rated for 28 watts, which helps. In light to moderate load scenarios, especially when running lightweight or networking VMs, it should keep cool enough without throttling.

    However, you’ll want to keep an eye on temperatures initially and make sure airflow around the case isn’t blocked. Temperatures consistently above 85°C on the CPU in prolonged workloads could be a sign to add better ventilation or reconsider active cooling.

    Living with Your Home Lab in a Small Apartment

    One huge perk of this setup is the quiet. No loud fans means your server blends into the background. It’s ideal for students or anyone sharing a small space. It’s also ready for light gaming servers or hosting small services for friends once you get comfortable managing your Proxmox-based environment.

    A Few Considerations Before You Buy

    • Check the case: Make sure it’s designed for passive cooling with plenty of heatsinks.
    • Monitor temps: Use software tools to keep tabs on CPU temps.
    • Be mindful of ambient temperature: A cooler room helps keep everything stable.

    Wrapping Up

    Using a passively cooled i7 1165G7 for your first home lab can be a solid choice if you prioritize silence and efficiency. It’s perfect for light virtualization tasks and straightforward networking projects, especially if you’ve got limited space and want to avoid noisy fans.

    For more detailed specs, you can check out the Intel i7 1165G7 information on Intel’s official site and learn more about Proxmox from its official documentation.

    Also, for understanding cooling principles in passively cooled PCs, Tom’s Hardware has great insights worth a read here.

    Have a cozy space and want a quiet, energy-friendly server to learn virtualization on? A passively cooled i7 1165G7 could be just the ticket.


    This blog post aims to help you decide if a passively cooled i7 1165G7 server fits your home lab needs. Every setup is different though—taking a little time to monitor your hardware and tweak your environment goes a long way.

  • Exploring the Possibilities of 8Gbps Symmetrical Internet

    Exploring the Possibilities of 8Gbps Symmetrical Internet

    What can you really do with lightning-fast 8Gbps symmetrical internet speeds?

    Imagine having 8gbps symmetrical internet at your fingertips. That’s the kind of speed some internet service providers are now offering, and it’s not something you hear about every day. Most of us are used to dealing with speeds like 100mbps to maybe 1gbps, so what does it mean to have 8gbps symmetrical internet? Is it worth it, and what can you actually do with such power?

    First off, let’s break down what 8gbps symmetrical internet means. “Symmetrical” means the upload and download speeds are the same—so you get 8 gigabits per second both ways. That’s a huge step up from most typical home internet connections where download speeds usually outpace upload speeds by a lot.

    Currently, many people, including myself, might be running something like 2.5gbps capped on the LAN side, so even if the ISP offers more speed, the home network could be a bottleneck. But assuming you can upgrade your home equipment to support it, 8gbps symmetrical internet opens up some interesting possibilities.

    What Can You Do with 8gbps Symmetrical Internet?

    1. Supercharged Streaming and Gaming
    If you’re into 4K or even 8K streaming, having this much bandwidth means you can stream multiple high-res videos without buffering. Gamers can also benefit from ultra-low latency and faster game downloads.

    2. Lightning-Fast Backups and Cloud Access
    Backing up terabytes of data to the cloud or accessing massive files remotely becomes way easier and faster. Think about uploading hours of 4K video footage in minutes instead of hours.

    3. High-Performance Home Office Setup
    For remote workers or freelancers who handle large file transfers, 3D rendering files, or frequent video calls, symmetrical upload and download speeds reduce waiting times and improve productivity.

    4. Powering a Small Business or Home Lab
    If you run a tech-heavy home lab or a small business that hosts servers or does regular data transfers over the internet, this speed can be a real timesaver.

    5. Future-Proofing Your Network
    While you might not use all that speed right now, having it available means your home network is ready for whatever comes next—new devices, higher resolution media, or even smarter home automation.

    What Do You Need to Actually Use It?

    To truly enjoy 8gbps symmetrical internet, your hardware has to keep up:
    – A gigabit (or multi-gig) router and switches that support these speeds
    – Wired Ethernet connections (Wi-Fi rarely hits such speeds currently) with Cat6a or Cat7 cables
    – Devices (laptops, PCs, smart TVs) capable of multi-gig connections

    Is It Worth the Price?

    The price in some areas is around €50 per month, which feels reasonable considering typical high-speed plans. Whether it’s worth it depends on how much you’ll genuinely use that speed. For many, 1gbps or 2.5gbps is plenty, but for tech enthusiasts or people with demanding workflows, it could be a smart investment.

    If you want to dig into the tech behind this, manufacturers like Netgear and ASUS have some great high-speed routers designed for multi-gigabit internet. Also, checking out BroadbandNow or Speedtest can give you a good idea about the availability and performance of ultra-fast internet in your area.

    Final Thoughts

    Having 8gbps symmetrical internet might seem like more speed than anyone could need, but for certain users, it’s a game of opens doors rather than just checking a box. Whether it’s for faster streaming, improved gaming experiences, or a serious upgrade to your home office or small business setup, it makes a strong case for what the future of home internet could look like.

    So, if your ISP offers such a plan, give a thought to how it might fit your digital lifestyle today and tomorrow. You might not use all the power right away, but it could be worth having when you do.

  • Building My Janky Homelab: Why a Veggie Rack Was the Perfect Choice

    Building My Janky Homelab: Why a Veggie Rack Was the Perfect Choice

    A friendly dive into creating a budget-friendly home server setup with Raspberry Pis, an Intel SOC, and some creativity

    If you’re thinking about starting a home server setup but don’t want to break the bank or spend a ton of time planning the perfect rack, I get it. I recently cobbled together my own janky homelab, and it turned out surprisingly well—especially considering it’s built inside a vegetable rack! It’s a funny, practical project that anyone curious about DIY servers might appreciate.

    My Basic Home Server Setup

    The heart of my setup includes three Raspberry Pis and a basic Intel N105 SOC. These little guys are the backbone of countless home server projects, and their low power usage makes them perfect for 24/7 uptime without racking up huge electricity bills.

    Instead of investing in an expensive data center rack, I repurposed a simple veggie rack which gave me great airflow naturally—something super important for keeping electronics cool. Plus, it’s on wheels, making it super easy to move around when needed.

    Why a Veggie Rack?

    You might wonder why a vegetable rack? Well, it’s all about airflow and practicality. Homemade or small-scale servers generate heat, and without proper ventilation, components can overheat, leading to reduced performance or failure. The open design of a veggie rack keeps air moving freely around all my devices.

    Another upside: it was affordable and readily available. When you’re trying out different hardware or just experimenting with your setup, it’s nice to have a flexible solution that’s easy to re-arrange. The wheels? A total bonus, especially when you need to access cables or reposition your gear.

    Tips for Others Building a Home Server Setup

    • Start small: Raspberry Pis and small SOCs are powerful enough for many low-demand tasks like media servers or personal cloud storage. Check out the official Raspberry Pi site for ideas and support.
    • Think about cooling: Whether you go with a veggie rack or something else, airflow matters. Fans, open shelving, or even creative DIY racks keep things running smoothly.
    • Plan for expansion: Keeping your setup mobile and modular means you can swap hardware or upgrade easily with minimal downtime.

    Why This Homelab Works for Me

    This janky yet functional setup hits the sweet spot between budget, performance, and convenience. It’s not about having the sleekest or most high-end gear but using what you have creatively to build something that works.

    If you want to know more about integrating an Intel N105 SOC or different Raspberry Pi models into your setup, Intel’s documentation and Pi community forums are great resources.

    Final Thoughts on Starting Your Own Home Server Setup

    Building a home server setup doesn’t require fancy racks or expensive gear. Sometimes a bit of improvisation is all you need. If you enjoy tinkering, don’t hesitate to try unconventional solutions like the veggie rack—it’s worked well for me in airflow management, accessibility, and mobility. Plus, it keeps the project fun and approachable.

    If you’re curious about this kind of DIY homelab, dive in! It’s a rewarding experience getting things up and running, learning the hardware basics, and making a little server ecosystem that’s truly your own.

  • Where Did the Perfect Homelab Chassis Go?

    Where Did the Perfect Homelab Chassis Go?

    Why the SGI Rackable SE3016 should inspire modern homelab gear design

    If you’ve ever dipped your toes into setting up a homelab, you’ve probably wished there was a simpler, more compact solution for storing your gear. That’s exactly why the concept of the perfect homelab chassis matters so much to a lot of folks. I recently revisited the old SGI Rackable SE3016, and honestly, it feels like a missed opportunity that nothing quite like it exists today.

    The SGI Rackable SE3016 chassis was a neat little unit designed for those who couldn’t (or didn’t want to) dedicate a full-size 42U rack or a mini data center at home. It was compact, kept a short depth, and was easy to modify — things that really matter in a casual or budding homelab builder’s world.

    What made the SGI Rackable SE3016 special?

    First off, it was built with the homelabber in mind. Unlike many modern alternatives that feel like they were designed for big enterprise systems or come loaded with proprietary tech that adds complexity, this chassis struck a great balance. You could retrofit it to silence the fans, add modern SAS-3 expanders, and even grow your setup without jumping through hoops thanks to its daisy-chain design.

    This chassis didn’t just save space. It made it easier to experiment and expand gradually — a real plus if you aren’t ready to go all in on a full-scale rack right away. Plus, it managed to keep things cool and nice without being a noise monster, which is a win for anyone running a homelab in a home environment.

    Why don’t we see more of these?

    Back when SGI was bought by Hewlett Packard Enterprise (HPE) over a decade ago, a lot of these designs disappeared. The market moved towards louder, hotter, and more complex options like QNAP, NetApp, or EMC systems that often lock you into specific hardware or software ecosystems.

    The simplicity and flexibility of something like the SE3016 just don’t seem to be the direction big companies want to go anymore. The focus shifted to more feature-heavy but less mod-friendly devices, which, while powerful, aren’t always ideal for a home setup or hobbyist.

    The dream: Modern homelab chassis inspired by the SE3016

    Imagine if a device like the SGI Rackable SE3016 came back but updated for today’s standards — with SAS-3 expanders, support for U.2 or U.3 drives, and a similarly accessible and modular design. It could be a dream for anyone setting up a homelab, letting you expand storage easily, keep noise down, and all while not taking up tons of space.

    If you’re into tinkering, modern homelabs could really benefit from a design that prioritizes simplicity and quietness without sacrificing growth options.

    Quick tips for homelab chassis hunting

    • Look for compact and shallow depth units to fit more personal spaces.
    • Prioritize mod-friendly designs — easy access means more customization and upgrades.
    • Check for expandability options like daisy chaining or modular bays.
    • Keep noise and heat in mind; you don’t want your homelab sounding like a jet engine in your living room.

    Though we can’t bring back the exact SGI Rackable SE3016, projects like those can still inspire the future of home server setups. Until then, it’s worth keeping an eye on gear that values straightforward usability and thoughtful design over complexity.

    For solid information on homelab gear, check out sites like ServeTheHome and manufacturer info on current storage technology at HPE’s official site. Those spots can help you stay updated on what’s out there and what might come next.

    In the end, the right homelab chassis isn’t just about hardware specs; it’s about making your tech work comfortably in your space and on your terms. The SE3016 hit that spot — and maybe it’s time we demand something like it again.


    Further Reading:
    – SGI Rackable history and specs overview at TechPowerUp
    – Modern storage expanders and SAS standards on Wikipedia

    Let’s keep the conversation going — what’s your ideal homelab chassis feature?

  • The Quiet Supporters: When Your Spouse Becomes Your Lab Talk Listener

    The Quiet Supporters: When Your Spouse Becomes Your Lab Talk Listener

    Why having a spouse who listens to your lab stories matters more than you think

    Have you ever found yourself chatting nonstop about your latest lab experiments or projects, only to realize your spouse is patiently listening without understanding a single word? If you have, then you know the true meaning of “spouse support”—that patient, steady presence who lets you unpack your brain, no matter how technical or tedious the topic.

    What Exactly is Spouse Support?

    Spouse support isn’t about just being married; it’s about being a real partner in your daily life, especially in the little, sometimes geeky moments. When I say ‘little moments,’ I mean the times you’re excitedly explaining your latest home lab setup or the intricacies of a new technology you’re diving into. Even if your partner doesn’t get the details, their willingness to listen? Priceless.

    Why Do We Use Our Spouses as Our Rubber Ducks?

    If you’ve spent any decent amount of time troubleshooting or experimenting in a home lab or any technical field, you might have heard of the “rubber duck debugging” method. This approach involves explaining your problem out loud to an inanimate object (like a rubber duck) to hear the issue clearly and maybe catch your own mistakes.

    But here’s the twist—many of us use our spouses as these human rubber ducks. They might not know the difference between a subnet and a switch, but they hear our voice, our reasoning, and our thought process. They offer emotional support, mental space, and sometimes even the nudge we need to figure things out.

    The Emotional Side of Spouse Support

    Being heard is powerful. When you talk your way through a problem, it helps clarify your thoughts. And having your spouse listen—without interrupting with technical corrections or dismissive comments—lets you feel valued and supported.

    This kind of support strengthens your relationship even when the topic is far from romantic dinner conversations. It’s these everyday kindnesses that build a foundation of trust and care.

    Tips for Nurturing Spouse Support

    • Be patient when roles reverse. Support is a two-way street. There will be times when your spouse needs you to be their rubber duck too.
    • Keep it light. If the topic turns too technical, a little humor can help keep things relatable.
    • Show appreciation. A quick thank you or a small gesture goes a long way.

    In Closing

    So, here’s to the spouses who listen—even when they don’t fully understand the lab jargon or the endless technical details. Your quiet support means more than you know.

    If you want to learn more about how communication helps in technical troubleshooting, check out these resources from Cisco and tech communication tips from IEEE. For some fun on the concept of rubber duck debugging, here’s a wikipedia summary.

    Remember, sometimes the best support isn’t having all the answers—it’s simply being there to listen.

  • Why I Added an HPE LCD8500 KVM Console to My Home Lab

    Why I Added an HPE LCD8500 KVM Console to My Home Lab

    Exploring the perks of a dedicated console beyond your everyday laptop

    When you’re deep into home lab setups, you quickly realize that having just a laptop isn’t always cutting it. That’s where a piece of gear like the HPE LCD8500 KVM console steps in to make life easier. I recently added this console to my setup, and it’s been a welcomed change. Let me tell you why I think every enthusiast could find it useful.

    What is the HPE LCD8500 KVM Console?

    So first off, what is this console? It’s essentially a compact keyboard, video, and mouse (KVM) unit with a built-in LCD screen. This all-in-one console is designed for managing servers directly, often used in data centers or server rooms. Instead of hooking up a bulky monitor and keyboard every time you want to control your equipment, the LCD8500 lets you do it right from the console itself—neat, right?

    Why Add It Even If You Already Have a Laptop?

    Honestly, that was my wife’s first reaction. “But you already have a laptop,” she said with a smile. And she was right! But here’s the thing: when you’re running multiple servers or devices, juggling cables and remote connections gets messy fast. The HPE LCD8500 KVM console streamlines this.

    • Direct Access: It plugs straight into your servers, giving you immediate control without relying on network setups or remote desktop tools.
    • Saves Space: It’s a slim, integrated unit that slots right into your rack or lab space, replacing the need for separate keyboard, monitor, and mouse setup.
    • Reliable Troubleshooting: If your network takes a hit or your laptop’s out of commission, the console keeps you connected directly to the hardware.

    How It Fits in My Home Lab

    Adding the HPE LCD8500 was about making my lab more functional and efficient. Before this, I was constantly switching between consoles, VNC sessions, and my laptop, which slowed me down. With this console, I can manage my servers in real time, which is great for updates, monitoring, or troubleshooting. Plus, it’s built tough and designed for this kind of use, so it’s more durable than my usual setup.

    Where to Find More Info

    If you’re curious to see the specs or consider getting one yourself, Hewlett Packard Enterprise’s official page has all the details on the LCD8500 series. It’s a solid resource for understanding the technical perks and setup instructions HPE LCD8500 KVM Console Overview.

    Additionally, sites like Network World provide deeper dives into KVM tech and why it remains relevant in modern network management Network World KVM Introduction.

    Is It Worth It?

    If you’re just dabbling in home networking, maybe not right away. But for those with a bustling lab or multiple physical devices, the HPE LCD8500 KVM console can really help keep things simple and accessible. It’s kind of like having a dedicated control panel tailored for your servers. Makes managing all those bits and bytes just a little less stressful.

    If you’re thinking about expanding your home lab setup, or even just want a more straightforward way to manage your existing gear, it’s worth checking out. Just be ready for that classic “But you already have a laptop” line at home—they’re probably just as curious as you!