Category: AI

  • Building a Small Mobile Unraid Server: Network in a Box with Type-C PD Power

    Building a Small Mobile Unraid Server: Network in a Box with Type-C PD Power

    Explore how to create a compact, mobile Unraid server setup that packs storage and networking in one neat package.

    If you’ve ever dreamed of having your own portable home server that’s powerful yet compact, you might enjoy this setup story. A mobile Unraid server can be just what you need when you want full network and storage capabilities on the go, powered simply via Type-C Power Delivery (PD). Let’s dive into what makes this build tick and why it could be your next DIY project.

    What is a Mobile Unraid Server?

    Unraid is a popular operating system for DIY NAS (Network Attached Storage) and home servers. When we say “mobile Unraid server,” we’re talking about a setup that’s small enough to carry around but still offers robust performance and networking features. The key here is blending storage, computing power, and networking into a portable box, powered efficiently through modern USB Type-C PD technology.

    The Heart of the Build: Components

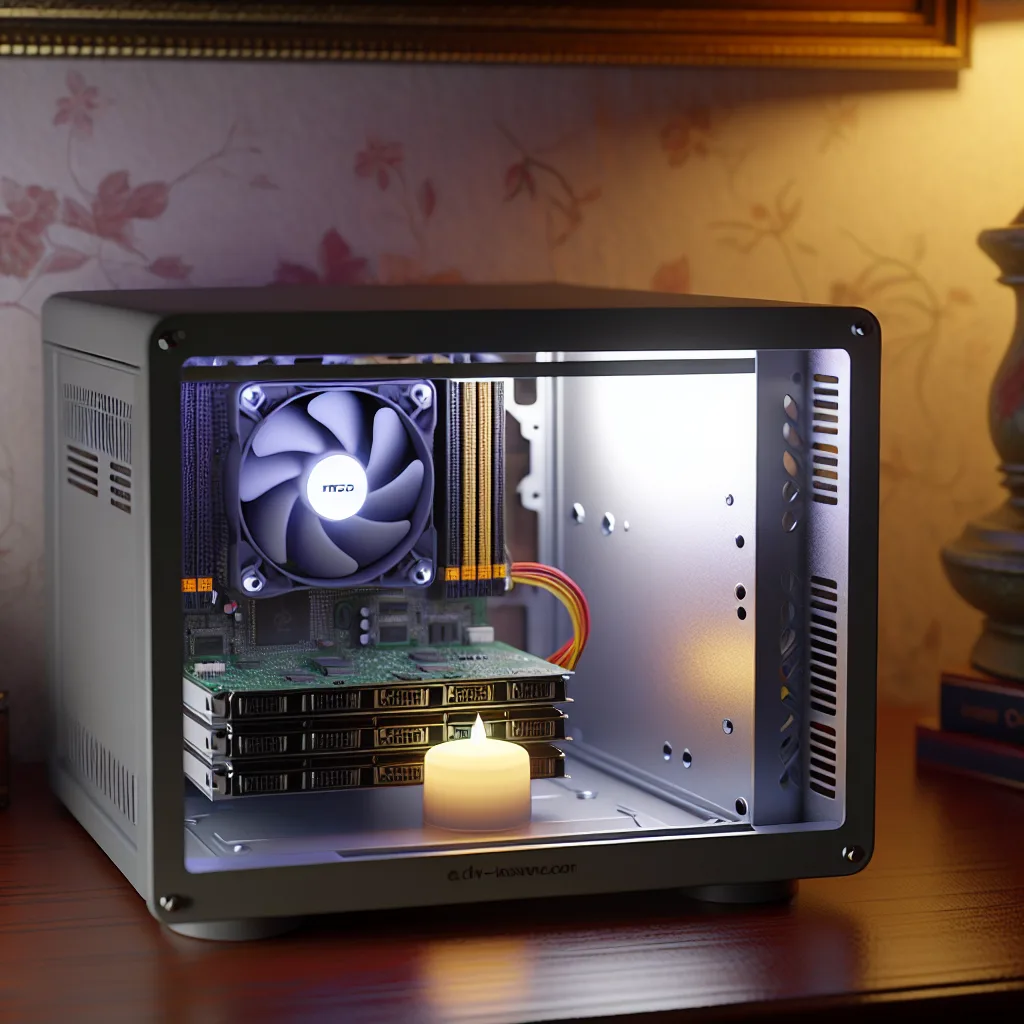
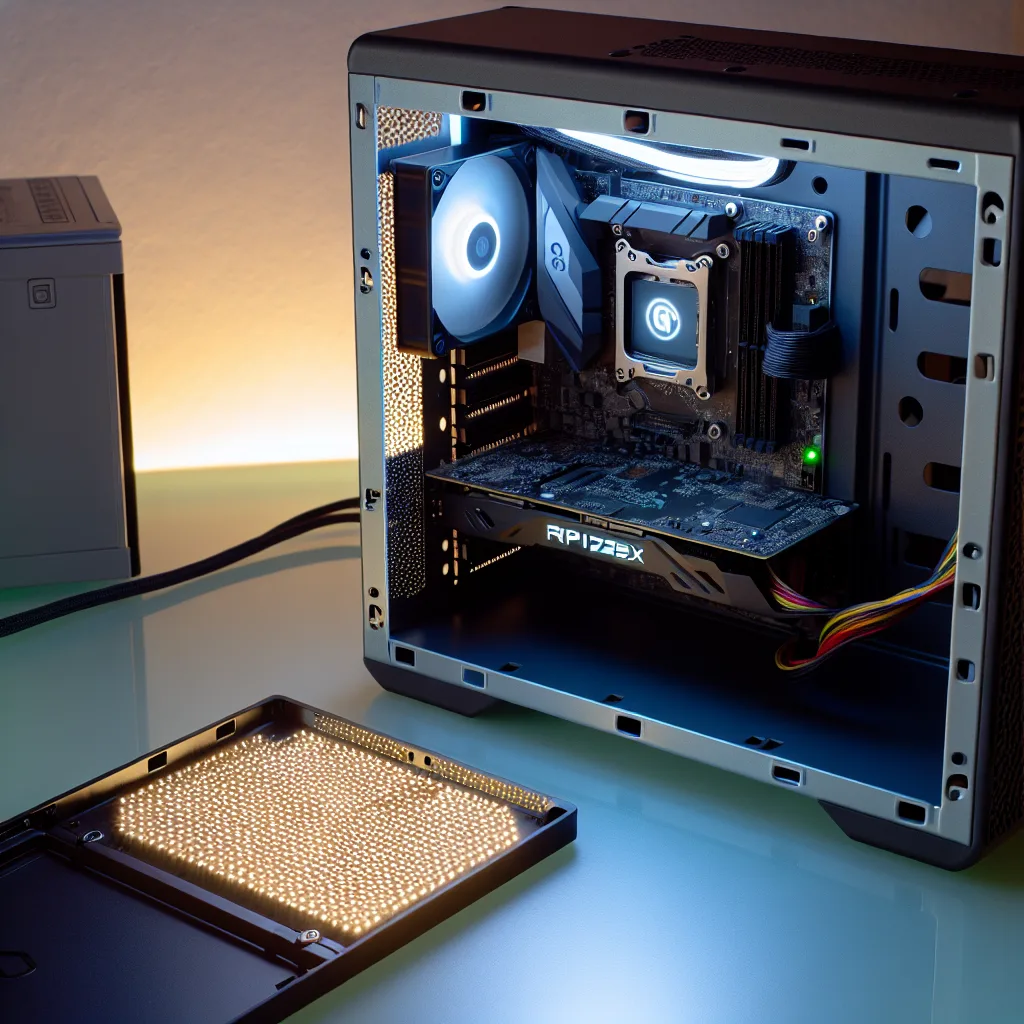
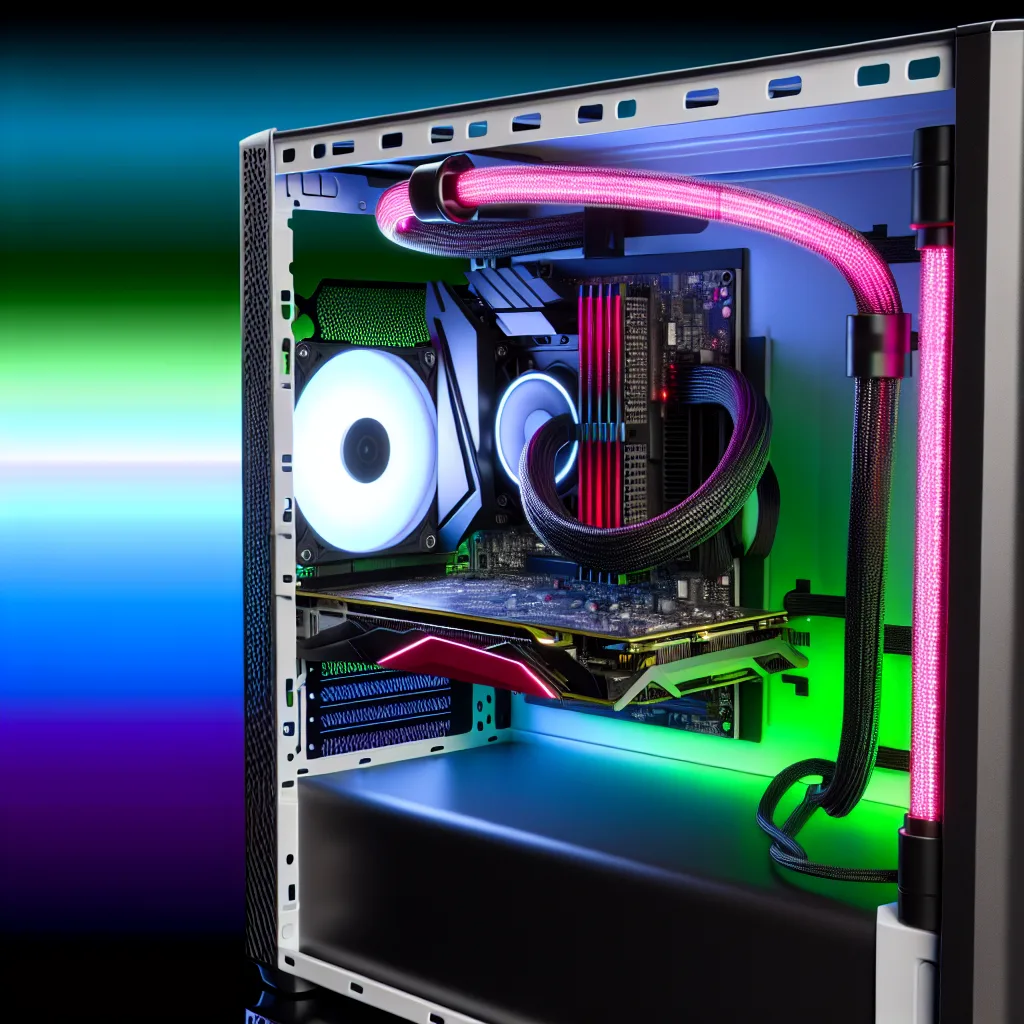
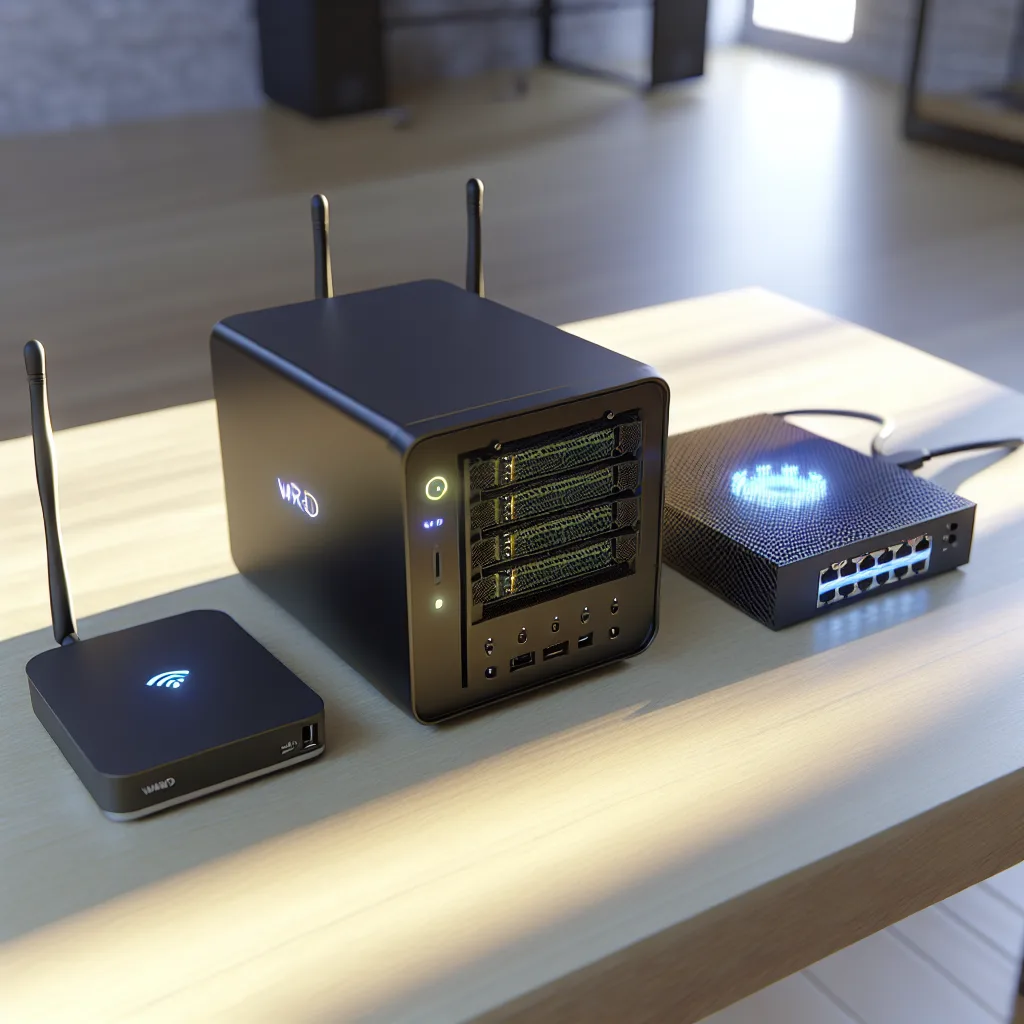
    This compact server uses a Zimablade 7700 as the mainboard — a solid platform that supports the necessary compute power. For graphics, surprisingly, it includes an entry-level GTX 1650, which might seem like overkill, but it’s handy if you want some GPU-accelerated tasks or plan to repurpose the build for light gaming or media encoding.

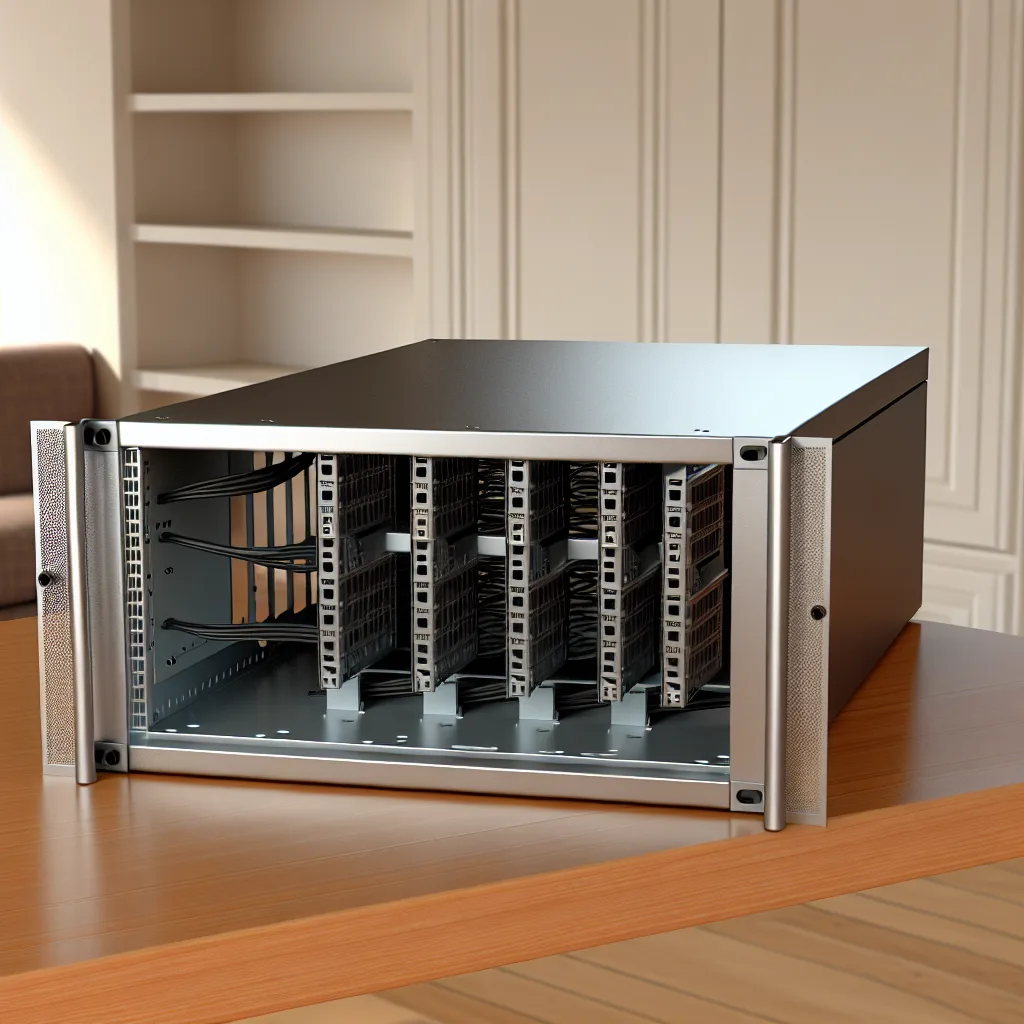
    Networking is handled by a TP-Link GL-AXT1800, which is a Wi-Fi 6 router known for solid performance and reliability. To tie it all together, a TP-Link LS1005G is used — a 5-port gigabit switch that boosts your wired network connections, ensuring fast data transfer between devices.

    Storage and Case

    Storage is crucial for any server, and in this build, two Crucial BX500 4TB SSDs handle the data storage tasks. These SSDs balance price and performance well, perfect for a mobile Unraid server that might be used in different environments.

    All of this fits neatly within an Apache 1800 case, designed for compact builds and excellent ventilation. It’s a small case but with smart design that makes sure your components stay cool even during extended use.

    Why Type-C PD Power?

    Using Type-C Power Delivery means you can power the entire server with a single USB-C cable, which is incredibly convenient. Whether you’re using a portable charger or a laptop charger, this setup can draw power efficiently without bulky adapters or complicated power bricks. This makes it ideal for use in locations where traditional power sources are limited.

    Benefits of a Mobile Unraid Server

    • Portability: Take your server to different sites or rooms without hassle.
    • Full Networking: With Wi-Fi 6 and a gigabit switch, you’re covered for fast wired and wireless connections.
    • Power Efficiency: Type-C PD powering reduces cable clutter and enhances mobility.
    • Customizable Storage: Easily upgrade or swap out SSDs for more capacity or speed as needed.

    For the DIY Enthusiast

    If you want to build your own mobile Unraid server, start by checking out official Unraid documentation to understand the OS and hardware compatibility. Also, TP-Link provides detailed specs and user manuals for their networking gear on their official site. For SSDs, Crucial has great product info and warranty details at crucial.com.

    Wrapping Up

    Creating a mobile Unraid server with full networking in a compact, powered-by-Type-C package is a neat way to have flexible, personal cloud storage and network capabilities wherever you go. Whether it’s for backup, media streaming, or even a bit of home lab experimentation, this setup brings serious functionality in a small footprint.

    If you ever get hands-on with a project like this, be sure to share your experience and tweaks. It’s always fascinating to see how different people personalize their home server setups!


    Explore more about Unraid and compact server builds on sites like ServeTheHome for enthusiast reviews and tutorials.

  • Out with the Old, In with the Proper: Upgrading My Homemade Equipment Rack

    Out with the Old, In with the Proper: Upgrading My Homemade Equipment Rack

    Why switching from a plywood rack to a real setup changed the game for my gear

    If you’re like me and have been using a makeshift setup for your gear, you’ll know how satisfying it feels to finally upgrade to something proper. After nearly a decade of relying on a homemade plywood rack, I finally decided it was time to give my equipment a proper home. This equipment rack upgrade wasn’t just about aesthetics—it made a real difference in how I manage and maintain my setup.

    Why I Needed an Equipment Rack Upgrade

    My old plywood rack served me well, but it was always a bit of a patchwork solution. It held my network switches, servers, and other equipment, but it wasn’t designed for this kind of use. Over time, the structure showed signs of wear and the setup started to feel cramped and harder to manage. Plus, having a proper rack opens up possibilities for better airflow, easier cabling, and more organized equipment layout.

    One funny side note: I had a TP-Link switch hanging around that actually wasn’t doing anything anymore. It was part of my old setup, but since upgrading, it’s just sitting there—a reminder of how far my network has come.

    Choosing the Right Rack

    When I started looking for a proper equipment rack, I wanted something sturdy but not overly complicated. Two main options stood out: an open-frame rack or an enclosed cabinet. I opted for a basic open-frame rack because:
    – It’s easier to access equipment.
    – Air circulation is naturally better.
    – It’s usually more affordable.

    If you’re interested in rack options, manufacturers like StarTech and Black Box have excellent guides and models for different needs.

    Setting Up the New Rack

    Moving all the equipment from my old plywood rack to the new one took a bit of time, but it was worth it. I had to rerun some cables for better management and added cable ties to keep things tidy. The difference in airflow was immediately noticeable—I didn’t feel that heat build-up that used to bother me.

    Having everything mounted on a purpose-built rack also made it easier to identify and troubleshoot gear. If a device needs replacing or upgrading, it’s a straightforward task now instead of a complex puzzle.

    Benefits of an Equipment Rack Upgrade

    • Improved organization: Your gear isn’t just piled up anymore; everything has its place.
    • Better cooling: Proper racks allow air to flow, getting rid of hot spots.
    • Simplified maintenance: Easier access means less hassle when swapping or fixing gear.
    • Scalability: Ready for future upgrades without needing a complete overhaul.

    For those curious about more technical aspects like airflow management and rack power options, articles on Network World and Cisco’s documentation offer in-depth insights.

    Final Thoughts

    Upgrading my equipment rack was one of those small decisions that made a big impact. It’s not just about having a fancy piece of furniture—it’s about making your gear easier to manage and extending its lifespan. If you’ve been using a rough setup like a plywood rack, I highly recommend looking into a proper equipment rack upgrade. Your gear will thank you.

    And hey, if you still have that old TP-Link switch doing nothing, maybe it’s time to finally retire it or put it to use somewhere else!

  • Why Bigger Racks Aren’t Always Easier: My Journey with a 42U Server Rack

    Why Bigger Racks Aren’t Always Easier: My Journey with a 42U Server Rack

    Navigating space challenges and upgrades with my new 42U server rack setup

    If you’re into home labs or server setups, you know that finding the right rack can feel like hitting a jackpot. I recently upgraded to a 42u server rack, and let me tell you, it was quite the adventure. At first, I thought bigger meant easier, but reality had other plans.

    The 42u Server Rack Discovery

    I used to have a modest 24u rack, which worked fine for years. Then, I came across an old HP 42u rack listed for just $150. It even came with four 3kW UPS units, which was a huge bonus. The deal was too good to pass up, so I jumped on it right away.

    When the rack arrived at my place though, the fun began. My front door, basement stairs, and basement entrance were all six inches too narrow to get the rack down. At first, I was stumped — but then I remembered, I have a workshop full of tools and I figured, why not saw it in half and put it back together down there? It wasn’t the smoothest plan, but it worked!

    Handling the Space Challenge

    Taking a massive 42u server rack and cutting it to fit through doors and stairs isn’t for the faint-hearted. It took about eight hours of solid work, with lots of cutting, riveting, and bolting. By the end, my back was sore, and I was exhausted, but the rack made it to its final spot.

    Now, it’s loaded with all my equipment and up and running again. The extra space is already making a difference for my gear setup. I’ve got a new power distribution unit (PDU) on the way to tidy up the wiring and some replacement batteries for those old UPS units.

    Benefits of a Larger Rack Setup

    Upgrading to a 42u server rack from a smaller unit offers a lot more room to grow, especially if you’re into home servers or networking. You can neatly organize more devices, manage cables better with a dedicated PDU, and handle bigger or more UPS units for power backup. HP’s official rack server hardware page has some great info if you want to explore their rack options.

    Tips from My Experience

    • Measure before you buy: Doorways and staircases can be tricky. If you’re dealing with a large rack, double-check all entry points.
    • Don’t underestimate the tools: Having the right saw, rivets, and bolts still may require some creative solutions.
    • Take your time: This wasn’t a quick project, but it was totally worth it. Make sure you plan for rest breaks!

    If you’re curious about power backup and PDU organization in racks, APC’s guides are pretty helpful: APC Rack PDUs and Power Solutions.

    Upgrading my rack turned out to be more of a project than I expected, but the extra space and improved organization have been great for future-proofing my lab. I’ll share more tips and detailed photos once I’ve fully settled in and recovered from the workout!

    For more on setting up your home server rack and tackling common challenges, check out this detailed guide by SmallNetBuilder.

  • Considering a Beelink Mini PC Upgrade? Here’s What You Should Know

    Considering a Beelink Mini PC Upgrade? Here’s What You Should Know

    Is the Beelink SER5 Max a worthy step up from your current setup?

    If you’ve been noodling on upgrading your little home setup, and you’re tossing around the idea of a Beelink mini PC, you’re not alone. I recently looked into the Beelink SER5 Max because, honestly, my trusty Raspberry Pi was starting to show its age. Let’s dig into what makes this mini PC worth considering and why it might just be the perfect next step for many of us.

    What’s the Beelink mini PC all about?

    The Beelink SER5 Max packs some serious hardware punch for the price. It has a Ryzen 7 6800U with 8 cores and 16 threads, 32GB of lightning-fast LPDDR5 memory, two PCIe 4.0 slots (which are great for speedy add-ons), and a Radeon 12-core integrated GPU running at 2200 MHz. All that comes for around $350 after tax, which feels like a pretty solid deal.

    Now compare that to a brand-new Raspberry Pi 5 with 16GB RAM, which costs about $100. Sure, the Pi is a solid little machine and great for lots of projects, but it’s ARM-based with only 4 cores at a lower clock speed and uses LPDDR4 memory. Once you add up the power supply, a decent case, a good NVMe drive, and the accessories needed to really make the Pi sing, you’re almost $100 away from the Beelink’s price. Plus, the Beelink supports virtualization—a big plus for those wanting to run VMs or more intensive server tasks, which the Pi can’t handle well.

    Real-world use: How does the Beelink mini PC hold up?

    I’ve spoken to users who’ve moved up to these Beelinks from various setups, including Raspberry Pis and older desktops. The general consensus? It holds up very well for day-to-day tasks, media streaming, and even more demanding workloads. Some report it runs quiet and stays cool thanks to efficient cooling design, which was a nice surprise.

    Of course, with any compact device, you might find occasional thermal throttling if pushed extremely hard over long periods or minor quirks in setup. But that’s true of many mini PCs on the market today. The support and drivers for the Ryzen mobile platform are pretty mature, and Beelink has a solid reputation for hardware.

    Why consider upgrading to a Beelink mini PC?

    • More power for multitasking: 8 cores and 16 threads mean it can handle more apps or background tasks without slowing down.
    • Better graphics performance: Thanks to the Radeon 12-core iGPU, it handles media and light gaming better than what you’d get from a Pi.
    • Virtualization support: A big bonus for tech enthusiasts who want to experiment with multiple virtual machines.
    • Compact yet expandable: Two PCIe 4.0 slots give room for future upgrades like extra SSDs or specialized cards.

    If you’re starting to feel the limits of your current setup and want something that keeps the small footprint but amps up the performance, the Beelink mini PC is worth a look.

    Things to keep in mind before making the switch

    • Price difference: It’s definitely a jump from a Raspberry Pi’s price, so consider what you really need.
    • Power draw and heat: Being more powerful means it uses more energy and needs cooling compared to ultra-low-power devices.
    • Software compatibility: The Beelink runs Windows or Linux easily, but some ARM-focused software on the Pi won’t run here.

    For more details about the Beelink SER5 Max specs and performance, check out the official Beelink website, and if you’re curious about processors, AMD’s official Ryzen 7 6800U info is a good read over here.

    In the end, whether to upgrade to a Beelink mini PC really comes down to what you want from your desktop or server setup. For heavy multitasking, virtualization, or a small yet powerful media center, it shines. But if you’re perfectly happy with a Pi for light projects or experimenting, your money might be better spent elsewhere.

    I’ve had my eye on one for a few weeks now, and if I decide to jump, I’ll be sure to share how it feels in real life. Meanwhile, if your Pi’s feeling cramped, it’s worth giving the Beelink mini PC a serious thought.

  • Breathing New Life into an Old HP ProLiant N40L: A Modern Home Server Upgrade

    Breathing New Life into an Old HP ProLiant N40L: A Modern Home Server Upgrade

    How I transformed my trusty HP ProLiant N40L into a speedy, reliable home server fit for 2025

    I’ve had an HP ProLiant N40L MicroServer since 2014, and while it’s always been a reliable little machine, over time it started feeling a bit outdated. The storage demands of today’s world just outpaced what this old server could handle. Instead of retiring it, I decided to take a different route. Why not keep the classic HP ProLiant chassis but rebuild everything inside? This home server upgrade turned out to be a great way to preserve something familiar while bringing it fully into the modern age.

    Why a Home Server Upgrade?

    The original N40L was great for its time but limited in power and expandability. Rather than squeezing incremental upgrades into the same old motherboard, I swapped it out completely. I replaced the guts with a compact Mini PC that fit neatly where the drives used to go, transforming the server into a powerhouse without losing the shell that I loved.

    The Heart of the Upgrade: Mini PC Inside the ProLiant

    Inside the new setup is an Intel N100 CPU — efficient, has a good onboard GPU, and supports Intel Quick Sync for hardware video transcoding, which is a big plus if you’re streaming or handling media at home. I also bumped the RAM up to 64GB, which is way more than the original server could ever dream of, giving me plenty of headroom for caching and running virtual machines.

    Networking got a boost too, with a built-in 2.5GbE port. That means faster file transfers and better performance across my home network, future-proofing the system as homes begin to upgrade their network speeds 1.

    Keeping the Original Power Supply, with a Twist

    One clever bit was how I powered the new Mini PC. I tapped into the original HP power supply, pulling a 12V feed, but since the old motherboard wasn’t there to control it, I had to jump-start the PSU manually so it runs nonstop when plugged in. It’s a neat way to reuse what’s already there without buying a new power supply.

    Quiet Cooling with Noctua Fans

    Cooling is simple and silent. The ProLiant’s original fan was controlled by its motherboard, which I no longer have. So, I swapped it for a 120mm Noctua fan, known for quiet efficiency. To keep things tidy, I powered the fan from the Mini PC’s USB port, so it runs constantly without any extra fan controllers or complicated wiring 2.

    Storage: NVMe Meets Classic Hot-Swap Bays

    One of the best features of the ProLiant case is its 4-bay hot-swap backplane. To keep this convenience, I used an NVMe to Mini-SAS adapter, connecting the new Mini PC’s storage to the legacy SATA bays seamlessly. I added a dedicated SATA SSD just for the OS to keep things stable and make future upgrades easier.

    I loaded the bays with four 6TB SATA drives. Using TrueNAS, a powerful open-source storage OS, I set up the drives in two mirrored vdevs — effectively like RAID 10. This setup offers redundancy, good read speeds, and dependable write performance, giving me about 12TB of usable space from 24TB raw capacity 3.

    Why TrueNAS?

    TrueNAS runs on ZFS, a file system designed with data integrity and flexibility in mind. With things like snapshots and easy management, it’s a huge improvement over old RAID controllers, providing more reliability for important data.

    The Final Result

    From the outside, the MicroServer looks the same — that familiar HP ProLiant N40L. But inside? It’s a completely different beast:
    – Intel N100 CPU with Quick Sync GPU for efficient media handling
    – 64GB RAM for future-proofing and virtualization
    – Fast 2.5GbE networking ready for modern setups
    – Whisper-quiet Noctua cooling
    – 12TB mirrored ZFS storage managed by TrueNAS

    In short, this home server upgrade turned an aging system into a silent, robust, and modern NAS ready for whatever I throw at it. It’s a great reminder that sometimes, with a bit of creativity, you don’t have to toss out the old — you can breathe new life into it and make it work even better today.

  • How I Got a Ryzen 5950X Running on an Optiplex 5055 SFF

    How I Got a Ryzen 5950X Running on an Optiplex 5055 SFF

    Upgrading a compact Dell Optiplex into a powerful OPNSense box with Ryzen 5950X

    If you’ve ever played around with PC hardware, you know how tempting it is to squeeze new life into old systems. Recently, I took on a challenge: getting a Ryzen 5950X running on a Dell Optiplex 5055 Small Form Factor (SFF). Sounds nuts, right? But it actually works—and it’s pretty neat.

    The Optiplex 5055 is a compact, business-class PC that Dell built with modest hardware support. Out of the box, it only supports first- or second-generation Ryzen processors, thanks to its B350 chipset motherboard. Dell’s hardware limitations usually mean you’re stuck with average performance, but I wanted more muscle for my OPNSense firewall setup. I figured, why not try crossflashing a Biostar X470 GTA BIOS to unlock support for Ryzen 5000-series CPUs?

    Getting the Ryzen 5950X on this Optiplex started with swapping in a Biostar X470 GTA motherboard BIOS to replace the original B350 firmware. It’s a bit of a hack, but it worked. Suddenly, the Optiplex started recognizing the Ryzen 9 5950X, a high-end CPU usually reserved for much more powerful systems. The best part? It all fits inside the tiny SFF case, which I mount neatly on my 2U Racknex Optiplex rack mount. The compact size combined with that powerhouse CPU is great for a home network firewall or server.

    Right now, I’m still figuring out how to handle display output because the setup leans toward console output for now. That’s not the biggest issue since I mainly need it working as an OPNSense box, which means routing and firewalling, all running on this beefy Ryzen CPU.

    Power is another part I’m upgrading. The current power supply in the Optiplex isn’t enough for the Ryzen 5950X, so I’m planning to swap it out for a Silverstone 600W FlexATX power supply. That’ll provide the juice needed for stable operation plus support for additional expansions like the X710-T4L network card I plan to use.

    Why go through all this trouble? Well, building a robust OPNSense box with a Ryzen 5950X gives you serious processing power for handling complex network tasks without the noise and size of a traditional server. Plus, it’s a fun project that steps way outside the usual upgrade path.

    If you want to try this yourself, be prepared for some BIOS flashing risks and power supply modifications. Crossflashing BIOS should always be done carefully—there’s plenty of detailed advice on sites like TechPowerUp and Biostar’s official support page. Also, planning power and cooling is crucial when fitting a 16-core CPU into a small case.

    In the end, this little Optiplex box transformed into a powerful and compact network appliance. It’s a reminder how with some creativity and a bit of determination, older systems can sometimes surprise you.

    Why Choose Ryzen 5950X for an Optiplex 5055?

    The Ryzen 5950X offers 16 cores and 32 threads, which is massive for an SFF machine. Whether you’re running multiple VMs, VPN traffic, or heavy firewall rules, this CPU handles it all smoothly. Pairing it with a small, inexpensive chassis like the Optiplex 5055 is a blend of power and practicality.

    Tips for BIOS Crossflashing and Compatibility

    • Always back up your original BIOS before flashing.
    • Use stable BIOS versions that other users have tested for your specific motherboard model.
    • Be ready with a recovery method, like a USB BIOS flashback, in case something goes wrong.

    Preparing Your Power Supply and Cooling

    Upgrading to a 600W Silverstone FlexATX PSU means your system won’t struggle under load. Also, ensure good airflow; Ryzen CPUs run hot, especially in smaller cases. Consider aftermarket low-profile coolers designed for tight spaces.

    For more on OPNSense setups, check their official docs at OPNSense.org.

    This project is a fun mix of DIY hardware hacking and practical network engineering; I love seeing what old gear can really do when you think outside the box.

  • No iGPU? No Space? How a Riser Can Save Your PC Build

    No iGPU? No Space? How a Riser Can Save Your PC Build

    Smart PC building tips for when your motherboard’s graphics are MIA and space is tight

    Building a PC can sometimes mean juggling a bunch of unexpected challenges, especially when your motherboard doesn’t have an integrated graphics processor (iGPU) or your case is just packed to the brim with components. If you’re in a spot where you find yourself saying, “No iGPU and no space?” you’re not alone. Luckily, there’s a straightforward fix: using a PCIe riser cable.

    A pc riser solution is a simple tool that lets you reposition your graphics card or other PCIe devices within your case, helping you overcome space limitations. Let’s dig into why and when you might want to use one and how it can totally change your PC build experience.

    Why Consider a PC Riser Solution?

    Some motherboards, especially those used for budget or specialized systems, don’t come with an integrated GPU. This means the only graphics processing will come from a dedicated graphics card. The setup can be tricky if your case isn’t roomy enough to comfortably fit a large GPU or if your motherboard layout limits where you can slot that card in.

    This is where a riser cable shines. It allows for flexibility in positioning your GPU:

    • Move the GPU to a different slot or place it vertically for better airflow or aesthetics.
    • Fit a bigger card in a smaller case by freeing up PCIe slot space.
    • Avoid blocking other important components or vents.

    How Does a PCIe Riser Work?

    A PCIe riser is a short, flexible cable that connects your motherboard’s PCIe slot to your graphics card, relocating the card from being directly plugged in to being positioned elsewhere in the case. This means even if your motherboard slots are cramped or your chassis design is tight, your GPU isn’t forced to fit where it normally would.

    Most riser cables support PCIe 3.0 or PCIe 4.0 speeds, which means your GPU performance won’t be bottlenecked by the extension. Just be sure to pick a quality riser from a reputable manufacturer to reduce signal loss or interference.

    When Is a Riser Especially Useful?

    • Compact builds: Small form factor (SFF) cases where traditional GPU placement is impossible.
    • Custom aesthetics: Want to show off that shiny GPU vertically? Riser cables are your friend.
    • Motherboards without iGPU: Without onboard video, your GPU placement flexibility becomes even more important.

    Tips for Using a PCIe Riser

    • Always check the cable quality and bandwidth capabilities.
    • Secure the riser and GPU properly to avoid strain on the motherboard or cable.
    • Manage airflow thoughtfully to keep components cool.

    Final Thoughts

    Using a PCIe riser is a simple yet clever solution for builders facing space and compatibility challenges. If your PC build is lacking an iGPU and space is tight, a pc riser solution might be just what you need to keep everything running smoothly without compromise.

    If you’re curious about trying one out, places like CableMod, EKWB, and Newegg offer high-quality riser cables. Also, check out Tom’s Hardware for detailed reviews and advice.

    Hopefully, this helps clear up why risers aren’t just niche accessories but practical tools in modern PC building. If space or component layout is stressing you out, a riser cable could be your new best friend. Happy building!

  • Upgrading My Home Server Setup: Why I Moved On From Old Hardware

    Upgrading My Home Server Setup: Why I Moved On From Old Hardware

    Discovering the right balance in home server setup for performance and energy efficiency

    If you’ve spent any time dabbling in home networking or IT hobbies, you know the importance of a solid home server setup. For me, it all started with some older gear that just wasn’t cutting it anymore. I was tired of my aging Dell R530 servers — they were hot, power-hungry, and honestly, they felt like way more machine than I needed. After all, running a home setup is about balance: you want enough power but without the waste.

    Originally, I was running pfSense on a Minisforum GK41. It did the job, but I was craving something a bit more premium in feel and performance. The R530s? One was running a standalone Security Onion node for network security monitoring, and the other was a Proxmox server juggling multiple tasks. Cool setups, but not what I wanted to keep for the long run.

    So, I decided to upgrade. I moved to a UDM-Pro, a popular all-in-one security gateway that’s much more efficient and sleek-looking. Then I updated my compute and storage nodes to two Minisforum MS-A2 units, each packing a hefty 96 GB of RAM and 6 TB of usable NVMe storage. For a little more storage flexibility, I added a Beelink ME Mini with an extra 6 TB of NVMe available. Oh, and the original GK41? I repurposed it to run a Proxmox Backup Server (PBS) with a 2 TB SSD via a USB-SATA adapter — perfect for backups without wasting precious new resources.

    Why upgrade? The answer is pretty straightforward: better power efficiency, less heat, and a sense of modern reliability. The older R530s were great for their time, but they felt like energy guzzlers in my setup. The newer Minisforum and Beelink units pack much more punch per watt and freed up space while giving me the reliability and speed I needed.

    If you’re thinking about your own home server setup, here are a few things I kept in mind:

    • Energy Consumption: Older servers like the R530s consume a lot of power and create heat, which isn’t ideal for a home environment.
    • Performance Needs: Match your hardware to your workload. I didn’t need massive server racks, just powerful, efficient boxes.
    • Flexibility: Having a modular setup with dedicated roles (like backup, security, virtualization) makes management easier.

    For those curious, the UDM-Pro is a solid choice for network routing and security. Its all-in-one approach is widely appreciated among home network enthusiasts. You can learn more about it on Ubiquiti’s official site. Minisforum offers some interesting small form-factor PCs that pack a punch with ample RAM and storage options — check out their MS-A2 specs here. And when it comes to backup strategies, setting up a Proxmox Backup Server can dramatically improve data security; the official documentation at Proxmox is a great resource.

    Switching up my home server setup wasn’t just about replacing old gear; it was about making my environment more efficient, manageable, and enjoyable. It’s quick to feel overwhelmed by the options out there, but focusing on what really matters to your use case can keep things simple and effective.

    In the end, the shift from those bulky, power-hungry servers to a more modern, energy-conscious setup has been fantastic. I get the performance I want without sweating over my electricity bill or cooling needs. If your home server setup feels more like a furnace than a tool, maybe it’s time to rethink things, just like I did.

  • How Much Can a Home Lab Really Save You?

    Exploring the cost and benefits of running your own home server setup

    If you’ve ever wondered whether a home server setup can actually save you money—or if it’s just a fun tech hobby that drains your wallet—you’re not alone. I recently took a close look at my own setup to see how the numbers shake out and wanted to share what I found.

    A home server setup can be a fantastic way to take control of your own media streaming, networking, and data backups. But when it comes to cost savings, it’s easy to overlook the actual expenses involved, especially electricity. For me, running a few servers with hardware like a Xeon 2640v4, an Intel 12500, and a j5005, plus a couple of access points, a switch, and a handful of hard drives, means the power consumption adds up.

    Why Electricity Costs Matter in a Home Server Setup

    Electricity is the main expense that can turn what feels like a cost-saving project into a surprise bill at the end of the month. Even if your hardware is humming along smoothly and doing a great job, the wattage draw can quietly eat away at your savings.

    I built a simple script to track exactly how much power my lab uses. The findings were eye-opening. For instance, media servers powered by Jellyfin combined with Cloudflare services help me avoid subscription fees for streaming and content delivery. Those savings add up and actually keep me “in the green.” But it’s clear that managing electricity consumption is essential if you want your home server setup to pay off financially.

    What Does a Typical Home Server Setup Include?

    If you’re thinking about starting your own home server, your setup might look a little like mine:

    • Servers with various CPUs, for example, older Xeon processors or newer Intel chips
    • Network devices like switches and access points
    • Multiple hard drives for storage

    Each piece contributes differently to your electricity usage, so knowing their power draw helps you estimate running costs.

    Tips for Keeping Your Home Server Setup Economical

    • Use energy-efficient hardware when possible. Newer CPUs often do more work for less power.
    • Monitor power use with tools or scripts to catch unexpected spikes.
    • Consider running some services through energy-efficient single-board computers for less critical tasks.
    • Take advantage of free or low-cost software options like Jellyfin for media streaming.

    Real Savings, Real Benefits

    Beyond just the cost, there’s a real value in running your own personalized server environment. You control your data, avoid monthly fees, and have a playground to experiment and learn. It’s rewarding in ways beyond the electric bill.

    For those curious about diving into this kind of project, resources from Cloudflare explain how content delivery networks work, which can complement your home server by reducing bandwidth costs.

    In the end, whether a home server setup saves you money depends on your specific hardware, usage, and energy prices. But if you approach it thoughtfully, tracking power use and selecting efficient components, it can be a smart investment—both financially and personally.

    What do you think? Have you tried running your own home server setup? What surprised you most about the costs?

  • Finally Got My Ideal NAS Server Case Without Breaking the Bank

    Finally Got My Ideal NAS Server Case Without Breaking the Bank

    How I navigated tariffs and shipping to snag the perfect home server case

    If you’ve ever dabbled in building your own server or NAS, you know the frustration of finding the right case at a decent price. After a long wait and some serious research, I finally got my hands on a NAS server case that I could actually afford—and I wanted to share the experience with you.

    My journey to find this NAS server case started when I saw some interesting models on AliExpress. The one that caught my eye was the JMCD Best Selling NAS12S4-2 12-Bay Rack-Mount ATX NAS Case. It looks perfect for a home PC or private cloud, boasting ample storage bays and functionality for an Unraid server setup. But then came the kicker: once tariffs hit, the cost skyrocketed to over $500 USD after shipping and customs when trying to get it in the US.

    Instead of giving up, I turned to Alibaba, a platform known for bulk and wholesale options. To my surprise, I found the exact same case listed for only $194 plus $54 for shipping, which was a huge saving. Yes, it took a month and a half to arrive, but it finally did!

    Navigating Tariffs and Shipping Costs

    Tariffs can seriously limit your options or make what seems like a great deal actually break the bank. It’s worth shopping around and considering different platforms—even shipping times and costs vary greatly. For my case, patience paid off.

    Why Choose the JMCD Best Selling NAS12S4-2?

    This case isn’t just about looks; it offers 12 bays to store multiple drives, is rack-mount compatible, and supports ATX motherboards, making it a solid choice for private cloud and data backup setups. Plus, I ordered it with breakout cables, which added a bit to the price but made setup easier and cleaner.

    Next Steps: Picking Components for My Unraid Server

    Now that the case has arrived, the real fun begins: choosing the core components to assemble my Unraid server. For those new to the concept, Unraid is a flexible OS for network-attached storage that lets you run a home server for backups, media streaming, and more.

    If you’re thinking about a similar setup, here are a few resources I found useful:
    Unraid Official Website
    JMCD Case on Alibaba
    Understanding Tariffs and Import Taxes

    Final Thoughts on Building Your Own Home NAS

    If you’ve been tempted to build a home NAS server but got discouraged by the price or complexity, my advice is to shop around and be patient. There are good deals out there, and the satisfaction of finally getting the right NAS server case for a manageable cost is pretty great. Sometimes, it just takes a bit of perseverance and a willingness to explore different options.

    I hope this story helps anyone on a similar hunt or sparks some ideas for your own home server journey. Happy building!