Category: AI

  • Why Solar? A Simple Look at EcoFlow’s Take on Solar Power

    Why Solar? A Simple Look at EcoFlow’s Take on Solar Power

    Exploring the practical reasons behind choosing solar power with insights from EcoFlow

    If you’ve ever wondered “why solar” makes sense for everyday life, you’re definitely not alone. Solar power has been growing in popularity, but sometimes it feels it’s just for the tech-savvy or those looking to make a huge investment. In this post, I want to share a straightforward look at why solar power is worth considering — inspired by some really clear points shared by EcoFlow, a name many of us recognize in the portable power space.

    Why Solar? The Basics

    To start, let’s talk about what “why solar” really means for most people. At its core, it boils down to using sunlight to produce electricity—a clean and renewable resource. Unlike fossil fuels, solar energy doesn’t run out and it doesn’t create pollution while generating power.

    EcoFlow highlights a few simple benefits that resonate with me:

    • Energy independence: You can generate your own power at home or on the go.
    • Cost savings: After the initial setup, solar systems can significantly reduce electricity bills.
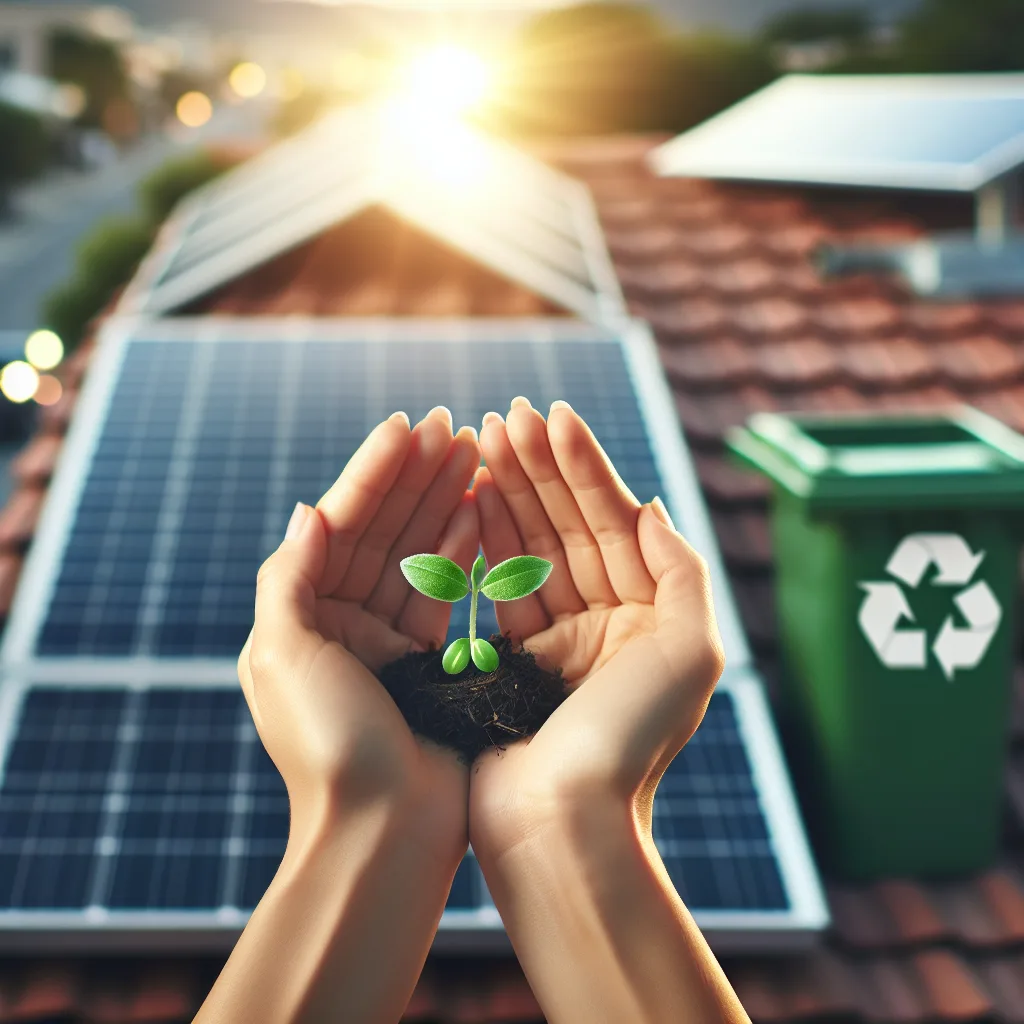
    • Eco-friendly: Solar power helps cut down on carbon footprints.

    These points make the decision pretty straightforward for reducing reliance on traditional power grids.

    How EcoFlow Frames the “Why Solar” Question

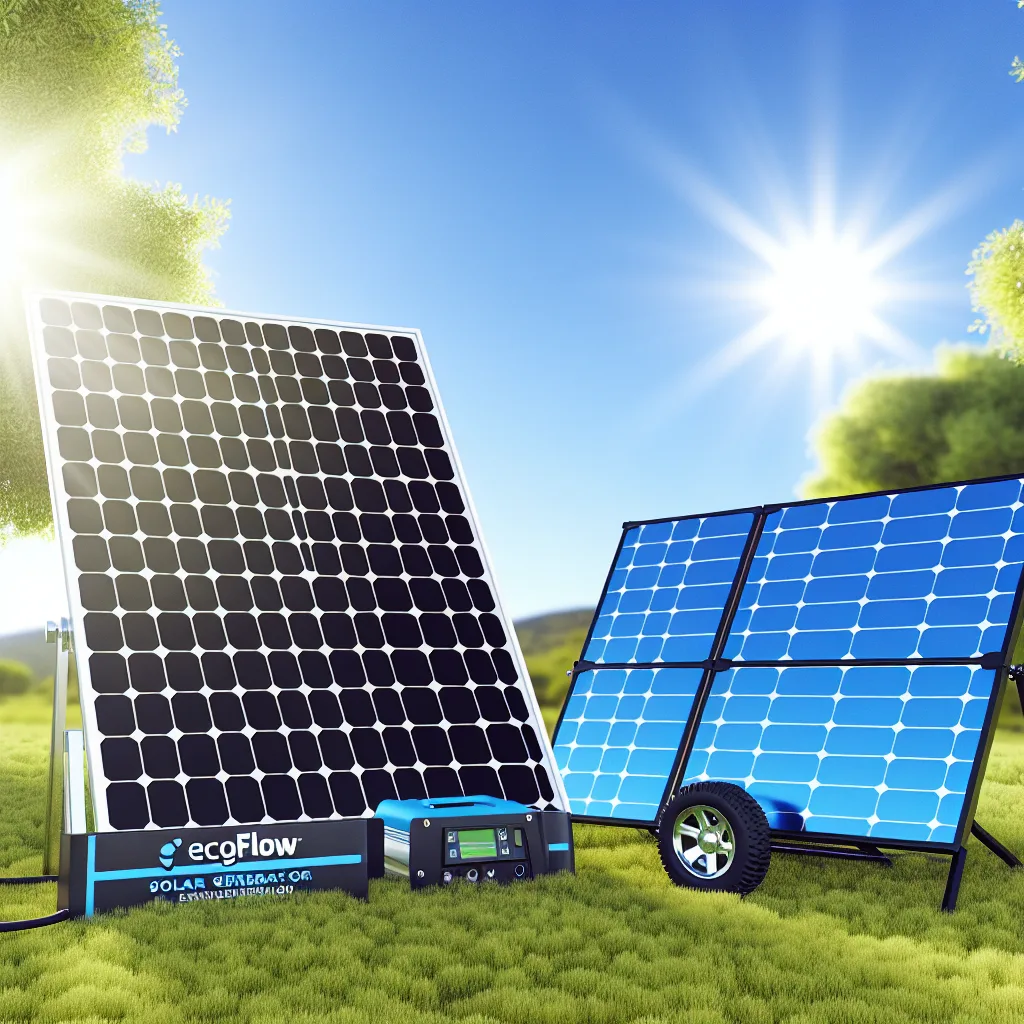
    EcoFlow approaches solar power not just from an environmental stance but also from a very practical, everyday use perspective. Their portable solar generators, for example, show how you can take solar energy with you anywhere, whether it’s camping, working remotely, or during emergencies.

    This practical side of “why solar” is compelling, because it’s about immediate and tangible benefits:

    • Portability: Power your devices without needing a wall outlet.
    • Reliability: Keep essential equipment running during outages.
    • Versatility: Use solar power in diverse settings, not just at home.

    It’s a great reminder that solar doesn’t have to stay fixed on your rooftop; it can move with you.

    The Financial and Environmental Upsides

    Investing in solar often makes more sense than it seems at first. The price of solar panels and kits like those from EcoFlow has dropped over the years. Plus, you can find incentives and rebates depending on where you live.

    For many, the key question is, “Will solar save me money?” The answer is often yes, especially when combined with energy-efficient habits. Beyond savings, you get the feel-good aspect of doing your bit for the planet.

    If you want to dig a little deeper, check out the U.S. Department of Energy’s Solar Energy Basics or EnergySage’s guide on going solar.

    A Quick Note on Going Solar Today

    Here’s the takeaway: Whether you’re thinking about installing solar panels on your roof or picking up a portable solar power station, it’s worth asking the question, “why solar?”

    It’s not about flashy tech or unclear promises. It’s about using a natural resource to meet your energy needs more cleanly and often more cost-effectively.

    If you like the idea of having power wherever you go, portable and reliable, look into solutions from brands you trust, like EcoFlow. Their user-oriented approach shows that solar is practical — not just an idealistic dream.

    Wrapping It Up

    So, why solar? Because it offers a real path to energy freedom, savings, and a lighter environmental load. It’s a choice many can make, with tools and technology that are easier to access than ever.

    If you want a closer look at EcoFlow’s products, visit their official website to see how they’re making the benefits of solar power accessible for everyone.

    Thanks for reading! If you’re curious or already diving into solar power, I’d love to hear your thoughts or experiences. After all, the more we talk about simple, realistic reasons to go solar, the more people can make informed choices about their energy future.

  • Building Your First Home Server: A Beginner’s Journey

    Building Your First Home Server: A Beginner’s Journey

    Exploring the fun and basics of home server setup for hobbyists and tech enthusiasts alike.

    If you’re thinking about diving into the world of homelabing, building your own rig can be a surprisingly rewarding experience. When I first started my home server setup, I wasn’t looking to create the most powerful machine, but rather, I wanted a practical and fun project to learn from. Let me walk you through the basics of my journey, which might just inspire your own adventure.

    My Starting Point: A Simple Home Server Setup

    The heart of my setup is a Supermicro motherboard, equipped with two Intel E5-2690 v4 processors. These are solid choices for multitasking and running multiple applications at once without breaking the bank. Alongside these CPUs, I installed 90GB of 2400 MHz ECC memory. ECC memory is great for servers because it helps prevent data corruption, which adds an extra layer of reliability.

    For graphics, I chose to mix things up by adding an NVIDIA RTX 4000 workstation card paired with a GTX 1070 that I picked up for just $20 — a steal! While graphics cards aren’t always crucial for a server, having some GPU power can be really helpful if you plan to do anything like media streaming or light gaming.

    Storage-wise, I’m running a 1TB Samsung SATA SSD as the boot drive for faster startup and responsiveness. Plus, I’ve added six 500GB Toshiba hard drives and a couple of 1TB drives that were already lying around. Although it’s not a huge amount compared to what some enthusiasts have, it’s plenty for my needs and a good way to repurpose old hardware.

    Choosing Your Software: Windows 10 and Beyond

    Right now, I’m running Windows 10 Home on the server since that’s what I’m familiar with. If you’re new to this, sticking to what you know at first is a good call. But as you get comfortable, there are plenty of other options to explore. For instance, Linux-based server OSes like Ubuntu Server or FreeNAS offer great tools for file sharing, backups, and even media streaming.

    Here are some ideas to consider for your home server software:
    Media servers: Plex or Jellyfin can serve your movies and music across devices smoothly.
    Virtualization tools: Platforms like Proxmox or VMware ESXi allow you to run multiple virtual machines.
    Backup and storage: FreeNAS/TrueNAS for organizing your drives and backing up important data.

    Want to learn more about setting up a home server OS? Check out the comprehensive Ubuntu Server Guide or get into FreeNAS on the TrueNAS website.

    Why Home Server Setup is Worth Trying

    Building a home server may sound daunting at first, but the process teaches you a lot about hardware compatibility, networking, and managing data. Plus, it can be genuinely enjoyable tinkering with the components and software—much like a hobby.

    You don’t need the flashiest gear. Some folks build with old parts for learning; others go all out. Either way, it’s about what works for you and what you want to get from it. My setup is modest, but it has been a fantastic way to experiment and grow my skills.

    Getting Started Tips

    • Start simple: Use hardware you already have before investing in new parts.
    • Document your setup: It helps troubleshooting later.
    • Join forums or communities: Sites like ServeTheHome offer tons of advice.
    • Experiment with software: Don’t be afraid to try new OS or apps that match your interests.

    If you’re interested in home server setup, just take the plunge! It’s okay to learn as you go, and there’s a big and friendly community out there to help.

    Hope this gives you a clear picture and maybe even some encouragement to start your own build. Feel free to share your setup or ask questions!


    Sources:

    • Intel E5-2690 v4 specs: https://www.intel.com/content/www/us/en/products/sku/83495/intel-xeon-processor-e5-2690-v4-35m-cache-2-60-ghz/specifications.html
    • NVIDIA RTX 4000: https://www.nvidia.com/en-us/design-visualization/quadro-rtx-4000/
    • ECC Memory explanation: https://www.crucial.com/articles/about-memory/what-is-ecc-memory
  • Why “AI Skills” Aren’t What You Think — And What Really Matters

    Why “AI Skills” Aren’t What You Think — And What Really Matters

    Understanding the truth behind AI skills and why anyone can harness AI effectively

    Let’s talk about AI skills — or more accurately, why the idea of “AI skills” as some special, elusive thing is a bit of a myth. If you’ve been hearing people say “Those who don’t understand AI will be left behind,” you’re not alone. But what does it really mean to have AI skills?

    The truth is, the phrase “AI skills” gets tossed around a lot, but usually without a clear explanation. A few years ago, some CEOs even claimed that “knowledge won’t matter” anymore because AI would take over. This sparked a lot of hype about how you must “embrace AI or get left behind.” But if you step back, AI is all about breaking down barriers, not building new ones.

    What Are “AI Skills” Really?

    If you dig into what people call AI skills, the most common one you’ll hear is “prompt engineering.” Sounds fancy, right? But really, prompt engineering is just the art of asking the AI the right questions or giving it the right instructions. It’s a function, not a brand-new magic skill.

    Think about it: I could show my 92-year-old aunt how to use ChatGPT in less than an hour. She can learn to write prompts to get useful results. The magic lies in knowing what you want and how to communicate it clearly — skills we all use every day.

    AI Is a Tool, Not a Talent Maker

    One big misconception is the idea that AI can turn someone who isn’t good at something into an expert instantly. That’s not how it works. AI can help you get “good enough” when perfection isn’t necessary, but it doesn’t replace the expertise needed for truly great work.

    What really matters is your knowledge in the field you’re applying AI to. AI amplifies expertise, but it doesn’t replace it. An expert can leverage AI to be faster or get creative in new ways, but someone with no background won’t suddenly become a pro just by tossing prompts at the system.

    The Real Skills Are Behind the Scenes

    There’s definitely deep knowledge in AI — understanding how models learn, vector embeddings, attention mechanisms — this stuff is complex and valuable. But these skills belong mostly to the people building AI models and the researchers pushing the field forward.

    For most of us, the engineering side (writing code, integrating AI) isn’t dramatically different from other software projects. The real challenge, and where skill really counts, is in training models and curating the right datasets.

    How Anyone Can Use AI Effectively

    The bottom line? Anyone can learn to “use AI” quite quickly. Writing good prompts or feeding context to AI doesn’t require a secret skill set. It’s about being clear, thoughtful, and knowing what you want.

    Here are a couple of quick tips to get started:

    • Start simple. Ask straightforward questions.
    • Add context if the AI doesn’t get it the first time.
    • Experiment — try different prompts to see what works best.

    If you want to explore a bit deeper into how AI works or how it’s built, websites like OpenAI have excellent resources. For tech enthusiasts, Google AI Blog gives insights into the research and advancements happening behind the scenes.

    Wrapping Up: Don’t Buy into the AI Skills Hype

    So, is “getting good at AI” some mystical new skill you must master? Not really. Most people overcomplicate it. If you can type, copy text, and explain what you want clearly, you’re already set.

    AI is a tool designed to make things easier, not another hurdle to jump over. Focus on your own expertise, use AI to support your work, and don’t stress about becoming an AI wizard overnight. That’s the real takeaway here.

    For more on how AI intersects with daily life and work, feel free to check out MIT Technology Review’s AI section.

    Remember: The most valuable “AI skill” is simply knowing how to use the tool wisely — and anyone can do that.

  • I Just Installed a Smart Lock and Here’s What I Learned

    I Just Installed a Smart Lock and Here’s What I Learned

    Choosing a smart lock feels overwhelming with so many options. Here’s a simple, friendly guide to help you find the best smart lock for your home and needs.

    So, you’re thinking about upgrading your home’s security and diving into the world of smart locks. It’s a great move. I recently went through the same process, swapping out all the old, clunky locks on my exterior doors, including the one to the garage. And I get it – the moment you start looking, it feels like there are a million options out there. It can be a little overwhelming.

    Choosing the best smart lock for your home really comes down to what you value most: convenience, security, or a seamless integration with your other smart home gadgets. I spent a ton of time digging through reviews and comparing features, and I’m happy to share what I learned to make your decision a little easier.

    What to Consider When Choosing the Best Smart Lock

    Before you even look at specific brands, it’s a good idea to think about how you’ll actually use the lock. Are you someone who frequently has guests or a dog walker who needs temporary access? Or are you mainly looking for the peace of mind that comes with knowing your door is always locked?

    Here are a few key things to consider:

    • Connectivity: How does the lock connect to your phone and other devices? Most use Bluetooth for short-range control, while others use Wi-Fi (often through a bridge) to let you lock and unlock your door from anywhere. Z-Wave and Zigbee are other options that connect directly to a smart home hub like SmartThings or Hubitat.
    • Power Source: Smart locks are battery-powered. You’ll want to check the expected battery life and how the lock notifies you when it’s running low. Nothing is worse than getting locked out because of a dead battery, though most have a backup option, like a physical key or a way to temporarily power it from the outside.
    • Key or Keyless?: Some models are completely keyless, featuring only a keypad or fingerprint scanner. Others are more traditional and still have a keyhole as a backup. I personally wanted a physical key option, just in case.
    • Smart Home Integration: If you’re already using a system like Amazon Alexa, Google Assistant, or Apple HomeKit, you’ll want a lock that plays nicely with it. This lets you do cool things like lock your door with a voice command or create routines where locking the door also turns off the lights and adjusts the thermostat.

    Our Top Picks for the Best Smart Lock in 2025

    After all my research, a few brands consistently came out on top. They each have their strengths, so the best one for you depends on your specific needs.

    1. Schlage Encode Plus™ Smart WiFi Deadbolt

    This one is a fan favorite for a reason. The Schlage Encode Plus is incredibly versatile. It has a built-in Wi-Fi connection, so you don’t need a separate bridge to connect it to your network. It works great with Alexa and Google Assistant, and the “Plus” version adds Apple Home Key support. This means you can just tap your iPhone or Apple Watch to the lock to open it. It’s super slick. It also has a traditional keypad and a keyhole, so you’ve got plenty of backup options.

    2. August Wi-Fi Smart Lock (4th Gen)

    If you’re a renter or just don’t want to replace your entire deadbolt, the August Wi-Fi Smart Lock is a fantastic choice. It installs on the inside of your door, over your existing deadbolt hardware. This means you can still use your original keys, which is a big plus for a lot of people. It’s sleek, discreet, and packed with features like Auto-Lock and Auto-Unlock, which uses your phone’s location to lock the door when you leave and unlock it as you approach. You can learn more about their tech on the official August website.

    3. Yale Assure Lock 2

    Yale is a name that’s been trusted in locks for over a century, and their smart locks live up to the reputation. The Yale Assure Lock 2 is a really solid, reliable option. It’s a bit more modular than the others. You can buy it as a Bluetooth-only model and then add a Wi-Fi or Z-Wave module later if you decide you need more connectivity. It comes in a bunch of different styles, including keypad-only and keyed versions, so you can find one that fits your home’s look. For more details on smart home compatibility, CNET has a great smart lock guide that breaks down the different connection types.

    Making the Final Call

    Ultimately, there isn’t one single “best smart lock” for everyone. For my home, I ended up going with a Schlage because of its direct Wi-Fi and the peace of mind that comes with a well-known security brand. But your needs might be different.

    My advice? Think about your daily routines. Do you want the futuristic feel of tapping your watch to unlock the door, or do you prefer the simple, practical approach of a keypad? Answering that will point you in the right direction. It’s a bit of an investment, but the convenience and security it adds to your daily life are totally worth it. Good luck with your upgrade!

  • That Time I Spent 4 Hours on a Password Manager Setup (So You Don’t Have To)

    That Time I Spent 4 Hours on a Password Manager Setup (So You Don’t Have To)

    A friendly guide to solving the dreaded certificate error for your self-hosted password manager.

    It’s a familiar story for anyone who’s dipped their toes into self-hosting. You get a brilliant idea—like running your own private, secure password manager. You spend a few hours setting up a Raspberry Pi, installing Docker, and getting an app like Vaultwarden running. It feels like you’re on top of the world. Then, you try to connect, and your browser screams: “Your connection is not private.” Suddenly, the project feels impossible. If you’ve been fighting with certificate errors to get Vaultwarden local access working, take a deep breath. You’re not doing anything wrong; you’ve just hit the most common roadblock in self-hosting.

    I’ve been there. Staring at the screen after hours of work, wondering why my phone or PC refused to trust the very service I just created. The dream is to have everything synced up on your home network, accessible only to you and your devices. But that little padlock icon in the browser stands in the way.

    The good news is that this is fixable, and you don’t need to be a network security guru to understand why it’s happening and how to solve it.

    Why Your Browser Distrusts Your Setup

    Let’s get one thing straight: the error message isn’t about your Vaultwarden setup. It’s about trust.

    When you connect to a website like your bank, your browser uses a TLS/SSL certificate to do two things:
    1. Encrypt the connection so no one can snoop on your data.
    2. Verify that the server you’re talking to is actually your bank and not an impostor.

    This verification works because the certificate is signed by a trusted third party, called a Certificate Authority (CA). Companies like Let’s Encrypt or DigiCert are CAs. Your browser has a built-in list of these trusted authorities.

    When you create your own “self-signed” certificate at home, your browser has no idea who signed it. It’s like a stranger handing you an ID card they printed themselves. It might be legit, but the browser’s job is to be skeptical. So, it throws up a warning. This is the core issue preventing your Vaultwarden local access.

    Solution 1: The “Just Trust Me” Method (Manually Installing the Certificate)

    The most direct way to solve this for a purely local setup is to tell your devices, “Hey, I know the person who made this certificate. It’s me. You can trust it.” You do this by installing your self-signed certificate as a trusted authority on each device that needs to connect to Vaultwarden.

    This sounds complicated, but it’s a one-time setup per device.

    Here’s the general idea:

    1. Find Your Certificate: When you set up Vaultwarden with a reverse proxy like Caddy or Nginx, it generates certificate files. You’re looking for the public certificate file, which usually ends in .crt or .pem.
    2. Get it On Your Device: You’ll need to copy this file to your PC, phone, or tablet. You can use a USB drive, email it to yourself, or use a file-sharing tool.
    3. Install and Trust It: This is the part that varies by operating system.
      • On Windows: You’ll double-click the file and go through the “Certificate Import Wizard.” The crucial step is to place the certificate in the “Trusted Root Certification Authorities” store.
      • On macOS: You can import the certificate into the Keychain Access app and then manually set it to “Always Trust.”
      • On Android & iOS: This process is a bit more locked down but generally involves opening the certificate file and following the prompts to install a new “profile” or “credential.”

    Once a device trusts your certificate, the browser and the official Bitwarden/Vaultwarden apps will connect without a fuss. It’s a fantastic solution for a completely offline, home-only setup. For detailed, step-by-step guides, a quick search for “how to install root certificate on Windows/macOS/Android” will give you official documentation.

    Solution 2: The “Let’s Make It Official” Method (A Real Domain)

    This might sound like overkill, but it’s often easier in the long run. Instead of using a local IP address like 192.168.1.50, you use a real domain name that you own.

    “But I want to keep it local!” you might say. You still can.

    The magic happens with a service like Cloudflare or DuckDNS and a clever feature from Let’s Encrypt called the DNS-01 challenge.

    Here’s how it works:
    1. You get a domain name (you can get one for a few dollars a year).
    2. You point that domain (or a subdomain, like vault.yourdomain.com) to your server’s local IP address.
    3. You configure your reverse proxy (Caddy makes this incredibly easy) to use the DNS challenge. Caddy will automatically talk to your domain provider to prove you own the domain.
    4. Let’s Encrypt issues a real, trusted certificate for that domain.

    Because the certificate is from a trusted CA, every device in the world trusts it automatically. No manual installation is needed. Your Vaultwarden instance can still be completely unreachable from the outside internet, but because it has a “real” certificate, everything just works. You can find excellent documentation on how to set this up on the official Caddy website. This method makes achieving seamless Vaultwarden local access much smoother.

    Don’t Feel Stupid—You’re Learning

    Hitting a wall like this isn’t a sign of failure. It’s a rite of passage in the self-hosting world. The frustration you felt is exactly what leads to a deeper understanding of how the web actually works. You’ve gone from just using the internet to helping build your own small piece of it.

    So, whether you decide to manually trust your own certificate or go the full domain route, know that you’re on the right track. Your private, secure, and self-hosted password manager is just one small configuration away. And once it’s running, the peace of mind is totally worth the effort. By the way, the Vaultwarden Wiki is a great resource if you run into any other snags. Happy hosting!

  • So, You’re Thinking About a Smart Lock? Let’s Talk.

    Feeling overwhelmed by all the choices? I get it. Here’s a simple breakdown of how to find the perfect smart lock for your home.

    I was standing in the hardware aisle, staring at a wall of door locks, and I felt completely lost. A few years ago, you just had to pick a color: brass or silver. Now? It’s a whole universe of smart home gadgets. If you’re thinking about upgrading your home’s security and convenience, you’ve probably found yourself wondering about the best smart locks and where to even begin. It just seems like there are a lot of options, right?

    I get it. I recently went through this exact process for my own house, swapping out every single exterior lock. It felt like a huge project, but breaking it down made it so much easier. So, let’s grab a coffee and talk through it. This isn’t about finding the one “perfect” lock for everyone, but about finding the perfect one for you.

    What to Consider When Choosing the Best Smart Locks

    Before you even look at specific brands, it helps to ask yourself a few simple questions about how you live. Your answers will narrow down the options fast.

    • How do you want it to connect? This is the biggest differentiator. You’ll mainly see Wi-Fi and Bluetooth.
      • Bluetooth locks connect directly to your phone when you’re nearby (usually within about 30 feet). They are amazing for battery life but won’t let you lock or unlock the door when you’re away from home unless you buy a separate Wi-Fi bridge or hub.
      • Wi-Fi locks connect directly to your home’s Wi-Fi network. This is awesome because you can check your door’s status, lock it, or unlock it from anywhere in the world. The tradeoff? It uses more power, so you’ll be changing batteries more often.
    • Keep your keys or go all-in? Some smart locks are a full deadbolt replacement—you take the old one out and put the new one in. Others are “retrofit” models that only replace the interior thumb-turn, letting you keep your existing deadbolt and keys. The August Smart Lock is famous for this, and it’s a fantastic option for renters who can’t change the locks.

    • How do you want to unlock it? The whole point is to not need a key, right? Most smart locks offer multiple ways in:

      • Your Smartphone: The most common method.
      • Keypad: Punch in a code. Super handy for guests or if your phone dies.
      • Fingerprint: Some newer models include a fingerprint scanner for super-fast access.
      • Voice Commands: “Hey Google, lock the front door.”
      • A Physical Key: Almost all smart locks still have a traditional keyway as a backup. Don’t worry, you won’t get locked out if the batteries die.

    Key Features of the Best Smart Locks You’ll Actually Use

    Once you have the basics figured out, you can look at the fun stuff. It’s easy to get drawn in by a long list of features, but these are the ones I’ve found genuinely useful.

    1. Auto-Unlock: This is the magic. The lock uses your phone’s location (a feature called geofencing) to know when you’re getting close to home. By the time you reach the door, it unlocks automatically. Walking up with an armful of groceries and hearing that click is a genuinely great feeling.

    2. Guest Access: This is probably my most-used feature. You can create temporary or recurring digital “keys” for anyone. I have one for my dog walker that only works on weekday afternoons and another for my parents that works anytime. No more hiding a key under the mat or worrying about who has a copy. You can see who comes and goes and delete their access with a tap.

    3. Activity Feed & Notifications: Most smart lock apps have a log that shows you exactly when the door was locked or unlocked and by whom. It’s a simple feature, but it provides incredible peace of mind. You can even get notifications on your phone, so you know the moment your kids get home from school.

    A Few Great Models to Get You Started

    While I can’t tell you which lock is perfect for you, here are a few consistently well-regarded options to start your research with.

    • August Wi-Fi Smart Lock: This is the king of retrofitting. It’s incredibly easy to install over your existing deadbolt, the app is fantastic, and it has all the core features you need.
    • Schlage Encode Plus: A powerhouse of a lock. It’s a full replacement with a built-in keypad, Wi-Fi, and it supports Apple Home Key, which lets you tap your iPhone or Apple Watch to unlock the door. It’s known for being incredibly reliable.
    • Wyze Lock: For those on a budget, Wyze offers a surprisingly solid and affordable option. It’s a retrofit model like August and covers all the basic smart features without the premium price tag. CNET has a great rundown of smart locks if you want to see a full comparison.

    Ultimately, choosing the best smart locks for your home is about making your life a little bit easier and more secure. Don’t get bogged down in the tech specs. Think about your daily routine and which features would bring you the most convenience and peace of mind. For me, it was absolutely worth the upgrade.

  • That Mysterious Plug on Your SSD: Solved

    That Mysterious Plug on Your SSD: Solved

    Let’s solve the mystery of that weird, unidentified port on your high-performance enterprise drive.

    It’s a familiar story for anyone who loves tinkering with computer hardware. You score a great deal on a piece of enterprise-grade equipment—maybe a server CPU, a high-end network card, or in this case, a seriously fast SSD. You get it back to your desk, admire your new toy, and then you see it: a port. A weird, unfamiliar connector that doesn’t seem to have a home. You check the manual, you search online, and… nothing. It’s a moment many of us have faced when dealing with a new SSD power connector we’ve never seen before.

    I recently saw someone run into this exact situation with a Samsung PM1735, a beast of a PCIe SSD designed for data centers. On the back edge, there was a small, mysterious connector that wasn’t mentioned in the standard datasheet. So, what is it? And more importantly, do you need to plug something into it?

    Let’s solve this little hardware mystery.

    So, What Is That Extra SSD Power Connector?

    Nine times out of ten, that strange little port on a high-performance SSD is an auxiliary power connector. Think of it like the extra power plugs on a beefy graphics card. While the main interface—the PCIe slot in this case—provides power, it has its limits. High-performance components can sometimes get a little thirsty for electricity, demanding more wattage than the standard slot can safely provide.

    The main job of the PCIe slot is data transfer. While it does deliver power (up to 75 watts for a standard x16 slot), it wasn’t designed for the kind of sustained, high-power draw that some modern components require. Enterprise SSDs, especially those built for intense, non-stop workloads, are engineered to be pushed to their absolute limits. To ensure they have all the stable, clean power they need, manufacturers add a direct line to the power supply.

    This supplemental SSD power connector provides that direct line, bypassing the motherboard and delivering steady voltage right where it’s needed.

    Why Your Enterprise Drive Needs More Juice

    A standard consumer NVMe SSD in your desktop PC might pull 5-7 watts under a heavy load. It’s efficient and perfectly happy with the power it gets from the M.2 slot. An enterprise drive like the Samsung PM1735, however, is in a completely different league. These drives are built for relentless 24/7 operation in servers, handling massive databases and virtual machines.

    Under a sustained, heavy read/write workload, a drive like this can consume upwards of 25 watts. When you have a server chassis packed with a dozen of these drives, the power requirements add up fast.

    Here’s why that extra power is so critical:

    • Stability: If the drive tries to draw more power than the PCIe slot can provide, it can lead to performance throttling, data errors, or even cause the drive to drop offline completely. The auxiliary power ensures this never happens.
    • Performance: To hit those advertised top speeds for reads and writes consistently, the drive needs a consistent and robust power source.
    • Longevity: Providing stable power reduces stress on the components, both on the SSD itself and on the motherboard.

    Reputable tech sites that review this kind of hardware, like StorageReview, often detail the power consumption of these drives in their testing, showing just how demanding they can be compared to consumer models.

    Do You Actually Need to Plug It In?

    This is the big question. You’ve got this SSD, you see the port, but you don’t have the cable, or your power supply doesn’t have a matching plug. Are you out of luck?

    The answer is: it depends on your use case.

    • For a standard desktop user: If you’re putting this drive in a regular PC for a gaming library or as a fast boot drive, you can probably get away with not using the auxiliary power connector. In these lighter-use scenarios, the drive rarely hits its maximum power draw, and the PCIe slot can typically provide enough juice to keep it running just fine.
    • For power users or in a server: If you plan to use this drive as intended—for heavy, sustained workloads like video editing, running virtual machines, or in a file server—you should absolutely plug it in. The manufacturer put it there for a reason. Not connecting it is like buying a sports car and never taking it out of first gear; you’re leaving performance and, more importantly, stability on the table.

    So, the next time you come across a mysterious port on a new piece of hardware, don’t panic. More often than not, it’s a sign that you’ve got your hands on a seriously powerful component designed for peak performance. That little SSD power connector isn’t a problem—it’s a feature.

  • The Ultimate Smart Home Setup Guide: Transform Your Living Space

    The Ultimate Smart Home Setup Guide: Transform Your Living Space

    Your Comprehensive Smart Home Setup Guide for a Connected Life

    Welcome to the future of living! A smart home isn’t just about convenience; it’s about creating an intuitive, efficient, and secure environment tailored to your lifestyle. If you’ve ever wondered how to bring this vision to life, this Smart Home Setup Guide is exactly what you need. From automating your lights to securing your premises, we’ll walk you through every step of transforming your living space into a truly connected haven. Gone are the days of fumbling for light switches or worrying if you locked the door – smart technology puts control at your fingertips.

    Planning Your Smart Home Ecosystem

    Before diving into purchases, a little planning goes a long way. Start by identifying your primary goals: Do you want to save energy with smart thermostats? Enhance security with cameras and smart locks? Or simply add convenience with voice-controlled lighting? Consider your budget and existing home infrastructure. Compatibility is key; choosing devices that work well together, ideally within the same ecosystem (like Apple HomeKit, Google Home, or Amazon Alexa), will simplify your Smart Home Setup Guide journey. Researching platforms is crucial for a seamless experience.

    Essential Smart Devices to Consider

    A typical smart home ecosystem often revolves around a central hub or a smart speaker that acts as a controller. Beyond that, popular devices include:
    * Smart Lighting: Bulbs or switches that can be controlled remotely, dimmed, or even change color. Brands like Philips Hue or Lutron Caseta are popular choices.
    * Smart Thermostats: Devices like Nest or Ecobee learn your preferences and optimize energy usage, often integrating with your HVAC system.
    * Smart Security: Doorbell cameras, indoor/outdoor cameras, smart locks, and window/door sensors provide peace of mind. Arlo and Ring are well-known in this space.
    * Smart Plugs: Turn any traditional appliance into a smart one, allowing remote control or scheduling.
    * Voice Assistants: Amazon Echo or Google Home devices serve as the central command center for many smart homes.

    The Smart Home Setup Guide to Connectivity

    Understanding how your devices communicate is vital. Most smart devices rely on your home Wi-Fi network. However, other protocols like Zigbee and Z-Wave are common for low-power devices, often requiring a dedicated hub. These protocols are designed for stability and efficiency, creating a mesh network that extends range. For more on these technologies, you can refer to an explanation of home automation protocols like those found on the Z-Wave Alliance website: https://z-wavealliance.org/what-is-z-wave/. Ensuring your router can handle multiple devices is also important for a smooth experience.

    Step-by-Step Installation and Configuration

    Once you have your devices, installation begins. For many smart devices, this primarily involves plugging them in and connecting them to your home network via their respective apps. Follow the manufacturer’s instructions carefully. After initial setup, the real magic happens:
    1. Device Integration: Link all your new smart devices to your chosen smart home platform (e.g., Google Home app, Amazon Alexa app).
    2. Room Assignment: Organize devices by room for easier control.
    3. Automation & Routines: This is where your Smart Home Setup Guide truly shines. Set up routines like “Good Morning” to gradually turn on lights, open blinds, and start your coffee machine, or “Away” to lock doors and arm your security system. Explore IFTTT (If This Then That) for advanced cross-platform automations: https://ifttt.com/.
    4. Voice Control: Enable voice commands for hands-free operation.

    Advanced Tips and Future-Proofing

    • Guest Access: Set up limited access for family or guests.
    • Data Privacy: Be mindful of the data collected by smart devices. Regularly review privacy settings and consider using a strong, unique password for your Wi-Fi network and smart home accounts. For general cybersecurity tips, a resource like CISA can be helpful: https://www.cisa.gov/cybersecurity-resources.
    • Software Updates: Keep your device firmware and apps updated for security and new features.
    • Scalability: Plan for future additions. Will your chosen ecosystem support new device types as they emerge?

    Conclusion

    Embarking on a smart home journey can seem daunting, but with this comprehensive Smart Home Setup Guide, you have the roadmap to success. By strategically planning, choosing the right devices, and setting up intelligent automations, you can create a home that truly works for you, enhancing convenience, security, and energy efficiency. Welcome to a smarter way of living!

  • Embrace a Greener Future: Practical Sustainable Living Tips for Everyone

    Embrace a Greener Future: Practical Sustainable Living Tips for Everyone

    Discover actionable sustainable living tips to reduce your environmental footprint and save money.

    Embrace a Greener Future: Practical Sustainable Living Tips for Everyone

    Discover actionable sustainable living tips to reduce your environmental footprint and save money.

    In an era where environmental concerns are paramount, adopting sustainable living tips isn’t just a trend; it’s a necessity. Sustainable living is about making conscious choices that minimize our negative impact on the planet, conserve natural resources, and support a healthier environment for current and future generations. It encompasses everything from how we consume to how we manage waste and energy. Embracing this lifestyle doesn’t require drastic, overnight changes; rather, it’s a journey of small, consistent steps that collectively make a significant difference. This guide will provide practical, actionable tips you can implement right away to begin your eco-friendly journey.

    Reduce, Reuse, Recycle: The Foundation of Sustainable Living

    The classic “Reduce, Reuse, Recycle” mantra remains the cornerstone of any sustainable lifestyle. Reducing consumption is the most impactful step. Before buying something new, ask yourself if you truly need it. Can you repair an existing item? Can you borrow instead of buy? Opt for products with minimal packaging or buy in bulk to cut down on waste.

    Reusing extends the life cycle of products. This could mean using reusable shopping bags, water bottles, and coffee cups. Upcycling old furniture, clothes, or containers into new functional items is another fantastic way to reuse and reduce waste. Think creatively!

    Finally, Recycling ensures materials can be processed and turned into new products, diverting them from landfills. Familiarize yourself with your local recycling guidelines, as rules can vary by municipality. For comprehensive information on what can and cannot be recycled and why it matters, check out resources like the EPA’s Recycling Basics page. Proper sorting is key to effective recycling.

    Energy Efficiency at Home: Smart Sustainable Living Tips

    Our homes are significant contributors to our carbon footprint, primarily through energy consumption. Implementing sustainable living tips focused on energy efficiency can lead to substantial savings on utility bills while benefiting the planet.

    Start by switching to LED light bulbs, which use up to 90% less energy and last much longer than traditional incandescent bulbs. Unplug electronics when not in use, as they can still draw “phantom” power. Consider investing in energy-efficient appliances certified by programs like ENERGY STAR. Simple habits like air-drying clothes instead of using a dryer can also make a big difference. For more detailed advice and tools to calculate your energy savings, visit authoritative sources such as the U.S. Department of Energy’s Energy Saver website. Smart thermostats, which learn your habits and adjust temperatures accordingly, can also optimize heating and cooling, further reducing energy waste.

    Mindful Consumption and Local Choices for a Sustainable Lifestyle

    Beyond waste and energy, mindful consumption plays a crucial role in sustainable living. This means being conscious about where your products come from and how they are produced. Support local businesses and farmers’ markets. Buying locally reduces transportation emissions and often supports more sustainable agricultural practices.

    When purchasing new items, research brands that prioritize ethical sourcing, fair labor practices, and environmental stewardship. Look for certifications that indicate a product’s sustainability credentials. Choosing second-hand items over new ones, whether it’s clothing, furniture, or electronics, is another excellent way to reduce demand for new production and extend product lifecycles. Learn more about the benefits of local food systems and how they contribute to sustainability from organizations like the Sustainable Food Trust.

    Beyond the Basics: Water, Transport, and Green Spaces

    Sustainable living extends to every facet of life. Conserve water by taking shorter showers, fixing leaks promptly, and using water-efficient appliances. Consider collecting rainwater for garden use. For transportation, prioritize walking, cycling, or public transport over driving. If driving is necessary, carpool or consider electric vehicles. Finally, embrace green spaces by planting trees, creating a home garden (even a small herb garden on a balcony), and composting food scraps to enrich your soil naturally.

    Conclusion

    Embracing sustainable living tips is a powerful way to make a positive impact on our planet. It’s a journey that encourages conscious choices, reduces our environmental footprint, and often leads to cost savings and a healthier lifestyle. Every small step, from recycling correctly to choosing energy-efficient options, contributes to a larger, more sustainable future for all. Start today, and inspire others to join you in this vital endeavor.

  • My Home Lab Was a Mess. Then I Drew a Map.

    My Home Lab Was a Mess. Then I Drew a Map.

    It’s the map that turns your chaotic collection of hardware into an organized, understandable system.

    It started with a single server humming away in the corner of my office. Then came a NAS for backups, a Raspberry Pi for ad-blocking, and before I knew it, I had a full-blown home lab on my hands. The problem? It was a mess of wires and blinking lights that only I vaguely understood. If you’ve ever felt that way, you know how crucial a good home lab network diagram is. It’s the map that turns your chaotic collection of hardware into an organized, understandable system.

    My own diagram has gone through a few versions. The first one was… well, it was a start. It was a bit like a subway map drawn from memory. But as of August 2025, I’ve finally landed on a design that feels clean, clear, and actually useful. It’s more than just a pretty picture; it’s a tool I use constantly.

    Why You Absolutely Need a Home Lab Network Diagram

    Let’s be honest, you could probably get by without one. But why would you want to? Creating a home lab network diagram isn’t just an obsessive-compulsive exercise for IT pros. It provides real, tangible benefits that save you time and headaches down the road.

    • Troubleshooting Becomes a Breeze: When your Plex server suddenly can’t connect to the internet, where do you start looking? Your diagram shows you the exact path: from the server to the switch, through the firewall, and out the modem. You can trace the connection visually instead of just guessing.
    • Planning for the Future: Want to add a new 10GbE switch or a dedicated server for virtualization? Your diagram helps you see exactly where it will fit, which devices will connect to it, and what impact it might have on the rest of your network.
    • It’s a Learning Tool: The very act of creating the diagram forces you to understand your own network on a deeper level. You have to know what each device does, how it’s configured, and why it’s connected the way it is. It’s one of the best ways to solidify your networking knowledge.

    My Home Lab Network Diagram: A Tale of Two Versions

    My first attempt at a diagram was overly complicated. I tried to use fancy enterprise-level concepts that just didn’t apply to my home setup. It was cluttered and, frankly, a bit wrong. The biggest lesson I learned was this: simplicity is key.

    For my redesign, I threw out the unnecessary complexity and focused on clarity.

    1. I Simplified the Structure: I got rid of confusing layers and focused on the actual physical and logical flow of my network. Everything starts at the modem, goes to the firewall, then branches out to the switches and the rest of the devices. Simple.
    2. Icons Are Your Best Friend: Instead of just boxes with labels, I used specific icons for everything: a firewall icon for my pfSense box, a switch icon, a server icon, a little Wi-Fi symbol for my access points. This makes the entire diagram scannable at a glance. You immediately know what you’re looking at.
    3. Labeled the Key Connections: I didn’t label every single cable, but I did label the important links, like the main trunk line from my router to my core switch and the connection to my primary server.

    Great Tools for Creating Your Diagram

    You don’t need expensive software to get started. There are amazing free tools out there that are more than powerful enough for even a complex home lab.

    My personal favorite is diagrams.net (which you might remember as draw.io). It’s free, runs in your browser, and has a massive library of network icons built right in. You can save your work to Google Drive or your computer and export it in various formats.

    If you’re looking for something with more collaborative features, you might check out Lucidchart, but for most home labbers, diagrams.net is the perfect starting point. Another great resource for hardware inspiration is looking at what companies like Ubiquiti offer, as their gear is incredibly popular in the homelab community and often featured in diagram examples. You can even find official icons for their products to use in your diagrams.

    What to Include in Your First Diagram

    Feeling ready to start? Don’t get overwhelmed. Just start with the basics and build from there. Your first version doesn’t have to be perfect.

    Here’s a checklist of what to include:

    • Internet Connection: Your modem or ISP’s fiber box.
    • Router/Firewall: The brain of your network.
    • Switches: The central hubs connecting your wired devices.
    • Wireless Access Points (APs): How your wireless devices get online.
    • Servers: Label each one and maybe add a note about its primary role (e.g., “Plex Server,” “VM Host”).
    • Storage: Any Network Attached Storage (NAS) devices.
    • Key Clients: You don’t need every phone and laptop, but maybe include your main desktop computer or a smart TV.

    It might seem like a small thing, but taking an hour to create your own home lab network diagram is one of the most satisfying and useful projects you can undertake. It brings a sense of order to the wonderful chaos of this hobby and sets you up for success as your lab continues to grow. Go give it a try.