Category: AI

  • My E-Paper Dashboard Adventure: A Low-Power Display for My Smart Home

    My E-Paper Dashboard Adventure: A Low-Power Display for My Smart Home

    It’s super useful and looks great, but building this DIY e-paper dashboard wasn’t exactly a walk in the park. Here’s how it went.

    My Quest for the Perfect, Low-Power Display

    I’ve been obsessed with my smart home setup for a while now, tweaking everything in Home Assistant and running services on my Proxmox server. But I always felt like something was missing. I wanted a simple, at-a-glance view of my home’s vitals—weather, temperatures, whether my critical services were online—without having to pull out my phone or wake up a computer monitor. I was looking for a quiet, low-power, always-on display. My search led me down a fascinating rabbit hole, and I eventually decided to build my own e-paper dashboard.

    E-paper, or e-ink, is the same technology you find in Kindle readers. It’s known for two things: it’s incredibly low-power (it only uses energy when the image changes) and it’s super easy on the eyes. It was the perfect candidate for my project.

    The Hardware for This E-Paper Dashboard Project

    After some research, I landed on the Seeed Studio 7.5″ ePaper Panel. At around $60, it felt like a reasonable investment for a hobby project. The best part is that it comes with an ESP32-C3 chip built right in. If you’re not familiar, the ESP32 is a tiny, powerful microcontroller that’s super popular in the DIY and smart home community. Having it integrated meant I didn’t have to deal with complex wiring or soldering a separate controller to the screen. It was almost plug-and-play from a hardware perspective.

    The idea was to create a display that would quietly cycle through a few different screens: one for weather, one for my Home Assistant sensor data, and another to show the resource usage of my Proxmox server containers. Simple, right?

    Getting the E-Paper Dashboard on the Wall: The ESPHome Hurdle

    This is where things got… interesting. To get the display talking to Home Assistant, I used ESPHome. ESPHome is a fantastic tool that lets you configure microcontrollers using simple YAML files, right from within Home Assistant. It’s usually my go-to for custom sensors and devices.

    But making a graphical layout for a display with it? That was a different beast entirely. Full transparency: it was a real pain. Unlike a drag-and-drop interface, every single element on the screen—every icon, every line of text, every number—had to be manually positioned using coordinates in a YAML file.

    My configuration file grew into a massive, sprawling list of entities. Want to move the temperature reading 5 pixels to the right? You have to find the right line, change the x coordinate, save it, and then upload the new firmware to the device. It’s a slow, tedious process of trial and error. There’s nothing dynamic about it. You can’t just add a new sensor in Home Assistant and have it appear on the screen. You have to go back into the code and add it manually.

    Was It Worth It? The Honest Truth

    So, after all that wrestling with YAML, do I regret it? Not at all. I absolutely love the final result. The e-paper dashboard sits on my desk, quietly doing its job. It sips power, the display is crisp and clean, and it gives me that perfect, at-a-glance summary I was craving. It feels like a truly custom piece of my smart home.

    But it’s important to be realistic about the process.

    The Good:

    • It looks amazing. The high-contrast, paper-like display is just plain cool.
    • Extremely low power. It can stay on 24/7 without making a dent in your electricity bill.
    • The satisfaction. Building something yourself that integrates perfectly into your setup is a great feeling.

    The Not-So-Good:

    • The setup is tedious. Be prepared to spend hours tweaking YAML code.
    • It’s not flexible. Changing the layout is a chore, so you have to be sure about what you want to display.

    If you’re someone who enjoys the process, loves to tinker, and has a bit of patience, I’d say go for it. It’s a deeply rewarding project. But if you’re looking for a quick and easy, plug-and-play solution, this probably isn’t it. For now, I’m happy with how my little dashboard turned out, but I might explore other ways to do it in the future—maybe with Arduino for more flexibility. Until then, I’ll enjoy my perfectly coded, beautifully static display.

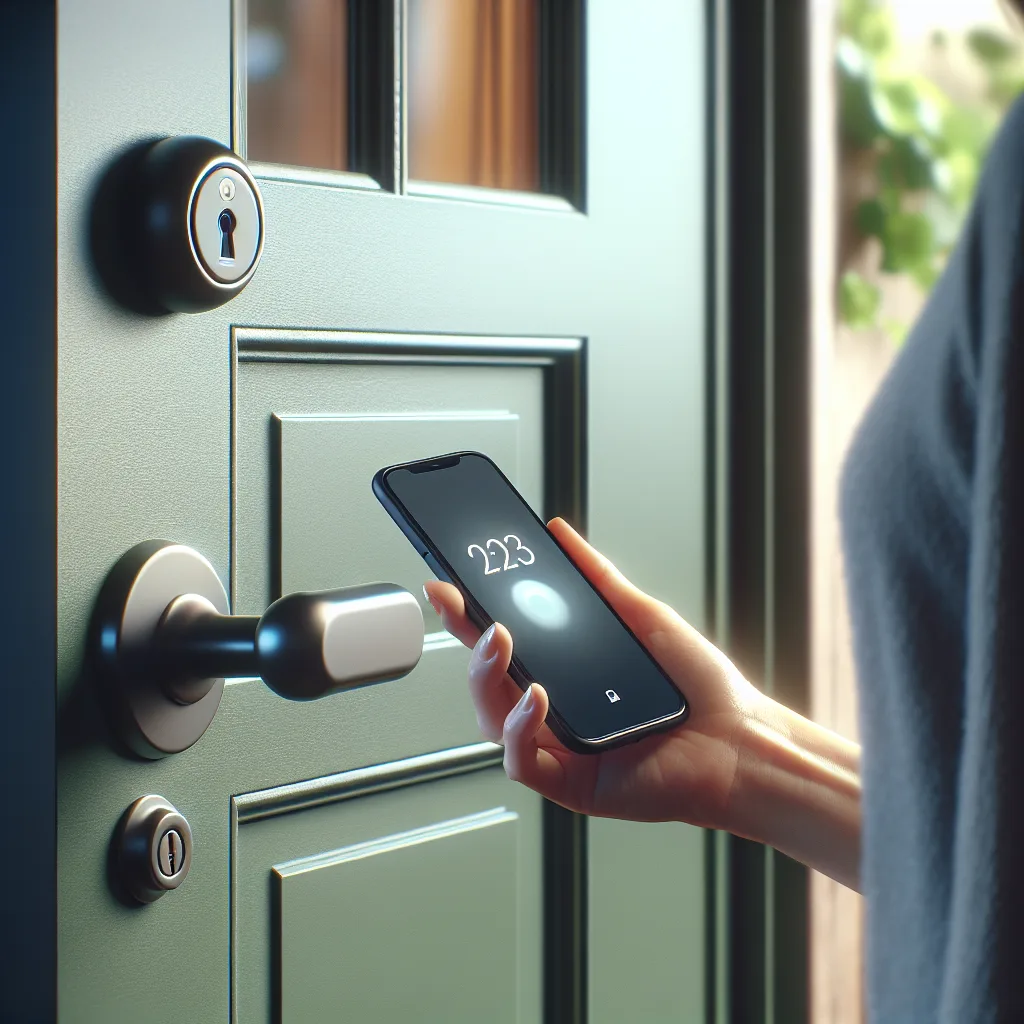
  • So, You’re Thinking About a Smart Lock? Here’s How to Pick the Right One

    So, You’re Thinking About a Smart Lock? Here’s How to Pick the Right One

    Overwhelmed by all the options for a keyless entry deadbolt? This guide will help you choose the best smart lock for your home without the headache.

    So, You’re Thinking About a Smart Lock? Here’s How to Pick the Right One

    It feels like a rite of passage for any homeowner these days: staring at your front door and thinking, “I could make this smarter.” If you’ve started looking into it, you’ve probably realized there are a ton of options. It’s easy to get overwhelmed. I’ve been there. When I decided to upgrade my locks, I spent weeks trying to figure out what the best smart lock for my home would actually be. But here’s the good news: once you know what to look for, the choice becomes much clearer.

    Think of it less as finding the single “best” lock on the market and more about finding the one that’s perfect for you and your daily life.

    What to Consider When Choosing the Best Smart Lock

    Before you even look at specific brands, it helps to answer a few questions about your own home and habits. This will narrow down the options fast.

    How Should It Connect? Wi-Fi vs. Bluetooth vs. Hubs

    This is probably the biggest technical choice you’ll make.

    • Wi-Fi: A Wi-Fi lock connects directly to your home’s network. This is great because you can lock or unlock your door from anywhere in the world (as long as you have an internet connection). The downside? It can be a bit of a battery hog compared to other options.
    • Bluetooth: This connects directly to your phone when you’re nearby (usually within about 30 feet). It’s very energy-efficient, but you can’t control it when you’re away from home unless you have a separate Wi-Fi bridge or hub.
    • Z-Wave or Zigbee: These are low-power mesh networks popular in the smart home world. They require a central hub (like a SmartThings or Hubitat hub) to connect to the internet. This is a fantastic option if you already have a smart home setup, as it’s reliable and won’t drain your batteries.

    Full Replacement or Retrofit?

    Do you want to replace your entire deadbolt, or just add smarts to the one you already have?

    • Full Replacement: This involves taking your old deadbolt out and putting a brand-new smart one in. It gives you a keypad on the outside and all-new hardware. It’s a bit more work but gives you a complete, integrated system.
    • Retrofit: This type of lock (like the August Smart Lock) installs on the inside of your door, over your existing deadbolt. The big advantage is that you can still use your original physical keys, which is great for peace of mind and for anyone who might be renting.

    What’s Your Backup Plan?

    Let’s be honest, technology can fail. Batteries die, Wi-Fi goes out. Your lock needs a backup plan. Most smart locks still have a traditional keyhole as a failsafe. Others have a keypad, which is a great option because you can still get in even if you don’t have your phone or keys. Some even have little terminals on the bottom where you can touch a 9-volt battery to give it enough temporary power to get inside.

    My Favorite Features (That Go Beyond Just Unlocking)

    The real magic of a smart lock isn’t just opening the door with your phone. It’s the little conveniences that simplify your life.

    • Guest Access: This is my absolute favorite. I can create temporary keypad codes for friends, my dog walker, or a contractor. The code can be set to only work on certain days or between certain hours. No more hiding keys under the mat or worrying about who has a copy.
    • Auto-Lock and Auto-Unlock: Auto-lock is a lifesaver. You can set it to automatically lock the door after it’s been closed for, say, three minutes. No more of that nagging “Did I lock the door?” feeling. Auto-unlock uses your phone’s location to sense when you’re arriving home and unlocks the door for you. It feels like magic when you’re walking up with an armful of groceries.
    • The Activity Log: The app for your lock will show you a history of every time the door was locked or unlocked, and by whom (if you’re using different codes). It’s a simple feature that provides incredible peace of mind.

    A Few Popular Models to Start Your Search

    While the best smart lock is a personal choice, here are a few well-regarded brands that showcase the different features we’ve talked about.

    1. Schlage: The Schlage Encode Plus is a powerhouse. It’s a full deadbolt replacement with a keypad, built-in Wi-Fi, and it works with Apple Home Key, letting you tap your iPhone or Apple Watch to unlock it. It’s a fantastic all-in-one solution.
    2. Yale: Yale has a huge lineup, but their Assure Lock series is incredibly versatile. These locks are modular, meaning you can buy the lock and then choose what kind of connectivity you want by adding a small module for Wi-Fi, Z-Wave, or Bluetooth. It lets you adapt the lock to your needs.
    3. August: If you’re interested in a retrofit design, August is the original and still one of the best. Their locks are discreet, easy to install, and their app is excellent. You can check out a great breakdown of their latest models on tech sites like The Verge.

    Ultimately, choosing a smart lock is about identifying what makes you feel secure and what makes your life a little bit easier. Don’t worry about getting the one with the most features—focus on the one with the right features for you. Good luck!

  • I Got 2.5TB of Server RAM for Free. Here’s How.

    I Got 2.5TB of Server RAM for Free. Here’s How.

    It sounds crazy, but a lucky break at work landed me a lifetime supply of memory for my home lab. Here’s how it happened.

    I have to tell you about the wildest stroke of luck I had recently. It’s one of those things that sounds completely made up, but I promise it’s 100% real. I ended up with 2.5TB of server RAM—yes, you read that right, terabytes—without spending a single penny. It all started with a simple task at work: decommissioning some old servers.

    It’s a pretty standard part of the IT lifecycle. A company upgrades its infrastructure, and the old gear has to go somewhere. Sometimes it’s sold, sometimes it’s recycled, but this time? I was told I could keep the components. My jaw just about hit the floor. It felt like winning the lottery for a tech enthusiast like me. This wasn’t just any old hardware; this was a mountain of high-quality enterprise gear.

    What Do You Even Do with 2.5TB of Server RAM?

    So, there I was, staring at a massive pile of 16GB ECC DDR4 sticks. Sure, having it in higher-density modules like 64GB or 128GB sticks would have been even more impressive, but I am absolutely not complaining. This haul is enough to keep my home lab running for years, probably for the rest of my life!

    For anyone running a home lab or thinking about starting one, you know that RAM is often one of the most expensive and crucial components. It’s the lifeblood of virtualization. With this much memory, I can spin up virtual machines, run complex simulations, host massive databases, and experiment with resource-hungry applications without ever worrying about hitting a ceiling. My dream of building a powerful home server setup just got a massive, unexpected boost.

    Finding Your Own Decommissioned Server Parts

    My story might sound like a once-in-a-lifetime fluke, but you’d be surprised. Opportunities to acquire used or decommissioned server parts are more common than you think. Companies are constantly upgrading their hardware, and the old equipment has to go somewhere.

    Here are a few places you can look:

    • Workplace Decommissions: This is the most direct route, just like my story. If you work in IT or a related field, keep your ears open. When your company plans a hardware refresh, ask what the plan is for the old gear. Sometimes, they’re just happy to have someone haul it away.
    • University Surplus Stores: Colleges and universities often have surplus departments that sell off old equipment, from computers to lab gear. Check their websites or give them a call.
    • Online Marketplaces: Sites like eBay and specialized forums can be treasure troves. You can often find sellers parting out entire server racks for a fraction of their original cost. For more professional-grade used equipment, checking out a trusted reseller like ServerMonkey can also be a great option.
    • Local E-Waste and Recyclers: Sometimes you can find gold at local electronics recycling centers. It requires a bit more digging, but the payoff can be huge.

    A Few Things to Keep in Mind with Decommissioned Server Parts

    Before you dive in, remember that enterprise hardware is a bit different from your standard consumer PC parts. The RAM I got, for example, is ECC (Error-Correcting Code) memory. It’s designed for stability and is fantastic for servers, but it’s not compatible with most consumer motherboards.

    You’ll need to make sure you have the right motherboard and CPU to support it. Building a home server with enterprise-grade components is a fun and rewarding project. If you’re new to it, resources like the official documentation for virtualization software like Proxmox VE can be incredibly helpful for planning your build.

    So, while I might be set for RAM for a very long time, my little adventure is a reminder to always keep your eyes peeled. You never know when you’ll stumble upon a tech jackpot that can supercharge your projects and hobbies. Happy hunting!

  • That GPT-5 Rumor: Should We Believe the Hype?

    That GPT-5 Rumor: Should We Believe the Hype?

    The internet is buzzing about a supposed GPT-5 leak. Let’s pour a coffee, break down what it says, and figure out if it’s the real deal or just wishful thinking.

    So, Did You See That Thing?

    The internet did what it does best this week: it got completely obsessed with a rumor. And this one is a big one. A document started making the rounds, claiming to be a GPT-5 leak straight from the source. My first thought? Whoa. My second thought? Okay, let’s take a deep breath.

    It’s so easy to get swept up in the excitement. The document paints a picture of an AI so advanced it feels like it’s pulled from a sci-fi movie. But as with all things that seem too good to be true, a little friendly skepticism is probably a good idea. So today, let’s just talk it through. What are these wild claims, and how likely are they to be real?

    What the Supposed GPT-5 Leak Claims

    If you take the document at face value, the next generation of AI isn’t just an improvement; it’s a whole new ballgame. It feels less like an update and more like a total rewrite of what’s possible.

    Here are a few of the standout points people are talking about:

    • Autonomous AI Agents: The document suggests the new model can manage other AI models, assigning them tasks and coordinating them to solve complex problems on its own. Think of a project manager who’s also the entire team, working at the speed of light.
    • Achieving AGI: The term AGI, or Artificial General Intelligence, gets thrown around. This is the holy grail of AI research—a machine that can understand, learn, and apply knowledge across a wide range of tasks, just like a human. The document hints that this model is taking major steps in that direction.
    • A Release Date? There was even a date mentioned: “training complete December 2023.” This sent a shockwave through the community, making it all feel much more immediate.

    It’s a lot to take in. But before we all start preparing for our new AI overlords, let’s pump the brakes a little.

    Is It Real? Let’s Be Honest.

    Right now, there is zero official confirmation from OpenAI. Nothing. Their official blog, which is where real announcements happen, has been silent on the matter. That’s Red Flag Number One.

    Leaks happen, for sure. But faked leaks happen even more often, especially when anticipation is this high. It would be relatively easy for someone to create a document that lists all the features everyone hopes to see in GPT-5. It’s a classic case of playing to the crowd.

    As much as I want to believe it, we have to treat this GPT-5 leak as what it is: a very compelling, very detailed, and completely unverified rumor. For now, it’s just a fun “what if?” scenario.

    But What if the GPT-5 Leak Is True?

    Okay, let’s let ourselves dream for a minute. What if this is real? What if even 10% of it is accurate?

    Honestly, it would be incredible. An AI that can reason, plan, and execute complex, multi-step projects would change everything. It could accelerate scientific research by years, create new forms of art we can’t even imagine, and handle the boring, administrative parts of our jobs, freeing us up to be more creative.

    It’s the kind of technology that you can’t fully predict. You just know it would be a massive shift in how we interact with computers and information. Reputable sources like The Verge have been covering the steady march of AI, but a leap this big would be front-page news everywhere.

    So, What’s the Takeaway?

    For now, the reality of the GPT-5 leak is still up in the air. It’s a fascinating piece of speculation that has sparked some incredible conversations about the future. It gives us a glimpse of what the brightest minds in AI are aiming for.

    My take? I’m excited, but I’m waiting for the official word. Until then, it’s just a great topic to think about. What do you think? Is this a clever fake, or are we on the verge of something amazing?

    Originally published: {{ $today }}

  • My Big Smart Home Decision: Google vs. Amazon

    Choosing the right smart home ecosystem is a huge first step. Here’s a friendly, no-fluff breakdown of the pros and cons to help you and your family decide.

    So, we’re moving soon. It’s a big project, and since I still live with my parents (I’m 20), I’m trying to help out as much as I can, especially since they’re getting a bit older. One of my big projects for the new place is to set up a smart home—I’m talking smart lights, cameras, a video doorbell, the whole deal. The biggest hurdle, however, is the very first decision: choosing a central hub. This brings me to the ultimate tech face-off: the Google vs Amazon smart home ecosystem. Which one is better for a family?

    I went down the rabbit hole of research, and honestly, a lot of what I found was pretty vague. Most articles end with, “it’s all about personal preference.” Thanks, that helps. But I was looking for real opinions, the nitty-gritty pros and cons from people who actually use these things every day.

    Choosing between a Google Nest Hub and an Amazon Echo Show isn’t just about picking a smart speaker. It’s about choosing the brain for your entire home. It’s the platform you’ll be locked into for the foreseeable future, so it’s a decision worth thinking about. Here’s the breakdown I wish I had when I started.

    The Great Debate: An Honest Look at Google vs Amazon Smart Home

    When you boil it down, you’re choosing between two tech giants who want to run your home. Both have compelling reasons to join their club, but they have very different personalities. Let’s start with the everything store’s champion.

    The Case for Amazon Echo & Alexa

    Amazon’s Echo devices, powered by Alexa, are incredibly popular for a reason. Their biggest strength is compatibility. It feels like almost every smart device on the planet works with Alexa.

    • Pros:
      • Massive Device Ecosystem: From the tiny Echo Dot to the wall-mounted Echo Show 15, there’s a device for every room and budget.
      • Huge Third-Party Support: The library of “Alexa Skills” is enormous. If a company makes a smart gadget, you can bet it has an Alexa skill.
      • Shopping Integration: If you’re a big Amazon Prime user, it’s seamless. Adding items to your shopping list or re-ordering things with your voice is genuinely useful.
    • Cons:
      • Ads and Up-selling: This was a big concern I saw, and it’s real. The Echo Show’s screen can feel cluttered with “suggestions” and ads, which might not be ideal for a simple, clean family hub.
      • The Assistant: While Alexa is great at direct commands (“Alexa, turn on the living room lights”), she can sometimes struggle with conversational queries or follow-up questions compared to Google.

    You can explore the full range of devices on the official Amazon Echo website.

    Exploring the Google Nest Ecosystem

    Google’s approach feels a bit different. It’s less about being a digital storefront and more about being a helpful, integrated assistant.

    The Case for Google Nest & Google Assistant

    The Google Nest line, especially the Nest Hub, often gets praised for its cleaner, more intuitive user experience.

    • Pros:
      • A Smarter Assistant: Google Assistant is powered by the world’s biggest search engine, and it shows. It’s fantastic at answering random questions, understanding context, and handling more natural language.
      • Clean Interface: The Nest Hub’s interface is generally considered less cluttered than the Echo Show’s. It’s famous for its digital photo frame feature, which beautifully cycles through your Google Photos and is a fantastic, passive feature for a family home.
      • Google Services Integration: If your family already uses Google Calendar, Google Photos, and Gmail, the Nest Hub integrates flawlessly and makes managing daily life a breeze.
    • Cons:
      • “Clunky” Feel for Some: As I found in my research, some users feel the interface, while clean, can be a little slow or dated compared to the snappy feel of a modern smartphone.
      • Smaller Ecosystem (Slightly): While Google is catching up fast, Alexa historically has had a larger number of third-party skills and compatible devices. However, nearly all major brands now support both.

    Check out the devices for yourself on the Google Store’s Nest page.

    Google vs Amazon Smart Home: The Key Differences for a Family

    So, how do you choose? It comes down to what you value most in daily use.

    For a family setting, especially with parents who might not be super tech-savvy, the user interface is huge. The debate boils down to this: Do you prefer the slightly more cluttered but feature-rich Amazon screen, or the simpler, cleaner (but perhaps slower) Google screen? For many, the Google Nest Hub’s function as a beautiful digital photo frame is a major selling point that makes it feel more like a part of the home.

    The voice assistants are also a key differentiator. If you want an assistant that can answer obscure questions from your kids or settle a dinner table debate, Google Assistant usually wins. If you primarily want to issue direct commands and build complex smart home routines, Alexa has a slight edge for its simplicity and massive skill library. For a more detailed technical comparison, tech sites like CNET offer great in-depth analysis.

    Ultimately, I realized there isn’t one “best” answer in the Google vs Amazon smart home debate. But there is a “best” answer for your home. Think about the ecosystem you’re already in. Are you an Android and Google Photos family, or a Prime shopping family? The path of least resistance is often the happiest one.

    For my family, the idea of a shared digital photo frame that’s easy to use was the deciding factor. But for you, the sheer volume of Alexa skills might be the key. Either way, you’re building a more connected and convenient home, and that’s a win no matter which team you choose.

  • The Smart Doorbell Chime: Your Old Doorbell’s New Best Friend

    You don’t need a whole new video doorbell to get smart notifications. Here’s how to upgrade your classic chime.

    You know that classic, two-tone “ding-dong” of a traditional doorbell? It’s a sound that’s been part of our homes for decades. But in a world of smart everything, it can feel a little… left behind. Maybe you don’t want or need a full-blown video doorbell, but you’ve probably wondered if you could teach your old doorbell some new tricks. You’re not alone. The great news is, you absolutely can, and the key is a nifty little device called a smart doorbell chime.

    It’s a simple idea that bridges the gap between your trusty old doorbell and your modern smart home. Instead of replacing the whole system, you add a small smart component to your existing, traditional chime. This device connects to your Wi-Fi and acts as a translator, turning that simple electrical signal from your doorbell button into a smart trigger you can use for all sorts of things.

    So, you can keep the doorbell button you like and the classic chime, but gain a whole new level of control.

    The Search for a Packaged Smart Doorbell Chime

    Okay, let’s get straight to it. You’d think there would be a dozen simple, plug-and-play options for this, right? Funnily enough, the market is a little thin on “packaged” solutions that work with any old doorbell.

    When you search for a “smart chime,” you’ll mostly find products like the Ring Chime or the Arlo Chime. These are great, but they are designed to work exclusively within their own ecosystems. They act as extenders for their specific video doorbells, not as smart upgrades for a traditional system.

    However, there are some clever workarounds using smart sensors. For example, some people have successfully used Z-Wave multi-purpose sensors that can be wired into the chime’s circuit. This requires a compatible smart home hub, which is like a central brain for your devices. You can learn more about how those work in this great overview of smart home hubs from The Verge. It’s a fantastic solution if you’re already invested in a system like Hubitat or Home Assistant, but it’s not quite the simple, standalone product many are hoping for.

    The DIY Solution: Your Best Bet for a Smart Doorbell Chime

    This brings us to the most popular and flexible option, the one that tech enthusiasts keep coming back to: a small smart relay. Don’t let the “DIY” part scare you; it’s more straightforward than it sounds.

    The most common device used for this is the Shelly 1 (or its newer, smaller version, the Shelly Plus 1 Mini). It’s a tiny, affordable Wi-Fi-enabled relay that you can tuck right inside your existing mechanical chime’s housing.

    Here’s how it works in plain English:

    1. Installation: You wire the Shelly between the transformer and your chime. It’s a low-voltage project, but as with any electrical work, you should turn off the power at the breaker first and be careful.
    2. Connection: When a visitor presses your doorbell button, the electrical current flows to the chime as usual.
    3. The Magic: The Shelly device senses this electrical pulse. Since it’s connected to your Wi-Fi, it instantly sends a notification or triggers an automation you’ve set up in the Shelly app or your smart home platform (like Alexa, Google Home, or Home Assistant).

    The best part? Your original chime still “ding-dongs” exactly as it did before. The Shelly just adds a layer of intelligence on top. You can find detailed guides and documentation directly on the official Shelly website, which is a great resource for getting started.

    What You Gain: The Real-World Perks

    Why go to the trouble of installing a smart relay? It’s all about adding convenience that fits your life.

    • Scheduled Silence: This is a big one. Have a baby napping or work late shifts? You can create a schedule to silence the physical chime during certain hours while still getting a notification on your phone or smartwatch. No more surprise “ding-dongs” waking up the house.
    • Smart Home Triggers: This is where the fun begins. You can link that doorbell press to almost anything. Have your smart lights flash in the office if you’re wearing headphones. Get an announcement on your Alexa or Google Home speakers. You could even have a smart display show a camera feed if you have a separate security camera pointed at your door.
    • Notifications Anywhere: Get a simple push notification on your phone the moment the bell is rung. It’s perfect for when you’re out in the backyard, down in the basement, or away from home, so you never miss a delivery or visitor.

    So, while the dream of a perfect, off-the-shelf smart doorbell chime that works with any system hasn’t been fully realized by major brands yet, the path to a smarter doorbell is clear and accessible. It’s a small project that delivers a surprisingly large impact, making your trusty old doorbell a truly integrated part of your modern home.

  • Powering Gadgets from a Light Socket? Here’s What You Need to Know

    Your guide to finding a safe E26 to USB adapter (and why it’s harder than you might think).

    It’s a thought I’ve had more than once: I have the perfect spot for a smart sensor, a security camera, or some other low-power gadget, but the only power source nearby is a light fixture. If only there were a simple, safe E26 to USB adapter to make it work. It seems like a simple product that should exist, right? You’re not alone in thinking this, but the journey to finding a safe solution is a bit more complicated than a quick search on Amazon.

    The truth is, while you can find dozens of these adapters online, a vast majority of them lack the safety certifications that really matter. Let’s talk about why that’s a big deal and what you can do about it.

    The Problem with Most E26 to USB Adapters

    When you’re dealing with household electricity, safety isn’t just a suggestion—it’s essential. In North America, trusted safety certifications come from organizations like Underwriters Laboratories (UL), Intertek (ETL), or the CSA Group. These marks mean a product has been rigorously tested to ensure it won’t overheat, short-circuit, or become a fire hazard.

    Here’s the problem: if you search for a direct E26 to USB adapter, you’ll find plenty of options. But you’ll also notice a distinct lack of any UL, ETL, or CSA logos on them. Why? The certification process is expensive, and for such a niche product, many manufacturers skip it to keep costs down. Plugging an uncertified device directly into your home’s wiring is a gamble you don’t want to take.

    The ‘Two-Piece’ Solution: A Safer E26 to USB Adapter Method

    So, if a direct, one-piece adapter is off the table, what’s the safe alternative? The most reliable method involves two separate, certified components:

    1. A UL-Listed E26 to Outlet Adapter: This is the key. These adapters screw into a standard light socket (E26 base) and provide a standard NEMA 1-15R or 5-15R outlet (the kind you see on your wall). These are much more common and are often properly safety certified. Look for the UL or ETL mark on the product itself or in the official specs.

    2. A Certified USB Charger: Once you have a safe outlet, just plug in a high-quality USB charger from a reputable brand like Anker, Belkin, or Apple. These chargers have their own safety circuits to deliver clean, stable power to your device.

    A friend once worried that this kind of setup might get loose over time, which is a valid concern. The leverage from a bulky adapter and charger could put stress on the light socket. The solution is to use a compact, lightweight USB charger. The small, cube-shaped chargers are perfect for this, as they add minimal weight and bulk.

    Why Are Direct, Certified Adapters So Rare?

    It seems odd that a direct, certified adapter isn’t a common product. While we can only speculate, there are a few likely reasons.

    • Niche Market: The demand isn’t high enough for major manufacturers to invest in the design and expensive certification process.
    • Potential for Misuse: An E26 socket is designed for a light bulb, not a power-hungry appliance. A direct USB port might tempt someone to try and charge a device that draws too much power, creating a potential failure point. The two-step solution using a proper outlet adapter is engineered to be more robust.
    • Cost: As mentioned, getting a product UL certified is a significant investment. For a low-volume product, it’s often not financially viable.

    Don’t Forget to Consider the Alternatives

    Before you commit to a socket adapter, take a moment to think if there’s a better way to power your gadget.

    • Battery Power: Could the device, like a fall sensor, run on batteries? Many modern sensors are incredibly power-efficient and can last for a year or more on a single battery.
    • Run a Low-Voltage Wire: It might be more work upfront, but running a dedicated USB cable from a nearby outlet could be a cleaner and more permanent solution. You can often tuck the thin cable along a baseboard or door frame.
    • Power over Ethernet (PoE): For some devices like security cameras, PoE is an excellent option. It sends both data and power over a single Ethernet cable, but it requires a PoE-compatible device and switch. You can learn more about the basics of PoE on a site like How-To Geek.

    Ultimately, while the dream of a simple, all-in-one E26 to USB adapter is appealing, safety has to be the priority. For now, the combination of a certified socket-to-outlet adapter and a quality USB charger is the most reliable and secure way to get the job done. Don’t risk the safety of your home for a cheap, unlisted gadget.

  • I Stumbled Upon a Big Problem with Smart Homes, So I’m Trying to Fix It

    It started as a small project, but growing IoT security concerns turned it into something much bigger. Here’s the story and how you can help.

    It all started as a weekend project, a classic case of a developer scratching their own itch. I have a mix of smart home gadgets, and I was just trying to build a simple way to make them all talk to each other—the new Matter-enabled devices and the older, non-Matter ones. But as I dug deeper, I realized the real problem wasn’t just about interoperability. It was about the massive IoT security concerns that came with a connected home.

    I went down a rabbit hole, and what I found was pretty unsettling. We invite these devices into our homes for convenience, but we often don’t know what they’re doing in the background. Many gadgets, especially cheaper Wi-Fi-enabled ones, have questionable security practices. They phone home to unknown servers, share data in ways we can’t control, and can create vulnerabilities in our home networks. What started as a project to connect things quickly became a mission to protect them.

    The Deeper Problem: Unpacking IoT Security Concerns

    Let’s be honest, most of us don’t read the terms of service. We plug in a new smart speaker or lightbulb and just hope for the best. But this “plug and pray” approach is becoming riskier. The convenience of a smart home shouldn’t come at the cost of your personal privacy.

    The core issue is that our data is often the product. Device manufacturers may collect usage data to improve their services, which sounds fine on the surface. But without strong regulations and transparency, it’s a black box. Where does that data go? Who has access to it? These are the IoT security concerns that kept me up at night and pivoted my entire project. According to security experts, many common IoT devices can be shockingly easy to compromise, turning a helpful gadget into a security liability. For a deeper dive into this, the Electronic Frontier Foundation (EFF) has some great resources on the privacy implications of the smart devices we use every day.

    Can the Matter Protocol Solve Everything?

    You might be thinking, “But what about Matter?” And that’s a great point. The Matter protocol, backed by major players like Apple, Google, and Amazon, is a huge step in the right direction. It aims to create a unified, secure standard for how devices communicate with each other on a local level. It’s fantastic for reliability and simplifying setup.

    However, Matter primarily addresses device-to-device communication. It doesn’t fully solve the problem of how your data is handled at the orchestration level—the apps and cloud services that manage your smart home. You still need a trustworthy platform to manage all your devices, set rules, and, most importantly, control your data. My project evolved to focus on this exact layer: a central hub built from the ground up with privacy at its core.

    A New Approach to Managing IoT Security Concerns

    After about 18 months of work, what began as a side project is now gearing up for a pilot launch. The goal is to create an IoT management platform that puts you, the user, back in control. The core idea is to manage all your devices—Matter and non-Matter—while prioritizing your privacy.

    This means features like:

    • Data Isolation: Preventing devices from communicating with external servers without your permission.
    • Clear Dashboards: Showing you exactly what each device is doing and what data it’s accessing.
    • User-Centric Control: Giving you simple, powerful tools to manage your home’s data flow.

    It’s not about just adding another app to your phone. It’s about building a foundation of trust for your smart home, so you can enjoy the convenience without the constant worry.

    Help Build the Future of Smart Home Privacy

    This is where you come in. I’m now at a stage where I need feedback from people who are passionate about this space. I’m looking for a small group of enthusiasts to participate in building this out. This isn’t just about getting early access; it’s about having a real say in the project’s direction through suggestions, early testing, and voting on new features.

    So, I have a question for you. As someone interested in smart homes and privacy, what would make you want to join a project like this? What kind of sign-up offer would grab your attention? What features would be most useful to you on day one?

    I started this journey because I was a concerned user, and I want to build it with other concerned users. Let’s figure out how to solve this problem together.

    Posted on August 5, 2025

  • You’ll Never Guess Where the Name ‘Bluetooth’ Came From

    It involves a 10th-century Viking king, a temporary codename, and a bit of a happy accident.

    You’re sitting at a cafe, you pop in your wireless earbuds, and you tap the little symbol on your phone to connect them. It’s a daily ritual for millions of us. But have you ever stopped to think about that name? Bluetooth. It’s a bit… weird, right? It doesn’t sound very techy. It’s not an acronym or some futuristic-sounding word. I went down a rabbit hole on this recently, and it turns out the Bluetooth name origin is far cooler and more historic than I ever could have imagined. It’s a story that involves Vikings, kings, and a last-minute decision that stuck.

    It all started back in 1996. A group of engineers from Intel, Ericsson, and Nokia were working together to create a new standard for short-range radio technology. Their goal was to unite different devices—like phones, laptops, and the newfangled accessories that were starting to appear—with a single wireless protocol. The problem was, they didn’t have a name for it yet.

    The Surprising Bluetooth Name Origin

    During a meeting, Jim Kardach from Intel and Sven Mattisson from Ericsson got to talking about history. Mattisson had just read a book about Vikings, and he started telling Kardach about a 10th-century king named Harald “Bluetooth” Gormsson.

    So, who was this guy, and why the strange nickname? History tells us he was the king who united the fiercely independent and often warring tribes of Denmark and parts of Norway into a single kingdom. The “Bluetooth” part is a bit of a historical mystery, but the prevailing theory is that he had a prominent dead tooth that was dark blue or black, earning him the moniker. It’s a little grim, but it stuck.

    As Kardach listened, he had a lightbulb moment. They were trying to unite different communication protocols from competing companies, just like Harald Bluetooth had united the Scandinavian tribes. It was the perfect metaphor. He suggested they use “Bluetooth” as a temporary codename for the project until the marketing department could come up with something better.

    From Viking King to Tech Icon: The Codename That Stuck

    The name was only ever meant to be a placeholder. The group had a few official names ready for the launch, including “RadioWire” and “PAN” (Personal Area Networking). But as the launch date approached, they ran into a problem. “RadioWire” couldn’t be trademarked in time. “PAN” was already a massively used term online.

    They were running out of time. With no other viable options, they decided to just go with the codename. “Bluetooth” was unique, memorable, and had a great story behind it. The temporary name became the permanent one, and it was officially adopted. You can read more about the standardization on the official Bluetooth SIG (Special Interest Group) website, which is the organization that oversees the technology.

    The Hidden Meaning in the Bluetooth Logo

    The tribute to King Harald doesn’t stop with the name. Take a close look at the Bluetooth symbol. It’s not just a stylized “B.” It’s actually a combination of two ancient Norse letters, known as runes.

    • ᚼ (Hagall): The rune for the letter “H.”
    • ᛒ (Bjarkan): The rune for the letter “B.”

    When you overlay these two runes, you get the familiar Bluetooth logo. They are the initials of Harald Bluetooth. It’s a brilliant little Easter egg hidden in plain sight, connecting our cutting-edge wireless technology directly to a Viking king who lived over a thousand years ago. For a deeper dive into his history, you can check out his entry on Britannica.

    So, the next time you connect your headphones or sync your smartwatch, take a moment to appreciate the incredible journey behind that little blue light. It’s a reminder that great ideas—and great names—can come from the most unexpected places, even from the pages of a history book about a Danish king with a bad tooth. The Bluetooth name origin is a perfect example of how the past can shape the future in ways we never expect.

  • My Quest for Year-Round Sparkle: Are Permanent Holiday Lights the Answer?

    I just finished a new build and the thought of climbing ladders every December is… not great. So, I’m exploring permanent holiday lights. Here’s what I’ve found.

    I’m standing in front of my new house, and honestly, it feels great. We just wrapped up the build, and everything is exactly how we pictured it. But as I’m admiring the clean lines of the roof, a familiar sense of dread creeps in. It’s August now, but I know what’s coming in a few short months. The annual ritual of untangling Christmas lights, climbing a wobbly ladder, and spending a whole weekend trying to get everything just right. This year, I want to do something different. I’ve been looking into permanent holiday lights, and I think I might be onto something.

    A couple of local installers I’ve talked to both use a system called Everlights, which sent me down a rabbit hole of research. So, what did I find? Let’s get into it.

    So, What Exactly Are Permanent Holiday Lights?

    The name is pretty straightforward. Instead of buying string lights you have to put up and take down every year, permanent holiday lights are professionally installed on your home and stay there for good. They consist of small, high-efficiency LED lights housed in a discreet channel that’s matched to the color of your home’s trim or soffit. During the day, you can barely see them.

    But at night, you can control them with a smartphone app. You’re not just stuck with classic white or multi-color. You can create custom patterns, change the colors for any occasion (think orange for Halloween, red and blue for the 4th of July, or your favorite team’s colors on game day), and even program animations. It’s not just about Christmas anymore; it’s about year-round architectural and accent lighting.

    An In-Depth Look at Everlights

    Since it’s the brand I keep hearing about, I decided to dig specifically into Everlights. Their whole philosophy seems to be about blending in. The lights are individually addressable, meaning you have precise control over every single bulb on the strand. Want to make every third bulb green and the rest red? You can do that. Want to create a chasing effect? Easy.

    One feature I found particularly clever is their design that allows the system to seamlessly “jump” over things like downspouts, keeping the spacing of the lights consistent all the way around the roofline. You can learn more about their specific tech on the official Everlights website. The app seems to be the heart of the system, giving you a huge library of pre-set patterns and the ability to design your own from scratch. This is a big step up from the single-function remote that comes with most store-bought string lights.

    The Big Question: Are Permanent Holiday Lights Worth the Cost?

    Okay, let’s talk about the elephant in the room: the price. This is not a cheap upgrade. A professional installation can cost several thousand dollars, depending on the size of your house and the complexity of the roofline. It’s a significant investment, and it’s easy to see why someone might hesitate.

    So, is it worth it? I think it comes down to what you value most.

    Here’s how I’m breaking it down:

    • Convenience: The idea of never climbing a ladder in the cold again is incredibly appealing. Pushing a button on my phone instead of wrestling with tangled wires sounds like a dream.
    • Safety: Ladder accidents are no joke. Removing that risk from my annual to-do list is a huge plus, especially as the years go on.
    • Year-Round Use: I’m not just paying for Christmas lights. I’m paying for custom lighting for every holiday, birthday, and special event. It can also serve as beautiful architectural up-lighting year-round, which adds to the home’s curb appeal.
    • Durability & Energy Use: These systems are built to withstand the elements for years, and LEDs are incredibly energy-efficient. No more replacing entire strands because one bulb went out.

    The main drawback is that high upfront cost. You’re paying for years of convenience all at once. There’s also the fact that you’re relying on a single company for installation and, potentially, repairs.

    What Are the Alternatives?

    Everlights is a big name in the space, but it’s not the only one. Other popular systems include Govee (which offers some popular DIY-friendly options) and Trimlight. Each has slightly different features, app functionality, and price points. It pays to get quotes from installers of different systems to compare. For a great technical breakdown of different options, CNET has a helpful guide on permanent outdoor smart lights.

    After looking at everything, I’m genuinely torn. The cost is significant, but the long-term benefits are undeniable. I love the idea of creating a unique look for my home for any occasion with just a few taps on my phone. The safety and convenience are probably the biggest selling points for me.

    I haven’t pulled the trigger just yet, but I’m leaning heavily toward “yes.” The thought of a future without tangled wires and wobbly ladders might just be worth the investment.