Category: AI

  • Share Anything: Why I Set Up My Own Self-Hosted File Sharing System

    Share Anything: Why I Set Up My Own Self-Hosted File Sharing System

    Tired of file size limits? It’s time to take control of your links and files with your very own self-hosted file sharing and URL shortener.

    Ever tried to share an amazing gaming clip on Discord, only to be smacked down by that tiny 10MB file limit? I’ve been there. You have the perfect, hilarious, or downright epic moment captured, and you can’t even share it with your friends. It’s frustrating. That exact problem is what led me down the rewarding path of self-hosted file sharing, and I’m here to tell you it’s easier than you think. It’s about taking back control over your own data, from video clips to custom short links.

    Think of it this way: instead of uploading your files to a service owned by someone else, you’re creating your own little private corner of the internet. You set the rules. No more arbitrary file size limits. No more worrying about who sees your data. It’s just you and your files, ready to be shared on your terms.

    Why Even Bother with Self-Hosted File Sharing?

    So, why go through the trouble? For me, it came down to a few simple, powerful benefits:

    • Freedom from Limits: This is the big one. Want to share a 500MB video file? Go for it. A 2GB project folder? No problem. When you host it yourself, the only limit is your own storage space.
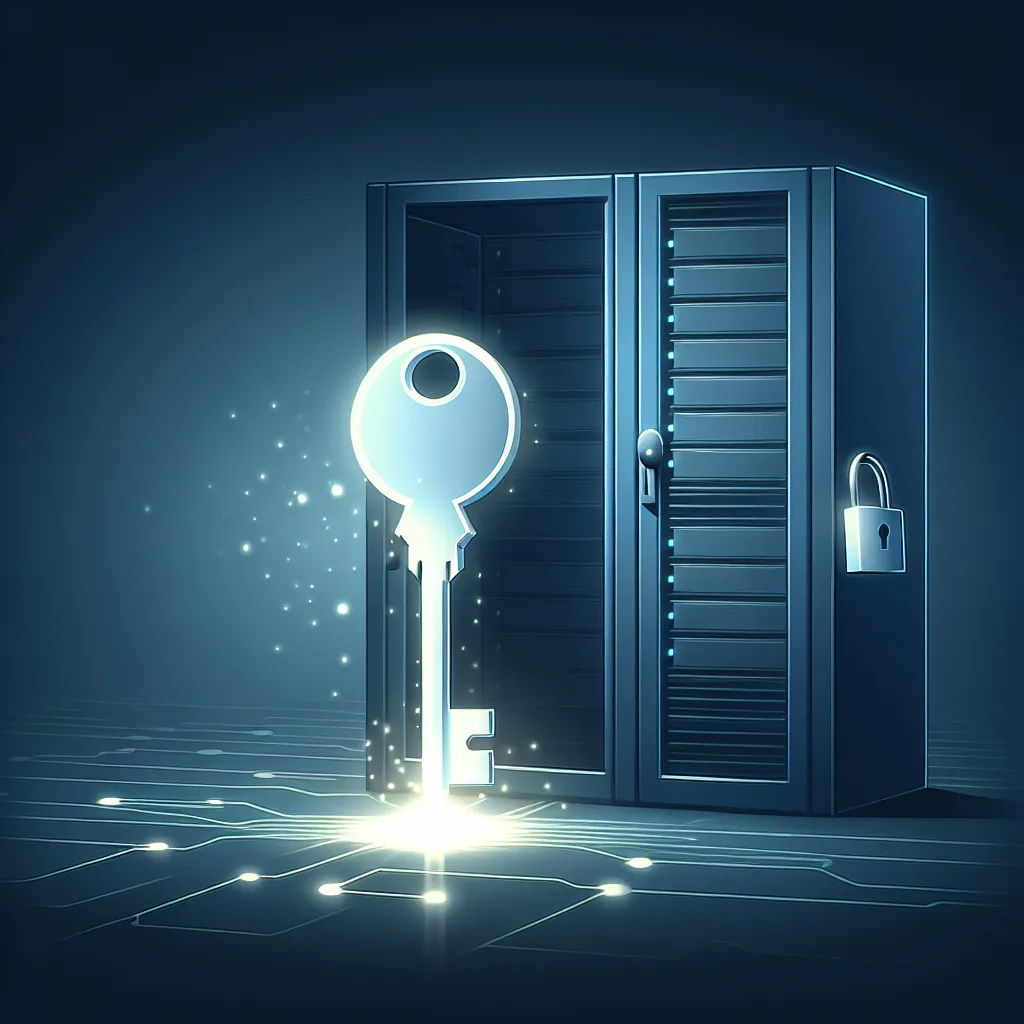
    • Total Privacy and Control: When you upload a file to a public service, you’re subject to their terms of service and privacy policies. By self-hosting, your files stay on your server. You decide who gets the link and how long it stays active.
    • Custom, Trustworthy Links: Instead of a random string of characters from a public service, you can share links with your own domain name (e.g., share.yourname.com/clip1). It looks professional, and your friends will know the link is coming directly from you.
    • More Than Just Files: Many of these tools also come with a built-in URL shortener. This is perfect for cleaning up long, clunky links to articles, tools, or anything else you want to share online.

    My Go-To Tool for Self-Hosted File Sharing and Links: Zipline

    When I started looking for a solution, I wanted something that could handle both file uploads and URL shortening in one package. I found the perfect tool for the job: Zipline.

    Zipline is an open-source project that’s lightweight, modern, and surprisingly simple to set up, especially if you’re familiar with Docker. Think of Docker as a way to run applications in neat, self-contained packages, which makes installation a breeze. You don’t have to be a command-line wizard to get it running.

    Here’s the basic idea of how it works:

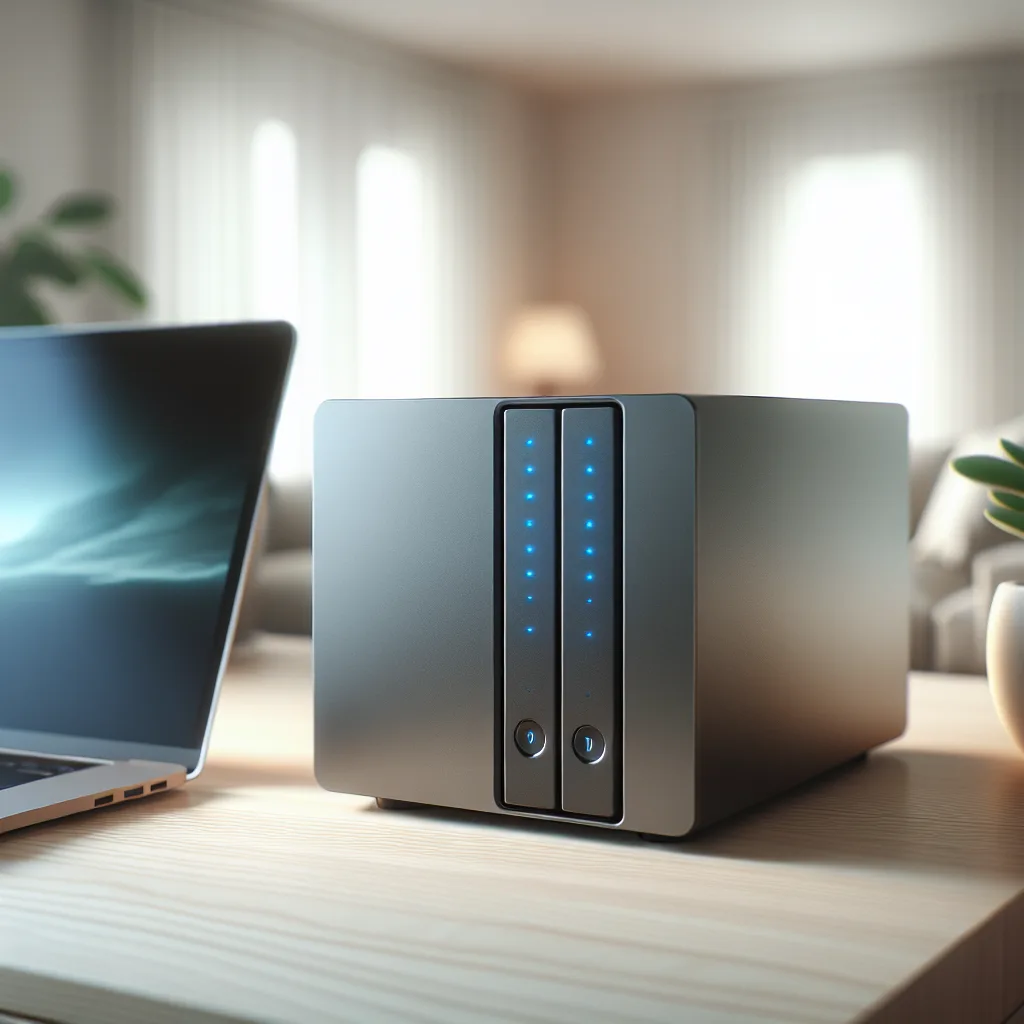
    1. Get a Server: You’ll need a place to run it. This could be a small, old computer sitting in your closet or a cheap Virtual Private Server (VPS) from a provider like DigitalOcean or Vultr. A basic $5-$10/month server is more than enough.
    2. Install with Docker: The Zipline documentation provides a simple docker-compose.yml file. This is just a configuration file that tells Docker exactly how to run the application. You pretty much just copy, paste, and run one command.
    3. Configure and Share: Once it’s running, you can access a simple web interface to upload files, see your history, and shorten URLs. You can drag and drop a file, and it instantly gives you a short link to share. It’s that easy.

    Setting this up was a “wow” moment for me. The first time I dropped a 100MB game recording and instantly got a clean link to paste into Discord, I knew I was never going back.

    What if I Only Need a URL Shortener?

    Maybe massive file sharing is overkill for you. If you’re just looking to tame long URLs and create your own branded short links, a dedicated tool might be even better.

    For this, I highly recommend Shlink. It’s another fantastic open-source project focused on one thing: doing URL shortening perfectly. It offers detailed analytics (like how many times a link has been clicked), the ability to use your own custom domain, and a super clean interface. Like Zipline, it’s also incredibly easy to deploy using Docker.

    Ultimately, setting up your own self-hosted file sharing system is one of the most practical and empowering projects you can tackle. It solves real, everyday annoyances and gives you a new level of control over your digital life. If you’re tired of hitting upload limits and want to start sharing on your own terms, I can’t recommend it enough. Give it a try! You might just be surprised at how simple it is.

  • Beyond WireGuard: Exploring Modern Remote Access Solutions

    If you’re tired of managing config files, it might be time to look at mesh networks. Let’s explore the options for better remote access solutions.

    I’ve been running my own little homelab for a while now, a simple setup with a mini-PC and a Raspberry Pi. For the longest time, I relied on a basic WireGuard tunnel to get back to my network when I was away from home. It worked, and it felt secure. But lately, things have gotten… complicated. As I’ve added more devices and started giving my family access, managing all the individual configuration files has turned into a real headache. This led me down a rabbit hole, exploring the world of modern remote access solutions, and I found some really interesting stuff I think is worth sharing.

    If you’re in the same boat, wrestling with peer configs and wondering if there’s a better way, this is for you. Let’s talk about the shift away from traditional VPNs and toward something a lot more flexible.

    The Classic Approach: Why VPNs Are Both Great and Frustrating

    Let’s be clear: traditional VPNs like OpenVPN and WireGuard are powerful tools. They give you a secure, encrypted tunnel back to your home base. You control the keys, you control the server, and you know exactly how your data is flowing. For a simple point-to-point connection—say, from your laptop to your home server—they are fantastic.

    The problem starts when you scale up.

    • New Device? You have to generate new keys and create a new config file.
    • Add a Family Member? You need to create a config for them, get it on their device securely, and walk them through setting it up.
    • Device-to-Device? Most basic VPNs use a “hub-and-spoke” model. If you want your laptop to talk to your work desktop while you’re at a coffee shop, the traffic often has to go from your laptop, all the way back to your home server, and then to the other device. It works, but it’s not exactly efficient.

    This manual overhead is what sent me looking for better remote access solutions. The goal wasn’t just access; it was simpler access.

    A Smarter Path: Exploring Modern Remote Access Solutions

    Enter the world of overlay networks and mesh VPNs. Think of them as a smart, private network that’s layered right on top of the regular internet. They connect all your devices directly, no matter where they are, creating a seamless virtual network.

    Instead of managing individual connections, you just install a small piece of software on each device (your phone, your laptop, your homelab server, your family’s computer) and log into a central account. That’s it. The service handles all the complex networking, key exchanges, and connection management for you.

    Two of the most popular tools in this space are Tailscale and ZeroTier. While they do things a bit differently behind the scenes, they both solve the same fundamental problem: they make connecting your devices incredibly simple.

    Choosing Your Tool: A Look at Popular Mesh VPNs

    So, what’s the difference between the main players? After playing around with them, here’s my take.

    Tailscale: The Easy Button

    Tailscale is built on top of WireGuard, so it uses the same fast and modern cryptography that many of us already trust. Its standout feature is its simplicity.

    To get started, you don’t create a new username and password. Instead, you log in using an existing identity provider you already have, like a Google, Microsoft, or GitHub account. This is great for security and convenience. Once you install the Tailscale client on your devices and log in with the same account, they can instantly see and communicate with each other. It just works. The admin panel is clean, letting you easily add or remove devices and users.

    ZeroTier: The Power User’s Choice

    ZeroTier is its own beast. It doesn’t use WireGuard; it has its own peer-to-peer protocol that is incredibly powerful. It operates like a virtual network switch. You create a network in the ZeroTier dashboard, get a Network ID, and then join your devices to that network.

    It offers a massive amount of control, allowing you to create complex network rules and even bridge your virtual network with your physical home LAN. It can feel a little more “network-y” and might take a bit more tweaking, but its flexibility is unmatched if you have advanced needs.

    For a great breakdown of these kinds of tools, tech sites like Ars Technica often have deep dives that are worth reading.

    So, Is It Time to Switch Your Remote Access Solutions?

    After years of manually managing config files, moving to an overlay network felt like a breath of fresh air. It’s not about replacing WireGuard—Tailscale uses it under the hood—but about abstracting away the management headaches.

    Is it just a different set of problems? For me, the answer is no. The trade-off is that you’re using a third-party service to coordinate the connections (a “control plane”). However, your actual data still flows directly between your devices whenever possible, and it remains encrypted end-to-end. For those who want full control, advanced projects like Headscale even let you self-host the Tailscale control plane.

    But for most of us, the convenience is a clear win. So, if you’re feeling the pain of managing a growing list of devices and users, I’d strongly recommend you give a tool like Tailscale or ZeroTier a try. You can get started for free and you might be shocked at how simple and effective modern remote access solutions have become. It could save you a lot of time and frustration.

  • I Finally Found a Home Storage Solution That Just Works

    I Finally Found a Home Storage Solution That Just Works

    Tired of juggling external hard drives? Here’s how I finally organized my digital life with a network attached storage device.

    My desk used to be a graveyard of external hard drives. I had one for photos, another for old college projects, one for video files, and a portable one that was supposed to be for backups but was always out of date. If you’d asked me for a specific photo from 2018, it would’ve started a 20-minute excavation process. I knew I needed a better home storage solution, but the idea of setting up a “server” felt complicated and expensive.

    I was wrong. It turns out, creating a central hub for all your digital stuff is easier and more affordable than ever. After a bit of research, I finally took the plunge, and it’s one of the best tech decisions I’ve ever made.

    What Exactly Is a Home Storage Solution?

    When you hear “server,” you might picture a humming, blinking rack of equipment in a cold, dark room. That’s technically one version, but for most of us, the perfect home storage solution is a tidy little box called a NAS, or Network Attached Storage device.

    Think of a NAS as a smart, mini-computer that’s dedicated to one thing: holding hard drives and making them available to all your devices over your home network. You plug it into your router, not your computer. This means your phone, your laptop, your partner’s computer, and even your smart TV can all access the same pool of files securely. It’s like having your very own private cloud, without the monthly fees.

    Why I Finally Got a NAS: My Home Storage Solution Journey

    My reasons were simple, and they might sound familiar to you:

    • Centralization: I was tired of the digital chaos. I wanted one single, organized place for every photo, video, and important document.
    • Automatic Backups: My backup plan was a joke. I knew it. A good NAS can automatically back up your computers every single day. I use Apple’s Time Machine, and my NAS works with it perfectly. No more “I’ll do it tomorrow” excuses.
    • Privacy and Control: Cloud services are convenient, but you’re trusting a big company with your most personal files. With a NAS, the only person who has access is you (and whoever you grant access to). Your data lives in your house.
    • Media Streaming: This was the fun part. I wanted to run a Plex server to organize my movies and TV shows and stream them to any device, anywhere. A modern NAS can handle this without breaking a sweat.

    Getting Started with Your Own Home Storage Solution

    It’s not as scary as it sounds, I promise. The whole process boils down to two main choices: the NAS itself and the hard drives that go inside it.

    First, you pick your NAS enclosure. Two of the biggest and most user-friendly names in the game are Synology and QNAP. I went with a Synology model because their software is known for being incredibly intuitive and beginner-friendly. Their website has a ton of information to help you pick the right model for your needs. It’s like buying an appliance—you just need to figure out what features you want.

    Second, you need the hard drives. You can use standard desktop hard drives, but it’s highly recommended to use drives specifically built for NAS use. These are designed to run 24/7 and are more reliable in a multi-drive environment. Look for models like the Western Digital Red series or Seagate IronWolf.

    Once you have the box and the drives, the setup is surprisingly simple. You pop the drives in (usually without any tools), plug the NAS into power and your router, and follow a web-based setup guide. In about 30 minutes, I had my own personal cloud up and running.

    The software lets you create user accounts, set up shared folders, and install apps with just a few clicks. It’s more like using a smartphone than managing a server. For a great walkthrough on the possibilities, trusted sites like TechRadar often have guides on setting up things like a media server, which can show you just how powerful these little boxes are.

    So, if you’re drowning in a sea of hard drives and constantly worrying about losing your photos, maybe it’s time to look into a real home storage solution. It brought a sense of order and peace of mind to my digital life, and it was way less hassle than I ever imagined.

    Posted on: August 4, 2025

  • My KVM Switch and Docking Station Weren’t Talking. Here’s Why.

    My KVM Switch and Docking Station Weren’t Talking. Here’s Why.

    If you’re struggling with a blank screen in your KVM switch docking station setup, you’re not alone. Let’s figure this out together.

    I was so close to the perfect home office setup. I had my trusty Thinkpad for work, my powerful desktop for everything else, and two beautiful monitors ready to go. The dream was to share my keyboard, mouse, and at least one of those monitors between both machines with the simple press of a button. That’s where the KVM switch came in. But when I tried to connect my laptop through its docking station, I hit a wall. A black, screen-sized wall. If you’re struggling with a KVM switch docking station setup that isn’t playing nice, trust me, you’re not alone.

    It’s a super common headache. You’ve got all this great tech that’s supposed to make life easier, but getting it all to talk to each other feels like a puzzle. You test every piece individually, and it all works perfectly. Laptop to monitor? Fine. Laptop to dock to monitor? No problem. Laptop to KVM to monitor? Golden. But the moment you try to chain them all together in the most logical way—Laptop -> Docking Station -> KVM -> Monitor—it all falls apart.

    So, what’s actually going on? Let’s break it down.

    Why Your KVM Switch and Docking Station Aren’t Friends

    Think of your video signal as a message being passed down a line of people. When you connect your laptop directly to a monitor, it’s a simple, direct conversation. Easy.

    When you add a docking station, especially a modern USB-C one, you’re adding a translator. The dock takes a complex signal from the USB-C port that includes video, data for your USB ports, and sometimes power, and splits it all up. This process is surprisingly complex, relying on something called DisplayPort Alt Mode to work its magic.

    Now, add the KVM switch. It’s another person in the line, but its job is simpler: it’s a traffic cop, designed to quickly switch a clean, standard video signal (like HDMI or DisplayPort) from one source to another.

    The problem arises when the “translated” signal coming out of the docking station isn’t clean enough for the KVM to understand. The KVM is expecting a simple message, but it’s getting a complicated, re-packaged one from the dock. This is the most common reason a KVM switch docking station combination fails. The KVM switch just gets confused and gives up, leaving you with a blank screen.

    How to Fix Your KVM Switch Docking Station Connection

    Before you throw any hardware out the window, let’s try a few things. We’ll start with the basics and move to the most likely solution.

    • Check Your Cables: I know, I know—it’s the oldest trick in the book. But in a complex chain like this, cable quality matters immensely. A cheap cable that works fine in a direct connection might not have the bandwidth or shielding to handle being passed through two separate devices. Make sure you’re using high-quality, certified cables that match the resolution and refresh rate you need.

    • Update Your Drivers and Firmware: This is a big one. Manufacturers are constantly releasing updates that fix compatibility issues.
      1. Update your laptop’s graphics drivers.
      2. Check for firmware updates for your docking station. This is critical. Manufacturers like Lenovo and Dell regularly post these on their support websites.
      3. Check if your KVM switch has any available firmware updates.
    • Power Cycle Everything: Unplug everything from the wall. Yes, everything. The monitors, the dock, the KVM, and the computers. Plug it all back in, but turn things on in a specific order:
      1. Monitors
      2. KVM Switch
      3. Docking Station
      4. Computers

    Sometimes, this forces all the devices to perform a new “handshake” and recognize each other properly.

    The Real Solution: Simplifying the Signal Path

    If you’ve tried all of the above and are still staring at a black screen, it’s time to accept the hard truth: your dock and KVM probably won’t work when daisy-chained for video. But don’t worry, there’s a different way to connect everything that usually works perfectly.

    The goal is to simplify the video signal’s journey. Instead of forcing it through both the dock and the KVM, we’re going to separate the connections.

    Here’s the new plan:

    1. Video Goes Directly to the KVM: Connect your laptop’s video output directly to one of the KVM’s inputs. If your laptop only has USB-C, you might need a simple USB-C to DisplayPort or HDMI adapter. Do the same for your desktop. This ensures the KVM gets a clean, simple video signal from each source.
    2. Peripherals Connect to the Dock: Use your docking station for everything else! Plug your mouse, keyboard, webcam, and external hard drives into the dock.
    3. Connect the Dock’s USB to the Laptop: Connect the dock to your laptop with its main USB-C cable as usual. This handles all your peripherals and charging.

    With this setup, when you switch the KVM, only the video signal and the USB devices plugged directly into the KVM’s console ports will switch. Your laptop will remain connected to all its other accessories through the dock. It’s a slightly different wiring setup, but it’s far more stable and reliable.

    Building the perfect desk setup is a journey of trial and error. This little hiccup with the KVM switch docking station is a classic rite of passage. By understanding why it happens, you can rethink your connections and build a setup that’s not just powerful, but also reliable. Happy connecting!

  • Worried About Corrupting Files on Your Server? Let’s Talk.

    Worried About Corrupting Files on Your Server? Let’s Talk.

    A friendly guide to understanding file server best practices and keeping your data safe from corruption when working over a network.

    I remember the moment I decided to set up my first proper home server. It felt like a huge step up from just using a bunch of external hard drives. The idea of having one central, protected place for all my important files was amazing. But then a little bit of fear crept in. If I’m working directly off the server, what’s stopping a random glitch from scrambling my files? Moving from local storage to a network setup is a new world, and it’s totally normal to worry about keeping your data safe. It’s a question I’ve spent a lot of time on, and it really comes down to a few core file server best practices.

    Let’s be honest, the thought of file corruption is terrifying. You hit save on a project you’ve poured hours into, only to find it’s an unreadable mess later. The good news is, if you’ve built your server with the right components, you’ve already won half the battle.

    Your First Line of Defense: ZFS and ECC RAM

    If you’re serious about protecting your data on your server, you’ll hear two acronyms over and over: ZFS and ECC. Think of them as the dynamic duo of data integrity.

    • ZFS (Zettabyte File System): This isn’t your average file system. ZFS is incredibly smart. Its superpower is something called “checksumming.” In simple terms, when you store a file, ZFS creates a unique signature (a checksum) for it. When you access the file later, it checks the signature again. If it doesn’t match, ZFS knows the data has been silently corrupted (a phenomenon known as “bit rot”) and can often fix it automatically using redundant data. It’s a foundational part of modern file server best practices. You can learn more about its powerful features on the official OpenZFS project page.

    • ECC (Error-Correcting Code) RAM: Standard computer memory can, on rare occasions, have tiny errors. A bit can flip from a 1 to a 0, or vice versa. Usually, it’s harmless. But if that bit is part of a file you’re saving, it introduces corruption. ECC RAM has an extra chip that acts as a full-time fact-checker, detecting and correcting these single-bit memory errors on the fly before they can cause any damage.

    If your server is running ZFS and has ECC RAM, you can feel very confident that the data sitting on your server is incredibly well-protected.

    What Happens When You Open a File?

    So, your server is a fortress. But what happens when you open a file from it on your regular workstation? This is where the confusion often starts.

    When you double-click a file stored on your server, it doesn’t just “live” in the server. A copy is sent over the network and loaded into your workstation’s RAM. The network part is surprisingly robust. Protocols like SMB (what Windows uses) have their own error-checking to make sure the file that arrives is the same one that left the server.

    The potential weak link isn’t the server or the network—it’s your workstation.

    Workstation Worries: More File Server Best Practices

    Let’s say your server has ECC RAM, but your Windows workstation doesn’t. You open a document, make some edits, and hit save. That entire process happens in your workstation’s non-ECC RAM.

    If a rare memory error occurs on your workstation while you’re editing, the file’s data can become corrupted in memory. When you press save, you are telling your computer to send this now-corrupted version back to the server. The server, with its ZFS file system, will faithfully write the file exactly as it received it. It has no way of knowing that the data is “wrong”; it only knows that the file was transferred and saved without any storage-level errors.

    It’s a classic “garbage in, garbage out” scenario. So, how do you manage this risk?

    1. Assess the Risk: For most day-to-day tasks, the risk of a memory error corrupting your work is very low. But for mission-critical files—the kind of stuff that would be a disaster to lose—it’s worth being more careful.
    2. Consider Your Machine: If you have a primary workstation where you do all your important work, investing in one with ECC RAM (if your motherboard and CPU support it) provides an end-to-end integrity chain. For other, less critical machines without ECC, you can treat them as “read-only” for important files or just be aware of the small risk.
    3. Implement a Bulletproof Backup Strategy: This is the most crucial takeaway. No system is infallible. The ultimate safety net is a solid backup plan. The gold standard is the 3-2-1 backup rule:
      • 3 copies of your data.
      • 2 different media types (e.g., your server + a cloud service).
      • 1 copy offsite.

      This ensures that even if something gets corrupted and saved back to the server, you have older, versioned copies to restore from. Services like Backblaze have written excellent guides on this strategy.

    A Practical Workflow for Peace of Mind

    Getting started with working from your server doesn’t have to be scary. It’s about building smart habits.

    • Trust your server’s foundation (ZFS and ECC).
    • Understand the workstation is the “danger zone” for active work.
    • For truly critical files, you can copy them locally to your workstation, edit them there, and then copy the final version back to the server.
    • Backup everything automatically. Seriously. Don’t rely on manually dragging files. Set up an automated system with versioning.

    So go ahead, embrace working from your network server. By following these file server best practices, you can get all the benefits of centralized storage while knowing you’ve done everything you can to keep your precious data safe and sound. It brings a peace of mind that’s totally worth it.

  • Why I Built a Tiny, Silent Server for My Home

    Why I Built a Tiny, Silent Server for My Home

    Why I built a personal server and how my homelab setup changed everything.

    Have you ever felt like your digital life is a mess? I know I have. Photos scattered across Google Photos and my phone, important documents living in Dropbox, and a dozen different streaming subscriptions. It felt disorganized and, honestly, a little out of my control. That’s what led me down the rabbit hole of creating my own homelab setup—and it’s been one of the most satisfying projects I’ve ever tackled.

    It sounds intimidating, right? The word “homelab” or “home server” conjures up images of giant, noisy server racks blinking away in a basement. But it doesn’t have to be that way. For me, the goal was to create something small, silent, and clean enough to fit right into my living space.

    A homelab is simply a personal server that you own and control, running right in your home. It’s your own private slice of the cloud, tailored exactly to your needs. Think of it as a central brain for your digital life.

    So, What’s a Homelab Setup For?

    You might be wondering what you’d actually do with a home server. The possibilities are surprisingly vast, but most people start with a few key things. Here are some of the most popular uses:

    • Media Server: This is a big one. Using software like Plex or Jellyfin, you can organize all your movies, TV shows, and music into a beautiful, Netflix-style library that you can stream to any device, anywhere.
    • Personal Cloud Storage: Instead of paying monthly fees for Dropbox or Google Drive, you can host your own with tools like Nextcloud. Your files are on your hardware, under your control. You decide how much storage you get.
    • Network-Wide Ad Blocking: A simple application called Pi-hole can block ads across every single device on your home network—your phone, your smart TV, your laptop—without installing any software on them.
    • Home Automation Hub: If you have smart lights, plugs, or sensors, a homelab can run Home Assistant, giving you one central place to control and automate everything, regardless of the brand.

    My Approach to the Perfect Homelab Setup

    When I started planning my setup, I had three main goals: it needed to be quiet, power-efficient, and look good. I wanted something that wouldn’t be an eyesore. After a bit of research, I landed on a simple but powerful combination of gear.

    My setup is built around a few core components:

    1. The “Brain”: I use a small, compact computer as the main server. Something like an Intel NUC or a similar mini-PC is perfect. They are incredibly small, use very little electricity, and are completely silent. This little box is powerful enough to run multiple applications at once without breaking a sweat.
    2. The Storage: For file storage, I use a dedicated Network Attached Storage (NAS) device. Companies like Synology make fantastic, user-friendly devices that are basically small computers designed specifically for holding hard drives safely. It’s where my personal cloud and media files live.
    3. The Network: A reliable network is the backbone of any good homelab. I opted for gear from Ubiquiti’s UniFi line because it’s known for being powerful, reliable, and having a clean, minimalist aesthetic. Their hardware can be managed from a single, simple interface, which makes keeping an eye on things incredibly easy.

    The best part is that all of this fits neatly on a single shelf. The cables are managed, the devices are all sleek and white, and it genuinely looks like it belongs in a modern home.

    More Than Just Tech: The Satisfaction of a Homelab Setup

    I can’t overstate the sense of satisfaction that comes from building and maintaining your own server. Yes, it’s about having your own private cloud and a slick media server. But it’s more than that.

    It’s about ownership. In an age where we rent access to our data from large corporations, there’s something powerful about having a physical device in your home that holds your digital life. It’s yours. You control it. You can learn from it, tinker with it, and make it do exactly what you want.

    This project taught me so much about how networks function, how software works, and how to manage a small system. It’s a hobby that pays you back with real, useful skills. And at the end of the day, stepping back and looking at a clean, organized, and perfectly functioning setup is a reward in itself.

    If you’re feeling curious, don’t be intimidated. You don’t need to be a network engineer to get started. You could begin with something as small and simple as a Raspberry Pi to run an ad-blocker. That small first step might just be the start of a project that, like it did for me, completely organizes your digital world.

  • Why My “Messy” Home Server is My Smartest Setup Yet

    Why My “Messy” Home Server is My Smartest Setup Yet

    Embracing home server redundancy means having two of everything, and it’s saved me more than once.

    It started, as these things often do, with a failure. I was out of town, and my partner called me. The internet was “down.” Except it wasn’t, not really. Our home server, which handles our DNS and blocks ads, had decided to take an unscheduled vacation. I couldn’t fix it from hundreds of miles away, so we were stuck with a crippled network until I got back. That was the moment I realized my tidy, single-point-of-failure setup wasn’t cutting it. I needed to embrace a little bit of controlled chaos, and that meant building for home server redundancy. It’s the simple idea that two is one, and one is none.

    My setup today isn’t going to win any cable management awards. It’s a bit messy, but it works flawlessly, and more importantly, it’s resilient. It’s built on a simple principle I saw someone mention once: “two of everything.” Two DNS servers, two VPNs, two copies of important files. It might sound like overkill for a home environment, but it brings a level of peace of mind that a “perfect” single-server setup never could.

    So, What is Home Server Redundancy?

    At its core, home server redundancy is just a fancy term for having a backup plan. It’s the digital equivalent of having a spare tire in your car. You hope you never have to use it, but you’re incredibly glad it’s there when you get a flat. In a home lab context, it means creating failover systems for the services you rely on most. If one component fails—whether it’s a piece of hardware, a software crash, or a botched update—a second component is ready to take over, either automatically or with very little effort.

    This isn’t about replicating a massive corporate data center in your basement. It’s about identifying your personal “oh no” scenarios and building a small, practical safety net. For me, that meant tackling the things that would cause the most disruption if they went offline.

    My “Rule of Two” Approach to Redundancy

    I didn’t try to duplicate my entire server rack overnight. Instead, I focused on the most critical services and gave them a twin. It’s a simple strategy that has saved me more than once.

    1. Two DNS Servers

    This was my first and most important step. Many of us running a home lab use something like a Pi-hole or AdGuard Home for network-wide ad blocking and local DNS management. It’s fantastic, until it isn’t. When that single Raspberry Pi running your DNS goes down, it can feel like the entire internet has vanished.

    • The Fix: I set up a second, identical DNS server. In my case, it’s another small, low-power device running AdGuard Home. My router is configured to use both as primary and secondary DNS servers. If one goes down for maintenance, a reboot, or just because it feels like it, the other one seamlessly handles all the requests. The rest of the family doesn’t even notice. You can learn more about setting up your own DNS server at the official Pi-hole documentation.

    2. Two Copies of Critical Data

    This one is non-negotiable. If you only have one copy of your family photos, important documents, or media files, you’re living on borrowed time. Hard drives fail. It’s not a matter of if, but when.

    • The Fix: I follow the classic 3-2-1 backup strategy. It’s a simple rule that provides a robust framework for data safety.
      • 3 Copies of Your Data: The original file on your main server, and two backups.
      • 2 Different Media: Don’t save all your copies on the same type of drive. I have my primary copy on my NAS, one backup on an external USB hard drive, and another on a separate machine.
      • 1 Copy Off-Site: This is the key. If your house has a fire or flood, all your local copies are gone. My “off-site” copy is a synced backup to a trusted cloud provider.

    This strategy ensures that a single point of failure—whether it’s a drive dying or a local disaster—won’t wipe out your irreplaceable data. Tech companies like Backblaze provide great resources on why this is the gold standard for personal data protection.

    3. Two VPNs

    This might seem excessive, but it provides flexibility. I use a primary VPN for secure, everyday browsing on all my devices. But I also have a second, separate VPN tunnel set up for a very specific purpose: connecting to a family member’s home network for remote server management and diagnostics. This separation ensures that my personal browsing traffic is completely isolated from my remote admin tasks. For those interested in the technical side of VPNs, the Electronic Frontier Foundation (EFF) has a good, non-commercial guide on what to look for.

    Is This Level of Home Server Redundancy for You?

    Probably not all of it, and that’s okay. The goal isn’t to copy my setup, but to adopt the mindset. You don’t need to rush out and buy two of everything. Start small.

    Ask yourself: What’s the one thing I can’t afford to have fail?

    For most people, the answer is personal data. So, start there. Perfect your backup strategy first. Get that 3-2-1 system in place. Once you have peace of mind about your data, you can look at other potential points of failure, like your network’s DNS.

    My server closet may not be the prettiest, but it’s dependable. It’s a quiet, humming testament to the fact that perfection isn’t the goal—resilience is. And that peace of mind is worth a few extra cables.

  • My Quest for a Bulletproof Home Network: A Redundant Router Setup Story

    My Quest for a Bulletproof Home Network: A Redundant Router Setup Story

    How I used Proxmox and pfSense to finally stop worrying about my internet going down during server maintenance.

    It’s a familiar feeling for any home lab enthusiast. You’re in the middle of a big software update on your main server, or maybe you’re just rebooting it after a quick tweak. Suddenly, the Wi-Fi cuts out. Your partner calls from the other room, “Is the internet down again?” Your smart home devices go dark. It’s a reminder that your entire digital life runs through that one machine. I was tired of this being my reality, which is why I embarked on a project to build a truly redundant router setup.

    My goal was simple: I wanted to be able to take one of my servers completely offline for maintenance, or even have it fail unexpectedly, without bringing my entire home network to a screeching halt. A brief interruption of a few seconds is fine, but I wanted the network to heal itself automatically for anything longer.

    If you’re running a virtualized router on Proxmox, pfSense, or a similar platform, you have a powerful but fragile single point of failure. This is the story of how I fixed that.

    Why Even Bother with a Redundant Router Setup?

    Let’s be honest, for most homes, a single router from your ISP is good enough. But if you’re like me and you use your home lab for critical services—or you just have a low tolerance for downtime from your own tinkering—then creating a failover system is a fantastic project.

    The main benefits for me were:

    • Zero-Downtime Maintenance: I can now perform Proxmox host updates, reboot servers, and even test new hardware on my primary machine without anyone in the house noticing the internet is gone.
    • Real-World Skills: Setting this up teaches you a ton about networking, virtualization, and high availability concepts that are used in enterprise environments.
    • Peace of Mind: It’s just nice knowing that if one server has a hardware issue, the backup is ready to take over instantly.

    The core of my project involved adding a second Proxmox server to my lab. With two hosts ready, I could finally tackle the single point of failure that was my lone virtualized pfSense router.

    The Big Challenge: One Public IP, Two Routers

    You can’t just plug two routers into your cable modem and call it a day. Your Internet Service Provider (ISP) typically only gives you a single public IP address. So, how do you make two routers share it?

    The solution lies in a concept called a “Virtual IP” (VIP). Instead of assigning your public IP directly to one router, you assign it to a virtual address that can float between your two router instances. One router acts as the “MASTER” and actively handles all traffic. The second router is the “BACKUP,” constantly monitoring the master. If the backup stops receiving a heartbeat signal from the master, it immediately takes control of the virtual IP and becomes the new master. This failover is the magic that makes a redundant router setup possible.

    Understanding CARP: The Heart of pfSense High Availability

    This automatic failover process is managed by a protocol. In the world of pfSense and OPNsense, this protocol is called CARP, or the Common Address Redundancy Protocol. It’s a free, open-source alternative to similar proprietary protocols used in expensive enterprise gear.

    Here’s a simple breakdown of how it works:

    1. Shared Virtual IP: Both of your pfSense VMs are configured with the same virtual IP address on their WAN and LAN interfaces.
    2. Master and Backup Roles: One firewall is given a primary status (MASTER) by setting its “advertising skew” value to a low number, like 0. The backup is given a higher number, like 100. The lower number wins.
    3. Heartbeats: The MASTER firewall constantly sends out CARP “advertisements” or heartbeats to the network, essentially shouting, “I’m here, and I’m in charge!”
    4. Failover: The BACKUP firewall listens for these heartbeats. If it doesn’t hear them for a short period (usually about a second), it assumes the MASTER is down. It then takes over the Virtual IP and becomes the new MASTER.

    This process is incredibly fast and is the standard way to achieve high availability. For a deep dive into the technical specifics, the official Netgate documentation for pfSense High Availability is an excellent resource.

    My Proxmox & pfSense Redundant Router Setup: An Overview

    I won’t provide a line-by-line tutorial here, but I will walk you through the key steps I took to get my system running.

    First, I configured two identical pfSense virtual machines, one on each of my Proxmox hosts. The crucial part of the Proxmox setup was networking. I created a Linux Bridge on each host that was tagged with a specific VLAN (e.g., VLAN 99). I then physically connected a port from each Proxmox host assigned to this VLAN to a small, unmanaged switch along with the port from my cable modem. This created an isolated “WAN zone” where both routers could see the internet connection.

    Inside pfSense, the configuration looked like this:

    • Sync Settings: First, I set up High Avail. Sync (System > High Avail. Sync) on the primary node. This is amazing because it automatically copies all of your firewall rules, DHCP settings, and more to the backup router. You only have to manage one firewall!
    • Create Virtual IPs: Next, under Firewall > Virtual IPs, I created CARP VIPs for both my WAN and LAN interfaces. This is where I assigned the “Advertising Skew” to define the MASTER (skew 0) and BACKUP (skew 100) roles.
    • Update Outbound NAT: A critical step is to change your Outbound NAT rules (Firewall > NAT > Outbound) to use the WAN’s CARP Virtual IP as the translation address. If you don’t, your traffic will leave with the wrong source IP after a failover.
    • DHCP & DNS: Finally, I made sure my LAN’s DHCP server was configured to give out the LAN’s CARP Virtual IP as the gateway and DNS server, not the individual IP of the primary router.

    After a bit of testing and tweaking, it worked perfectly. I could unplug my primary server, and within about 2-3 seconds, my network traffic would seamlessly failover to the backup. It felt like magic. If you’re an OPNsense user, the process is very similar, as it also uses CARP. You can find more info in the OPNsense CARP configuration guide.

    Was It Worth It?

    Absolutely. For a home lab enthusiast, this project hits the sweet spot of being incredibly useful, a fantastic learning experience, and genuinely cool. It requires a second server, which is a consideration, but if you already have the hardware, the reward is a rock-solid network that you can rely on, even when you’re breaking things. The days of shouting “Sorry, the internet will be back in a minute!” are finally over.

  • Tired of Toggling SSH? A Better Way to Secure Your Home Network

    Tired of Toggling SSH? A Better Way to Secure Your Home Network

    Learn how to secure SSH access on your home servers, so you can set it and forget it.

    I have a confession. For the longest time, I was caught in a tedious cycle with my home servers. Whenever I needed to run a command or check on a service, I’d enable SSH. As soon as I was done, I’d manually disable it. It felt like a basic security step, but it was a nagging annoyance. My biggest fear? What if the web interface I used to toggle SSH ever went down? I’d be completely locked out. If this sounds familiar, I want you to know there’s a much smarter way to handle things. You don’t need to choose between convenience and security. The key is to secure SSH access by telling your servers to only listen to devices you already trust.

    It’s a simple change that completely removes the need to flip that switch back and forth, giving you peace of mind and robust security without the hassle.

    Why Toggling SSH Manually is a Bad Habit

    Let’s be honest, the main reason for manually disabling SSH is a lack of trust in our own security measures. Maybe it’s just a password holding the line, and the thought of leaving that port open to the world feels reckless. But this manual toggle creates two bigger problems:

    1. It’s a Pain: It adds an extra, unnecessary step to every quick task. What should be a 30-second job turns into a two-minute process of logging into a UI, enabling the service, doing the work, and then disabling it again. It just doesn’t scale, especially as you add more devices like a Raspberry Pi, a NAS, or a mini-PC running Proxmox to your network.
    2. It’s Brittle: Your system becomes fragile. If the web UI or front-end controlling that SSH toggle breaks, you’ve lost your only way in. You’re left hoping you can physically access the machine to fix it, which isn’t always easy or possible.

    How to Properly Secure SSH Access on Your Network

    The best way to solve this is to stop thinking of SSH as an on/off switch and start thinking of it as a locked door with a specific key. Instead of leaving the door wide open (or constantly locking and unlocking it), you can just tell the door to only open for a few trusted friends.

    In networking terms, this means configuring your server’s firewall to only allow SSH connections (typically on port 22) from the specific IP addresses of your trusted devices—like your main desktop or laptop. Any connection attempt from an unknown IP address is simply ignored. It’s like they’re knocking on a soundproof wall.

    This method is far superior because the SSH service can remain active 24/7, ready for when you need it, but it’s completely invisible and inaccessible to anyone else.

    A Simple Guide to Restrict SSH Access with UFW

    For most Linux-based servers (including those running on a Proxmox host or Raspberry Pi), the easiest way to do this is with Uncomplicated Firewall (UFW). It’s designed to be user-friendly, and it’s perfect for this task.

    Let’s say your main computer has the IP address 192.168.1.100 and you want to allow it to SSH into your server.

    1. Install UFW: If it’s not already installed on your server, you can add it with a simple command:
      sudo apt-get install ufw

    2. Allow Your Specific IP: This is the magic command. You’re telling the firewall to allow any connection from your trusted IP address to any port on the server. The to any port 22 part specifies that this rule is only for the SSH port.
      sudo ufw allow from 192.168.1.100 to any port 22

    3. Enable the Firewall: Once your rule is in place, you can turn the firewall on.
      sudo ufw enable

    That’s it! Now, your server will only accept SSH connections from the device at 192.168.1.100. All other connection attempts will be blocked. You can repeat step 2 for any other trusted machines on your network. For more detailed information, the official Ubuntu UFW documentation is an excellent resource.

    Take Your SSH Security Even Further

    While IP whitelisting is a fantastic step, you can make your setup even more bulletproof. If you’re ready to level up, here are two more best practices for how to secure SSH access:

    • Use SSH Keys Instead of Passwords: Passwords can be guessed or cracked. SSH keys are a pair of cryptographic keys that are used to authenticate you. They are significantly more secure than passwords. Setting them up is a one-time process and provides incredible security. Websites like DigitalOcean have fantastic guides on how to generate and use them.
    • Install Fail2Ban: This is a brilliant little tool that scans log files for malicious activity, like repeated failed login attempts. If it detects a brute-force attack from a specific IP, it will automatically update the firewall to block that IP for a set amount of time. You can learn more at the official Fail2Ban website.

    By combining a firewall rule with SSH keys, you create a layered defense that is both incredibly secure and wonderfully convenient. You can finally leave SSH running with confidence, knowing that your home lab is protected. So go ahead, break the cycle, and give yourself one less thing to worry about.

  • My Weekend Project: Building a Smart Fan Controller with an ESP32

    From a simple idea to a fully automated ESP32 fan control system. Here’s how I did it.

    A little while ago, I was looking at the fans whirring away in my electronics cabinet and had a thought. They were doing their job, sure, but they were kind of… dumb. Always on, always at the same speed, and always making the same amount of noise. It got me thinking: what if I could make them smarter? What if they only spun up when things got hot? This little idea kicked off a super interesting weekend project: creating a custom ESP32 fan control system. And you know what? It’s totally doable and surprisingly fun.

    The basic idea was to use a cheap but powerful ESP32 microcontroller to act as the brain. I’d connect a temperature sensor to it, and then have the ESP32 tell the fans how fast to spin based on the heat. It’s a simple concept, but it’s the foundation for a much quieter and more efficient cooling setup. If you’ve ever wanted to dip your toes into a practical electronics project, this is a great place to start.

    First, a Quick Word on Fan Types

    Before you start plugging things in, it’s important to know what kind of fans you have. Many basic fans use a simple 2-pin connector. They get power, and they spin. You can control their speed, but you have to do it by adjusting the voltage, which can be a bit tricky and sometimes bad for the fan’s motor long-term.

    The fans you really want for a project like this are 4-pin PWM fans. PWM stands for “Pulse Width Modulation.” These fans have four wires:

    • Ground (GND): The black wire.
    • Power (+12V): The yellow wire, which provides constant power.
    • Tachometer (Tach): The green wire, which sends out a signal telling you how fast the fan is actually spinning (in RPM).
    • PWM Control: The blue wire, which accepts a special signal to control the fan’s speed without changing the voltage.

    This PWM pin is the key. The ESP32 is great at sending out PWM signals, which makes it perfect for this job.

    My Approach to Smart ESP32 Fan Control

    So, how do we make this happen? My plan was to let the ESP32 be the intelligent link between the temperature and the fans. The fans would get their main power from a dedicated power supply (you don’t want to power them directly from the ESP32), but the instructions would come from the microcontroller.

    Here’s the setup:

    1. Power the Fans Separately: The fans’ +12V and Ground pins connect to a power supply that can handle their load.
    2. Connect the Brains: The PWM control pin from each fan connects to a PWM-capable output pin on the ESP32.
    3. Get the Temperature: A simple temperature sensor, like a DHT22 or DS18B20, gets connected to one of the ESP32’s data pins.
    4. Write the Logic: The code on the ESP32 reads the temperature. If it’s cool, it sends a low-duty-cycle PWM signal to the fans (making them spin slowly or stop). As the temperature rises, it increases the PWM signal, ramping up the fan speed.

    This setup is great because it’s efficient and gives you precise control. For a much deeper dive into the technical specifications, Noctua has an excellent white paper on how 4-pin PWM fans work.

    Building Your Own ESP32 Fan Control System

    Ready to try it? You don’t need a ton of gear.

    Your Shopping List:

    • An ESP32 development board
    • One or more 4-pin (PWM) computer fans
    • A temperature sensor (the DS18B20 is very accurate)
    • A 12V power supply for the fans
    • A breadboard and some jumper wires

    The “code” part is less intimidating than it sounds. If you’re using the Arduino IDE with your ESP32, you’ll mainly use a function to read the sensor and another to set the PWM output. You can find the official documentation for the ESP32’s PWM functions, called LEDC, right on the Espressif documentation site. It’s a fantastic resource.

    You can start with simple logic:

    • If temp < 30°C, set fan speed to 20%.
    • If temp > 30°C AND temp < 40°C, set fan speed to 60%.
    • If temp > 40°C, set fan speed to 100%.

    This creates a tiered system that reacts to the heat in your cabinet. You can even read the tachometer pin to see the actual RPM and display it, so you know everything is working as expected.

    Taking It to the Next Level

    Once you have the basics working, the sky’s the limit. You could create a smooth curve where the fan speed increases gradually with every degree, eliminating any sudden bursts of noise. You could even set up a simple web server on the ESP32 to show a graph of the temperature and let you manually override the fan speeds from your phone.

    For inspiration, you can find tons of similar projects on sites like Hackaday, where people have built incredibly sophisticated climate control systems for everything from servers to greenhouses.

    So, is this idea of building a smart fan controller feasible? Absolutely. It’s a perfect weekend project that solves a real problem and teaches you a ton about microcontrollers, sensors, and hardware control. It’s quiet, efficient, and honestly, just really cool to see in action.