Category: AI

  • My Next Project: A Tiny But Mighty RV Homelab

    My Next Project: A Tiny But Mighty RV Homelab

    How I’m planning a tiny, low-power server setup for movies, networking, and more while living on the road.

    I’ve been dreaming of a new project lately. It’s this idea of being completely self-sufficient with my tech, even when I’m on the road. Imagine being parked in the middle of nowhere, totally off-grid, and still being able to stream your entire movie library. That’s the magic of building a personal RV homelab, and it’s a project I’ve been mapping out. It’s all about creating a tiny, low-power server setup that can handle your networking and media needs without needing a constant internet connection.

    The whole thing started when I was thinking about how to solve a few key problems of life on the road. Sure, you can download movies to your laptop, but what about a centralized library that everyone in the RV can access? And what about having a secure, reliable network you actually control? This little project tackles all of that. But it comes with its own unique challenges, mainly centered around three things: size, power, and heat.

    So, Why Build an RV Homelab Anyway?

    You might be wondering if it’s worth the effort. For me, it comes down to a few key benefits:

    • Your Media, Anywhere: The biggest win is having a Plex server on board. I can load it up with movies and shows, and it doesn’t matter if I have cell service or not. No more buffering, no more worrying about data caps.
    • A Better Network: Instead of relying on whatever a campground offers, I’m planning to use a mini-PC running OPNsense. It’s a powerful open-source firewall that gives you way more control and security over your local network.
    • No More Ads: By running Pi-hole, I can block ads at the network level for every device that connects to my RV’s Wi-Fi. It makes browsing faster and less annoying.
    • It’s a Fun Challenge: Let’s be honest, it’s also just a really cool project for anyone who loves to tinker with tech.

    The Hardware Plan for a Pint-Sized RV Homelab

    The core of this setup is choosing hardware that is small and sips power. After all, when you’re running on solar and batteries, every watt counts.

    My plan revolves around two mini-PCs. The first will be a super-efficient N100 or N150-based machine dedicated to running my firewall software. These things are tiny, fanless, and use barely any electricity.

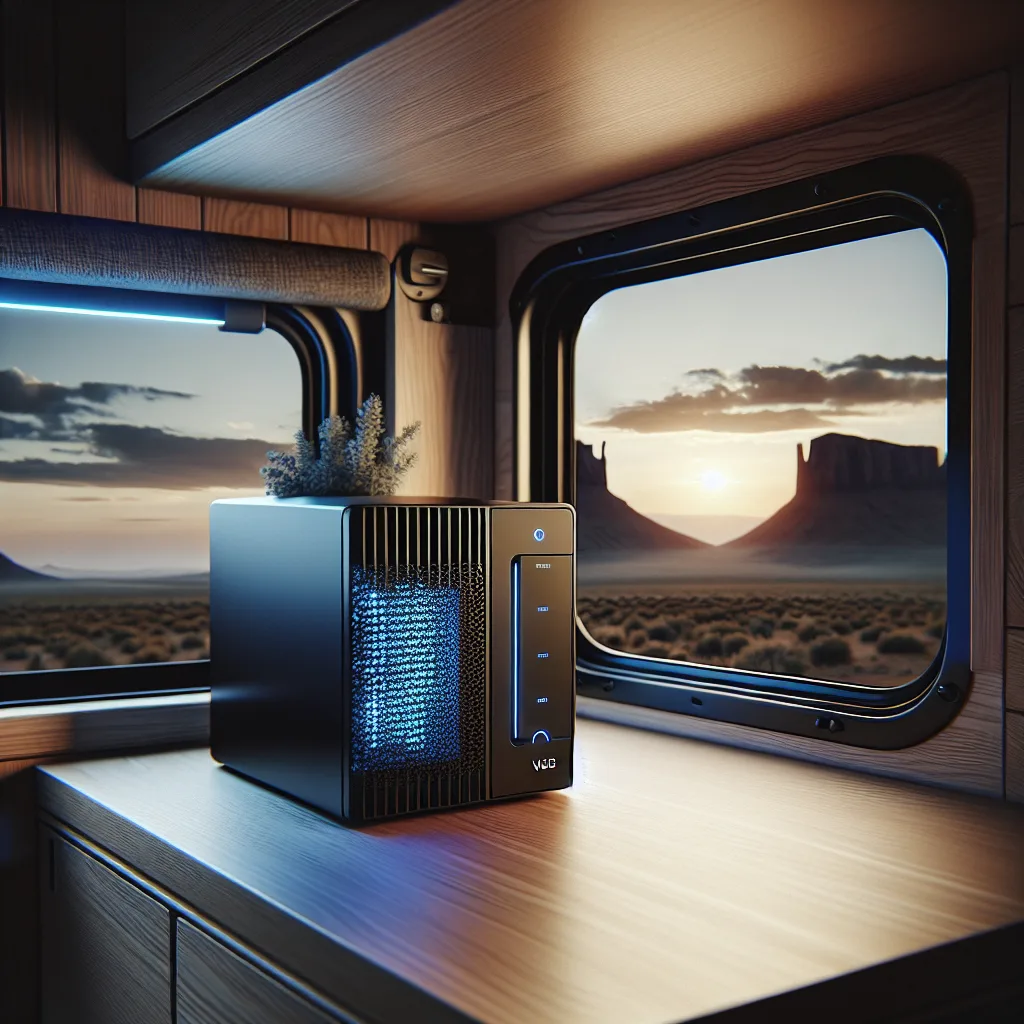
    The second mini-PC is the heart of the media setup. I found a really interesting model that’s basically a small vertical tower with built-in space for two full-sized 3.5″ hard drives. This is perfect for a NAS (Network Attached Storage). It means I can get a good amount of storage for my media library without having a bulky, power-hungry server. Everything will be connected with a simple 2.5 Gb unmanaged switch—no need for complicated VLANs in a small space like an RV.

    Putting It All Together with Software

    Hardware is only half the battle. The software is what will bring this RV homelab to life.

    My choice for the NAS and media server is Unraid. It’s an operating system that’s incredibly flexible. It lets you mix and match hard drives of different sizes, which is great for future upgrades. On top of Unraid, I’ll run a few key applications in Docker containers:

    • Plex: For organizing and streaming all my media.
    • Pi-hole: To handle ad-blocking for the whole network.
    • …and other “arr” apps for managing the library.

    For the router, I’m leaning towards OPNsense. It’s robust, secure, and gives me the kind of control I want over my network, which is especially important when you might be connecting to untrusted public Wi-Fi.

    The Big Challenges: Power and Heat

    Now for the two biggest hurdles. First, power. The low-power N100/N150 processors are the heroes here. Their efficiency is what makes a project like this feasible for an off-grid or solar-powered setup.

    The second, and perhaps trickier, challenge is heat. RVs can get hot. I mean, ambient temperatures can easily reach 100°F (or 38°C) in the summer. Electronics don’t love that. My plan is to store the setup in a cabinet with good ventilation. I might even add a quiet, USB-powered fan to keep air circulating around the mini-PCs. Choosing hardware that’s known for running cool is also a big part of the strategy. Keeping an eye on thermals, especially in the beginning, will be critical. You can find great thermal performance tests for mini-PCs on sites like ServeTheHome, which can help you choose the right device.

    Building a small server for the road is a fascinating puzzle. It’s about balancing performance with the real-world constraints of mobile living. But for the freedom and convenience it offers, it feels like a project worth tackling. Happy tinkering!

  • Can’t Access Your MikroTik Switch? A Common Connection Puzzle

    Can’t Access Your MikroTik Switch? A Common Connection Puzzle

    If connecting your router makes your switch’s admin page disappear, you’re not alone. Here’s the simple MikroTik WebFig fix you’ve been searching for.

    So, you got a new MikroTik switch. You plug it in, connect your computer directly, and everything works beautifully. You can access the configuration page, you’re clicking around, and feeling pretty good about your new gear. Then, you do the one thing you’re supposed to do: you connect it to your main router to get it on the network. And just like that, it’s gone. You can’t access the WebFig admin page anymore. If this sounds familiar, don’t worry—you’ve just stumbled upon a classic networking puzzle, and this simple MikroTik WebFig fix will get you sorted out in no time.

    It’s a frustrating experience, but what’s happening is actually pretty straightforward. It all comes down to a classic case of mistaken identity—for your network devices, that is.

    What’s Really Happening with Your Switch?

    Most MikroTik switches running SwitchOS, like the popular CSS610 series, come out of the box with a default, static IP address: 192.168.88.1. This is so you can easily connect to it for the initial setup.

    Your router, however, has a job to do. Its DHCP server is responsible for handing out IP addresses to every device that connects to it, ensuring there are no duplicates. When you plug your switch into the router, a conflict happens:

    1. The IP Address Conflict: Your router might also be using a 192.168.x.1 address, causing a direct traffic jam.
    2. The DHCP Takeover: The switch, by default, is often set to “DHCP with fallback.” This means it first tries to get an IP from your router. If it succeeds, it gets a new IP address that you don’t know, and the old 192.168.88.1 address stops working.

    Either way, the address you were using to talk to your switch is suddenly gone, and you’re locked out. The solution is to step in and manually assign your switch a permanent, predictable address.

    The Step-by-Step MikroTik WebFig Fix

    Ready to fix it for good? We just need to isolate the switch, give it a new address, and tell it to stick with it.

    Step 1: Isolate Your Switch
    First things first, unplug the Ethernet cable that connects your switch to your router. For now, the only connection should be between your computer and the switch. This takes the router’s DHCP server out of the equation so we can talk to the switch directly again.

    Step 2: Set a Temporary Static IP on Your Computer
    Since the switch is on the 192.168.88.x network, your computer needs to be on it, too. You’ll need to temporarily change your computer’s network settings.
    * On Windows: Go to Settings > Network & Internet > Ethernet > Change adapter options. Right-click your Ethernet adapter, choose Properties, select “Internet Protocol Version 4 (TCP/IPv4),” and click Properties.
    * On Mac: Go to System Settings > Network > Ethernet > Details… > TCP/IP.

    Choose “Use the following IP address” and enter:
    * IP Address: 192.168.88.5 (anything other than .1 will work)
    * Subnet Mask: 255.255.255.0

    Leave the gateway and DNS fields blank for now. Click OK/Apply.

    Step 3: Access WebFig and Change the IP Settings
    Open your web browser and navigate to `http://192.168.88.1`. Voila! The WebFig login page should appear.

    Once you’re logged in, find the “System” tab. This is where the magic happens. Here’s what you need to change:

    • Address Acquisition: Change this from DHCP with Fallback to Static.
    • IP Address: This is the most important part. You need to assign an address that fits your main network. For example, if your router’s IP is 192.168.1.1, you could set your switch’s IP to 192.168.1.2. Crucially, make sure this IP is outside your router’s DHCP range to avoid future conflicts. (You can find your router’s DHCP range in its admin settings).
    • Gateway: Set this to your router’s IP address (e.g., 192.168.1.1).

    Click “Apply All” to save your changes. The switch will now have its new, permanent home on your network.

    Finalizing Your MikroTik Switch Setup

    Your switch is now configured, but your computer is still stuck on the old network. Let’s finish the job.

    1. Reset Your Computer’s IP: Go back to your computer’s TCP/IPv4 settings and change it back to “Obtain an IP address automatically.”
    2. Reconnect Everything: Plug the Ethernet cable from your router back into your switch. Your computer should also be connected to the switch.
    3. Test It Out: Open your browser and navigate to the new static IP address you just assigned (e.g., `http://192.168.1.2`). The WebFig login page should load perfectly.

    You’ve done it! You’ve resolved one of the most common setup hurdles for managed switches. It’s a rite of passage for anyone building a more robust home network. For a deeper dive into the settings, the official MikroTik SwitchOS manual is an excellent resource. And if you’re curious about the difference between IP address types, you can find great explainers on sites like How-To Geek.

    Welcome to the wonderful world of MikroTik!

  • The One-Button Dream: Solving the Annoyance of Multi-Room PC Output Switching

    The One-Button Dream: Solving the Annoyance of Multi-Room PC Output Switching

    I built an amazing multi-room setup with one PC powering it all. But switching displays and audio was a chore. Here’s how I’m tackling PC output switching.

    I have this dream setup in my head. It’s a single, powerful PC that runs everything in my house. It’s my work machine in the office, my 4K gaming rig in the bedroom, and the engine for my VR adventures in the living room. I recently got to experience this firsthand, and let me tell you, it feels like living in the future. Thanks to some clever tech like 50-foot fiber optic HDMI cables and USB-over-Ethernet, I can get a perfect, lag-free 4K 120Hz signal anywhere I need it. But this amazing setup has one tiny, incredibly annoying flaw: the constant, manual hassle of PC output switching.

    You know what I’m talking about. Every time I move from my desk to the couch, I have to pull out my phone, VNC into the computer, and wrestle with Windows display settings to change the primary monitor and switch from my desk speakers to the Dolby Atmos soundbar. It’s a clunky process that completely breaks the magic of an otherwise seamless system.

    The Real Problem with Manual PC Output Switching

    It sounds like a minor complaint, I know. But the friction is real. The whole point of a centralized, multi-room PC is elegance and convenience. You want to just sit down and have it work. When you have to spend a minute or two fiddling with settings, it pulls you right out of the experience.

    Imagine you want to quickly show your family a video on the living room TV. Instead of just hitting play, you’re saying, “Hang on, let me just connect to the computer… okay, now change the audio device… wait, why is it not showing up?” That’s the exact opposite of the effortless experience I was aiming for. I just want a button—physical or virtual—that knows, “I’m in the living room now, so switch to the TV and soundbar.”

    Are There Apps for That? Exploring Software Solutions

    The good news is, I’m not the first person to have this problem. After a bit of digging, I found that there are some really smart software tools out there designed to solve this exact issue. They range from simple, free utilities to more powerful, feature-rich applications.

    Here are a few of the most promising options I’ve come across:

    • DisplayFusion: This is like the Swiss Army knife of monitor management. While it’s famous for handling multi-monitor wallpapers and window snapping, it also has powerful Display Profiles and scripting features. You could create a profile for each room (“Basement Office,” “Bedroom Gaming”) and then assign a hotkey to each one. Pressing the hotkey would instantly switch your monitor and audio to the correct preset. It’s a paid tool, but incredibly powerful. You can check out all its features on the DisplayFusion website.
    • SoundSwitch: If your main headache is audio, this tool is a dedicated lifesaver. It lets you switch between your playback and recording devices with a simple keyboard shortcut. No more clicking through menus. You can set up profiles for your headphones, speakers, and TV sound system and cycle through them instantly. It’s a simple utility that does one thing and does it perfectly. You can learn more about it on the official SoundSwitch site.
    • AutoHotkey (AHK): For the DIY-ers who don’t mind getting their hands a little dirty, AutoHotkey is a free and incredibly powerful scripting language for Windows. You could write a simple script that changes your default display and audio devices with a single command. The learning curve is a bit steeper, but the possibilities are endless, and you can customize it to do exactly what you want. The AutoHotkey documentation is a great place to start if you’re curious.

    A Better Approach to PC Output Switching

    Ultimately, the goal is to make the technology disappear. A truly smart setup shouldn’t require you to think about which output is active. While a hardware solution like an HDMI matrix switcher exists, it’s often more expensive and adds another layer of complexity and potential failure points. For a setup like this—one computer, multiple locations used one at a time—software is a more elegant and cost-effective path.

    I’m still experimenting to find the perfect one-button solution. I’m leaning towards trying DisplayFusion first for its all-in-one approach, but the simplicity of SoundSwitch is also really appealing. The ideal solution might even be a combination of tools.

    It’s a fun problem to solve, and it’s the last little hurdle to making this multi-room setup truly perfect. If you’ve tackled something similar, I’d love to hear about it. What does your dream setup look like?

  • From Tower Chaos to Tidy Setup: Your First Home Server Rack

    From Tower Chaos to Tidy Setup: Your First Home Server Rack

    Tired of that pile of PCs? It’s time to go vertical. Here’s how to choose your first home server rack and finally get organized.

    If you’re anything like me, you’ve got a growing collection of computers. It starts with one, then you build a custom NAS for your files, and suddenly you have a dedicated gaming rig, too. The next thing you know, you’re staring at a pile of towers and a tangled mess of cables that looks more like a tech octopus than a clean setup. If that sounds familiar, you might be thinking about getting your first home server rack.

    It’s the next logical step for any home lab enthusiast. A rack brings order to the chaos, centralizing your hardware into a single, neat, and surprisingly space-efficient tower. But where do you even begin? It’s not as simple as just buying a metal frame and sliding your computers inside. So, let’s talk through how to move your collection of PCs into a clean, professional-looking setup.

    Why Bother With a Home Server Rack?

    First off, why do this? It sounds like a lot of work. And it can be, but the payoff is huge.

    • Organization: This is the big one. All your equipment lives in one place. Cables can be managed neatly, making troubleshooting a breeze.
    • Space: It might seem counterintuitive, but going vertical saves a ton of floor space compared to three or four desktop towers sitting side-by-side.
    • Airflow: Proper racks are designed for airflow. When paired with the right cases, you can create a much more efficient cooling path than a bunch of PCs crammed under a desk.
    • It Just Looks Cool: Let’s be honest. A tidy server rack is the mark of a serious hobbyist. It’s immensely satisfying to see your hardware all racked up and blinking away.

    Your First Big Decision: The Rack Itself

    Before you buy anything, you need to understand two key measurements: rack height (U) and rack depth.

    A “U” is a standard unit of measure for rack-mounted equipment, equal to 1.75 inches. A 2U server is 3.5 inches high, a 4U server is 7 inches high, and so on. For a home setup with a few machines, a 9U, 12U, or 15U rack is a fantastic starting point. It gives you enough space for your current gear plus room to grow.

    Depth is just as important. Racks come in various depths, and you need to make sure your new server cases will actually fit. I’d recommend a rack with an adjustable depth or one that’s at least 30 inches deep to accommodate most standard components. For an excellent, detailed breakdown of all the specifications, check out this server rack buying guide from StarTech.

    The Most Important Part: The Rackmount Chassis

    Here’s the thing they don’t tell you: you can’t just put your ATX desktop case on a shelf in the rack. I mean, you could, but it defeats the whole purpose. The real solution is to move the guts of your computers into new cases called rackmount chassis.

    Think of it as just another PC case, but in a different shape. You’ll take your motherboard, CPU, RAM, power supply, and all your drives and transplant them into this new rack-friendly enclosure.

    A Rackmount Chassis for Every Need

    For a setup like the one you’re probably imagining—a gaming PC, a NAS, and a workstation—you’ll need different types of chassis.

    • For the Gaming PC & Workstation: You’ll almost certainly need a 4U chassis. Why? Because modern graphics cards are huge, and so are many CPU air coolers. A 4U case provides the vertical space needed to fit these tall components without having to switch to specialized, and often louder, low-profile coolers.
    • For the NAS: This is where it gets fun. You’ll want a chassis designed for holding a lot of hard drives. A 4U chassis is still a great option here, as many have 8, 10, or even more 3.5-inch drive bays. This gives you plenty of room for all your storage and future expansion. Companies like SilverStone and Rosewill make some fantastic and affordable rackmount chassis that are perfect for these kinds of builds.

    Putting It All Together: The Migration Plan

    So you’ve got a plan. You know which rack and what chassis you need. What’s next?

    1. Build One at a Time: Don’t tear all your computers apart at once. Pick one, and perform the transplant completely before moving to the next. I’d start with the easiest one, maybe the workstation.
    2. Take Pictures: Before you unplug everything from your motherboard, snap a few photos with your phone. It’s a simple trick that can save you a huge headache when you’re trying to remember where that tiny “JFP1” connector goes.
    3. Mount and Manage: Once a PC is rebuilt in its new chassis, slide it into the rack. Don’t worry about perfect cable management yet—just get everything in place.
    4. The Final Polish: After all your machines are racked, dedicate some time to cabling. This is where the magic happens. Route your power cords to a power distribution unit (PDU) and your network cables to a patch panel. It’s the final step that separates a pile of hardware from a truly clean home server rack.

    It’s a project, for sure. But when you’re done, you’ll have a setup that’s not only more functional but also a source of pride. You’ve tamed the chaos. Welcome to the club.

  • More Speed or More Space? My Home Server Hard Drive Dilemma

    More Speed or More Space? My Home Server Hard Drive Dilemma

    Choosing between speed and capacity for my home lab wasn’t easy. Here’s how I decided which hard drive was the right fit.

    My trusty home server has been a faithful companion, but lately, it’s been feeling a bit cramped. I started with a modest 300GB of mirrored storage, which felt like plenty at the time. But as my projects grew, my available space shrank. It was time for an upgrade. I found myself at a familiar crossroads for any home lab enthusiast: how do I expand my storage without breaking the bank? The core of my dilemma came down to a classic tech debate: SAS vs SATA drives.

    I had two main options, both hovering around a similar price point on the second-hand market.

    • Option 1: The Capacity King. Go with used WD Red drives. These are SATA, 3.5-inch Large Form Factor (LFF), and spin at a respectable 5,400 RPM. The big win here? Tons of storage for a great price.

    • Option 2: The Speed Demon. Buy used HPE SAS drives. These are 12G SAS, 2.5-inch Small Form Factor (SFF), and spin at a much faster 10,000 RPM. The trade-off? I’d get about half the total capacity for the same cost.

    So, the choice was clear: do I prioritize raw terabytes or faster performance?

    The Case for SATA: Easy and Familiar

    For most people building a home server, SATA drives are the default choice, and for good reason. They are the standard in consumer desktops and offer a fantastic price-per-gigabyte. Drives like the Western Digital Red series are specifically designed for NAS (Network Attached Storage) environments, built to be reliable in 24/7 operation, which is a step up from a basic desktop drive.

    The main appeal is simple: you can get a massive amount of storage space for relatively little money. If your primary goal is to build a giant media server for movies and music or a simple file backup archive, SATA is almost always the right answer. The 5,400 RPM speed is perfectly fine for streaming video or accessing documents. It’s the practical, sensible choice for capacity-focused builds.

    Understanding SAS vs SATA Drives: Why Speed Matters

    So why would anyone choose the second option? This is where the world of enterprise hardware comes in. SAS (Serial Attached SCSI) drives are the standard in business servers and data centers. While SATA is built for affordability and capacity, SAS is built for performance and reliability under heavy, constant use. You can get a great technical breakdown of the differences from sites like TechTarget, but the key difference for my situation was the rotational speed.

    A 10,000 RPM drive reads and writes data significantly faster than a 5,400 RPM drive. This speed isn’t just a number on a spec sheet; it translates to a more responsive system, especially when you’re running virtual machines, databases, or any application that frequently accesses small files. These drives are engineered for intense workloads, and you can often find them for a great price on the used market as companies upgrade their data centers.

    My Verdict on SAS vs SATA Drives for My Workload

    I had to be honest about my server’s job. It wasn’t just storing large media files. I run a few virtual machines, a code repository, and some databases for my development projects. When I’m compiling code or spinning up a test environment, disk access speed (measured in IOPS, or input/output operations per second) is way more important than storing another 2TB of movies.

    A sluggish VM or a slow database query is a real workflow killer. The idea of getting that enterprise-level responsiveness was incredibly appealing. I realized that my bottleneck wasn’t raw space—it was performance. Sacrificing some capacity for a much snappier experience felt like the right trade-off for my specific needs.

    So, I pulled the trigger on the 10k SAS drives.

    The result? It’s been fantastic. The server feels more alive. My virtual machines boot faster, applications feel more responsive, and file operations are noticeably quicker. It was a good reminder that in the world of home labs, the “best” hardware isn’t always the one with the biggest numbers. It’s about understanding your workload and choosing the components that best serve it. If you’re running performance-sensitive applications, don’t overlook those used enterprise HPE SAS drives. They might just be the most impactful upgrade you can make.

  • My Smart Home Setup: A Real-Person’s Guide to Getting Started

    My Smart Home Setup: A Real-Person’s Guide to Getting Started

    From Wi-Fi woes to the best smart gadgets, here’s what I wish I’d known before building my connected home.

    So, you’re thinking about making your home a little smarter? I’ve been there. A couple of years ago, I looked around my two-story house and had a vision: lights that adjust themselves, doors that I could check from my phone, and a little less worrying about whether I left the air conditioner running. Getting started with a smart home setup can feel overwhelming, but it doesn’t have to be. It’s less about creating a futuristic robot house and more about adding a little convenience and peace of mind to your daily life.

    I dove in headfirst, and I’ve learned a ton along the way. Forget the confusing technical jargon. Let’s just talk, friend to friend, about what actually works.

    First, Pick a “Brain” for Your Smart Home

    Before you buy a single smart bulb, you need to decide on your smart home ecosystem. Think of this as the central app or voice assistant that will control everything. The big three are Amazon’s Alexa, Google Home, and Apple HomeKit.

    • Google Home & Amazon Alexa: These are the most popular and for good reason. They are compatible with a massive range of devices at all price points. If you want the most options, from lightbulbs to robot vacuums to obscure kitchen gadgets, this is where you’ll find them. They are incredibly flexible and great for beginners.
    • Apple HomeKit: If you’re already in the Apple world (iPhones, MacBooks, etc.), HomeKit is a fantastic choice. It’s known for its slick interface, strong privacy standards, and reliability. The downside? The selection of compatible devices is smaller and often a bit more expensive. You can learn more about its curated approach directly on the Apple Home app page.

    So which one should you choose? My advice is to start with what you already know and use. If you have an Android phone and use Google Assistant, Google Home is a natural fit. Heavy iPhone user? Give HomeKit a serious look. You can always mix and match later, but starting with one simplifies things immensely.

    The Foundation of Your Smart Home Setup: Strong Wi-Fi

    Your smart home is only as good as your Wi-Fi network. This is especially true in a bigger, two-floor house where a single router in the corner just won’t cut it. You have two main options here: a mesh system or wired access points.

    For 99% of people, a mesh Wi-Fi system is the way to go. Brands like TP-Link Deco, Eero, or Google Nest Wifi use multiple units placed around your house to create a single, seamless network with no dead zones. You can walk from upstairs to downstairs on a video call without it ever dropping. They are incredibly easy to set up.

    Wired access points are the gold standard for speed and reliability, but they require running Ethernet cables through your walls, which is a major project. Unless you’re building a new home or are a serious networking enthusiast, a good mesh system is the perfect blend of performance and simplicity. If you want to dive deeper, this guide on what a mesh Wi-Fi system is is a great resource.

    Let’s Talk Gadgets: My Smart Home Setup Ideas

    Okay, now for the fun part: the devices! Here’s a breakdown of what I’ve found useful.

    • Smart Lighting: This is the best place to start. Philips Hue is the gold standard for its reliability and features, but brands like Wyze and WiZ offer great, budget-friendly alternatives. Being able to dim the lights from the couch or schedule them to turn on when you’re away is a small luxury you’ll quickly love.
    • Locks and Security: A smart lock (from a trusted brand like August or Schlage) is amazing. No more fumbling for keys, and you can grant temporary access to guests. For cameras, I like Eufy because they offer great performance with no mandatory monthly fees. Combining a video doorbell with a few door/window sensors gives you a solid, basic security system.
    • Energy and Water Monitoring: Want to know which appliances are energy hogs? Start simple with a smart plug that has energy monitoring. The Kasa Smart Plug Mini is a great example. For whole-home monitoring, you can look at devices like the Sense monitor. As for water, in my area, monitoring our overhead tank is important. There are sensor-based systems you can install for this, though they can be a bit more DIY.
    • Power Backup is a MUST: This is the one thing I can’t stress enough. A small power flicker can knock your entire smart home offline. Get a small Uninterruptible Power Supply (UPS) and plug your modem, router, and smart home hub (if you have one) into it. It’s a small investment that saves you from constant resets and headaches.

    A final thought: the best smart home setup is one that grows with you. Start with one area, like lighting in your living room. See what you like and what you don’t. The goal isn’t to buy every gadget available, but to thoughtfully add things that make your life just a little bit easier. Before you know it, you’ll have a connected home that feels perfectly tailored to you. Happy automating!

  • That Glow-Up: A No-Nonsense Guide to Under-Cabinet LED Lighting

    That Glow-Up: A No-Nonsense Guide to Under-Cabinet LED Lighting

    Feeling lost in a sea of LED strips and diffusers? I get it. Let’s break down your under-cabinet LED lighting project into simple, manageable steps.

    So, you’re standing in your kitchen, dreaming of that perfect, warm glow under your cabinets. You hop online, ready to make it happen, and are immediately hit with a tidal wave of terms like “drivers,” “diffusers,” “Kelvin scales,” and “LED density.” Sound familiar? It’s easy to get overwhelmed. But I promise, installing beautiful and functional under-cabinet LED lighting is much easier than it seems when you break it down.

    I’ve been there, staring at diagrams and product pages, feeling more confused with every click. The good news is that you don’t need an engineering degree to achieve a high-end look. You just need a solid plan and the right components. Let’s walk through it, step by step, and get you that amazing kitchen lighting you’re picturing.

    First Things First: Planning Your Under-Cabinet LED Lighting

    Before you add a single thing to your cart, let’s map it out. A little planning now saves a ton of headaches later.

    • Measure Everything: Grab a tape measure and figure out the exact length of the cabinet sections you want to light. If you have sections broken up by a microwave or a window, measure each one individually. Jot these numbers down. This determines how much LED stripping you’ll need.
    • Find Your Power Source: The person who inspired this post was smart—they had already pulled power from a nearby light switch. This is a great, clean way to do it. You can also use a standard wall outlet. The key is knowing where the power will come from, as this dictates how you’ll run your wiring. For a hardwired setup like the one from the switch, you’ll need a power supply (often called a “driver”) that can be safely tucked away in a cabinet or another hidden spot.
    • Plan the Route: Think about how the LED strips will connect. If you have multiple cabinet sections, you’ll likely need to run a small wire between them. This often means drilling a small, discreet hole in the bottom or side of the cabinet partitions. It sounds scarier than it is! A half-inch hole is usually more than enough to pass the low-voltage wire through.

    The “Big Three”: Choosing Your Lighting Gear

    Okay, this is where the research can get intense, but it really boils down to three main components.

    1. The LED Strips: This is the fun part. For that smooth, diffused light without visible dots, look for a strip with a density of at least 60 LEDs per meter. The Reddit user was spot on with this. An even better option for a truly seamless glow is a “COB” (Chip on Board) LED strip, which has no visible dots at all.
      • Color Temperature (Kelvin): You mentioned wanting to control the Kelvin scale. This is a fantastic feature! It means you can change the light from a cool, bright white (great for food prep) to a warm, cozy yellow (perfect for relaxing in the evening). Look for “Tunable White,” “CCT,” or “Variable White” LED strips.
      • The “Easy Button”: You can make your life a lot easier by choosing an LED strip that comes pre-installed in an aluminum channel with a diffuser. These all-in-one units take the guesswork out of matching components and are incredibly simple to mount.
    2. The Power Supply (Driver): The LED strips run on low-voltage DC power (usually 12V or 24V), so you need a power supply to convert your home’s 120V AC power. Don’t let this intimidate you. The product description for your LED strip will tell you what voltage it requires. To calculate the size, you just need to know the watts per foot/meter of the strip and multiply that by the total length you’re installing. It’s always a good rule to get a power supply with about 20% more wattage capacity than you need, just to be safe.

    3. The Controller and Dimmer: To control both the brightness and the color temperature, you’ll need a compatible controller and wall switch. Companies like Lutron offer fantastic, reliable dimmer switches that work with many LED systems. You’ll install a small receiver between the power supply and the LED strip, which then “talks” to your wall switch. This gives you that slick, professional control right from the wall.

    The Final Step: A Simple Guide to Installing Your Under-Cabinet LED Lighting

    Once you have your gear, the installation is pretty straightforward.

    1. Safety First: Turn off the power at the breaker. Always. If you are not 100% comfortable with wiring, please hire an electrician for the high-voltage connections. It’s worth the peace of mind. For more on this, a trusted resource like This Old House is a great read.
    2. Mount Your Channels: Clean the underside of your cabinets thoroughly. Then, screw the aluminum channels directly into the wood.
    3. Install the Strips: Peel the adhesive backing off your LED strips and press them firmly into the channels.
    4. Connect the Sections: Run your low-voltage connector wires through the small holes you drilled earlier to link the different cabinet sections. Most kits from places like Armacost Lighting come with easy-to-use connectors.
    5. Wire It Up: Connect the strips to the controller/receiver, and then connect the receiver to the power supply. Finally, have your electrician (or yourself, if you’re qualified) connect the power supply to the main power line from your switch.
    6. The Grand Finale: Snap the plastic diffusers onto the front of the aluminum channels.

    Now, flip the breaker back on, and turn on your new lights. You did it. That overwhelming project is now a gorgeous, practical upgrade that you’ll enjoy every single day. See? Not so bad when you take it one step at a time.

  • My Bedroom Turned Into a 2 AM Disco, So I Found Better Smart Switches

    My Bedroom Turned Into a 2 AM Disco, So I Found Better Smart Switches

    Tired of smart home gadgets that fail? I was too. Here’s how I found the best smart switches for Alexa that won’t wake you up at 2 AM.

    It’s 2:30 AM. You’re sound asleep, and suddenly, your bedroom light starts flashing on and off like a strobe in a nightclub. You jump out of bed, heart pounding, only to find it’s not a paranormal event—it’s just your smart switch having a total meltdown. If this sounds familiar, you’re not alone. A reliable smart home is a quiet one, which is why finding the best smart switches for Alexa that don’t fail is so important.

    I went through this exact same thing. After getting repeatedly woken up by what I can only describe as a “bedroom disco,” I decided to ditch the cheap, unreliable switches and find something that just works. It’s about more than just convenience; it’s about peace of mind.

    Why Choosing the Right Smart Switch for Alexa Matters

    When you’re building a smart home, the light switch is one of the most fundamental pieces. It’s the physical interface you and your family will use every single day. So, when it fails, it’s not a minor inconvenience; it’s a major disruption.

    The problem with many budget-friendly switches is that their Wi-Fi connectivity can be spotty. They work great for a few weeks or months, but then they start dropping off your network, becoming unresponsive, or worse, entering that dreaded on-off loop. They might be fighting for bandwidth with your dozens of other devices, or the internal components just aren’t built for the long haul. This is why investing a little more in a quality switch up front can save you a ton of headaches later.

    My Top Recommendations for the Best Smart Switches for Alexa

    After my own disco nightmare, I did a ton of research and testing. I wasn’t just looking for something that worked; I was looking for something I could install and then completely forget about. Here are the two brands that have proven to be rock-solid in my home.

    1. Lutron Caseta Wireless

    If your number one priority is reliability, stop reading and just go with Lutron Caseta. Seriously. Lutron has been a leader in lighting controls for decades, and it shows. Instead of relying on your crowded home Wi-Fi network, Caseta switches use their own proprietary radio frequency called Clear Connect.

    They communicate with a small hub (the Smart Bridge) that you plug directly into your router. This creates a separate, dedicated network just for your lights that is incredibly stable and lightning-fast.

    Here’s the breakdown:

    • Pros: Unmatched reliability, incredibly fast response times, and many of their dimmers don’t require a neutral wire, which is a huge plus for older homes. The companion Pico remotes are also fantastic.
    • Cons: They are more expensive, and you need to buy the Smart Bridge for the system to work with Alexa. But trust me, it’s worth the investment.

    2. Leviton Decora Smart Switches

    If you’d prefer to avoid a hub and connect directly to Wi-Fi, my top pick is the Leviton Decora Smart lineup. Leviton is another legacy brand in the electrical space, and their smart switches bring that history of quality to the modern smart home.

    They offer a wide range of products, from simple on/off switches to dimmers and fan controllers, that all connect directly to your Wi-Fi. In my experience, their connectivity is far more stable than the cheaper brands they compete with. They are a significant step up in quality and performance.

    Here’s the breakdown:

    • Pros: No hub required, high-quality build, and a trusted brand name. They look and feel like standard, premium decorator switches.
    • Cons: You’ll need to make sure you have a strong Wi-Fi signal where you plan to install them, and most models require a neutral wire for installation.

    A Few Final Things to Check Before You Buy

    Before you add anything to your cart, keep these three things in mind. They’ll help you select the perfect switch for your needs.

    1. Check Your Wiring (Do you have a neutral wire?): This is the most common installation hiccup. Open up your switch box and look for a bundle of white wires tucked in the back. If you have them, you can use almost any smart switch. If you don’t, your options are more limited, making the no-neutral-required Lutron Caseta dimmers an excellent choice.
    2. Hub vs. Wi-Fi: As we discussed, a hub-based system like Lutron is generally more reliable. A Wi-Fi switch like Leviton is simpler to set up initially. If you have a robust Wi-Fi network and only a few smart devices, Wi-Fi is fine. If you plan on adding dozens of devices, a hub is the better long-term strategy.
    3. Dimmer or Just On/Off?: Do you want to set the mood or just turn the lights on and off? Dimmers offer more flexibility but make sure your light bulbs are “dimmable” to avoid flickering.

    Ultimately, putting an end to your smart home frustrations is possible. By choosing a switch from a trusted brand, you can finally get a good night’s sleep, free from any surprise disco parties. Happy automating!

  • So, You Want to Install a Smart Thermostat? Let’s Talk Wiring.

    So, You Want to Install a Smart Thermostat? Let’s Talk Wiring.

    Before you buy that shiny new Nest or Ecobee, let’s figure out if you can actually install a smart thermostat with your current setup. It’s easier than you think.

    You just got the keys to a new place. You walk through, imagining where the couch will go, what color to paint the walls… and then you see it. On the wall is a beige, plastic box with a tiny, cloudy screen and a clunky switch. The old thermostat. Your first thought is probably, “I need to upgrade this.” And you’re right, it’s one of the easiest and most impactful smart home upgrades you can make. So, you’re ready to install a smart thermostat like a Google Nest or an Ecobee, but there’s one crucial step you can’t skip: checking if your system is even compatible.

    It’s a question I hear all the time. Can I just pop the old one off and put a new one on? Sometimes, yes. But a quick 5-minute check can save you a ton of headache, a trip back to the hardware store, and the disappointment of an unpowered screen.

    Why Bother With a Smart Thermostat Anyway?

    Let’s get this out of the way. Is it worth the effort? Absolutely. A smart thermostat isn’t just about controlling the temperature from your phone. It learns your habits and can build schedules automatically, saving you real money on your energy bills. It’s also incredibly convenient to adjust the temperature from the couch, or even when you’re on your way home, so you walk into a perfectly comfortable house. It’s a small upgrade that makes your home feel significantly more modern.

    The Big Question: A Guide to Smart Thermostat Compatibility

    This is the moment of truth. Before you can install a smart thermostat, you need to play detective with your current wiring. Don’t worry, you don’t need to be an electrician for this part. It’s surprisingly simple.

    1. Turn Off the Power: First things first: safety. Go to your breaker box and shut off the power to your heating and cooling system (your HVAC). If you’re not sure which breaker it is, you can turn off the main breaker to be safe. Give the thermostat a quick check to make sure it’s completely off.

    2. Gently Pop Off the Old Cover: Most old thermostat covers either pull straight off or have a small tab you can press to release them. Once it’s off, you should see the backplate with a series of small screws and colorful wires attached. This is what we need to see. It’s a good idea to snap a quick picture with your phone right now. This photo will be your best friend.

    Decoding Your Wires: The “C-Wire” Mystery

    Now, look at those wires. You’ll see letters next to the screws. Here’s a quick rundown of the most common ones:

    • R, Rh, or Rc: This is for power. It’s almost always red.
    • G: This controls the fan. Usually a green wire.
    • Y, Y1, Y2: This is for your air conditioning. Typically a yellow wire.
    • W, W1, W2: This controls your heat. Almost always a white wire.

    But the most important wire for our mission is the C-wire, or “Common” wire. It’s typically blue or black. The C-wire provides continuous, 24V power to the smart thermostat, keeping its Wi-Fi connection active and its screen lit up. Most new models, especially those with big, bright screens, require it.

    Take a look at your setup. Do you have a C-wire connected? Many older homes don’t. This is the single biggest roadblock people face when trying to install a smart thermostat. For a great visual guide and an official compatibility checker, Google provides an excellent one right on the Google Nest support page.

    What If I Don’t Have a C-Wire? (Don’t Panic!)

    If you just looked and your heart sank because you don’t see a C-wire, take a deep breath. You still have options, and you’re not alone.

    1. Check for a Hidden Wire: Sometimes, an unused C-wire is tucked back inside the wall. Gently pull the bundle of wires out an inch or two and see if there’s an extra one (often blue) that simply wasn’t connected to your old thermostat.
    2. Use a Power Adapter Kit: Most smart thermostat brands, like Ecobee, sell a Power Extender Kit (PEK). These clever devices can often use your existing four wires to create a “virtual” C-wire. It involves a bit more work at your furnace control board, but the instructions are usually very clear. This Old House has a great article explaining the process.
    3. Choose a Thermostat That Doesn’t Require One: Some models, particularly some of the entry-level Google Nest Thermostats, can sometimes operate without a C-wire by “power stealing” from the other wires. However, this can sometimes lead to issues down the line, so a C-wire is always the most reliable option.
    4. Call a Pro: If you’re not comfortable with any of the above, there is zero shame in calling an HVAC technician. They can run a new wire for you in no time.

    Ready to Go?

    Once you’ve confirmed your wiring is compatible, the hard part is over. Seriously. From here, you can confidently buy your new thermostat and follow the manufacturer’s step-by-step installation guide. Companies like Ecobee offer fantastic support and clear guides on their websites.

    So before you get dazzled by the sleek designs, take five minutes to look behind the beige box. A quick check of your wiring is the key to a smooth, stress-free installation. You’ve got this!

  • Building a New Home? A Beginner’s Guide to Your First Smart Home

    Building a New Home? A Beginner’s Guide to Your First Smart Home

    Feeling overwhelmed with smart home options for your new build? Here’s a simple smart home for beginners plan to get you started without the headache.

    So, you’re building a new home. Congratulations! It’s an incredibly exciting journey, a blank canvas where you get to make every decision. But I know it can also be a little… much. Amid choosing paint colors and flooring, you’re probably also thinking about technology. If you’re looking to dip your toes into home automation, you’re in the perfect position. This is the ultimate guide to planning a smart home for beginners, especially when you have the rare opportunity to build it from the ground up.

    Forget the complicated, futuristic stuff you see in movies. A truly smart home is one that just makes life a little bit easier, especially for everyone living in it, from kids to parents.

    First, Ask ‘Why?’ Before ‘What?’

    Before you buy a single gadget, take a moment and think about what you actually want to achieve. It’s easy to get lost in an ocean of cool devices. Instead, start with your daily routines and annoyances.

    • Goal: “I want my parents to be able to turn on the living room lights without fumbling for a switch in the dark.”
    • Solution: Smart lighting or smart switches that can be controlled by voice.

    • Goal: “I want to make sure the coffee maker is off after I leave for work.”

    • Solution: A simple smart plug.

    • Goal: “I want the house to feel secure and welcoming when I arrive home.”

    • Solution: A routine that turns on porch lights at sunset and entryway lights when you’re close to home.

    Starting with your “why” helps you create a home that’s genuinely helpful, not just technologically cluttered. Write down 3-5 things you’d love to simplify. That’s your starting plan.

    Choose Your ‘Brain’: The Smart Home Hub

    Every smart home needs a central hub to connect and control all your devices. You mentioned you already have an Alexa, which is fantastic news! That means you already have one of the most popular and versatile hubs on the market.

    Other popular options include Google Assistant (via Nest speakers) and Apple HomeKit. For most people starting out, sticking with one of these three is the way to go. They are user-friendly and compatible with thousands of devices. Since you’re on Team Alexa, your main task when shopping will be to look for the “Works with Alexa” badge on the product packaging or online description.

    For the more technically adventurous, platforms like Home Assistant offer incredible power and control, but they come with a much steeper learning curve. For now, let’s stick to the basics.

    A Smart Home for Beginners: Where to Start?

    You don’t need to automate everything at once. The beauty of a smart home for beginners approach is that you can build it piece by piece. Here are the three best places to start:

    1. Smart Lighting: This is often the “gateway” to home automation because it’s so practical. You have two main choices: smart bulbs or smart switches.
      • Smart Bulbs (like Philips Hue): You just screw them in and set them up with an app. They’re great for lamps and for adding color to a room.
      • Smart Switches (like those from Lutron or TP-Link): These replace your existing wall switches. The advantage? The switch is always smart, even if someone manually turns it off. This is often better for main room lighting.
    2. Smart Plugs: These are the unsung heroes of the smart home. You plug one into a regular outlet, and then plug a “dumb” appliance—like a fan, a lamp, or that coffee maker—into it. Instantly, you can control it with your voice or an app. They are cheap, versatile, and a perfect starting point.
    3. Smart Speakers & Displays: You’ve already got this covered with Alexa. Placing a speaker (like an Echo Dot) in key rooms like the kitchen and living room makes voice control accessible to everyone in the family. A smart display (like an Echo Show) is even better for kitchens, as it can show you recipes, timers, or a video feed from a security camera.

    Planning Ahead: A Smart Home for Beginners Guide to Wiring

    Here’s where building a new home gives you a superpower. You can plan your wiring to be “smart-ready.” This is the part where you might need a professional.

    When you meet with your electrician, tell them you’re planning for home automation. Here’s the single most important request:

    “Please run a neutral wire to every light switch box.”

    Many smart switches require a neutral wire to get power, and older homes often don’t have them at the switch. Ensuring they’re installed now will save you a massive headache and make installing smart switches a breeze down the line.

    When it comes to buying appliances, just keep an eye out for compatibility. The “Works with Alexa” program is a great resource, and you can see a huge list of compatible brands on Amazon’s official page. For broader research, tech sites like The Verge offer excellent, up-to-date guides on the best devices in every category.

    DIY or Pro? Your Role in the Setup

    So, how much can you do yourself? Here’s the simple breakdown:

    • The Electrician’s Job: Anything involving high-voltage wiring. This means installing the outlets, light fixtures, and those all-important smart switches. Safety first, always. Let the professional handle the part that lives inside your walls.
    • Your Job: The fun part! Once the electrician has safely installed the hardware, you can take over. You’ll be the one connecting the devices to your Wi-Fi, setting them up in the Alexa app, naming them (“Living Room Lamp”), and creating cool routines (“Alexa, good morning” to turn on the lights and start the coffee maker).

    This hybrid approach is perfect. You get the safety and reliability of professional installation with the satisfaction and customization of a DIY setup.

    Building a home is a marathon, not a sprint. The same is true for building a smart home. Start with a solid foundation, focus on solving real, everyday problems, and add new devices over time. Your goal isn’t a complicated house of the future; it’s a comfortable, helpful home for you and your family. Enjoy the process!