Elevate Your Home Server Setup with Personalized 10-Inch Racks
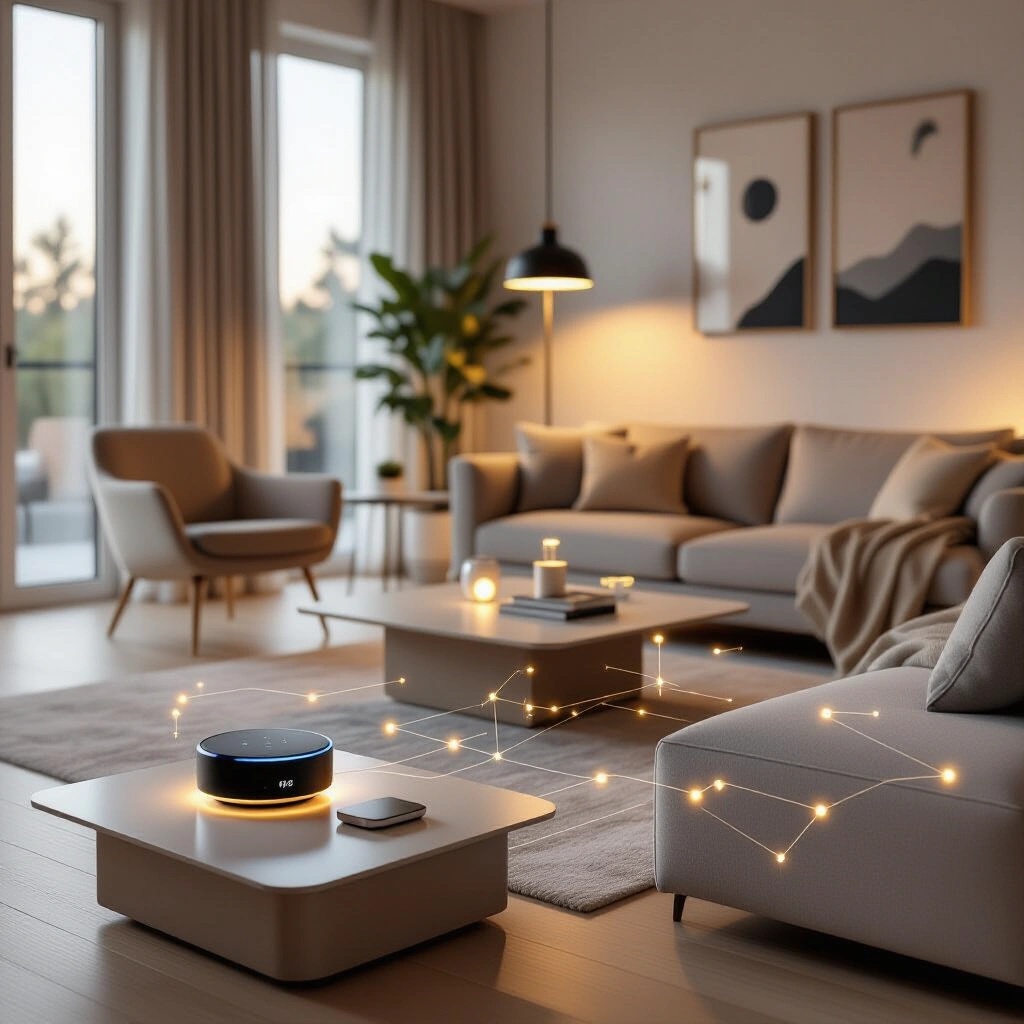
In the dynamic world of home labs, functionality often takes precedence over form. Yet, a growing number of enthusiasts are discovering the immense satisfaction of creating a setup that not only performs flawlessly but also looks stunning. This desire for both power and personalized style is driving the trend towards custom homelab racks, particularly compact 10-inch systems. Gone are the days of sprawling, utilitarian server rooms; today’s homelab can be a meticulously organized, aesthetically pleasing centerpiece.
Building a custom homelab allows you to tailor every aspect to your specific needs, from optimizing airflow to integrating unique color schemes. It’s about more than just housing your hardware; it’s about crafting an environment where your servers, networking gear, and storage solutions coexist efficiently and beautifully. This guide explores how to transform your vision into a high-performance, visually striking 10-inch homelab rack, proving that powerful technology can indeed be a work of art.
The Allure of 10-Inch Racks: Compact Power for Your Homelab
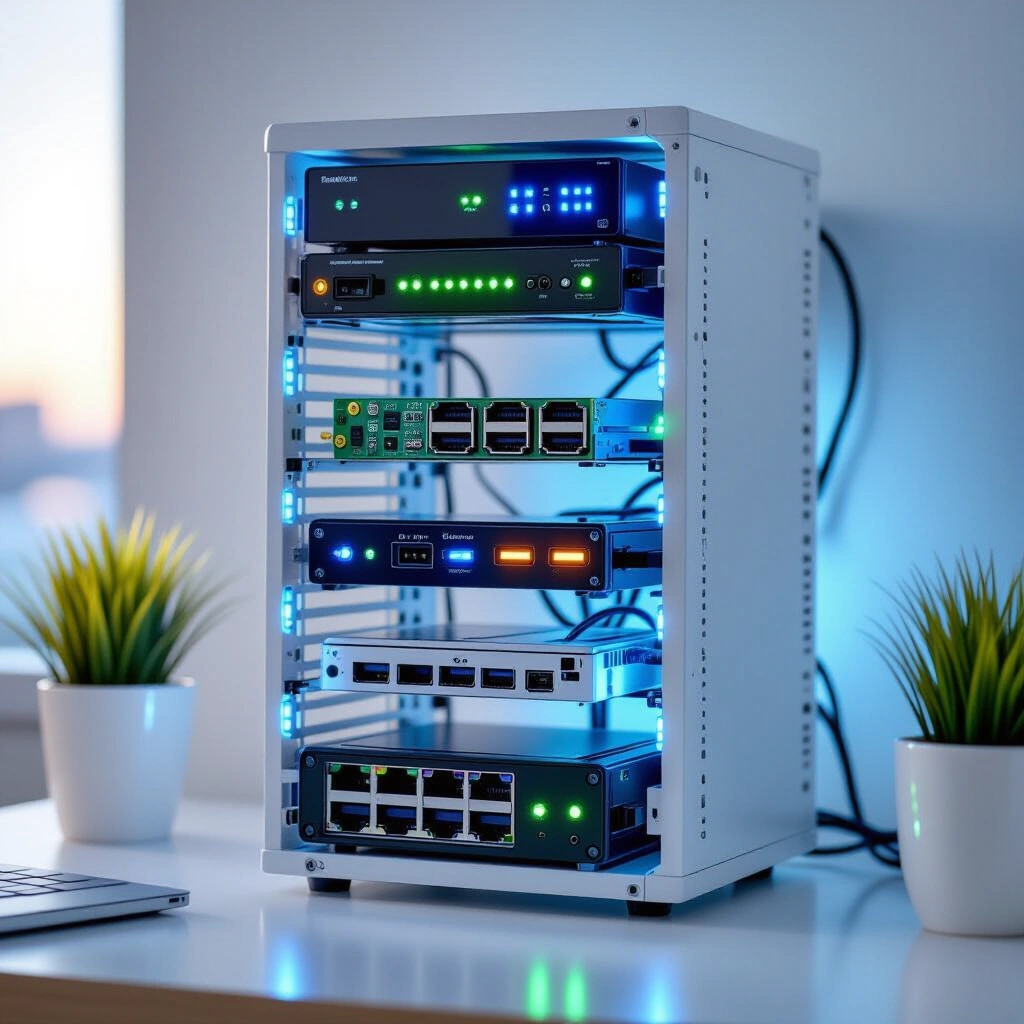
The appeal of 10-inch server racks lies in their remarkable balance of compact size and significant potential. Unlike their larger 19-inch counterparts, these smaller racks are perfectly suited for home environments where space is often at a premium. They enable enthusiasts to consolidate powerful computing resources without dominating a room, making them ideal for apartments, home offices, or dedicated tech corners. Their modular nature also allows for focused expansion.
This compact footprint doesn’t mean compromising on capabilities. Many users successfully integrate multi-node clusters, dedicated editing rigs, and robust network infrastructure within these smaller dimensions. The key is thoughtful planning and leveraging innovative mounting solutions. Systems like the open-source Labrax 10-inch rack designs, pioneered by creators like Michael Klements, offer a fantastic foundation, proving that professional-grade organization is achievable in a desktop-friendly form factor.
Space-Saving Ingenuity: Why Size Matters for Your Setup
Opting for a 10-inch rack allows for greater flexibility in placement and a reduced visual impact. This is particularly beneficial for those who prefer their technology to blend seamlessly into their living space rather than stand out as an industrial behemoth. Furthermore, smaller setups often lead to lower power consumption and easier thermal management, especially with efficient components. When considering your components, remember that every inch counts.
Consider your current and future needs. Are you planning a compact Proxmox cluster, a dedicated media server, or a comprehensive network hub? A 10-inch rack provides ample room for these core functions, encouraging a disciplined approach to hardware selection and maximizing every available slot. This deliberate selection process ultimately leads to a more efficient and purpose-built homelab.
Beyond Basic: 3D Printing for Homelab Customization
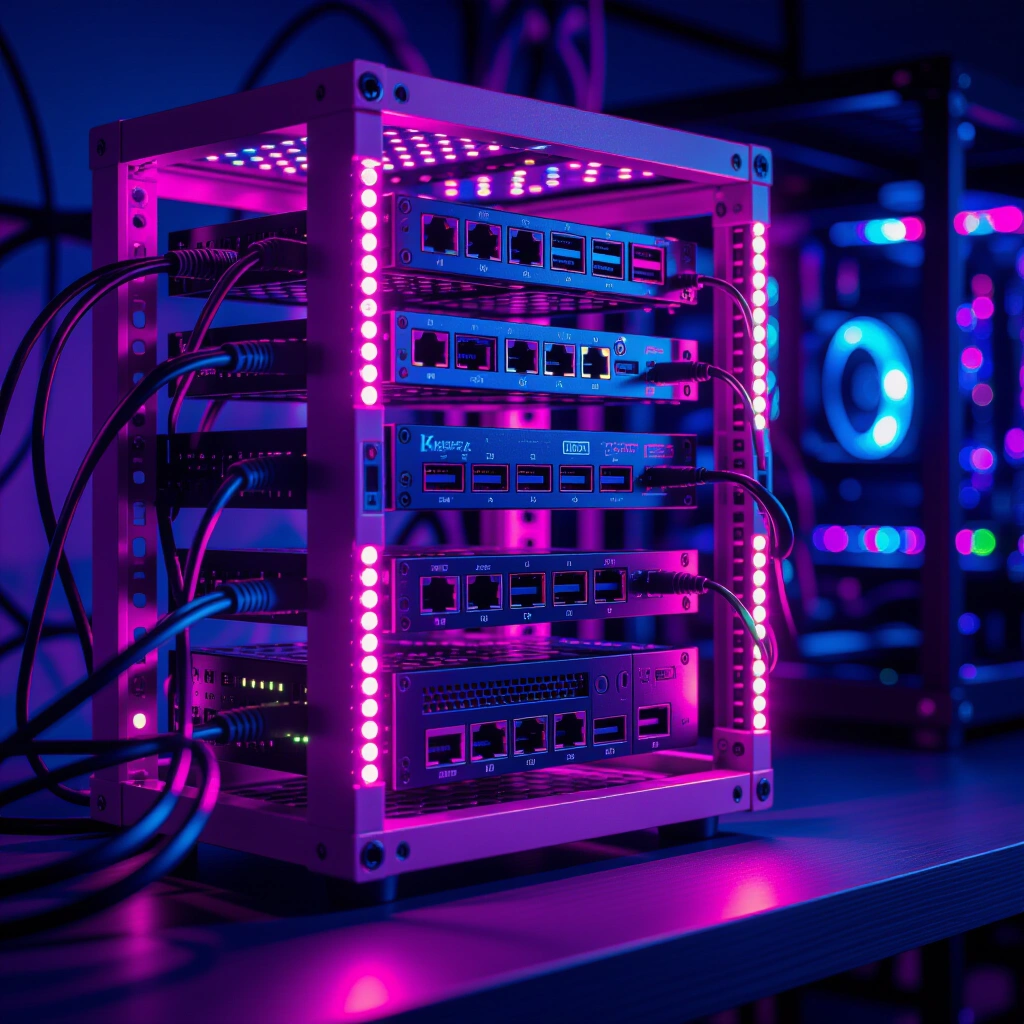
One of the most transformative tools in modern homelab building is 3D printing. It empowers builders to move beyond off-the-shelf solutions, designing and fabricating custom components that perfectly fit their specific hardware and aesthetic preferences. From bespoke mounts for mini PCs and ITX boards to custom bezels and intricate cable management clips, 3D printing unlocks an unprecedented level of personalization and organization within your rack.
This technology allows for solving unique challenges, such as mounting non-standard equipment or integrating personal touches like a specific color scheme – perhaps a vibrant pink accent for that touch of individuality. The ability to iterate on designs quickly means you can refine your setup continually, addressing airflow, accessibility, and visual appeal with precision. The open-source community provides a wealth of shared designs, making advanced customization accessible to everyone.
“The beauty of home lab and DIY lies in the freedom to build or design things exactly the way your brain thinks about them by default. It allows for questioning traditional practicality and finding unique solutions that truly resonate with your personal style.”
Essential 3D Printed Components for Rack Organization
Numerous 3D printable designs can dramatically improve your homelab’s organization. Custom ITX motherboard trays, for instance, ensure secure and aesthetically pleasing integration of your primary compute nodes. Power supply mounts can neatly secure PSUs to the rack frame, freeing up valuable space and improving cable routing. Even simple cable guides and blanking panels can transform a chaotic rack into an organized masterpiece.
Platforms like MakerWorld host an extensive collection of user-contributed STL files, offering solutions for almost any component you can imagine. Before you even start printing, explore these repositories to find existing designs that fit your needs, or use them as inspiration to create your own unique parts. Leveraging these community resources is a smart way to accelerate your build and benefit from collective innovation.
Crafting a High-Performance & Aesthetic Homelab: Component Integration
Integrating diverse, powerful components into a compact 10-inch rack requires strategic planning. Whether you’re running a multi-node Proxmox cluster for virtualization, a dedicated Windows 11 ITX rig for editing, or a robust network setup, careful component selection and placement are crucial. The goal is to maximize performance and organization while maintaining a clean, accessible layout.
For compute-intensive tasks, mini PCs and ITX boards offer excellent performance-per-watt in a small form factor. Consider fanless designs or efficient cooling solutions to manage heat effectively within the confined space. Strategically placing your router and switches ensures optimal network performance, while centralizing power supplies can simplify cabling and improve overall aesthetics. Every element needs to serve a purpose, both functionally and visually.
Maximizing Network Efficiency: 2.5GbE in a Compact Footprint
Achieving high-speed networking in a compact homelab is entirely feasible. Even if your mini PCs and server boards primarily offer 1GbE, affordable 2.5GbE USB 3.0 to Ethernet adapters can easily upgrade your network backbone. These adapters allow you to dedicate the built-in 1GbE ports for management or redundancy, while the faster connection handles data-intensive tasks.
Unmanaged 2.5GbE switches provide simple, effective high-speed connectivity for your devices. As your homelab grows, you might consider upgrading to managed switches for advanced features like VLANs and QoS. The key is to plan your network topology early, ensuring that all your devices have adequate bandwidth and that cabling is managed to prevent clutter and facilitate airflow. This proactive approach prevents bottlenecks and enhances the overall responsiveness of your setup.
Building a Robust Raspberry Pi NAS with RaidZ1
A Raspberry Pi-based Network Attached Storage (NAS) system, configured with RaidZ1, presents an incredibly power-efficient and cost-effective storage solution for your homelab. Running on Ubuntu Server and utilizing Samba/NFS protocols, such a setup can provide reliable, redundant storage for your entire network. Combining multiple hard drives into a RaidZ1 array offers data protection against a single drive failure, a crucial aspect for any critical data storage.
To ensure optimal performance, especially with large file transfers, connect your Raspberry Pi NAS to your 2.5GbE network using those same USB 3.0 to Ethernet adapters. This maximizes throughput, making your NAS a truly capable and responsive storage hub. Integrating this into your 10-inch rack with custom 3D-printed mounts can create a very clean and functional storage block, proving that even a small, inexpensive device can form the backbone of a powerful storage solution. For further details on open-source solutions like Proxmox for virtualization, exploring their official documentation is highly recommended.
Common Pitfalls in Custom Homelab Rack Builds
While the journey of building a custom homelab rack is rewarding, it’s not without its challenges. Overlooking seemingly minor details can lead to significant headaches down the line. Common pitfalls often revolve around power management, thermal dynamics, and unexpected component compatibility issues. Anticipating these challenges and planning proactively can save you a lot of time and frustration.
One frequent oversight is underestimating the total power draw of all components and ensuring adequate power distribution. Another is neglecting proper airflow within the confined space of a 10-inch rack, which can lead to overheating and reduced hardware longevity. Always factor in the future; a rigid design might make upgrades or troubleshooting difficult. The beauty of a DIY approach is learning from these moments, continuously refining your methods and designs for better outcomes.
“Sometimes, I question if the ways I design and build things are practical or even make sense. But that’s the essence of home lab and DIY—the freedom to experiment, learn from mistakes, and discover what truly works best for you.”
Overcoming Cable Management and Airflow Challenges
Cable management in a compact rack is paramount. Messy cabling doesn’t just look untidy; it obstructs airflow, traps heat, and makes maintenance a nightmare. Invest in custom cable guides, Velcro straps, and appropriate cable lengths. Plan your power and data cable runs before you even mount components, seeking the shortest and most direct paths.
For airflow, ensure that hot air has a clear path to exit the rack and that cool air can be drawn in. This might involve strategically placed fans, perforated panels, or leaving deliberate gaps between components. Consider the natural convection of heat, guiding it upwards and out. A well-ventilated rack protects your hardware, extends its lifespan, and ensures stable operation, which is critical for continuous homelab services.
Building Your Dream Custom 10-Inch Homelab Rack: A Step-by-Step Guide
Crafting a personalized 10-inch homelab rack is a rewarding project that combines technical skill with creative expression. Follow these steps to bring your vision to life, ensuring both functionality and aesthetic appeal.
- Define Your Needs and Components (Planning – 2-4 hours): List all the hardware you intend to house. Consider CPU, RAM, storage, and networking requirements. This dictates the size and number of 3D-printed mounts needed.
- Source Your 10-Inch Rack (Sourcing – 1-2 hours): Decide on a rack system. Open-source designs like Labrax are excellent for customizability. Purchase or prepare to 3D print the main rack frame elements.
- Design or Download 3D Print Files (Design/Sourcing – 4-8 hours): Browse MakerWorld for existing ITX mounts, power supply brackets, or cable management solutions. If a design doesn’t exist, use CAD software to create your own bespoke parts, incorporating your chosen aesthetic details, like a custom color for filaments.
- Print Your Custom Components (Fabrication – Varies): Print all your custom parts. Ensure filament choice considers durability and heat resistance, especially for components near heat sources. This is where your chosen colors can truly shine.
- Assemble and Mount Hardware (Assembly – 6-10 hours): Carefully assemble your rack frame. Then, mount your mini PCs, ITX motherboards, networking gear, and storage devices using your custom 3D-printed parts. Pay close attention to secure fittings and alignment.
- Implement Cable Management (Organization – 3-5 hours): Route all power and data cables meticulously. Use custom cable guides, zip ties, or Velcro straps. Ensure cables do not obstruct airflow and are easily accessible for future maintenance.
- Power Up and Test (Testing – 2-3 hours): Connect all power, network, and peripheral cables. Power on your homelab and thoroughly test all components, network connections, and services. Monitor temperatures to ensure adequate cooling.
This framework typically requires 15-30 hours of focused effort, spread over several days or weeks, depending on the complexity of your design and your 3D printing capabilities. The continuous learning and iterative improvement are part of the fun!
Frequently Asked Questions About Custom Homelab Racks
Q1: What are the main advantages of using 10-inch racks for a homelab?
10-inch racks offer significant advantages in terms of space efficiency, making them perfect for home environments where a large server rack is impractical. Their smaller footprint allows for greater flexibility in placement, blending into an office or living space. They also encourage a more disciplined approach to component selection, leading to more power-efficient and purpose-built systems. Furthermore, they are often quieter and easier to manage thermally compared to larger setups, making them ideal for continuous operation in a residential setting. Their modularity allows for focused, incremental upgrades without overhauling an entire system.
Q2: Can I really run a powerful editing rig and a Proxmox cluster in a small rack?
Absolutely. Modern mini PCs and ITX form factor motherboards pack impressive processing power into very small footprints. With efficient Intel i5/i7 (like the 6500t) or AMD Ryzen 7 CPUs, you can comfortably run a Windows 11 editing rig and a multi-node Proxmox cluster for virtualization. The key is to select components with good power efficiency and thermal design. Strategic use of 3D-printed mounts ensures optimal use of space, allowing you to fit everything neatly. Efficient networking solutions, like 2.5GbE USB adapters, also support high-bandwidth applications within these compact setups, ensuring smooth operation for demanding tasks.
Q3: How important is cable management in a compact homelab rack?
Cable management is critically important in any homelab, but especially so in compact 10-inch racks. Poor cable management can lead to several problems: it obstructs airflow, causing heat buildup and potential hardware damage; it makes troubleshooting and maintenance difficult; and it significantly detracts from the aesthetic appeal of a custom build. Proper cable routing ensures optimal cooling, easier access to components, and a clean, professional look. Using custom 3D-printed cable guides, Velcro straps, and planning your runs carefully are essential steps to maintain both performance and visual order.
Q4: Where can I find reliable 3D printer designs for homelab components?
Reliable 3D printer designs for homelab components are widely available through online communities and repositories. Platforms like MakerWorld are excellent starting points, offering a vast array of user-contributed STL files for everything from ITX mounts and power supply brackets to fan shrouds and cable organizers. Many designers, like Michael Klements, also share their work through YouTube channels or personal websites, often providing detailed build guides. When selecting designs, prioritize those with positive reviews or a strong community backing to ensure quality and compatibility. Always double-check dimensions against your specific hardware before printing.
Q5: What are some tips for integrating aesthetics, like color, into my homelab?
Integrating aesthetics, such as color, into your homelab involves thoughtful material selection and design choices. For custom homelab racks, 3D printing offers an incredible advantage, allowing you to choose filament colors that match your personal style – whether it’s a subtle accent or a vibrant highlight like pink. Consider using a consistent color for all 3D-printed mounts, bezels, and cable guides to create a cohesive look. You can also use LED lighting to add ambiance or highlight specific components. A clean, organized setup itself contributes significantly to aesthetics, so don’t overlook meticulous cable management and component arrangement. The goal is a visually appealing and personalized system that reflects your taste.
Key Takeaways for Your Custom Homelab Rack Journey
- Embrace Compact Power: 10-inch racks offer a highly efficient and aesthetically pleasing solution for modern homelabs, proving that small footprints can house substantial power.
- Unleash 3D Printing’s Potential: Leverage 3D printing for custom mounts, cable management, and unique aesthetic touches, personalizing your setup like never before.
- Prioritize Smart Integration: Carefully plan component placement, networking solutions, and power distribution to achieve high performance in a compact, organized space.
- Learn from Challenges: Anticipate and address common pitfalls like thermal management and cable routing to ensure long-term stability and ease of maintenance.
- Personalize Your Tech: Your homelab is an extension of your creativity; don’t shy away from incorporating personal design preferences, making it uniquely yours.
Building a custom homelab rack is an ongoing journey of learning and refinement. By focusing on organization, performance, and personalization, you can create a powerful and beautiful setup that truly meets your needs. Start planning your custom build today, exploring the vast possibilities of compact rack solutions and 3D printing!