Category: Uncategorized

  • That Free Office Switch: A Gift or a Trap?

    That Free Office Switch: A Gift or a Trap?

    Is that old enterprise switch from the office a good deal for your homelab? We break down the pros and cons, from noise and power consumption to features.

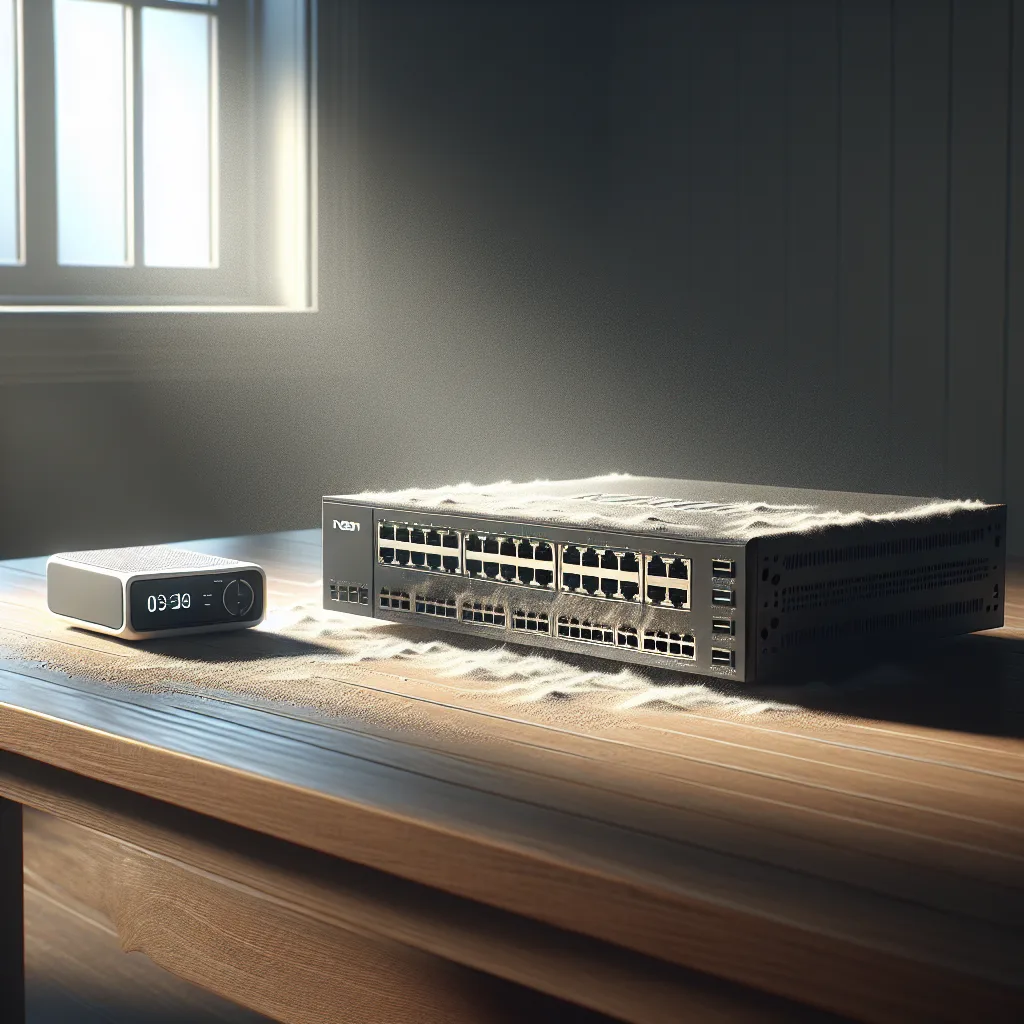
    A friend of mine was recently offered a piece of old hardware from his office. They were about to send a big, beefy-looking network switch to be recycled, and the IT manager told him, “Hey, if you want it for your home setup, it’s yours.”

    It’s a tempting offer, right? Free enterprise-grade gear. It feels like a secret upgrade, a chance to get powerful equipment without spending a dime.

    But he hesitated, and for good reason. He’s currently running a simple, small Netgear switch that does the job. This free switch was a whole different beast. He asked me if it was worth taking. My answer? It’s complicated.

    This is a situation a lot of us who tinker with tech find ourselves in. An old server from a data center, a high-end firewall being decommissioned, or a managed switch like this one. The allure of “free” is strong, but “free” doesn’t always mean “no cost.”

    So, if you’re ever in this spot, here’s how I’d think about it.

    The Case for “Yes, Absolutely Take It!”

    Let’s start with the good stuff, because there’s a lot of it. The gear you find in a corporate environment is on another level compared to most consumer hardware.

    • Built to Last: Enterprise switches are absolute tanks. They’re designed to run 24/7 for years without a hiccup in a dusty, poorly ventilated closet. Your typical home switch is… not. This thing is likely made of metal, not plastic, and feels substantial for a reason.
    • Power and Features: This is the main attraction. A managed enterprise switch opens up a whole new world of networking. You can create VLANs to segment your network (keeping your IoT gadgets separate from your main computers, for example), use Link Aggregation for faster speeds to a NAS, and implement advanced security features. If you’re running a homelab, these are the kinds of tools that let you truly replicate a professional environment.
    • PoE (Power over Ethernet): Many of these switches come with PoE. This is incredibly useful for powering things like security cameras, wireless access points, or even a Raspberry Pi without needing a separate power adapter for each one. It just cleans everything up.

    For someone looking to learn about networking, a free enterprise switch is like being handed a textbook, a lab, and an engine all in one. You get to play with the kind of tech that powers actual businesses.

    The Hidden Costs of “Free”

    Okay, now for the reality check. That powerful, free switch comes with baggage. These are the things the IT manager probably won’t mention.

    • The Noise: This is the biggest deal-breaker for most people. Enterprise switches are designed for a server room, not your home office. They often have multiple small, high-RPM fans to keep them cool. And those fans are LOUD. Not like a desktop computer fan, but a persistent, high-pitched whine that will drive you crazy if it’s in the same room you work or relax in. Unless you have a basement, a garage, or a dedicated closet far away from your living space, the noise alone might make it unusable.
    • The Power Bill: An old enterprise switch can be shockingly power-hungry. It might draw 50, 70, or even over 100 watts just sitting there, doing nothing. Your small consumer switch probably uses less than 10 watts. That difference adds up. A “free” switch could easily cost you an extra $10-20 a month on your electricity bill. Suddenly, it’s not so free anymore. Over a year, you could have just bought a brand-new, silent, efficient switch with the money you spent on electricity.
    • The Complexity: Setting it up isn’t always plug-and-play. You might need to connect to it with a special console cable, learn a command-line interface (CLI), or navigate a web interface that looks like it was designed in 1998. Firmware updates can be hard to find, sometimes locked behind a corporate support contract. If you love a challenge, this is a fun project. If you just want your stuff to work, it’s a headache.

    So, What’s the Verdict?

    There’s no single right answer. It comes down to what kind of homelab you’re running and what your priorities are.

    Ask yourself these questions:

    1. Where will I put it? If you have a dedicated server rack in the basement, noise and size don’t matter. If it’s going under your desk, forget it.
    2. Am I okay with a higher power bill? Do the math. Is the functionality worth the recurring cost?
    3. Do I need these features? Are you actually going to set up VLANs and manage traffic, or do you just need more ports? Be honest with yourself. Sometimes a simple, “dumb” switch is the better tool for the job.
    4. Do I enjoy the process of tinkering? If your idea of fun is spending a weekend learning a new CLI and reading old technical manuals, then you’ll love it. If not, you’ll hate it.

    Ultimately, that “free” switch isn’t a simple gift. It’s a trade-off. You’re trading money for features, but you’re also trading peace and quiet for noise, and a low power bill for a higher one.

    For my friend, he decided to pass. He lives in a small apartment, and the noise and power draw just weren’t worth it for his simple setup. He’s better off with the little switch he already has. And that’s a perfectly smart decision.

  • That Old Laptop in Your Closet? It Might Be Your Next Server.

    That Old Laptop in Your Closet? It Might Be Your Next Server.

    Thinking about a home server? Your old laptop might be all you need. Learn how a simple machine can run Plex, file sharing, and more.

    You see pictures of home servers online and they all look the same. Racks of humming machines. A web of perfectly managed cables. Blue and green lights blinking in a dark, cool room. It all seems so… serious. And expensive.

    I get it. It’s impressive. But it’s also intimidating. It creates this idea that if you want to run your own services at home, you need a degree in IT and a budget to match.

    I’m here to tell you that’s just not true.

    My friend’s home server? It’s an old Dell laptop from a few years back. The kind you’d buy for college or for your parents to browse the web. It has a modest Intel i3 processor and runs plain old Windows 10. And you know what? It works beautifully.

    The Humble Heart of the Operation

    Let’s be clear, this machine is not a powerhouse. It’s a Dell Inspiron 3593. It won’t be mining cryptocurrency or running a dozen virtual machines. But that’s not the point. The point is what it can do, with hardware that many of us already have gathering dust in a closet.

    Right now, that little laptop does two things, and it does them well:

    • It runs Plex. If you haven’t used Plex, it’s basically your own personal Netflix. You load it up with your movies and TV shows, and it organizes them into a beautiful library that you can stream to your TV, phone, or computer, wherever you are. This laptop is powerful enough to handle a couple of streams at once without breaking a sweat.
    • It’s a central file hub. All the family photos, important documents, and random downloads have a single, safe place to live. No more “Wait, is that photo on your laptop or my old desktop?” It’s all just there, accessible from any device on the home network.

    That’s it. It’s not running a global enterprise. It’s just making life a little more convenient.

    Why a Laptop Is a Surprisingly Great Server

    When you stop and think about it, a laptop is almost perfectly designed for this kind of light-duty server work.

    First, it’s incredibly power-efficient. Unlike a big desktop tower that’s always drawing a significant amount of power, a laptop sips electricity. It’s designed to run for hours on a small battery, after all. When it’s just sitting there, plugged in and serving files, it’s using a tiny fraction of the energy of a “proper” server. That’s a real, tangible saving on your electricity bill.

    Second, it has a built-in battery backup. If the power flickers or goes out for a few minutes, the laptop doesn’t care. It just keeps running on its battery. No need to buy a separate, expensive Uninterruptible Power Supply (UPS).

    And finally, it’s simple. You don’t have to learn a new, complicated operating system like Linux or TrueNAS if you don’t want to. It’s just Windows. You know how to use it. You set it to not go to sleep when you close the lid, install your software, and you’re done.

    But Is It Really Good Enough?

    Sure, there are downsides. An i3 processor will struggle if you ask it to stream a high-bitrate 4K movie to three people at once. The single hard drive means you need a separate backup plan (which you should have anyway!). And a dedicated server will always be more powerful and expandable.

    But that’s missing the forest for the trees.

    This isn’t about building the ultimate server. It’s about solving a problem with the tools you already have. It’s about demystifying the process and proving that you can get started with almost no investment.

    So before you go shopping for enterprise-grade hardware, take a look in your closet. That old laptop you replaced last year might just be the most practical, efficient, and budget-friendly home server you could ever ask for.

  • My Tiny Network: A Step-by-Step Home Lab Story

    My Tiny Network: A Step-by-Step Home Lab Story

    A personal journey of building a tiny, powerful home network using a Raspberry Pi, Firewalla, and VLANs. A step-by-step story for tech beginners.

    It’s funny how a small project can spiral into something more.

    It all started with a gift from a friend. I’d been getting more interested in my home network, wanting to understand how it all worked and maybe make it a bit better. So, for my birthday, a small box arrived with a Raspberry Pi 4B inside. I had a mission: set up Pi-hole to block ads across my entire network.

    And honestly, that first step was great. Seeing ads just disappear from websites on every device was a little taste of magic. It worked, and it made me curious. What else could I do?

    Stepping Up Security with a Firewall

    My friend, who is clearly an enabler of nerdy hobbies, sent another gift my way a few months later: a Firewalla Purple. If you haven’t heard of them, it’s a powerful little cybersecurity firewall packed into a tiny box. It promised better security, network monitoring, and more control than my standard internet provider’s router could ever offer.

    There was just one problem. To let the Firewalla do its job properly, it needs to be the main “gateway” for the whole network. This means my existing Wi-Fi router had to be switched into “bridge mode” or “AP mode,” essentially turning it into a simple antenna that just passes on the signal.

    Turns out, my router couldn’t do that. It was a basic model, and its features were locked down. So my powerful new firewall was sitting there, unable to use its best features.

    Finding the Right Router (and Unleashing the Nerd)

    The solution came in the mail, again, courtesy of my friend. This time it was an old but very capable gaming router. The key feature? It had the flexibility I needed. I could finally put the Firewalla in charge as the gateway and configure the new router to work in bridge mode, acting purely as a Wireless Access Point (WAP).

    This is where things started to feel like a real network.

    I wasn’t just using the all-in-one box my ISP gave me anymore. I had separate devices for separate jobs.

    • Firewalla Purple: The brain of the operation. It manages all the traffic, blocks ads and malicious sites, and lets me see what every device is doing.
    • Gaming Router (in Bridge Mode): The WAP. Its only job is to provide a strong, reliable Wi-Fi signal.

    This setup was already a huge improvement in security and control. But the project wasn’t quite finished.

    The Final Pieces: A Managed Switch and a Local Website

    The Raspberry Pi that started it all was about to get a new job. I decided I wanted to host a small, local website on it—just as a fun project. But I didn’t want the traffic coming to that website to be on the same network as my personal computer or phone.

    This is where the final two pieces of the puzzle came in: a managed switch and something called VLANs.

    A “managed switch” is just a device that lets you direct your network traffic more precisely. Think of it like a smart power strip for your internet cables. The magic it unlocks is the ability to create VLANs, or Virtual Local Area Networks.

    In simple terms, VLANs let you split one physical network into multiple separate, isolated networks. It’s a security best practice.

    With a little help, I set up two VLANs:
    1. A ‘Private’ VLAN: For all my trusted devices—my laptop, our phones, the smart TV. This is our secure home network.
    2. A ‘Public’ VLAN: Just for the Raspberry Pi website. It’s completely isolated, so any traffic coming to it can’t see or access anything on my private network.

    The final touch? The new switch was a POE (Power over Ethernet) model, which means it sends power through the ethernet cable itself. The Raspberry Pi was now being powered directly by the switch, eliminating an extra power adapter.

    To keep it all organized, I 3D-printed a simple, clean stand with built-in cable routing. The entire setup—firewall, switch, and Pi—is so small that it sits neatly on a speaker behind my TV.

    What started as a simple ad-blocking project slowly evolved, piece by piece, into a tiny but seriously capable home network. It’s faster, way more secure, and I learned a ton along the way. And it all fits in a space you’d never even notice. Sometimes the best projects are the ones you build one step at a time.

  • My Home Lab Server Rack Thinks It’s a Saturn V Rocket

    My Home Lab Server Rack Thinks It’s a Saturn V Rocket

    See how a standard home lab server rack was transformed into a stunning tribute to the Saturn V rocket with a creative DIY paint job. A unique tech project.

    I have a confession to make. I’m a nerd.

    Actually, I’m a few different kinds of nerd. I’m a tech nerd, which is why I have a server rack in my house. It runs my media, stores my files, and lets me tinker with new software. It’s my little digital sandbox.

    But I’m also a space nerd. I grew up fascinated by the Apollo missions. The sheer audacity of strapping humans to a controlled explosion and sending them to another world? It still blows my mind. And at the heart of that effort was the Saturn V, the most powerful rocket ever built.

    For a long time, my server rack was just… a rack. A big, black, boring metal box tucked away in a corner. It was functional, sure, but it had zero personality. One day, I was looking at it and then saw a picture of the Saturn V, and a thought sparked.

    They’re both tall, cylindrical things. They’re both packed with power. What if… what if I made my server rack look like a Saturn V?

    The idea seemed a little crazy, but it wouldn’t leave me alone. So, I decided to just go for it.

    From Black Box to Launch Tower

    The project started with a standard server rack. Nothing special. The first step was the most important: the paint job.

    The Saturn V has such an iconic look. It’s not just random black and white patches. Each section, each color block, corresponds to a different stage of the rocket—the S-IC, S-II, and S-IVB. I wanted to get it right.

    So, I spent a good amount of time with masking tape and spray paint.

    1. The Prep: First, I emptied the rack. You can’t paint around servers. I gave the whole thing a good cleaning and a light sanding to help the new paint stick.
    2. The White Coat: The base of the rocket is mostly white, so I started there. Several thin coats of matte white spray paint gave me a nice, clean canvas to work with.
    3. The Masking: This was the hard part. I used photos of the real Saturn V as a reference, carefully masking off the sections that would remain white. The lines had to be crisp and straight. It took a lot of patience and a lot of tape.
    4. The Black Coat: With the white sections protected, I sprayed the rest of the rack with matte black. Again, a few light coats did the trick.

    Peeling off the masking tape was probably the most satisfying part of the whole project. Seeing those clean, perfect lines appear was a huge relief. It was starting to look like a rocket.

    It’s All in the Details

    A simple paint job was a good start, but the Saturn V’s character comes from the little things. To really sell the look, I had to add the details.

    • The “USA” Lettering: I used a stencil to paint the classic “U-S-A” down the side, just like on the real thing.
    • The American Flag: A small, high-quality flag decal went on, right where it should be.
    • The Roll Patterns: I even added the black roll patterns and umbilical connection points using black vinyl. These small geometric shapes make a massive difference.

    Once I started loading the servers and networking gear back in, the whole thing came to life. The blinking LEDs of the servers almost look like the complex instrument panels of a mission control center. It’s no longer a boring box of computer parts; it’s my own personal launch tower.

    It’s funny how a simple idea can totally transform something you see every day. My server rack is still a server rack. It still runs my media and stores my files. But now, it’s also a tribute to one of humanity’s greatest achievements. It’s a conversation starter. And every time I look at it, it makes me smile.

    It just goes to show you don’t need a massive budget or some revolutionary idea to make something cool. Sometimes, all you need is a couple of cans of spray paint and a nerdy obsession.

  • My New Home Lab: A Look at the Hardware

    My New Home Lab: A Look at the Hardware

    A personal look at building a powerful home lab with a mix of new and used hardware. See the specs and the ‘why’ behind each machine. Perfect for tech enthusiasts.

    I’ve always been a tinkerer. It started with taking apart old radios and eventually graduated to building my own computers. For a while, a single, powerful desktop was enough. But my curiosity kept growing, and so did my project list. Soon, I found myself hitting the limits of what one machine could do.

    So, I decided it was time for a real upgrade. Not just a new computer, but a proper home lab. A place to experiment, learn, and build things without compromising my main workstation. It was a fun process, and I thought I’d share what I ended up with.

    The Goal: A Playground for Everything

    Before I started buying parts, I had to ask myself: what is this for?

    I wanted a setup that could handle serious virtualization. I’m talking about running multiple operating systems at once, creating isolated networks, and testing software in a safe environment. I also needed enough raw power for compiling code, running data-heavy simulations, and maybe even hosting a powerful media server for the house.

    The idea was to build a small-scale, personal cloud. A mix of new and used enterprise gear that gave me flexibility without an insane power bill.

    Here’s a look at the machines that make up the lab.

    Machine #1: The All-Rounder

    • CPU: AMD 5950x
    • RAM: 128GB DDR4 @ 3200MHz
    • Storage: 4TB SATA SSD

    This is my main workhorse and primary virtualization node. The AMD 5950x is a beast. It has a ton of cores for running multiple virtual machines, but those cores are also incredibly fast on their own. This is great for tasks that can’t be spread across many cores, like compiling certain types of code or running a game.

    With 128GB of RAM, I can comfortably spin up several VMs for development and testing without worrying about memory usage. It’s the perfect blend of a high-end desktop and a capable server.

    Machines #2 & #3: The Heavy-Lifting Twins

    • CPU: 2x Intel Gold 6144 (per machine)
    • RAM: 384GB DDR4 (per machine)
    • Storage: 8TB SAS SSD (per machine)

    These two are identical, and they are the core of the server setup. I managed to get my hands on some used enterprise hardware, which is a fantastic way to get incredible performance for a fraction of the original cost.

    Each of these machines has two CPUs, giving them a massive number of cores. This is perfect for tasks that can run in parallel, like running a whole cluster of containers or virtual machines. They form a small cluster, which means if one has an issue, the other can pick up the slack.

    And the memory? A combined 768GB of RAM between them is honestly a little absurd, but it opens up so many possibilities. I can run memory-hungry applications, large databases, or just an enormous number of services without ever thinking about limitations. The fast SAS SSDs ensure that storage is never a bottleneck.

    Machine #4: The Reliable Utility Player

    • CPU: Intel 7700K
    • RAM: 32GB DDR4
    • Storage: 4TB SATA SSD

    You might look at this one and think it’s a bit out of place. It’s definitely older than the others, but it plays a crucial role. This machine is my stable, low-power server for essential services.

    Think of it as the one that’s always on and just works. It could run a firewall, handle network-wide ad-blocking, or act as a lightweight backup server. It doesn’t need a ton of power, but it needs to be reliable. The 7700K is more than enough for these kinds of tasks, and it sips power compared to the bigger machines.

    Tying It All Together

    These machines don’t just exist in a vacuum. They’re all connected on a high-speed network, allowing them to talk to each other and move data around quickly.

    The result is a powerful, flexible, and surprisingly resilient home lab. It’s a place where I can learn about clustering, try out new operating systems, and host my own services without relying on big tech companies. It’s a project that’s never really “done,” and that’s what I love about it. It’s a constant source of learning and a ton of fun to manage. If you’ve been thinking about starting your own, I hope this gives you a few ideas.

  • I Found a Server on the Street. Here’s What I Did Next.

    I Found a Server on the Street. Here’s What I Did Next.

    Found an old Dell server on the street and turned it into a powerful home NAS. Here’s the story of my unexpected DIY tech project and why you might want one.

    It’s funny how a random walk can turn into a full-blown tech project.

    I was just walking through my neighborhood the other day, minding my own business, when I saw it. Sitting right there on the curb, looking completely out of place, was a computer. But not just any computer. This was a beast. A tall, black tower that looked like it belonged in a data center, not next to someone’s recycling bin.

    My curiosity got the best of me. I walked over and saw the Dell logo. A quick search on my phone confirmed it: a PowerEdge T620. For those who don’t spend their time looking up enterprise hardware, that’s a serious piece of equipment. It’s a server that businesses use to run their entire operations. And it was just… sitting there.

    For a second, I thought it had to be broken. But it looked to be in decent shape, just a little dusty. The thought crossed my mind: “Can I just take this?” It felt like finding a treasure chest on the sidewalk. So, I did what any self-respecting nerd would do. I hauled it home.

    The “What Have I Done?” Moment

    Getting it into my apartment was a workout. These things are not light. Once I set it down, the reality of the situation hit me. What was I going to do with this thing?

    My first thought was to just boot it up and see what happened. After plugging it in, the fans spun up with the roar of a jet engine. This thing was loud. And I knew it would probably drink electricity like it was going out of style.

    For a moment, I considered just taking it to an e-waste facility. It seemed like more trouble than it was worth. But then, an idea started to form. I’d been thinking about getting a proper backup system for my files for a while. I have years of photos, important documents, and a growing collection of movies and shows scattered across various hard drives.

    Maybe this curbside find was the solution. Maybe I could turn this corporate workhorse into a personal home server. Specifically, a Network Attached Storage (NAS) device.

    So, What’s a NAS?

    Think of a NAS as your own private cloud. It’s a central box that holds a bunch of hard drives, and it’s connected to your home network. Instead of saving files to your laptop or a USB drive, you save them to the NAS.

    Here’s why that’s so useful:

    • All your files in one place. No more hunting for that one photo on that one old hard drive. Everything is organized and accessible from any device on your network.
    • Automatic backups. You can set it up to automatically back up your computers. If your laptop ever dies, you won’t lose a thing. It’s peace of mind in a box.
    • Your own media server. You can run software like Plex or Jellyfin on it. This organizes all your movies and TV shows into a beautiful, Netflix-style library that you can stream to your TV, tablet, or phone.
    • A playground for other projects. A home server can also run other cool stuff, like home automation software or a personal website.

    Suddenly, this loud, heavy box didn’t seem like a burden. It seemed like an opportunity.

    Giving Old Hardware a New Life

    The project began. First, a thorough cleaning. I opened it up and blew out years of accumulated dust. I checked the specs—it had a decent processor and a good amount of RAM. More than enough for what I had in mind.

    The biggest challenge was the noise and power. I spent some time in the server’s settings, tweaking fan speeds and power profiles. Enterprise servers are designed for performance, not quiet operation in a living room. But with a little work, I managed to get the noise down to a much more manageable hum.

    Next, I needed to install the software that would turn it into a NAS. There are some amazing free options out there, like TrueNAS Core. It’s a powerful operating system designed specifically for building storage systems. After a few YouTube tutorials and a bit of trial and error, I had it up and running.

    I loaded it up with a few hard drives I had lying around, and just like that, I had my own personal cloud.

    Was It Worth It?

    Absolutely.

    This project wasn’t just about getting more storage. It was about the satisfaction of taking something discarded and giving it a new purpose. It was a fantastic learning experience. I now have a ridiculously powerful backup and media server that would have cost a fortune to buy new, and I built it from something someone was throwing away.

    It’s a reminder that there’s a lot of value left in old technology. So next time you see an old piece of tech on the curb, don’t just walk by. You might be looking at your next favorite project.

  • Your Credit Card’s Secret Perk: Does It Cover Your Portable Power Station?

    Your Credit Card’s Secret Perk: Does It Cover Your Portable Power Station?

    Thinking of buying a portable power station? Find out if your credit card’s extended warranty will cover your expensive purchase before you buy. Learn how to check.

    I’ve been looking at portable power stations lately. You know, the big ones. The kind of units from brands like EcoFlow, Anker, or Bluetti that can run your fridge during a power outage or power a whole campsite for a weekend.

    They look amazing. But they also cost a small fortune.

    Dropping two or three thousand dollars on a piece of tech is a big decision. And it got me thinking about something that often gets overlooked: what happens if it breaks?

    Most of these units come with a decent manufacturer’s warranty, usually two or three years, sometimes five. But for something I expect to last a decade, that’s not a lot of time. It led me down a rabbit hole, and I ended up on a question I think a lot of people have but don’t ask: Will my credit card’s extended warranty cover a massive, expensive portable power station?

    It’s a fantastic question. After all, this is one of the best, most underused perks that comes with a premium credit card.

    The Secret Power of Extended Warranties

    If you’re not familiar with them, many credit cards offer an “extended warranty” benefit. In most cases, they add an extra year of coverage to a manufacturer’s warranty. So if your new gadget has a two-year warranty, your credit card effectively turns it into a three-year warranty.

    It’s an amazing perk. I’ve used it myself to replace a fancy coffee maker that died a month after its official warranty expired. The credit card company just refunded me the entire purchase price. No hassle.

    So, logically, you’d think this would apply to a portable power station, right? It’s just a big piece of electronics, after all.

    Well, it’s a little complicated.

    Where Things Get Murky

    The devil is always in the details, and in this case, the details are in a boring PDF document called your “Guide to Benefits.”

    Every credit card has one. And buried inside is a list of exclusions for the extended warranty program. This is where you might run into trouble.

    Most credit card benefits guides exclude a few common categories:
    * Boats, cars, airplanes, and other motorized vehicles.
    * Things bought for resale.
    * Computer software.
    * Items that become permanent fixtures of your home.

    That last one is interesting. But the most common point of confusion for a power station is the “motorized vehicles” clause. Some policies have broad language that excludes anything with a motor. Does the inverter or cooling fan in a power station count? Probably not, but it’s an ambiguity.

    More importantly, some of these high-end power stations, like the EcoFlow Delta Pro Ultra, are designed to be integrated directly into your home’s electrical panel with a transfer switch. At that point, does it stop being a “portable appliance” and become a “permanent fixture”?

    This is the gray area. For a smaller unit, like a Jackery 1000, I’d be shocked if it weren’t covered. It’s clearly an electronic device. But for a 150-pound beast that can be wired into your house? The answer is a solid “maybe.”

    The Only Way to Know for Sure

    So what’s the answer? It depends entirely on your specific credit card. There is no universal rule.

    But don’t worry, finding out is easier than you think. You just have to do a tiny bit of homework before you buy.

    1. Find Your “Guide to Benefits.” The easiest way is to just Google it. Search for “[Your Credit Card Name] Guide to Benefits.” For example, “Chase Sapphire Preferred Guide to Benefits.” You’ll usually find a direct link to the PDF. You can also find it by logging into your online banking portal.

    2. Search the Document. Once you have the PDF open, use the search function (Ctrl+F or Cmd+F) and look for the “Extended Warranty” section. Go straight to the list of exclusions. Read it carefully. Look for any language about power supplies, generators, motorized equipment, or items that attach to a building.

    3. If in Doubt, Call and Ask. If the language is vague, don’t guess. Call the number on the back of your credit card and ask to speak to a “benefits administrator.” They are the ones who handle these claims. Ask them directly: “I am planning to purchase an Anker SOLIX F3800 portable power station. Can you confirm if this type of product is eligible for the extended warranty benefit?”

    Getting a clear answer before you swipe your card is the smartest thing you can do.

    I actually did this for my own card. I pulled up the benefits guide and scanned the exclusions. It listed cars, boats, and medical equipment, but nothing that would clearly disqualify a portable power station. For my situation, it seems like I’d be covered.

    But your card could be different. Taking ten minutes to verify could literally save you thousands of dollars if your expensive new power station decides to give up the ghost in year three. It’s a small investment of time for some serious peace of mind.

  • My Ceiling Speakers Didn’t Fit. Here’s What I Did.

    My Ceiling Speakers Didn’t Fit. Here’s What I Did.

    Struggling with shallow ceiling cavities for your speakers? Learn how to find the best low-profile ceiling speakers that deliver great sound without needing deep holes.

    So, you’ve got this perfect spot picked out for ceiling speakers. You can already imagine the sound filling the room. You cut the hole, grab your brand new speakers, and… they don’t fit. The hole is deep enough, but there’s a ceiling joist, a pipe, or some other obstruction in the way. Suddenly, your weekend project just got a lot more complicated.

    I’ve been there. It’s a frustrating moment when you realize you only have a few inches of clearance to work with. My first thought was, “Well, so much for that idea.” I had a set of awesome Sonos speakers that needed a good 6 inches of depth, but my ceiling only offered about 4 inches before hitting a stubborn truss.

    But don’t give up and patch that hole just yet. It turns out this is a pretty common problem, especially in older homes or condos with complex construction. The good news is that manufacturers know this, and there’s a whole category of speakers made for this exact situation: low-profile or shallow-mount ceiling speakers.

    What to Look for in a Low-Profile Speaker

    Finding the right speaker isn’t just about depth. You’re trying to solve a space problem without creating a sound problem. Here’s what I learned to look for.

    1. Check the Mounting Depth (Obviously)

    This is the most critical spec. Speaker manufacturers will always list the required mounting depth. Don’t just look at the number; give yourself a little wiggle room. If you have exactly 4 inches of clearance, look for a speaker that needs 3.75 inches or less. This just makes the installation process smoother and less stressful. You don’t want to be fighting to squeeze it in.

    2. Don’t Sacrifice Sound Quality

    You might think a slimmer speaker means weaker sound. That can be true for some of the ultra-cheap options, but many reputable brands have put serious engineering into their low-profile models. They use clever designs, like offset woofers and high-quality materials, to produce rich sound from a compact form factor.

    Look for brands known for audio quality, not just their space-saving designs. Brands like Polk Audio, Klipsch, and Monitor Audio all offer excellent shallow-mount options that sound fantastic.

    3. Consider the Speaker Size

    You mentioned you were cutting holes for 8-inch speakers. That’s a great size for full-range sound. The challenge is that larger speakers often require more depth. However, you can still find 8-inch low-profile models.

    If you’re struggling to find an 8-inch that fits, consider a high-quality 6.5-inch speaker instead. A top-tier 6.5-inch speaker can often outperform a mediocre 8-inch one. You might lose a tiny bit on the low-end bass, but you can always supplement with a subwoofer later if you feel it’s missing.

    A Few Speaker Suggestions

    I’m not here to sell you on one specific model, but I can share a few that I came across in my own search that are known for their shallow designs:

    • Polk Audio RC60i or RC80i: These are popular for a reason. While not the absolute thinnest, they are known for fitting into tighter spaces than many competitors and delivering great sound for the price. Always double-check the specific depth requirements for the model you’re considering.
    • Monitor Audio Slim Series: Monitor Audio has a “Slim” or “CS” series specifically designed for shallow cavities. They are well-regarded for their audio fidelity.
    • Klipsch SlimLine Series: Klipsch is famous for its horn-loaded tweeters, which deliver crisp, clear highs. They have specific “SLM” (Slim) models that might be exactly what you need.

    The most important thing you can do is measure your space carefully, then head to an audio equipment website and use their filters. You can almost always filter by mounting depth, which makes finding the right fit a whole lot easier.

    So, don’t let a shallow ceiling stop you. The right speaker is out there. It just takes a little extra research to find the one that lets you have your cake and eat it too—great sound without having to tear out your ceiling.

  • The Car Key Trick: What If Your House Knew You Were Home?

    The Car Key Trick: What If Your House Knew You Were Home?

    Want your lights to turn on automatically when you get home? Explore how to use your keys as a trigger for your smart home, using NFC, Bluetooth, or your phone.

    I have a little obsession with making my home feel smarter, not just in a techy way, but in a way that’s actually, genuinely helpful. I want it to anticipate what I need without me having to ask.

    It’s a lot like the keyless entry on a modern car. You walk up, and the car just knows you’re there. The doors unlock. Maybe the interior lights fade on. It’s a small thing, but it feels seamless. It feels welcoming.

    So I got to thinking: why can’t my house do that?

    Specifically, I wanted to tie it to my keys. When my keys are home, I’m home. When they’re gone, I’m gone. It seems so simple. Lights on when I arrive, lights off when I leave. No fumbling for a switch with my hands full of groceries, and no more wondering if I left the living room lamp on all day.

    The goal is to make the house react to the presence of my keys. It turns out, there are a few clever ways to make this happen, ranging from a little DIY project to using tech you might already own.

    The “Tap-to-Enter” Method: Using an NFC Tag

    This is the most direct way to make your keys the trigger. It’s a fun little project if you like to tinker.

    NFC, or Near Field Communication, is the same technology that powers tap-to-pay with your phone or credit card. It works over a very short distance, which is perfect for a deliberate action like placing your keys down when you get home.

    Here’s the basic idea:

    1. Get an NFC Tag: You can buy a pack of tiny NFC sticker tags online for cheap. They’re small, passive (no battery needed), and you can stick one to your keychain, or even a specific key.
    2. Set Up an NFC Reader: This is the part that receives the signal. You’d place a small NFC reader right by your door—maybe on a little entryway table where you naturally drop your keys. The reader would be connected to a smart home hub.
    3. Create the Automation: You’d use a platform like Home Assistant, which is amazing for this kind of custom project. The logic is simple: “When the NFC reader detects my key tag, run the ‘I’m Home’ scene.” That scene could turn on the entryway light, the living room lamp, and maybe even start your favorite “welcome home” playlist.

    The beauty of this is how intentional it is. You’re not just passively entering a zone; you’re performing a physical action—placing your keys on the reader—that kicks off the automation. It’s incredibly reliable. When you leave, you grab your keys, and the reader losing contact can trigger the “I’m Away” scene, turning everything off.

    The downside? It’s not quite as magical as the car key experience. You have to physically tap your keys to the reader. But for reliability, it’s fantastic.

    The Wireless Way: Using a Bluetooth Beacon

    If you want something a bit more passive and automatic, a Bluetooth Low Energy (BLE) beacon is the way to go. This gets much closer to that “car key” feeling.

    Think of those little trackers you put on your keys to find them, like a Tile or Chipolo. Those are essentially BLE beacons. They constantly send out a tiny, low-energy Bluetooth signal that says, “I’m here!”

    Here’s how you could use one for your home:

    • Attach a Beacon: Just put a small BLE beacon on your keychain.
    • Set Up a Detector: Your smart home hub (again, Home Assistant is the king of this) needs a way to “hear” that signal. A simple Bluetooth adapter connected to the device running your hub is usually all it takes.
    • Automate Based on Presence: You then create an automation based on whether the hub can detect the beacon. When your keys (and you) get close to your house, the hub “sees” the beacon and triggers your “I’m Home” scene. When you drive away, the signal disappears, and it can trigger the “I’m Away” scene.

    This method feels a little more magical because you don’t have to do anything. You just approach your home, and things start happening.

    The trade-off is that it can be a bit less precise than NFC. Bluetooth signals can sometimes be affected by walls or interference, so it might take 30 seconds for your home to realize you’ve arrived. You also have to change the beacon’s battery once a year or so. But for pure convenience, it’s a great option.

    The Simple Way: Your Phone’s Location

    Let’s be honest, the first two methods are cool, but they require some setup. If you want the same result with almost no effort, the answer is probably already in your pocket.

    Your phone.

    Using your phone’s location (geofencing) is the most common way to trigger home and away automations. All major smart home platforms—Apple HomeKit, Google Home, Amazon Alexa—can do this right out of the box.

    You simply go into the app, define your home’s location on a map, and create an automation that says, “When I arrive home, turn on the lights.”

    It’s not tied to your keys, but for most of us, our phone is just as essential. We rarely leave home without it.

    • The Good: It’s incredibly easy to set up, requires no extra hardware, and is generally very reliable.
    • The Not-So-Good: If you leave your phone at home, your house will think you’re there all day. It also doesn’t account for other people. You’ll need to add your partner’s or roommate’s phones to the automation so the lights don’t turn off when you leave them at home.

    For me, the idea of using my actual keys as the trigger still feels special. It’s a tangible object that represents coming and going. But no matter which path you choose—a DIY tap of a key, the passive magic of Bluetooth, or the simple reliability of your phone—you can absolutely make your home feel a little more welcoming. And that’s a pretty great feeling to come home to.

  • Just Switched From Home Assistant to Hubitat? Here’s What to Expect

    Just Switched From Home Assistant to Hubitat? Here’s What to Expect

    Thinking of moving from Home Assistant to Hubitat? This guide covers the key differences, what you’ll gain, what you’ll miss, and practical tips for a smooth transition.

    So, you’re thinking about making the jump from Home Assistant to Hubitat. Or maybe you’ve already got the little black box in your hands and you’re wondering, “What now?”

    I get it. It’s a move a lot of people in the smart home world consider. You’ve probably spent countless hours in YAML, tweaking dashboards, and dealing with the occasional SD card failure. Home Assistant is incredibly powerful, a tinkerer’s dream. But sometimes, you just want your automations to run without the constant maintenance.

    That’s where Hubitat comes in. It’s not about replacing Home Assistant with something “better.” It’s about choosing a different path—one that trades endless customization for appliance-like reliability.

    Let’s talk about what to expect.

    The Biggest Win: It’s All Local

    First, take a deep breath. The best part of your Home Assistant setup is likely still here: 100% local control. Hubitat is built from the ground up to keep everything inside your own network. Your lights will still turn on even if your internet goes down. This is the core philosophy of Hubitat, and it’s a big reason it feels like a natural next step for many HA users. You aren’t giving up your privacy or reliability.

    What Might Feel a Little… Different

    I’m not going to pretend the transition is all sunshine and rainbows. There are things you’ll probably miss.

    1. The User Interface (UI)

    Let’s be honest, Hubitat’s interface is functional, not beautiful. If you’ve spent ages perfecting a slick, custom Lovelace dashboard in Home Assistant, the default Hubitat dashboards will feel like a step back. They work, they’re fast, and they’re local. But they aren’t pretty. Many users end up using a third-party dashboard or just accept that the UI is for setup, not daily interaction.

    2. The Massive World of Integrations

    Home Assistant can connect to almost anything with a plug or a battery. Its library of community-built integrations is massive. Hubitat has a healthy number of built-in integrations and a fantastic community, but it doesn’t have everything. You might find that one obscure, cloud-connected device you loved in HA doesn’t have a dedicated driver for Hubitat. Always check for your essential devices first.

    What You’ll Learn to Love

    Now for the good stuff. You’re making this change for a reason, and here’s the payoff.

    1. Rock-Solid Stability

    This is the number one reason people switch. Hubitat is an appliance. You set it up, and it just… works. There are no operating system updates to worry about, no Python dependencies to break, and no SD cards to corrupt. It’s a dedicated piece of hardware running one thing: your home automation. You get your weekends back.

    2. Rule Machine: The Powerful Heart

    Instead of YAML files, your complex automations will be built in an app called Rule Machine. At first glance, it can look a little intimidating with all its dropdown menus. But once you get the hang of it, you’ll realize it’s incredibly powerful. You can create complex conditional logic (“IF the front door opens AND it’s after sunset AND my phone is away, THEN turn on the porch light”) without writing a single line of code.

    3. Simplicity for Simple Things

    While Rule Machine is for complexity, Hubitat also has built-in apps for simple tasks. The “Simple Automation Rules” app is perfect for basic “if this, then that” logic. The “Motion and Mode Lighting” app makes setting up motion-activated lights a breeze. You don’t always have to reach for the biggest tool in the box.

    Tips for a Smooth Start

    Ready to dive in? Here’s my advice for making the move as painless as possible.

    • Install the Hubitat Package Manager (HPM) First. This is the unofficial app store for Hubitat. It’s the easiest way to find and install community-built apps and drivers. Seriously, do this before anything else.
    • Start Small. Don’t try to migrate your entire smart home at once. You’ll just get frustrated. Pick one room or one type of device (like your Zigbee light bulbs) and get them working perfectly. Build your confidence and learn the system, then move on to the next thing.
    • Get Your Zigbee and Z-Wave Mesh Right. Hubitat has excellent radios. When you’re adding devices, start with the ones closest to the hub and work your way out. This helps build a strong, reliable mesh network from the start. Give it time to settle.
    • Embrace the Forums. The Hubitat community is one of its biggest assets. The official forums are filled with friendly, knowledgeable people who are happy to help new users. If you get stuck, there’s a good chance someone has already asked your question and gotten a detailed answer.

    Moving from Home Assistant to Hubitat is a trade-off. You give up a bit of freedom and aesthetic polish. In return, you get stability, simplicity, and a system that quietly hums along in the background, doing its job. For many, that’s a trade worth making.

    Welcome to the club.