Category: Uncategorized

  • The Search for Vanishing Tech: Hunting for a Vintage Smart Home Part

    The Search for Vanishing Tech: Hunting for a Vintage Smart Home Part

    Ever tried to find a part for an old smart home system? Join the hunt for vintage tech and discover why keeping older systems alive is worth the effort.

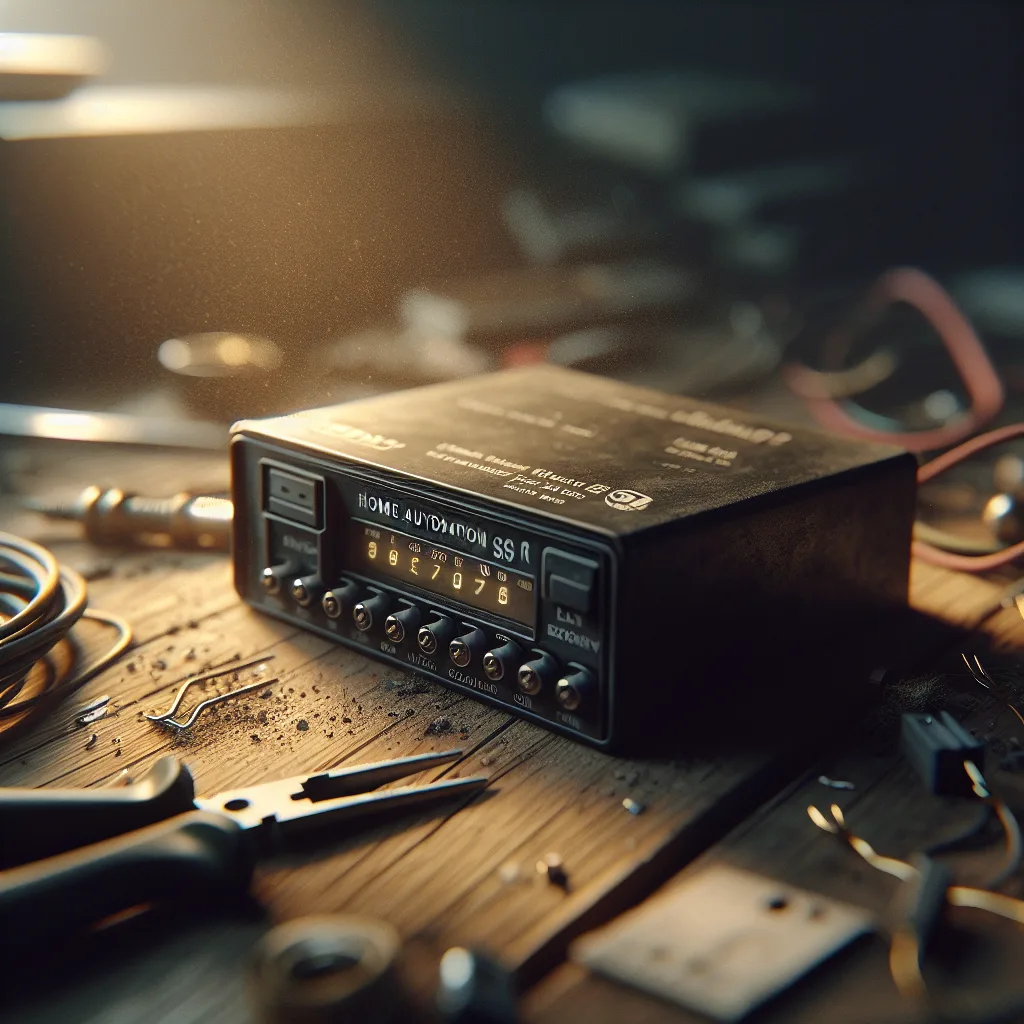
    I saw something the other day that got me thinking. It was a simple request, a message from someone looking for a specific, seemingly random piece of electronics: an Elan SS R1 IR sense relay module.

    I know, it doesn’t sound like much. It’s not the latest flashy gadget. It’s a small, black box that was probably installed in a closet or behind a TV two decades ago. But for someone out there, this little box is the key to keeping their entire system running.

    And it just reminded me how much of our technology, especially in the smart home world, has a hidden expiration date. Not because it will break, but because it will simply… vanish.

    What is This Thing, Anyway?

    So, what does a little box like the SS R1 even do?

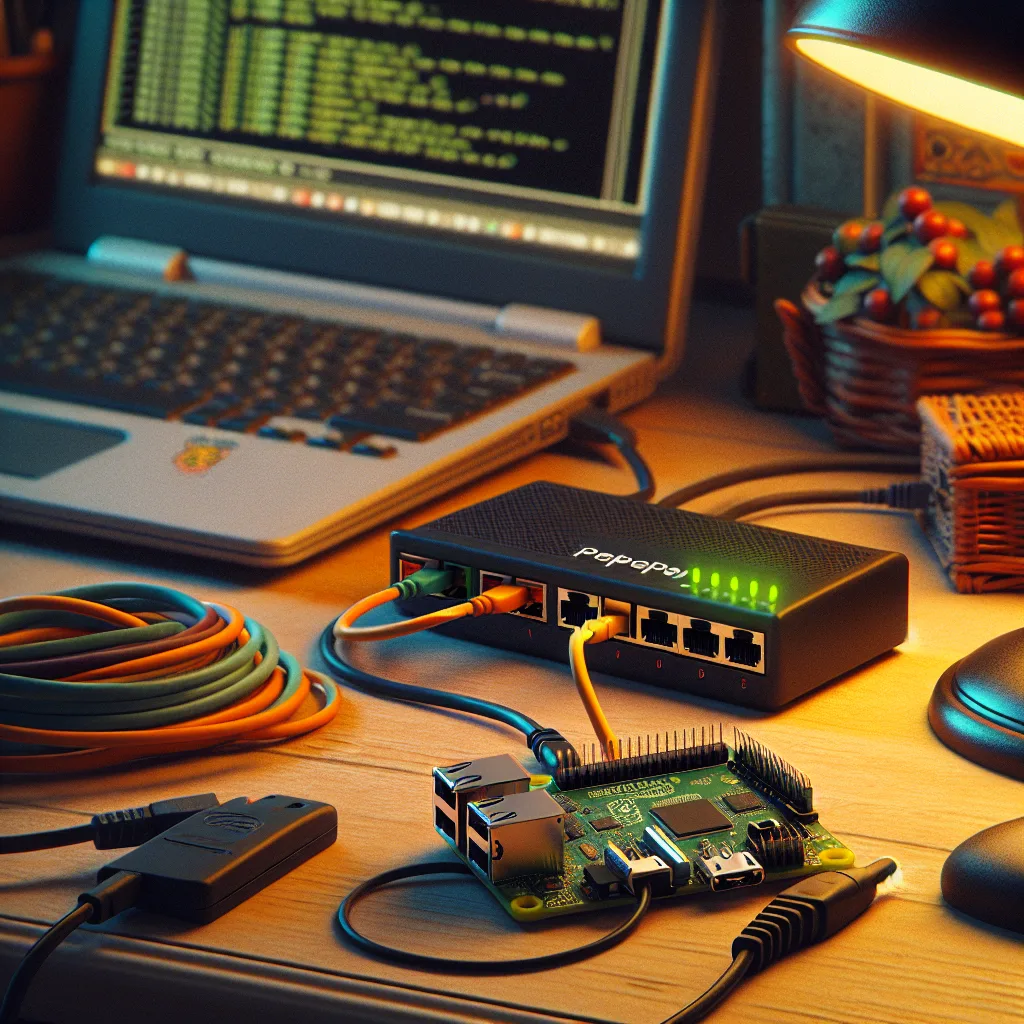
    Think of it as a translator. It’s a simple but brilliant device. It senses an infrared (IR) signal—the same kind your old TV remote uses—and triggers an action.

    Maybe you press a button on your remote. The SS R1 sees that signal and tells your projector screen to lower. Or it tells the lights to dim. It’s a bridge between a simple command and a physical action. In its day, it was a rock-solid piece of the custom automation puzzle.

    These things were part of high-end home automation systems installed by professionals. They were built to last, wired carefully into the guts of a house, and designed to just work, day in and day out.

    The Problem of Discontinued Parts

    But here’s the catch. Elan, and every other company, moves on. Technology evolves. Today, we control things with Wi-Fi, with voice commands, with apps on our phones. The old-school IR-based systems, as reliable as they are, aren’t the new hotness.

    So, they stop making the parts.

    And suddenly, that little black box in the closet becomes incredibly important. If it fails, the whole chain breaks. Your screen doesn’t drop, your lights don’t dim. The seamless system you’ve relied on for years gets a crack in its foundation.

    You can’t just go to a big-box store and buy a new one. You can’t find it on Amazon. You’re left searching, hoping someone has one sitting in a dusty box in their garage.

    So, Why Bother? Why Not Just Upgrade?

    This is the question that always comes up. “Why not just rip it all out and install a new system?”

    There are a few really good reasons.

    First, these old systems were often built like tanks. They are incredibly reliable because they are, in many ways, much simpler than modern wireless systems. They were wired, robust, and professionally installed. If the core of the system still works perfectly, it feels wasteful and frustrating to tear it all out for one failed component.

    Second, the cost. A full rip-and-replace of a custom-installed home automation system can cost tens of thousands of dollars. It’s disruptive, messy, and a huge undertaking. Hunting down a replacement part, even a rare one, for $50 or $100 is a much, much better option.

    And finally, there’s the community. There’s a whole network of home theater enthusiasts, custom installers, and hobbyists who understand this struggle. They have forums, classifieds, and a shared knowledge base dedicated to keeping this “vintage” gear alive. They trade parts, offer advice, and help each other solve problems. Finding a part isn’t just a transaction; it’s plugging into a community of people who get it.

    The Hunt is Part of the Fun

    There’s something deeply satisfying about keeping good technology going. It’s a more sustainable way of thinking, a quiet rebellion against the endless upgrade cycle. It’s about valuing things that were built to last.

    So, if you’re ever in this boat, looking for a part that seems to have disappeared from the face of the earth, don’t give up.

    • Check the forums: Places like AVS Forum or even Reddit are full of experts and old-school installers.
    • Set up eBay alerts: Be patient. The part you need will eventually show up.
    • Talk to local installers: Find the veterans, the ones who were doing this 20 years ago. They might just have a box of old parts they’d be willing to sell.

    That search for the Elan SS R1 isn’t just about one person trying to fix their setup. It’s a story about the hidden world of legacy tech, the value of well-built hardware, and the communities that keep it all humming along, long after the rest of the world has moved on.

  • Should You Make a List of Everything You Own?

    Should You Make a List of Everything You Own?

    Ever wonder if a home inventory app is worth the effort? We break down the real reasons you might want a digital list of all your stuff—for insurance, moving, and more.

    I was cleaning out my garage the other day and had a thought: If something happened to my house, could I actually remember everything I own?

    Not just the big stuff like the TV and the sofa. I’m talking about everything. The specific set of tools in the toolbox, the good plates we only use for holidays, the collection of books stacked on the nightstand.

    Honestly? No way. I’d forget half of it.

    That led me down a rabbit hole, and I ended up thinking about home inventory apps. It sounds a little obsessive, right? Cataloging every single thing in your home. But the more I thought about it, the more it started to make a weird kind of sense.

    So, is it actually worth the effort? Let’s talk about it.

    The Big Reason: Insurance

    This is the most obvious and maybe the most important reason. We all pay for homeowners or renters insurance, hoping we never have to use it. But if you do—say, after a fire, a flood, or a break-in—you have to file a claim.

    The insurance company is going to ask for a list of what was lost or damaged. And they’re not just looking for “a television.” They’re looking for “a Samsung 55-inch QLED TV, model number QN55Q80A, purchased in 2021.”

    Trying to create that list from memory after a disaster sounds like an absolute nightmare. Having a digital inventory with photos, receipts, and serial numbers already saved somewhere safe (like in the cloud) would be a lifesaver. You’d have proof of ownership and a clear, detailed record that could make the claims process faster and a lot less painful.

    Beyond the Worst-Case Scenario

    Okay, so insurance is the heavyweight champion of reasons. But there are other, everyday benefits that are surprisingly practical.

    • Moving: A move is organized chaos. An inventory list can help you keep track of what’s in which box. As you unpack, you can check items off your list, making it immediately obvious if that one box with all your kitchen knives went missing.
    • Organization and Decluttering: Seeing a list of everything you own can be an eye-opener. You might realize you have three coffee makers or a comical number of half-used cleaning supplies. It’s a powerful tool for decluttering because it forces you to confront what you actually have versus what you think you have.
    • Simple Memory: Where did you put those ski gloves from last winter? Are they in the attic? The garage? A quick search in your inventory app could tell you exactly where you stored them. It’s like a search engine for your own stuff.
    • Lending and Borrowing: If you’re the person in your friend group who always lends out your tools, books, or camping gear, an app can help you remember who has what. No more “Hey, did I ever get that power drill back from you?” conversations.

    How Hard Is It, Really?

    Let’s be honest. The initial setup is a project. Walking through your entire house, taking pictures of everything, and typing in details is not a five-minute task. It takes time.

    But you don’t have to do it all at once.

    You could tackle it one room at a time. Spend a Saturday afternoon doing the kitchen. Next weekend, do the living room. Or, start with just the most expensive items—electronics, jewelry, appliances—to get the biggest insurance benefit first.

    Once the initial work is done, maintenance is pretty easy. You just add new, significant purchases as you get them.

    So, Is It Worth It?

    I think for a lot of people, the answer is yes.

    It’s not about being materialistic or obsessively tracking your possessions. It’s about practicality and peace of mind. It’s a bit of work upfront for a system that can save you from a massive headache later.

    Think of it this way: You have smoke detectors and a fire extinguisher not because you expect a fire, but because you want to be prepared if one happens. A home inventory is the same kind of thing. It’s a “just in case” tool that also happens to make your life a little more organized.

    It’s not for everyone, but if the idea of trying to remember everything in your home sounds impossible, it might be worth looking into.

  • Your First Homelab Switch: A Simple Guide (No, You Don’t Need a $500 One)

    Your First Homelab Switch: A Simple Guide (No, You Don’t Need a $500 One)

    New to homelabbing and confused about network switches? Learn the simple difference between managed and unmanaged switches and find the right one for you.

    So, you’ve got the bug.

    It starts slowly. First, a Raspberry Pi for a fun little project. Then you get a hand-me-down PC from a friend, and a little spark goes off in your head: “I could turn this into a server.” Before you know it, you have a small stack of devices, a head full of ideas, and one nagging question:

    How do I connect all this stuff together?

    Your ISP-provided router only has four ports, and they’re already full. You’ve seen pictures of other people’s setups with these complex-looking boxes covered in blinking lights. You’ve heard them called switches. You’ve even heard people say they use them “to do switch things.”

    What does that even mean? Let’s talk about it.

    First Off, What is a Network Switch?

    Let’s keep it simple. A network switch is like a smart power strip for your internet connection.

    You plug one cable from your router into the switch, and suddenly you have 4, 8, 16, or even more ports to use. Each device you plug into that switch gets its own dedicated, stable connection. It’s the foundation of any network that has more than a couple of devices.

    For a homelab, this is essential. Your Raspberry Pi running Pi-hole, your PC running a media server, your future NAS—they all need a reliable, wired connection to talk to each other and the internet. A switch makes that happen.

    But the real question isn’t if you need a switch. It’s what kind of switch you need. This is where things can get confusing, but they don’t have to be. It really boils down to two main choices.

    The Two Flavors: Unmanaged vs. Managed

    This is the main fork in the road. Your choice here depends entirely on what you want to do with your homelab.

    1. The Unmanaged Switch: Plug It In and Forget It

    This is the simplest option. An unmanaged switch does one job and does it well: it gives you more Ethernet ports.

    There’s no setup. No software. No password to forget. You take it out of the box, plug in the power, connect it to your router, and start plugging in your devices. It just works.

    • Who is this for? This is for the person who says, “I just need more ports.” If your goal is to get your devices online quickly and you don’t want to mess with network settings, this is your answer. It’s cheap, reliable, and does exactly what it says on the tin.

    2. The Managed Switch: You’re in Control

    A managed switch is the “pro” option, but don’t let that scare you. “Managed” simply means you can log into the switch and configure it. You get control over how your network behaves.

    The single biggest reason to get a managed switch for a homelab is for something called VLANs (Virtual Local Area Networks).

    In simple terms, VLANs let you create separate, isolated networks using the same switch. Think of it like putting up digital walls between groups of devices.

    Why is this so cool?
    * Security: You can put all your “Internet of Things” (IoT) devices—like smart plugs or cameras—on their own VLAN. They can talk to the internet, but they can’t see or access your main computer or your NAS.
    * Organization: You can create a “lab” VLAN for all your experimental projects, keeping them separate from your “home” network that your family uses.
    * Learning: Setting up VLANs is a fundamental networking skill. If you’re building a homelab to learn, getting a managed switch is a fantastic way to dive into the world of networking.

    Many managed switches, often called “Smart” or “Web-Managed,” have a simple website-like interface. You don’t necessarily need to be a command-line wizard to use them.

    So, Which One Should You Actually Buy?

    Here’s the honest, no-fluff advice.

    If you are just starting your homelab journey, an 8-port unmanaged gigabit switch is probably all you need.

    Seriously. It will cost you about $20. It will solve your immediate problem (not enough ports) and let you focus on learning the other parts of your lab, like setting up your server or configuring your Raspberry Pis. You can always upgrade later. Don’t let the pursuit of the “perfect” switch stop you from making progress.

    However, if you’re the kind of person who loves to tinker, and the idea of creating separate virtual networks sounds more exciting than intimidating, then get a small, managed switch. It’s a foundational piece of gear that will grow with you. It’s an investment not just in your lab, but in your skills. You can find 8-port managed switches for a very reasonable price, and they are worth every penny if you plan on using the features.

    A quick side note: You might see switches that mention PoE (Power over Ethernet). This means the switch can send electrical power through the Ethernet cable to a compatible device. This is super handy for things like Wi-Fi access points or security cameras, as they won’t need a separate power adapter. It adds to the cost, so only get it if you know you have a use for it.

    Ultimately, the best switch is the one that gets your lab running. Start simple, see what you need, and don’t be afraid to upgrade down the road. Welcome to the rabbit hole.

  • If I Won the Lottery, This Would Be My Homelab

    If I Won the Lottery, This Would Be My Homelab

    Ever dream about your ultimate homelab with an unlimited budget? Explore a fantasy setup, from dual ISPs and fiber optics to redundant servers and massive storage.

    A friend and I were chatting the other day, and we got onto one of our favorite topics: the “what if” game. What if time and money were just… not a thing? What would we do? My answer was immediate: I’d build the ultimate homelab.

    It’s a fun thought experiment. Not just about buying the most expensive gear, but about designing a system from the ground up with no compromises. It would be a place to learn, to tinker, and to finally build all those cool projects that are rattling around in my head.

    So, I thought it would be fun to map out exactly what this dream setup would look like.

    The Foundation: A Purpose-Built Space

    First things first, you can’t build a world-class lab in a dusty corner of the basement. My dream starts with the house itself. I’m talking about a dedicated space, actually, two of them.

    • Dual Cooled Rooms: Two separate, climate-controlled rooms on opposite sides of the house. This provides physical redundancy. If one room has a cooling failure or a leak, the other side keeps humming along.
    • Dual ISPs: I’d have two separate fiber internet connections from different providers. No more worrying about an outage taking down my whole setup. One goes down? The other takes over seamlessly.
    • Solar and Battery Backup: The whole house would run on a solar roof with a significant battery array. This isn’t just about being green; it’s about clean, reliable power that’s independent of the grid.

    The Network: A Flawless Digital Nervous System

    With the physical foundation in place, the next layer is the network. I’m a big believer that a great lab is built on a great network.

    • Fiber Everywhere: Forget standard Ethernet cables. In this dream scenario, I’m running fiber optic cables to every key point in the house. It’s incredibly fast, reliable, and future-proof.
    • Ubiquiti Everything: I’d stick with Ubiquiti for my core networking gear. Their routers, switches, and access points offer a fantastic balance of power and usability.
    • Proper Segmentation: This is where I’d finally have the time to do things right. I would meticulously set up VLANs to separate different types of traffic. For example, my core servers would be on a different network from my smart home devices, and guests would be on their own isolated network. Adding RADIUS authentication would mean only authorized devices could even connect. It’s the pro-level security you always mean to set up.

    The Heart: Servers, Storage, and Redundancy

    Now for the fun part: the servers and storage that would power everything.

    • Redundant Proxmox Cluster: I use Proxmox to run my virtual machines, and in this lab, I’d have a high-availability cluster. That means if one server (or “node”) fails, the virtual machines automatically restart on another one. No downtime.
    • The Data Hoard: Let’s be honest, every lab enthusiast has a bit of a data-hoarding problem. I’d solve it with two massive Synology HD6500 network-attached storage (NAS) units, filled to the brim with the largest hard drives I can find. One would be in my primary server room, and the identical twin would live at my parents’ house, acting as a complete, off-site backup. All my family photos, media, and important documents would be safe from almost any disaster.
    • KVM Switches: A small but crucial detail. Instead of having a monitor and keyboard for every machine, a KVM switch would let me control any server in the rack from a single console. Clean and efficient.

    The Command Center and Playground

    What’s the point of having all this power if you can’t easily see what it’s doing and have some fun with it?

    • The Dashboard: I’d have a large TV on the wall in my office acting as a dedicated dashboard. Using software like Grafana, it would display real-time stats for everything: network speed, server temperatures, storage capacity, internet status. It’s functional, but let’s be real, it would also just look incredibly cool.
    • Raspberry Pi Cluster: I’ve always wanted to build a proper Raspberry Pi cluster. It’s not about raw power; it’s about having a dedicated, low-power environment to experiment with container orchestration like Kubernetes or just to run fun little scripts and services. It’s a sandbox for learning.
    • Graceful Shutdown: Both racks would be connected to large Uninterruptible Power Supplies (UPS). If the main power (and solar) somehow failed, the UPS would keep everything running for a while. More importantly, it would signal all the servers to shut down gracefully before the batteries run out, preventing any data corruption.

    Bringing it Back to Reality

    It’s fun to dream, right?

    But you don’t need two server rooms and a solar roof to have a great homelab. The spirit of a homelab isn’t about spending a fortune; it’s about the curiosity to learn, the satisfaction of building something yourself, and making the most of the gear you have. My first “server” was an old desktop computer, and I learned more from that than almost anything else.

    Still, a guy can dream. Now I’m curious—what would your ultimate homelab look like?

  • My Next Game Server Might Be a Tiny PC

    My Next Game Server Might Be a Tiny PC

    Is a powerful mini PC the right choice for a home game server? Exploring the pros and cons of using a MINISFORUM BD795i SE to host games for friends.

    My old game server is starting to feel a little tired.

    It’s an older machine, built around a Ryzen 3200G, and for years it’s been the trusty workhorse for my friends and me. It’s hosted our late-night Minecraft worlds, our brutal adventures in Ark, and most recently, our scrambles for survival in Abiotic Factor.

    But lately, it’s been struggling.

    As more friends have joined in, the server has started to lag. You can feel it groaning under the pressure. So, I started looking for an upgrade. My first instinct was to build another tower, but then I stumbled down a rabbit hole that got me thinking: what if the next server wasn’t a big box, but a tiny one?

    The Mighty Mini PC

    I’ve been looking at these new high-performance mini PCs, and they seem almost too good to be true. Specifically, I’ve been eyeing a build around the MINISFORUM BD795i SE motherboard, which comes with a monster of a laptop CPU soldered right onto it: the AMD Ryzen 9 7945HX.

    On paper, this chip is a beast. It has 16 cores and 32 threads, which is a massive leap from the 4 cores in my old 3200G. For a game server, especially when you’re hosting for a growing group of friends, more cores are exactly what you need. Each core can handle different tasks, so the server can manage more players and more in-game chaos without breaking a sweat.

    My plan is to take this tiny motherboard and pair it with a whopping 96GB of RAM. It might sound like overkill, but games like Ark are notoriously RAM-hungry, and who knows what we’ll be playing next year. This feels like a good way to future-proof the setup.

    So, Is This a Good Idea?

    This is the big question I’ve been wrestling with. There are some serious pros and a few cons to consider.

    The Good Stuff:

    • Incredible Performance: The Ryzen 9 7945HX is a top-tier mobile processor that competes with many desktop CPUs. For running game servers, its high core count is perfect for handling multiple players and even running a few different game servers at once.
    • Power Efficiency: Since it’s a mobile CPU, it uses a lot less power than a comparable desktop chip. A server runs 24/7, so a lower electricity bill is a nice bonus.
    • Small Footprint: I love the idea of replacing a bulky tower with a tiny, quiet box that can sit discreetly on a shelf. It just feels cleaner and more modern.

    The Trade-Offs:

    • No CPU Upgrades: This is the main drawback. The CPU is soldered to the motherboard. If a new, must-have processor comes out in a few years, I can’t just swap it in. The entire board would need to be replaced. You have to be confident that the 7945HX will be powerful enough for years to come. (Honestly, with 16 cores, I think it will be.)
    • Cooling is Key: Cramming so much power into a small space means you have to be smart about cooling. I’ll need to make sure the case I choose has excellent airflow and that I pick a quality cooler to keep the CPU from getting too hot under sustained load. A hot CPU is an unhappy, underperforming CPU.

    My Final Verdict

    So, am I going for it? I think so.

    The idea of having that much power in such a small, efficient package is just too compelling to ignore. While the lack of upgradeability is a valid concern, the performance of the Ryzen 9 7945HX feels like a safe bet for the next five years, at least for my needs.

    It’s a different way of thinking about a home server. Instead of a big, power-hungry tower, the future might be small, efficient, and surprisingly powerful. For anyone out there whose friend-server is starting to show its age, maybe it’s time to think small, too.

  • My Renovation Snowballed Into a Full-Blown Homelab

    My Renovation Snowballed Into a Full-Blown Homelab

    Planning a home renovation? Don’t just think about paint colors. Learn why running ethernet and planning a central spot for your tech now is the best move.

    It started, as these things often do, with a simple idea. I’m in the middle of a massive home renovation—we’re talking walls-are-open, dust-everywhere kind of messy. And in a moment of organizational pride, I set up a neat little pegboard for my router. It looked good. Clean.

    Then the thought crept in: “You know, while the walls are open, I could run a few cables.”

    That’s when the snowball started rolling downhill.

    I had an old Optiplex computer lying around. Why not tuck it in there for some basic smart home stuff? A good idea, right? Then I remembered how much I disliked ads. “I should set up my own network-wide ad blocker,” I thought. While I’m at it, a personal media server for movies sounds pretty great, too.

    Suddenly, my little pegboard was a full-blown wall cabinet, and it was getting crowded. The house is still a construction zone, but the fiber internet is blazing, ten security cameras are wired up, the smart smoke alarms are online, and Wi-Fi access points are in the ceiling.

    Now I’m staring at a pile of networking gear I impulse-bought, wondering where a full server rack is supposed to go.

    If you’re nodding along, or if you’re at the start of your own renovation, let me share what I’ve learned. If your walls are open, you have a golden ticket. Don’t waste it.

    Run More Cable Than You Could Ever Imagine

    This is the biggest one. Seriously. Ethernet cable is cheap. Opening up drywall, patching it, and repainting it is not.

    Right now, you might only need one connection behind your TV. But in five years, you might have a new streaming box, a gaming console, and a soundbar that could all benefit from a stable, wired connection.

    My rule of thumb now is this: Run at least two Ethernet drops to every single spot you think you might need one.

    • Bedrooms? Two drops in at least two different walls.
    • Living Room? Four drops behind the TV, and two more elsewhere.
    • Office? At least four. You’ll use them.
    • Kitchen? Yes, even the kitchen. Smart displays and appliances are getting more common.
    • Weird spots? Run one to the garage, the attic, and maybe even the porch.

    The best-case scenario is you don’t use them all. The worst-case scenario is kicking yourself in a year because you have to tear open a brand-new wall to run a $1 cable. If you can, run the cables inside conduit. That way, if a new standard like Cat 8 becomes common, you can just pull new wires through without opening the walls.

    Give Your Tech a Home

    All those cables need to go somewhere. Don’t just have them all dangling in a messy bundle in your basement. Plan for a central “nerve center.” It doesn’t have to be a full server rack like the ones you see in data centers. It can be a simple wall-mounted cabinet in a utility room, a closet, or the basement.

    Think about a few things when picking the spot:

    • Ventilation: This gear can get warm. A closet with no airflow is a bad idea. Make sure there’s a way for hot air to get out.
    • Power: You’ll need a dedicated electrical circuit. Don’t put it on the same circuit as your freezer or a space heater.
    • Noise: While most basic home networking gear is quiet, if you start adding servers, they come with fans. Tucking it away in a basement is better than putting it in the coat closet by the front door.

    So, What Do You Actually Need to Wire For?

    It’s easy to get carried away. But while the walls are open, here are the things you should absolutely plan for.

    • Wi-Fi Access Points (APs): A single router sitting in your office is not going to give you great Wi-Fi across the whole house. The best way to get flawless coverage is with multiple Access Points. These are small devices that broadcast your Wi-Fi signal. They work best when they’re mounted on the ceiling, and they need an Ethernet cable for connection and power (this is called Power over Ethernet, or PoE). Pick a few central spots in your hallways on each floor and run a cable there.
    • Security Cameras: Wired security cameras are more reliable than their wireless-only cousins. They also use PoE, so you only need to run one cable for both data and electricity. Walk around your property and decide where you want cameras. Now is the time to run the wires.
    • The Obvious Stuff: Your main computer, your TV, your media streamer (Apple TV, Roku), and your gaming consoles will always perform better on a wire.

    It’s a slippery slope, this whole homelab thing. It starts with a simple desire for better organization and quickly spirals into something much bigger. But the planning part? That’s the foundation. Get the wiring right while the walls are open, and you can build out the fun stuff slowly over time.

    You don’t need to buy the server rack today. But it’s a really good idea to run the cables for it now. Trust me.

  • My Server Kept Shutting Down. The Culprit Was Hiding in a PCIe Slot.

    My Server Kept Shutting Down. The Culprit Was Hiding in a PCIe Slot.

    Is your server randomly shutting down? The problem might be your M.2 SSDs overheating. Learn why it happens and the simple ways you can fix it for good.

    My server just wouldn’t stay on.

    It’s one of the most frustrating problems to have. You hit the power button, everything whirs to life, and then sometime later—maybe minutes, maybe an hour—it just gives up. No warning, no blue screen, just… silence.

    That was my reality for a few days. I was wracking my brain trying to figure it out. Was it a bad power supply? Faulty RAM? I spent hours digging through system logs, but nothing pointed to a clear cause. The server, a trusty HP ProLiant, wasn’t giving me any obvious clues. It just seemed to decide, “I’m done for now,” and would unceremoniously shut itself down.

    After what felt like an eternity of troubleshooting, I finally stumbled into the server’s deeper management interface. And there it was. A tiny alert I’d overlooked, buried in a sea of data: a temperature warning. But it wasn’t the CPU. The CPUs were sitting at a perfectly reasonable temperature. It was something else.

    The culprit? The brand new, lightning-fast M.2 NVMe drives I had just installed.

    The Hidden Heat Source

    I was so excited about these drives. I’d put them on a simple PCIe adapter card to add some high-speed storage to my setup. What I didn’t fully appreciate was just how much heat those little sticks of storage can generate.

    When I looked at the detailed sensor readings, my jaw dropped. One of the drives was idling at over 70°C (that’s about 160°F). Under any kind of load, it was likely getting even hotter, triggering the server’s emergency shutdown to protect itself from damage.

    But why was it happening? My server room is cool, and the server’s fans sound like a jet engine. Shouldn’t there be enough airflow?

    Well, here’s the lesson I learned the hard way.

    Enterprise servers, like my HP DL360, are marvels of thermal engineering. Every component, every fan, every plastic baffle is designed to work together to create precise tunnels of airflow. The air is meant to be pulled in from the front, shot across the drives, then over the CPUs and RAM, and finally exhausted out the back.

    My PCIe adapter card, however, was sitting in a thermal blind spot. The server’s powerful fans were doing their job, but the air was rushing right over the top of the card, completely missing the M.2 drives mounted on it. They were essentially sitting in a pocket of dead, hot air, slowly cooking themselves.

    How to Cool Down Your Drives

    So, if you’re thinking of adding M.2 drives to your own server, don’t let my story scare you off. It’s a fantastic upgrade. You just need to plan for the heat. Here are a few things that can solve the problem.

    • Get a Better Heatsink: Most M.2 drives come with a sticker on them and nothing else. Some PCIe adapters include flimsy, tiny aluminum heatsinks. Ditch them. You can buy much beefier, passive M.2 heatsinks online for a few bucks. They have more surface area and do a much better job of pulling heat away from the drive’s controller. This is the easiest first step.

    • Consider Active Cooling: If a passive heatsink isn’t enough, you might need to get some air moving directly over the card. Some high-end adapter cards come with their own built-in fans. Another option, popular in the homelab community, is to strategically place or 3D-print a mount for a small fan to blow air directly onto the PCIe card. It doesn’t have to be a hurricane; just a little bit of direct airflow can make a huge difference.

    • Check Your Fan Speeds: Most servers have different fan profiles in their BIOS or management settings (like “Optimal Cooling” vs. “Maximum Cooling”). You can manually set the fans to run at a higher RPM. This will increase noise and power consumption, so I see it as more of a temporary fix, but it can help you diagnose if airflow is truly the issue.

    • Mind the Baffles: Those weird plastic shrouds inside your server are incredibly important. They guide the air where it needs to go. Make sure they are all present and properly seated. If one is missing, it can completely disrupt the designed airflow path and create hot spots.

    In my case, a combination of a much larger heatsink and slightly increasing the server’s minimum fan speed did the trick. My drive temperatures dropped by nearly 20°C, and the random shutdowns stopped completely.

    It was a simple fix, but a valuable lesson. In the world of servers and high-performance parts, heat is always the enemy. Sometimes, it’s just hiding where you least expect it.

  • Is This the Perfect 10GbE Switch for My Homelab?

    Is This the Perfect 10GbE Switch for My Homelab?

    Considering the FS S3260-10S for your homelab? A detailed look at my plan, the key questions, and whether it’s the right 10GbE switch for you.

    I think I’m ready for a network upgrade. My homelab has been running happily on 1GbE for a while, but with bigger files, faster servers, and more complex projects, the old network is starting to feel like a bottleneck.

    So, I’ve been hunting for a 10GbE switch that fits the bill: powerful enough for my needs, but not so loud it drives me out of the room. And honestly, it needs to be affordable.

    That search led me to the FS S3260-10S. On paper, it looks almost perfect. It has ten 10GbE SFP+ ports and a couple of standard 1GbE RJ45 ports for good measure. That mix of ports feels just right for what I have in mind.

    Here’s My Plan

    My setup is a mix of old and new gear, which is pretty common for a homelab. I need a switch that can bring it all together.

    Here’s the connection plan I’ve mapped out:

    • My Main Server: I have a Dell PowerEdge T360 with a 10GBase-T network card. I’d connect this using an SFP+ to 10GBase-T transceiver module in the switch. This server handles the heavy lifting, so it needs the full 10GbE speed.
    • My Compact Powerhouse: I also run a Minisforum MS-01. It’s a fantastic little machine with a native SFP+ port. For this one, a simple DAC (Direct Attach Copper) cable should do the trick. Quick, easy, and reliable.
    • The Backup Server: My trusty backup server is still on 1GbE for now. I’ll upgrade it to 10GbE eventually, but for now, I can just use one of the switch’s 1GbE RJ45 ports. No need to overcomplicate things.
    • The Uplink: Finally, I need to connect this new 10GbE switch back to my main core switch, a FortiSwitch 124F. I’ll use the other 1GbE port for that uplink.

    This setup seems solid. It gives my key servers the 10GbE speeds they need while still connecting to the rest of my network. But before I click “buy,” I have a few questions that I need to think through.

    The Big Questions on My Mind

    A spec sheet can only tell you so much. What I really want to know is how a piece of gear performs in the real world, especially in a home environment.

    1. Is it stable?
    This is the most important question. A network switch has to be reliable. If it crashes, the whole lab goes down. I need something I can set up and then forget about. I’m not looking for another device that needs constant babysitting.

    2. How loud is it, really?
    Homelabbers know the struggle. Enterprise gear is often powerful but sounds like a jet engine. My lab is in my office, not a dedicated server room. So, noise is a huge factor. The product page says it has “smart fans,” but that can mean a lot of things. Is it a quiet hum, or a distracting whine? This could be the dealbreaker.

    3. Will my gear play nice with it?
    I’m planning to use a mix of transceivers and cables. A DAC cable for one server, an SFP+ to RJ45 module for another. Some switches are notoriously picky about the modules you use, sometimes locking you into their own expensive brand. I need to know if the FS S3260-10S is flexible and will work well with third-party gear. Nobody has time to troubleshoot compatibility issues.

    4. Is the software decent?
    I don’t need a super-complex feature set, but I do need to handle the basics without pulling my hair out. I plan on setting up a few VLANs to keep my server traffic separate from my main network traffic. Is the FSOS web interface intuitive? Is the command-line interface (CLI) logical and easy to use for basic L2/L3 routing and VLAN tagging? A clunky interface can turn a simple task into a frustrating ordeal.

    My Final Thoughts

    After laying it all out, the FS S3260-10S still feels like a really strong contender. It has the right ports, a reasonable price, and the features I need for my homelab’s next chapter.

    But those lingering questions about reliability, noise, and usability are what I’m chewing on now. It’s one thing to read about a switch, and another to live with it. I’m going to do a bit more digging, but I have a feeling this might just be the switch that ties my whole 10GbE homelab upgrade together. If you’ve used one, I’d love to hear your thoughts.

  • My Home Network Is a Time Machine

    My Home Network Is a Time Machine

    A personal look at a home network built over years to support a collection of vintage computers, game consoles, and other retro tech. It’s a fun project!

    My home network is a bit of a Frankenstein’s monster.

    It didn’t start this way, of course. Years ago, it was just a simple router blinking away in a corner, doing its job without any fuss. But over time, as my hobbies grew, so did the network. It spread and evolved, slowly turning into the complex web it is today.

    And what’s the hobby that demanded all this? I collect and restore vintage tech. I’m talking old computers, game consoles, handhelds, phones—you name it. And I don’t just let them sit on a shelf. I actively use them. This created a fascinating problem: How do you get a 40-year-old computer to talk to a modern, secure internet?

    That’s what my network is built for. It’s a bridge between eras.

    It All Started with a Simple Goal

    The whole thing began with a simple desire. I wanted to be able to download files from the internet directly onto my vintage machines. No more shuffling files around with floppy disks or weird adapters if I could help it. I wanted my Commodore 64, my old PowerPC Macs, and my classic game consoles to feel like first-class citizens in my home.

    This meant they needed a stable, friendly connection. The problem is, the security protocols on a brand-new iPhone are worlds away from what an old machine from the 90s can handle. Putting them all on the same Wi-Fi network felt like a bad idea. I needed a way to keep my modern, important stuff—like my work laptop and personal phone—separate from the old-timers.

    How It’s All Connected

    So, how did I solve this? I split my network into pieces. Think of it like having different zones in your house. You have the super-secure area for sensitive stuff, a general area for everyday things, and a workshop for your experimental projects.

    My network works the same way:

    • The Main Network: This is for my trusted devices. My partner and I use this for our laptops, phones, and the main TV. It’s fast, secure, and completely walled off from everything else.
    • The “Internet of Things” Network: I have another, separate network just for all those random smart devices. Things like smart plugs, a thermostat, and a few security cameras. These devices are useful, but I don’t fully trust their security, so they live on their own island where they can’t cause any trouble for my main devices.
    • The Retro Lab: This is where the magic happens. It’s a dedicated Wi-Fi and wired network specifically for my vintage collection. It’s designed to be as compatible as possible with old technology. It uses older, more basic security that a 20-year-old laptop can actually understand. This is the playground.

    The “brain” of this whole operation is a powerful router that can manage all these separate networks, making sure traffic from the retro lab can’t just wander over into my main, secure network.

    The Real Fun: Making It All Work

    Building this setup has been a slow and rewarding process. It’s been a puzzle, piecing it together one device at a time. I have a central home server that acts like a digital library for my old machines. It stores old software, game ROMs (for emulation), and digital copies of instruction manuals.

    So now, I can sit down at my 25-year-old Macintosh, connect to the retro network, and pull a file from the server just as easily as I would on my modern PC. I can use my collection of old handhelds to browse simple, text-based versions of websites that I host locally.

    It’s less about efficiency and more about the experience. There’s something deeply satisfying about seeing a piece of ancient technology do something it was never designed to do. Each new device I get online feels like a small victory.

    Was It Overkill? Absolutely. Was It Worth It? Yes.

    I’m sure some people would look at a diagram of my network and think it’s complete overkill. And they’d be right. Most people don’t need this. A single, simple network is perfectly fine.

    But for me, building this system has become part of the hobby itself. It’s a project that’s never truly finished. It’s a testament to years of collecting, tinkering, and problem-solving. It’s the invisible backbone that brings my entire collection of tech history to life.

    And honestly, it’s just plain fun.

  • Why Your Smart Air Conditioner Won’t Connect to Wi-Fi (and How to Actually Fix It)

    Why Your Smart Air Conditioner Won’t Connect to Wi-Fi (and How to Actually Fix It)

    Struggling to connect your smart air conditioner to Wi-Fi? Our simple, step-by-step troubleshooting guide helps you fix common connection issues.

    I was so excited. I’d just bought a new smart air conditioner, and I had visions of pure, automated bliss. I’d be able to turn it on from the office before heading home, arriving to a perfectly chilled apartment. I could tweak the temperature from the couch without having to get up. This was the future.

    Except, it wasn’t.

    Because my brand-new, top-of-the-line Frigidaire air conditioner would not connect to the Wi-Fi. No matter what I did. I followed the instructions. I uninstalled and reinstalled the app. I restarted my router. I typed in my password so slowly and carefully you’d think I was defusing a bomb.

    Nothing. Legit nothing. The little Wi-Fi light just kept blinking, mocking me.

    It’s one of the most maddening experiences of modern life. Your “smart” device ends up making you feel incredibly dumb. If you’re reading this, you’re probably in that exact spot. You’re frustrated, you’re on the verge of throwing something, and you’ve probably Googled yourself into a dead end.

    I get it. But before you give up, let’s walk through a few things I learned. It turns out, the problem is often surprisingly simple, and it’s usually not your fault.

    Let’s Get This Thing Connected

    Think of this as a checklist. Start at the top and work your way down. Don’t skip the “obvious” ones—trust me on this.

    1. The Super Obvious Stuff (Seriously, Do It Anyway)

    I know, I know. You’ve already done this. But let’s do it one more time, in a specific order. It’s like a magic ritual for electronics.

    • Unplug the Air Conditioner: Don’t just turn it off. Pull the plug from the wall. Let it sit for a full 60 seconds.
    • Reboot Your Router: While the AC is unplugged, do the same for your internet router. Unplug it, wait a minute, and plug it back in. Give it a few minutes to fully wake up.
    • Restart Your Phone: Yes, really. Turn your phone completely off and on again.

    Once everything is back on, try the connection process again from the very beginning. Sometimes, one of these devices just has a digital cobweb that a simple restart will clear out.

    2. Your Wi-Fi Might Be Too Fancy

    This is the big one. This is the issue that trips up almost everyone.

    Most of us now have routers that broadcast two different Wi-Fi signals (or “bands”): 2.4 GHz and 5 GHz.

    • 5 GHz is faster and great for streaming Netflix in 4K.
    • 2.4 GHz is a bit slower, but it has a much longer range and is better at getting through walls.

    Here’s the catch: The vast majority of smart home devices, including many air conditioners, can only connect to the 2.4 GHz band.

    If your phone is connected to the 5 GHz signal, the setup app might not be able to find the AC. Sometimes your router gives you two separate networks to choose from (e.g., “MyWifi” and “MyWifi-5G”). If so, make sure your phone is connected to the regular “MyWifi” (the 2.4 GHz one) before you start the setup.

    If your router combines both bands into a single network name, you might have to temporarily disable the 5 GHz band in your router’s settings. It sounds complicated, but a quick Google search for “how to disable 5 GHz on [Your Router’s Brand]” will usually give you a step-by-step guide.

    3. Check Your Wi-Fi Name and Password

    This is another weirdly common problem. Some smart devices are just… picky.

    • Keep it Simple: Does your Wi-Fi network name (the SSID) or password have any special characters like an ampersand (&), an asterisk (*), or a dollar sign ($)? If so, this could be the culprit. Some devices just can’t handle them.
    • No Emojis: I hope this goes without saying, but if you have an emoji in your Wi-Fi password, you are a beautiful, chaotic soul, and you need to change it immediately for this to work.

    Try temporarily changing your password to something simple (letters and numbers only) just to see if the AC connects. If it does, you’ve found your problem.

    4. Use the “WPS” Button

    Look on the back of your router. See a button labeled “WPS” (it sometimes has an icon of two circling arrows)? This is Wi-Fi Protected Setup, and it can be a lifesaver.

    It allows a device to connect to your network without needing a password. The process is usually something like this:

    1. Start the connection process in your AC’s app.
    2. When it asks for the password, look for an option that says “Connect using WPS.”
    3. Press the WPS button on your router.
    4. The app and the router should then find each other and connect automatically.

    It doesn’t always work, but when it does, it feels like magic.

    What If It Still Won’t Connect?

    If you’ve gone through all of this and that light is still blinking, take a deep breath. You’ve done your due diligence. You have officially tried everything a reasonable person would try.

    At this point, it’s time to contact customer support for the air conditioner brand. Don’t just email them—try to find a phone number. When you explain the situation, you can confidently tell them every single step you’ve already taken. This proves you’re not just missing a simple step and will hopefully get you past the first level of support and on to someone who can actually help.

    It might be a faulty unit. It might be a known issue with their app. But you’ve done your part. Now it’s their turn to make their “smart” product work the way it was supposed to. Good luck!