Category: Uncategorized

  • The Hunt for the Perfect Short-Depth DAS: DIY or Buy?

    The Hunt for the Perfect Short-Depth DAS: DIY or Buy?

    Looking for a short-depth rackmount JBOD or DAS for your home lab? Explore the pros and cons of buying a pre-built unit versus building your own.

    I found myself nodding along to a question someone asked online the other day. It’s a problem I’ve run into myself, and it’s one of those things that seems like it should be simple, but it really isn’t.

    The gist was this: “Does a short-depth, rack-mountable case for a bunch of hard drives even exist?”

    They were looking for something that could hold around 16 hard drives but wouldn’t stick out the back of a shallow server rack—those 18-inch deep ones common for home networking or audio gear. It’s a classic home lab dilemma. You want to add a ton of storage, but you don’t have a massive, enterprise-grade rack that can fit a 30-inch deep server chassis.

    So, you start searching. And you quickly discover two things:
    1. The options are surprisingly limited.
    2. The options you do find are outrageously expensive.

    Let’s talk about why this is such a tough spot to be in and what you can actually do about it.

    The Problem with “Off-the-Shelf”

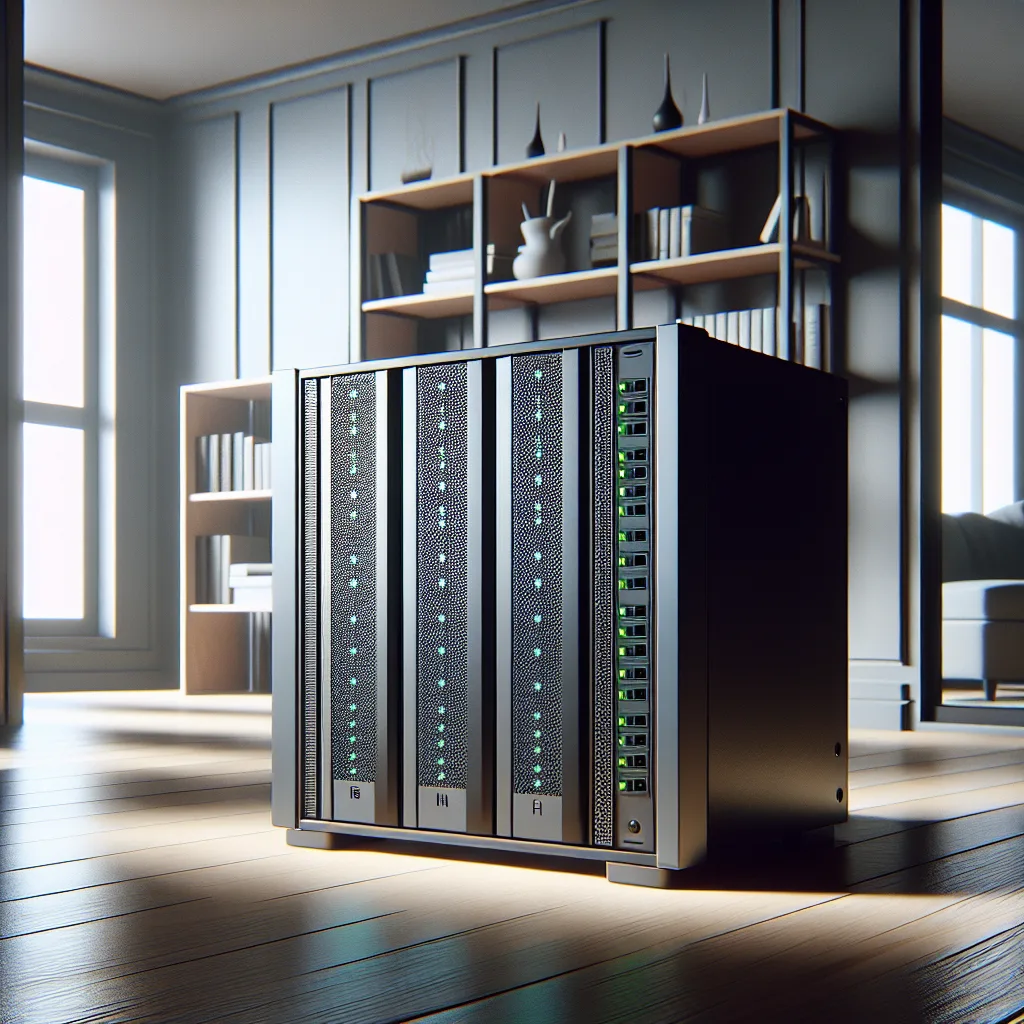
    When you look for a pre-built solution, often called a DAS (Direct Attached Storage) or JBOD (Just a Bunch of Disks) enclosure, you’ll see names like QNAP, Synology, or TerraMaster. They make some beautiful, high-quality gear.

    But they are pricey. Often, shockingly so.

    Why? Because you’re not just buying a metal box. These units are turnkey solutions. They come with their own redundant power supplies, controller cards, cooling systems, and the support and warranty to back it all up. They are designed for small businesses or prosumers who need a plug-and-play system that just works. You’re paying for convenience and reliability, not just the hardware itself.

    For a lot of us building a home lab, paying thousands for an empty enclosure just feels wrong. We’re used to getting our hands dirty, finding deals on used parts, and building things ourselves. Which leads us to the other path.

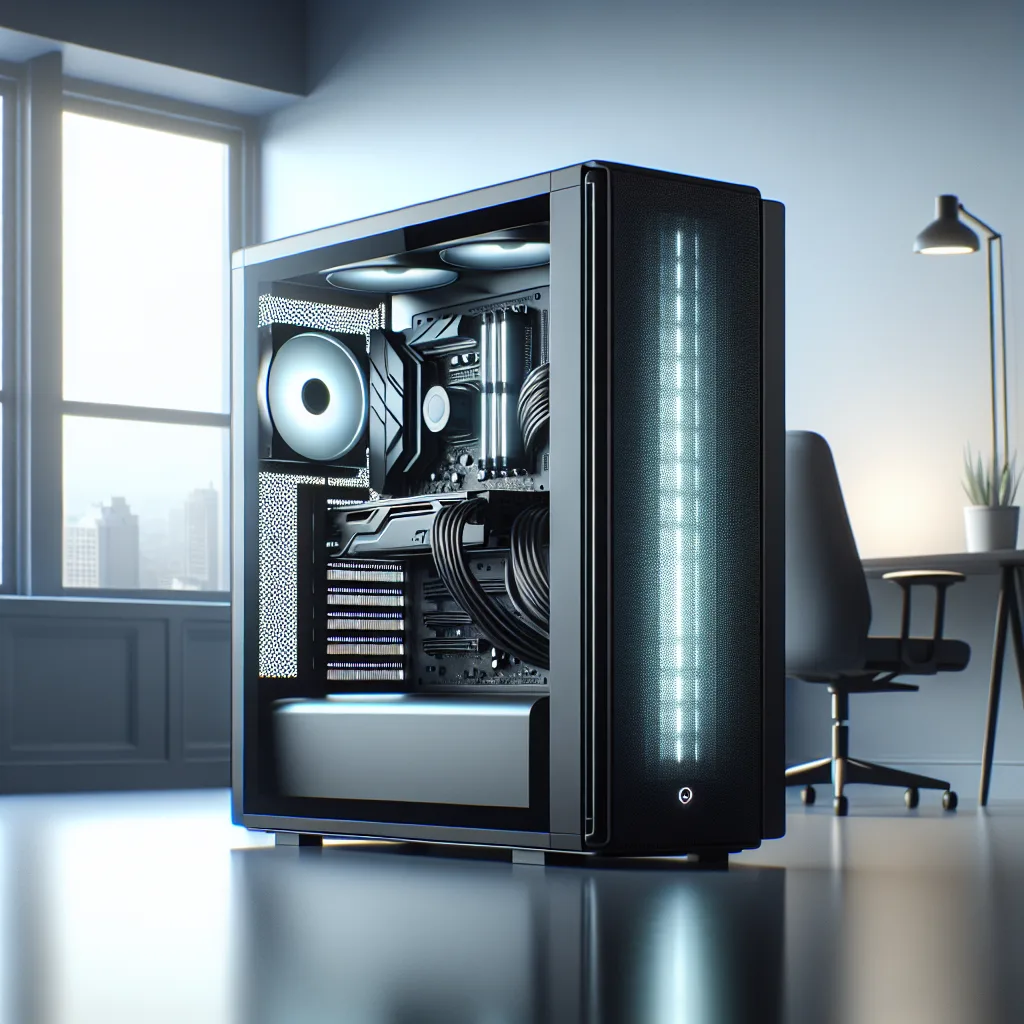
    The DIY Path: Building Your Own Short-Depth DAS

    If the pre-built options feel out of reach, you’re not out of luck. You’re just entering DIY territory. Honestly, this is where the fun begins, and it’s almost always cheaper.

    Building your own short-depth DAS isn’t as intimidating as it sounds. It breaks down into a few key components.
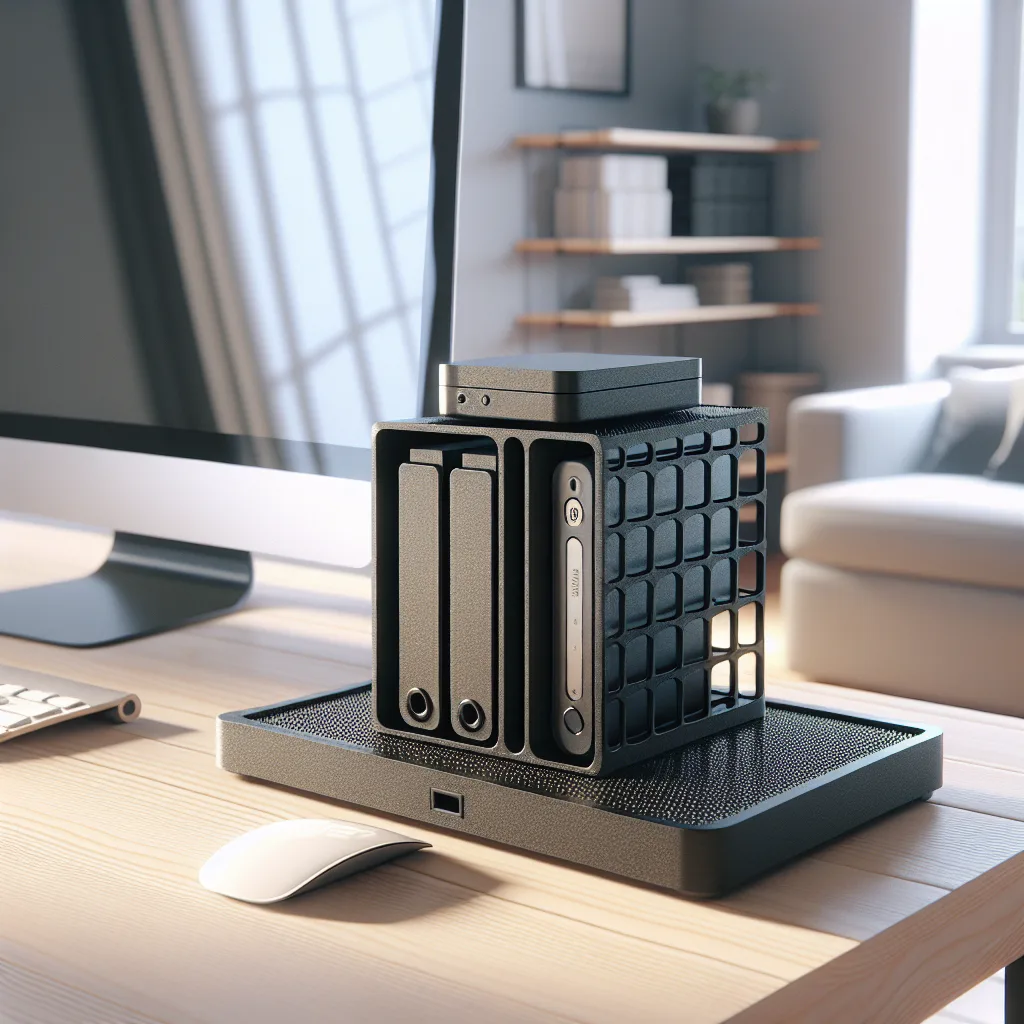
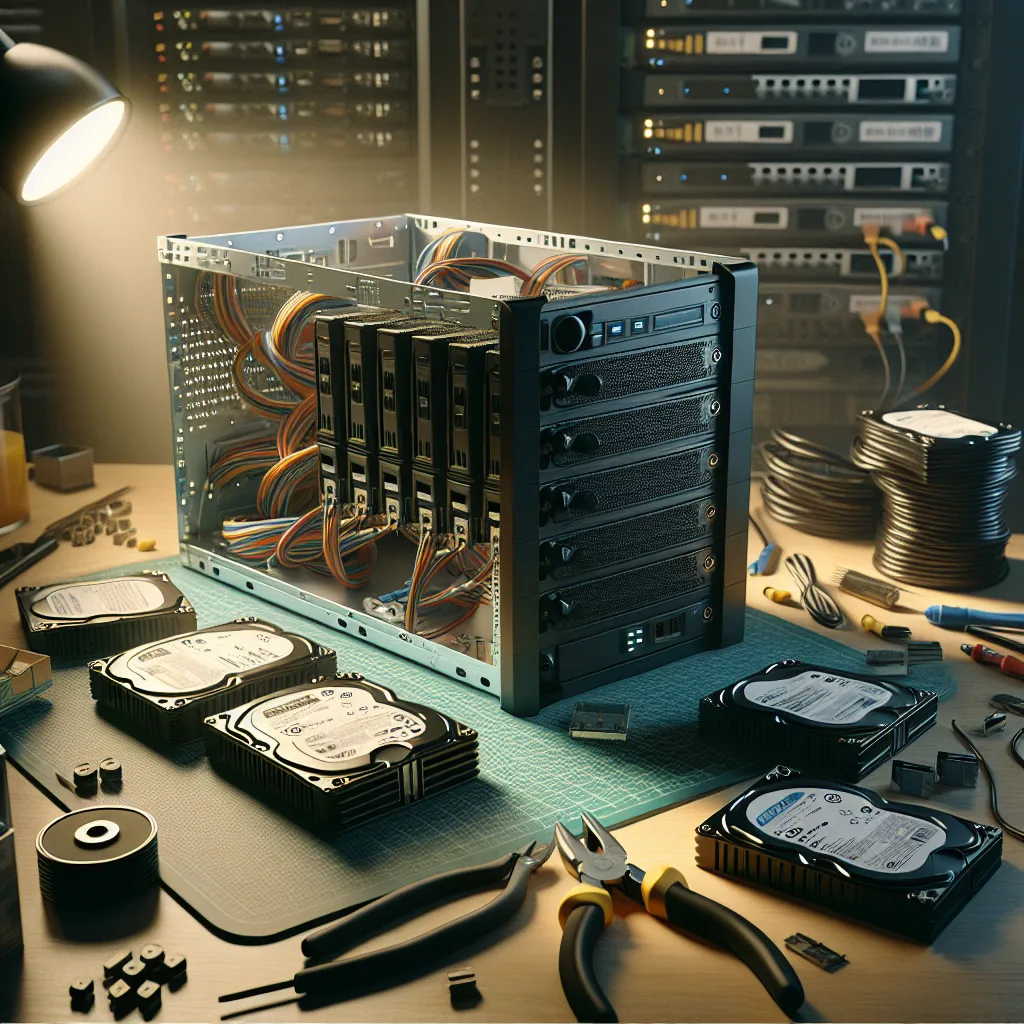
    1. The Chassis

    This is the most important piece of the puzzle. You need a rack-mountable server chassis that is 18 inches deep or less. This is the “short-depth” part. You’ll also want one that has a lot of drive bays—like 8, 12, or even 16 hot-swap bays for 3.5″ drives.

    You’ll have to do some digging here. Look for 3U or 4U cases, as they have the height needed for multiple rows of drives. Sites like ServerCase.com or even eBay and AliExpress can be gold mines. Search for terms like “short-depth server chassis” or “4U ITX case.” Just be prepared to triple-check the dimensions before you buy.

    2. The Backplane

    A hot-swap chassis will come with a backplane. This is a circuit board at the back of the drive cage that all the hard drives plug into. It simplifies everything. Instead of running 16 separate power and data cables, you just have a few main connectors on the backplane. It’s the magic that makes a clean, multi-drive setup possible. Most use standard SATA connectors or, more commonly, SAS connectors (like SFF-8087 or SFF-8643) that bundle four SATA connections into one cable.

    3. The Power Supply

    You don’t need anything crazy here. A standard, reliable ATX or SFX power supply from a brand like Corsair or Seasonic will do the job perfectly. Just make sure it has enough SATA power connectors to feed your backplane.

    4. The “Brain” (or lack thereof)

    This is what makes a DAS different from a NAS (Network Attached Storage). A NAS is a standalone computer. A DAS is just a “dumb” box of drives that attaches to another computer.

    To make this work, you need two things:

    • Inside your DIY DAS: You need a way to connect all the drives to an external port. This is usually done with a SAS Expander card. It takes all the connections from the backplane and funnels them into one or two external SAS ports. Think of it as a USB hub, but for hard drives.
    • Inside your main server: You need a Host Bus Adapter (HBA). This is a PCIe card that gives your server the external SAS port needed to talk to your new drive enclosure. A used LSI card from eBay, flashed to “IT Mode,” is the go-to for the home lab community.

    You connect the two with a simple external SAS cable (like an SFF-8088 or SFF-8644 cable), and suddenly your main server sees all 16 drives as if they were plugged in directly.

    Is It Worth It?

    So, back to the original question. Does a short-depth, 16-bay JBOD exist?

    Yes, but probably not in the way most people hope. The affordable, easy, off-the-shelf option is mostly a myth.

    Instead, you have a choice:
    * Buy: Spend a lot of money on a polished, pre-made unit for a plug-and-play experience.
    * Build: Spend some time and effort to create a custom solution that perfectly fits your rack and your budget.

    For me, the answer is almost always to build. It’s more rewarding, you learn a ton, and you end up with a system you know inside and out. It might seem like a hassle, but the hunt for the perfect parts is half the fun.

  • Should You Put a Fire Detector in Your Garage? (The Answer Is Yes)

    Should You Put a Fire Detector in Your Garage? (The Answer Is Yes)

    Wondering if you need a fire detector in your garage? Learn why a heat detector is a better choice than a smoke detector and explore your options.

    I was cleaning out my garage the other day, and it hit me just how much flammable stuff is in there. Between the lawnmower’s gas can, leftover paint thinners, and oily rags I probably shouldn’t have kept, it’s a bit of a fire hazard.

    That got me thinking. I have smoke detectors all over my house, but what about the garage? It’s probably the one place where a fire is most likely to start.

    So, I started looking into it. My first thought was to just stick a regular smoke detector on the ceiling and call it a day. But it turns out, that’s not the best idea.

    Why a Regular Smoke Detector Isn’t Great for a Garage

    Your garage is a dusty, dirty place. Car exhaust, sawdust from a project, and even big temperature swings can trigger false alarms with a standard smoke detector. Imagine your alarm going off every time you start your car on a cold morning. No, thank you.

    That’s when I stumbled upon heat detectors.

    They work differently. Instead of “sniffing” the air for smoke particles, heat detectors do exactly what the name suggests: they detect a rapid rise in temperature. They don’t care about dust or fumes. They only care about heat. This makes them perfect for places like garages, workshops, or attics.

    A heat detector won’t go off because of a little exhaust smoke. But it will go off if a fire starts and the temperature suddenly skyrockets. Fewer false alarms, but you still get the protection you need.

    So, What Are the Options?

    Once I decided a heat detector was the way to go, I had to figure out which one to get. There are a few different paths you can take.

    1. The Simple, Standalone Detector

    This is the easiest option. You can buy a battery-powered heat detector from most big-box hardware stores. You just screw it to the ceiling, and you’re done. It has its own loud alarm, just like a smoke detector.

    * Pros: Cheap, easy to install, no wiring needed.
    * Cons: It only alerts you if you’re home and can hear it. If you’re away, you won’t know there’s a problem.

    2. The Interconnected System

    If you have a modern, hardwired smoke detector system in your house, you can often add a compatible heat detector to it. When the heat detector in the garage goes off, all the alarms in your house will sound.

    * Pros: Whole-house alert system. More reliable since it’s hardwired (with battery backup).
    * Cons: More complex to install. You might need an electrician, and you have to find a model that works with your existing system.

    3. The Smart Home Route (Z-Wave, Zigbee, etc.)

    This is where things get interesting for smart home fans. I started looking for a Z-Wave heat detector, thinking I could connect it to my smart home hub. That way, I’d get an alert on my phone no matter where I am.

    The options for dedicated Z-Wave heat detectors are surprisingly thin. But I found a clever workaround that many people use:

    You can get a “listening” device or a sensor that is designed to detect the specific sound frequency of a standard alarm. For example, you can place a Z-Wave smoke/CO “listener” near a basic, standalone heat detector. If the heat alarm goes off, the listener hears it and triggers your smart home automations—sending a notification to your phone, flashing your lights, you name it.

    There are also some smoke detectors with built-in heat sensors that are designed to be less prone to false alarms from dust and bugs, and these often come in smart versions. While not a pure “heat detector,” they’re a solid smart-home-friendly option for the garage.

    * Pros: Get alerts on your phone, integrate with other smart devices, peace of mind when you’re away.
    * Cons: Can be more expensive and require a bit of tech-savviness to set up.

    What Did I End Up Doing?

    For now, I’m leaning toward the interconnected route, as my system is due for an upgrade anyway. But that smart home listener idea is really compelling. The thought of getting an alert on my phone if something happens while I’m out is a huge plus.

    Ultimately, doing something is better than doing nothing. The garage is often overlooked, but it’s a critical spot to monitor. A simple heat detector is a small investment for a whole lot of peace of mind.

    So, take a look at your garage. If it’s anything like mine, it might be time to think about adding that extra layer of safety.

  • That Used Server Won’t Wreck Your Power Bill (Here’s the Math)

    That Used Server Won’t Wreck Your Power Bill (Here’s the Math)

    Curious about the real cost of a home server with used enterprise gear? I break down the power bill, noise, and hardware costs. It’s cheaper than you think.

    You’ve probably heard the warnings. Maybe you were scrolling through forums or chatting with tech-savvy friends about building your own home server. And someone, with the best intentions, probably told you to steer clear of used enterprise gear.

    “It’s too loud!”
    “It’s a power-hungry monster!”
    “Your electricity bill will go through the roof!”

    I heard it all, too. When I was piecing together my own home lab, I was surprised how many people were convinced that buying powerful, second-hand server hardware was a terrible idea. The common wisdom is that it’s just not practical for a home setting.

    But I love a good deal, and the prices for used enterprise parts are ridiculously low for the performance you get. So I decided to ignore the warnings and do the math myself.

    So, What’s the Real Cost?

    Let’s get right to it. The biggest fear is the power bill. People picture a giant, humming rack that spins their electric meter like a top. The reality, at least for my setup, is much less dramatic.

    My server is built from a single-socket motherboard and a solid Xeon processor—all bought for pennies on the dollar from eBay. I measured its power draw. Most of the time, when it’s just sitting there, it pulls about 200 watts.

    When it’s working harder—maybe transcoding a video for movie night or running a backup—that number might climb to 250 watts. I’ve never even seen it hit 300 watts.

    Okay, but what does that mean in dollars and cents?

    Where I live, the average cost of electricity is about 13.5 cents per kilowatt-hour (kWh). Let’s be pessimistic and assume my server runs at that higher 250-watt level, 24 hours a day, 7 days a week.

    The math looks like this:

    • 0.25 kW * 24 hours/day * 365 days/year = 2,190 kWh per year
    • 2,190 kWh * $0.1356/kWh = $296.96 per year

    That comes out to just under $25 a month.

    Honestly, that’s nothing. It’s far, far less than the cost of the streaming and storage subscriptions I no longer need because of my server. Even if my power costs were double, or if the server used way more energy, it would still make financial sense. For the value I get, I’d be perfectly happy paying up to $100 a month.

    But Isn’t It Loud?

    The second myth is about noise. People think “enterprise” and imagine a jet engine in their basement. Again, not necessarily true.

    It all comes down to how you build it. I didn’t stuff my server into a tiny 1U chassis, which uses small, high-RPM fans that have to scream to move any air. Instead, I built it inside a big, spacious 4U server case.

    This lets me use large, 120mm fans that spin slowly and quietly. The result? The server makes less noise than my gaming PC when its graphics card spins up. The loudest parts are the hard drives clicking away, and there’s not much you can do about that with any computer.

    Here’s the Gear, if You’re Curious

    This powerful, quiet, and affordable setup wasn’t built with magic. It was built with smart shopping on eBay. Here’s a quick look at the core components and what I paid for them:

    • Motherboard: Supermicro X11SPI-TF – $200
    • CPU: Intel Xeon 6240 – $50 (Yes, really)
    • CPU Cooler: A decent air cooler – $60
    • HBA Card (for storage): 3008-16i HBA – $60
    • RAM: 192GB of DDR4 ECC – I had this already, but you can get 32GB sticks for around $25 each online.

    Before storage, the grand total was just over $500. For that price, I have a machine that can handle anything I throw at it, from running virtual machines to managing a massive library of Linux ISOs.

    So, next time someone warns you away from used enterprise gear, just smile and nod. It doesn’t have to be a power-hungry, noisy beast. With a little bit of research and simple math, you can build an incredibly powerful home server that’s surprisingly cheap to run. Don’t let the myths scare you.

  • My New PC Runs on Nostalgia (and a Re-Modeled ’56)

    My New PC Runs on Nostalgia (and a Re-Modeled ’56)

    Tired of boring PC towers? Discover how to build a powerful computer inside a piece of vintage furniture for a unique, stealthy, and stylish homelab setup.

    I love technology. I really do. But I’ve never loved the way most of it looks. For years, my home office has been a battleground between function and style. On one side, the powerful computer I need for work and play. On the other, the clean, warm, and vaguely mid-century aesthetic I want for my home.

    The two have never gotten along.

    The typical computer tower is a metal box. It can be black, white, or lit up like a traveling carnival, but it’s still a box. It screams “computer” and doesn’t blend with wood, plants, and soft lighting. I was tired of it. So I decided to build a new homelab with one primary goal: it had to be completely invisible.

    Meet the ARM56

    I started hunting for furniture. Not desks, not shelves, but a proper piece of vintage furniture that could secretly house a computer. After a few weeks of searching through thrift stores and online marketplaces, I found it: a beautiful, solid wood media console from 1956.

    It had great lines, that unmistakable smell of old, well-cared-for wood, and just the right amount of space inside. This became the heart of the project, which I’ve nicknamed the “ARM56″—short for A Re-Modeled ’56.

    The idea was simple. Gut the inside, keep the outside pristine, and build a powerful PC within its wooden shell.

    The Challenge: Making It Actually Work

    Hiding a computer is easy. Making it run well without melting is hard. My two biggest challenges were airflow and cable management.

    1. Keeping It Cool

    Computers generate a lot of heat. A wooden box is basically an oven. Without proper airflow, I’d have a very expensive space heater that couldn’t even run a web browser.

    • Intake and Exhaust: I carefully measured and drilled a series of holes in the back panel, which faces the wall. I used a pattern that looked almost decorative, so it wouldn’t be an eyesore.
    • Silent Fans: I mounted two large, ultra-quiet fans inside—one for intake, one for exhaust. They pull cool air in from the bottom back, guide it over the components, and push hot air out the top back. They run at a low RPM, so you can’t even hear them.
    • Strategic Placement: The motherboard and processor are mounted in the direct path of the airflow. The power supply, which has its own fan, is positioned to exhaust its heat directly out the back.

    2. Hiding the Wires

    The second problem was the mess of cables. The beauty of a vintage cabinet is its clean exterior. The last thing I wanted was a tangle of power cords, USB cables, and display wires ruining the illusion.

    I drilled one discreet hole in the floor of the cabinet, right behind a leg where it’s impossible to see. All the necessary cables are bundled together and run through there, hidden from view.

    The Fun Part: The Specs (and the Puns)

    Now for the fun stuff. The setup is running a custom “Windows Sill” image. It’s a cheeky name, I know, but it feels appropriate since the whole thing sits right by my window.

    But the absolute best feature? The storage.

    I’ve got over 1,000 square feet of storage.

    …Wait, no, that’s my apartment. Inside the cabinet, though, there’s more than enough room for a few terabytes of digital storage, with plenty of physical space left over for my old records and a bottle of whiskey. That’s a kind of storage you can’t get with a standard PC tower.

    More Than Just a Computer

    Now, when friends come over, they compliment the beautiful mid-century console in the living room. They have no idea it’s the machine running my media server, handling my backups, and letting me tinker with new software.

    It’s a quiet, powerful, and stealthy machine hiding in plain sight.

    This project was a reminder that technology doesn’t have to exist in a sterile, beige box. You can integrate it into your home and your life in a way that feels personal and creative. You just have to think outside the box—or in this case, inside a much older, more interesting one.

  • I Closed All My Firewall Ports. Here’s What I Do for Security Instead.

    I Closed All My Firewall Ports. Here’s What I Do for Security Instead.

    Learn how to replace traditional firewall rules and open ports with Cloudflare Zero Trust for your homelab. A simpler, more secure approach to self-hosting.
    I have a confession to make. For years, my homelab setup was a patchwork of open ports, dynamic DNS scripts, and a constant, low-level anxiety. Every service I wanted to access from outside my home—be it Plex, a file server, or a new app I was testing—meant punching another hole in my firewall.

    Each hole felt like a tiny, unlocked window. I’d tell myself it was fine, that the services were secure. But I was always aware that I was exposing my home network to the entire internet, hoping no one would jiggle the handle. The constant IP address changes from my ISP didn’t help, adding another layer of clunky fixes to the mix.

    Then I switched to Cloudflare Zero Trust, and I closed every single one of those ports. Forever. The relief was immediate. No more open ports. No more dynamic DNS headaches. It just worked.

    But after the initial honeymoon phase, a new question popped up. If my firewall isn’t managing the traffic anymore, how do I set up the rules I used to rely on? You know, the basics like blocking traffic from certain countries or only allowing specific connections.

    I hit a wall. It seemed like everyone had a different opinion or a slightly different method. It turns out, the solution isn’t about recreating your old firewall; it’s about adopting a new, simpler mindset.

    The Big Wins: Why This is Better Than an Old-School Firewall

    First, let’s just touch on why this move is so great. It boils down to two things for me.

    • No More Open Ports: This is the big one. With a Cloudflare Tunnel, you’re not opening any inbound ports on your router or firewall. Instead, a lightweight service runs on your server and creates a secure, outbound-only connection to Cloudflare’s network. Nothing on your home network is exposed. It’s like having a secure, private bridge that only you know how to access, instead of leaving your front door unlocked.

    • Dynamic IPs Don’t Matter Anymore: My ISP can change my home’s IP address daily, and I wouldn’t even notice. Because the connection is made from my server to Cloudflare, my public IP address is irrelevant. Cloudflare handles everything, giving my services a stable, consistent address.

    This is a fundamentally more secure and robust way to expose services. But it does leave that one big question: What about the rules?

    Recreating Firewall Rules: The Zero Trust Way

    Here’s the mental shift you have to make: You’re no longer managing traffic at the network level (like with a firewall). You’re now managing access at the application level.

    Instead of a blanket rule like “block all traffic from outside the US,” you set a rule that says “only people in the US can access this specific application.” It’s more granular, and ultimately, more secure.

    Here’s a simple way to think about setting this up.

    1. Start with “Block All”

    By default, Cloudflare Zero Trust blocks everything. No one can access the applications you’ve set up through your tunnel unless you explicitly allow them. This is the core principle of “Zero Trust”—trust no one by default.

    2. Add Your Access Policies

    For each application (like your dashboard, your file server, etc.), you create an “Access Policy.” This is where you define who is allowed in. This is your new “firewall rules” dashboard.

    Inside a policy, you can get very specific. Want to block traffic from outside your country? Easy.

    • Create a policy for your application.
    • Set the “Action” to Allow.
    • In the “Include” rules, add a “Countries” selector and choose your country.

    That’s it. Now, only traffic originating from your selected country can even see the login page for that application. You can just as easily use an “Exclude” rule to block specific countries you’re worried about.

    3. It’s About “Who,” Not Just “Where”

    But you can go so much further. This is where it gets really powerful. You can add rules that require a user to log in with a specific email address, use a hardware security key (like a Yubikey), or be on a specific IP address (like your work office).

    A typical policy might look like this:

    • Allow traffic if ALL of the following are true:
      • The request is from the United States.
      • The user’s email ends in @my-personal-domain.com.
      • The user successfully authenticates with their Github account.

    You’re no longer just checking an IP address. You’re verifying the person and the context of their request.

    What About Port Ranges?

    This is one of the biggest differences. In the old world, you might open a range of ports. With Zero Trust, you don’t think about ports anymore.

    You create a tunnel for a specific service running on a specific internal port. For example, http://localhost:8080`. You then assign a public hostname to it, likemy-dashboard.my-domain.com`.

    The security policy is applied to that hostname, not the port. The port is never exposed to the internet. If you want to secure another service on another port, you just add it as a new hostname and create a new policy for it. You never have to think about “allowing a port range” again, because the concept is obsolete in this model.

    It’s a Shift, But It’s Worth It

    Moving from a traditional firewall to a Zero Trust model felt like a step into the future. It simplified my setup, removed a ton of security anxiety, and ultimately gave me more meaningful control over who can access my stuff.

    There’s a small learning curve, and it requires you to change how you think about access. You move from broad network rules to specific application rules. But once it clicks, you’ll wonder why you ever did it the old way. You haven’t lost your firewall rules; you’ve replaced them with something much better.

  • I Couldn’t Find a 3D-Printed Rack for My Tiny Homelab, So I Got Smarter

    I Couldn’t Find a 3D-Printed Rack for My Tiny Homelab, So I Got Smarter

    It’s a common scene. You scroll through amazing pictures of home labs—towers of servers, blinking lights, and perfectly managed cables all nestled into impressive racks. It’s inspiring stuff. But what if your “lab” is a bit more… humble?

    Maybe, like me, you’re starting with just a small desktop computer and an external hard drive. My own setup began with an Optiplex Micro and a single Seagate drive. It’s not much, but it’s a start. It’s my start.

    When I first got my 3D printer, my immediate thought was to create a neat, tidy home for my mini-setup. A small rack. Something to lift the components off the desk, give them some air, and make it feel a little more intentional.

    So I started searching. And I found… well, I found a lot for the big guys.

    The Search for the “Micro” Rack

    I looked on Thingiverse, Printables, and all the usual spots. I searched for “homelab rack,” “server rack,” and “3D printed rack.” The results were incredible, but they were all for full-sized servers, complex network switches, and clusters of Raspberry Pis. It felt like trying to find a bicycle rack and only getting designs for a multi-story car park.

    Everything was geared toward these decked-out, super impressive homelabs. It was a little discouraging. Was I the only one out there with a setup that didn’t require a 19-inch rack? Was my mini-lab not worthy of its own custom-printed home?

    I realized I was probably just using the wrong words. The community for massive homelabs is vocal and visible, so it dominates the search results. But the world of “micro-labs” is out there. You just have to know how to find it.

    Finding Your Niche: The Right Search Terms

    After a lot of trial and error, I stumbled upon a few search terms that started giving me the results I was looking for. If you’re in the same boat, try these out:

    • “Mini Rack” or “Micro Rack”: This is the most obvious one, but combining it with your device name is key. For example, “Optiplex Micro rack” or “NUC rack.”
    • “Stacking Stand” or “Device Stand”: Sometimes, what you’re looking for isn’t called a “rack” at all. A simple stand that can hold your mini PC and a hard drive on top is often labeled as a “stacking stand.”
    • “Vertical Stand”: This is a great one. Many designs orient your computer and drive vertically to save desk space. Searching for “Optiplex vertical stand” might give you exactly what you need.
    • “Component Shelf”: A more generic term, but sometimes you’ll find modular, printable shelves that you can adapt to your needs.

    It turns out there isn’t one magic word. It’s more about describing what you have, not what you aspire to. Forget “homelab” for a second and just search for a stand for your specific little computer.

    Sometimes, You Have to Make It Yourself

    Here’s the other thing I learned: sometimes the perfect thing doesn’t exist. And that’s actually the best part about having a 3D printer.

    You don’t have to be a CAD expert to get started. Tools like Tinkercad are incredibly easy to learn. You can start with basic shapes. Measure your Optiplex Micro. Measure your hard drive. Then, create simple, blocky holders for each.

    My first design was literally just two rectangles with lips on the front to keep the devices from sliding off. It wasn’t pretty, but it was functional. It got my hardware off the desk and gave it some breathing room. And it was mine. I made it.

    The beauty of a small setup is its simplicity. You don’t need complex airflow designs or heavy-duty brackets. You just need something that holds your gear.

    Your Lab is Your Lab

    It’s easy to feel like your small setup isn’t a “real” homelab. But it is. A homelab is about learning, experimenting, and building something that works for you. It doesn’t matter if it’s a single Raspberry Pi or a full rack of enterprise gear.

    So if you’re just starting out, don’t get discouraged by the giant setups. Your mini-lab is the perfect place to begin. And with a 3D printer, you have the power to create a custom home for it that’s exactly the right size.

    Start small. Search smart. And if you can’t find it, build it. Your homelab journey is your own, and it starts right where you are.

  • Can You Use a High-Security Key With Your Smart Lock?

    Can You Use a High-Security Key With Your Smart Lock?

    It’s a classic home improvement dilemma.

    You’ve decided to upgrade to a smart lock. You’re sold on the convenience—no more fumbling for keys, the ability to grant temporary access to a friend, and that little peace of mind knowing the door is locked from an app. You land on a popular choice, like the Yale Assure Lock 2. It looks great, it’s packed with features, and it’s from a brand you trust.

    But then you look at the key in your hand.

    It’s not just any key. It might be a high-security key, like an Abloy Protec2. It’s a key you invested in for a reason. It’s pick-resistant, drill-resistant, and the key itself is patented, meaning no one can just go to a hardware store and make a copy. It’s the peak of physical lock security.

    And that’s when the big question hits you: Can I have both? Can I pair the smart convenience of my Yale Assure 2 with the serious security of my Abloy key?

    It’s a fantastic question, and it gets right to the heart of a common worry: am I sacrificing security for convenience?

    The Dream: Smart Tech Meets High Security

    Let’s be clear, this idea is the perfect “have your cake and eat it too” scenario.

    On one hand, you have the Yale Assure 2, a leader in the consumer smart lock space. It offers:
    * Keypad or key-free entry
    * Remote locking/unlocking via an app
    * Activity logs so you know who’s coming and going
    * Integration with smart home systems like Apple HomeKit, Alexa, and Google Home

    On the other hand, you have a high-security lock cylinder. A cylinder is the part of the lock where the key goes in. Standard cylinders from brands like Yale or Schlage are great for everyday use, but high-security cylinders from companies like Abloy or Medeco are in a different league. They’re built to resist advanced picking, drilling, and bumping attacks. Their keys are also strictly controlled.

    Combining them would be the ultimate setup: a digital front door with a nearly impenetrable physical backup.

    So, Can It Be Done? The Straight Answer

    I’ll get right to the point: No, you can’t easily use an Abloy Protec2 cylinder (or most other high-security cylinders) with a standard Yale Assure Lock 2.

    It’s not a simple swap. These locks are designed as integrated systems. The internal mechanics of the Assure Lock 2 are built specifically for its own Yale cylinder. A high-security cylinder from another brand has different dimensions, a different shape, and a different way of interacting with the lock’s bolt mechanism.

    Forcing them together isn’t like changing a tire. It would require a highly specialized (and expensive) locksmith to attempt custom modifications, which would absolutely void your Yale warranty. Even then, there’s no guarantee it would work reliably or securely. The internal mechanisms that make the smart lock “smart” could be compromised.

    Okay, So What Are Your Real Options?

    Just because the dream combo is off the table doesn’t mean you’re out of luck. You just have to decide what your top priority is.

    Option 1: Go All-In on Key-Free

    This might sound backward, but the most secure version of the Yale Assure Lock 2 is the one with no keyhole at all. The key-free model is just a sleek, discreet keypad.

    Think about it: the biggest vulnerability of any lock is the keyhole itself. It’s a point of attack for picking or bumping. By removing it entirely, you eliminate that threat. Your entry methods are the keypad, your phone’s app, or your smart home system. It’s a different way of thinking about security, but it’s a very modern and effective one.

    Option 2: Explore a Commercial-Grade Smart Lock

    While consumer smart locks like the Assure 2 are built as all-in-one units, the world of commercial security is different. Some higher-end, commercial-grade smart locks are designed to work with what’s called an “interchangeable core” or IC.

    This feature allows a facility manager to quickly swap out the lock cylinders without changing the entire lock. These locks are often compatible with high-security systems. However, be prepared for a significant jump in price and complexity. They’re built for businesses, not necessarily for the average home, and they might lack the user-friendly app or slick design of consumer models.

    Option 3: The Two-Lock Solution

    This is the most common compromise. Keep your trusted Abloy deadbolt as your primary lock—the one you use for overnight security and when you’re away on vacation.

    Then, install a smart lock on your door’s handle (a lever or knob lock). You can use the smart lock for daily convenience—coming home with groceries, letting a dog walker in—while still having the high-security deadbolt as your main line of defense. It’s not as elegant, but it’s practical and doesn’t compromise on either front.

    What’s the Right Call for You?

    Ultimately, you can’t quite get the best of both worlds in one simple package. You have to choose what matters most.

    If your primary goal is the convenience and modern features of a smart lock, then embracing a key-free model is likely your most secure and straightforward path.

    If you absolutely cannot part with the physical security of your high-security key, then sticking with a robust mechanical deadbolt is still one of the most reliable ways to secure your home.

    It’s less a question of which is “better” and more about which approach gives you the most peace of mind.

  • That Old PC in Your Closet? It Can Supercharge Your Home Server

    That Old PC in Your Closet? It Can Supercharge Your Home Server

    So you’ve got a home server. Maybe it’s an old desktop you’ve repurposed, humming away in a corner, serving up your movies with Plex and handling a few other background tasks. It feels pretty great, right? You’re self-hosting, you’re in control.

    But then you start to push it.

    You decide to rebuild your media library, and suddenly your download client is working overtime. You try to stream a movie, and it stutters. You log in to check on things, and the whole system feels sluggish, like it’s running through mud. And all the while, that other old computer you have is sitting in the closet, gathering dust.

    It’s a familiar story. I’ve been there. You start wondering, “Can I use that spare PC to help out? Can I somehow combine their power?”

    It’s a great question. And the short answer is yes, you absolutely can. But probably not in the way you’re thinking.

    You Can’t Just “Merge” Computers

    First, let’s get one thing straight. You can’t just connect two computers with a cable and have them magically merge their processors into one super-CPU. That kind of technology, often called clustering, is real but it’s incredibly complex and usually reserved for data centers with very specific software. For a home setup, it’s massive overkill and a huge headache.

    So, if you can’t combine their power directly, what do you do?

    You get smarter. You don’t combine the power; you divide the work.

    The “Two Specialists” Approach

    Instead of one machine trying to be a jack-of-all-trades and getting overwhelmed, you turn your two computers into specialists. Each one gets a specific job to do. This is the most practical and effective way to use two machines for your home server setup.

    Think of it like a two-person kitchen. If one person tries to chop vegetables, stir the sauce, and bake a cake all at once, things get messy and slow. But if one person handles all the prep work (chopping, measuring) and the other handles the cooking, everything flows smoothly.

    It’s the same with your computers.

    Machine #1: The Star of the Show

    This is your main server, probably the more powerful of the two. Its primary job should be the most demanding task you have. For most of us, that’s Plex.

    Plex, especially when it has to transcode a video file (change its format on the fly), can be very CPU-intensive. You want to give it as much power as possible so your streams are always smooth, no matter who is watching or where.

    Machine #2: The Helpful Sidekick

    This second PC is perfect for offloading all the other tasks that can bog down your main server. What kind of tasks?

    • Download Clients: Torrent or Usenet clients can use a surprising amount of CPU and disk activity, especially when managing lots of files. Move them here.
    • The ‘Arr’ Stack: Services like Sonarr, Radarr, Lidarr, and Prowlarr are fantastic, but they are constantly running in the background, scanning for new things. They are perfect candidates for the sidekick machine.
    • Utility Containers: Anything else you’re running in Docker or Portainer that isn’t mission-critical for streaming can go here. VPNs, maintenance scripts, you name it.

    By moving all of this “background noise” to a second machine, you free up your main server to do one thing and do it well: serve your media.

    How Does It Work in Practice?

    “Okay, this sounds good,” you might be thinking, “but how do they talk to each other?”

    It’s simpler than it sounds. When you run services on different machines, they just communicate over your home network.

    Let’s say your main Plex server is at the IP address 192.168.1.10, and your new sidekick server is at 192.168.1.11.

    When you set up Sonarr on your sidekick machine, you just tell it your download client is also on the sidekick machine (it can use a local address for that). But when you tell Sonarr where your Plex server is, you just point it to the other machine’s IP address: 192.168.1.10.

    That’s it. The applications don’t really care if they’re on the same computer or not, as long as they can reach each other over the network.

    Is It Worth the Effort?

    Absolutely. For the cost of a bit of your time, you get some serious benefits:

    • Better Performance: Your Plex streaming will be more reliable because its resources aren’t being stolen by a dozen torrents.
    • No Wasted Hardware: You’re putting that old computer to good use instead of letting it become e-waste.
    • A Great Learning Project: Setting this up is a fantastic way to learn more about networking and how services interact. It’s a real level-up for your home lab skills.

    So next time you look at your sluggish server and then at that dusty old PC in the corner, don’t think about combining them. Think about dividing the labor. It’s a smarter, more efficient way to build a powerful and resilient home server setup without spending a dime.

  • I Heard a Scary Story About PC Recycling

    I Heard a Scary Story About PC Recycling

    I’ve got a pile of old electronics in my closet. I think we all do. A dusty laptop from college, a couple of old phones, and a desktop PC tower that’s probably heavier than I am. The responsible thing to do is recycle them, right? Just drop them off and let the pros handle it.

    But I recently heard a story that made me think twice about how simple that really is.

    It’s a story about what can happen when the people handling our old tech don’t do their job right. Someone I know who tinkers with old hardware bought a big lot of used PCs from a recycler. These weren’t from individuals; they were from businesses and organizations that had paid to have their old equipment professionally and securely decommissioned.

    Or so they thought.

    A Recycler’s Scary Mistake

    When he got the computers back to his workshop, he made a pretty shocking discovery. He booted one up, and it went straight to a Windows login screen. No password. He clicked on the user profile, and he was in.

    The hard drive was completely untouched.

    He found documents from a law firm. Sensitive client information, case details, private correspondence. All just sitting there. On another machine, he found the entire student database for a local school district. Names, grades, contact information, disciplinary records. Everything.

    But the most alarming find was a computer from a government defense contractor. It had project files, schematics, and internal communications on it. The kind of data that absolutely, under no circumstances, should ever leave a secure environment.

    The recycler, who was supposed to be wiping these drives clean as part of their service, had simply… not. They just unplugged them, stacked them on a pallet, and sold them.

    Why This Is a Huge Deal

    This isn’t just a simple mistake. It’s a massive privacy and security disaster waiting to happen. For you, for me, for anyone.

    Think about what’s on your old computer.
    * Tax returns with your social security number.
    * Saved passwords in your browser for banking and email.
    * Personal photos and private messages.
    * Work documents or client files.

    We assume that when we “delete” a file, it’s gone. But it’s not. Deleting a file just tells the computer that the space it occupies is available to be used later. The actual data often stays on the drive until it’s overwritten by something new. A factory reset can help, but even that isn’t always foolproof.

    A professional recycler is supposed to use special software to write over every single part of the drive, making the original data impossible to recover. The fact that this one didn’t is terrifying.

    How to Protect Yourself (It’s Easier Than You Think)

    The good news is, you don’t have to be a security expert to protect yourself. Before you sell, donate, or recycle an old computer, you need to wipe the hard drive clean.

    Here’s how.

    For most people, use the built-in tools:
    * On Windows 10 or 11: Go to Settings > Update & Security > Recovery. Under “Reset this PC,” click “Get started.” Critically, you need to choose the “Remove everything” option, and then look for a “Change settings” link where you can select “Clean data” or “Remove files and clean the drive.” This is the important step. It will take a few hours, but it overwrites your data, making it much, much harder to recover.
    * On macOS: The process is a bit different depending on your Mac’s age, but it involves booting into Recovery Mode and using Disk Utility to erase the drive. The key is to choose the “Security Options” and move the slider to a more secure setting, which will overwrite the data.

    For the truly paranoid (or if you have very sensitive data):
    If you want to be absolutely certain, there’s always the physical option. Open up the computer case, remove the hard drive, and destroy it. I’m not kidding. A few well-placed strikes with a hammer or drilling a few holes straight through it will do the trick. It’s extreme, but it’s also 100% effective.

    The Bottom Line

    That pile of electronics in the closet isn’t just junk; it’s an archive of your life. And you wouldn’t just hand your diary over to a stranger.

    So before you let go of your old tech, take a moment. Wipe it clean. It’s a simple step that ensures your private information stays that way. Don’t trust someone else to do it for you, because as this story shows, sometimes they just don’t care.

  • The Ultimate Home Server Isn’t a Server at All

    The Ultimate Home Server Isn’t a Server at All

    So, you’ve got that itch. The one that whispers, “You should build a home server.” It’s a great idea. You could run a media center, experiment with virtual machines, host your own cloud storage, and so much more.

    But then, reality hits. You look up “home server,” and you’re flooded with images of 1U and 2U rackmount units. You hear the phantom whine of tiny, high-RPM fans. You imagine the heat they pump out and the corner of your office or basement you’d have to sacrifice to a noisy, power-hungry beast.

    What if I told you the perfect home server isn’t a “server” at all?

    Forget the Rack, Embrace the Workstation

    For years, I’ve seen people fall into the same trap. They think they need enterprise-grade rackmount hardware to build a proper home lab. But for most of us, that’s overkill in all the wrong ways. Those machines are designed for data centers with dedicated cooling and sound insulation. They are not designed to share a room with a human.

    The secret? A used workstation.

    I’m talking about high-end desktop towers from brands like Dell, HP, and Lenovo. Think of models like the Dell Precision T7920, the HP Z8 G4, or the Lenovo ThinkStation P920. These are the machines that engineers, video editors, and 3D artists use. They are built for performance and reliability, but critically, they’re also designed to sit quietly under a desk in an office.

    They have:
    * Excellent cooling with large, quiet fans.
    * Support for powerful Xeon processors (often two of them).
    * Tons of room for RAM (hello, ECC memory!).
    * Plenty of space for storage expansion.
    * Robust power supplies to handle it all.

    Best of all, you can find incredible deals on these machines on the used market. Companies lease them for a few years, and then they hit sites like eBay in fantastic condition for a fraction of their original cost.

    Dell vs. HP vs. Lenovo: Does It Matter?

    I get this question a lot. You’ll see listings for all three and wonder if you’re missing some crucial difference.

    Honestly? You can’t go wrong with any of them.

    • Dell Precision towers are famous for their tool-less, easy-to-service design. Popping one open and swapping parts is usually a breeze.
    • HP’s Z-series workstations are built like tanks. They have phenomenal thermal engineering and a reputation for rock-solid stability.
    • Lenovo ThinkStations carry the legacy of the “Think” brand—no-nonsense, reliable, and just plain solid.

    My advice: Don’t get hung up on the brand. Focus on the specific components, the condition, and the price of the unit you’re looking at. A great deal on a Dell is better than a mediocre deal on an HP.

    What to Look For: A Peek Inside

    When you’re browsing listings, the specs can feel a little overwhelming. Here’s a quick guide to what matters for a powerful virtualization server.

    CPU: The Brains of the Operation

    You’ll likely see dual-CPU setups with Intel Xeon Scalable processors. This is where the magic happens for running multiple virtual machines (VMs). You might see a choice between something like a dual Xeon Gold 6148 setup and a dual Xeon Platinum 8160.

    • The Gold 6148 has fewer cores but a higher clock speed. This is great for single-threaded performance within a VM.
    • The Platinum 8160 has a whopping 24 cores per CPU. This is an absolute beast for running many, many VMs at once.

    There’s no wrong answer here. If your use is a few heavy-duty VMs (like for 3D modeling), the Gold might feel a bit snappier. If your goal is to run a dozen different services, the Platinum’s core count is your friend. And don’t worry too much about power draw; these workstations are designed to handle these chips efficiently and quietly.

    RAM: Your Digital Workspace

    Virtual machines love RAM. Starting with 128GB of DDR4 ECC RAM is a fantastic baseline. The “ECC” part means it’s Error Correcting Code memory, which prevents data corruption and is a key benefit of using workstation/server hardware. It’s incredibly stable. You’ll notice the price jumps significantly to get to 256GB, but the great thing about these workstations is that you can almost always add more later.

    GPU: For More Than Just Gaming

    If you plan on running a VM for tasks like Blender or Solidworks, or even just a home theater PC (HTPC), you’ll need a decent GPU. A professional card like the NVIDIA RTX A2000 is a great choice. It’s powerful enough for professional 3D work and sipping power. The key will be setting up “GPU passthrough,” which lets you dedicate the graphics card directly to one of your VMs. It sounds complex, but it’s a well-trodden path with platforms like Proxmox or ESXi.

    Storage: Speed and Space

    Starting with a 1TB NVMe SSD is the perfect move. It’s blazing fast and ideal for hosting your main operating system and your most-used VMs. The beauty of a workstation tower is the space. You’ll have a ton of drive bays to add more storage later, whether it’s more SSDs for VMs or large hard drives to build your own network-attached storage (NAS).

    So, if you’re dreaming of a home lab, look beyond the noisy rack. A quiet, powerful, and surprisingly affordable used workstation is waiting for you. Happy building.