Category: Uncategorized

  • From Home Office to Homelab: Gearing Up Your New Business

    From Home Office to Homelab: Gearing Up Your New Business

    So, you’re thinking about starting a business from home. That’s awesome. The freedom, the ridiculously short commute… it’s a great move.

    I was thinking about this the other day. Someone I know is starting their own tech helpdesk business, right from their house. And it got me thinking about the gear you need when your home office is also your command center.

    When your business is tech, a simple laptop and a Wi-Fi router might not cut it for long. You quickly enter the world of the “homelab.” It sounds intense, but it’s really just a term for having more robust, professional-grade tech at home. And it can be surprisingly practical.

    The Spark: When You Need More Than a Laptop

    For a tech helpdesk, you’re dealing with client data, testing software, and maybe even running virtual machines to replicate a customer’s issue. You need a setup that’s reliable, secure, and powerful.

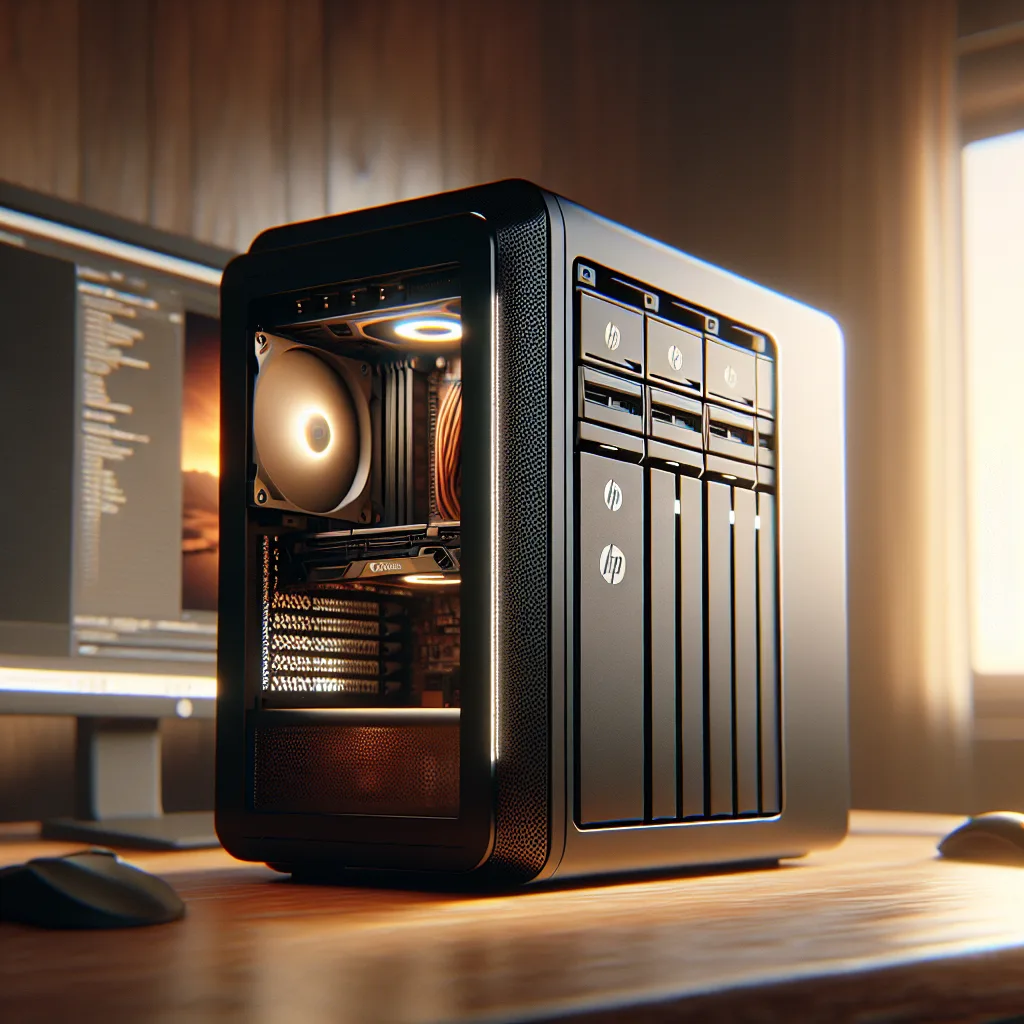
    This is where having a dedicated server comes in.

    I saw a perfect example of a starting setup recently:

    • A solid server: A Dell PowerEdge R540 with 16 cores and 128GB of RAM. In simple terms, that’s a beast. It has more than enough power to handle multiple tasks at once without breaking a sweat.
    • Smart storage: A mix of fast SAS drives (1.2TB each) and larger SATA hard drives (8TB each).

    This kind of setup is a fantastic starting point. The fast drives are perfect for running operating systems and apps, while the big drives are great for backups and long-term storage. The first, most obvious use? Turning it into your own private cloud storage, often called a NAS.

    What’s a NAS, Anyway?

    NAS stands for Network Attached Storage. Think of it like Dropbox or Google Drive, but it lives in your house. It’s a central hub for all your files. For a business, this is huge.

    • You can store all your business files in one secure place.
    • You can set up automatic backups for your computers.
    • You can access your files from any device on your home network.
    • You control the data, not a third-party company.

    Starting with a server as a NAS is a smart, focused first step. It solves a real, immediate problem: managing your business’s data.

    Putting It All Together: The Rack and Switch

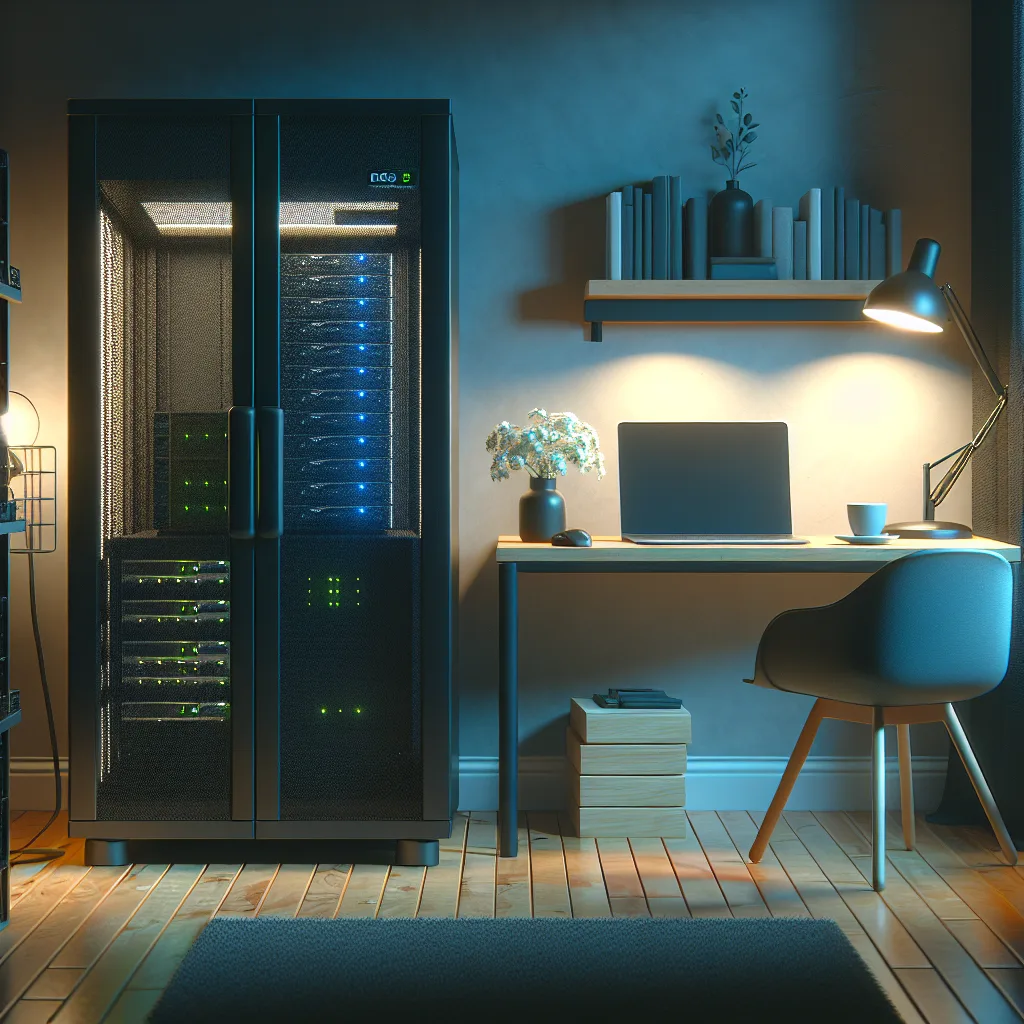
    Okay, so you’ve got a server. You can’t just leave a machine like that sitting on the carpet. It’s loud, generates heat, and needs to be organized. This is where racks and switches come in.

    1. Finding the Right Rack

    A server rack is more than a fancy shelf. It’s a standardized frame for mounting your gear that helps with airflow, cable management, and safety. But for a home, you have to consider noise and space. A giant 42U rack that belongs in a data center is probably overkill.

    Instead, look at smaller options:

    • Short Racks (12U or 15U): These are fantastic for a home office. They’re about the height of a small filing cabinet and can be tucked into a closet or a corner. Many come with enclosed sides and a glass door, which helps a lot with the noise.
    • Wall-Mount Racks: If floor space is tight, you can mount a smaller rack on the wall. Just make sure it’s a sturdy wall!

    The biggest advice for a home setup? Think about where it will live. Noise and heat are your main considerations. An enclosed rack in a room with good ventilation (like a garage or basement) is often the sweet spot.

    2. Picking a Network Switch

    Next, you need a switch. If the server is the brain, the switch is the nervous system. It’s a box that lets you plug in multiple wired devices (like your server, desktop, and other gear) into your network. A wired connection is almost always faster and more reliable than Wi-Fi, which is critical for a server.

    You’ll see two main types:

    • Unmanaged Switch: This is plug-and-play. You just plug your devices in, and it works. It’s simple and effective. If all you need is more Ethernet ports, this is perfect.
    • Managed Switch: This gives you control. You can log into the switch and configure it. You can do things like prioritize traffic (e.g., make sure your server always has the fastest connection) or create separate virtual networks (VLANs). A VLAN could let you keep your business network completely separate from your home and guest Wi-Fi, which is a great security move.

    For a home business, starting with a simple unmanaged switch is fine. But if you have the technical curiosity, a managed switch offers more security and flexibility as your business grows.

    Start Here, Then Dream Big

    The best part about a homelab is that it can evolve. You might start with a single server acting as a NAS. But later, you can add another server for more storage. You can teach yourself to run virtual machines to test software for your clients. You can host your own website or a project management tool.

    It becomes a platform for learning and a powerful asset for your business.

    Starting a business from home is a journey. Setting up the tech to support it is part of the adventure. Don’t feel like you need to have it all figured out on day one. Start with a solid foundation, solve an immediate problem, and build from there. Good luck.

  • My Plex Server Was Feeling Cramped. Here’s the Upgrade I’m Considering.

    My Plex Server Was Feeling Cramped. Here’s the Upgrade I’m Considering.

    So, your Plex server is starting to feel a little… cramped.

    I get it. Maybe you started with a spare PC you had lying around, like an old office machine or a tiny, low-power box. At first, it was perfect. It streamed your shows, played your music, and didn’t make a fuss. But now? Now you’re running out of space. You’re tired of juggling a bunch of external USB drives, and you’re starting to dream of something a bit more robust.

    If that sounds familiar, you’re in the right place. Let’s talk about leveling up your home media server without breaking the bank.

    The Appeal of the Used Workstation

    You’ve probably noticed that your old setup, while power-efficient, doesn’t leave much room to grow. A small Celeron-powered PC is great for getting started, but it hits a wall pretty fast. You can’t add more hard drives internally, and you’re stuck with a mess of cables from all those external drives.

    This is where used enterprise gear comes in. Specifically, workstations like the HP Z420 or similar models from Dell or Lenovo. These machines were absolute powerhouses in their day, built for serious professional work like CAD or video editing. Now, you can often find them on the second-hand market for a surprisingly low price—sometimes just over 100 bucks.

    Why are they such a good deal?

    • Room to Grow: Unlike a tiny PC, these towers have space. Lots of it. They come with multiple hard drive bays, meaning you can finally bring all your storage inside one neat case.
    • Serious Power (for the Price): They often pack powerful Intel Xeon processors. While a bit older, these CPUs can handle multiple Plex streams, and even transcoding, far better than a low-power Celeron.
    • Upgradability: They have proper PCIe slots. This means you can add things like a faster network card, a GPU for hardware transcoding if you need it, or a dedicated RAID controller card to manage your drives.

    It’s the perfect middle-ground. You get way more power and flexibility than a Raspberry Pi or a basic desktop, but for a fraction of the cost of a brand-new, dedicated NAS (Network Attached Storage).

    But What About Power Consumption?

    This is the big question, and it’s a smart one to ask. Your tiny server barely sips electricity, and it’s easy to get spoiled by that. A big, powerful workstation will, without a doubt, use more power.

    There’s no getting around it. A Xeon processor and multiple spinning hard drives will draw more watts than a Celeron and a single USB drive. But you have to weigh the trade-offs. You’re not just paying for electricity; you’re paying for capability. The ability to store all your media in one place, to stream to multiple devices at once, and to have a system that can grow with your library.

    Think of it this way: the extra cost in power is what buys you the upgrade. For many, having a reliable, all-in-one server that just works is worth a few extra dollars on the monthly energy bill.

    Thinking Ahead: TrueNAS and the All-in-One Server

    The real beauty of moving to a bigger machine is the software possibilities it unlocks. With multiple drive bays, you can start thinking about running something like TrueNAS.

    TrueNAS is an operating system built specifically for turning a computer into a NAS. It lets you pool your hard drives together into a single, massive storage volume with built-in protection against drive failure. You can run Plex directly on TrueNAS, creating a truly integrated media server and storage solution.

    This is the end goal for many home server enthusiasts. One box that handles everything:

    • Storing all your files safely.
    • Running your Plex Media Server.
    • Potentially even hosting other services, like a backup server for your family’s computers.

    A used workstation like the Z420 is a fantastic starting point for this journey. You can start with a couple of drives and add more as your budget and library grow. You get the space, the power, and the flexibility to build something truly your own.

    So, is it the right move? If you’re tired of the limitations of your current setup and want a clear upgrade path, then yes. A budget-friendly used workstation is one of the best bangs for your buck in the home server world. It’s the perfect way to build a serious Plex setup without a serious price tag.

  • Why Are My Torrents Stuck? The Frustratingly Simple Fix

    Why Are My Torrents Stuck? The Frustratingly Simple Fix

    It’s a familiar feeling. You’ve got your home lab humming along, your *arr suite (Sonarr, Radarr, etc.) is set up, and you’re ready for a world of automated content bliss. For a while, everything is perfect. New things pop up as expected. But then, one day, the well runs dry.

    You peek into your dashboard and see a graveyard of stalled downloads. Everything is either stuck at 0% or queued with no signs of life. You restart the container, you check your settings, but nothing seems to get the data flowing again. What gives?

    I’ve been there. It’s a frustrating spot to be in, especially when you’ve spent so much time getting your setup just right. More often than not, the culprit is something small and overlooked in your network configuration. Let’s walk through how to fix it, coffee in hand.

    The Usual Suspect: Your Proxy or VPN

    Before you start tearing your entire setup apart, let’s look at the most common reason for this sudden halt: your proxy or VPN connection.

    For a lot of us using torrent clients like qBittorrent, a SOCKS5 proxy or a full-blown VPN is standard practice for privacy. These services are great, but they can also be a single point of failure. You might have had the same proxy settings for years without a hitch, but services can change, servers can go down, or configurations can silently fail.

    In the world of qBittorrent, there’s a specific setting that often causes this kind of trouble, especially if you’re using a proxy.

    Check This One Setting First

    Let’s get straight to the point. The setting that often trips people up is how qBittorrent handles the connection between your proxy and your network interface.

    Here’s what happens: You tell qBittorrent to use a SOCKS5 proxy for all its traffic. But if the underlying network interface it’s supposed to be bound to isn’t correctly configured or loses its connection, qBittorrent just… stops. It won’t download, it won’t upload, it just sits there.

    The fix is surprisingly simple: stop binding qBittorrent to a specific network interface.

    Here’s how to do it in qBittorrent’s settings:

    1. Open qBittorrent’s Web UI or desktop app.
    2. Go to Tools > Options.
    3. Click on the Advanced tab (the little gear icon).
    4. Find the Network Interface dropdown menu.
    5. Change this setting from your specific interface (like eth0 or your VPN’s interface) to Any interface.
    6. While you’re there, make sure your proxy settings are still correct under the Connection tab. You’ve told qBittorrent to use the proxy, so it will still funnel all its traffic through there. The key difference is that it’s no longer strictly bound to one network path.

    Hit Apply and OK. Now, give it a minute. You should see those stalled torrents spring back to life.

    So, Why Does This Work?

    You might be wondering, “Isn’t it more secure to bind the client to my VPN or proxy interface?” And you’re not wrong to think that. The idea behind binding is to create a “kill switch.” If the VPN or proxy connection drops, the torrent client can’t access the internet through your regular, unprotected connection.

    However, this feature can be a bit sensitive, especially in Docker or virtualized environments. Sometimes, the way the network stack is handled within a container can confuse qBittorrent. It might think the interface is down when it’s actually not, or it might struggle to re-establish the connection after a restart.

    By setting the interface to “Any,” you’re telling qBittorrent: “Just focus on sending traffic through the proxy I’ve configured. I trust that the proxy will handle the connection.” As long as your SOCKS5 proxy is set up correctly in the Connection settings, your traffic is still being routed for privacy. The client just has more flexibility in how it establishes that initial network link.

    What If That Doesn’t Fix It?

    If changing the network interface didn’t do the trick, here are a few other common culprits to investigate:

    • Dead Trackers: Are the trackers for your torrents active? Sometimes, a torrent has simply run its course and there are no active seeders left.
    • Outdated Client: Make sure your qBittorrent instance is up to date. New versions often contain important bug fixes related to connectivity.
    • Proxy/VPN Server Issues: Try switching to a different server location in your VPN or proxy provider’s list. The one you’ve been using for years might be overloaded, blocked, or simply offline for maintenance.
    • Firewall Rules: Double-check that your firewall isn’t suddenly blocking qBittorrent or its ports. This can sometimes happen after a system update.

    But honestly? Nine times out of ten, it’s that little network interface setting. It’s one of those things that’s easy to set and forget, but can bring your whole automated media empire to a grinding halt.

    So next time you see a sea of stalled downloads, take a deep breath, and check your advanced settings first. It might just save you a whole lot of headache.