Category: Uncategorized

  • Stuck in the Spam Filter? Here’s Why Your Online Posts Get Deleted

    Stuck in the Spam Filter? Here’s Why Your Online Posts Get Deleted

    Frustrated that your posts get removed online? Learn about karma, spam filters, and the unwritten rules of communities like Reddit. Here’s what you can do.

    You’ve been there, right? You find a new online community, maybe a subreddit, a Facebook group, or a niche forum. You get an idea for a post—something you think is genuinely useful or interesting. You type it all out, hit “submit,” and… poof. It’s gone.

    A message pops up: “Your post has been removed by the moderators.” Or worse, you get no message at all. It just vanishes into the digital ether.

    You check the rules. You’ve followed every single one. You even try messaging the moderators, but all you hear back is silence. It’s incredibly frustrating. It feels like you’re knocking on a door, but no one is home, and an automated voice just keeps telling you to go away.

    I’ve been there, and it’s a uniquely maddening experience. You start to wonder, “Is it me? Am I doing something wrong?”

    Most of the time, the answer is no. It’s not you. It’s the system.

    The Invisible Walls of Online Communities

    Most online spaces with user-generated content are fighting a constant, invisible war against spam and trolls. To manage this, they rely on automated systems and unwritten rules that can feel completely opaque to a newcomer.

    Think of it less like a public square and more like a private club with a bouncer who doesn’t speak. Here are the usual suspects when your post gets zapped.

    The “New Account” Penalty

    This is probably the biggest one. Many communities, especially on Reddit, have a built-in defense mechanism against spammers who create brand new accounts to flood the place with junk.

    So, they set up silent requirements:

    • Minimum Account Age: Your account might need to be a week, a month, or even several months old before you can create a post.
    • Minimum Karma/Points: “Karma” on Reddit is a reputation score. You get it when people upvote your posts and comments. Many subreddits require you to have a certain amount of karma before you can post. If you have zero, your post is automatically flagged and removed.

    The problem? Most communities don’t advertise these minimums because if they did, spammers would know the exact target they need to hit. It’s a necessary evil that unfortunately catches a lot of well-meaning newcomers in its net.

    The Overzealous Robot Butler (Automod)

    Almost every large community uses an automated moderator (like Reddit’s “AutoModerator”). This bot is programmed to scan every single post and comment for patterns that look like spam.

    It might remove your post for things like:

    • Using certain keywords: Mentioning “crypto,” “free,” or other spammy-sounding words can be an instant trigger.
    • Including a link: Posting a link as a brand new user is a classic spammer move. The bot doesn’t know your link is a helpful resource; it just sees a new account posting an external URL and assumes the worst.
    • Weird formatting: USING ALL CAPS or excessive emojis can sometimes get you flagged.

    This bot is just a robot. It doesn’t understand context or intent. It just follows its programming, and sometimes, its programming is a little too aggressive.

    So, What Can You Actually Do About It?

    Okay, so you’re stuck outside the club, and the bouncer is a robot. How do you get in? You have to stop acting like a stranger and start acting like a regular.

    1. Just Be a Member First.
      Don’t show up to the party and immediately try to get on the microphone. The best thing you can do is hang out for a bit. Read other posts. More importantly, leave helpful, insightful, or funny comments. Commenting is almost always allowed for new users. This does two things: it slowly builds up your karma/reputation, and it shows the system (and any humans watching) that you’re a real person here to engage, not a bot here to spam.

    2. Lurk and Learn the Vibe.
      Every community has its own culture and unwritten rules. Spend some time just observing. What kinds of posts do well? What’s the tone—is it serious, sarcastic, funny? Do people use a lot of jargon? Understanding the vibe is just as important as reading the official rules in the sidebar. You’ll start to see patterns in what gets celebrated and what gets ignored or removed.

    3. If You Message the Mods, Be Smart About It.
      Moderators are usually unpaid volunteers who are overwhelmed with notifications. A demanding or vague message is easy to ignore. If you’re sure you’ve built up some history and your post still got removed, a good message can work wonders.

      Keep it short, polite, and to the point.

      Bad message: “Why was my post deleted??? I didn’t break any rules!”

      Good message: “Hi there! My post titled ‘A question about X’ was removed automatically a few minutes ago. I’ve read through the community rules and I believe I followed them, but I’m new here, so I may have missed something. Could you let me know what I did wrong so I can fix it? Thanks for your time.”

    This shows you respect their time and are willing to learn. It changes the dynamic from a complaint to a polite request.

    It’s easy to feel personally rejected when your post gets deleted. But remember, it’s rarely personal. You’re just navigating a system designed to keep communities healthy, and sometimes the gates are a little too strong.

    Be patient, be a good community member, and eventually, you’ll be able to share that great idea. You just have to earn the key first.

  • Your Favorite ‘Chill’ YouTube Channel Might Be Run by a Robot

    Your Favorite ‘Chill’ YouTube Channel Might Be Run by a Robot

    Ever wonder how those 10-hour rain videos are made? Many ‘chill’ YouTube channels are automated. Let’s explore if that matters.

    You know those YouTube channels. The ones you put on when you need to focus, relax, or just fill the silence. Maybe it’s a 10-hour loop of gentle rain on a tin roof, a non-stop stream of lo-fi beats with a looping anime character, or just a crackling fireplace.

    They’re the perfect background noise for modern life. I use them all the time. I always pictured a dedicated creator behind them—someone who loves ambient sounds, records the rain, or curates the perfect, chill playlist.

    But I recently fell down a rabbit hole that made me rethink everything. It turns out, a huge number of these channels aren’t run by a person in the traditional sense. They’re automated.

    The Ghost in the Machine

    So, what does that even mean?

    It means a person might set up a system, but a script or a bot does most of the heavy lifting. These programs can automatically:

    • Find royalty-free or public domain audio clips (like rain, café sounds, or simple melodies).
    • Pair them with a simple, looping visual—a static image, a basic animation, or a stock video clip.
    • Render it all into a super long video (think 8, 10, or even 12 hours).
    • Even upload it to YouTube with a pre-written title and description.

    One person can potentially generate hundreds of these videos with minimal effort. It’s a content factory, churning out endless streams of “chill.” The goal isn’t necessarily artistic expression; it’s to capture search terms like “rain sounds for sleeping” or “music for studying.” It’s a volume game.

    When I first learned this, I felt a little weird. It was like finding out your favorite cozy café is actually a chain restaurant run by a giant corporation. The coffee tastes the same, but the feeling is a little different.

    But Does It Really Matter?

    I’ve been wrestling with this question. If the entire point of a video is to help me relax or focus, does it matter if it was made by a human or a script?

    On one hand, probably not. The rain still sounds like rain. The crackling fire is still cozy. The video delivers on its promise, and I get the benefit. It’s pure utility. If the end product is good, who cares about the process? It’s just a tool I’m using to change my environment.

    On the other hand, it feels… different. There’s an unspoken bond we have with creators. We appreciate the time, effort, and intention they put into their work. Finding out that the “creator” is an algorithm feels a little hollow. It shifts the content from being a piece of art, however simple, to being just a product. There’s no story behind it, no person on the other end.

    It removes the human element from something we use for a very human purpose—to feel calm, safe, or focused.

    A New Kind of Creator

    This isn’t just about rain videos. It’s a peek into the future of all content. AI and automation are becoming powerful tools. We’re seeing it with AI-generated art, articles written by algorithms, and music composed by machines.

    And maybe that’s okay. Maybe this is just the next evolution of creativity.

    Perhaps the “creator” isn’t the one painstakingly animating every frame, but the one clever enough to design the system that does it. It lowers the barrier to entry. You don’t need to be a musician or a video editor to create a channel that helps people. You just need a good idea and the right tools.

    I’m still not sure where I land. I’ll probably still put on a 10-hour thunderstorm video to fall asleep. But I’ll look at it differently. I’ll see it less as a handmade craft and more as a clever piece of engineering.

    The magic is a little different, but maybe it’s still there.

    What do you think? Does knowing your favorite ambient channel is automated change how you feel about it? Does the authenticity of the creator matter when it comes to background noise? It’s a strange new world, and I’m curious to know how other people feel about it.

  • So, You Want Smart Lights? First, Let’s Talk About the Neutral Wire.

    So, You Want Smart Lights? First, Let’s Talk About the Neutral Wire.

    Want to make your LED shop lights smart? Learn what a neutral wire is, why you need it for most smart switches, and what to do if you don’t have one.

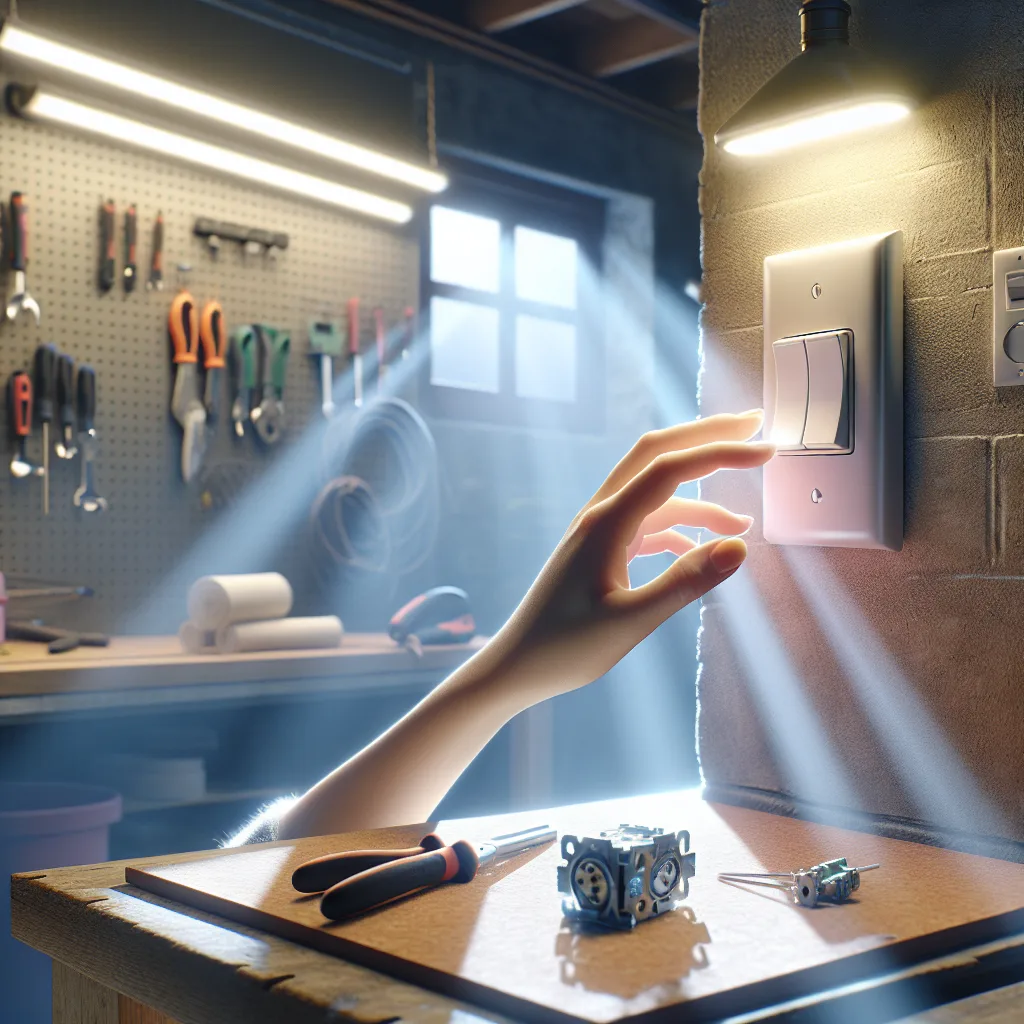
    So, I was staring at the fluorescent shop lights in my garage the other day. You know the ones—long, humming tubes that take a second to flicker to life. They do the job, but they feel… dumb. In a world of smart everything, my garage lighting felt like a relic. My first thought was, “How hard could it be to make these a little smarter?”

    I just wanted to be able to turn them on from my phone or maybe have them pop on automatically when I open the garage door. Simple stuff. But as I started looking into it, I ran into a wall. A wall that, electrically speaking, might be missing something important: a neutral wire.

    It turns out, this is a common roadblock for anyone wanting to upgrade to a smart switch. And it all comes down to a bit of wiring most of us never think about.

    What’s a Neutral Wire, Anyway?

    Let’s get this out of the way. I’m not an electrician, but I’ve done enough tinkering to learn the basics. Think of your home’s wiring like a simple loop. To get a light to turn on, electricity has to flow from the power source, through the switch, to the light, and then back to the source to complete the circle.

    • The hot wire brings the power in.
    • The neutral wire takes the power back out, completing the circuit.

    A standard “dumb” switch is just a gate on the hot wire. When you flip it, you’re either opening or closing that gate. It doesn’t need its own continuous power source to work.

    But a smart switch is different. It’s a tiny computer. It has a little radio inside to talk to your Wi-Fi or smart home hub. And just like any computer, it needs a constant, tiny trickle of power to stay on and listen for your commands. It gets this power by tapping into the hot wire and sending it back through the neutral wire.

    Without that neutral wire, the smart switch has no way to complete its own circuit and stay powered on.

    How to Tell If You Have a Neutral Wire

    So, how do you know if you’re good to go? The only way to be sure is to take a look inside the switch box.

    First, a very important warning: Turn off the power at your circuit breaker before you touch anything inside a switch box. Seriously. If you’re not 100% comfortable with this, call an electrician. It’s not worth the risk.

    Once the power is off, you can unscrew the faceplate and pull the switch out from the wall. Here’s what you might see:

    • If you have a neutral wire: You’ll likely see a bundle of two or more white wires tucked away in the back of the box, connected with a wire nut. They probably aren’t even connected to your current switch. This is the best-case scenario.
    • If you don’t have a neutral wire: You’ll probably only see two wires connected to your switch (one hot, one going to the light) and a bare copper or green wire, which is the ground.

    In many older homes, running a neutral wire to every switch box wasn’t common practice. It was seen as saving copper and money. So if your house is a few decades old, you might be out of luck.

    Okay, So What Are My Options?

    Let’s say you’ve confirmed you have that lovely bundle of white neutral wires. Great! You can buy just about any smart switch you want. Installation is usually straightforward: connect the hot, the load (the wire going to the light), the neutral, and the ground. Follow the instructions, and you’ll have smart lights in no time.

    But what if you’re staring at a box with no neutral? Don’t despair. You still have a few options.

    1. “No-Neutral” Smart Switches: Some companies make smart switches specifically designed for this problem. They work by sending a tiny amount of current through the light fixture itself to power the switch. The catch? They don’t always play nice with low-power LED bulbs. You might get some flickering or find that the lights glow faintly even when they’re “off.” Be sure to check the compatibility with your specific LED tubes.

    2. Smart Bulbs or Tubes: This is often the easiest workaround. Instead of making the switch smart, you make the light itself smart. You can now find smart LED tubes that can replace your old fluorescent ones. You just pop them in, leave the old wall switch on, and control them entirely from an app or a voice assistant. The downside is they can be more expensive, and if someone flips the physical switch off, your smart control is cut off.

    3. Smart Plugs (For Plug-In Lights): If your shop lights plug into an outlet rather than being hardwired, your job is incredibly simple. Just get a smart plug. Plug the light into it, plug it into the wall, and you’re done. Instant smarts.

    For me, I got lucky. After shutting off the breaker and pulling out the switch, I found that tell-tale bundle of white wires tucked in the back. A quick installation later, and my “dumb” garage lights were officially smart. It felt like a huge win from such a small project. It’s not about revolutionizing my life; it’s just about making one little thing work a little bit better. And sometimes, that’s the most satisfying upgrade of all.

  • That Annoying 3-Second Delay: Solving the Mystery of a Faulty Gate Lock

    That Annoying 3-Second Delay: Solving the Mystery of a Faulty Gate Lock

    Struggling with a delayed electric gate lock? Learn why it happens and how a small, dedicated control board can solve common wiring and timing issues.

    I found myself in a familiar situation the other day, staring at a mess of wires and a control board, feeling that classic mix of determination and slight confusion. A client needed an electric lock installed on their gate. Simple enough, right? But as anyone who’s worked with gate systems knows, “simple” can get complicated fast.

    Someone else had already done the initial install, including a wired exit sensor. But when I went to wire in the new electric lock, I hit a snag. Every time I tested it, there was this odd, three-second delay before the lock would engage. It wasn’t right, and I wasn’t about to leave a client with a half-finished, buggy setup.

    The kit for the new lock came with its own small control board, which I hadn’t installed yet. I had a feeling the answer was tucked away in that little piece of hardware, but I decided to pause and regroup. There’s no shame in stepping back to make sure you get it right.

    The Mystery of the Delayed Gate Lock

    So, what causes a delay like that? When you’re dealing with gate openers, exit sensors, and electric locks, you’re essentially getting three different systems to talk to each other. The gate opener has its own brain (the main control board), the exit sensor is a trigger, and the electric lock is the final action.

    Often, these delays are programmed in on purpose. For instance, some systems have a “pre-warning” setting that creates a pause before the gate starts moving. But a three-second delay for the lock itself? That felt like a wiring issue or a compatibility problem between the components.

    The exit sensor’s job is to tell the gate opener, “Hey, a car is here, open up!” When you add an electric lock, you’re adding another step. The command now has to be, “Unlock the gate first, then open it.” If these signals get crossed or misinterpreted, you can end up with weird timing issues.

    Untangling the Wires: What I Learned

    After a bit of thinking and looking over the components, I realized the small, extra control board that came with the lock was the key. These little boards are often designed to act as a go-between.

    Here’s a breakdown of what I figured out:

    • The Problem: I had likely wired the lock directly into the gate opener’s main board. While this can sometimes work, the main board wasn’t designed to manage the specific timing the electric lock required. It was trying its best but causing that awkward delay.
    • The Solution: The small, dedicated control board that came with the lock was built for this exact purpose. Its job is to manage the lock exclusively. You wire the lock to this board, and then you wire this board to the main gate opener board.
    • How it Works: This setup creates a clear chain of command.
      1. The exit sensor tells the main gate board to open.
      2. The main board tells the small lock control board, “It’s time.”
      3. The small board immediately disengages the electric lock.
      4. The main board then proceeds to open the gate.

    By isolating the lock’s function to its own dedicated controller, you remove any timing conflicts. The small board handles the lock, and the big board handles the gate. Everyone’s happy.

    A Few Tips If You Face a Similar Problem

    If you ever find yourself in a similar spot, here’s my advice:

    1. Read the Manual (Seriously): I know, I know. But the instructions for the lock itself, not just the gate opener, usually have a diagram for this exact scenario.
    2. Use the Included Parts: If a component comes with its own little control board, there’s a good reason. The manufacturer put it in the box to solve a problem they already anticipated. Don’t skip it to save time—it’ll probably cost you more time in the long run.
    3. Think in Steps: Mentally walk through the sequence of events. What needs to happen first? The unlock. What happens second? The gate opening. If the wiring doesn’t follow that logic, it’s probably incorrect.
    4. Don’t Be Afraid to Pause: I didn’t finish the install that day. And that’s okay. It’s better to leave a job temporarily incomplete than to leave it done wrong. It gives you time to clear your head, do a little research, and come back with a solution that works perfectly.

    In the end, it’s all about getting the components to communicate correctly. That little extra control board was the translator I needed. Once I went back and wired it in, the delay vanished, and the gate lock worked exactly as it should. It was a good reminder that sometimes, the smallest parts make the biggest difference.

  • Can You Remotely Open a Pet Door From Your Phone?

    Can You Remotely Open a Pet Door From Your Phone?

    Looking for a pet door you can open remotely in an emergency? We explore the options, from smart-unlock doors to DIY solutions for ultimate peace of mind.

    I was thinking about a really specific pet safety question the other day. It started with a unique scenario: imagine you have an indoor-only cat, but you live on a boat. You’d want to keep her safely inside, of course. But what if there was an emergency—a fire, a sudden leak—and you weren’t there? How could you give her a way to escape?

    You’d want a pet door you could open from your phone, from anywhere in the world. Just tap a button and give your pet a chance.

    It sounds simple, right? We have smart thermostats, smart lights, and smart everything else. A remotely controlled pet door should be easy to find. But it turns out, it’s not.

    The Search for a Truly Remote Pet Door

    When you first start looking, you’ll find plenty of “smart” pet doors. They generally fall into two camps:

    1. Microchip or RFID Doors: These are brilliant. They read your pet’s existing microchip or a special tag on their collar. The door only unlocks for your pet, keeping raccoons, strays, and your neighbor’s curious cat out of your kitchen.
    2. Timer-Based Doors: These let you set a schedule. You can program the door to lock and unlock at certain times of the day, which is perfect for creating a routine for a dog that has a fenced-in yard.

    But neither of these solves the emergency problem. They’re proactive, designed for daily routines. What we’re looking for is something reactive—a door that stays locked until you, the human, decide it needs to be open right now.

    So, why is a simple “open on command” feature so hard to find? The most likely reasons are security and liability. A door that can be opened over Wi-Fi is, technically, a potential vulnerability for your home. Manufacturers are probably hesitant to create a product that could be exploited to let an intruder in, however unlikely. There’s also the risk of accidental opening, which could put a pet in danger in a non-emergency situation.

    The Best Off-the-Shelf Solution: Remote Unlocking

    After digging around, the closest thing to a solution is a door that offers remote unlocking.

    Products like the SureFlap Microchip Pet Door Connect (and others in this category) are a great example. By itself, it’s a microchip-activated door. But when you add the “Hub” accessory, you connect it to your home Wi-Fi.

    This doesn’t let you swing the door open from your phone. Instead, it lets you change the door’s permissions remotely.

    Here’s how it works for our emergency scenario:
    * Default State: You set the door to be completely locked 24/7. Your pet can’t get in or out.
    * The App: Using the smartphone app, you can see the door’s status.
    * Emergency Action: If you need to let your pet out, you open the app and change the setting from “Locked” to “Unlocked.”

    The door is now unlocked, and your pet, sensing danger, can push through it to get to safety. Once the emergency has passed (or if you change your mind), you can remotely lock it again.

    It’s not a magic, self-opening door, but it accomplishes the core mission: giving you remote control over your pet’s ability to exit in a crisis. You’re essentially flipping the deadbolt from miles away.

    For the Tinkerers: The DIY Smart Home Route

    If you’re comfortable with a bit of tech and want more direct control, you could build your own solution. This path offers the most flexibility but requires some know-how.

    The idea is to connect a motorized, electronic pet door—the kind that slides up automatically—to a smart home relay.

    1. Get a Motorized Door: Find a standard electronic pet door that opens with a motor. These are more common for larger dogs but come in various sizes.
    2. Add a Smart Relay: Wire a smart relay switch (like those from Shelly, Sonoff, or Zooz) into the door’s motor control. This tiny device connects to your Wi-Fi.
    3. Connect to a Hub: Using an app like SmartThings or a system like Home Assistant, you can now trigger that relay from your phone.

    With this setup, you could create a button on your phone that says “Open Pet Door.” Tapping it would send a signal to the relay, which would activate the motor and physically open the door. You could even integrate it with smoke alarms, so if your smart smoke detector goes off, the pet door opens automatically.

    This is a more complex setup, for sure. But it’s the only way to get a true “push a button, door opens” experience.

    Peace of Mind Is the Goal

    Whether it’s for a cat on a boat or a dog in a city apartment, the desire is the same. We want to keep our pets safe, even when we can’t be there.

    While the perfect, one-click remote pet door isn’t quite a mainstream product yet, we have options. The “remote unlock” models offer a simple, reliable solution that works for most people. And for those who like a project, the DIY route provides ultimate control.

    Either way, it’s good to know that with a little research and the right tech, we can add one more layer of safety for our furry family members.

  • La “Constancia de Manejo” en México: ¿Realmente Sirve Para Sacar Tu Licencia?

    La “Constancia de Manejo” en México: ¿Realmente Sirve Para Sacar Tu Licencia?

    Te explicamos cómo funciona la constancia de manejo de las autoescuelas en México y si te ayuda a evitar el examen práctico para obtener tu licencia.

    El Gran Misterio: ¿Para Qué Sirve la “Constancia de Manejo”?

    Terminas tus clases en la escuela de manejo. Sientes esa mezcla de nervios y emoción. Te entregan un papel, una “Constancia de Manejo”, y te felicitan. La guardas en tu mochila y, de camino a casa, te surge la gran duda: y esto, ¿para qué me sirve exactamente?

    Si te sientes así, no estás solo. Es una de las preguntas más comunes para quienes están aprendiendo a manejar en México. ¿Ese documento es un pase mágico para obtener la licencia? ¿Es solo un diploma bonito para colgar en la pared?

    Vamos a aclarar esto de una vez por todas, como si estuviéramos tomándonos un café.

    ¿Qué es Exactamente esa Famosa Constancia?

    Primero lo primero. La constancia de manejo no es tu licencia de conducir.

    Piénsalo de esta forma: es un certificado oficial de la escuela que confirma que completaste su programa. Demuestra que recibiste un número específico de horas de clases teóricas (sobre el reglamento de tránsito) y, lo más importante, de clases prácticas al volante.

    Pero aquí viene el detalle clave que lo cambia todo: su verdadera utilidad depende de si tu escuela de manejo está certificada por la Secretaría de Movilidad (SEMOVI) o la dependencia de tránsito de tu estado.

    La Verdad: ¿Te Ayuda a Sacar la Licencia?

    Sí, y mucho. Pero con una condición.

    En muchos estados de México, si presentas una constancia de una escuela de manejo certificada, puedes saltarte el examen práctico de manejo al momento de tramitar tu licencia por primera vez.

    Así es. Te ahorras los nervios de tener a un evaluador a tu lado, juzgando cómo te estacionas en paralelo o cómo haces los cambios de carril. Simplemente entregas tu constancia junto con el resto de tus papeles (identificación, comprobante de domicilio, pago de derechos) y, después de pasar el examen de la vista y el examen teórico de conocimientos, el proceso avanza.

    Ojo: esto no es una regla universal en todo el país. Las normativas pueden variar un poco entre estados. Por eso, antes de inscribirte a una escuela, tu primera pregunta debería ser:

    “¿Su escuela está certificada por la autoridad de tránsito local? Y, con su constancia, ¿puedo exentar el examen práctico para la licencia?”

    Si la respuesta es “sí” a ambas preguntas, has encontrado un buen lugar. Si dudan o te dicen que no, esa constancia podría no ser más que un simple reconocimiento de la escuela, sin validez oficial para el trámite.

    Entonces, ¿Vale la Pena la Inversión?

    Ahora la pregunta del millón, sobre todo si buscas la opción más económica. ¿Conviene pagar un curso completo solo por obtener ese papel?

    Mi opinión, especialmente si tienes poca experiencia al volante (como muchos a los 18 o 19 años), es que sí, vale totalmente la pena.

    Pero no solo por la constancia. Piénsalo así:

    • Confianza real: Una buena escuela no te enseña a pasar un examen, te enseña a manejar. Te da las herramientas para sentirte seguro en el tráfico, para reaccionar ante imprevistos y para dominar el auto. Eso no tiene precio.
    • Menos estrés: El proceso de la licencia ya es bastante burocrático. Eliminar la presión del examen práctico es una gran ventaja. Es una ruta más tranquila y directa.
    • Buenos hábitos desde cero: Aprender con un instructor profesional evita que adquieras los malos hábitos o “mañas” que a veces se pasan de familiar a familiar.

    Claro, si ya sabes manejar bien porque alguien te enseñó y solo necesitas el plástico, quizás sientas que el curso es un gasto extra. Pero si eres nuevo en esto, ver la escuela de manejo como una inversión en tu seguridad es la mejor forma de abordarlo. La constancia que te permite saltarte el examen es, en realidad, un increíble bono adicional.

    En Resumen: Tu Plan de Acción

    Si estás empezando desde cero, aquí tienes una ruta sencilla:

    1. Investiga escuelas de manejo en tu ciudad.
    2. Llama y pregunta directamente si están certificadas y si su constancia te exenta del examen práctico.
    3. Inscríbete y aprovecha cada clase. Pregunta todo, no te quedes con dudas.
    4. Al terminar, recibe tu constancia y asegúrate de que tenga todos los sellos y firmas necesarios.
    5. Agenda tu cita para la licencia, reúne tus documentos (incluida la constancia) y sigue el proceso.

    Al final del día, el objetivo no es solo tener una licencia en la cartera. Es convertirte en un conductor que se siente capaz y seguro en el camino. La escuela de manejo es el mejor primer paso para lograrlo, y esa “constancia” es la llave que te facilita bastante el último trámite.

    ¡Mucha suerte y conduce con cuidado!

  • I Went Down the Home Security Rabbit Hole. Here’s What I Found.

    I Went Down the Home Security Rabbit Hole. Here’s What I Found.

    Confused by ADT, Ring, and Nest? This simple guide breaks down the difference between DIY and pro security to help you choose the right system for your home.

    I went down the home security rabbit hole so you don’t have to.

    It started with a simple thought: “Maybe we should get a security system.” An hour later, I was drowning in a sea of acronyms, brand names, and conflicting advice. ADT, Ring, Nest, SimpliSafe, Vivint… my head was spinning. It felt like you needed a security clearance just to figure out how to secure your own home.

    But after a lot of digging, I realized something important. The choice isn’t as complicated as it seems. It really boils down to one fundamental question, and once you answer it, the path forward gets a whole lot clearer.

    So, let’s talk about it, friend to friend. No sales pitches, no hype.

    The Big Question: Do You Want to DIY or Have It Done for You?

    This is it. This is the fork in the road. Nearly every security system falls into one of two camps:

    • DIY (Do-It-Yourself): This is the modern approach, popularized by brands like Ring and SimpliSafe. You buy a starter kit, they ship it to you in a box, and you set it up yourself. Think sticking sensors to doors and connecting a hub to your Wi-Fi.
    • Professional Install: This is the traditional model, dominated by companies like ADT. You sign up, they send a technician to your house to install everything, and they show you how it works.

    There’s no right or wrong answer here, just what’s right for you.

    DIY systems are great if:

    • You’re on a budget. The upfront cost is usually much lower.
    • You’re a renter. You can easily pack it up and take it with you when you move.
    • You like control. You decide where every sensor and camera goes.
    • You hate contracts. Most DIY systems offer optional, month-to-month professional monitoring. You can turn it on or off as you please.

    Professional systems might be better if:

    • You want it to be completely hands-off. You’re happy to pay for someone to handle the entire setup.
    • You have a larger home. A professional can help identify weak spots you might miss.
    • You prefer a long-term service relationship. These systems are almost always tied to a multi-year contract for professional monitoring.

    Once I figured this out, the big brand names started making more sense. They weren’t just a random list; they were players on two different teams.

    A Quick Look at the Main Players

    Let’s break down the brands you’ve probably heard of.

    ADT: The Old Guard

    You know the blue octagon. ADT is the Coca-Cola of home security. Their entire model is built on professional service. You call them, they come to you.

    The main benefit is peace of mind. You sign a contract (usually for 36 months), and they take care of everything. The monitoring is top-notch, and they’ve been doing this for a very, very long time. The downside? It’s often the most expensive option, and that long-term contract can feel restrictive if you’re used to a subscription-based world.

    Ring: The Scrappy Disruptor

    Ring started with a doorbell and basically built a security empire from there. It is the king of DIY.

    You can start with a single $60 camera and slowly build out a full system of window sensors, motion detectors, and outdoor lights. The genius of Ring is its app and its affordable monitoring. For a small monthly fee, you get 24/7 professional monitoring, which is a steal. It’s perfect for the person who wants to start small and customize their setup over time.

    Google Nest: The Smart Home Brain

    Nest (which is now part of Google) is less of a pure security company and more of a smart home company. Their products—from the famous thermostat to their cameras and doorbells—are beautifully designed and work seamlessly within the Google ecosystem.

    If you already use Google Assistant and have Nest Hubs around your house, their cameras and doorbell are a natural fit. While they discontinued their all-in-one “Nest Secure” system, they still offer professional monitoring for their cameras through partners like Brinks. Think of Nest as the choice for people who want their security to be just one integrated piece of a larger smart home puzzle.

    So, How Do You Choose?

    Forget the noise. Just ask yourself these simple questions:

    1. What’s my budget like? Am I okay with a higher upfront cost and a monthly contract (Pro-Install), or do I want to buy gear as I go (DIY)?
    2. Am I a renter or a homeowner? If you’re renting, a portable DIY system is almost always the better choice.
    3. How “smart” do I want my home to be? Do I just want a simple alarm, or do I want a system that integrates with my speakers, lights, and thermostat?
    4. How much work do I want to do? Am I cool with spending an hour setting things up, or would I rather just pay someone to make it all work?

    Answering these will point you directly to the right category. From there, you’re just picking a brand, not trying to solve a giant puzzle. It’s not about finding the “best” system. It’s about finding the one that fits your life, your home, and your budget. And that’s a choice you can definitely make.

  • Your New Sliding Gate Feels Dumb, Doesn’t It? Here’s How to Fix It.

    Your New Sliding Gate Feels Dumb, Doesn’t It? Here’s How to Fix It.

    Struggling to connect your new sliding gate to Wi-Fi or your car’s HomeLink system? Our guide explains how to make your electric gate smart.

    So you got a new automatic sliding gate. Awesome. It’s a serious upgrade for your home, and for the first few days, you probably felt pretty cool clicking that little remote.

    But then, the novelty wears off and the questions start.

    Why do I have to use this clunky remote? Why can’t I just use my phone? And the biggest one of all: why in the world won’t my car’s built-in garage door opener button work with this brand-new gate?

    If you’re asking these questions, you’re not alone. I’ve been there. You have this great piece of hardware, but it feels completely disconnected from the rest of your modern life. The good news is, you can absolutely fix this. It’s easier than you think.

    First, Let’s Get Your Gate on Wi-Fi

    Most automatic gates are pretty simple. The “brain” is a control board that’s designed to do one thing: open and close when it gets a signal from its own specific remote. It usually doesn’t come with Wi-Fi built right in.

    But here’s the secret: that control board almost always has a set of simple terminals for a wired push-button, just like a doorbell. It’s there for installing a keypad or an intercom.

    This is our way in.

    We can add a small, inexpensive “smart relay” or “Wi-Fi module.” Think of it as a tiny, smart finger that you can control from your phone. You wire this module to the push-button terminals on your gate’s control board. When you tap a button in an app (like Smart Life, Tuya, or a brand-specific one), the module closes a circuit for a second—it metaphorically “pushes the button” for you.

    And just like that, your gate is on Wi-Fi.

    You can now open or close it from anywhere in the world. You can get notifications. You can even give access to family members or let a delivery driver in while you’re at your desk.

    Which module should you get?
    There are tons of them out there. Brands like Sonoff and Shelly make popular universal Wi-Fi relays that are perfect for this. Search for a “Wi-Fi gate opener” or “smart garage door opener” (they work the same way), and you’ll find plenty of options. Just make sure it’s compatible with your gate’s voltage and has “dry contact” or “relay” mode.

    Okay, But What About My Car’s Button?

    This is the one that frustrates everyone. You’d think a 2024 car could talk to a 2024 gate opener. But it’s often not the case.

    The problem is that your car’s built-in buttons, usually part of the HomeLink system, aren’t universal remotes. They are learners. They are designed to learn the specific radio frequency and rolling code from your original remote.

    Sometimes, the “language” your gate opener speaks is just too new, too old, or too obscure for HomeLink to learn. It’s like trying to teach Spanish to someone who only has a French-to-English dictionary. It just doesn’t work.

    So, you can sit in your car pressing buttons for an hour, but if they aren’t compatible, they’ll never sync up.

    The All-in-One Fix: The Bridge

    This brings us to the real solution, the one that solves both the Wi-Fi and the car problem at the same time.

    You don’t need two separate gadgets. What you need is a smart gate opener kit that comes with its own HomeLink-compatible remote.

    Here’s how it works:
    1. You buy a Wi-Fi module kit that includes both the smart relay and one or two of its own physical remotes.
    2. You wire the smart relay to your gate’s control board, just like we talked about before. This gets your gate on your phone.
    3. Then, you take the new remote that came with your kit and program your car’s HomeLink system to that.

    Problem solved.

    The Wi-Fi module acts as a bridge. Your car talks to the new remote (via HomeLink), which tells the Wi-Fi module to open the gate. And your phone talks to the Wi-Fi module directly. Everything works.

    It’s a simple, elegant solution that connects all the dots. You get the convenience of opening the gate from your app, and the seamless experience of pulling up to your driveway and opening the gate with the button that’s already built into your car.

    It’s the way it should have been from the start. It might take a little bit of research and a screwdriver to install, but the payoff in convenience is huge. You’ll never look at that old clunky remote again.

  • So, You’ve Outgrown Your SmartThings Hub. What’s Next?

    So, You’ve Outgrown Your SmartThings Hub. What’s Next?

    Feeling stuck with SmartThings? This guide explores user-friendly hub alternatives like Hubitat and Homey Pro for more power and local control.

    It’s a familiar story for a lot of us who get into the smart home world. You start with something friendly and accessible, like the SmartThings hub. It’s a fantastic entry point. It connects to a bunch of devices, the app is pretty straightforward, and for a while, it does everything you need it to.

    But then, you start to bump into its limits.

    Maybe you want your automations to run instantly, without a trip to the cloud and back. Or perhaps the news that Samsung sold the hardware side of the business to Aeotec a while back has you feeling a little uncertain about the future. Or maybe, just maybe, you’ve collected a small army of devices—lights from Philips Hue, speakers from Sonos, maybe a few quirky gadgets from SwitchBot—and you feel like you need a more powerful conductor for your smart home orchestra.

    If you’re nodding along, you’re in the right place. You’ve graduated from SmartThings 101, and you’re ready for the next level. The good news is, you don’t need to be a coder or a network engineer to make the leap.

    Let’s talk about what’s next.

    Why Even Bother Moving?

    Before we get into the alternatives, let’s be clear: this isn’t about bashing SmartThings. It got millions of people started, and that’s a good thing. But the primary reason people look for an alternative comes down to one key concept: local control.

    SmartThings relies heavily on the cloud. If your internet goes down, many of your automations might stop working. A hub with local control, on the other hand, does all the processing right inside your home. This means your lights will still turn on when you walk into a room, even if your Wi-Fi is on the fritz. It’s faster, more reliable, and more private.

    So, what hubs give you that local power without asking you to get a degree in computer science?

    Option 1: Hubitat Elevation — The Local Powerhouse

    If you ask around about the most logical next step after SmartThings, you’ll hear one name over and over: Hubitat Elevation.

    Think of Hubitat as SmartThings’ more powerful, slightly more technical cousin. It was actually created by a group of former SmartThings power users who wanted more control.

    Why you might like it:

    • Local Control is Everything: This is Hubitat’s core philosophy. Nearly everything runs locally. The speed difference is noticeable. Automations are immediate.
    • Powerful Automations: The built-in automation tool, Rule Machine, is incredibly powerful. If you can dream it, you can probably build an automation for it without writing a single line of code.
    • Great Device Support: Like SmartThings, it has both Z-Wave and Zigbee radios built-in, so it will work with the vast majority of your existing sensors and switches.

    The Catch:
    While it’s not “coding,” Hubitat does have a steeper learning curve. The interface is more functional than beautiful. You’ll spend a bit more time in menus and settings to get things just right. But for many, the trade-off for speed and reliability is well worth it. It’s the perfect choice for the enthusiast who wants to tinker a bit more without opening a command prompt.

    Option 2: Homey Pro — The Beautiful All-in-One

    If your priority is a beautiful user experience combined with broad device support, then the Homey Pro is worth a serious look.

    Where Hubitat is purely functional, Homey Pro puts a lot of effort into design and user-friendliness. Its app is gorgeous, and its approach to automation, called “Flows,” is very visual and intuitive.

    Why you might like it:

    • Incredible Connectivity: Homey Pro is the Swiss Army knife of smart home hubs. It doesn’t just have Z-Wave and Zigbee; it also has built-in Wi-Fi, Bluetooth, Infrared, and 433MHz radios. That means it can control your Sonos speakers, your TV, your smart thermostat, and that random remote-controlled gadget you bought.
    • Polished Experience: The mobile and web apps are slick. Creating automations is a simple drag-and-drop process that feels less intimidating than Hubitat’s Rule Machine.
    • It Just Works: It’s designed to be a premium, plug-and-play experience. For many devices, the setup is incredibly simple.

    The Catch:
    The main drawback is the price. The Homey Pro is a premium product with a premium price tag. It’s a significant investment compared to other options. But if you value a seamless experience and want a single box to control almost everything, it’s a top contender.

    A Quick Word on Home Assistant

    You can’t talk about smart home hubs without mentioning Home Assistant. This is the ultimate DIY, open-source platform. The power and customization are practically infinite.

    However, you mentioned you’re not a coder and want something plug-and-play. While Home Assistant has become MUCH more user-friendly over the years (especially with options like the Home Assistant Green hub), it still requires a willingness to learn, troubleshoot, and sometimes dive into configuration files.

    Think of it this way: Hubitat and Homey are like buying a great, reliable car. Home Assistant is like being given a massive box of high-performance car parts and a detailed manual. You can build the car of your dreams, but you have to build it yourself.

    Making the Move

    Once you pick a new hub, the process isn’t just plugging it in. For your Z-Wave devices, you’ll need to “exclude” them from your SmartThings hub before you can “include” them on your new one. It’s like un-pairing a Bluetooth headphone before you can pair it to a new phone.

    My advice? Don’t try to move everything at once. Start with one or two non-essential devices, like a lamp or a single motion sensor. Get a feel for the new system, learn how its automation tools work, and then slowly migrate everything else over.

    Leaving the platform you started with can feel daunting, but it’s a natural step in the journey. You’re not just looking for a new hub; you’re building a smarter, more reliable, and more personal home. And that’s a pretty exciting upgrade.

  • My $6 Smart Lighting Project: An Adventure with Alibaba Electronics

    My $6 Smart Lighting Project: An Adventure with Alibaba Electronics

    Discover a budget-friendly way to build custom smart lighting using cheap Alibaba LED controllers and open-source firmware for Home Assistant. A DIY guide.

    I love smart lighting. The ability to change the color and brightness of a room from my phone or with my voice feels like living in the future. What I don’t love is the price. A few bulbs or light strips from the big brands can easily cost hundreds of dollars.

    So, I started wondering if there was a cheaper way. I’m pretty comfortable with tinkering, so my goal wasn’t just to find a bargain, but to find something I could truly customize and make my own. This led me down the rabbit hole of international shopping sites like Alibaba.

    The $6 Experiment

    After some digging, I found what I was looking for: a generic, unbranded WiFi LED strip controller. On paper, it was perfect. It was based on an ESP chip, which is a favorite in the DIY community, and it promised support for MQTT, a communication protocol that’s perfect for smart home hubs.

    The best part? A single sample unit cost just $6, including shipping.

    I figured, for six bucks, what did I have to lose? I placed the order and prepared to wait.

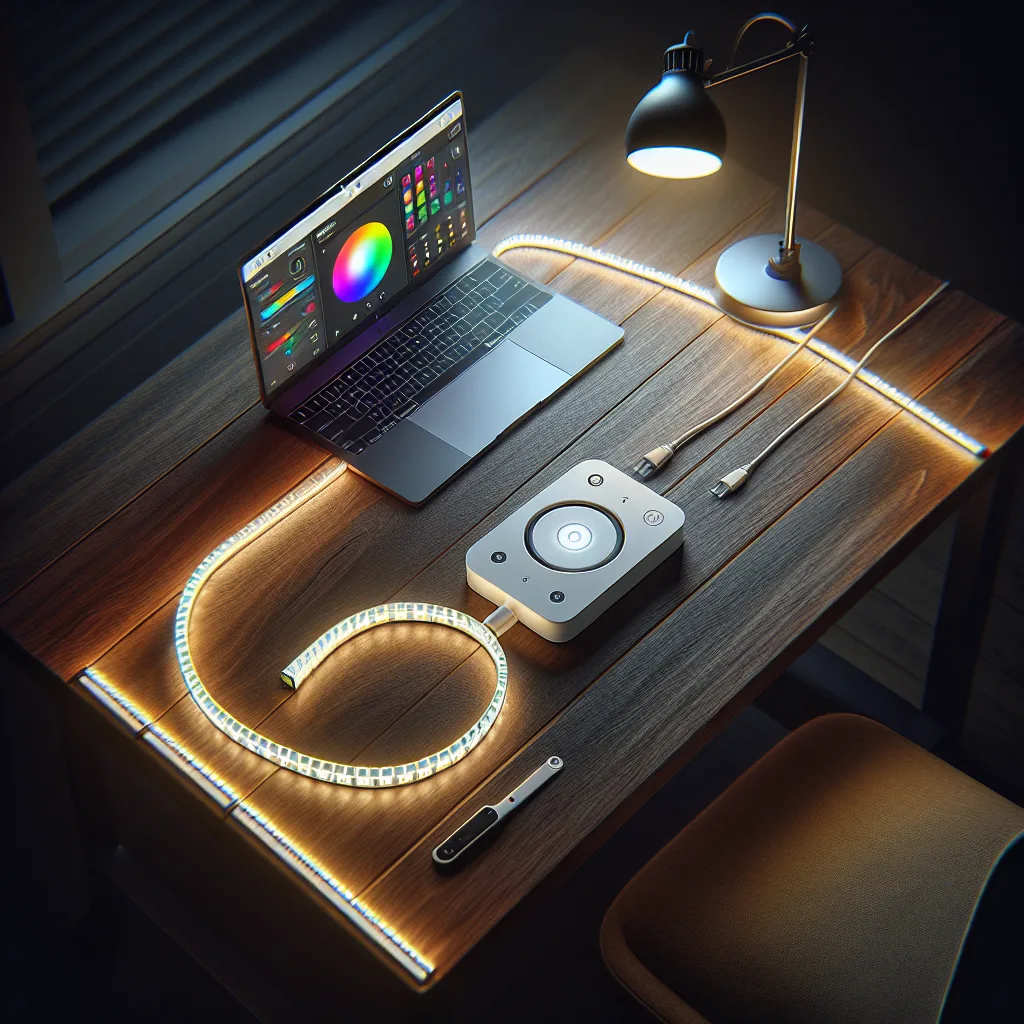
    Seventeen days later, a small package arrived. Inside was a simple white plastic module. It had a micro-USB port for power, an IR sensor, a physical button for basic controls, and a connector for an LED strip. It was plain, unassuming, and exactly what I expected. The hardware felt solid enough for what it was.

    Bringing It to Life with Open-Source Firmware

    Here’s where the real fun began. The controller’s stock firmware was probably fine, but I wanted to unlock its full potential. The magic of these generic ESP-based devices is that you can often flash them with powerful, open-source firmware.

    My weapon of choice was WLED. It’s an incredible piece of software for controlling addressable LED strips, packed with effects, and designed to integrate seamlessly with home automation platforms.

    The process involved connecting the controller to my computer, firing up a simple flashing tool, and loading the WLED software onto the chip. It sounds technical, but the community has made it surprisingly straightforward. Within about 15 minutes, the generic controller was running a powerful, feature-rich firmware that I controlled.

    The final step was connecting it to my smart home hub, Home Assistant. Because WLED has native Home Assistant integration, it was instantly recognized. No complex configuration, no fighting with settings. It just worked.

    I connected an RGBW LED strip I had, and the result was stunning. The control was instantaneous—no lag at all. I could set any color, any brightness, and trigger wild effects, all from my central dashboard. The experiment was a massive success.

    From One to Twenty

    I was so impressed with the performance of my $6 controller that I decided to go all-in. I went back to the seller and ordered twenty more, this time at a bulk price that worked out to about $4 per unit. Now I have a stack of these little guys ready for any future project that comes to mind—under-cabinet lighting, accent lighting behind the TV, you name it.

    But Let’s Be Honest: Is It Safe?

    This is the big question, isn’t it? When you buy ultra-cheap, unbranded electronics from overseas, you’re making a trade-off.

    These devices don’t come with the fancy FCC or CE certifications you see on products sold in big box stores. That means they haven’t undergone the rigorous independent testing for safety and interference that branded products do. Power safety is a real consideration, especially with anything you’re plugging into the wall. I’m powering mine with a reliable, certified USB power adapter, not a cheap, unknown one.

    There’s also the question of long-term reliability. Will the firmware I installed still be compatible in five years? Will the hardware itself hold up? Honestly, it’s hard to say.

    For me, this is a calculated risk I’m willing to take for a hobby project. I’m comfortable with the technology and I understand the potential pitfalls. It’s an amazing solution if you’re a DIYer who likes to tinker and wants ultimate control for a low price.

    But it’s not a solution I’d recommend to a friend who just wants to plug something in and have it work. For that, the premium brands still offer peace of mind and simplicity that’s worth the cost. For the rest of us? The adventure is half the fun.