Category: Uncategorized

  • How I Tamed My Outdoor Floodlights (Without a Major Rewiring)

    How I Tamed My Outdoor Floodlights (Without a Major Rewiring)

    Tired of harsh outdoor floodlights ruining your patio vibe? Learn the simple way to control your hardwired lights using a smart switch you already know.

    I love my smart lights. Bit by bit, I’ve been swapping out the old, “dumb” switches in my house for smart ones. It’s just… better. Dimming the living room lights from the couch for movie night? Perfect. Having the kitchen lights slowly brighten up in the morning? A much nicer way to wake up.

    But for a long time, my outdoor floodlights were the odd ones out.

    They were hardwired, old-school, and frankly, a bit of a pain. They were either on or off, and the switch was tucked away in a spot I always forgot about. This became a real headache whenever we wanted to have people over for a backyard party or just a quiet evening on the patio. Nothing kills the vibe faster than a security floodlight blasting your guests with the intensity of a thousand suns.

    I just wanted a simple thing: the ability to turn them off (or maybe even dim them) without a major rewiring project. It turns out, it’s not that hard to do.

    The Problem with “Dumb” Outdoor Lights

    Most homes have them. Those super-bright floodlights are great for security, but they’re terrible for atmosphere. They’re usually installed once and then forgotten, wired directly into your home’s electrical system with a basic switch somewhere inside.

    My goal was simple:
    * Control the lights from my phone or a convenient switch.
    * Turn them off completely for parties.
    * Ideally, dim them for a softer, more welcoming glow.
    * And please, no more new hubs. My router area is crowded enough.

    I already had a bunch of Lutron Caséta switches inside, and I really wanted to stick with that system. It’s reliable, the app is clean, and I didn’t want to juggle multiple apps to control different lights. The thought of adding a Zigbee hub or some other random controller just for one set of lights felt like a step backward.

    The Simple Fix: A Smart Switch

    The easiest solution is often the best one. For hardwired floodlights, the answer is usually to replace the switch that controls them with a smart one.

    If you’re in the Lutron ecosystem like me, the Lutron Caséta Outdoor Smart Plug is a fantastic piece of hardware. But wait, my lights are hardwired, not plugged in, right?

    Well, many “hardwired” floodlights are actually wired into a junction box. You can have an electrician (or do it yourself if you’re comfortable and know what you’re doing) put an outlet on that junction box. Then you can plug your lights into the outdoor smart plug.

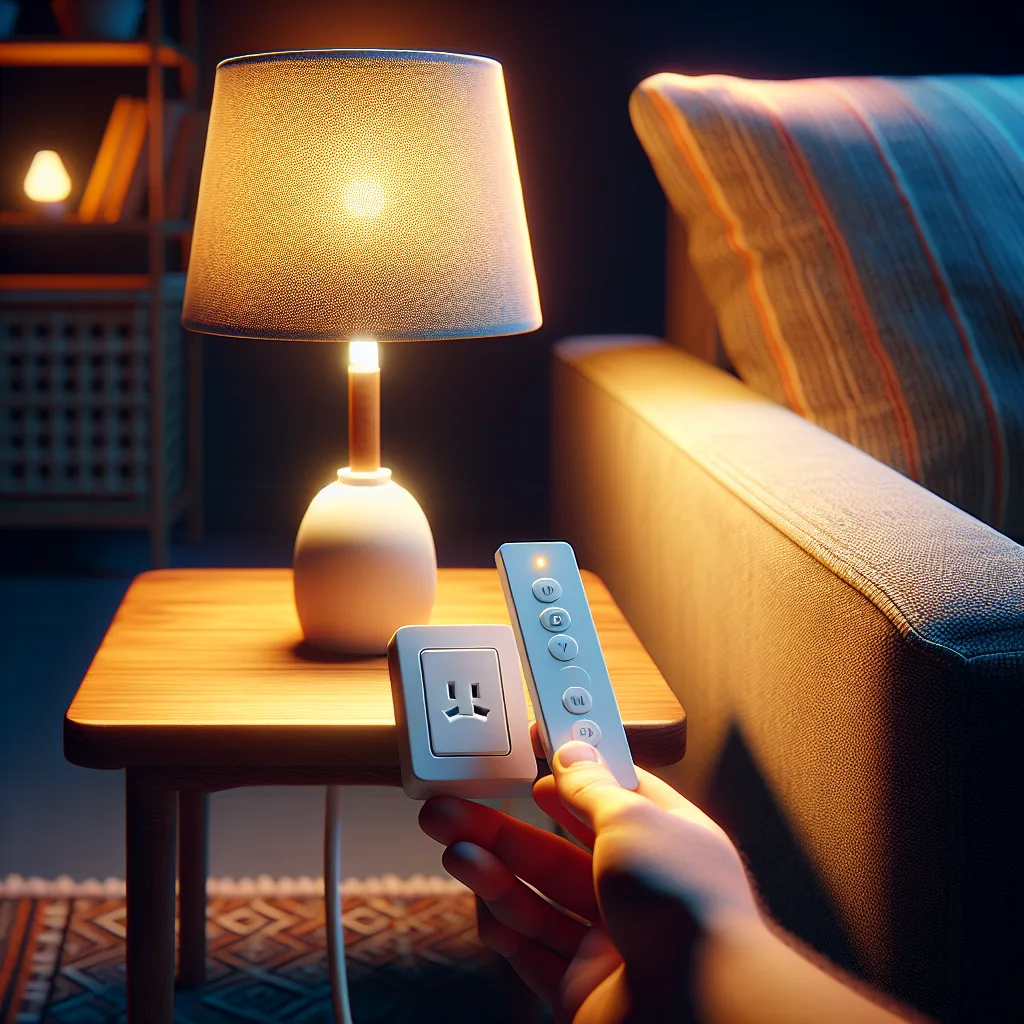
    But an even simpler way for many is to just replace the indoor switch. The switch on the wall that controls the floodlights can almost always be swapped out. I used a Lutron Caséta Smart Switch. The installation was surprisingly straightforward.

    Here’s the basic process:

    1. Turn off the power. Seriously. Go to your breaker box and kill the power to that switch. Don’t skip this.
    2. Unscrew and remove the old switch. You’ll typically see a few wires connected. Take a picture with your phone before you disconnect anything, just in case.
    3. Install the new smart switch. The Lutron app and instructions have a great step-by-step guide. You’ll connect the wires to the new switch, screw it into place, and put the faceplate on.
    4. Turn the power back on.
    5. Pair it with your hub. This is the magic part. You open the Lutron app, tell it you’re adding a new device, and press a button on the switch. Within seconds, it’s part of your system.

    What About That Zigbee Thing?

    In my research, I kept seeing people mention Zigbee controllers. Zigbee is just another wireless language that smart home devices use to talk to each other. It’s a good system, but it usually requires its own hub to translate its signals for your Wi-Fi network.

    If you’re starting from scratch, it’s a fine option. But if you’re already invested in a system like Lutron, adding a second hub creates clutter and complexity. You’d have to manage the lights in a separate app or try to get them all to play nice inside a third-party app like Apple HomeKit or Google Home.

    For me, keeping it simple was the whole point. Sticking with one system means one app, one hub, and less troubleshooting.

    The Result: Total Control and Better Parties

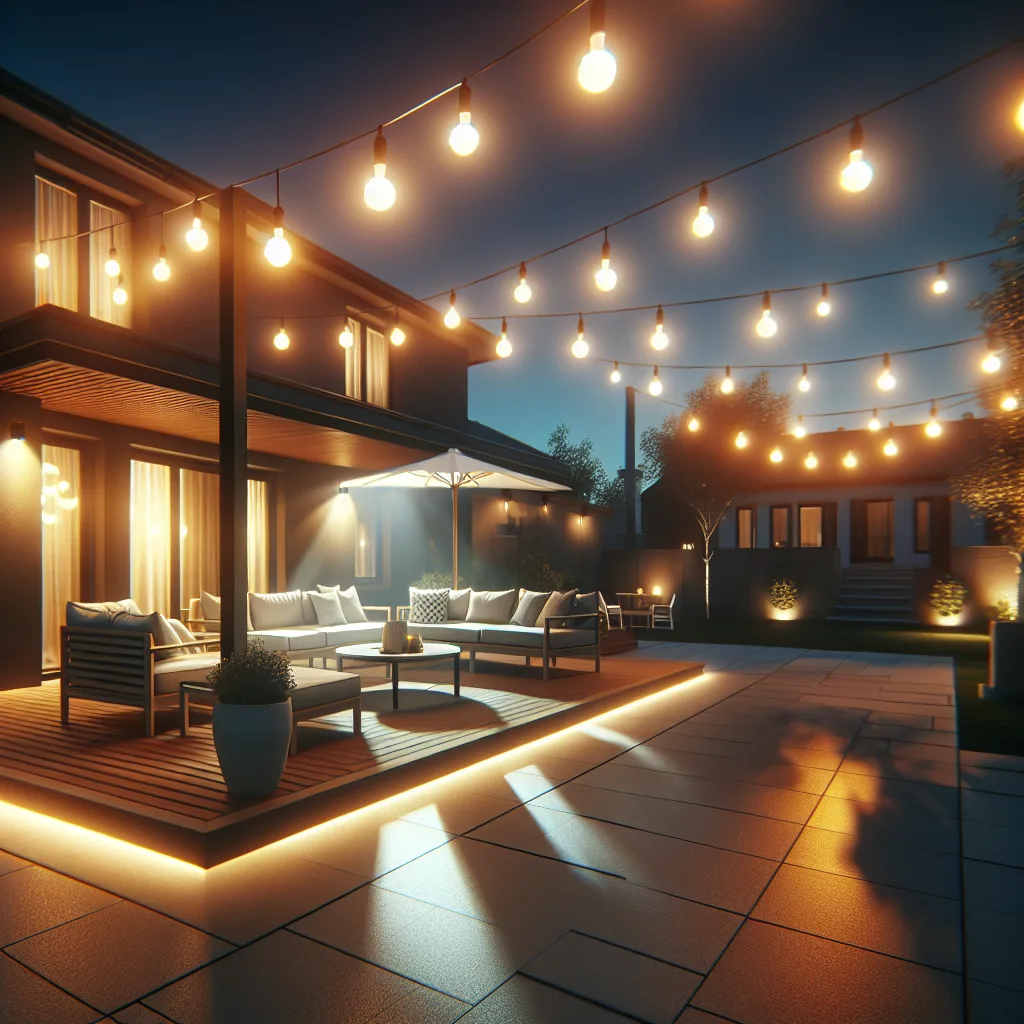
    The first time I hosted a get-together after installing the switch was a quiet victory. As the sun went down, instead of letting the floodlights turn my backyard into a prison yard, I pulled out my phone, tapped a button, and turned them off. We used string lights for ambiance instead. It felt like I’d finally unlocked my backyard’s full potential.

    Later, I set up a “Patio” scene in the app that dims the floodlights to a gentle 20%—just enough to see, but not so much that it’s jarring.

    So if you’re feeling stuck with your “dumb” outdoor lights, you’re not. You don’t need a complicated new system. Often, the solution is as simple as a new switch on the wall. It’s a small upgrade that makes a huge difference.

  • My Quest to Kill the Remote Shuffle: Automating My Projector, Screen, and TV

    My Quest to Kill the Remote Shuffle: Automating My Projector, Screen, and TV

    Tired of juggling remotes for your projector, screen, and TV? Learn how to automate your home theater setup with a smart hub for a one-action movie night.

    The Remote Shuffle. You Know the One.

    It’s movie night. You’ve got your popcorn. You’ve picked a film. You flop onto the couch, ready to escape. But first, you have to perform the ritual.

    I call it the remote shuffle.

    First, you grab the tiny, slippery remote for the Android TV box. You point and click. The little white light turns on. Great.

    Next, you fumble for the projector remote. It’s bigger, clunkier, and has about 47 buttons you’ve never touched. You aim it at the ceiling, press power, and wait for the whirring sound and the blindingly bright lamp to warm up.

    Finally, you find the third remote—the one for the motorized screen. You hold down the ‘down’ button and watch as it slowly descends, hoping you remember to let go before it goes too far.

    By the time the movie is actually ready to play, the mood is slightly… less magical.

    This was my reality. My setup was simple enough: a Mi Box for streaming, an Epson projector, and a motorized screen. But the process felt needlessly complicated. My goal became beautifully simple: I wanted to go from zero to movie with a single action. No remote shuffle. No app fumbling. Just… on.

    The Core of the Problem: Speaking Different Languages

    The main issue wasn’t the devices themselves, but how they communicate.

    • My Android TV and Projector both used Infrared (IR). This is the classic remote technology. It needs a direct line of sight to work and the signals are pretty standard.
    • My motorized screen, however, used Radio Frequency (RF). RF is great because it doesn’t need a line of sight—you can point the remote anywhere—but it’s a completely different language from IR.

    My Android TV remote couldn’t speak RF, and my screen remote couldn’t speak IR. They were like three people in a room who all needed to coordinate, but none of them spoke the same language. The dream of using just the little Mi Box remote to trigger everything seemed impossible.

    Finding a Translator

    My first thought was, “Can’t something just detect when my Android TV turns on?” If something knew the TV was on, it could surely tell the other devices to get ready.

    This is a great idea in theory, but in practice, it’s tricky. Making one device’s power state a trigger for others usually requires a deeper, more complex smart home brain like Home Assistant. I respect the power of those systems, but I wasn’t looking for a new hobby; I was looking for a straightforward solution.

    So I shifted my thinking. What if, instead of trying to make the devices talk to each other directly, I hired a translator?

    This is where a little device called a smart hub comes in. You’ve probably heard of them. I ended up looking closely at the BroadLink RM4 Pro, which a friend recommended. Here’s what it does:

    1. It learns. You point your existing remotes at it (both IR and RF) and press the buttons. The hub records and saves those signals. Power on, power off, screen down, screen up—it learns them all.
    2. It blasts. Once it knows the commands, it can blast them out on your command. It has powerful IR and RF transmitters that can cover a whole room.

    Suddenly, I had one device that could speak both IR and RF. The language barrier was gone.

    Creating the “One-Action” Magic

    The smart hub was the key. With all my remote commands learned and stored in the BroadLink app, I could create “scenes” or “routines.” This is where the magic happens.

    I created two simple scenes:

    1. Movie Night ON
    * Action 1: Turn on the Projector (sends the IR signal).
    * Action 2: Lower the Screen (sends the RF signal).
    * Action 3: Turn on the Android TV (sends the IR signal).

    2. Movie Night OFF
    * Action 1: Turn off the Android TV (IR).
    * Action 2: Retract the Screen (RF).
    * Action 3: Turn off the Projector (IR).

    I arranged the steps logically, with a few seconds of delay between each one to give the devices time to respond. Now, instead of juggling three remotes, I could just open one app and tap one button.

    This was a huge improvement! But I still had to pull out my phone. We were close, but not quite at the finish line.

    The Final Step: No Hands Needed

    The last piece of the puzzle was connecting the smart hub app to my Google Assistant. Most of these hubs (including the BroadLink) have integrations with Alexa and Google Assistant.

    Setting it up took about five minutes. Once linked, my “Movie Night ON” scene was now a voice command.

    Now, this is my new reality:

    I walk into the living room and say, “Hey Google, start movie night.”

    The projector whirs to life. The screen silently lowers into position. The Android TV home screen appears. Everything is on, perfectly synced, and ready to go.

    When the movie is over, I just say, “Hey Google, end movie night,” and the whole process reverses.

    Is it the “one remote” solution I originally pictured? Not exactly. I didn’t get the Mi Box remote to trigger the sequence. But it’s a “one action” solution, which is what I really wanted. I traded three frustrating remotes for one simple voice command. The remote shuffle is officially a thing of the past. The magic is back.

  • Your First Smart Home: A Guide for People Who Don’t Tinker

    Your First Smart Home: A Guide for People Who Don’t Tinker

    New to smart homes? This simple guide helps you choose between Google, Amazon, and Apple platforms without the technical jargon. Perfect for non-tinkerers.

    So, you just moved into a new place. Congrats! Amidst the chaos of unpacking boxes and figuring out which way the shower curtain goes, a new thought probably popped into your head: “Maybe I should do some of that… smart home stuff.”

    And then comes the second thought: “Where on earth do I even start?”

    It feels like a tech minefield. There are a dozen different brands, weird-sounding protocols like Zigbee and Z-Wave, and a whole internet of enthusiasts who seem to spend their weekends programming their light bulbs.

    If you’re like me, you just want stuff that works. You want to say, “Hey, turn on the lights,” and have the lights turn on. You don’t want a new part-time job as your home’s IT administrator.

    Let’s cut through the noise. For most of us who aren’t looking for a new hobby, there are really only three main players to consider.

    The Big Three: Your Real Starting Points

    Forget the super-complex custom setups for a minute. Your journey will almost certainly start with one of these three ecosystems, because they’re built for regular people, not programmers.

    1. Amazon Alexa: The One That Works With Everything

    If you want the path of least resistance, it’s probably Alexa.

    Amazon’s big advantage is that they’re everywhere. Almost every smart device company on the planet makes sure its products work with Alexa. Smart plugs, thermostats, robot vacuums, you name it. If it exists, it probably has a “Works with Alexa” sticker on the box.

    • The Good: The sheer volume of compatible devices is massive. Echo speakers are often on sale, making it cheap to get started and put a voice assistant in multiple rooms.
    • The Not-So-Good: The Alexa app can feel a little cluttered because it’s trying to do so much. And, of course, you have to be comfortable living in Amazon’s world.

    Basically: If your top priority is making sure any device you buy will probably work with your system, start here.

    2. Google Home/Assistant: The Clean Competitor

    If you’re an Android user or already use a lot of Google services (Gmail, Google Calendar, etc.), then the Google Assistant ecosystem is a natural fit.

    Google’s real strength is in understanding how people actually talk. Its voice commands often feel a bit more natural and conversational. The Google Home app is also generally cleaner and more intuitive to navigate than Alexa’s. Plus, their own Nest products, like the famous thermostat and doorbells, integrate perfectly.

    • The Good: Great voice recognition and a cleaner user interface. Seamless integration if you’re already in the Google ecosystem.
    • The Not-So-Good: While its device compatibility is huge, it’s just a little bit behind Alexa. Not every obscure brand will work with it.

    Basically: If you value a slightly slicker user experience and use Google for everything else in your life, this is your horse in the race.

    3. Apple HomeKit: The Secure, Simple Garden

    If you’re an Apple person through and through, HomeKit is designed for you.

    Apple’s entire philosophy is on display here: it’s private, it’s secure, and it’s incredibly simple to use. Everything is managed through the “Home” app that’s already on your iPhone, iPad, and Mac. There’s no extra app to download. The setup for new devices is often as simple as scanning a QR code.

    • The Good: Unmatched privacy and security. A beautifully simple and integrated user experience. Things tend to “just work” without much fuss.
    • The Not-So-Good: This simplicity comes at a cost. The list of compatible devices is much, much shorter than the other two. And those devices often come with a higher price tag. You are definitely locked into the Apple ecosystem.

    Basically: If you live and breathe Apple and your top priority is privacy and a seamless, integrated feel, HomeKit is fantastic. You just have to be willing to accept fewer choices.

    So, What’s My First Step?

    Here’s the secret: you don’t have to make your whole house smart overnight. That’s a recipe for frustration and a pile of half-used gadgets.

    1. Pick Your Team: Don’t overthink it. Do you have an iPhone? Maybe start with HomeKit. Love your Android phone? Go with Google. Already own an Echo Dot? You’re on Team Alexa.
    2. Start Small: Buy one or two simple things. A couple of smart plugs for your lamps are a perfect first step. Or maybe a few smart light bulbs for the living room. They’re cheap and genuinely useful.
    3. Live With It: Use it for a few weeks. Do you actually like telling your lights to turn off, or do you find it annoying? Do you use the app? Getting a feel for the system with a low-stakes device will tell you everything you need to know.

    The goal isn’t to build a “house of the future.” It’s to solve a few small, annoying problems. Maybe it’s turning off all the lights from your bed. Or making sure the coffee pot starts before you’re even out of the shower.

    Start there. See what you like. And ignore the pressure to become a smart home guru. The best system is the one you actually use.

  • That Alexa Routine You’re Trying to Build? Here’s Why It Won’t Work (and How to Fix It)

    That Alexa Routine You’re Trying to Build? Here’s Why It Won’t Work (and How to Fix It)

    Trying to automatically turn on your TV backlights with an Alexa routine? Here’s why it doesn’t work and a simple fix using a smart plug or a clever command.

    So, you have a vision. It’s a simple one. You turn on your TV, and at that exact moment, the cool new LED backlights you just installed flare to life, bathing the wall in a soft, cinematic glow. It feels futuristic. It feels smart.

    You grab your phone, open the Alexa app, and dive into the routines section. This should be easy, right?

    When… My TV turns on.
    Alexa will… Turn on the backlights.

    But you hit a wall. A weirdly specific wall. You scroll through the list of triggers in the “When” section, and your TV is nowhere to be found. But you know Alexa can see your TV, because it’s right there in the “Alexa will” action list.

    What gives?

    If this sounds familiar, you’re not alone. I’ve been there myself, tapping through the app, feeling like I must be missing something obvious. The good news is you’re not missing anything. The bad news is, it’s a little more complicated than it seems. But don’t worry, there’s a great fix.

    The Problem: Why Your TV Can’t Start a Routine

    Here’s the simple-ish explanation: In the world of Alexa, devices are often either “controllers” or “the controlled.”

    • Controllers are devices that can kick off an action. Think of an Echo Dot hearing a command, a motion sensor detecting movement, or a smart button being pressed. They send a signal to Alexa saying, “Hey, something just happened!” These are the things you can use as a “When” trigger.
    • The Controlled are devices that just listen for commands. Your TV, in this case, is one of them. It can receive a command from Alexa to turn on, change the volume, or switch inputs. But it doesn’t send a signal back to Alexa saying, “Hey, just so you know, I’m on now!”

    So, your TV is waiting for instructions, but it’s not designed to be the one giving them. That’s why you can tell it what to do, but you can’t use its status to trigger anything else.

    So how do you get around it?

    The Best Fix: The Smart Plug Workaround

    The most reliable way to solve this is with a piece of gear you might already have: a smart plug with power monitoring.

    It sounds technical, but the idea is simple. Instead of trying to see if the TV is on, you see if the TV is drawing power.

    Here’s how it works:

    1. Get the Right Plug: You’ll need a smart plug that specifically mentions “power monitoring” or “energy monitoring.” Brands like Kasa, TP-Link, and Eve make popular versions. They’re not usually much more expensive than standard smart plugs.
    2. Plug It In: Plug your TV into the smart plug, and then plug the smart plug into the wall.
    3. Create Your New Routine: Now, go back to the Alexa app and build your routine again, but with a different trigger.
      • When… This time, select your smart plug. You should see a new option for power detection. You can set it to trigger when the wattage goes above a certain threshold (say, 20 watts). This means the routine starts the moment your TV starts drawing power.
      • Alexa will… Turn on the backlights.

    That’s it. Now, whenever you turn on your TV with its regular remote, the smart plug detects the power draw and tells Alexa to fire up your lights. It’s the seamless, automatic experience you were looking for from the start.

    The “No-New-Gear” Method: Rethink Your Command

    What if you don’t want to buy another piece of tech? Fair enough. You can get almost the same effect by changing your habit just a little bit.

    Instead of making the TV the trigger, make your voice the trigger for everything.

    Create a new, custom routine that’s more of a “scene setter.” You could call it “Alexa, TV time” or “Alexa, movie night.”

    Here’s what that routine would look like:

    • When… You say “Alexa, TV time.”
    • Alexa will…
      1. Turn on your TV.
      2. Turn on your TV backlights.
      3. (Optional) Dim your other living room lights to 30%.
      4. (Optional) Announce “Okay, enjoy the show.”

    This method puts all the actions into one simple command. The only trade-off is that you have to remember to use the voice command instead of grabbing your old TV remote. But for a lot of people, this is a perfect solution that costs nothing extra.

    So, while it’s a bummer that Alexa can’t natively use your TV as a trigger, these workarounds get the job done beautifully. Whether you opt for the clever smart plug trick or a streamlined voice command, you can still get that smart, connected feeling you were hoping for.

  • The Simple Gadget I Couldn’t Find (Until I Did)

    The Simple Gadget I Couldn’t Find (Until I Did)

    Searching for a simple programmable timer plug with a remote control override? Here’s why they’re so hard to find and what to look for.

    I have a weirdly specific relationship with my home gadgets. I love automation, but only when it makes my life simpler, not more complicated.

    So, I have some of my lamps plugged into those simple digital timers. You know the ones. You set them to turn on at sunset and off when you usually go to bed. It’s perfect 90% of the time. It makes the house feel lived-in, and it’s one less thing to think about.

    But then there’s the other 10%.

    The other night, I was up late, lost in a good book, and click. My favorite reading lamp went out, right on schedule. I was left in the dark, and my options were suddenly annoying. I could get up, unplug the lamp from the timer, plug it directly into the wall, and then reverse the whole process in the morning.

    It’s a small thing, I know. But it got me thinking: why isn’t there a simpler way?

    The Obvious Solutions That Don’t Work

    My first thought was, “I’ll just get one of those remote-controlled outlets.” They’re simple on/off switches you can control from the couch. Problem solved, right?

    Not quite. Those remote outlets don’t have a timer. So I’d gain the manual override I wanted, but I’d lose the daily schedule that I loved. I’d have to remember to turn the lights on and off myself, which defeats the whole purpose.

    “Okay,” I thought, “what if I combine them?”

    I tried plugging the remote-control outlet into the timer plug. The timer part worked, but as soon as the timer turned off for the night, it cut all power to the remote outlet. The remote was useless. I couldn’t turn the lamp back on because the remote outlet itself had no power.

    Strike one.

    Then I tried the reverse: plugging the timer into the remote-controlled outlet. This didn’t work either. I could use the remote to cut power to the timer, but I couldn’t use it to bypass the timer’s own schedule. If the timer’s program said “off,” the lamp was off, no matter what the remote wanted to do.

    Strike two.

    What About “Smart” Plugs?

    This is where someone usually chimes in with, “Just get an Alexa or Google Home smart plug!”

    And they’re not wrong. A few years ago, I had a setup like that. I could set schedules in an app, and I could use my voice or my phone to override them whenever I wanted. It worked.

    But I’ve been moving away from that kind of “smart” smart device lately. It’s not that I’m against them, but sometimes they feel like overkill. It means another app on my phone, another device connected to my Wi-Fi, another company’s ecosystem I have to live in. Sometimes I just want a gadget that does one job well, without needing an internet connection or a software update.

    I just wanted a simple timer with a simple remote. A “dumb” smart plug, if you will.

    The Search for the Gadget That Shouldn’t Be Rare

    I was convinced this thing had to exist. It feels like such an obvious combination of features. A programmable daily schedule plus a simple button to say, “Hey, ignore that for now.”

    For a while, I couldn’t find anything. It seemed like the market had decided you either wanted a “dumb” timer or a fully Wi-Fi-connected “smart” plug. There was no middle ground. I started to wonder if there was some technical reason it wasn’t possible or if the audience for such a device was just… me.

    But it turns out, they do exist. They’re just a little niche and you have to use the right search terms.

    After some digging, I found what I was looking for. The trick was to search for things like:

    • “Programmable outlet with remote override”
    • “Timer plug with remote control”
    • “Countdown timer remote outlet”

    These products combine both functions into one simple device. You program the daily on/off schedule right on the plug itself. Then, you get a small, simple remote—no app, no Wi-Fi, no voice assistant—that lets you manually turn the plug on or off whenever you want, overriding the schedule. When the next scheduled event comes around (like “on” tomorrow at sunset), it just resumes the program.

    It’s exactly what I wanted. The convenience of a schedule, with the simple, tactile control of a button when I need it.

    So if you’ve been on a similar quest, don’t give up. The perfect, simple gadget is probably out there. It just might not be on the first page of Amazon results. And for me, finding a piece of tech that does its job without demanding my constant attention feels like the smartest solution of all.

  • Why Is My Nest Thermostat Turning On By Itself?

    Why Is My Nest Thermostat Turning On By Itself?

    Is your Nest thermostat turning on and off by itself? Learn the simple reasons why, from its learning features to schedules, and how to take back control.

    So you got a Nest thermostat. The idea was simple: save some money, make life a little easier, and add a cool gadget to your wall. But now, you’re noticing something… odd. The heat clicks on when you’re not cold. The AC kicks in when the house feels fine. It’s like a little ghost in the machine is playing with the temperature.

    If you’re standing in your living room wondering why your smart thermostat seems to have a mind of its own, you’re not alone. I’ve been there. It’s a super common question, and the answer isn’t about faulty wiring or a haunted house. It’s usually about the very feature that makes the Nest “smart” in the first place: its learning ability.

    Let’s break down what’s likely happening and how you can get it to behave.

    The Smart Brain: How the Nest “Learns”

    The main selling point of a Nest is that it programs itself. When you first install it, you adjust the temperature whenever you feel too hot or too cold. The Nest watches you. It learns that you like it cooler when you sleep, warmer when you wake up, and that you turn it down when you leave for work.

    Over the first week or two, it uses this data to build a schedule automatically. This feature is called Auto-Schedule. The goal is for the thermostat to anticipate your needs without you ever having to touch it.

    But here’s the thing: it’s not a perfect mind reader.

    Maybe you had a few weirdly cold days and cranked the heat at odd hours. Maybe you had guests over and adjusted the AC more than usual. The Nest logs all of this as a preference. It doesn’t know the context; it just sees the data. So, it might build a schedule based on a weird week, and now it thinks you love having the heat on at 2 PM on a Tuesday.

    This is often the number one reason your thermostat is turning on by itself. It’s not random—it’s just following a schedule it created for you.

    The All-Seeing Eye: Home/Away Assist

    There’s another feature working in the background called Home/Away Assist. This uses sensors in the thermostat and the location of your phone (if you allow it in the app) to guess whether you’re home or away.

    When it detects you’ve left, it can automatically switch to an energy-saving “Eco” temperature. When it senses you’ve returned, it will switch back to your regular schedule.

    This can also cause some confusion. If you’re home but sitting still in a room where the thermostat can’t see you, it might think you’ve left and go into Eco mode. Then, when you walk by an hour later, it senses you and kicks the system back on. This can feel like it’s turning on and off for no reason.

    How to Take Back Control

    So, if your Nest’s smarts are a little too smart, what can you do? You don’t have to live with a thermostat that constantly surprises you. You have two great options.

    1. Check and Edit the Schedule

    Before you do anything else, just look at the schedule your Nest has created. You can do this easily in the Nest or Google Home app.

    • Open the app and select your thermostat.
    • Tap on “Schedule.”
    • You’ll see a full weekly schedule with all the temperature changes your Nest has planned.

    You’ll probably find the culprit right away—a temperature change set for a time that doesn’t make sense. You can easily delete these unwanted setpoints or adjust the temperatures to your liking. Sometimes, just cleaning up the learned schedule is all you need to do.

    2. Turn Off Learning and Set a Manual Schedule

    What if you don’t want the thermostat guessing at all? That’s perfectly fine. Some people (myself included) prefer a predictable, fixed schedule. If that’s you, you can turn off the learning feature.

    • Go to your Nest thermostat.
    • Push it to open the menu, then go to Settings > Nest Sense > Auto-Schedule.
    • From here, you can just turn it off.

    Your Nest will stop learning from your adjustments and creating new setpoints. It will only follow the schedule that’s currently saved. From here, you can go into the app and set up your schedule exactly the way you want it. A simple one for weekdays and another for weekends is a great place to start.

    Your thermostat will still be “smart.” You’ll still be able to control it from your phone, use Home/Away Assist (if you want), and save energy. The only difference is that you are the one telling it what to do, not the other way around.

    So no, your Nest isn’t broken or haunted. It’s just trying to do its job, and sometimes it needs a little guidance. Take a look at its schedule, decide if you want it to keep learning, and make the tweaks that work best for you. Pretty soon, it’ll be the simple, helpful gadget you wanted it to be.

  • So, You’re Thinking About a Digital Whiteboard?

    So, You’re Thinking About a Digital Whiteboard?

    Considering a digital whiteboard for your home office? We break down the costs, features, and smart integrations to help you choose the right one for your space.

    I was tidying up my home office the other day, and my eyes landed on my traditional whiteboard. It’s a battlefield of faded markers, eraser smudges, and a dozen old ideas I forgot to photograph. It got me thinking: what’s the next step?

    For a lot of us, that thought leads to the world of electronic whiteboards.

    It sounds a little futuristic, right? A giant screen on your wall that you can draw on, save everything, and maybe even connect to your other gadgets. It’s not science fiction, though. These devices are real, and they’re becoming more common in home offices.

    So, if you’re curious about adding a digital whiteboard to your space, let’s talk it through. It’s a big purchase, so it’s worth thinking about what you actually need.

    First, Why Go Digital?

    The old-school whiteboard works fine, mostly. But a digital one solves a few annoying problems. You never have to hunt for a working marker, and your notes don’t get accidentally erased. Everything can be saved, exported as a PDF, or emailed to your team with a tap.

    The real magic is in the workflow. It’s less about just drawing and more about having a central hub for ideas that can connect to your digital life.

    What to Actually Look For

    It’s easy to get lost in specs and features. But it really boils down to a few key things.

    1. The Screen Itself
    This is the most important part. You’re looking for a screen that feels good to write on. Some have a slight texture that mimics paper, which is a nice touch. You also want something that’s responsive, with no annoying lag between your stylus and the line on the screen.

    • Size: How much wall space do you have? Common sizes range from 55 to 85 inches. A 55-inch screen is plenty for a personal office, but if you have the room, bigger is often better.
    • Resolution: 4K is pretty standard now, and it makes everything look sharp, from your handwriting to any videos or presentations you pull up.

    2. The “Smart” Features
    This is where things get interesting, especially if you want to integrate it into a smart home setup.

    Direct control via Google Home or Home Assistant (“Hey Google, turn on the whiteboard”) is still pretty rare. The “smart” part is usually about software integration. Can it easily connect to your Google Drive or Microsoft OneDrive? Does it have apps for tools you already use, like Trello, Miro, or Slack?

    This software ecosystem is arguably more important than voice commands. It’s what turns the whiteboard from a cool gadget into a genuinely useful productivity tool.

    3. Collaboration
    Do you plan on using this with other people? If so, you’ll want to look at its collaboration features. The best digital whiteboards let multiple people—both in the room and remotely—write on the canvas at the same time. Some even have built-in video conferencing capabilities with high-quality cameras and microphones.

    Let’s Talk About Price

    Okay, the big question. What does one of these cost? The budget from our original inspiration was under $4,000, which is a very healthy and realistic budget.

    • Under $1,500: In this range, you’re often looking at creative solutions rather than dedicated whiteboard devices. Think about a large touch-screen monitor paired with a PC or a big tablet mounted on the wall. It’s not as seamless, but it can work.
    • $1,500 – $4,000: This is the sweet spot. Here you’ll find excellent, dedicated options like the Vibe Board or the Samsung Flip. These are all-in-one devices built specifically for whiteboarding and collaboration. They have their own operating systems, built-in apps, and high-quality touchscreens.
    • $4,000+: Now you’re getting into high-end, enterprise-level hardware. Think massive screens, advanced tracking cameras, and deeper integrations for corporate environments. For a home office, this is usually overkill.

    So, Is It Worth It?

    A digital whiteboard is a serious investment. It’s not a casual purchase. But if your work revolves around brainstorming, visual planning, or remote collaboration, it can be an incredible tool.

    It removes the friction between thinking of an idea and capturing it permanently. It keeps your office looking clean and modern. And most importantly, it can bring a new level of organization to your creative process.

    My advice? Don’t rush. Think hard about your daily workflow. Do you find yourself constantly drawing diagrams? Are you frustrated with taking photos of your current whiteboard? If the answer is yes, then a digital whiteboard might be a perfect fit for your home office.

  • Proxmox and TrueNAS: Should They Be Separate or Live Together?

    Proxmox and TrueNAS: Should They Be Separate or Live Together?

    Deciding between a dedicated TrueNAS server or running it as a VM on Proxmox? This guide breaks down the pros and cons to help you choose the best path.

    So, you’re standing at a crossroads in your home lab journey. You’ve got your server hardware, you’ve decided on Proxmox for your hypervisor, but now you’re staring at your new NAS build and thinking: what’s next? Do you give it its own dedicated TrueNAS install, or do you fold it into your Proxmox cluster as just another virtual machine?

    It’s a classic home lab dilemma. I’ve been there myself. You’ve got these two powerful tools, Proxmox and TrueNAS, and you want them to play nicely together. But what’s the “right” way to do it? The truth is, there isn’t one right answer. It all depends on what you value most: simplicity, flexibility, or raw performance.

    Let’s break it down, coffee-shop style. No jargon, no hype. Just a straightforward look at your options.

    The Two Paths: Bare Metal vs. Virtualized

    First, let’s get on the same page.

    • Proxmox: This is your hypervisor. Think of it as the manager of your server hardware. It lets you slice up your physical machine into smaller, independent virtual machines (VMs). It’s the foundation of your lab.
    • TrueNAS: This is your storage specialist. It’s an operating system designed to turn a computer into a network-attached storage (NAS) device. It’s brilliant for managing storage pools, sharing files, and keeping your data safe.

    The question is, do you install TrueNAS directly onto your NAS hardware (this is called “bare metal”), or do you install Proxmox on that hardware and then run TrueNAS as a VM inside it?

    The Case for a Dedicated TrueNAS Box (Bare Metal)

    Running TrueNAS directly on the metal is the traditional approach. You build a NAS, you install NAS software. Simple.

    Why you might like this:

    • Simplicity and Stability: This setup is clean. One machine, one job. It’s generally easier to set up and troubleshoot. TrueNAS has full, direct control over all the hardware—the hard drives, the network cards, everything. This direct access often leads to a more stable and predictable system.
    • Peak Performance: When TrueNAS isn’t competing for resources with a hypervisor or other VMs, it can dedicate 100% of the hardware’s power to storage tasks. For heavy-duty file transfers or demanding applications, this can make a noticeable difference.
    • Easier Drive Management: This is a big one. For TrueNAS to work its magic (especially with ZFS, its powerful file system), it needs direct, unimpeded access to your hard drives. Running it on bare metal makes this a non-issue.

    I lean this way for my most critical data. There’s a certain peace of mind that comes from knowing my storage isn’t tangled up with my other virtual experiments. If my Proxmox host goes down for maintenance (or because I broke something), my storage stays online.

    The Case for Running TrueNAS in a Proxmox VM (Virtualized)

    Now for the other side: treating TrueNAS as just another guest in your Proxmox hotel. This approach has become incredibly popular, and for good reason.

    Why you might like this:

    • Ultimate Flexibility: This is the biggest win. Your NAS is no longer just a NAS. It’s a full-fledged hypervisor. You can run TrueNAS in a VM, and right next to it, you can spin up a Docker container, a Plex server, a Linux test environment, or anything else you can dream up. It turns one box into an entire playground.
    • Hardware Consolidation: Maybe you don’t want two different machines running 24/7. Consolidating everything onto one powerful server saves space, cuts down on noise, and can lower your electricity bill. It’s efficient.
    • Centralized Management: You get to manage everything—your storage, your VMs, your containers—from one place: the Proxmox web interface. It’s tidy. Proxmox also has great backup and snapshot features that can manage your TrueNAS VM just like any other.

    The main challenge here is something called “PCI passthrough.” It’s the trick you use to give the TrueNAS VM direct control over the hard drive controller. It can be a bit tricky to set up correctly, but once it’s working, it’s solid. You’re essentially handing the keys to the hardware directly to the VM, bypassing the hypervisor.

    So, What’s the Verdict?

    Let’s boil it down.

    • Go with a dedicated TrueNAS box if: You prioritize stability, top-tier storage performance, and want a simple, set-it-and-forget-it system for your data. Your NAS is a critical service, not an experiment.
    • Go with a virtualized TrueNAS VM if: You love to tinker, want maximum flexibility from your hardware, and prefer consolidating everything into one machine. You’re comfortable with a slightly more complex setup to get that all-in-one power.

    There’s no wrong choice. I’ve seen people build amazing, rock-solid labs using both methods. Think about your own comfort level and what you want to achieve. Do you want a reliable appliance, or do you want a flexible powerhouse?

    My personal advice? If you’re just starting out, the dedicated, bare-metal approach is a little more straightforward. But if you have a powerful server and a sense of adventure, virtualizing TrueNAS on Proxmox is a fantastic way to get the most out of your hardware.

  • Stuck on a VLAN Problem? You’re Not Alone.

    Stuck on a VLAN Problem? You’re Not Alone.

    Facing a tricky VLAN issue where a device won’t get an IP? Learn the common causes, like access vs. trunk ports, and how to troubleshoot them simply.

    We’ve all been there. You’re staring at a network configuration that looks perfect. It should work. All the guides and your own experience say so. Yet, here you are, stuck.

    I found myself in this exact spot recently. I was setting up a simple VLAN on a switch. The goal was to isolate a specific device on its own little network segment, VLAN 600. I set up two ports as access ports for that VLAN. Simple enough.

    Then came the weird part. The switch itself, through its virtual interface (SVI), could grab an IP address on VLAN 600 just fine. But the actual device I plugged into the other port? Nothing. It couldn’t get an IP address to save its life.

    It’s one of those problems that makes you question everything you know. I went over the config again and again. It was so basic, it felt like I had to be missing something obvious. And, as it often turns out, I was.

    If you ever find yourself in this situation, it almost always comes down to one fundamental concept: the difference between an Access Port and a Trunk Port.

    The Big Question: Access or Trunk?

    This is where most VLAN headaches begin. We mix up when to use which, and the network, being the logical and unforgiving thing it is, simply doesn’t work.

    Think of it this way:

    • An Access Port is for a single occupant. It belongs to one, and only one, VLAN. It’s like a private driveway to a house. Only traffic for that one house (VLAN) is allowed. You use access ports for your end-user devices: laptops, printers, servers, smart TVs, etc. The device itself doesn’t need to know anything about VLANs; the switch handles it.

    • A Trunk Port is a highway for many. It can carry traffic for multiple VLANs at the same time. To keep things from getting mixed up, the switch adds a “tag” to each piece of data, indicating which VLAN it belongs to. It’s like a multi-lane highway where every car has a sign telling everyone which city (VLAN) it’s heading to. You use trunk ports to connect your switch to other network devices that also understand VLANs, like another switch or a router.

    So, when I said I was trying to “pass a VLAN through a switch,” the real problem was hidden in that phrase. What was I connecting to?

    Scenario 1: You’re Connecting to a Router or Another Switch

    This is the most common reason for this specific problem.

    If your setup looks something like [Router] --- [Switch] --- [My Device], the connection between your router and your switch is key. Your router is likely handling the IP address assignments (DHCP) for VLAN 600. For your switch to get that traffic from the router and pass it along to your device, it needs to understand that the traffic is for VLAN 600.

    This is a job for a trunk port.

    The link between the router and the switch needs to be a trunk that is configured to “allow” VLAN 600 to pass through it. Then, the port that your actual device is plugged into should be an access port set to VLAN 600.

    • Router Port → Switch Port 1 (This should be a Trunk Port)
    • Switch Port 2 → Your Laptop (This should be an Access Port for VLAN 600)

    The switch’s own interface (SVI) could get an IP because the switch itself understands the VLAN. But it couldn’t pass that DHCP goodness along to my laptop because the connection to the router wasn’t configured to carry tagged traffic for multiple VLANs. It was likely set as an access port, creating a misconfiguration.

    Scenario 2: Both Devices Are on the Same Switch

    But what if your setup is simpler? What if you’re just plugging two laptops into the same switch and want them to be on VLAN 600 together? In that case, setting both ports as access ports for VLAN 600 is the correct move.

    If it’s still not working, it’s time to check other things:

    • Where is the DHCP server? For your device to get an IP address, something has to be giving it out. Is there a router or server on another port of this same switch? If so, that link might need to be a trunk (see Scenario 1). If the DHCP server is on VLAN 600 with them, check its configuration.
    • Check for typos. I can’t tell you how many times I’ve spent an hour troubleshooting only to find I typed vlan 60 instead of vlan 600. It happens to everyone.
    • Did you save the configuration? The classic mistake. On many enterprise switches, you need to explicitly save your running configuration to the startup configuration. Otherwise, a reboot could wipe your changes.
    • Port Security: Is it possible there’s a port security feature enabled that’s blocking the device’s MAC address? It’s less common, but a possibility on a corporate or managed switch.

    A Quick Troubleshooting Checklist

    Next time you’re stuck, take a deep breath and run through these questions:

    1. What is plugged into the port? Is it an end device (PC, printer) or a network device (router, switch)?
    2. Use Access for End Devices: If it’s a PC, it needs an access port. switchport mode access & switchport access vlan 600.
    3. Use Trunk for Network Devices: If it’s another switch or a router, it probably needs a trunk port. switchport mode trunk.
    4. Verify the Trunk: If you’re using a trunk, make sure you’ve allowed the necessary VLAN. switchport trunk allowed vlan add 600.
    5. Follow the Path: Trace the entire path from the DHCP server to your device. Every link in between has to be configured to carry the VLAN traffic correctly.

    It’s almost never some deep, complex issue. It’s usually one simple setting, one tiny detail that’s out of place. And figuring it out is a great reminder that even with the basics, there’s always something new to learn or, more often, something simple to remember.

  • I Found a €200 Server Bundle. Is It My Perfect First Home Lab?

    I Found a €200 Server Bundle. Is It My Perfect First Home Lab?

    Thinking about building your first home lab? Discover if buying older, used hardware like an X99 motherboard and i7 CPU is a smart move for your budget.

    I love the idea of a home lab. It’s this personal playground where you can experiment with tech, host your own services, and just… learn. But getting started can feel intimidating. The cost, the complexity, the fear of buying the wrong thing. It’s a lot.

    So, when I stumbled upon a deal for some older hardware, I had to pause and think. Is this a brilliant shortcut or a beginner’s trap?

    The bundle in question was an ASRock X99 motherboard, an Intel i7-5820K processor, and 32GB of RAM, all for €200. I already had a case, a power supply, and a stack of hard drives ready to go.

    On the surface, it sounds like a steal. But this hardware is from around 2014. In the tech world, that’s practically ancient history. So, the real question is: is it a good purchase for a first home lab today?

    Let’s Break Down the Parts

    First, let’s look at what we’re dealing with. This isn’t your typical desktop setup from back in the day. The X99 platform was what Intel called “High-End Desktop” or HEDT. It was built for professionals and enthusiasts who needed more power than the average consumer.

    • The CPU (Intel i7-5820K): This is the heart of the system. It has 6 cores and 12 threads. In simple terms, that means it’s great at multitasking. Modern entry-level chips might be more efficient, but having 12 threads is fantastic for running multiple things at once, which is the whole point of a home lab. You can run several virtual machines (VMs) or a bunch of Docker containers without this CPU even breaking a sweat.

    • The RAM (32GB DDR4): RAM is what your server uses to juggle active programs. 32GB is a fantastic starting point. It’s enough to run a file server, a media server like Plex, a smart home dashboard like Home Assistant, and still have room to spare for other projects. The fact that the X99 platform supports quad-channel memory is a nice little performance boost, too.

    • The Motherboard (ASRock X99 Extreme4): This is the foundation that connects everything. A good X99 board like this one is packed with features. It has tons of SATA ports, which is perfect for someone like me who has a bunch of hard drives (I’ve got eight 3TB drives) to create a massive storage pool. It’s a stable, reliable board built for heavy workloads.

    So, What Could You Do With It?

    This is where it gets exciting. This isn’t just a pile of old parts; it’s a launchpad. With this hardware, you could build an incredibly capable all-in-one server.

    My first thought was a Network Attached Storage (NAS) system. With 24TB of raw storage from my existing drives, I could use software like TrueNAS or Unraid to create a central hub for all my files. It would be perfect for backups, storing photos and videos, and even running a Plex server to stream movies to any device in the house. The i7-5820K is more than powerful enough to handle transcoding video on the fly.

    But why stop there? The real magic is virtualization. By installing a hypervisor like Proxmox (which is free!), you can turn this one physical machine into dozens of virtual ones. Each VM or container acts like its own separate computer. You could run:

    • A Pi-hole to block ads on your entire network.
    • A Home Assistant instance to automate your smart home.
    • A personal WordPress site to experiment with web development.
    • A VPN server to securely access your home network from anywhere.

    With 6 cores and 32GB of RAM, you can run all of this at the same time. That’s the kind of power that sparks real learning and creativity.

    The Honest Downsides

    Of course, it’s not all perfect. There are reasons this hardware is so cheap.

    Power Consumption: This is the big one. An i7-5820K and an X99 motherboard will use significantly more electricity than a modern Intel Core i3 or a Raspberry Pi. It won’t be a crazy amount, but you will notice it on your monthly bill. It’s the trade-off for getting so much performance for such a low upfront cost.

    Age and Reliability: These parts are almost a decade old. They are well past their warranty period. If a component fails, you’ll be hunting for replacements on the used market, which can be a hassle.

    No Frills: The i7-5820K doesn’t have integrated graphics. This means you’ll need to find a cheap, basic graphics card just to handle the initial setup and any troubleshooting. You can often find one for less than €20.

    The Verdict: A Great Starting Point

    So, is this €200 bundle a good purchase for a first home lab? Absolutely, one hundred percent yes.

    For someone just starting, the price-to-performance ratio is unbeatable. You are getting a massive amount of computing power for the price of a few fancy dinners. This setup is powerful enough to grow with you. You can start with a simple file server and slowly add more services and virtual machines as you learn.

    It forces you to get your hands dirty. You’ll learn about hardware, about power management, and about how to build and configure a server from the ground up. The potential downsides are real, but they are also part of the learning experience.

    If your goal is to learn and experiment without breaking the bank, deals like this are golden. It’s the perfect, low-risk entry into a deeply rewarding hobby.