Category: Uncategorized

  • My Brand-New UDM Pro Failed. Then The Replacement Failed, Too.

    My Brand-New UDM Pro Failed. Then The Replacement Failed, Too.

    A UDM Pro froze and went into a reboot loop. An RMA and a new device didn’t fix it. Here’s a look at what else could be the problem.

    You know that feeling? The excitement of a new piece of tech arriving. You’ve done the research, you’ve clicked “buy,” and now the box is finally in your hands. For me, that was the Ubiquiti Dream Machine Pro, or UDM Pro. It’s a beast of a machine and the centerpiece for a lot of home and small business networks. I was ready to get my home lab humming.

    But then, my excitement hit a wall. A hard one.

    The First Freeze

    After getting everything set up, things ran smoothly for a bit. And then, out of nowhere, it happened. The UDM Pro froze. Completely unresponsive. No network, no access to the controller, just… a brick with pretty lights.

    I did what any of us would do: I turned it off and on again. It started to boot up, the little screen showing the familiar startup sequence, and then… it got stuck. A reboot loop. It would try to start, fail, and try again. Over and over.

    Okay, deep breaths. This is tech. Stuff happens. I went through the standard troubleshooting playbook.

    First, a soft reset. Nothing.
    Then, the more serious factory reset. I held down that little button, hoping to wipe it clean and start fresh. Still nothing. The same endless boot loop.

    At this point, you start to accept that you just got a dud. It’s rare, but it happens. The hardware must be faulty. So, I started the RMA process.

    Hope in a Box

    If you’ve never done an RMA (Return Merchandise Authorization), it’s basically the formal process of sending a faulty product back to the manufacturer. You explain the problem, they verify it, and they send you a replacement.

    I sent my UDM Pro on its journey back home, and a few days later, a brand-new one arrived. The box was crisp, the device was flawless. It was a fresh start. All those initial setup frustrations were in the past. This new one would be perfect.

    I plugged it in, went through the setup process again, and breathed a sigh of relief as my network came back to life. Everything was working. The problem was solved.

    Or so I thought.

    When Lightning Strikes Twice

    Less than 24 hours later, it happened again.

    The exact same problem. The network went down. The UDM Pro was frozen solid. And after a reboot, it was right back in that same cursed boot loop.

    I was stunned. I mean, what are the odds? Getting one faulty device is unlucky. But two in a row, with the exact same failure? That’s not bad luck. That’s a pattern.

    This is the point where troubleshooting takes a hard turn. The problem wasn’t the UDM Pro. It couldn’t be. The chances of two separate devices having the identical, rare hardware flaw were just too slim.

    The problem was something else. Something in my setup. The UDM Pro wasn’t the cause; it was the victim.

    Looking Beyond the Box

    When a brand-new replacement device fails, you have to start looking at the environment. What is this device connected to?

    So, I started a new investigation, and this is where I think the real lesson is. If you ever find yourself in a similar situation, here are the things to check:

    • The Power Source: This is a big one. Is the outlet it’s plugged into clean? Is there a UPS (Uninterruptible Power Supply) that might be failing or providing “dirty” power? I took the original power cord that came with the UDM Pro and tried a different one. I also plugged it into a different outlet in a different room, bypassing my power strip and UPS entirely.
    • Connected Peripherals: The UDM Pro isn’t an island. It’s connected to a dozen other things. Could one of them be the culprit? A faulty SFP module, for example, could potentially cause the whole system to crash. A bad Ethernet cable with a short in it? Maybe even a downstream switch that was sending bad packets? I began unplugging everything except the bare essentials.
    • The Configuration: This was a sneaky one I almost missed. When I set up the second UDM Pro, I restored it from a backup I made of the first one. It’s convenient, right? But what if that backup file was corrupted? What if there was some weird setting I enabled that was causing this specific crash? For my next attempt, I decided not to restore from a backup and to set everything up manually, from scratch.

    It’s a frustrating process. It turns a simple hardware swap into a full-blown detective story. But it’s a critical shift in thinking for anyone who runs their own tech. Sometimes, the shiny new box isn’t the problem. You have to look at all the messy, boring cables and configurations around it.

    It’s a humbling reminder that in a complex system, the point of failure isn’t always the most obvious one.
  • DAC vs. Fiber: The Right Way to Cable Your 10G Home Lab

    DAC vs. Fiber: The Right Way to Cable Your 10G Home Lab

    Upgrading to a 10Gbps or 25Gbps network? Learn the real-world pros and cons of DAC vs. fiber optic cables to make the right choice for your home lab.

    So, you’re leveling up your home lab. You’ve got the servers, you’ve picked out the new 10Gbps or even 25Gbps network cards, and you’re ready for some serious speed. But then you hit a surprisingly tricky question: how do you actually connect everything together?

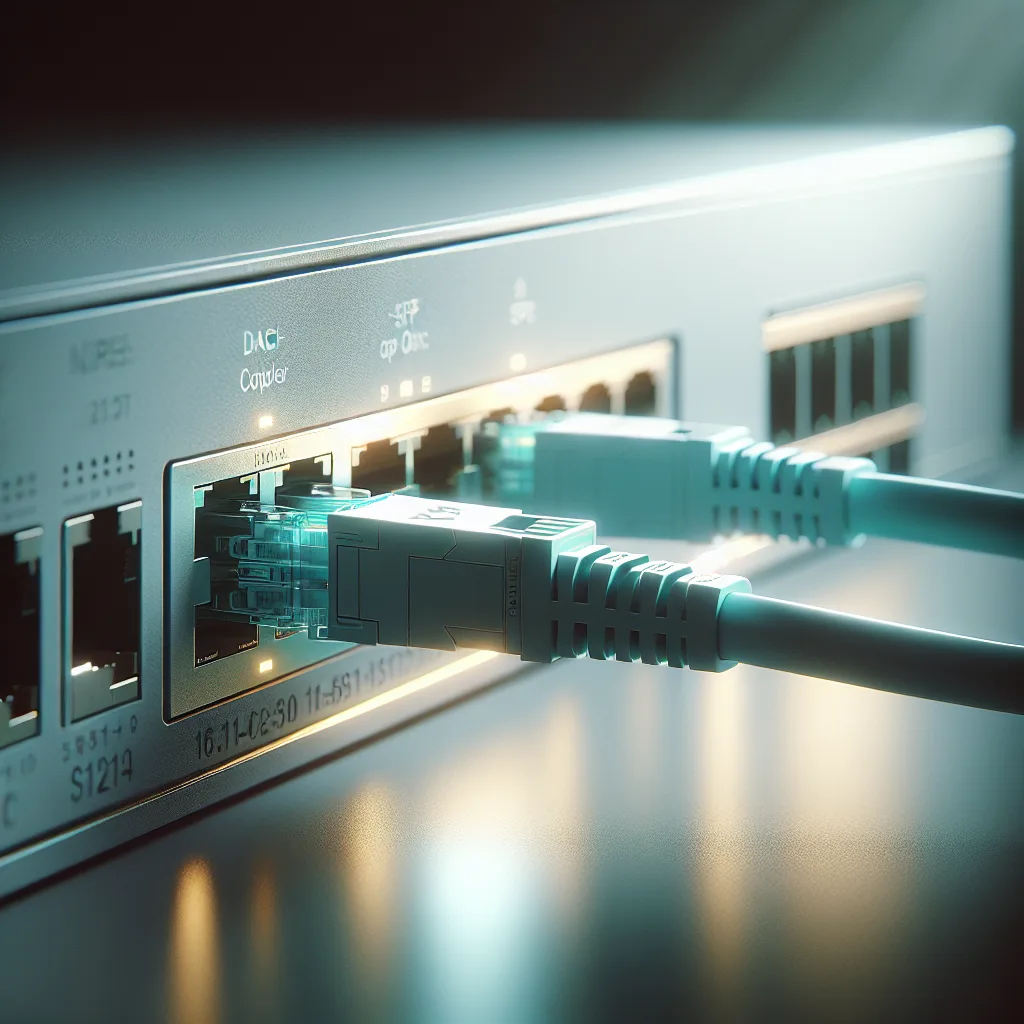
    You start looking at your switch’s SFP+ ports and realize you have two main choices: Direct Attach Copper (DAC) cables or SFP+ transceivers with fiber optic cables.

    If you’re feeling a little stuck, you’re not alone. I’ve been there. It seems like a technical decision, but it’s actually pretty simple once you break it down. Let’s walk through the real-world pros and cons, so you can figure out what’s best for your setup.

    The Plug-and-Play Option: DAC Cables

    First up, let’s talk about DACs. Think of a DAC as a super-simple, all-in-one solution. It’s a thick copper cable with the SFP+ connectors permanently attached to both ends. You just buy the cable length you need and plug it in. Done.

    So, when should you use them?

    DACs are perfect for short-distance connections. I’m talking about connecting a server to a switch that’s in the same rack.

    Here’s why they shine in that role:

    • They’re cheap. A DAC is almost always the most cost-effective way to get a 10G or 25G link up and running. You buy one item—the cable—and that’s it. No need to buy two separate transceivers plus a cable to go between them.
    • They’re simple. There’s no guesswork. You just plug it in, and it works. You don’t have to worry about matching transceiver types to fiber cable types.
    • They run cool. This is a big one. DACs are passive, meaning they don’t draw any real power, and as a result, they don’t produce heat. In a crowded server rack where every degree matters, using DACs can genuinely help with your overall cooling.

    But they have one major limitation: distance.

    Most DACs top out at around 7 meters (about 23 feet), and they can get a bit finicky at the longer end of that range. They’re also thicker and less flexible than fiber, which can make cable management in a tight space a bit more challenging.

    The verdict on DACs: Use them whenever you can for short, in-rack connections. They’re the simple, cool-running, and budget-friendly choice.

    The Flexible Powerhouse: Fiber Optic Cables

    Now for the other option: fiber. This setup involves three pieces: two SFP+ transceivers (one for your server, one for your switch) and a fiber optic cable that connects them. The transceivers are the little modules that do the work of converting electrical signals to light, and the cable is just the glass pathway.

    So, when does fiber make sense?

    Anytime distance is a factor. If you need to connect a computer in your office to a switch in a closet down the hall, fiber is your only real answer.

    Here’s where fiber excels:

    • Incredible distance. Even the most common type of “short-range” multimode fiber (like OM3 or OM4) can run for hundreds of meters without breaking a sweat. If you use single-mode fiber, you can go for kilometers.
    • Amazing flexibility. The cables themselves are thin, lightweight, and easy to snake around corners or through conduits. This makes routing them much easier than wrestling with a stiff DAC cable.
    • It’s modular. Need to change something later? Just swap the parts. You can use the same fiber cable and just upgrade the transceivers on each end if a new standard comes out.

    But there are a few trade-offs:

    • It costs more. You have to buy two transceivers and a cable, which adds up. For a single short link, it can be two or three times the price of a DAC.
    • It’s slightly more complex. You have to make sure your parts match. For example, if you buy “SR” or Short Range transceivers, you need to pair them with a multimode fiber cable (like an aqua-colored OM3/OM4). It’s not hard, but it’s one more thing to think about.
    • They generate some heat. This was a key point in the original question that inspired this post. While fiber transceivers run much cooler than the notoriously hot 10GBASE-T Ethernet SFPs, they still use power and create heat. A rack full of them will be warmer than a rack full of passive DACs.

    My Rule of Thumb: In the Rack vs. Between Rooms

    So, here’s how I decide. It’s a simple, two-part rule:

    1. If I’m connecting two devices in the same rack, I always use a DAC. It’s cheaper, simpler, and runs cooler. No-brainer.
    2. If I need to connect to another rack or another room, I use fiber. It’s the only practical way to cover the distance, and the flexibility is a huge bonus.

    That’s really all there is to it. Don’t overthink it. One isn’t “better” than the other; they’re just tools for different jobs. Look at your rack, measure the distance you need to cover, and you’ll have your answer. Happy networking!

  • My Homelab Is Now Saving Resources, and I Barely Lifted a Finger

    My Homelab Is Now Saving Resources, and I Barely Lifted a Finger

    Learn how a simple tool called DockerWakeUp can automatically start and stop your Docker containers on demand, saving homelab resources without sacrificing convenience.

    I have a confession to make. I love my homelab, but I have a bad habit of leaving things running.

    You know how it goes. You spin up a new service because it looks cool, play with it for a day, and then forget about it. A Nextcloud instance for file sharing, an Immich server for photo backups, maybe a game server for a weekend of fun with friends.

    They’re all great, but they’re not all needed all the time.

    Each one of those idle containers sits there, quietly sipping away at my server’s RAM and CPU cycles. It’s not a huge deal, but it feels… wasteful. I’ve always wanted a way to automatically shut down services when they aren’t being used, but without the hassle of manually starting them again. Logging into a terminal to type docker start every time I want to access a dashboard feels like a chore.

    What if your services just woke up when you needed them?

    I stumbled upon a neat little open-source project that does exactly this, and it’s one of those “why didn’t I think of that?” ideas. It’s called DockerWakeUp, and it’s a clever tool that works with Nginx to automatically start your Docker containers the moment they get a web request.

    And the best part? It can also shut them down for you after a period of inactivity.

    So, that Immich instance your family uses only occasionally? It stays asleep until someone opens the app on their phone. The moment they do, DockerWakeUp senses the traffic, wakes the container up, and a few seconds later, they’re browsing photos as if it were running all along. Once they’re done, the container can go back to sleep, saving you resources.

    It’s a simple, lightweight solution to a common homelab problem.

    How It Works (Without Getting Too Technical)

    The magic is in the combination of a smart Nginx configuration and a small background service.

    1. A Request Comes In: When you try to visit one of your self-hosted services, the request first hits Nginx, which acts as a reverse proxy.
    2. Nginx Checks In: Instead of immediately trying to send the traffic to the container (which might be offline), Nginx asks DockerWakeUp, “Hey, is this service running?”
    3. DockerWakeUp Does Its Thing: If the container is stopped, DockerWakeUp starts it. You’ll see a temporary loading page for a few seconds. Once the container is up and running, you’re automatically redirected.
    4. Idle Timer: If you want, you can configure the tool to automatically stop the container after a set amount of idle time. No traffic for 30 minutes? It shuts the service down gracefully, ready for the next time it’s needed.

    This makes it perfect for managing those services that you want available, but don’t need running 24/7.

    A Few Ideas Where This Is Super Useful

    After playing around with it, a few use cases immediately came to mind:

    • Infrequently Used Apps: Perfect for self-hosted applications like Nextcloud, Immich, or wiki platforms that you or your family might only access a few times a week.
    • Game Servers: This is a big one. Why keep a resource-hungry Minecraft or Valheim server running all week for a session that only happens on Friday night? Friends can just try to connect, and the server will spin up on demand.
    • Utility & Dev Tools: We all have those dashboards and admin panels we only check once in a while. Things like Portainer, Uptime Kuma, or a documentation generator don’t need to be always-on.

    It’s a simple, practical way to keep your homelab lean without sacrificing convenience. You get the resource savings of shutting things down with the always-on feel of leaving them running.

    If you’re like me and have a collection of idle Docker containers, you might want to give it a look. It’s a small change that makes a real difference. The project is open source and available on GitHub if you want to check it out. It’s one of those little homelab upgrades that just makes sense.

  • The Used Hard Drive Gamble: Is It Worth the Risk for Your Home Server?

    Thinking of buying used hard drives for your home server? Explore the risks and rewards of using secondhand enterprise HDDs to save money on your build.

    I was finally doing it. After years of relying on an ancient, slow, and frankly full-to-the-brim network-attached storage (NAS) box, I decided to build my first proper home server. The dream was simple: a central hub for all my files, a powerful media server using Plex, and a playground for new apps with Unraid.

    The plan was solid. I found a great deal on a used HP Elitedesk mini-PC—small, quiet, and powerful enough for my needs. But then I hit the big, expensive wall: storage.

    To make this server useful, I needed space. Lots of it. I was looking at a minimum of 12TB per drive. As I browsed for new hard drives, my budget started to cry. High-capacity drives are not cheap.

    And that’s when I stumbled into the rabbit hole of used enterprise hard drives on eBay.

    The Siren Song of Secondhand Storage

    Suddenly, my screen was filled with listings for 12TB, 14TB, even 16TB drives for a fraction of the price of new ones. These weren’t your standard consumer drives; they were enterprise-grade models like the Seagate Exos—beasts designed for 24/7 operation in data centers. They were helium-filled for better performance and longevity.

    It felt like a cheat code. A seller with thousands of positive reviews was offering drives with less than six months of power-on hours. It seemed too good to be true.

    So, the big question popped into my head, and it’s probably the same one you’re asking: What’s the catch?

    Am I missing something obvious? Why would someone be selling huge quantities of lightly used, high-end server drives? It’s a fair question, and it’s where the gamble truly begins.

    Understanding the Used Drive Gamble

    Buying a used hard drive isn’t like buying a used book. It’s a piece of complex mechanical hardware that can, and eventually will, fail. When you buy new, you’re paying for a warranty (usually 3-5 years) that acts as a safety net. With most used drives, especially OEM ones (like Dell-branded drives sold by a third party), that safety net is gone.

    Here are the core risks you’re accepting:

    • Zero Warranty: If the drive dies a week after the seller’s 30-day return policy expires, you own a very expensive paperweight. There’s no manufacturer to call for a replacement.
    • An Unknown Past: The S.M.A.R.T. (Self-Monitoring, Analysis, and Reporting Technology) data might show low power-on hours, but it doesn’t tell the whole story. Were these drives run in a hot, poorly ventilated environment? Were they subject to frequent power cycles? You just don’t know their life story.
    • The “Why?” Question: The most likely reason for a flood of used enterprise drives on the market is a data center decommissioning or upgrade cycle. This is usually fine. But there’s always a nagging doubt: were these pulled from service because they were part of a batch that was showing early signs of trouble?

    How to Gamble Smart: My Rules for Buying Used Drives

    After a ton of research and a bit of nail-biting, I decided to take the plunge. But I didn’t do it blindly. I set some firm rules for myself to turn a risky gamble into a calculated one.

    1. Assume It Will Fail (Seriously)
    This is the most important rule. Never, ever, use a single used drive to store data you can’t afford to lose. The entire strategy hinges on having a robust backup and redundancy plan. This is where a system like Unraid or TrueNAS is your best friend. I set up my server with a parity drive, which means one drive is dedicated entirely to protecting the data on the other drives. If one of my used data drives fails, I can pop in a new one and completely rebuild the lost data from parity.

    2. Test, Test, and Test Again
    The moment the drives arrived, the real work began. I didn’t just plug them in and start copying files. I immediately started a “preclear” process on each drive. This is a deep, multi-pass test that writes zeroes to every single sector and then reads them back to ensure the drive is sound. It takes days to complete for a large drive, but it’s absolutely crucial. It’s your one chance to stress-test the drive during the seller’s return window. I also dove into the S.M.A.R.T. data, looking for any red flags like reallocated sectors, which can be an early sign of a failing drive.

    3. Buy from a Reputable Seller
    Don’t just buy the absolute cheapest drive you can find. I paid a little extra to buy from a seller who specialized in used IT hardware, had a near-perfect feedback score over thousands of transactions, and offered a 90-day warranty. That 90-day window gave me plenty of time to run my extensive tests without pressure.

    So, Was It Worth It?

    For me, the answer is a resounding yes.

    I now have a home server with a massive amount of storage space that I simply couldn’t have afforded if I had bought new drives. It’s been running smoothly for months, happily serving up movies and backing up all our family’s computers.

    But it’s not for everyone.

    If you’re looking for a simple, plug-and-play solution and the thought of drive testing and parity checks makes your head spin, you should probably stick with new drives. The peace of mind that comes with a full manufacturer’s warranty is a valuable thing.

    But if you’re a tinkerer, a home lab enthusiast, or someone building on a tight budget who doesn’t mind getting their hands a little dirty? The world of used enterprise drives is an incredible value. You just have to be smart about it. Go in with your eyes open, have a solid backup plan, and test everything. If you do, you might just build the server of your dreams for a fraction of the cost.

  • Why I’d Choose a Tiny PC Over a Huge, Cheap Server

    Why I’d Choose a Tiny PC Over a Huge, Cheap Server

    Thinking about a homelab? We compare cheap, used enterprise servers with modern mini PCs to help you decide which is truly the better value.

    I was scrolling through some tech forums the other day and saw a question that really made me think: “I can get a powerful old server for about $100. Why would I ever buy a mini PC?”

    It’s a great question. On the surface, it seems like a no-brainer. Why pay more for less?

    A decommissioned enterprise server, like a Dell PowerEdge R630, offers a ton of raw power. We’re talking dual CPUs, tons of RAM slots, and enterprise-grade reliability. For a hundred bucks, you can get a machine that was worth thousands just a few years ago. If you’re looking to build a serious homelab for running something like Proxmox with a whole cluster of virtual machines, the appeal is obvious. More cores, more memory, more power.

    But I’ve come to realize the choice isn’t just about the spec sheet. The real story is in the hidden costs.

    The True Cost of “Cheap” Power

    That $100 server is just the beginning. The first thing you’ll notice isn’t the performance, but the noise. These machines were designed for server rooms, where noise doesn’t matter. In your home office or closet? It’s like having a jet engine idling in the next room. Some people don’t mind it, but for many, it’s a deal-breaker.

    Then there’s the power bill. An old server like that can easily pull 100-200 watts at idle. Let’s be generous and say it averages 150W. Running 24/7, that’s over 1,300 kWh a year. Depending on where you live, that could add hundreds of dollars to your annual electricity costs. Suddenly, your “cheap” server isn’t so cheap anymore.

    And let’s not forget the size. A rack server is, well, big. It’s heavy, needs a dedicated space, and isn’t exactly something you can tuck behind your monitor.

    The Quiet Competence of the Mini PC

    This is where the mini PC comes in. For a few hundred dollars, you can get a brand new mini PC that’s smaller than a book. It’s quiet—often completely silent—and sips power, typically using just 10-15 watts at idle.

    Sure, it might not have 24 CPU cores or 128GB of RAM. But do you really need it?

    Here’s the thing I’ve learned about my own projects: most of the time, my server is just sitting there, waiting for me to do something. For running a handful of services like Pi-hole, a media server, or Home Assistant, a modern mini PC is more than capable. The processors in these little machines are surprisingly powerful and efficient.

    It really boils down to what you actually need versus what sounds cool.

    • Need a powerful virtual machine cluster? That old server might be the right call, as long as you can handle the noise and power draw.
    • Need to run a few key services reliably and efficiently? A mini PC is probably the smarter, simpler choice.

    I started my homelab journey thinking I needed the most powerful gear I could find. I ended up realizing I valued silence and a lower power bill a lot more. The mini PC won me over not with raw specs, but with its practicality. It just sits there, does its job, and stays out of the way.

    So, while the allure of a $100 server is strong, it’s worth looking past the price tag. Think about the hidden costs of noise, power, and space. Sometimes, the small, quiet, and efficient choice is the better one in the long run.

  • So You Got a VNXe3200 for Your Homelab. Now What?

    So You Got a VNXe3200 for Your Homelab. Now What?

    Struggling to configure your EMC VNXe3200 in your homelab? Learn the simple steps to find its IP and get it running with the connection utility.

    So you did it. You found a great deal on an old piece of enterprise gear, and now there’s a hefty, powerful EMC VNXe3200 sitting in your homelab. It’s exciting, right? All that potential for storage, for learning, for tinkering. You get it racked, plugged in, and powered on. The lights are blinking. The fans are humming (or, let’s be honest, roaring).

    You log into your network controller, ready to assign it an IP, and… nothing. You can see the device, a mysterious client with a MAC address, but it hasn’t pulled an IP. It’s just sitting there, silent.

    If this is you, don’t worry. Your new toy isn’t a brick. You’ve just hit the classic first hurdle of wrangling enterprise hardware.

    Why It’s Not Showing Up

    Unlike a simple Raspberry Pi or your desktop PC, these kinds of storage arrays don’t just ask for an IP address from your router out of the box. They are designed for corporate networks with specific setup procedures. They wake up with a default, hard-coded IP address and expect you to connect to them in a very specific way.

    For the VNXe3200, the system is waiting for you to find it. And to do that, you need a special tool and a specific network configuration.

    The Secret Weapon: The Connection Utility

    The key to unlocking your VNX is a piece of software called the EMC VNX Connection Utility (or sometimes called the Initialization Tool). This little program is designed to do one thing: scan the network for unconfigured arrays and let you perform the initial setup.

    The catch? Finding the utility can sometimes be a bit of a treasure hunt, as this hardware is a few generations old. The first and best place to look is the official Dell support website, which now hosts all the legacy EMC support files. You’ll likely need to search for your specific model (VNXe3200) to find the corresponding tool.

    Your Step-by-Step Guide to Getting Connected

    Ready to get this thing talking? It’s actually pretty straightforward once you know the steps.

    1. The Direct Connection

    First, forget your main network for a minute. You need to connect directly to the array.

    • Take a laptop or desktop computer.
    • Plug an ethernet cable directly from your computer into one of the management ports on the back of the VNXe3200. Don’t plug it into the storage (fibre channel or iSCSI) ports.

    2. Set a Static IP on Your Computer

    This is the most crucial step. Your VNX has a default IP address, and you need to put your computer on the same network “island” to talk to it. The default management IP for these units is usually 128.221.1.250 or 128.221.1.251.

    So, you need to set your computer’s IP address manually to something in that range.

    • Go to your network settings on your laptop.
    • Find the ethernet adapter and go to its TCP/IP v4 properties.
    • Set the following:
      • IP Address: 128.221.1.249
      • Subnet Mask: 255.255.255.0
      • Gateway: You can leave this blank.

    Save those settings. Now, your computer and the VNX are on the same tiny, private network.

    3. Run the Connection Utility

    Now, fire up that Connection Utility you downloaded. It will scan the network it’s connected to. Since you’re wired in directly, it should pop right up and discover your VNXe3200.

    4. The Initial Setup

    Once the utility finds your array, it will launch a configuration wizard. This is where you finally get to make the machine your own. The wizard will walk you through:

    • Creating a new admin username and password.
    • Assigning a new static IP address for the management port—this time, use an IP that actually belongs on your main homelab network (e.g., 192.168.1.50).
    • Configuring DNS settings.

    Once you complete the wizard and the array applies the new settings, you’re done with the hard part. You can unplug your laptop, plug the VNX’s management port into your main network switch, and reset your laptop’s network settings back to automatic/DHCP.

    You should now be able to access the VNX’s web interface (Unisphere) by typing the new IP address you just assigned into your web browser.

    Was It Worth It?

    Was that a bit more work than plugging in a Synology NAS? Absolutely. So, why bother?

    Because the point of a homelab isn’t just to have services running; it’s to learn. By going through this process, you’ve just done a basic storage array deployment. You’ve learned about default IPs, management networks, and initialization tools—all things that are common in the enterprise world.

    Plus, you now have a seriously powerful piece of kit to play with for a fraction of its original cost. Sure, it’s probably loud and uses more power, but the capabilities for learning about iSCSI, LUNs, and advanced storage features are fantastic.

    So take a moment to admire the login screen. You earned it. Happy labbing!

  • My Quest for the Perfect Off-Site Homelab Backup

    My Quest for the Perfect Off-Site Homelab Backup

    Struggling to choose an OS for your off-site homelab backup? Explore the options for protecting both Proxmox and TrueNAS data in a 3-2-1 strategy.

    Anyone who runs a homelab knows the feeling. You spend weeks, maybe months, getting everything just right. Your Proxmox nodes are humming along, your TrueNAS server is dishing out files perfectly, and your collection of VMs and containers is a thing of beauty.

    Then comes the quiet, creeping thought: What if this all just… disappeared?

    A power surge, a failed drive, a catastrophic mistake in the terminal—it happens. That’s why we all know the golden rule of data safety: the 3-2-1 backup strategy.

    • 3 copies of your data
    • On 2 different types of media
    • With 1 copy kept off-site

    I’ve got the first two parts down. My local backups are solid. But that last part, the “1 off-site copy,” has turned into a surprisingly tricky puzzle.

    My Homelab’s Two Halves

    My setup isn’t too complicated, but it has two distinct parts that don’t always want to play nicely together when it comes to backups.

    • The Proxmox Side: I have a couple of small PCs running Proxmox, hosting all my virtual machines and containers. This is the brains of the operation. For backups, I use the excellent Proxmox Backup Server (PBS). It’s incredibly efficient at what it does.
    • The TrueNAS Side: I also have a dedicated NAS running TrueNAS Scale. This is where all the “stuff” lives—media, documents, phone backups, you name it. It’s the heart of the storage.

    The challenge is getting both of these systems backed up to a single, off-site machine that I plan to leave with a trusted friend in another city. My first thought was that no matter what I chose for the off-site server’s operating system, one backup process would be easy and the other would be a headache.

    The Big Question: What OS for the Off-site Box?

    So, what operating system should I install on this remote backup machine? It needs to gracefully handle backups from Proxmox Backup Server and pull in all the datasets from TrueNAS. After a lot of thought, I narrowed it down to a few key options.

    Option 1: Use Proxmox Backup Server as the OS

    This was my first instinct. Why not use the tool designed for the job?

    The Good:
    Backing up my Proxmox cluster would be seamless. I could just add the remote PBS instance as a new “remote” in my datacenter and set up a sync job. It’s the native, intended way to do it. All the fancy features like deduplication, encryption, and verification would just work.

    The Complication:
    How do I get my TrueNAS datasets onto it? PBS is designed for virtual machine backups, not general file storage.

    But then I stumbled upon a clever solution: you can install the Proxmox Backup Client on another Linux system. Since TrueNAS Scale is built on Debian, it’s possible to install the client directly onto the TrueNAS machine. From there, you can write a script to back up specific datasets to the remote PBS server.

    It’s not a one-click solution, but it’s a very clean and powerful one. It keeps the PBS side of things pure while providing a robust, scriptable way to handle the TrueNAS data.

    Option 2: Use TrueNAS Scale as the OS

    What if I went the other way and put TrueNAS on the remote machine?

    The Good:
    Backing up my local TrueNAS server would be incredibly simple. I could use ZFS replication (zfs send/recv), which is built right into TrueNAS. It’s ridiculously fast, efficient, and reliable for syncing datasets between two ZFS systems.

    The Complication:
    This makes the Proxmox side of things much harder. How would I back up my PBS data to a TrueNAS box? I’d essentially have to treat the PBS datastore as a giant file and copy it over. This would completely defeat the purpose of PBS. I’d lose the ability to browse old backups, the amazing deduplication, and the simple restore process. This feels like a major step backward.

    Option 3: Just Use a Standard Linux OS (like Debian)

    What about a blank slate? I could install a minimal Debian server and build my own solution.

    The Good:
    Maximum flexibility. I could install the Proxmox Backup Server application on top of Debian. I could also set up ZFS on the disks and use it as a target for ZFS replication from my TrueNAS box. In theory, I could have the best of both worlds.

    The Complication:
    This is the most hands-on approach. I’d be responsible for configuring and maintaining everything from the ground up. While PBS itself is based on Debian, starting from scratch means more work to get to a stable, reliable state. It’s a great option if you love tinkering, but it adds complexity I’m not sure I want for a critical backup machine.

    What About Just Using the Cloud?

    I also had to ask myself: Should I even be building a physical machine for this? Maybe a cloud provider is the answer. Services like Backblaze B2 are popular in the homelab community for a reason.

    The Good:
    It’s simple. There’s no hardware for me to buy, set up, or worry about. It’s someone else’s job to keep the disks spinning.

    The Bad:
    The cost can be unpredictable, especially if I have a lot of data. And the biggest issue is the restore process. If my local lab goes down, downloading terabytes of data from the cloud would take a very, very long time. There’s also the matter of privacy and control over my data.

    My Final Decision

    After weighing all the options, I’m leaning heavily toward Option 1: using Proxmox Backup Server as the OS for the off-site machine.

    It feels like the most elegant compromise. It keeps the backup and restore process for my most complex systems—the VMs and containers—as simple and reliable as possible. The method for backing up the TrueNAS data using the client is a well-documented and powerful workaround.

    It’s a solution that prioritizes the integrity of the most critical backups while still providing a clear path for everything else. Now, I just need to build it. But that’s the fun part, right?

  • I Found a 7.68TB Enterprise SSD for Under $400. Is It a Genius Move or a Terrible Mistake?

    I Found a 7.68TB Enterprise SSD for Under $400. Is It a Genius Move or a Terrible Mistake?

    Thinking of buying cheap, refurbished enterprise SAS SSDs for your home lab? We break down the risks, rewards, and whether it’s actually worth the bargain.

    I spend way too much time browsing for homelab gear. It’s a bit of a habit. Most days, it’s just window shopping. But every now and then, you stumble across a deal that makes you stop and think, “Wait a minute… is that for real?”

    That happened to me the other day. I was thinking about building a new all-flash storage array for my server. My goal was simple: get a ton of fast, reliable storage without the watt-sucking hum of spinning hard drives. The problem? Large SSDs are expensive.

    But then I saw it: a 7.68TB enterprise-grade SAS SSD. Refurbished, but with a 2-year warranty. The price was under $400.

    My first thought was, “That has to be a typo.” My second was, “What’s the catch?”

    You can’t just buy five of those, build a nearly 40TB flash array for less than two grand, and call it a day, right? Or can you? This is the kind of question that keeps home lab enthusiasts up at night.

    The Allure of Enterprise Gear

    First, let’s talk about why these drives are so tempting. Why not just buy regular consumer SSDs?

    It comes down to two things: endurance and design.

    • Endurance: Enterprise SSDs are built for a completely different workload. They’re designed to be written to, over and over, 24/7, for years. Their endurance is measured in “Drive Writes Per Day” (DWPD). A drive with 1 DWPD rating means you can write its entire capacity—all 7.68TB—every single day for the warranty period (usually 5 years) without it failing. Consumer drives don’t even come close to that.
    • Design: These drives are often built with features you don’t find in consumer gear, like power-loss protection (supercapacitors that keep the drive powered long enough to save data in transit during an outage) and more consistent performance under heavy load.

    The catch has always been the price. New, these drives cost thousands of dollars. Which brings us back to that “too good to be true” deal on a refurbished one.

    So, What’s the Real Catch?

    Okay, let’s be real. A massive, cheap enterprise SSD isn’t a magic bullet. It’s a trade-off. You’re giving up some things to get that price. Here’s what I’ve been weighing.

    1. “Refurbished” Means “Used.”

    For an SSD, “refurbished” doesn’t mean a factory worker polished it up and put it in a new box. It means it was used in a data center, pulled from a server, and resold. The most important question is: how much was it used? All that legendary endurance gets used up over time. You might be buying a drive with 95% of its life left, or you might be getting one with 30%. Without seeing the drive’s SMART data (which is like an odometer for SSDs), you’re flying blind.

    2. The SAS Interface Isn’t for Everyone.

    This is a big one. These aren’t your typical SATA or NVMe SSDs that plug into any desktop motherboard. SAS (Serial Attached SCSI) is an enterprise standard. To use these drives, you need a special controller card called an HBA (Host Bus Adapter), like one of the popular LSI cards. You also need the right cables. This adds cost (a good HBA can be $50-$150) and a layer of complexity. It’s not hard, but it’s not plug-and-play.

    3. The Warranty is a Question Mark.

    The listing said “2-year warranty,” which sounds great. But who is providing it? It’s not the original manufacturer (like Samsung or Seagate). It’s the reseller. Will they still be in business in 18 months? How easy is their claims process? A reseller warranty is better than nothing, but it’s not the same as a rock-solid manufacturer’s guarantee. You’re taking a gamble on the seller as much as the drive.

    Is It a Smart Move or a Huge Mistake?

    After thinking it through, I don’t think there’s a simple “yes” or “no” answer. It depends entirely on who you are.

    It’s probably a good idea if:

    • You’re a tinkerer who is comfortable with the tech. You know what an HBA is, you’re not afraid to flash it to “IT Mode,” and you know how to immediately check the SMART data on your new drives.
    • You understand the risk. You’re buying these for a home lab, not to store critical business data without backups. You’re prepared for one to potentially fail.
    • You’re building something that can handle a failure, like a ZFS RAIDz1 or RAIDz2 array, where one drive dying won’t take down your whole pool.

    It’s probably a bad idea if:

    • You want something that “just works.” The extra steps and potential troubleshooting are not worth the savings to you.
    • The data is irreplaceable. For mission-critical storage, the peace of mind that comes with new drives and a manufacturer warranty is worth the premium.
    • You’re on a super tight budget where a failed drive and the hassle of a return would be a major setback.

    For me, the idea is still incredibly tempting. The project itself—building a massive, power-efficient, and screaming-fast storage server on a budget—is half the fun. It’s the very essence of the homelab spirit. But I’d go in with my eyes wide open, ready to test every drive and fully expecting that the “deal” comes with a few hidden costs—mostly in my own time and risk.

  • How Much Power Does Your PC Really Need?

    How Much Power Does Your PC Really Need?

    Building a custom media server and confused about PSU wattage? Follow my journey and learn how to choose the right power supply for your rig.

    I’m a tinkerer at heart. I love taking things apart, putting them back together, and making them my own. So when my old media server, a faithful Dell from 2006, was ready for retirement, I didn’t just want to buy a new box. I wanted to build one.

    This wasn’t just any build. I was upgrading my gaming rig, which meant I had a bunch of powerful, relatively new components ready for a new home. My goal was to create the ultimate media server and disk-ripping machine for my family. We’re talking a serious setup:

    • An i9-10900K processor
    • 64GB of RAM
    • A whole bunch of storage: four 1TB SSDs and four 3TB hard drives
    • And for the main event: seven optical drives for archiving all our old physical media.

    Yes, you read that right. Seven.

    I was designing a completely custom case to house all this hardware. It’s a beast, with dedicated bays for all the drives and even front-mounted PCIe slots for extra ports. But as I was planning everything out, I hit a major roadblock.

    Power.

    The Big Wattage Question

    My plan was to use two power supply units (PSUs). A main 750W unit for the core components and a smaller, older PSU just to handle some of the optical drives.

    Why two? Because when I manually added up the maximum power draw for every single component, the total was scary high. It looked like the 750W PSU wouldn’t be enough on its own. So, the two-PSU plan seemed like a clever, if complicated, solution.

    But then I plugged everything into PCPartPicker, a popular tool for planning builds. It gave me a much, much lower number—well within the range of my single 750W PSU.

    So, who was right? My detailed, “worst-case scenario” math, or the trusted online tool?

    Manual Math vs. Online Calculators

    Here’s the thing about power consumption: it’s not a single, fixed number.

    When you do the math by hand, you’re usually looking at the maximum possible power draw for each part. That’s the amount of power a component could pull if it were running at 100% capacity. Your CPU under a heavy benchmark, your graphics card rendering a complex scene, every drive spinning up at the exact same moment—it’s a perfect storm of power usage.

    Does that happen in the real world? Almost never.

    Your media server isn’t going to be transcoding 4K video, spinning up all seven optical drives, and running a stress test on all eight storage drives simultaneously. Most of the time, many of your components will be idle or close to it, sipping a tiny fraction of their maximum power.

    PCPartPicker and other online calculators know this. Their estimates are based on more realistic, typical usage scenarios. They account for the fact that you won’t be redlining your entire system 24/7. That’s why their numbers are usually lower and often more practical.

    So, What’s the Right Call?

    In my case, the answer was to trust the PCPartPicker estimate, but with a healthy dose of caution.

    While my manual calculation was an overestimate, it highlighted a crucial point: you need headroom. A good rule of thumb is to aim for a PSU that can handle your estimated load at around 50-60% of its total capacity. This is the sweet spot where PSUs are most efficient, generating less heat and running quieter.

    A 750W PSU for an estimated 500W load is a great fit. It provides plenty of power for the current setup and leaves room for future upgrades (like the 3-fan radiator I’m planning to add).

    Using two PSUs is certainly possible, but it adds a lot of complexity to the wiring and setup. For a build that’s already this custom, simplifying the power delivery is a smart move. Sticking with a single, high-quality PSU is safer, cleaner, and more reliable in the long run.

    A Quick Word on the Case

    Building a custom case from scratch is its own adventure. My design is focused on function, with massive bays for all the drives. The key challenge with any custom case is airflow. With so many components packed in, you have to be mindful of how cool air gets in and hot air gets out.

    My advice if you’re thinking of doing something similar:
    * Plan your airflow: Think about intake and exhaust fans from the very beginning.
    * Cable management is your friend: With this many components, clean wiring isn’t just for looks; it’s crucial for good airflow.
    * Think about the future: What else might you add? Leave space for it now, whether it’s more drives, a bigger cooler, or extra I/O.

    This project has been a deep dive into the nuts and bolts of what makes a computer tick. And that power question? It was a good reminder that sometimes the “by the book” answer isn’t always the most practical one. Now, if you’ll excuse me, I have a case to finish.

  • I Accidentally Created a Pet in My Kitchen

    I Accidentally Created a Pet in My Kitchen

    Thinking about making a sourdough starter? Here’s a real, honest story about the process, the failure, and the moment it finally comes to life.

    It started with a jar.
    A simple, empty glass jar on my kitchen counter. My plan was to create a sourdough starter. You know, like all those people on the internet with their perfect, crusty loaves of bread. It seemed simple enough. Just flour and water. What could go wrong?

    For the first three days, absolutely nothing happened.

    I’d mix the flour and water into a sad, grey paste. I’d look at it. I’d stir it. I’d put the lid on loosely, just like the instructions said. And I’d wait. The next day, I’d throw half of it out and feed it again. More flour, more water. More stirring. More waiting.

    It felt less like baking and more like a weird science experiment. Or maybe a test of my own patience. My husband would ask, “How’s your flour-pet?” and I’d just shrug. It was a lifeless, goopy mess. I was pretty sure I was just wasting flour.

    The First Sign of Life

    On day four, I almost gave up. I walked over to the jar, ready to dump the whole thing and reclaim my counter space. But I decided to give it one last look. I picked it up and tilted it toward the light.

    And there it was. A bubble.

    It was tiny. Almost invisible. But it was undeniably a bubble. It was proof that something was happening in there. All that waiting and feeding—it was actually doing something. Microscopic yeasts and bacteria were waking up and getting to work.

    I’m not going to lie, I got way too excited. I yelled, “It’s alive!” to an empty kitchen. I felt like a mad scientist who had finally succeeded. My little jar of paste wasn’t just paste anymore. It was becoming a living thing.

    What is a Sourdough Starter, Really?

    If you’re not familiar, a sourdough starter is just a community of wild yeast and bacteria. You’re not creating life, but you are capturing it and nurturing it.

    The whole process is surprisingly basic:

    • You mix: Just flour and water. That’s it.
    • You wait: You give the natural yeast in the flour and the air a chance to start multiplying.
    • You feed it: To keep the yeast happy, you have to give them fresh food regularly. This involves discarding a portion of the starter and adding new flour and water.

    This daily ritual becomes a strange, comforting routine. You get to know your starter. You can see when it’s hungry (it looks flat) and when it’s active and happy (it’s bubbly and doubles in size). Mine started smelling a little like vinegar, then a little like ripe apples. It was developing a personality.

    More Than Just Bread

    After a week, my starter was strong and bubbly. I finally used it to bake my first loaf of bread. It wasn’t perfect. It was a little dense, a little lopsided. But it was delicious. It had that signature tangy flavor that you just can’t get from a packet of yeast.

    But the real reward wasn’t just the bread.

    It was the process itself. It taught me a weird lesson in patience. In a world of instant gratification, it’s a strange and wonderful thing to tend to something for a week just to see if it will work. It’s a small, quiet act of creation.

    So if you’ve ever thought about it, I say go for it. All you need is a jar, some flour, and a little bit of patience. You might fail a few times. You might feel a little silly feeding a jar of paste. But one day, you’ll look inside and see that first bubble. And trust me, it’s a pretty great feeling.