Category: Uncategorized

  • My Accidental Under-Desk Datacenter

    My Accidental Under-Desk Datacenter

    My journey into the world of homelabs started with a tiny Orange Pi. Here’s how I built a small, personal server and what I learned along the way.

    I have a confession to make. I’ve officially fallen down the homelab rabbit hole, and I’m not sure I ever want to get out.

    It all started with a simple idea: to build a tiny, low-power server for a few personal projects. Nothing fancy, just a little box that could handle some basic tasks without sending my electricity bill through the roof.

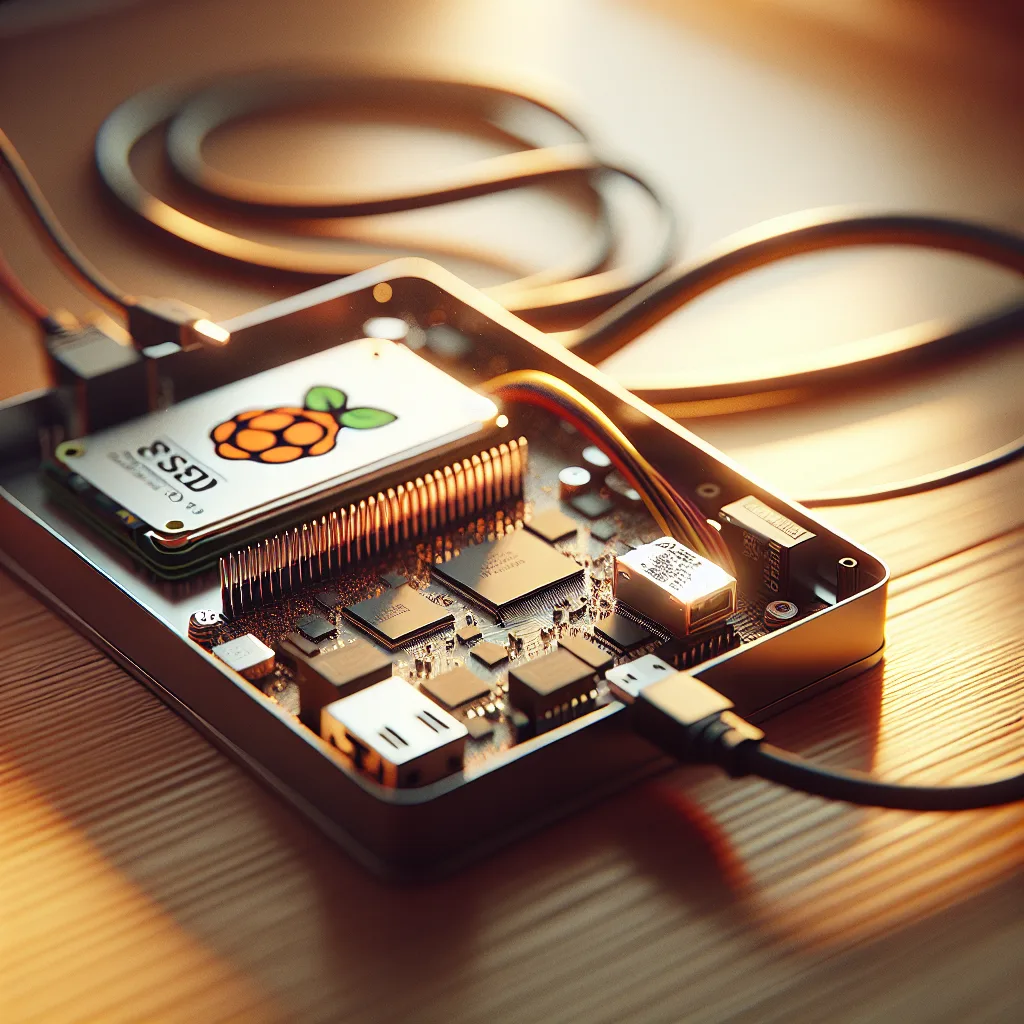
    After lurking on some online forums, I decided to start small. Really small. I picked up an Orange Pi Zero 3, a single-board computer (SBC) that’s not much bigger than a credit card. It seemed perfect. Inexpensive, tiny, and just enough power for what I had in mind.

    Or so I thought.

    The Best Laid Plans

    My initial plan was straightforward. I wanted to run a few services:

    • Navidrome: To stream my personal music collection, like my own private Spotify.
    • Homebox: To keep my home inventory and digital assets organized.
    • A torrent client: For… well, for downloading Linux ISOs, of course.

    I got the Orange Pi, installed Armbian (a lightweight operating system for these kinds of boards), and felt pretty good about myself. This was easy!

    But then, reality hit. The cheap, generic SD card I was using for the operating system wasn’t cutting it. It was slow and I worried about its long-term reliability. So, my first “small” upgrade was a high-endurance Sandisk SD card designed for constant read/write operations.

    Next came the storage. The little SBC has no native storage, so I needed a place to keep my music and files. I ended up with an Intel DC S3610 SSD—a 400GB datacenter-grade drive. Yes, you read that right. The SSD cost more than the computer it was plugged into. It felt a little absurd, but I wanted something solid and reliable.

    My tiny, budget-friendly project was already getting less tiny and less budget-friendly. And I was loving every minute of it.

    My Under-Desk Datacenter

    So here it is, my little under-desk lab. It’s a humble setup, but it’s mine.

    • The Brains: Orange Pi Zero 3 (1GB RAM model)
    • The Boot Drive: Sandisk High Endurance 64GB SD Card
    • The Storage: Intel DC S3610 400GB SSD

    It’s a strange little beast, a mix of budget-friendly computing and enterprise-grade hardware, but it works. Most of the time.

    Which brings me to my next lesson: heat.

    These tiny computers sip power, but they can still get hot, especially when they’re working hard. My little Orange Pi, with its tiny heatsink, was not prepared for the 40°C (104°F) ambient temperatures of a summer afternoon. I’d find it would randomly crash right around noon.

    The solution? It’s not elegant, but it works. I have the whole setup plugged into a smart plug. When it freezes, I just cut the power from my phone, wait ten minutes for it to cool down, and turn it back on. Problem solved. For now. A bigger heatsink or a small fan is probably next on the shopping list.

    What I’ve Learned

    Starting this project has been a fantastic learning experience. It’s one thing to read about self-hosting and another thing entirely to build, troubleshoot, and maintain your own server, no matter how small.

    If I could do it all over again, the only thing I’d change is getting the 2GB RAM version of the Orange Pi. That extra gigabyte would provide a little more breathing room for running multiple services.

    But regrets? I have none. I have my own private cloud for music and files, running silently under my desk on just a few watts of power. It’s a testament to how accessible this hobby has become.

    If you’ve ever been curious about setting up your own server, don’t be intimidated. Start small. You don’t need a rack of enterprise gear. All it takes is a tiny board, a bit of patience, and a willingness to fall down a very deep, very rewarding rabbit hole. You might be surprised at what you can build.

  • Gem or Garbage? The Lure of Second-Hand Server Gear

    Gem or Garbage? The Lure of Second-Hand Server Gear

    Found a cheap server or enterprise hardware on Facebook Marketplace? Here’s why it might be more e-waste than treasure, and what to look out for.

    You know that late-night scroll. You’re not looking for anything specific. You’re just browsing Facebook Marketplace, Zillow, or eBay, seeing what’s out there. It’s digital window shopping.

    Most of the time, it’s just a blur of used couches and questionable car mods. But every once in a while, you see it. A deal. A real, head-turning, “wait, what?” kind of deal.

    That happened to me the other day. I stumbled upon a listing for a full-sized server rack. The kind of thing that runs a whole office building. And it wasn’t just the rack. It was loaded with six power supply units, or PSUs. And these weren’t your average computer parts. Each one was rated for 2,700 watts.

    My first thought was, “Wow, what a beast.” My second thought was a quick, back-of-the-napkin calculation.

    2,700 watts x 6 = 16,200 watts.

    Sixteen. Thousand. Watts.

    For a moment, I let myself dream. I could run anything on this rig. It was the kind of hardware that could handle some serious computing. The price was low, and the temptation was high. It felt like finding a retired race car for the price of a used sedan. Sure, it’s not practical, but look at all that power!

    But then, reality started to creep in.

    The Harsh Reality of “Pro” Hardware

    This is the moment where the dream of a bargain meets the reality of hidden costs. That server rack wasn’t just a piece of hardware; it was a commitment. A commitment to noise, heat, and an electric bill that would make my eyes water.

    Let’s talk about that power draw again. A standard wall outlet in a U.S. home runs on a 15-amp circuit, which provides about 1,800 watts. That single server rack, running at full tilt, could demand the power of nine separate household circuits.

    Plugging this thing in wouldn’t just trip a breaker. It would be a declaration of war on my home’s electrical system. And even if I had a dedicated 240v circuit, like the one for an electric dryer, the monthly cost would be staggering. Enterprise hardware is built for performance, not efficiency.

    Then there’s the noise.

    If you’ve never been in a server room, it’s hard to describe the sound. It’s not a gentle hum. It’s a constant, high-pitched scream of fans working tirelessly to keep everything from melting. Those six 2,700-watt PSUs would make it sound like a jet was preparing for takeoff in my basement. It’s not something you can just ignore or get used to. It’s an actively hostile sound.

    And all that power and noise is really just a side effect of the main event: heat. Every single one of those 16,200 watts is eventually converted into heat. Running this rack would turn any normal room into a sauna in minutes. You don’t just need the rack; you need a dedicated cooling system to keep the rack—and the room it’s in—from overheating.

    So, Is It a Gem or Just E-Waste?

    This is the question, isn’t it? When does a piece of powerful, second-hand tech stop being a diamond in the rough and start being a piece of junk you’re paying to haul away?

    For 99% of people, this server rack is a trap. It’s a classic example of something that’s cheap to acquire but expensive to own. The “deal” isn’t in the purchase price; it’s in the operational cost.

    • For the average home lab enthusiast: It’s complete overkill. You can run a fantastic Plex server, a network storage system, and a dozen other services on a modern, low-power machine that sips electricity.
    • For the tinkerer: Maybe there’s some value in stripping it for parts? The rack itself is useful. But the main components, the PSUs, are the most impractical part of the whole package.

    The only person who could maybe, maybe justify it is someone with a dedicated, soundproofed, and separately-wired workshop who needs to do some serious number crunching, like training AI models or some other high-performance computing task. But even then, there are probably newer, more efficient ways to do it.

    So I closed the tab. I walked away. It’s fun to look at the monster truck, but you probably shouldn’t buy it to get groceries.

    The real lesson here is a simple one. The next time you see an incredible deal on professional or enterprise gear, take a second. Look past the shiny specs and the low price tag. Ask yourself about the hidden costs: the power, the noise, the heat, and the sheer practicality of it. Sometimes the best deal is the one you let someone else have.

  • Building My All-in-One Homelab in a Single Desktop PC

    Building My All-in-One Homelab in a Single Desktop PC

    Learn how a used HP Z440 workstation was transformed into a powerful, budget-friendly hyperconverged homelab running Proxmox, VyOS, and ZFS.

    From Humble Desktop to All-in-One Server

    It all started with a simple idea: what if I could build a powerful, flexible lab for my networking projects without filling a room with equipment? I’m fascinated by what’s happening in data centers with hyperconvergence—this idea of collapsing the network, compute, and storage into a single, efficient solution.

    So, I decided to try it myself. My goal was to combine everything into one chassis. The foundation for this project? A used HP Z440 workstation. It turns out, these machines are an amazing platform for building out massive compute power on a budget.

    The Hardware Foundation

    The Z440 was pretty barebones when I got it. It was a solid starting point, but I knew it needed some serious upgrades to handle what I had in mind.

    First up was memory. I wanted to run multiple virtual machines without breaking a sweat, so I went big. By combining the existing RAM with four new 16GB sticks, I brought the total up to a whopping 96GB of DDR4 ECC memory. For a homelab of this scale, that’s a fantastic amount of headroom.

    Next was networking, which is my main area of interest. The onboard 1-gigabit ethernet port is fine for management or as a backup, but I needed more speed. I installed an HPE FLR-560 SFP+ card, which gives me a 10-gigabit connection. This card is based on the solid Intel 82599 controller, which is great for virtualization. It connects to a Mikrotik CRS210 switch, which acts as the core of my entire network.

    For storage, I needed a way to connect multiple drives and manage them efficiently. I chose a Dell PERC H310 SAS controller. These are popular because you can “cross-flash” them with firmware from LSI, turning them into a very reliable Host Bus Adapter (HBA). This allows my virtualized storage operating system to talk directly to the drives.

    Here’s the final hardware breakdown:
    * Chassis: HP Z440 Workstation
    * RAM: 96GB DDR4 ECC
    * Networking: 10G SFP+ via HPE FLR-560, plus onboard 1G
    * Storage HBA: Dell PERC H310 (flashed to LSI firmware)
    * Drives: A mix of drives for different purposes—an M.2 NVMe for fast VM booting, a 2TB HDD and 4TB HDD for bulk storage, and a couple of SSDs for other tasks.
    * Cooling: An extra fan pointed directly at the expansion cards. Enterprise gear can run hot, and this simple addition keeps temperatures under 40°C even under heavy load.

    The Z440 has a surprising number of expansion slots, which gave me the flexibility to put all of this together in one box.

    The Software: Making It All Work Together

    Hardware is only half the story. The real magic is in the software architecture that brings it all to life. I chose Proxmox VE as my hypervisor—it’s a powerful and free platform for managing virtual machines.

    A Virtualized Network and Router

    Since I’m a networking person, this is where things get fun. All the network traffic flows through a single VLAN-aware bridge in Proxmox. I have about 20 different VLANs to segment traffic based on trust, purpose, and tenants.

    For routing, I’m running VyOS in a virtual machine. I used to run OPNsense on a separate mini-PC, but I found that managing many networks and VPN tunnels through a web UI became counterproductive. With VyOS, I can manage everything through a command-line interface, which is much faster and more powerful for my needs. I even use BGP to connect my homelab routes with some of my cloud deployments.

    A Virtualized Approach to Storage

    This is one of the parts I’m most proud of. Instead of just installing a NAS operating system like TrueNAS directly on the hardware, I virtualized my storage. I passed the HBA controller directly through to a FreeBSD virtual machine.

    Why? Two main reasons.

    1. Future-Proofing: This design separates my applications from my storage. In the future, if I want to scale up, I can build a dedicated storage server and disk shelf, and my VMs won’t even know the difference. They access the storage over the network (NFS or iSCSI) and are completely blind to the underlying hardware.
    2. Flexibility: I was already using ZFS pools from an old FreeBSD setup. This approach allowed me to import them without any of the conflicts I ran into when trying TrueNAS SCALE. It just works.

    What Am I Actually Running?

    With all this setup, you might be wondering what I’m doing with it. To be honest, it’s more of a lab for networking experiments than a server running a hundred different apps.

    My main workloads are:
    * CDN projects I contribute to.
    * Personal chat relays and Syncthing for file synchronization.
    * A Jellyfin media server (still a work in progress!).

    To keep track of it all, I use Netbox to document all my network prefixes, VLANs, and VMs. At this scale, good documentation isn’t optional; it’s a necessity.

    This project has been a blast. It’s proof that you don’t need a full server rack to explore advanced data center concepts. A well-chosen desktop workstation can be the perfect, budget-friendly heart of a seriously powerful all-in-one homelab.

  • Why Does My Computer Fan Get Quiet When I Press On It?

    Why Does My Computer Fan Get Quiet When I Press On It?

    Is your computer fan making a racket? Learn the simple reasons why pressing on it makes it quiet and how to fix the noise for good. No tech skills needed!

    You know that sound. The one you try to ignore, but it just keeps getting louder. It’s the constant, irritating whir of a computer fan that’s decided to throw a party at the worst possible time. I had this happen with an old PC, and it drove me nuts. The fan was so loud, but if I gently pressed on the case, the noise would die down. What gives?

    If this sounds familiar, you’re not alone. A noisy fan is a common problem, and it’s usually a sign that something is a little off-kilter. The good news is you can probably fix it yourself without having to call in a pro or, even worse, buy a new computer.

    Let’s walk through why this happens and what you can do about it.

    So, Why Does Pressing on It Help?

    When you press on your computer case and the fan gets quieter, you’re essentially providing temporary stability. The pressure you apply is likely stopping something from vibrating. Think of it like holding a rattling picture frame against the wall—the noise stops because the vibration stops.

    This little diagnostic trick points to a couple of likely culprits:

    • Worn-Out Fan Bearings: This is the most common cause. Inside the fan’s motor are tiny bearings that allow it to spin smoothly and quietly. Over time, they wear out. When you press on the case, you’re slightly shifting the fan’s position, forcing the bearings into a less-worn groove, which quiets them down for a moment.
    • Something is Loose: The fan itself might not be screwed in tightly. The vibrations from its normal operation can cause a loose fan to rattle against the computer case or its own housing. Your hand pressure dampens that vibration.
    • Dust and Grime: A fan caked in dust and pet hair is an unbalanced fan. This imbalance can cause vibrations and noise. It can also make the fan work harder and spin faster than it needs to, which only adds to the racket.

    How to Actually Fix the Noise

    Okay, so we know why it’s happening. Now for the fun part: fixing it. Before you start, a quick word of caution.

    Important: Unplug your computer from the wall before you open the case. Don’t just shut it down—unplug it completely. Static electricity is the enemy of computer components, so it’s a good idea to ground yourself by touching a metal part of the case before you start poking around inside.

    Here’s a simple plan of attack.

    1. The Clean-Up Crew

    First things first, let’s get rid of the dust.

    • Open the Case: Most desktop computer cases have a side panel that comes off with a couple of thumbscrews on the back.
    • Grab Some Canned Air: This is your best friend for computer cleaning. Do not use a vacuum cleaner! Vacuums can create a static charge that can fry your components.
    • Blow It Out: Hold the fan blades still with one finger (so they don’t spin like crazy and damage the motor) and use short bursts of canned air to blow the dust off the blades and out of the fan housing. Get the dust off the power supply and any other fans you see in there, too.

    Sometimes, a good cleaning is all it takes. If the noise is gone, congratulations! You’re done. If not, on to the next step.

    2. The Tighten-Up

    While the case is still open, check if the fan is securely mounted.

    • Check the Screws: You’ll see a few screws holding the fan to the case. Gently check if they’re tight. If you can turn them easily, they might be the source of your rattle. Just snug them up—don’t overtighten.
    • Check the Fan Housing: Some fans are clipped into a plastic housing. Make sure it’s all snapped together properly.

    If you’ve cleaned and tightened everything and the noise persists, it’s probably time to face the music. The fan itself is likely the problem.

    3. The Last Resort: A New Fan

    If the bearings are shot, no amount of cleaning or tightening will be a permanent fix. Replacing a case fan is surprisingly easy and inexpensive.

    • Identify Your Fan: Look for a sticker on the fan hub. It will usually have the model number and, most importantly, the size (commonly 80mm, 120mm, or 140mm). Note how it connects to the motherboard (usually a small 3- or 4-pin connector).
    • Buy a Replacement: You can find replacement fans online for just a few dollars. It’s a cheap and effective upgrade.
    • Swap It Out: Unplug the old fan from the motherboard, unscrew it from the case, and then simply screw the new one in its place and plug it in.

    It might sound intimidating, but it’s usually a 10-minute job. And the sweet, sweet sound of a quiet computer is totally worth it. You’ll be able to hear yourself think again.

  • Proxmox vs. UnRAID: How I Finally Chose My Home Server OS

    Proxmox vs. UnRAID: How I Finally Chose My Home Server OS

    Stuck choosing between Proxmox and UnRAID for your home server? I break down the key differences in plain English to help you pick the right OS for your needs.

    So you’ve got a computer, a list of cool projects, and a desire to build your own home server. Welcome to the club. It’s an exciting first step. But it leads to the first big, head-scratching question: which operating system do you use?

    After a bit of searching, you probably landed on the two most common answers: Proxmox and UnRAID. And now you’re stuck.

    I’ve been there. I spent way too much time staring at forums and watching videos, trying to figure out which path to take. It felt like a massive decision, and in some ways, it is. But the choice is actually simpler than it seems. It all comes down to one question: What is the primary job of your server?

    Let’s break it down.

    My Server “To-Do” List

    First, I had to get clear on what I actually wanted this thing to do. My plan looked a lot like the ones I see people discussing online. I wanted a central place to:

    • Store and serve files: A network-attached storage (NAS) for my important documents and backups.
    • Run a media server: Plex was the goal, so I could stream movies and shows anywhere.
    • Host a smart home hub: Home Assistant was a must-have.
    • Block ads on my network: Using something like Pi-hole or AdGuard Home.
    • Tinker: I wanted the freedom to spin up virtual machines (VMs) and containers to experiment with new software without breaking my main setup.

    This is a classic “all-in-one” server. Both Proxmox and UnRAID can do all of these things. But they approach the job from completely different angles.

    UnRAID: The Storage-First Friend

    The easiest way to think about UnRAID is as a super flexible NAS that also happens to be great at running apps.

    Its killer feature is how it handles hard drives. You can take a bunch of drives of completely different sizes, toss them in a box, and UnRAID will pool them all into one giant storage space. It protects your data using a “parity drive.” This means if one of your data drives fails, you can pop in a new one and rebuild your lost files.

    This is amazing for a media server where you’re constantly adding more storage. Found a cheap 8TB drive on sale? Great, throw it in. Your friend gave you an old 4TB drive? No problem, add it to the pool. You don’t have to worry about matching drive sizes like you do with traditional RAID setups.

    The Bottom Line on UnRAID:
    * Its strength: Unbeatable storage flexibility. Perfect for building a massive, ever-expanding media library.
    * The user experience: It has a very friendly web interface. Setting up apps (as Docker containers) and managing your storage is incredibly straightforward. It’s designed for home users.
    * The catch: It’s not free. You pay a one-time fee based on the number of drives you plan to use.

    If your number one goal is building a NAS, UnRAID is probably your answer. It makes the storage part dead simple.

    Proxmox: The Virtualization Powerhouse

    Proxmox comes at the problem from the opposite direction. It’s a “hypervisor.” Its main job is to run virtual machines and containers, and it does this incredibly well.

    Think of Proxmox as a powerful, bare-metal foundation for all your virtual projects. It’s built on Debian Linux and includes enterprise-grade tools, but it’s completely free and open-source. You can slice up your server’s resources and dedicate them to a Windows VM, a dozen different Linux containers, and anything else you can dream up.

    Storage on Proxmox is more traditional. The most popular choice is ZFS, which is a fantastic file system known for its data integrity features. It can detect and repair data corruption on its own. But it’s also more rigid. With ZFS, you typically create storage pools with drives of the same size. You can’t just toss in random drives like you can with UnRAID. It requires a bit more planning upfront.

    The Bottom Line on Proxmox:
    * Its strength: It’s the king of virtualization. If you want to run a lot of complex VMs and learn how enterprise-level systems work, this is it.
    * The user experience: It has a steeper learning curve. The web interface is powerful but dense. You’ll probably find yourself using the command line to get things done.
    * The catch: Storage is less flexible. It’s powerful and safe, but not as forgiving as UnRAID’s mix-and-match approach.

    So, How Did I Choose?

    After laying it all out, the answer became clear for me. I looked back at my list. While a NAS was on there, my real excitement came from the “tinker” category. I wanted to experiment, to break things in a safe environment, and to have a dozen little projects running at once.

    My primary goal was to learn and experiment with VMs and containers. The NAS part was important, but secondary.

    Because of that, I chose Proxmox.

    It gave me the powerful, flexible foundation for virtualization I was craving. I was willing to accept the more rigid storage requirements and the steeper learning curve because it was the best tool for my main job. I set up my NAS inside a VM on Proxmox, which gives me the best of both worlds.

    Don’t Choose the “Best” One, Choose the Right One

    There is no single “best” home server OS. Anyone who tells you otherwise is probably trying to justify their own choice.

    • If your server’s main purpose in life is to be a NAS that holds your growing media collection, and you want the simplest path to get there, start with UnRAID.
    • If your server’s main purpose is to be a playground for virtual machines and containers, and you’re excited by the idea of learning a more powerful, professional tool, start with Proxmox.

    Forget the hype. Just look at your to-do list, identify your real priority, and pick the tool that’s built for that job. You can’t go wrong. Good luck with your build!

  • From Cable Spaghetti to Clean: My Home Network Makeover

    From Cable Spaghetti to Clean: My Home Network Makeover

    A personal journey of transforming a messy home network cabinet into a clean, organized, and high-performance setup. Get inspired to tackle your own project.

    It always starts with “I’ll get to it later.”

    For me, “it” was the network cabinet in my office. It was a classic case of organized chaos that slowly devolved into just… chaos. It worked, mostly, but I tried not to look at it. You know the look: a web of cables, multiple power bricks, and a collection of devices stacked on top of each other.

    The real push came when I upgraded my internet. I went from a respectable 1Gbps to a wild 5Gbps connection. Suddenly, the tangled mess of hardware didn’t just look bad; it felt like a bottleneck. My network was spread across four different switches—a mix of 1GbE, 2.5GbE with Power over Ethernet (PoE), 10GbE with PoE, and even an unmanaged 10GbE switch. It was a patchwork system that had grown over time, and it was holding back my shiny new internet speeds.

    Something had to change.

    The First Big Step: Consolidation

    My initial plan was to simplify. I sold all four of my existing switches. It felt good to clear out the clutter. I replaced them with a single, powerful managed switch that could handle everything I needed: high speeds, plenty of ports, and PoE for my devices.

    I also had a patch panel, which is supposed to be the key to organization. I dutifully routed all my connections through it. And yet, when I stepped back, it was still a mess. I had replaced a multi-device mess with a single-device mess. The problem wasn’t just the hardware; it was the cabling. I had a severe case of “cable spaghetti,” with wires that were way too long, crisscrossing in a tangled bird’s nest.

    It was better, but it wasn’t right.

    The Real Fix: Getting the Details Right

    The midpoint cleanup taught me an important lesson: a good foundation is everything. The real transformation happened when I decided to redo my home’s network wiring from the ground up.

    This was the big one. I ran 24 new CAT6A ethernet cables throughout the house, giving me a fast, reliable connection in every room I needed one. Every single run terminated neatly at the back of my patch panel.

    With a solid infrastructure in place, I could finally focus on the details that make all the difference.

    • Clean Patch Cables: I invested in a set of short, slim-run patch cables. Instead of using a three-foot cable where I only needed six inches, I got cables that were the perfect length. This alone made a huge impact.
    • Cable Management: I used the patch panel as intended, creating clean, direct lines from the panel down to the switch. No more crossing over, no more excess loops.
    • Finishing Touches: I even added some simple rubber grommets to the pass-through holes in the cabinet. It’s a tiny thing, but it keeps the dust out and makes the whole setup look more professional.

    Was It Worth It?

    Absolutely.

    Stepping back and looking at the final result is incredibly satisfying. It’s not just about aesthetics, though it does look great. It’s about building a system that is reliable, easy to manage, and capable of handling anything I throw at it.

    If I need to trace a connection or troubleshoot an issue, I can do it in seconds. I know that every part of my network, from the wall jack to the switch, is solid. And I’m finally getting the full performance of that 5Gbps internet connection I’m paying for.

    So if you have a tech cabinet that’s slowly descending into chaos, maybe it’s time for a cleanup. It might start with a simple hardware upgrade, but don’t forget the details. Sometimes, the most satisfying projects are the ones that bring a little bit of order to the chaos.

  • My First Homelab: It’s Not About the Gear

    My First Homelab: It’s Not About the Gear

    Thinking about building your first homelab? Follow my journey from a pile of old parts to a working home server. It’s easier than you think to start!

    It doesn’t look like much. Just a small stack of black and grey boxes tucked away on a shelf, with a few blinking green and orange lights to prove they’re alive. But this little pile of technology is the start of a project I’ve been putting off for years: my first homelab.

    If you’ve ever browsed certain corners of the internet, you’ve probably seen them. Massive server racks with dozens of machines, intricate network diagrams, and enough computing power to launch a small satellite. It’s impressive, but it’s also incredibly intimidating.

    For the longest time, I thought that’s what a homelab had to be. Expensive, complicated, and reserved for seasoned IT professionals. But I was wrong. It turns out, a homelab is simply a space to learn. And you can start with whatever you’ve got.

    So, What Is a Homelab, Anyway?

    In simple terms, it’s a personal server (or servers) that you run at your own home. It’s your private sandbox for tinkering with technology.

    Think about all the digital services you use. Streaming music, storing photos, using an app to turn your lights on. Most of that runs on servers in a data center somewhere. A homelab lets you bring some of that capability into your own house. It’s a place to host your own applications, experiment with enterprise-grade software, and ultimately, learn how things really work.

    You get to be the system administrator, the network engineer, and the user, all at once.

    Why Bother Building One?

    I had a few reasons.

    First, I was curious. I work with technology, but I often only see a small piece of the puzzle. I wanted to understand the whole stack, from the physical hardware up to the application a person uses. There’s no better way to learn than by doing (and by breaking things in a safe environment).

    Second, I wanted more control over my own data. Services like Google Photos and Dropbox are convenient, but they come with privacy trade-offs and subscription fees. The idea of hosting my own private cloud for photos and files was really appealing.

    And finally, I just wanted a place to play. I wanted to test out things I’d read about, like Docker containers, virtualization, and network-wide ad-blocking, without messing up my main home network.

    My Humble Beginnings: The Hardware

    This is the part that stops most people, but it shouldn’t. My setup is proof that you don’t need to spend a fortune. Here’s what my “lab” consists of:

    • An old mini-PC: It’s a refurbished Dell OptiPlex Micro I found online. It’s small, quiet, and sips power, but its i5 processor is more than enough to run a few virtual machines.
    • An external hard drive: Just a simple 4TB USB drive I already had. For now, it’s handling my media and file storage. It’s not a fancy NAS, but it works.
    • A Raspberry Pi 4: This little guy is perfect for lightweight, always-on tasks. I plan on using it for network-level ad blocking with Pi-hole.
    • A basic network switch: Nothing fancy, just an 8-port unmanaged switch to connect everything.

    That’s it. No rack, no server-grade components. Just a few pieces of consumer hardware that I cobbled together. The whole thing cost less than a new smartphone.

    The First Small Victory

    After getting everything plugged in, my first goal was to install Proxmox, a popular open-source virtualization platform. It lets you run multiple virtual computers on a single physical machine.

    I’ll be honest: it was a bit of a struggle. I had to re-format the USB installer three times. I couldn’t figure out why it wasn’t getting a network connection. But after a couple of hours of searching forums and tweaking settings, I finally saw the Proxmox login screen in my web browser.

    That small win felt huge.

    In that moment, it wasn’t just a pile of hardware anymore. It was a server. My server. And I can’t wait to see what I learn with it next. If you’ve been on the fence, maybe this is your sign. Start small, use what you have, and just get started.

  • Yes, You Can Fit a Giant GPU in a Dell Server. Here’s How.

    Yes, You Can Fit a Giant GPU in a Dell Server. Here’s How.

    Discover how to install a large consumer GPU like the NVIDIA RTX 4060 into a Dell PowerEdge R740xd server. A simple, no-mod guide for your homelab.

    It’s a common story for anyone with a homelab. You get your hands on a powerful, reliable enterprise server—like a Dell PowerEdge R740xd—and it’s fantastic. It’s quiet, efficient, and handles everything you throw at it. But then you get an idea. A little voice whispers, “What if it could do more? What if I could add a real graphics card to this thing?”

    You immediately dismiss it. Those rack servers are packed tight. They’re designed for specific, low-profile enterprise cards, not for the massive, triple-fan consumer GPUs we see today. The airflow, the power, the physical space—it’s just not meant to be.

    At least, that’s what I thought. But it turns out, it’s not only possible to fit a big, modern GPU into an R740xd, it’s surprisingly straightforward.

    The Goal: A Modern GPU in a Workhorse Server

    My server is the Dell R740xd, but the version without the mid-bay drive cage. This part is important, as that extra space is crucial. The goal was to install something modern and capable, like an NVIDIA GeForce RTX 4060, to handle tasks like Plex transcoding, run some local AI models, or even power a high-performance virtual machine.

    The problem is obvious the moment you look at the card and the server’s internals. The RTX 4060 is long. Way too long for the standard configuration.

    The Fix Is In (And It’s Just Four Screws)

    Here’s the part that surprised me. You don’t need a Dremel, a saw, or any destructive case mods. All you need is a screwdriver.

    Above the power supply unit (PSU), there’s a metal PCI card holder. It’s there to support and secure the cards you install. From the factory, it’s installed in a way that limits the length of the card you can use. But here’s the secret: the bracket is reversible.

    I’m not sure if Dell designed it this way on purpose, but it works perfectly. All you have to do is:

    1. Power down and open up your server.
    2. Locate the PCI card holder bracket.
    3. Remove the four screws holding it in place.
    4. Turn the bracket 180 degrees (flip it around).
    5. Screw it back in with the same four screws.

    That’s it. This simple flip moves the support wall out of the way, giving you the exact amount of extra clearance needed to slide a full-length GPU into the PCIe slot. It’s a clean, simple, and completely reversible modification that takes less than five minutes.

    Don’t Forget the Power

    The second piece of the puzzle is power. Server power supplies are incredibly robust, but they don’t come with the standard 6-pin or 8-pin PCIe power connectors that consumer GPUs need.

    To solve this, you’ll need a special power adapter cable. The cable connects to an 8-pin power port on the server’s power distribution board and provides a standard 8-pin PCIe connector for your graphics card. You can find these online by searching for something like “Dell R-series 8-pin to 8-pin PCIe power cable.” Just make sure it’s compatible with the R740xd. It’s a simple plug-and-play solution.

    So, Why Do This?

    Putting a card like this in your server unlocks a ton of potential:

    • Media Server Powerhouse: Your Plex or Jellyfin server can transcode multiple 4K streams without breaking a sweat.
    • AI and Machine Learning at Home: You can start experimenting with large language models (LLMs), Stable Diffusion, or other AI tools without paying for cloud services.
    • Beefy Virtual Machines: You can use GPU passthrough to assign the RTX 4060 to a specific VM. This is great for creating a powerful remote desktop, a development environment, or even a cloud gaming machine.

    It’s been a fantastic upgrade. I was genuinely expecting a weekend of frustrating modifications, but it ended up being one of the simplest hardware upgrades I’ve ever done. So if you have a similar server and have been dreaming of adding more graphical muscle, don’t be afraid to pop the lid open. The solution might be easier than you think.

  • The Quiet Win: When My Homelab Hobby Paid Off at My New Job

    The Quiet Win: When My Homelab Hobby Paid Off at My New Job

    Ever wonder if your homelab hobby is worthwhile? Here’s a short story about how tinkering at home can prepare you for your first task at a new tech job.

    You know that feeling when you start a new job? It’s a mix of excitement and a low-key hum of anxiety. You want to prove you belong. You want to show them they made the right choice.

    I had my first one of those moments last week.

    My boss walked over, sent me the login details for a virtual machine, and said something like, “Here, have a go at spinning up this Docker container for me.”

    And that was it. The first real task. Not onboarding paperwork, not another Zoom orientation. A real, tangible thing that needed to be done.

    The Moment of Truth

    I logged into the machine, staring at the command line. For a second, that little voice of doubt popped up. What if I mess this up? What if I take too long?

    But then, something else kicked in. A sense of familiarity.

    See, for the last couple of years, I’ve been tinkering at home. I have a modest little homelab—a couple of old machines I pieced together to learn new things. It’s my little sandbox for playing with networking, virtualization, and, you guessed it, Docker.

    I’ve spent countless weekend hours SSH-ing into my own machines, breaking things, fixing them, and figuring out how software works in a hands-on way. I’ve fumbled through Docker Compose files, trying to get a new service running just for the fun of it.

    So, as I looked at the task my boss gave me, I realized I’d done this exact thing a dozen times before. Just not for a paycheck.

    From Hobby Project to Professional Task

    The process was almost muscle memory. I navigated the file system, found the docker-compose.yml file, and read through it to understand what it was supposed to do. It wasn’t anything overly complex, which was a relief.

    A few commands later, the logs were scrolling up the screen. The container was up. The service was running.

    It took a couple of hours from start to finish, mostly because I was being extra careful. Double-checking every step. But I did it. I sent a quick message to my boss letting him know it was done. He replied with a simple “thanks,” and that was that.

    No fireworks went off. No one threw a parade. But for me, it was this incredibly quiet, satisfying win.

    Why Your “Useless” Hobbies Matter

    This whole experience got me thinking. It’s so easy to dismiss our hobbies and side projects as just messing around. We don’t get grades for them. They don’t show up on a performance review.

    But they are, without a doubt, some of the best training you can get. Here’s why:

    • It’s learning under no pressure. In a homelab, the stakes are low. If you break something, only you are inconvenienced. This freedom gives you the space to be curious, to poke at things, and to learn in a way that isn’t driven by fear of failure.
    • You build practical muscle memory. Reading about a technology is one thing. Actually typing the commands, troubleshooting the weird errors, and seeing it work (or not work) builds a kind of practical knowledge that theory alone can’t provide.
    • It proves you’re actually interested. You’re not just learning this stuff because a job requires it. You’re learning it because you have a genuine curiosity. That passion is a powerful driver, and it’s something employers can’t teach.

    So if you’re one of those people tinkering with code, building a server in your closet, or designing something just for the fun of it, don’t stop. It might feel like you’re just playing around, but you’re actually building a library of experiences.

    And one day, at a new job, you’ll get your first real task, and you’ll realize you already know exactly what to do. And trust me, it feels good.

  • I Built a 36TB Home Server for Under €400. Here’s How.

    I Built a 36TB Home Server for Under €400. Here’s How.

    Learn how to build a powerful and affordable home server for under €400. A step-by-step guide to creating your own personal cloud and media server.

    I’ve always been tempted by the idea of having my own home server. A little box in the corner that could act as my personal cloud, a media hub for movies, and a central backup spot for all my family’s devices. But then I’d look at the price of off-the-shelf NAS (Network Attached Storage) systems from brands like Synology or QNAP, and my enthusiasm would quickly fade.

    But what if you could build something just as powerful, if not more so, for a fraction of the price?

    I recently went down this rabbit hole and managed to build a powerful 36TB home server for just around €375. It wasn’t that hard, and honestly, the process was a lot of fun. Here’s a look at how I did it.

    The Shopping List: Finding Bargains

    The core of this project is about being resourceful. You don’t need brand-new, top-of-the-line components to build a fantastic home server.

    • The Brains: I started by looking for a used mini PC. These things are perfect because they’re small, quiet, and sip power. I found an old Fujitsu Esprimo with an Intel i5-6500T processor for just €50. This CPU is more than capable of handling file transfers, media streaming, and even running a few applications simultaneously.
    • The Storage: This is where most of the budget went. I needed a lot of space and, more importantly, I needed it to be reliable. After searching a local online marketplace, I found a great deal on two massive 18TB hard drives for €150 each. Buying used or refurbished enterprise drives is a great way to get a ton of storage without breaking the bank.
    • The Little Details: The mini PC came with a 120GB SSD, which is perfect for running the operating system. I didn’t have a proper way to mount it inside the tiny case alongside the big hard drives, so I secured it with a bit of hot glue. It’s not elegant, but it’s secure and it works perfectly. Add in a specific 12V power supply and a buck converter to properly power the hard drives, and the hardware was complete.

    The grand total for all the parts came out to around €375. Not bad for a 36TB server.

    Putting It All Together

    With all the parts in hand, the assembly was pretty straightforward. The real magic happens in the software and setup.

    First, I configured the two 18TB hard drives in a “mirrored” setup. This is a form of RAID (Redundant Array of Independent Disks) known as RAID 1. In simple terms, it means the second drive is an exact, real-time copy of the first one. It’s a crucial step for peace of mind. If one hard drive ever fails, all of my data is still safe and sound on the other one. I effectively have 18TB of usable storage, with another 18TB acting as an instant backup.

    For the operating system, I went with TrueNAS CORE. It’s a free, open-source, and incredibly powerful OS designed specifically for creating a NAS. It handles the disk mirroring, file sharing, and all the complicated stuff automatically. The installation was as simple as flashing it to a USB drive and booting the mini PC from it.

    So, What Can You Actually Do With It?

    This is the best part. You’ve built this powerful little box, now what? The original inspiration for this project was someone who built the server but wasn’t sure what to do next. Here are the things I’m most excited about.

    • A Private Cloud: Think of it like Dropbox or Google Drive, but you own it completely. Using a service called Nextcloud (which you can run on TrueNAS), you can sync files across your phone, laptop, and desktop. You can access your documents from anywhere in the world, knowing they’re stored safely on your own hardware at home.
    • A Media Streaming Powerhouse: This is a big one. By installing Plex or Jellyfin, you can turn your server into a personal Netflix. I’ve been digitizing my old Blu-ray collection, and now I can stream my movies and TV shows to any TV, tablet, or phone in the house (or even outside the house). No more subscription fees.
    • The Ultimate Backup Hub: TrueNAS is brilliant at handling backups. You can set it up to automatically back up all the computers in your home. My partner’s MacBook and my Windows PC are now backed up nightly without us having to think about it.
    • A Hub for a Smarter Home: If you’re into smart home tech, you can run software like Home Assistant. This lets you control all your smart lights, plugs, and sensors from one private interface, without relying on corporate clouds.

    Building your own server sounds intimidating, but it doesn’t have to be. With a bit of patience and some savvy shopping, you can create a powerful and private digital hub for your home. And you get the satisfaction of knowing you built it yourself—even if parts of it are held together with hot glue.