Category: Uncategorized

  • That Weirdly Cheap Server I Can’t Stop Thinking About

    That Weirdly Cheap Server I Can’t Stop Thinking About

    Ever find a cheap server online and dream of building a powerful gaming rig? Let’s talk about the pros, cons, and the reality of that tempting DIY project.

    You know the feeling. It’s late, you’re scrolling through eBay, Facebook Marketplace, or some other digital bazaar of forgotten things. You’re not looking for anything in particular. And then, you see it.

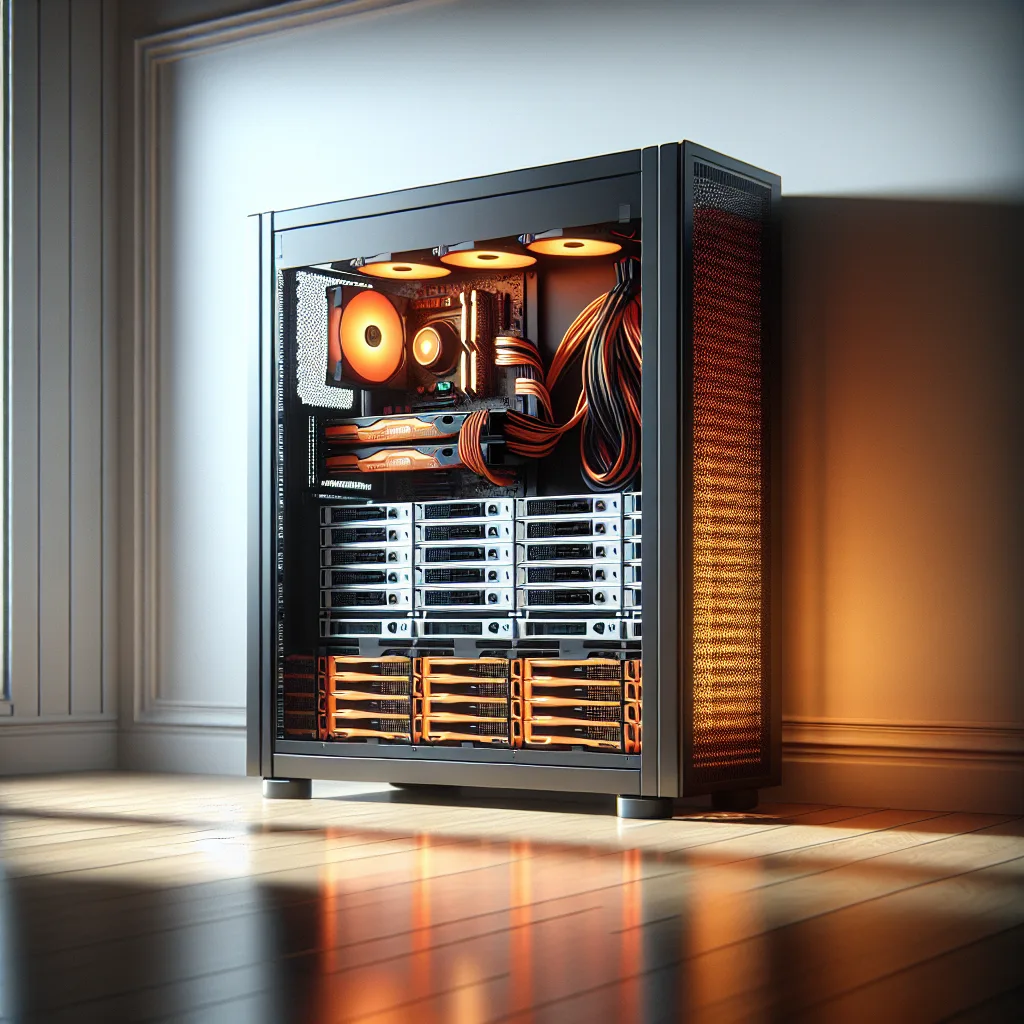
    For me, it was a server. Not just any server, but a hulking, industrial, multi-bay server chassis. The kind of thing you’d expect to see bolted into a rack in a freezing-cold data center, blinking away silently as it powers a whole company.

    And it was cheap. Crazy cheap.

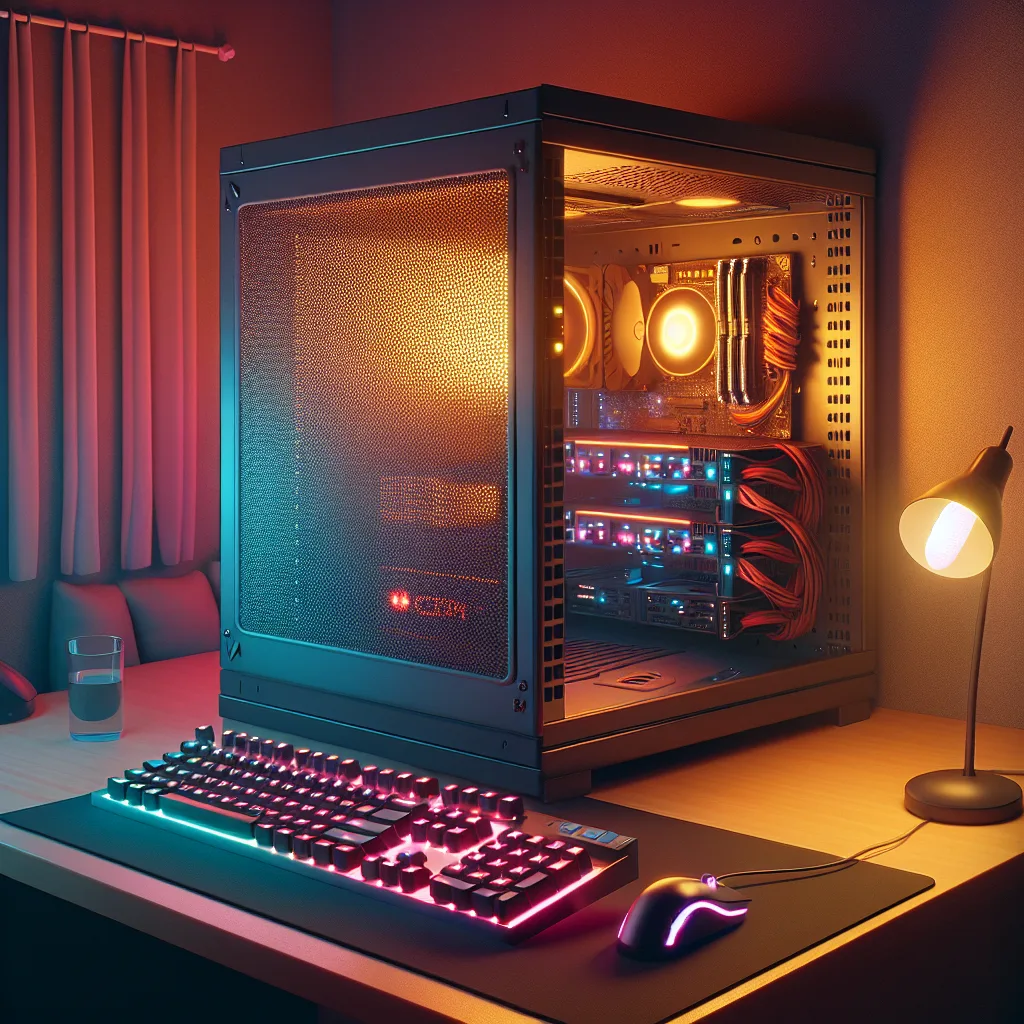
    My first thought wasn’t about running a business website or managing databases. No. My first thought was, “Imagine building a gaming rig in that.”

    The Dream of a Ridiculous-Box

    My mind immediately started racing. I wasn’t just thinking of a PC; I was thinking of a home data-center. This wouldn’t be just for gaming. Oh no.

    It would be the ultimate all-in-one machine.
    * A powerful gaming server, capable of running anything I throw at it.
    * A Plex server that could stream 4K movies to every device in the house without breaking a sweat.
    * A private cloud for all my files, photos, and projects.
    * A host for a few private game servers for me and my friends.

    The possibilities felt endless. It was a tech enthusiast’s dream project. The satisfaction of taking this piece of industrial hardware and taming it, making it the heart of my home network… it was a powerful fantasy.

    The price tag made it all the more tempting. For less than the cost of a high-end gaming case, I could get this behemoth. It felt like a loophole, a secret I had stumbled upon that no one else knew. All that potential, just sitting there waiting for me.

    My brain was already in build-mode. I was picturing the components, planning the cable management, imagining the satisfying thunk of the hard drive bays sliding into place.

    But Then, a Little Voice of Reason Chimes In

    Just as I was about to click “Add to Cart,” a small, nagging voice in the back of my head decided to speak up. It started asking some very inconvenient questions.

    “Where are you going to put this thing?”

    Good point. This isn’t a sleek tower that can be tucked under a desk. It’s a massive, heavy metal box. It belongs in a rack, in a basement, or a garage. My small home office would suddenly feel like a server room, and not in a cool, aesthetic way.

    “Have you thought about the noise?”

    Server hardware is designed for one thing: performance and cooling in a room where nobody has to listen to it. The fans inside these things aren’t the whisper-quiet, RGB-lit fans from the consumer market. They are jet engines. They are designed to move as much air as possible, and they don’t care about your ears. The dream of a quiet evening of gaming would be replaced by a constant, high-pitched WHIRRRRR.

    “And the power bill?”

    That cheap initial price is a bit of a Trojan horse. Server components, especially older ones, are not known for their energy efficiency. Running a machine like this 24/7 could have a very real, very noticeable impact on my monthly electricity bill. The “crazy cheap” server suddenly doesn’t seem so cheap when you factor in its running costs over a year.

    “Will your stuff even fit?”

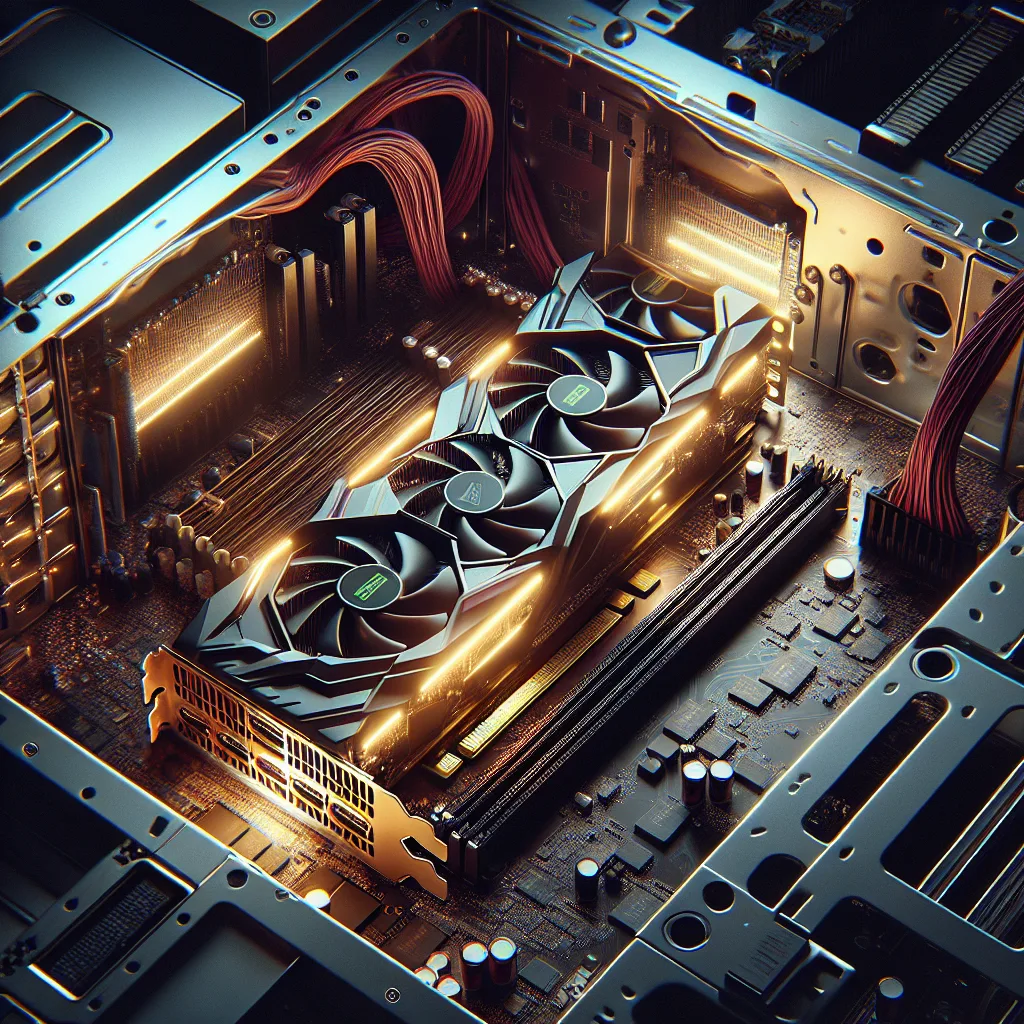
    Server chassis are built for server motherboards and server components. They have different layouts, different mounting points, and different priorities. Would my consumer-grade motherboard fit? What about my giant, triple-fan graphics card? Would I spend half the project just trying to dremel and drill new holes to make everything compatible? The fun DIY project could quickly turn into a frustrating nightmare of incompatibility.

    So, What’s the Verdict?

    After my internal debate, I closed the browser tab. For now.

    The truth is, the allure of a project like this is undeniable. It’s not just about the end result; it’s about the challenge, the learning process, and the story you get to tell afterward. It’s the modern-day equivalent of finding an old car in a barn and spending weekends bringing it back to life.

    But it’s also important to be realistic. It’s a project that demands space, patience, and a tolerance for noise and high power bills. For most of us, a powerful desktop PC and a separate, dedicated NAS (Network Attached Storage) device is a much more practical—and quieter—solution.

    I still think about that server sometimes. I still wonder, “What if?” And maybe one day, if I have a house with a garage or a basement where I can let a jet engine run, I’ll go for it.

    Until then, it remains a fun, ridiculous dream. And sometimes, the dream is just as good as the real thing. What’s the one impractical tech project you can’t stop thinking about?

  • My Home Lab Is a Glorious, Unfinished Mess

    My Home Lab Is a Glorious, Unfinished Mess

    A personal tour of a work-in-progress home lab. It’s not about perfection, but the joy of tinkering, learning, and building something uniquely your own.

    It All Starts Somewhere

    I have a confession. My home lab is a glorious, unfinished mess. And I absolutely love it.

    If you’re in the tech world, you’ve probably seen those perfect network racks on social media. The cables are managed with surgical precision, every device is perfectly aligned, and it all hums along in a climate-controlled room. Mine isn’t quite like that. It’s a living, breathing project that’s constantly evolving.

    There’s a certain pride that comes from building something yourself, especially when it’s a constant work in progress. It’s a testament to late-night tinkering, cheap marketplace finds, and the sheer joy of making something work.

    So, let me give you a little tour of my setup. It’s not perfect, but it’s mine.

    The Heart of the Operation

    At the very top of my rack, I’ve got the brains of the whole network: a UniFi Dream Machine Pro Max. This thing handles everything from my internet connection to network security. Below that is a simple 24-port patch panel, which is just a neat way to organize all the ethernet cables coming in from around the house.

    Next up is the big switch, a UniFi Switch 48 Pro Max. This is what lets all the devices talk to each other. It’s a non-POE model, meaning it doesn’t send power over the ethernet cables, but for my current needs, it’s a beast. Another patch panel sits right below it, keeping the connections tidy.

    Storage, Servers, and a Bit of Everything

    Now for the fun stuff. My storage workhorse is a UNAS Pro server. I’ve loaded it with 8TB drives, giving me a raw total of 56TB. After setting it up for data redundancy (so I don’t lose everything if a drive fails), I have about 48TB of usable space. This is where I keep everything—family photos, important backups, and, of course, my Plex media library.

    For running various apps and services, I use a couple of tiny but mighty PCs. They are two Lenovo m93p mini PCs, and they mostly run Docker containers. Think of Docker as a way to run lots of small, independent applications without them interfering with each other. It’s incredibly efficient.

    I also have a dedicated machine, a Dell Optiplex 7040, for one specific, classic home lab task: downloading Linux ISOs. If you know, you know.

    Sitting at the bottom is my dedicated Plex Server, housed in an old Supermicro case. It’s a bit of a project right now because I still need to find drive bays that actually fit this specific chassis. It’s a classic example of making do with what you have.

    The Future Pile

    Like any good hobbyist, I have more gear than I have space or time.

    I just picked up a Dell R730XD for a great price. It’s a serious piece of enterprise hardware that needs some TLC before I can put it to use. It’s also incredibly loud, so it will probably end up in another room entirely. But the potential is exciting.

    And that’s not all. I’ve got a Dell 48-port SFP+ 10-gig switch for when I’m ready to upgrade my core network speeds, a Juniper 48-port POE switch for future projects like security cameras, and even a couple of older Cisco Catalyst switches. You never know when they might come in handy.

    The Real Point of It All

    Looking at this list, it’s easy to see the imperfections. The half-finished projects, the mismatched gear, the ever-present “to-do” list.

    But that’s the whole point.

    A home lab isn’t a product you buy; it’s a journey you take. It’s about the problems you solve, the skills you learn, and the satisfaction of watching it all come to life. It’s a physical representation of your curiosity.

    So yeah, it’s not perfect. There’s a ton left to do. But I wouldn’t have it any other way.

  • My Homelab in 2025: A Look Inside the Rack

    My Homelab in 2025: A Look Inside the Rack

    A personal tour of a 2025 homelab setup. Explore the hardware and software behind a custom pfSense router, Proxmox server, NAS, and more.

    It’s funny how hobbies evolve. What started a few years ago as a simple setup with a couple of servers has… well, it’s gotten a bit more elaborate. It’s 2025, and my homelab has taken on a life of its own.

    I get asked what I’m running at home, so I thought it would be fun to give you a little tour of my current setup. It’s a mix of new, old, and repurposed hardware that works together surprisingly well.

    The Gatekeeper: My Custom Router

    Let’s start with the most eye-catching piece: the bright orange PC. This isn’t a gaming rig; it’s the brain of my entire network. It’s a custom-built router and firewall running pfSense.

    Why build my own router? Control. It gives me a ton of flexibility and security features you just don’t get with off-the-shelf routers. Inside, it has a Xeon E3-1245 V2 processor and 32 GB of RAM, which is admittedly overkill, but it never breaks a sweat. It handles all the internet traffic, keeps the network secure, and just works.

    Oh, and there’s a little secret inside: a Raspberry Pi tucked away in the case, quietly running a small personal website.

    The Workhorses: My Servers

    Under the router sits a small but mighty HP EliteDesk. This one runs Windows Server. Its main job is to handle WSUS, which is a service that manages and distributes Windows updates to all the other machines on my network. It keeps everything patched and up-to-date automatically. It also hosts a couple of simple websites. It’s powered by an i5-8500 and 32 GB of RAM, so it has plenty of horsepower for its tasks.

    Next to it is another EliteDesk, this one a slightly older model. This is probably the busiest machine in the rack. It runs Proxmox VE, which is a fantastic tool that lets me create and manage multiple virtual machines (VMs) and containers on a single physical computer. It’s like having a dozen tiny computers all running on one box.

    This Proxmox server is where most of my services live:

    • NGINX Proxy Manager: It directs all my web traffic to the right service.
    • Keycloak: This handles user logins for my applications, all in one secure place.
    • Gitea: A self-hosted Git service, like having my own private GitHub.
    • Docker: I run a bunch of applications in Docker containers.
    • WordPress: The very blog you might be reading this on!

    This machine makes it incredibly easy to spin up new projects, test software, or host new services without needing more hardware.

    The Library: My 8TB NAS

    The big black box in the corner is my Network Attached Storage, or NAS. It’s the central file cabinet for the entire network. With 8 TB of storage, it holds all my documents, media, backups, and project files.

    I went with some solid hardware for this: a Xeon E-2124 processor and 32 GB of RAM on an ASRockRack motherboard. The server-grade motherboard is great because it has features for remote management, which means I can check on it or fix issues without having to plug in a monitor and keyboard.

    The Backbone: Switch and Access Point

    You can have the best servers in the world, but they’re useless without a solid network connecting them. For my wireless needs, I’m using a FRITZ!Box 4040. It used to be my main router, but it was struggling to keep up. Now it runs OpenWRT and serves as a simple, reliable Wi-Fi access point.

    But the real hero of my network is the switch. It’s a 3com Baseline Switch from 2010 that I got for free from my old school. It’s a beast. It has 24 gigabit Ethernet ports and even 4 SFP ports for fiber connections.

    Sure, it’s old, but it’s a perfect example of “they don’t make them like they used to.” It’s incredibly solid, has a lifetime warranty, and provides all the gigabit ports I could ever need. Right now, I’m only using 8 of the 24 ports, so there’s plenty of room to grow.

    Why Do All This?

    Building and maintaining a homelab is a hobby. It’s a fantastic way to learn about networking, servers, and enterprise-grade software in a hands-on way. It gives me a sandbox to experiment in, a reliable place to host my own projects, and full control over my own data.

    It might look like a lot, but each piece has a purpose. And for a tech enthusiast, it’s incredibly rewarding to see it all come together and work seamlessly.

  • Building a DIY NAS: Can You Use a Server SAS Card in a Regular PC?

    Building a DIY NAS: Can You Use a Server SAS Card in a Regular PC?

    Thinking of building a DIY NAS? Find out if a professional SAS HBA card will work with a standard consumer motherboard. We cover compatibility, drivers, and cables.

    So you’re staring at a pile of parts for a new project. Maybe it’s a home server, a media-gobbling NAS (Network Attached Storage), or just a fun experiment for your home lab. You’ve got your consumer motherboard—something like a popular B550 model—and then you have this other part that feels a bit… different.
    \n\nIt’s a SAS HBA, or Host Bus Adapter. A piece of enterprise-grade server hardware.
    \n\nThe immediate question hits you: Can I plug this professional server card into my regular desktop motherboard? It feels like it should work, but mixing pro gear with consumer stuff can feel a little risky.
    \n\nI’ve been there. Let’s talk about it.
    \n\n### First Off, What Even Is a SAS HBA?
    \n\nThink of it as a supercharged controller for your hard drives. Most of us are familiar with SATA ports—those little L-shaped connectors on our motherboards where we plug in our SSDs and hard drives. They’re great, but you usually only get a handful of them.
    \n\nA SAS (Serial Attached SCSI) HBA is a card that slots into one of your motherboard’s PCIe slots (the same kind you use for a graphics card). Its main job is to let you connect a lot more drives than your motherboard can handle on its own. It’s common to see these cards with ports that can each handle four, eight, or even more drives. They’re built for servers that need massive amounts of storage.
    \n\nThey’re loved by the home server community because you can often find powerful, used models from retired enterprise servers for a fantastic price.
    \n\n### The Big Question: Will It Actually Work?
    \n\nHere’s the short and sweet answer: Yes, almost always.
    \n\nThat professional-looking SAS card and your consumer motherboard have a common language: PCIe (or PCI Express). It’s a standard. As long as you have a free PCIe slot that the card physically fits in (like an x8 or x16 slot), the motherboard will generally recognize that something has been plugged in.
    \n\nFrom the motherboard’s perspective, it’s just another device that wants to talk to the rest of the system. It doesn’t really care if it’s a fancy graphics card or a storage controller from a data center.
    \n\nSo, you can breathe a little easier. You didn’t buy an expensive paperweight.
    \n\n### But… There Are a Few Things to Know
    \n\nGetting it to work isn’t just about plugging it in and hoping for the best. There are a few practical details you need to get right.
    \n\n1. The Operating System is Key
    \n\nThis is the most important part. Your operating system (OS) needs the correct drivers to communicate with the HBA.
    \n\n* For NAS/Server OSes (like TrueNAS, Unraid, Proxmox): You’re in luck. These operating systems are built for this kind of stuff. They often include drivers for popular LSI/Broadcom HBAs right out of the box. The OS boots up, sees the card, and knows exactly what to do. It’s usually a seamless experience.
    * For Desktop Windows/Linux: It’s a bit more of a manual process. Windows won’t magically know what this server card is. You’ll likely need to go to the manufacturer’s website (like Broadcom for LSI cards) and download the appropriate driver for your version of Windows. It’s an extra step, but not a difficult one.
    \n\n2. Don’t Forget the Cables!
    \n\nThis is the #1 thing that trips people up. Your HBA won’t have the familiar SATA ports on it. Instead, it will have more dense connectors, like SFF-8643 or SFF-8087.
    \n\nTo connect your regular SATA drives, you need what’s called a “breakout cable.” For example, you’d buy a cable that has an SFF-8643 connector on one end (for the HBA) and four standard SATA connectors on the other end (for your drives).
    \n\nOrdering the card is easy. Forgetting to order the specific cables you need is a classic project-delaying mistake. (Ask me how I know.)
    \n\n3. A Quick BIOS/UEFI Check
    \n\nIn very rare cases, a motherboard’s BIOS/UEFI (the software that runs before your OS) can be a little picky. Sometimes, you might not see the card’s own boot menu appear. Generally, this isn’t a problem unless you intend to boot your operating system from a drive connected to the HBA. For most NAS builders, the OS is on a separate USB stick or SSD, so this is rarely an issue. A simple BIOS update on your motherboard often smooths out any weird compatibility quirks.
    \n\n### The Bottom Line
    \n\nSo, can you plug that server-grade SAS HBA into your consumer motherboard? Absolutely.
    \n\nIt’s one of the best ways to get a massive amount of storage for a DIY NAS or home server without breaking the bank. It takes a tiny bit of homework, but the process is straightforward:
    \n\n* Make sure the card physically fits in a free PCIe slot.
    * Use a server-focused OS for the easiest setup.
    * If using Windows, be ready to install a driver.
    * And please, for the love of all things tech, order the right breakout cables.
    \n\nDon’t be afraid to mix and match. Sometimes the most powerful and cost-effective solutions come from combining the worlds of consumer and enterprise tech. Now go get that build finished!

  • I Tried to Buy a UPS and Accidentally Built a Smart Home Instead

    I Tried to Buy a UPS and Accidentally Built a Smart Home Instead

    Learn how a simple quest to buy a UPS for a homelab accidentally turned into a full-fledged, custom, and cloud-free home automation project. A surprising journey.

    My homelab is my pride and joy. It’s a humble setup—a few servers, a couple of NAS devices, my network gear, and my high-end desktop workstation. But a recent lightning strike tripped my breaker, and everything shut down. Instantly.

    This was the second time it had happened in three months. The risk of data corruption or, even worse, fried hardware was starting to feel very real. The solution seemed obvious: I needed an Uninterruptible Power Supply (UPS).

    So, my journey began. But it ended up in a place I never expected.

    The Simple Question That Started It All

    The first step was figuring out what size UPS to buy. This is a bigger deal than it sounds. If you buy one that’s too small, it won’t be able to keep everything running when the power cuts out. If you buy one that’s too big, you’re just wasting money on capacity you’ll never use.

    I didn’t want to guess. I wanted data.

    And that’s where things took a turn. Instead of just buying a simple plug-in power meter, I decided to go a little deeper. I bought a few Tasmota-based smart plugs with power monitoring and hooked them into a brand new Home Assistant setup.

    Why? Because buying just one gadget would have been too simple, I guess. I had a new side project.

    What the Data Told Me

    After letting the power meters run for about a week, I had a crystal-clear picture of my power consumption. I knew exactly what each device was drawing, both at peak load and when idle. This was perfect for sizing the UPS.

    But the data also revealed something surprising. My desktop workstation, my main machine, was incredibly power-hungry even when it was just sitting there, doing nothing. It was one of the biggest energy vampires in the whole house when idle.

    This new piece of information changed my perspective. The problem wasn’t just about protecting my gear from sudden outages; it was also about managing its power consumption more intelligently.

    The mission had officially expanded.

    From Monitoring to Automating

    With Home Assistant already up and running, I started to connect the dots.

    First, I tackled the power-hungry desktop. I found a simple agent called LNXlink that I could install on the PC. It reports back to Home Assistant and allows it to trigger commands. Now, if I forget to shut my computer down at the end of the day, an automation can gracefully do it for me. I can also trigger a shutdown remotely from my phone if needed. Problem solved.

    Next, I looked around the room. What else could be smarter? The air conditioner.

    I picked up a cheap Tasmota-based IR blaster. After a bit of tinkering, I had it fully integrated with Home Assistant. Now, my AC is part of my smart home, controllable from the same dashboard.

    The Automated Morning Routine

    This is where it all came together. I created a simple morning routine automation that runs just before my workday is scheduled to begin.

    1. Home Assistant checks the room temperature and turns on the AC, setting it to a comfortable level.
    2. A few minutes later, it sends a Wake-on-LAN command to my desktop computer.

    By the time I walk into my office with a cup of coffee, the room is cool and my computer is on the login screen, ready to go. It’s a small thing, but it feels incredibly seamless.

    I Still Haven’t Bought a UPS

    So here I am. I have a cheaper, more reliable, and completely cloud-free smart home system that actively manages my power consumption and makes my daily routine better. It started as a simple research project for a single piece of hardware.

    It ended with a full-blown home automation system.

    And the best part? I still haven’t actually bought the UPS. Turns out, the journey was a lot more interesting than the destination. Maybe I’ll get to it next week.

  • My GPU Wouldn’t Work in My Old Dell Server (And How I Fixed It)

    My GPU Wouldn’t Work in My Old Dell Server (And How I Fixed It)

    Trying to install a modern GPU in a Dell PowerEdge R730 and getting a PCI link error? Here’s a step-by-step BIOS guide to fix it for good.

    I had a brilliant idea the other day. I’d grab a retired enterprise server, a Dell PowerEdge R730, and turn it into a little AI playground. These old servers are built like tanks, have tons of processing power, and you can often find them for a steal. The plan was simple: pop in a modern graphics card, and I’d have a powerful machine for experimenting.

    I settled on an NVIDIA RTX 3060 Ti. It’s a great card with a solid price-to-performance ratio. I got the server, got the card, and spent an afternoon putting it all together. I updated the server’s BIOS, installed all the drivers, and felt pretty good about myself.

    Then I hit the power button. And that’s when the dream hit a wall.

    On nearly every startup, the server would halt with a cryptic error: “PCI link training failure.”

    My heart sank. The error pointed to the exact PCIe slot where my shiny new GPU was sitting. It’s a frustratingly common problem when you try to mix old enterprise gear with new consumer hardware. The two just don’t want to talk to each other.

    The Troubleshooting Rabbit Hole

    If you’re in the same boat, you probably did what I did. First, I covered the basics.

    • Is it getting power? I double-checked the power cables running to the GPU. Everything looked good. The R730 has two beefy 750W power supplies, so that wasn’t the issue.
    • Is it the drivers? I uninstalled and reinstalled the NVIDIA drivers multiple times, even trying a few older versions just in case. No dice.
    • Is the server updated? I checked again. The BIOS, the firmware, the iDRAC (Dell’s remote access controller)—everything was on the latest version.

    Nothing worked. The error persisted. It felt like the server was actively rejecting the new GPU.

    What “PCI Link Training Failure” Actually Means

    This error sounds complicated, but the concept is pretty simple. When your server starts, the motherboard (the “host”) and the GPU (the “device”) need to have a quick chat. They negotiate how fast they can communicate over the PCIe slot.

    Think of it like two people meeting for the first time. One speaks modern English (the new GPU, which can handle fast PCIe Gen4 speeds), and the other speaks a slightly older dialect (the server, which tops out at PCIe Gen3). The server tries to keep up, fails, and the conversation just stops. That’s the link training failure.

    The server and the GPU can’t agree on a stable communication speed, so the server gives up.

    The Fix That Finally Worked

    After a lot of digging through old forum posts and technical manuals, I found the solution. It’s not about power or drivers. It’s about forcing them to speak the same language.

    The fix is in the server’s BIOS.

    You need to manually set the PCIe link speed for the slot your GPU is in. Instead of letting the server and GPU try to automatically negotiate the speed (and fail), you tell the server, “Hey, for this slot, you are only allowed to talk at Gen3 speeds.”

    Here’s how to do it:

    1. Restart your Dell PowerEdge server.
    2. When you see the Dell logo, press F2 to enter System Setup (BIOS).
    3. Navigate to System BIOS Settings > Integrated Devices.
    4. Find the setting called Slot Disablement. This is a bit of a misnomer, as you’re not disabling the slot, but this is where the speed settings live.
    5. Find the PCIe slot that has your GPU installed (for me, it was Slot 4 on Riser 2).
    6. You’ll see an option for Link Speed. It’s likely set to “Auto”.
    7. Change the Link Speed from “Auto” to “Gen3”. If Gen3 doesn’t work for some reason, you can even try dropping it to “Gen2”, but Gen3 should be the sweet spot.
    8. Save your changes and exit the BIOS.

    I held my breath as the server rebooted. It whirred, the screen flickered, and… it booted right into the operating system. No errors. The GPU was detected and working perfectly. It was a huge relief.

    So if you’re pulling your hair out trying to get a modern GPU to work in an older server, give this a try. Sometimes the smartest solution is just to tell the hardware to slow down and talk to each other properly. It’s a simple change that can save you hours of frustration.

    Happy tinkering!

  • Do You Really Need a Patch Panel for Your Home Lab?

    Do You Really Need a Patch Panel for Your Home Lab?

    Is a patch panel necessary for a home lab, or can you just plug devices into your switch? We break down the honest pros and cons for your home network setup.

    So you’re setting up your home lab or upgrading your home network. You scroll through forums and watch videos, and you see all these slick, professional-looking server racks. And there it is, in almost every single one: a patch panel.

    Meanwhile, you’ve just plugged all your devices straight into your network switch. And it works.

    This leads to that nagging question: Is that wrong? Did I miss a crucial step?

    Let’s get this out of the way right now: No, you’re not doing it “wrong.” Plugging your devices directly into your switch is perfectly fine for many, many setups. But that doesn’t tell the whole story. The real question isn’t whether a patch panel is necessary, but when it becomes a really good idea.

    First, What Exactly Is a Patch Panel?

    Think of a patch panel as a simple, static switchboard for your ethernet cables. That’s it. It has no power, no “smarts.” It’s just a row of ports.

    On the back side, you connect the long, permanent cables that run through your walls and ceilings to different rooms in your house. These are the “structured cables.” On the front side, you use short, flexible “patch cables” to connect those permanent lines to the ports on your actual network switch.

    So the path looks like this:

    Device in another room → Wall Jack → In-wall Cable → Patch Panel → Patch Cable → Switch

    If all your gear is in the same room as your switch, you might skip the in-wall part and just have cables running directly from your devices to the back of the patch panel.

    The Case for Just Plugging Directly Into the Switch

    Honestly? For a lot of home labs, this is the way to go, at least at first.

    If your “lab” consists of a server, a desktop, and a NAS all sitting on the same desk or rack as your switch, a patch panel is overkill. It’s an extra piece of equipment to buy and an extra set of connections to manage.

    For years, my own setup was a simple 8-port switch with a mess of cables plugged right into it. It wasn’t pretty, but it was simple, cheap, and it worked flawlessly. You get a signal, you have internet, and life goes on. There is zero shame in this game.

    So if your setup is small, simple, and all in one place, you can stop reading here. You don’t need a patch panel. Go enjoy your weekend.

    Okay, So Why Do People Bother With Them?

    This is where the conversation gets interesting. People don’t use patch panels because they’re strictly “necessary” for the network to function. They use them for a few very smart reasons that pay off in the long run.

    1. Organization and Sanity

    This is the most obvious benefit. A patch panel is the foundation of good cable management. Instead of a chaotic “waterfall” of cables pouring down from your devices into your switch, you get a clean, orderly system.

    • All the long-run cables are terminated neatly in one place.
    • You use short, manageable patch cables for the final connection to the switch.

    This turns a potential rat’s nest into something you can actually make sense of. It’s not just about looking good; it’s about being able to find and trace a specific connection without having to pull on a cable and see what wiggles on the other end.

    2. Flexibility and Ease of Use

    Imagine you want to rearrange your network. You need to move the device that’s in port 3 of your switch over to port 15.

    • Without a patch panel: You have to find the long cable coming from the device, trace it through the tangled mess, unplug it, and re-route it to the new port.
    • With a patch panel: You simply unplug the short, 6-inch patch cable from port 3 and plug it into port 15. The job takes about five seconds.

    This makes testing connections, taking a device offline, or re-configuring your network incredibly simple.

    3. It Protects Your Expensive Gear

    This is the most important technical reason. The ports on your network switch are soldered directly onto its main circuit board. Every time you plug and unplug a cable, you’re putting mechanical stress on that port. Over years of use, that wear and tear can cause a port to fail. And when a port on your switch dies, it’s dead for good.

    A patch panel acts as a sacrificial, replaceable buffer. The ports on a patch panel are simple keystone jacks. They are designed to be plugged into thousands of times. If one ever does fail from overuse (which is unlikely), you can pop it out and replace it for a few dollars.

    By using a patch panel, the only cables you’re regularly plugging and unplugging are the short patch cables connecting it to the switch. The expensive, delicate ports on your switch remain untouched. You’re basically saving your $300 switch from wear and tear by using a $40 panel.

    The Verdict: When Should You Get One?

    You should seriously consider a patch panel if you check any of these boxes:

    • You have cables running through your walls. If you have structured cabling in your home, a patch panel is the proper way to terminate those runs.
    • You value organization. If the “spaghetti monster” of cables gives you anxiety, a patch panel is your best friend.
    • You change your setup often. If you’re constantly testing things and moving connections, it will make your life much easier.
    • You want to protect your switch for the long haul. It’s a cheap insurance policy for your more expensive networking equipment.

    Ultimately, there’s no right or wrong answer. Don’t let the pristine network racks you see online make you feel like your setup is inadequate. If plugging directly into your switch works for you, that’s all that matters.

    But if you’re looking to grow your network, protect your investment, and make it a whole lot easier to manage, a patch panel is one of the smartest, most satisfying upgrades you can make.

  • Confessions of a Hopeless Homelab Addict

    Confessions of a Hopeless Homelab Addict

    My journey from a single, simple server to a full-blown homelab addiction. A relatable story for anyone who can’t resist ‘just one more’ upgrade.

    It Starts With a Confession

    Hi, my name is… well, it doesn’t matter. What matters is that I’m a homelabaholic.

    It’s been about twenty minutes since my last “quick config change.” You know the one. The little tweak that somehow snowballs into a six-hour rabbit hole of optimizing a setting that was working perfectly fine before you decided to “improve” it.

    I told myself I was done. I really did. I had everything a reasonable person could ever need. My server, a trusty old Dell machine, was humming along beautifully. It managed my storage, ran all my media apps, and served up movies without a complaint. “This is enough,” I said to myself, trying to believe it. “24GB of RAM is plenty for anyone.”

    I was lying, of course.

    The First Stutter

    Everything was fine until it wasn’t. The breaking point came silently at first, then all at once. The new 4K movie files started to stutter during playback. My photo management app, which uses machine learning to tag photos, was eating up RAM like it was free. My poor, aging graphics card was working so hard I think I could hear it crying.

    The system that was “enough” suddenly felt ancient. The thought started as a whisper: You need more power.

    So I relapsed. And I relapsed hard.

    “Just one more server,” I told myself as I clicked ‘Buy It Now’ on a shiny, compact HP EliteDesk. “It’s just for transcoding,” I rationalized. “It’s a practical purchase. A necessity, even.”

    That’s how it starts, isn’t it? With a perfectly reasonable excuse.

    Welcome to the Command Center

    Now, my reality is a little different. My main network switch, for reasons I can’t explain, has decided to connect at 100Mb speeds, like it’s 2005. My storage drives are filling up faster than my list of excuses. My wife asked me if I was having an affair last week because I keep sneaking down to the basement at 2 AM to “check on the servers.”

    I guess I am having an affair. With a Dell and an HP. And honestly, my relationship with them is far less stable.

    The worst part? That shiny new HP server is just sitting there, running a single, barely-used operating system, mocking me. It’s like buying a Ferrari to just go get the mail. It stares at me with its cold, blinking power light, a monument to my impulsiveness. “You bought me for a reason,” it seems to say. “Yet here I sit, doing nothing.”

    My desk has become what I can only describe as a “command center.” That sounds cool, but the reality is much less glamorous.

    • The Left Monitor: Shows the login screen for my old server.
    • The Center Monitor: Displays the Proxmox dashboard, which I refresh compulsively as if something magical will happen.
    • The Right Monitor: Is an extension of my laptop, which constantly reminds me that it’s too old for Windows 11. Even my laptop is a relic.

    I have two keyboards and three mice on my desk. Why? I have no idea, but I live in constant fear that unplugging one of them will bring the entire system crashing down.

    The desk itself is a wasteland of poor life choices. Empty energy drink cans stand guard next to bags of Cheetos from last week’s “late-night maintenance window.” There’s a bottle of cleaning spray that’s been sitting here so long it’s become a decorative item, a fossil from a time when I had ambitions of keeping things tidy.

    “I’ll clean this up one day,” I tell myself, right before getting an idea to spin up another container to test something I don’t really need.

    The Cycle Continues

    I’ve come to accept a few things. I will never have enough RAM. I will never have enough storage. And my desk will probably never be clean. I’m powerless against the urge to add “just one more thing” to my setup.

    It’s a strange, frustrating, and deeply satisfying hobby. You’re the creator, the user, and the full-time, unpaid IT support staff, all rolled into one.

    Now if you’ll excuse me, I have to go do some research. I’m wondering if I can fit a second graphics card in that old Dell…

  • What’s a Homelab For, Anyway?

    What’s a Homelab For, Anyway?

    Ever wondered why people build home labs? Discover the practical and creative reasons for starting one, from professional development to self-hosting your own services.

    You see them pop up in conversations online. Maybe a friend has one. It’s this mysterious thing called a “homelab,” and it can sound intimidating. You might picture a full-blown server rack humming away in a basement, blinking lights and a web of cables, something straight out of a data center.

    And sure, it can be that. But it doesn’t have to be.

    At its core, a homelab is just a computer (or a few) that you run at home for your own projects. It could be an old laptop you’ve given a new life, a tiny Raspberry Pi, or a custom-built server. The hardware isn’t the most interesting part. The real question is: what do people actually do with them?

    It turns out, the answer is a lot. A homelab is a personal playground, and what you do with it depends entirely on what you’re curious about.

    It’s a Sandbox for Professionals

    I have a friend who’s a C++ developer. His homelab isn’t for fun side projects; it’s a core part of his workflow. Instead of bogging down his main computer, he offloads massive compiling jobs to his home server. It’s faster, it keeps his desktop free for other tasks, and it gives him a controlled environment to test things without messing up his primary workstation.

    For developers, a homelab is a professional sandbox. It’s a place to:
    * Run and test code in a clean, isolated environment.
    * Experiment with new technologies like Docker or Kubernetes without any risk.
    * Host your own Git server for private version control.

    It’s about having a space you completely own and control, tailored to your specific professional needs.

    It’s a Workshop for Tinkerers

    Another friend, an electrical engineer, is obsessed with IoT sensors. She’s constantly building little gadgets to measure everything from the temperature in her workshop to the moisture level of her houseplants.

    But where does all that data go? Straight to her homelab.

    She runs a server that collects and archives all this information. This allows her to analyze trends over time, create dashboards to visualize the data, and prototype new devices. Her homelab is a private workshop for her engineering projects, a place to build, test, and learn without needing to rely on third-party cloud services. She even hosts a private blog on it to document her experiments.

    It’s Your Own Private Streaming Service

    This is one of the most popular reasons people start a homelab. You’ve probably heard of Plex, Jellyfin, or Emby. These are applications that let you organize your personal collection of movies, TV shows, and music and stream them to any device, anywhere.

    Think of it like running your own personal Netflix or Spotify.

    Instead of relying on streaming platforms that can lose licenses to your favorite shows, you have a permanent library. It’s all your media, organized just how you like it, available on your TV, phone, or tablet. For media lovers, this is often the gateway drug into the world of homelabbing.

    It’s a Way to Reclaim Your Digital Privacy

    Are you a little tired of how much of your data lives on Google’s or Apple’s servers? A homelab is your escape hatch.

    The self-hosting community is huge, and it’s all about running your own versions of popular services. With a little bit of work, you can host:

    • Your own cloud storage (like Nextcloud) to sync files and photos.
    • Your own password manager (like Vaultwarden) so your credentials never leave your network.
    • Ad-blocking for your entire network (with Pi-hole).
    • Your own document editor, calendar, and contacts.

    It’s a powerful feeling to know that your personal data is sitting on a machine in your own home, not on a server thousands of miles away.

    Above All, It’s for Learning

    Here’s the real secret: no matter why you start a homelab, you end up learning. A lot.

    You don’t set up a server without learning about operating systems like Linux. You don’t connect it to the internet without learning the basics of networking. You don’t host a service without learning about security, firewalls, and maybe even virtualization or containers.

    These aren’t just abstract skills; they’re highly valuable in the tech industry. A homelab is a hands-on, practical, and surprisingly fun way to build a real-world skill set.

    So if you’re curious, don’t be intimidated. You don’t need a server rack. Just find an old computer, install a new operating system, and ask yourself a simple question: “What do I want to build today?”

  • I Finally Organized My Tech Chaos with a Mini Server Rack

    I Finally Organized My Tech Chaos with a Mini Server Rack

    Tired of cable clutter? Follow my journey of building a mini home server rack to organize my tech, learn new skills, and create a clean, satisfying setup.

    It Started with a Mess

    Let’s be honest. The space behind my desk was a disaster. A chaotic tangle of black and white cables for the modem, the router, a smart home hub, and a few other little boxes with their own blinking lights. It worked, sure, but it was an eyesore. And every time I needed to reset something, it felt like performing surgery in the dark.

    I’d seen pictures of “homelabs” online—these beautiful, clean setups with neatly managed wires and professional-looking gear. I always thought they were just for serious IT pros or people running massive operations from their basement.

    But then I had an idea. What if I could build a mini version of that? Something small, just for my own stuff. A weekend project to finally bring some order to my tech chaos. So, I did. And it turned out to be one of the most satisfying projects I’ve tackled in a long time.

    Why Even Bother with a Server Rack at Home?

    I get it. It sounds like overkill. A “server rack” feels like something that belongs in an office building, not a spare room. But the benefits are surprisingly practical, even for a small setup like mine.

    • Pure Organization: This was my main reason. All those little boxes and their power bricks are now in one single, tidy cabinet. The cable mess is gone. Everything has its place, and it’s all neatly plugged into a single power strip inside the rack. It just looks better.

    • A Central Hub for Everything: It’s not just about looks. Having a central, always-on computer in the rack (in my case, a tiny little PC) opens up a lot of possibilities. I use it to run a Plex media server, so I can watch my movies on any device in the house. I also run a network-wide ad blocker, which speeds up browsing on every single device I own.

    • It’s a Great Way to Learn: If you’re at all curious about how networks work, this is the best sandbox you can build. You learn about networking, cables, and how to set up simple server software in a hands-on way. It’s a practical skill, and it’s genuinely fun to see it all come together.

    My “Work in Progress” Mini Setup

    The best part about this project is that it’s never really “done.” It’s a work in progress, and that’s what makes it fun. You can start small and add to it over time. Here’s a peek at what’s in my rack so far.

    1. The Rack Itself: I went with a small, 6U wall-mounted rack. “U” is just a unit of measurement for height in the server world. 6U is tiny—just big enough for the essentials, which is perfect for a home. It keeps everything off the floor and tucked away.

    2. A Network Switch: This is the heart of the network. It’s a simple device with a bunch of Ethernet ports. The internet comes in from the modem, plugs into the switch, and then the switch sends it out to all the other devices.

    3. A Patch Panel: This might be my favorite part, just because of how clean it makes everything look. Instead of plugging devices directly into the switch, you run the cables to this panel. Then you use short, clean-looking patch cables to connect the panel to the switch. It’s an extra step, but it’s the secret to that pro-level organization.

    4. The “Server”: You don’t need a huge, loud machine. I’m using a simple, low-power mini PC. It’s quiet, energy-efficient, and more than powerful enough to handle a media server and a few other small tasks. People use all sorts of things, from Raspberry Pis to old laptops.

    5. Power Management: To avoid a mess of power adapters, I got a basic Power Distribution Unit (PDU). It’s essentially a fancy power strip that’s designed to be mounted in the rack. One plug in the wall, eight outlets in the cabinet. Simple and clean.

    It’s Your Turn

    Building this little rack was surprisingly straightforward. It wasn’t about spending a ton of money or having deep technical knowledge. It was about taking it one step at a time. I started with just the rack and the modem and router I already owned. Then I added the switch. Then the patch panel.

    Is it a little nerdy? Absolutely. Did I spend a bit of time watching videos on how to properly punch down an ethernet cable? You bet.

    But now, when I look at that neat little cabinet on the wall, with its quietly blinking lights and perfectly ordered cables, I feel a huge sense of accomplishment. The chaos is gone, replaced by satisfying, functional order. If you’ve got a little tech clutter of your own, maybe a mini server rack is the weekend project you’ve been looking for.