Category: Uncategorized

  • Building My Business from Home, One Server at a Time

    Building My Business from Home, One Server at a Time

    Follow my journey of starting a home-based business, from a leap of faith to building the powerful home lab that runs it all. A look at the tech.

    It’s funny how a big life change can start with a quiet decision. For me, it was the choice to finally take a leap of faith in myself.

    I’ve spent a lot of time and money investing in professional endeavors for other people. But recently, I decided it was time to pivot and bet on my own ideas. It’s not always easy, but the thought of building something from the ground up was too exciting to ignore.

    So, I started my own business.

    For now, it’s running straight out of my house. The plan is to see how things go, establish a foothold in the region, and then hopefully expand from there. The best part? The infrastructure I’m building for the business also gets to host some of my personal passion projects. It’s the perfect blend of work and play.

    It’s all still coming together, but I wanted to share a look at the engine I’ve built to power this new chapter.

    The Foundation: More Than Just a Rack

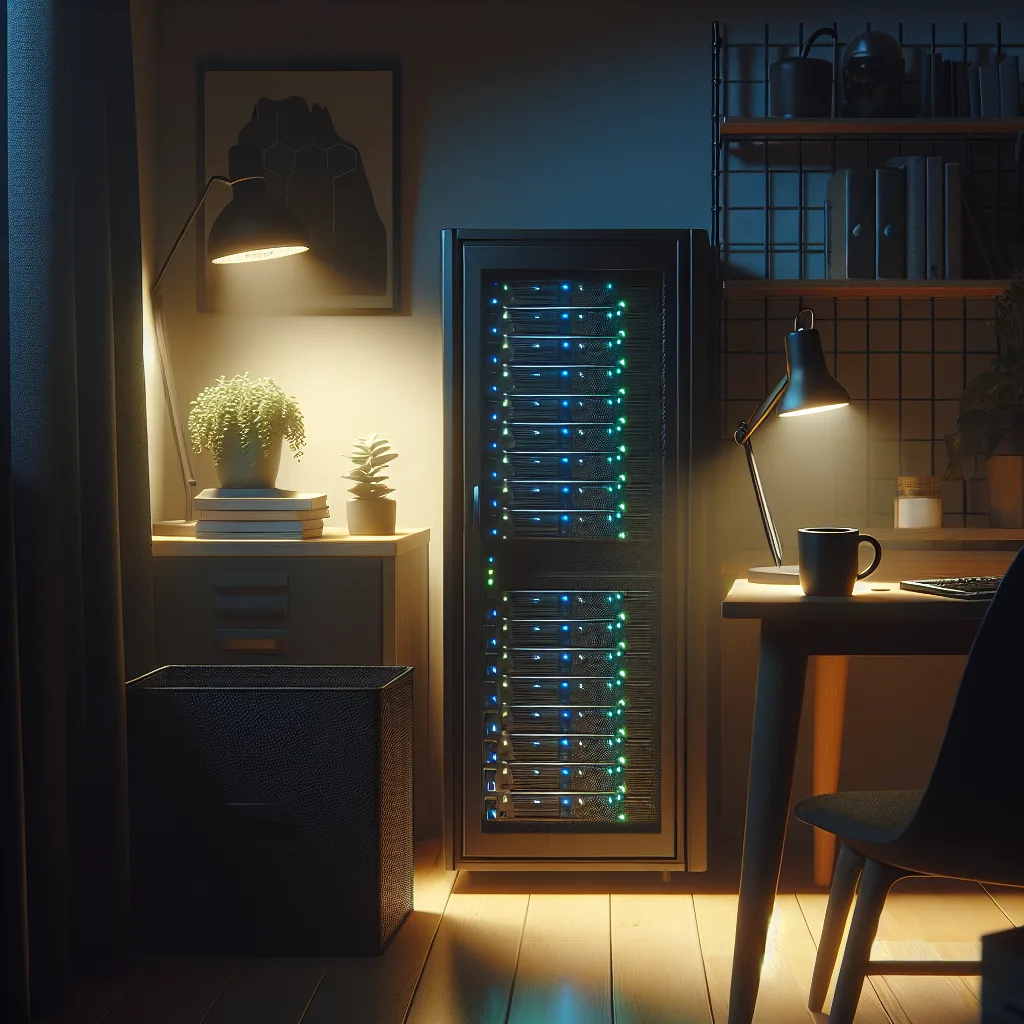
    At the heart of it all is a simple server rack. It’s not tucked away in a sterile data center, but right here where the action is. This rack is the skeleton holding everything together.

    It all starts with a gigabit fiber uplink, which means I have a seriously fast connection to the outside world. From there, the data flows through a TP-Link router, which acts as the main gateway, and a 48-port Cisco switch that directs traffic where it needs to go.

    To keep things organized and secure, I’ve segmented the network using VLANs. Think of it like this: the business network and my personal network are running on the same hardware, but they’re in completely different, walled-off hallways. It keeps client data safe and my personal projects from interfering with work.

    The Hardware: A Mix of Muscle and Utility

    This is where it gets fun. I needed a setup that could handle everything from heavy-duty AI processing for the business to simple file storage for personal use. Here’s a breakdown of the rig:

    • The AI Powerhouse: This is a custom-built machine and the star of the show. It’s running an AMD processor with 128GB of RAM and, most importantly, two NVIDIA 3090 GPUs. This thing is an absolute beast for the AI and machine learning tasks that are central to my business.
    • General & Light Compute: I have an HP Pro Desk for general networking tasks and a Dell T7810 workstation with a 1090 GPU for lighter AI experiments and other compute needs. They’re the reliable workhorses that handle the day-to-day.
    • Data and Backups: Data is everything. A Dell R720 server handles the databases and caching, ensuring that frequently accessed information is delivered lightning-fast. Right next to it, a Dell R730xd, packed with drives, serves as the primary NAS (Network Attached Storage) and the backup hub for everything else. It’s the vault, keeping all my data safe and sound.

    All of this is connected with Cat6 cabling, with a fiber SPF link on the way to make the core connection even faster.

    It’s More Than Just Tech

    Looking at the blinking lights on the rack, it’s hard not to feel a sense of accomplishment. This isn’t just a collection of powerful hardware. It’s the physical manifestation of a big decision. It’s the engine for a new venture and a testament to the idea that you can build something meaningful right from your own home.

    There are still upgrades planned and a long road ahead, but for the first time in a while, I’m building for myself. And that feels pretty great. Thanks for stopping by.

  • Your Motherboard Stopped Getting Updates. Should You Panic?

    Your Motherboard Stopped Getting Updates. Should You Panic?

    Your motherboard isn’t getting BIOS updates anymore. Find out what ‘end-of-life’ really means and if it’s a security or stability risk for your PC.

    I was tinkering with my home server the other day—a humble machine pieced together from older parts—and a thought crossed my mind. The motherboard in that box is ancient in tech years. It hasn’t seen a BIOS update since the company stopped supporting it half a decade ago.

    So it got me thinking: Is that a problem? When a motherboard reaches its official “end-of-life” (EOL), should you be concerned?

    It’s a great question, because “end-of-life” sounds so final, so… dramatic. But the reality, like most things in tech, is a bit more nuanced.

    First, What Do BIOS Updates Actually Do?

    Before we decide whether to panic, let’s quickly break down what a BIOS (or its modern cousin, UEFI) update even is. When a manufacturer releases one, it’s usually for one of three reasons:

    • Security Patches: This is the big one. Researchers are always finding new vulnerabilities at the firmware level (think Spectre and Meltdown). BIOS updates patch these holes to keep attackers out.
    • Hardware Compatibility: A motherboard might need an update to properly recognize a brand-new CPU that was released after the board was manufactured. It can also improve compatibility with new RAM kits or other peripherals.
    • Stability and Bug Fixes: Sometimes, a board has weird quirks. Maybe it has trouble waking from sleep, or the fan speeds are wonky. BIOS updates often contain simple bug fixes to iron out these kinds of performance issues.

    That’s pretty much it. They aren’t like Windows or macOS updates that add a bunch of new features. They’re low-level, surgical fixes.

    The “If It Ain’t Broke” Rule of Thumb

    Now, back to our EOL motherboard. It’s not getting any of those updates. Is it a ticking time bomb?

    Probably not.

    The answer really depends on one simple question: How are you using the computer?

    Let’s imagine your PC is like my old server. It’s sitting in a corner, not connected to the internet, and its only job is to store files on my local network. It has a CPU and RAM that have been in it for years, and the whole system is perfectly stable.

    In that scenario, a lack of BIOS updates is almost completely irrelevant.

    • Security? The biggest threats are patched via BIOS updates, but those threats almost always come from the internet. If the machine is offline, its attack surface is tiny. It’s like worrying about pirates when your boat is in a landlocked lake.
    • Hardware support? I’m not planning on upgrading the CPU or RAM. The hardware I have works, and it’s going to be the same hardware tomorrow. No need for new compatibility updates.
    • Stability? The machine has been running without a hiccup for years. A “stability” update could, ironically, introduce new bugs. There’s no reason to fix what isn’t broken.

    For a machine like this, “end-of-life” doesn’t mean “dead.” It just means “finished.” The hardware configuration is set in stone, and as long as it’s doing its job, you can let it run until the capacitors give out.

    So, When Should You Actually Worry?

    Of course, it’s not always that simple. There are definitely times when an EOL motherboard is a genuine problem. You should probably consider upgrading if your situation looks more like this:

    1. Your Computer is Online: If the PC is your daily driver—used for browsing the web, checking email, and downloading files—then you want those security patches. An EOL motherboard on an internet-facing machine is an unnecessary risk. New vulnerabilities are discovered all the time, and you’re leaving the door wide open.
    2. You Want to Upgrade Your Hardware: Let’s say you find a great deal on a newer, compatible CPU. You pop it in, and… nothing. It turns out you need a BIOS update from six months after your support ended to make it work. In this case, your motherboard’s EOL status is actively preventing you from upgrading.
    3. You’re Dealing with a Known, Unfixed Bug: If your computer has a specific, annoying issue (like random reboots or USB ports that don’t work right) and you find an old forum post describing how a later BIOS update fixed it for everyone else… well, that’s frustrating. You’re stuck with the problem forever.

    It’s Not a Death Sentence, It’s a Retirement

    Ultimately, a motherboard hitting its end-of-life isn’t a sign of impending failure. It’s a sign of retirement. It’s done learning new tricks.

    For many perfectly good machines—especially offline servers, retro gaming rigs, or dedicated workshop PCs—that’s completely fine. They can continue doing their jobs reliably for years to come.

    So before you rush to replace that old board, just take a look at what you’re asking it to do. If it’s stable, secure in its environment, and not in need of new parts, you can save your money. Just let the old workhorse keep on working.

  • My Server Rack Is 20 Years Old, and It’s Not Going Anywhere

    Discover the joy of vintage tech. A look at a 20-year-old server rack that’s still running and the hands-on lessons it teaches.

    I have an old server rack in my basement. And when I say old, I mean old. It’s a vintage 19-inch Compaq cabinet that I got my hands on more than 20 years ago, and it’s been humming along ever since.

    It’s one of those things that’s just so satisfying. In a world where our phones barely last a few years, this hunk of metal and wires has been a faithful servant for two decades. It’s not winning any beauty contests, and it certainly isn’t quiet, but it works just as well today as it did the day I set it up.

    That’s something you don’t see much anymore.

    The Beauty of Old, Noisy Machines

    This rack has seen its share of hardware come and go. For years, it was home to a couple of Alpha Servers running OpenVMS 8.4, which were the backbone of my little home network. If you’ve ever worked with that kind of equipment, you know what I’m talking about. It’s heavy, it’s loud, and it feels like it was built to survive a nuclear winter.

    I also had a stack of old-school Cisco routers in there—the kind of gear that would probably be considered paperweights by today’s standards. But for me, it was a goldmine.

    Why? Because it was the best learning tool I ever had.

    There’s a huge difference between reading about network protocols in a book and actually getting your hands dirty. This setup was my sandbox. It’s where I learned about SAN fabrics, MPLS, and the fundamentals of how the internet really works.

    • You learn to troubleshoot when a physical cable goes bad.
    • You learn about power consumption when you get the electricity bill.
    • And you definitely learn about noise management when you’re trying to watch a movie in the next room.

    But those lessons stick with you. It’s a kind of practical, hands-on knowledge that’s hard to get from a virtual lab or a cloud dashboard. You develop an intuition for how things work, and an appreciation for the engineering that goes into them.

    More Than Just a Pile of Hardware

    So why keep this old thing running? It’s not for performance, that’s for sure. My laptop could probably run circles around this entire rack.

    It’s about something else.

    It’s partly nostalgia, of course. This rack is a time capsule from a different era of computing. An era when hardware was built to last, and when you could actually see and touch the components that made everything tick. There’s a certain romance to it that you just don’t get with today’s sleek, sealed-off devices.

    But it’s also about the joy of tinkering. It’s about having a project that’s never quite finished, and a space where you can experiment without worrying about breaking something important. It’s a hobby that’s both challenging and rewarding, and it connects you to a community of like-minded people who share your passion for all things tech.

    I know I’m not the only one with a setup like this. There are entire communities online dedicated to homelabbing and retro computing, full of people who find joy in firing up old machines and pushing them to their limits.

    So if you ever get the chance to play with some “obsolete” hardware, I highly recommend it. You might be surprised by how much you learn, and how much fun you have in the process. Just make sure you have a good pair of noise-canceling headphones. You’re going to need them.

  • I Think I’m About to Break My Server

    I Think I’m About to Break My Server

    My journey to silence a loud HPE server. Follow along as I replace every fan, even the tricky PSU fan, in a high-stakes DIY hardware modification.

    I have this fantastic server, an HPE ML110 Gen10. It’s powerful, reliable, and the heart of my home lab. But it came with one massive problem.

    It was loud. Like, really loud.

    If you’ve ever run enterprise-grade equipment at home, you know what I’m talking about. The stock fans in these machines are designed for performance, not peace and quiet. They’re meant to keep things cool in a data center, where the noise floor is already high. In a home office or a corner of the living room? Not so much.

    The constant whirring was driving me nuts. It was the kind of background noise you can’t ignore, slowly chipping away at your sanity. I knew I had to do something about it. So, I decided to replace all the fans.

    The Point of No Return

    This wasn’t my first time modding a piece of hardware, but there’s always a little voice in the back of your head when you start taking things apart. Are you sure you know what you’re doing? What if you break it?

    I pushed that voice aside and got to work. The case fans were the first to go. I researched quieter alternatives, found some that matched the specs, and carefully swapped them out. It was satisfying work. With each fan I replaced, I could feel a small victory. The process was straightforward enough: unplug the old, plug in the new. The server was getting quieter, and my confidence was growing.

    But then I got to the last one. The final boss of this quiet-computing quest: the power supply unit (PSU) fan.

    PSUs are the black boxes of the computer world. They’re not really designed to be opened. Stickers often cover the seams, warning you that breaking the seal will void your warranty. And for good reason—they hold a lot of electrical charge, even when unplugged.

    But I was too far in to turn back now. The case fans were quiet, which only made the high-pitched whine of the PSU fan even more noticeable. It was the last hurdle.

    Down the Rabbit Hole

    So, I did it. I took a deep breath, broke the seal, and carefully disassembled the power supply.

    And that’s when I saw it. The fan connector. It wasn’t standard. Of course, it wasn’t. Why would it be? Instead of the typical 3-pin or 4-pin connector you see on every case fan, this one was a proprietary little thing. My heart sank.

    This is the moment every DIY project has. The point where you’re standing in front of a problem you didn’t anticipate, with your expensive hardware in pieces all around you. You have two choices: put it all back together and admit defeat, or push forward and hope for the best.

    I looked at the tiny connector, then at the standard connector on my brand-new, whisper-quiet fan. They wouldn’t mate. But the wires were the same colors. The pinout looked like it was probably the same as a standard case fan. Probably.

    There was only one way to find out.

    I decided to go for it. With my fingers crossed, I carefully de-pinned the proprietary connector and swapped it with a standard housing. It was delicate work, requiring a steady hand and a lot of hope. If I got the pin assignment wrong, I could fry the fan, or worse, the entire power supply.

    This is the part of the story where you feel like you’re on the verge of either a brilliant success or a costly failure. There’s no in-between. I’m at that point right now, with a modified PSU on my workbench.

    The next step is to plug it in and see if my gamble paid off. If it works, I’ll have what I’ve been dreaming of: a silent server. A powerful machine that doesn’t sound like a jet engine is taking off in my office. If it doesn’t… well, I’ll be shopping for a new power supply.

    Wish me luck.

  • I Built a Tiny Home Server, and You Can Too

    I Built a Tiny Home Server, and You Can Too

    Discover how a simple home lab, built with a mini-PC and 3D-printed parts, can run a private AI, manage files, and give you back control of your data.

    It Started with a Simple Idea

    I’ve been relying on cloud services for years. You know how it goes. A little bit of Google Drive for documents, Dropbox for photos, maybe a subscription for a password manager. It’s convenient, but it adds up. And I started feeling a little weird about having all my digital stuff scattered across different company servers.

    So, I got an idea. What if I could build my own little server, right here at home? Not some giant, noisy rack in the basement, but something small, quiet, and simple. Something that could handle my files, run a few useful apps, and even let me experiment with some of the new AI tools.

    That’s what sent me down the path of building my own “homelab.” And honestly, it’s been one of the most rewarding tech projects I’ve ever done.

    What’s a “Home Lab,” Anyway?

    It sounds more intimidating than it is. A home lab is just a computer (or a few computers) at your home that you use as a server. It can be as simple as an old laptop you have lying around or as complex as you want to make it.

    My goal was to keep it simple and efficient. I wanted a machine that could be on 24/7 without making a racket or running up my electricity bill.

    Here’s what I wanted it to do:

    • Store my files: A central, private place for my documents, photos, and backups.
    • Run some apps: Things like a password manager, a media server for movies, and maybe a home automation dashboard.
    • Experiment with AI: This was the big one. I was fascinated by Large Language Models (LLMs) like ChatGPT, but I wanted to run one locally for privacy and fun.

    My Setup: A Mix of Old and New

    I ended up using a mini-PC. These things are great—they’re tiny, quiet, and surprisingly powerful for their size. It’s the brains of the whole operation.

    But here’s the part that I really love: the case is partly 3D printed.

    I have a simple 3D printer, and I’ve been looking for practical things to make with it. Designing and printing a custom rack and enclosure for my server was perfect. It allowed me to make everything fit together perfectly. It’s a snug little unit where the mini-PC and my storage drives are all stacked neatly. It’s not just functional; it’s a physical object I made myself, which is pretty cool.

    It’s a constant reminder that you don’t always have to buy an off-the-shelf solution. Sometimes, you can build something that’s better—or at least, more you.

    The Really Fun Part: A Private AI Assistant

    Okay, so let’s talk about the LLM. This has been the most interesting part of the project. Using a tool called Ollama, I can download and run different open-source language models right on my mini-PC.

    Why would I do this instead of just using a website? Two reasons:

    1. Privacy: Anything I type into my local LLM stays on my machine. It’s not sent to a big tech company, it’s not used for training data, it’s not logged anywhere I don’t control. I can use it to help me write sensitive emails or summarize personal documents without a second thought.

    2. Learning and Fun: It’s just plain fun to tinker with! I can try out different models, see which ones are best at certain tasks, and I don’t have to pay a subscription fee. It’s my own little AI sandbox.

    It’s surprisingly capable. I use it to brainstorm ideas, write code snippets, summarize articles I’ve saved, and answer dumb questions that pop into my head. It’s like having a private, offline brain extension.

    Was It Worth It?

    Absolutely.

    This project wasn’t just about the end result. It was about the process. I learned so much about how servers, networking, and even AI models work on a fundamental level. It’s empowering to know you’re in control of your own data and services.

    And it’s not just for “techy” people. If you’re curious and like to tinker, you can do this too. You can start small—maybe with just an old computer or a Raspberry Pi—and build from there.

    The best part is the feeling of self-sufficiency. My little 3D-printed box just sits there, quietly humming along, running my digital life. And I built it. That feels pretty good.

  • My Homelab Is Finally (Almost) Complete

    A personal look at building a complete home lab, from securing a rare JetKVM to configuring a 10GbE network with Ubiquiti gear and a Mac mini.

    It’s a familiar feeling for anyone who builds things. You have a project—a home network, a workshop, a PC build—and it’s almost perfect. There’s just one missing piece that lives in the back of your mind. For me, that piece was a JetKVM.

    After weeks of searching, I finally found one. And yes, I paid way too much for it. The kind of price that makes you wince a little when you click “buy.” But when it arrived, I was immediately impressed. The thing is surprisingly heavy and feels incredibly well-built. It’s a neat little device that solves a very specific problem, and holding it, the sting of the price started to fade.

    Of course, the first thing I wished it had was Power over Ethernet (PoE). It’s the one feature that would have made it absolutely perfect. But nothing ever is, right? It works great, and that’s what matters. Getting the JetKVM was the final push I needed to call my home lab setup “mostly complete.”

    A Quick Tour of the Rack

    The whole system is built into a DeskPi Rackmate T2. It’s a compact and clever solution that keeps everything tidy. For now, there are a few 3D-printed blank panels filling the gaps while I figure out my final 10GbE NAS situation, but the core is solid.

    Here’s a quick rundown from top to bottom:

    • Connectivity & Core Switching: It all starts with a 2.5g fiber connection from my ISP, which runs into a Ubiquiti UCG Fiber gateway. From there, it hits the heart of the network: a USW Pro XG 8 PoE. This 10g switch acts as the core, routing everything and managing a couple of VLANs to keep my main devices, guests, and IoT gadgets safely separated.
    • Wiring & Patching: Everything is wired up with CAT6a cables running through two patch panels. Clean wiring is one of those things that takes time but is so worth it for troubleshooting and peace of mind.
    • The Mac Mini Workhorse: Tucked in the rack is an M4 Mac mini with 16GB of RAM. It’s a quiet, power-efficient little beast. Right now, it’s running a containerized version of Home Assistant, but I’ve got my eye on playing with container orchestration tools like Kubernetes or Docker Swarm down the line.
    • Secondary Switching: A smaller USW Flex 2.5g PoE switch branches off the core. This handles additional wired clients and will eventually support some UniFi Protect cameras I plan to add.

    How It All Works Together

    The 10g switch is really the star. It gives the whole network a massive amount of internal bandwidth, which is great for file transfers and ensures there are no bottlenecks. The VLANs are essential for security—I don’t necessarily want my smart toaster talking to my work computer, and this setup prevents that.

    The wireless side is just as important. I have two U7 Pro XGS access points, and they are ridiculously fast. I’ve clocked speeds around 1100Mbps over the 6GHz band. It’s the kind of performance that makes you forget you’re not plugged in with a cable.

    That “Mostly Complete” Feeling

    Is it finished? Not really. A home lab is never truly “finished.” There’s always something to tweak, a new service to spin up, or a better way to organize the rack. My next project is a proper 10GbE NAS to take full advantage of the network’s speed.

    But for now, it feels complete. It’s stable, powerful, and does everything I need it to, from running my smart home to delivering incredible Wi-Fi speeds. It was a journey to get here, capped off by overpaying for that one last piece. And honestly? It was worth it.

  • The Home Lab Trap: How a Simple Project Takes Over a Wall

    The Home Lab Trap: How a Simple Project Takes Over a Wall

    Discover the common journey of a home lab enthusiast, from a simple IKEA cube setup to a full-blown wall-mounted server rack. It happens faster than you think.

    It always starts with something small.
    \n\nFor me, it was a single Raspberry Pi. For a friend, it was an old laptop he wanted to turn into a file server. It’s the little project you start on a whim. The one you think will be simple, clean, and tucked away in a corner.
    \n\nAnd often, it starts in an IKEA cube.
    \n\nIt’s the perfect beginning. It’s cheap, looks clean, and hides the mess. You set up your first device, run a few simple programs, and feel pretty good about it. Your own little slice of the cloud, right at home. But then, the itch begins.
    \n\n## The “What If?” Phase
    \n\nYou start thinking, “What if I added more storage?” or “What if I ran another service?”
    \n\nThat one little server was great, but now you want to run Plex for your movies, Home Assistant for your smart devices, and maybe a Pi-hole to block ads. That single IKEA cube starts to feel a little cramped.
    \n\nSo you get another one.
    \n\nNow you’ve got a stack. Two cubes. Maybe one for the server and one for the networking gear. The cables are starting to look a little more… creative. But it works. You’ve got more power, more storage, more grunt. You’re happy. For a while.
    \n\n## When Furniture Isn’t Enough
    \n\nThis is the tipping point. It’s the moment you realize you’ve outgrown your clever furniture solution.
    \n\nHeat becomes a problem. The back of those cubes doesn’t have great airflow, and your little machines are starting to run hot. Cable management goes from being a fun puzzle to a genuine nightmare. You need to unplug one thing and suddenly three other things get pulled out with it.
    \n\nYou start looking at what the “serious” people use. And you see them: wall-mounted server racks.
    \n\nSuddenly, you’re measuring wall space and looking for studs. What started as a small, contained hobby is now about to become a permanent fixture in your home. You’ve evolved. You’re no longer just hiding a computer in a box; you’re building a proper command center.
    \n\nGoing for a rack is a big step, but it solves a lot of problems:
    \n\n* Airflow: Racks are open and designed to keep things cool.
    * Space: You can fit more gear, neatly and securely.
    * Management: Everything is accessible. No more digging around in a dark cube.
    \n\nIt’s a beautiful, organized, and slightly terrifying evolution.
    \n\n## The Work Is Never Really Done
    \n\nHere’s the secret: you’re never really finished.
    \n\nOnce the rack is on the wall, you start thinking about the next upgrade. And if you’re running all this important stuff, you’ll quickly realize you need to protect it.
    \n\nThis leads to the next logical, and crucial, purchase: a UPS (Uninterruptible Power Supply).
    \n\nI’ve seen people use smart plugs to monitor power, and they live in constant fear of accidentally tapping the wrong button in an app and shutting everything down. It’s a terrifying thought. A UPS solves this. It’s a big battery that sits between your gear and the wall outlet. If the power goes out, it keeps everything running long enough for a safe shutdown. It also protects your expensive hardware from power surges. It’s not just a nice-to-have; it’s peace of mind.
    \n\nThis whole journey—from a single box to a wall of tech—is a familiar one. It’s a story of curiosity, of solving problems, and of a hobby that has a tendency to get delightfully out of hand. If you find yourself measuring your wall for a server rack, don’t worry. You’re just following a well-worn, and very rewarding, path.

  • So You Got a New Computer. Now What?

    So You Got a New Computer. Now What?

    Got a spare computer? Turn it into a powerful home server! This guide walks you through setting up Proxmox, handling hardware, and remote access with WireGuard.

    So, you got a new computer.

    Maybe it’s a small, quiet box you found online, or maybe it’s an old desktop that was just collecting dust. It has that new-project energy. That “I could do something cool with this” feeling.

    But then comes the big question: What now?

    If you’re anything like me, your mind starts racing. Could it be a media center? A place to back up files? A laboratory for tech experiments? The answer is yes, to all of the above. You’re on the verge of building your first home server. And it’s way more fun and less intimidating than it sounds.

    Let’s walk through turning that box into the digital heart of your home.

    First, a Quick Look at the Hardware

    You might have popped it open and found some interesting parts inside. I recently heard about a machine that had a hybrid Intel Optane and NVMe SSD drive.

    If you’ve run into one of these, you might be scratching your head. What’s the Optane part for?

    Here’s the simple version: Intel Optane was designed as a cache to speed up slower, traditional hard drives (the spinning kind). It was a pretty neat idea at the time. But here’s the thing—it was meant to help a slow drive feel fast. Your NVMe SSD is already fast. Really fast.

    So, for a home server project in today’s world, that Optane portion is mostly useless. It adds a layer of complexity you just don’t need. My advice? Just ignore the Optane functionality. Treat the drive as a standard NVMe SSD. If the drive is too small for your ambitions, you might even consider swapping it out for a simple, larger NVMe or SATA SSD. Keep it simple.

    Giving Your Server Its Brain: Meet Proxmox

    Okay, hardware sorted. Now, what software do you run on this thing? You could just install Windows or a standard version of Linux, but if you want to unlock its true potential, you’ll want a “hypervisor.”

    Think of a hypervisor as a lightweight base camp for your server. It lets you run multiple, separate operating systems all on the same machine, all at the same time. It turns one computer into a dozen little computers.

    The best place to start? Proxmox.

    It’s free, incredibly powerful, and has a huge community behind it. You install Proxmox first, and from there, you can easily create “virtual machines” (VMs) and “containers” (LXCs).

    Don’t let the terms scare you. It’s basically like digital Lego. You can spin up a new container in seconds to try something out and then tear it down just as fast if you don’t like it.

    What can you build with these digital Legos? Here are a few ideas to get you started:
    * Ad-Blocker: Install Pi-hole to block ads across your entire home network. No more annoying banners on your phone or smart TV.
    * Media Server: Set up Jellyfin or Plex to organize your movies and TV shows into a beautiful, Netflix-style library you can stream anywhere.
    * Smart Home Hub: Run Home Assistant to finally unify all your random smart plugs, lights, and sensors into one amazing interface.
    * Personal Cloud: Use Nextcloud to create your very own private Google Drive or Dropbox for your files and photos.

    Suddenly, this little box is doing a lot of heavy lifting for you, and you’re learning a ton along the way.

    Accessing Your Lab from Anywhere

    Your server is humming along at home, but what if you’re at a coffee shop or traveling and want to check on it, grab a file, or show a friend your new media setup?

    This is where remote access comes in. It has two parts: connecting securely and then controlling the machine.

    For the secure connection, the best tool for the job right now is WireGuard. It’s a modern VPN (Virtual Private Network) that creates a super-fast and super-secure “tunnel” from your laptop or phone directly to your home network. It’s like having a very, very long Ethernet cable that follows you everywhere. Setting it up is a great weekend project, and once it’s running, you’ll wonder how you ever lived without it.

    Once you’re connected via WireGuard, you can control things. Proxmox has a great web interface that lets you manage all your virtual machines. And if you’ve set up a VM with a desktop (like Windows or Linux Mint), you can use standard Remote Desktop (RDP) or VNC software to see and use its desktop as if you were sitting right in front of it.

    It’s a Journey, Not a Destination

    And that’s really it. You start with a box. You install a powerful base like Proxmox. You start building things you find useful or fun. You figure out how to access it from anywhere.

    Don’t worry about getting it perfect on day one. The real fun of a home lab is the process itself. The tinkering, the problem-solving, and the “aha!” moment when your new service finally clicks on.

    So go ahead, plug it in, and start building. You’ve got this.

  • I Used My Home as a VPN and Accidentally Moved My IP Address to Trinidad

    My personal VPN travel hack backfired. Learn how using a Tailscale exit node confused Google and made it think my Canadian IP was in Trinidad.

    I love a good travel hack. And recently, I thought I had the perfect one.

    I was visiting family in Trinidad, and I wanted a simple way to access my digital life back home in Canada. Specifically, I wanted to stream my region-specific shows and use my YouTube Premium account without the usual ad-supported, feature-limited experience you get abroad.

    The solution seemed brilliant: I used a tool called Tailscale to turn my home network into my own personal VPN. By setting my house as an “exit node,” all my internet traffic from Trinidad would route through my Canadian internet connection. It was like I was sitting on my own couch, digitally speaking.

    And you know what? It worked perfectly. For the whole trip, I had seamless access to everything. I felt pretty clever.

    Then I came home.

    The Strange Welcome Back

    The first sign something was wrong was subtle. I landed in Canada, got back to my apartment, and hopped on my laptop. It was a freshly reformatted machine, so I knew it was clean. I opened a browser and went to Google.

    In the bottom-left corner of the page, it said: “Trinidad and Tobago.”

    That’s weird, I thought. I typed “my IP” into the search bar, and Google confidently told me my location was “Chaguanas, Trinidad and Tobago”—the exact town where I had been staying.

    But I was in Toronto. My internet service provider is Canadian. I checked a few other IP-lookup websites, and they all correctly placed me in Toronto. It was only Google that was confused.

    This wasn’t just a weird quirk. It had real consequences:

    • YouTube Broke: My YouTube Premium account on my phone and tablet suddenly lost its best features, like background play. Why? Because YouTube, powered by Google’s location data, thought I was in a region where those features weren’t offered.
    • It Was Contagious: This wasn’t just my laptop. Every single device on my home network had the same problem. My phone, my smart TV, even devices that had never left the country were all suddenly located in Trinidad, according to Google.
    • Incognito Mode Didn’t Help: This wasn’t a cookie or cache issue. The problem persisted even in private browsing windows.

    Somehow, by using my home network as a VPN exit point from another country, I had seemingly convinced Google’s massive database that my Canadian IP address had permanently moved to the Caribbean. I had poisoned my own digital well.

    “Have You Tried Turning It Off and On Again?”

    My next step was to contact YouTube Premium support. I figured if I explained the situation clearly, they could escalate it and get someone to fix their database.

    I laid out all the evidence: the conflicting geolocation reports, the fact that it affected all my devices, the screenshots. I explained the Tailscale exit node setup.

    Their response? A series of emails asking me to:

    • Reboot my iPhone.
    • Reinstall the YouTube app.
    • Check that the “Background Play” toggle was switched on.

    It was maddening. I was dealing with a server-side, database-level problem, and the support script was built for someone who didn’t know how to use their phone. It was clear this path was a dead end.

    Taking Matters Into My Own Hands

    I knew there were two ways to fix this. Wait for Google to maybe, someday, fix their geolocation data for my IP. Or, I could just change my IP.

    Changing your public IP isn’t always straightforward. Your ISP usually assigns you one automatically, and it can “stick” to your router for a long time. Just rebooting the router often doesn’t do it.

    But my router runs on custom firmware (OpenWRT), which gives me more control. The trick is to change the MAC address of the router’s WAN port. The MAC address is a unique hardware identifier, and when your ISP sees a new, unrecognized MAC address asking for a connection, it typically assigns a fresh public IP address.

    So that’s what I did. I changed one character in the MAC address, rebooted the router, and voilà. Success.

    I immediately got a new Canadian IP address. Google showed my location as Toronto. YouTube Premium started working properly again. All was right with the world.

    It was a fascinating, frustrating, and ultimately educational experience. Tools like Tailscale are incredibly powerful, but the internet is a tangled web of systems. Sometimes, a clever solution in one area can cause a bizarre problem in another. I fixed it, but I can’t help but feel for the next person who gets assigned my old IP address. They might be in for a confusing time.

    As for me, I’m heading to the east coast later this summer. Maybe I’ll try it again and see if I can convince Google my home is in Halifax this time.

  • I Built My First Homelab, and It’s Pretty Cool

    I Built My First Homelab, and It’s Pretty Cool

    Curious about homelabs? I share my journey of building my first one, the services I’m running, and why it might be your next favorite hobby.

    I’ve been playing around with something new for the last month, and I’m genuinely excited to share how it’s been going. I built my first homelab. And honestly, it’s been working surprisingly well.

    If you’re wondering what a homelab is, you’re not alone. I was in the same boat not too long ago. Think of it as a personal playground for tech stuff, right in your own home. It’s a space where you can experiment with servers, networking, and software without the risk of breaking anything important. For me, it started with a simple idea: I wanted more control over my digital life and a place to learn new skills.

    So, What’s in My Homelab?

    My setup is pretty modest. It’s not one of those giant server racks you see in movies. It’s basically a dedicated computer running a few services using Docker containers. If you haven’t heard of Docker, it’s a tool that lets you run applications in isolated environments called containers. It’s like having a bunch of mini-computers all running on one machine, which is perfect for a homelab.

    Here’s a peek at what I’m running:

    • A Media Server: This is probably the most-used service in my lab. I’m using Plex, which organizes all my movies and shows and lets me stream them to any device, whether I’m at home or on the go. It’s like having a personal Netflix, but with my own collection.
    • Network-Wide Ad Blocker: I set up Pi-hole, which blocks ads on every device connected to my home Wi-Fi. It’s amazing how much faster and cleaner web pages look without all the clutter. My phone, my laptop, even my smart TV—all ad-free.
    • Personal Cloud Storage: Instead of relying solely on Google Drive or Dropbox, I’m running Nextcloud. It gives me a private space to store files, photos, and documents. I can access them from anywhere, and I know exactly where my data is—on my own server.
    • A Monitoring Dashboard: To keep an eye on everything, I set up a dashboard with Grafana. It shows me how my server is performing, how much memory is being used, and whether all my services are running smoothly. It looks complicated, but it’s surprisingly straightforward to set up.

    Why Bother Building a Homelab?

    I get it. This might sound like a lot of work for things you can get from other services. And you’re not wrong. But for me, the process was the point.

    Building this little lab taught me so much. A month ago, I barely knew what a Docker container was. Now, I feel comfortable deploying new services and troubleshooting problems. It’s a practical way to learn about technologies that are used in the professional IT world.

    There’s also the privacy aspect. By self-hosting services like cloud storage and a media server, I have complete control over my data. I’m not handing it over to a big corporation, and I can customize everything exactly how I want it.

    And honestly, it’s just fun. It’s a hobby that’s both challenging and rewarding. There’s a real sense of accomplishment when you get a new service up and running perfectly.

    Thinking About Starting Your Own?

    If any of this sounds interesting, you might be a good candidate for starting a homelab. You don’t need a powerful, expensive server to begin. You can start with an old desktop computer or even a tiny Raspberry Pi.

    My advice? Start small. Pick one thing you want to do. Maybe you want to block ads with Pi-hole or set up a simple file server. Find a good tutorial, take your time, and don’t be afraid to break things. That’s how you learn.

    I’m still at the beginning of my journey. There are so many other services I want to try, like a password manager, a recipe organizer, or maybe even a home automation hub. The possibilities feel endless. If you have any ideas for services that could be a good addition, I’d love to hear them. Let me know what you’re running in your own lab!