Category: Uncategorized

  • I Used My Home as a VPN and Accidentally Moved My IP Address to Trinidad

    My personal VPN travel hack backfired. Learn how using a Tailscale exit node confused Google and made it think my Canadian IP was in Trinidad.

    I love a good travel hack. And recently, I thought I had the perfect one.

    I was visiting family in Trinidad, and I wanted a simple way to access my digital life back home in Canada. Specifically, I wanted to stream my region-specific shows and use my YouTube Premium account without the usual ad-supported, feature-limited experience you get abroad.

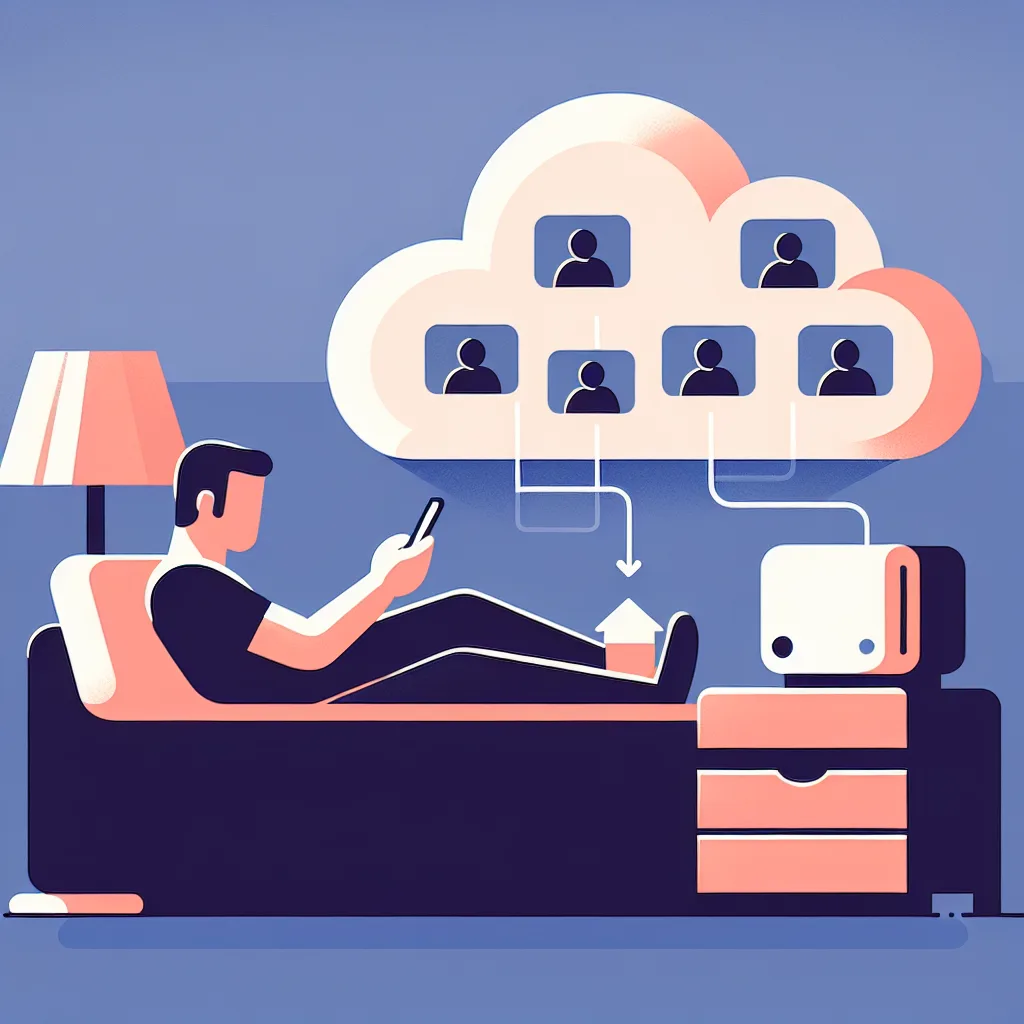
    The solution seemed brilliant: I used a tool called Tailscale to turn my home network into my own personal VPN. By setting my house as an “exit node,” all my internet traffic from Trinidad would route through my Canadian internet connection. It was like I was sitting on my own couch, digitally speaking.

    And you know what? It worked perfectly. For the whole trip, I had seamless access to everything. I felt pretty clever.

    Then I came home.

    The Strange Welcome Back

    The first sign something was wrong was subtle. I landed in Canada, got back to my apartment, and hopped on my laptop. It was a freshly reformatted machine, so I knew it was clean. I opened a browser and went to Google.

    In the bottom-left corner of the page, it said: “Trinidad and Tobago.”

    That’s weird, I thought. I typed “my IP” into the search bar, and Google confidently told me my location was “Chaguanas, Trinidad and Tobago”—the exact town where I had been staying.

    But I was in Toronto. My internet service provider is Canadian. I checked a few other IP-lookup websites, and they all correctly placed me in Toronto. It was only Google that was confused.

    This wasn’t just a weird quirk. It had real consequences:

    • YouTube Broke: My YouTube Premium account on my phone and tablet suddenly lost its best features, like background play. Why? Because YouTube, powered by Google’s location data, thought I was in a region where those features weren’t offered.
    • It Was Contagious: This wasn’t just my laptop. Every single device on my home network had the same problem. My phone, my smart TV, even devices that had never left the country were all suddenly located in Trinidad, according to Google.
    • Incognito Mode Didn’t Help: This wasn’t a cookie or cache issue. The problem persisted even in private browsing windows.

    Somehow, by using my home network as a VPN exit point from another country, I had seemingly convinced Google’s massive database that my Canadian IP address had permanently moved to the Caribbean. I had poisoned my own digital well.

    “Have You Tried Turning It Off and On Again?”

    My next step was to contact YouTube Premium support. I figured if I explained the situation clearly, they could escalate it and get someone to fix their database.

    I laid out all the evidence: the conflicting geolocation reports, the fact that it affected all my devices, the screenshots. I explained the Tailscale exit node setup.

    Their response? A series of emails asking me to:

    • Reboot my iPhone.
    • Reinstall the YouTube app.
    • Check that the “Background Play” toggle was switched on.

    It was maddening. I was dealing with a server-side, database-level problem, and the support script was built for someone who didn’t know how to use their phone. It was clear this path was a dead end.

    Taking Matters Into My Own Hands

    I knew there were two ways to fix this. Wait for Google to maybe, someday, fix their geolocation data for my IP. Or, I could just change my IP.

    Changing your public IP isn’t always straightforward. Your ISP usually assigns you one automatically, and it can “stick” to your router for a long time. Just rebooting the router often doesn’t do it.

    But my router runs on custom firmware (OpenWRT), which gives me more control. The trick is to change the MAC address of the router’s WAN port. The MAC address is a unique hardware identifier, and when your ISP sees a new, unrecognized MAC address asking for a connection, it typically assigns a fresh public IP address.

    So that’s what I did. I changed one character in the MAC address, rebooted the router, and voilà. Success.

    I immediately got a new Canadian IP address. Google showed my location as Toronto. YouTube Premium started working properly again. All was right with the world.

    It was a fascinating, frustrating, and ultimately educational experience. Tools like Tailscale are incredibly powerful, but the internet is a tangled web of systems. Sometimes, a clever solution in one area can cause a bizarre problem in another. I fixed it, but I can’t help but feel for the next person who gets assigned my old IP address. They might be in for a confusing time.

    As for me, I’m heading to the east coast later this summer. Maybe I’ll try it again and see if I can convince Google my home is in Halifax this time.

  • My Homelab Story: From One NAS to a Full Server Rack

    My Homelab Story: From One NAS to a Full Server Rack

    Follow my personal journey of building a homelab, from a simple Synology NAS for files to a massive Proxmox server for virtualization and media.

    It’s funny how hobbies start. Sometimes it’s a deliberate choice, and other times you just sort of stumble into it. For me, my homelab journey was definitely the second one. It didn’t begin with a grand plan for a server rack and a wall of blinking lights. It began with a simple need: I had to store my school files.

    The Humble Beginning: One Simple NAS

    My first “homelab,” if you could even call it that, was a Synology NAS. It was a straightforward, reliable little box. Its main job was to make sure my schoolwork was safe and accessible. That’s it. No fancy media streaming, no complex virtual machines. Just files.

    For a while, that was enough. It did its job perfectly. But if you’ve ever tinkered with tech, you know that “enough” doesn’t always stay enough for long. The curiosity bug starts to bite.

    The First Real Upgrade: Getting Serious About Media

    The next step came when I wanted a better way to manage my media. That’s when I brought a Mac Mini into the mix. I set it up to run Plex for streaming and the “Arrs” (software like Sonarr and Radarr that help manage media collections).

    This was a solid setup. The Synology handled the files, and the Mac Mini had enough power to serve everything up smoothly. The two devices worked together well. My needs were met. But the itch was back. I started wondering, “What else could I do? What if I wanted more control? More power?”

    The Great Leap: Building a Proper Server

    In the last month, I decided to go all in. I moved from my simple consumer-grade setup to a full-blown enterprise server running Proxmox.

    For anyone new to this, Proxmox is a hypervisor. Think of it as an operating system for your server that lets you create and run multiple other operating systems inside it, all at the same time. These are called virtual machines, or VMs.

    My main storage is now a TrueNAS VM. This is where things get a little technical and, I think, really cool. I have two special storage controller cards (HBAs) in the server that I “pass through” directly to the TrueNAS virtual machine. This means the VM gets to talk to my hard drives directly, with no middleman, giving it full speed and control. It’s a powerful and efficient way to manage a huge amount of storage.

    The Mac Mini has a new job now, too. It’s a central backup station for all my family’s Apple devices using a great tool called iMazing.

    A Look Under the Hood

    So, what’s actually running this whole operation? I managed to get my hands on a decommissioned Nutanix server, which is built from Supermicro parts. It’s a beast.

    Here’s a quick rundown of the specs:

    • Server: Supermicro 2U Chassis (Model: CSE-829U)
    • CPU: 2x Intel Xeon Gold 6140 processors. That gives me a total of 36 cores and 72 threads.
    • Memory: 384GB of DDR4 ECC RAM. The “ECC” part is important—it stands for Error Correcting Code, which helps prevent data corruption.
    • Storage (OS/VMs): Two 2TB Samsung 990 PRO NVMe SSDs in a mirrored setup for speed and redundancy.
    • Storage (Main Pool): 12x 16TB Seagate drives managed by TrueNAS.
    • GPU: An NVIDIA RTX A2000 with 12GB of VRAM. This is fantastic for Plex, as it can handle multiple video transcodes without breaking a sweat.
    • Networking: A 10GbE NIC and a 10GbE switch to make sure data moves between devices lightning fast.
    • Power: Dual 1000W power supplies for redundancy and a CyberPower UPS to keep everything running safely if the power goes out.

    My 3-2-1 Backup Strategy

    Having a powerful server is great, but all that data is worthless if it’s not backed up properly. I follow the classic 3-2-1 rule: three copies of my data, on two different types of media, with one copy off-site.

    1. The Proxmox server and Apple device backups (from the Mac Mini) are first backed up to my old friend, the Synology NAS.
    2. The Synology NAS then uses a tool called HyperBackup to send an encrypted copy of everything to BackBlaze, an online cloud storage service.

    This way, even if my house and all my hardware were to disappear, my most important data would still be safe in the cloud.

    It’s been quite a journey, from a single NAS for school files to this powerhouse in a rack. It’s a hobby that’s always evolving, and I’m constantly learning. If you’re just starting out, don’t be intimidated by setups like this. Start small, solve a problem you have, and let your curiosity guide you. You might be surprised where you end up.

  • The Accidental Techie: When a Hobby Feels Like a Calling

    The Accidental Techie: When a Hobby Feels Like a Calling

    Started a home lab for fun and now wondering if it should be your career? Explore why it’s okay for your tech passion to just be a rewarding hobby.

    It often starts with a simple problem.

    “I wish I could share files more easily at home.” Or, “I’m tired of seeing ads everywhere.” So you get a Raspberry Pi or dust off an old computer you had in the closet. You follow a tutorial, type a few commands into a black screen, and suddenly, it works. You’ve created something.

    That feeling is powerful.

    So you do it again. You set up a media server. Then a network-wide ad blocker. Before you know it, you’re learning about Docker containers, networking, and firewalls. Your little project has snowballed into a full-blown home lab, a stack of blinking lights that hums quietly in the corner.

    It stops being just a hobby. It feels like you’ve stumbled into a whole new world. And that’s when the big, slightly scary question pops into your head: “Should I be doing this for a living?”

    The Hobbyist’s Dilemma

    If you’ve ever felt this way, you’re not alone. I’ve talked to a lot of people who get deep into home labs—people who are students, artists, engineers in completely unrelated fields, or retirees. They spend their nights and weekends learning skills that are directly transferable to a career in IT, DevOps, or network engineering.

    It’s a strange crossroads to be at. You’re passionate about what you’re building. You love the challenge, the problem-solving, and the endless learning. It feels more engaging than your actual day job or field of study.

    But then the doubt creeps in.

    You wonder what the job is really like. Is being a DevOps professional actually fun? Or is it a stressful grind of fixing other people’s problems? You imagine a world where you can’t just build what you want. Instead, you’re stuck maintaining a system someone else built a decade ago, navigating office politics, and hearing the dreaded phrase, “We can’t change that. It’s just how we’ve always done it.”

    The fear is that turning your passion into a paycheck might just kill the joy that got you started in the first place.

    It’s Okay If It’s Just for Fun

    So, here’s the simple answer: You don’t have to choose. It is perfectly fine—and incredibly common—to be a wildly passionate “amateur.”

    Think about it this way: plenty of people are amazing home cooks. They buy fancy knives, perfect their sourdough starter, and host incredible dinner parties. Does that mean they should all quit their jobs and open a restaurant? Of course not. The pressure of turning a profit, managing staff, and dealing with health inspectors would suck the joy out of it for many.

    Your home lab can be the exact same thing. It can be your kitchen, your workshop, your studio. It’s a place for you, by you.

    Here are a few reasons why keeping your tech passion as a hobby is a powerful choice:

    • You Have Total Freedom: You are the boss. You decide what services to run, what hardware to buy, and when to tear it all down and start over. There are no tickets, no deadlines, and no one telling you that your idea is out of scope.
    • The Learning is Pure: You learn because you’re curious. You can spend a whole weekend figuring out a complex networking problem just for the satisfaction of it, not because it’s a requirement for your job. This is learning in its purest form.
    • It Makes You Better at Everything: The skills you gain from running a home lab—critical thinking, project management, and deep-level problem-solving—are valuable in any field. A biomedical engineer who understands server infrastructure is a better engineer. A writer who can automate their own backups is a more efficient writer.

      Your Day Job Doesn’t Define You

      That little server rack in your closet doesn’t have to be a sign that you’re in the wrong career. It can just be a sign that you’re a curious person who loves to learn and build.

      Your home lab is your personal playground. A place to experiment without consequence. A creative and technical outlet that you control completely. It doesn’t need to be anything more than that.

      So whether you’re a student, a lawyer, a doctor, or a barista, your place in the world of tech is valid. You don’t need to be a professional to be passionate.

      What about you? What do you do for a living, and what does your personal tech playground look like?

  • My Homelab Started With One Small Rack. Now I’m Hooked.

    Thinking about starting a homelab? Follow one user’s journey from a simple Raspberry Pi rack to building a custom router and exploring uses for a powerful GPU.

    I spent years in the IT world, starting way back in the 90s. But about a decade ago, I traded my command line for a cap and gown, moving into university administration. I’m a Dean now, but I never quite managed to shake the tech bug. It’s a part of who I am.

    So, when Amazon Prime Day rolled around, I saw a deal on a little 4U server rack and thought, “Why not?” It seemed like the perfect home for my growing collection of Raspberry Pis.

    That was the start. It was a small, simple project. But if you’ve ever tinkered with tech, you know how this goes. One small project is never just one small project.

    From a Small Rack to a Bigger Plan

    That little 4U rack filled up faster than I expected. Soon, I was browsing eBay for micro PCs and upgrading to a bigger 8U rack. As the hardware grew, so did the complexity. I realized I needed a way to keep track of it all—what was connected to what, which IP addresses were assigned where, and what my future plans were.

    This led me down a completely different rabbit hole: Obsidian. It’s a note-taking app, but it’s so much more than that. I started using it to document my entire homelab. I created diagrams, network maps, and notes on every piece of hardware and software. It’s my single source of truth. If you’re starting a homelab, my best advice is to document your setup from day one. You’ll thank yourself later.

    My latest project? Ditching my ISP’s router. I have a 2Gbps internet plan from Xfinity, but the mesh router I was using just couldn’t keep up. It was bottlenecking my speeds, which is the kind of problem a good homelab is built to solve. So, I’ve got a new, dedicated machine on the way to build my own router using OPNsense, a powerful open-source firewall.

    The Big Question: What Do I Do With This GPU?

    In the middle of all this planning, I have one piece of hardware that feels like a beautiful, unsolved puzzle. My main server, a Dell Precision running Proxmox, is hosting my TrueNAS storage setup. And inside that machine is a beastly NVDIA RTX A5000 GPU.

    It’s powerful. Maybe a little too powerful for what I’m doing right now, which is… nothing. And that feels like a waste.

    So, what can you actually do with a high-end GPU in a home server? I’ve been digging into this, and it turns out, there are some pretty cool answers.

    • Media Server Transcoding: This is the most common use case. If you run a media server like Plex or Jellyfin, a GPU can handle video transcoding on the fly. That means if you’re streaming a 4K movie to your phone, the GPU can convert the file to a smaller format without breaking a sweat, leaving your main CPU free for other tasks.

    • Running AI Models: This is where things get really interesting. You can use a powerful GPU to run your own local AI and machine learning models. Think running a private version of a large language model (like ChatGPT) or setting up Stable Diffusion to generate AI images right from your own server. It’s a great way to experiment with AI without relying on cloud services.

    • GPU Passthrough for Virtual Machines: With Proxmox, I can dedicate the entire GPU to a specific virtual machine (VM). This would let me spin up a high-performance Windows or Linux VM and use it for things that need serious graphics power, like video editing, 3D rendering with software like Blender, or even cloud gaming. I could stream games from my server to any screen in the house.

    • Data Science and Computation: While I’m not a data scientist, a GPU like the A5000 is built for heavy-duty computation. It could be used for scientific research, complex simulations, or massive data analysis projects.

    For now, I’m leaning toward setting it up for Plex transcoding and starting to play around with some local AI models. It feels like the right mix of practical and experimental—which is what a homelab is all about. It’s a personal space to learn, build, and solve your own unique challenges. It all starts with one small project, and from there, the journey is up to you.

  • My Home Lab Went a Little Overboard

    Ever wondered why someone would run a data center in their house? A look inside a massive home lab and the surprising reasons behind the hardware.

    I have a small confession to make. My home lab might have gotten a little out of hand.

    What started as a simple hobby, a desire to tinker and learn, has quietly morphed into something… bigger. We’re not talking about an old desktop computer humming away in the corner. We’re talking about a stack of enterprise-grade servers. The kind of hardware you usually find in a dedicated data center, now living in my house.

    It’s a mix of Dell R730s, 630s, some Fujitsu Primergys, and even a few HP DL385 G10s. For those not deep into the server world, let’s just say it’s a lot of horsepower. We’re looking at a collective 3 terabytes of RAM for the main compute cluster. That’s more memory than you’ll find in a hundred typical laptops combined. And yes, it’s all connected with a speedy 10-gigabit network.

    So, the big question is… why? Why build something so ridiculously powerful at home?

    It’s a fair question. My friends sometimes joke that I could probably run a small country from my basement. And honestly, they might not be wrong.

    It’s Not Just About Power, It’s About the Playground

    The simple answer is: because I use it. All of it. This isn’t just about collecting impressive-looking machines. This setup is my personal playground, my workshop, and my classroom all rolled into one. It’s where I get to break things without consequence and learn how to put them back together.

    Think of it like this. A car enthusiast might have a project car they’re always tuning and tweaking in the garage. A woodworker has a shop full of tools for different jobs. My thing is technology. I love to see what’s possible when you remove the usual constraints.

    Here’s a taste of what’s actually running on these machines:

    * Virtualization is Key: I run a hypervisor, which is basically a system that lets me create dozens of smaller, virtual computers (VMs). One physical server can host 10, 20, or even more VMs, each with its own operating system and purpose.
    * A Media Server on Steroids: Sure, you can run a Plex server on a small little box. But have you ever tried transcoding multiple 4K streams for family and friends at the same time? My setup doesn’t even break a sweat.
    * Testing and Development: In my day job, I work in IT. Having a home lab that mirrors a corporate environment is incredibly valuable. I can spin up a new server, test a piece of software, or try out a new networking configuration without any risk to a live system. It’s the ultimate sandbox.
    * Self-Hosting Everything: Why rely on cloud services when you can host your own? I run my own cloud storage, password managers, project management tools, and more. It gives me complete control over my data and saves money in the long run (we won’t talk about the electricity bill just yet).

    Is It Overkill? Absolutely. And That’s the Point.

    Let’s be honest. For most people, this is complete and utter overkill. And I love that about it. It’s a hobby, and hobbies are allowed to be a little bit excessive. They’re supposed to be fun and push the limits of what you think is practical.

    Building and maintaining this lab has taught me more than any textbook ever could. I’ve learned about networking, server administration, cybersecurity, and automation. I’ve troubleshot cryptic error messages at 2 AM and felt the triumph of a complex system finally clicking into place.

    It’s a constant source of challenge and satisfaction. And while the hum of the server fans is a constant reminder of the power being used, it’s also the sound of learning. The sound of possibility.

    So yeah, maybe I went a little overboard. But I wouldn’t have it any other way.

  • Your People Aren’t Going to Find You

    Your People Aren’t Going to Find You

    Feeling lonely? Here’s a no-fluff guide to intentionally building a meaningful support system as an adult. It’s easier than you think.

    I used to think a support system was something you just… had. That you’d trip over your people one day, like finding a twenty-dollar bill on the sidewalk. You leave school, you start your job, and the friendships just sort of happen, right?

    Turns out, not so much.

    As I’ve gotten older, I’ve realized something important: A real support system doesn’t just appear. You have to build it. Brick by brick. Conversation by conversation. It’s an act of intention, not luck. And it’s one of the most important projects you’ll ever work on.

    The Myth of “Finding Your Tribe”

    We love the idea of “finding your tribe.” It sounds so effortless. But it sets us up for disappointment. We wait around to be discovered, to be welcomed into a fully-formed group of best friends. When it doesn’t happen, we feel like we’re doing something wrong.

    But you’re not doing anything wrong. It’s just that adult life is different. There’s no built-in social structure like there was in school. Everyone is busy, schedules are a nightmare, and people are often wrapped up in their own little worlds of work, partners, and kids.

    If you want deep, meaningful connections, you have to be the architect.

    What Is a Support System, Anyway?

    It’s not just one person. A solid support system is a small, diverse network of people you can lean on for different things. It’s not about having a huge circle of friends; it’s about having the right kinds of support.

    I like to think of it in a few categories:

    • The Practical Pal: This is the person you can call when your car won’t start or you need help moving a couch. It’s support based on action and favors. You help them, they help you. It’s simple and incredibly valuable.
    • The Emotional Anchor: This is the friend who listens. The one you can text after a terrible day and say, “Do you have a minute to talk?” They don’t need to solve your problems. They just need to hold space for you to feel your feelings.
    • The Honest Advisor: We all need someone who will tell us the truth, even when it’s hard to hear. This is the friend who says, “I think you might be wrong here,” or “Are you sure that’s a good idea?” Their honesty is a gift, even if it stings a little.
    • The Fun Friend: This person is pure joy. They’re the one who pulls you out of a funk, makes you laugh, and reminds you not to take life so seriously. Their job is to help you forget your troubles for a little while.

    You won’t find all of these qualities in one person. And that’s the point. Building a network means you don’t have to put all of that pressure on a single relationship.

    So, How Do You Actually Build It?

    Okay, so you’re sold on the idea. But how do you go from feeling lonely to having a network? It’s a slow process, but it starts with small, deliberate actions.

    1. Start by Giving. The fastest way to build support is to be support. Offer to help a coworker with a project. Check in on a friend you haven’t heard from in a while. Be the person who listens without judgment. When you put that energy out there, it has a funny way of coming back to you.

    2. Revisit Your Interests. What do you actually like to do? Hiking, board games, pottery, learning a language? Go do those things. Consistently. Don’t go once with the goal of making a best friend. Go because you enjoy the activity. Friendships often bloom as a side effect of shared passions.

    3. Nurture Weak Ties. We all have “weak ties”—acquaintances, neighbors, that friendly person at the coffee shop. These are the seeds of potential friendships. Don’t dismiss them. Ask a follow-up question. Remember their name. The simple act of showing genuine interest can turn a casual connection into something more.

    4. Be the One to Make the Plan. This is the hardest part for most of us. We meet someone cool, we exchange numbers, and then… nothing. We wait for them to reach out. Don’t wait. Be the one who sends the text: “Hey, it was great talking to you. Want to grab coffee next week?” The worst they can say is no. But they’ll almost always be flattered that you made the effort.

    Building your people is a quiet, steady, and sometimes awkward process. It won’t happen overnight. But by shifting your mindset from finding to building, you take back control. You stop waiting and start creating the connections you need. And that’s a pretty powerful thing.

  • Tired of Paying for Google Photos? Here’s How to Host Your Own

    Tired of Paying for Google Photos? Here’s How to Host Your Own

    Tired of Google Photos fees? Learn how to create your own private photo cloud with self-hosted alternatives like Immich, PhotoPrism, and Nextcloud.

    That little notification pops up when you least expect it: “Your account storage is almost full.”

    It’s happened to me, and it probably just happened to you or someone you know. My girlfriend got the alert last week, and it started a whole conversation. We love the convenience of Google Photos. You take a picture, and boom, it’s everywhere—safe, sound, and sorted. But that convenience comes with a catch: a monthly subscription that only ever seems to go up.

    So we started asking the same question you probably are: Is there another way? What if you could have all the convenience of a photo cloud without the endless fees and privacy trade-offs?

    It turns out, you can. It’s called self-hosting, and it’s basically like creating your own private, secure version of Google Photos right in your own home.

    So, What Does “Self-Hosting” Your Photos Even Mean?

    Let’s cut through the jargon. Self-hosting simply means running an application on your own hardware instead of on a tech company’s servers.

    Think of it like this: Instead of renting a storage unit from Google, you’re buying your own shed and putting it in your backyard. You have the only key. You decide how it’s organized. No one else can peek inside or change the rental terms on you.

    For photos, this means setting up a program on a computer you own—which could be an old desktop, a tiny Raspberry Pi, or a dedicated device called a NAS (Network Attached Storage). This program then serves your photos to an app on your phone, just like Google Photos does.

    You get the same experience: automatic uploads, a beautiful gallery, and access from anywhere. The big difference? Your pictures live with you, not on a server farm in another state.

    The Best Self-Hosted Alternatives to Google Photos

    The good news is that smart people have already built amazing, free software to do this. After looking into it, a few clear winners emerged that are perfect for someone leaving Google Photos.

    1. For the True Google Photos Experience: Immich

    If you want something that looks and feels almost identical to Google Photos, start with Immich. It’s a modern, fast, and beautiful platform that’s clearly inspired by Google’s design.

    • Familiar Interface: The timeline, album structure, and search feel incredibly intuitive if you’re used to Google Photos.
    • Great Mobile App: The Android and iOS apps are slick and handle automatic background uploads perfectly. This is a must.
    • Advanced Features: It’s not just a simple gallery. It has facial recognition for grouping people, object detection for searching (“show me photos of cars”), and a map view to see where your photos were taken.
    • Multi-User Support: Perfect for families. You can set up separate accounts for your partner or kids, all running on the same server.

    2. For the AI-Powered Organizer: PhotoPrism

    PhotoPrism is another fantastic choice, but it really shines for its powerful organization and tagging features. It’s a metadata machine.

    • Incredible AI Search: PhotoPrism automatically scans your photos and tags them with keywords, colors, locations, and more. You can find photos based on what’s in them with surprising accuracy.
    • Built for Big Libraries: It’s designed to handle massive photo collections (we’re talking 100,000+) without slowing down.
    • Maps and Stats: It offers detailed world maps of your photos and provides cool data about what cameras and lenses you use most often.
    • Less of a 1:1 Clone: The interface is clean but different from Google Photos. It feels more like a professional archival tool, which some people absolutely love.

    3. For the All-in-One Private Cloud: Nextcloud Memories

    What if you want to de-Google your life, not just your photos? That’s where Nextcloud comes in. Nextcloud is a full suite of apps you can host yourself—think of it as your own private Google Drive, Calendar, Contacts, and Photos all rolled into one. The “Memories” app is their photo solution.

    • Complete Ecosystem: If you also want to host your own files and documents, Nextcloud is the most efficient choice.
    • Solid Photo Features: The Memories app has a nice timeline view, automatic tagging, and albums.
    • Mature and Stable: Nextcloud is a massive open-source project and is incredibly robust and well-supported.

    Okay, What’s the Catch? A Quick Reality Check

    This all sounds great, but is it as easy as signing up for Google One? Honestly, no. It requires a little bit of a DIY spirit. But you don’t need to be a coding genius.

    Here’s what you’ll need:

    1. A Server: This is the computer that will run 24/7. An old laptop, a tiny and cheap Raspberry Pi, or a dedicated NAS from a brand like Synology or QNAP will work perfectly.
    2. Some Time for Setup: You’ll have to install the software. Most of these apps run on a platform called Docker, which makes installation much, much simpler. You’re basically just copying and pasting a few commands from an online guide. There are tons of step-by-step tutorials on YouTube for each of these apps.

    Is It Really Worth the Effort?

    For me, and for a growing number of people, the answer is a definite yes.

    The initial setup might take you an afternoon. But once it’s running, it’s mostly hands-off. You get a private, secure photo library that you control. There are no more monthly fees. No more worrying about a company changing its privacy policy. Your most precious memories are truly yours.

    It’s a pretty powerful feeling.

  • How to Find the Best CPU for Your Money (It’s Not Just About Price)

    How to Find the Best CPU for Your Money (It’s Not Just About Price)

    Learn how to measure CPU value beyond the sticker price. We explain price-to-performance and performance-per-watt to help you find the best deal on your next PC build.

    I was chatting with a friend the other day who’s looking to upgrade his computer. He was getting lost in a sea of specs, model numbers, and prices. It’s easy to do. You see a CPU for $500 and another for $250, and the simple math says the cheaper one saves you money.

    But that’s not the whole story.

    The real question isn’t just “what does it cost?” but “what do I get for what it costs?” This is the core idea behind a super useful concept: price-to-performance ratio.

    So, What Is Price-to-Performance?

    Think of it like buying a car. You wouldn’t just look at the price tag. You’d ask about its gas mileage, right? A cheap car that guzzles gas might cost you more over a few years than a slightly more expensive one that sips fuel.

    CPUs are the same. The sticker price is just the entry fee. The real cost includes the electricity it uses every single day. That’s where we get into an even more important metric: performance-per-watt.

    This number tells you how much processing power you get for every watt of electricity the chip burns. A chip with great performance-per-watt is efficient. It runs cooler, quieter (because the fan doesn’t have to scream), and, most importantly, keeps your power bill down.

    The Hidden Costs of “Cheap” Hardware

    This is especially true if you’re building a machine that will be on 24/7, like a home server for your files, a media center, or even just a PC that you never really shut down.

    I’ve seen people buy old, decommissioned server hardware for a bargain. On paper, it looks great—tons of cores for next to nothing! But then the power bill arrives. Those older chips were often built for raw power in a time when electricity costs weren’t as big of a concern for data centers. They can run hot and loud, and that “great deal” ends up costing hundreds in extra electricity over its life.

    A modern, entry-level processor might have fewer cores but can often be faster in everyday tasks and use a tiny fraction of the power. So, while it might cost more upfront, it’s the cheaper, smarter choice in the long run.

    Okay, How Do I Actually Figure This Out?

    You don’t have to do the complex math yourself. Thankfully, some real hardware nerds out there do it for us. If you’re looking to compare chips, here are a few places I’d look:

    • PassMark Software: They have a famous “CPU Value Chart” that literally plots performance against price. It’s one of the fastest ways to see which CPUs are a true bargain at any given moment.
    • Tech Review Sites: Websites like Tom’s Hardware, AnandTech, and Gamers Nexus do incredibly deep dives. When they review a CPU, they almost always include charts showing its power consumption under different loads (like idle, gaming, or heavy work).
    • Puget Systems: These folks build high-end workstations, and they publish tons of data on how different components perform in real-world professional software, along with power usage.

    When you’re looking at these charts, don’t just find the one with the highest benchmark score. Look for the sweet spot. Find a chip that performs well but has a surprisingly low power draw. That’s your winner.

    It’s Not About Being Stingy, It’s About Being Smart

    At the end of the day, this isn’t about pinching every penny. It’s about making an informed choice. It’s about building a machine that’s not just powerful, but also balanced and efficient. The most expensive, top-of-the-line CPU is rarely the best value. Often, the smartest buy is a step or two down the ladder—a chip that delivers 90% of the performance for 50% of the cost and power draw.

    So next time you’re upgrading, don’t just look at the price. Dig one level deeper. You’ll save money, run a quieter machine, and build something you can feel genuinely good about. Happy building!

  • The Quest for the Perfect Mini Plex Server: Decoding 4K Transcoding

    The Quest for the Perfect Mini Plex Server: Decoding 4K Transcoding

    Thinking of a mini PC for your Plex server? Learn if budget models can handle 4K Dolby Vision transcoding and what to look for in a powerful, compact setup.

    So, you’ve finally done it. You’ve built a beautiful library of your favorite movies and shows, all saved as high-quality digital files on a network-attached storage (NAS) drive. The dream is to create your own personal Netflix—a slick, easy-to-use media server with Plex or Jellyfin that lets you stream your collection to any device, anywhere.

    You start looking for a small, quiet, power-efficient computer to run the server 24/7. And you quickly stumble upon the world of mini-PCs, like the super popular Beelink or Minisforum models. They seem perfect. They’re tiny, they sip power, and they’re surprisingly affordable.

    But then you hit a wall of technical jargon: “transcoding,” “hardware acceleration,” “Dolby Vision Profile 8.” Suddenly, the simple project feels complicated. The big question is, can one of these tiny, budget-friendly PCs actually handle the heavy lifting of streaming a pristine 4K movie file?

    I’ve been down this exact rabbit hole. Let’s break it down over a virtual coffee.

    What is “Transcoding” Anyway?

    Before we get into the hardware, let’s quickly demystify transcoding.

    Imagine your server has a huge, 80GB 4K movie file. You want to watch it on your phone while riding the bus. Your phone screen isn’t 4K, and your mobile connection definitely can’t handle streaming that much data.

    Transcoding is the process where your server, in real-time, converts that massive file into a smaller, more manageable version that’s perfect for your phone. It’s like having a personal video editor instantly resizing and compressing the movie just for you.

    When everything on your network is perfect—your TV supports the exact file format, your connection is fast—your server can “Direct Play” the file, which is easy. But the moment you need to convert it, your server’s processor has to do some serious work. And this is where 4K, especially with fancy formats like Dolby Vision, becomes a real challenge.

    The N100 Mini-PC: A Great Start, But Know Its Limits

    A lot of the popular, affordable mini-PCs right now use an Intel N100 processor. It’s a fantastic little chip that’s perfect for a lot of tasks. For a media server, it’s a champ at Direct Play and can even handle transcoding a couple of standard 1080p streams without breaking a sweat.

    But 4K is a different beast. And 4K with Dolby Vision (specifically Profile 7 or 8, the kind found on Blu-ray remuxes) is the final boss.

    Here’s the catch: The N100 relies on a built-in feature called Intel Quick Sync to handle video transcoding efficiently without maxing out the CPU. While it’s great for common formats, it often lacks the specific hardware support to properly transcode certain Dolby Vision profiles.

    When Plex or Jellyfin asks it to transcode a Dolby Vision Profile 8 file, the N100’s hardware acceleration can’t do it. So, it falls back to “software transcoding,” meaning the main CPU has to do all the work. And frankly, the N100 just isn’t powerful enough for that. You’ll likely see buffering, stuttering, or it might just fail completely, especially if you try to run two streams at once.

    So, can an N100-based mini-PC run a 4K media server? Yes, but only if you are 100% certain your devices will always Direct Play the files. If you need a reliable transcoding safety net, you’ll need something with a bit more muscle.

    Finding the Right Tool for 4K Transcoding

    If your goal is to reliably transcode one or two 4K streams, you don’t need a giant, power-hungry tower. You just need a mini-PC with a slightly better processor.

    The key isn’t necessarily getting a Core i7, but getting a processor with a more modern and capable integrated GPU. For Plex and Jellyfin, the recommendation is almost always an Intel CPU from the 8th generation or newer.

    Here are a few paths to consider:

    • The Value King: Refurbished Office PCs: Look for used or refurbished mini-PCs like a Dell OptiPlex Micro, HP EliteDesk/ProDesk Mini, or a Lenovo ThinkCentre Tiny. You can often find models with 8th, 9th, or 10th-gen Intel Core i3 or i5 processors for an incredible price. These CPUs have the Quick Sync muscle needed to handle multiple 4K transcodes smoothly.
    • The Modern Step-Up: If you want to buy new, look for mini-PCs with more modern Intel processors like the i3-N305 (a more powerful sibling to the N100) or any of the 12th-gen or newer Core i3 or i5 chips. These are more expensive than an N100 box but are basically guaranteed to handle anything you throw at them.
    • A Quick Hardware Checklist:
      • CPU: 8th-generation Intel Core series or newer.
      • RAM: 8GB is the minimum. 16GB is a comfortable and future-proof choice, especially if you want to run other applications on your server.
      • Storage: A 256GB or 500GB NVMe SSD is perfect for the operating system and your server software. It makes the whole system feel snappy. Your movie files can stay on your NAS.

    It’s About the Right Fit, Not Just Power

    Building a home server is a fun and rewarding project. It’s easy to get caught up in specs, but it’s really about finding the right balance for your specific needs and budget.

    That little N100 mini-PC is an amazing piece of tech and a perfect starting point for many. But if your library is full of high-bitrate 4K files, investing a little more in a PC with a more capable processor will save you a lot of headaches. You’ll get a silent, efficient, and powerful little server that just works, letting you get back to what really matters: enjoying your movie collection.

  • Have We Forgotten What a Real Server Can Do?

    Explore the debate between big homelab servers and mini PCs. Discover the pros and cons of each and find out which setup is right for your needs.

    I’ve noticed something interesting in the world of home servers lately. It seems like every time someone asks for advice on building their own lab, the answer is always the same: “Just get a mini PC.”

    And I get it. I really do. Mini PCs are small, quiet, and don’t use a lot of power. I even have one myself, a little HP Elitedesk that’s perfect for a few specific tasks. But I have to ask: have we forgotten what a real server can do?

    There was a time when building a homelab meant one thing: getting your hands on some serious hardware. We’re talking about 19-inch rack-mounted servers with powerful processors, tons of RAM, and enough storage to hold a small library. These machines were loud, power-hungry, and definitely not something you could hide behind a monitor. But they were also incredibly capable.

    My main server, for example, is a dual-socket beast with an E5-2660 v4 processor. It’s got more PCIe lanes than I know what to do with, supports ECC memory (a must for data integrity), and can hold a dozen hard drives. It’s the kind of machine that can run a dozen virtual machines, a Plex server, and a handful of game servers without breaking a sweat.

    And then there’s the GPU situation. I have another server that’s not on all the time, but it holds three GPUs for when I need to do some serious number crunching. Try doing that with a mini PC.

    But here’s the thing: I’m not saying that everyone needs a giant server in their basement. For a lot of people, a mini PC is more than enough. If you just want to run a Pi-hole, a small file server, or a handful of Docker containers, a mini PC is a great choice. They’re cheap, efficient, and get the job done.

    But if you’re like me, and you want to really experiment with technology, a mini PC is going to feel limiting very quickly. You’ll run out of storage, you’ll max out your RAM, and you’ll find yourself wishing you had more power.

    So what’s the answer? Is it big servers or mini PCs?

    I think the answer is both.

    There’s no reason to choose one over the other. In my own lab, I have a mix of both. My big server is the workhorse, handling all the heavy lifting. My mini PC, on the other hand, is perfect for smaller, more specialized tasks. It’s a great little machine, but it’s not a replacement for a real server.

    So next time you see someone asking for advice on building a homelab, don’t just tell them to buy a mini PC. Ask them what they want to do with it. Ask them what their goals are. And if they tell you they want to run a dozen virtual machines, a Plex server, and a handful of game servers, don’t be afraid to tell them the truth: they’re going to need a bigger boat.