Category: Uncategorized

  • This Tiny CPU Can Use Double the RAM Intel Says It Can

    Can the Intel N305 handle 64GB of RAM? I pushed this low-power CPU past its official 32GB limit to find out. Here’s what happened.

    I have a small, low-power computer that runs a few things for me 24/7. It’s one of those mini PCs with an Intel N305 processor—a quiet, efficient little chip that sips power. I love it, but I’ve always been a bit constrained by memory.

    Official documentation from Intel is pretty clear: the N305 processor supports a maximum of 32GB of RAM. And for a while, that’s exactly what I was running. It worked fine, but I always felt like I was bumping up against that ceiling. When you run a few services, maybe a virtual machine or two, 32GB can get eaten up surprisingly fast.

    So, I got curious.

    What if the official spec sheet was more of a… suggestion? A conservative, guaranteed-to-work number? I’d seen whispers online of people pushing hardware past the official limits, so I decided to try it myself.

    The Experiment: One Stick of RAM to Rule Them All?

    My plan was simple. I was going to take out my existing RAM and swap in a single 64GB DDR5 SODIMM stick. In my head, I figured one of two things would happen: the computer wouldn’t boot, or it would boot but only recognize 32GB of the available memory, ignoring the rest.

    I ordered the 64GB stick, and when it arrived, I shut down my little server, opened the case, and made the swap. It felt a little absurd putting a single module with that much memory into such a tiny machine.

    Then came the moment of truth. I plugged it back in, held my breath, and hit the power button.

    The Surprising Result

    It just… worked.

    The system booted up without any complaints. I immediately jumped into the system stats, half-expecting to see the number “32GB” staring back at me. But there it was, clear as day: 64GB of usable memory.

    I was honestly shocked. No special configuration, no BIOS hacks, nothing. It just recognized the full amount and got to work.

    Of course, recognizing the RAM is one thing. Being stable is another entirely. I let it run, putting it through its usual paces—running my services, moving files, the whole routine. I kept a close eye on it for the first few hours, then the first day, then the first few days.

    It’s been chugging along perfectly ever since. No crashes, no weird errors, no memory-related faults. It’s as stable as it was with 32GB, but now I have an enormous amount of headroom. My memory usage chart went from looking stressed to looking relaxed.

    So, What’s the Catch?

    Now for the important part. This is just my experience with my specific machine. It’s not a guarantee that this will work for every Intel N305 system out there. Hardware manufacturers can have their own limitations, and maybe I just got lucky with my combination of motherboard and RAM.

    I also can’t speak to the long-term effects. Will running double the “supported” RAM cause any degradation or weird issues six months from now? I have no idea. It’s a risk I was willing to take for my home lab, but you should definitely think it over before trying it on a critical system.

    But for now, this is a huge win. It means this little, power-efficient CPU is more capable than its spec sheet lets on. For anyone looking to build a beefy home server without a big, power-hungry machine, this is incredibly useful information. You might be able to get a lot more performance out of these tiny PCs than you think.

    If you were on the fence about one of these systems because you thought 32GB of RAM wasn’t enough, well, it turns out you might not have to settle. Just be prepared to be a bit of a guinea pig.
  • How Much NAS Do You Actually Need? A Guide for First-Time Buyers

    How Much NAS Do You Actually Need? A Guide for First-Time Buyers

    A friendly guide to choosing your first Network Attached Storage (NAS). Learn how to pick the right pre-built NAS for media, files, and apps without the DIY hassle.

    So, you’ve decided you need a NAS.

    Maybe you’re tired of juggling external hard drives. Maybe you want to create your own personal Netflix with Plex or Jellyfin. Or maybe, like a lot of creatives, you need a central, reliable spot to store massive design files.

    Whatever the reason, you’ve landed here. And if you’re feeling a little overwhelmed by the options, you’re not alone. The world of Network Attached Storage (NAS) can feel like a deep rabbit hole of technical specs, passionate forum debates, and a whole lot of acronyms.

    I’ve been there. You just want something that works. You don’t have a ton of cash to throw around, and you definitely aren’t interested in spending a weekend building a server from scratch.

    Let’s talk through it.

    What Do You Actually Need It For?

    Before you even look at a single product page, let’s get clear on the job you’re hiring this little box to do. For many people, it comes down to a few core tasks:

    • Streaming Media: This is a big one. Running a service like Jellyfin or Plex is fantastic, but it has one major technical catch: transcoding. If the device you’re watching on doesn’t support the video file’s format, the NAS has to convert it on the fly. This requires a decent amount of CPU power. If all your devices can “direct play” the files, the CPU doesn’t have to work as hard.
    • Running Small Apps: Things like a personal wiki (using Wiki.js, for example), a password manager, or running Docker containers are becoming super popular. These don’t usually require a ton of processing power, but they do appreciate a little extra RAM.
    • Storing Files: This is the most basic function of a NAS. For storing graphic design projects, photos, documents, or backups, the main thing you need is reliable storage, not a super-powered processor.

    The trick is that your choice of NAS will depend on which of these is your priority. If you’re a 4K video-transcoding power user, your needs are very different from someone who just needs a simple file repository.

    The “Appliance” vs. The “Flexible Box”

    For years, the pre-built NAS market has been dominated by two main players: Synology and QNAP. They sell you an “appliance.” The hardware and software are tightly integrated, and for the most part, it’s a very slick, user-friendly experience. Think of it like the Apple of the NAS world.

    But this comes with a trade-off. You’re locked into their ecosystem. Their hardware can sometimes be a little less powerful for the price you pay, and you can’t just wipe it and install a different operating system if you want to experiment down the line. For some, this proprietary nature is a deal-breaker.

    This is where a new wave of devices, from companies like UGREEN and others, is starting to make things interesting.

    They offer another path: a pre-built box with solid hardware that doesn’t lock you into a single OS. This is the sweet spot for a lot of people. You get the convenience of not having to build it yourself, but you gain the freedom to install something more open and powerful like TrueNAS or Unraid. It’s the best of both worlds if you’re a little adventurous but not a full-on DIYer.

    So, How Much Power Is “Enough”?

    This is the real question, isn’t it? You don’t want to overspend, but you don’t want a sluggish machine that can’t handle your needs a year from now.

    Let’s break it down based on the use cases we talked about.

    • For heavy media streaming (e.g., transcoding 4K Jellyfin streams): You’ll want to look for a NAS with a modern Intel processor that has Quick Sync Video. This feature is designed for video transcoding and does the job much more efficiently than the main CPU cores. An Intel Celeron N-series or Pentium chip found in many modern NAS units is surprisingly capable here.
    • For running a few apps and storing files: Honestly, you don’t need a beast. The same Celeron or Pentium processors are more than enough. Where you might want to invest is in RAM. While you can get by with 4GB, starting with 8GB gives you much more breathing room to run a few apps in the background without things slowing down.

    For most people looking for their first NAS for media, files, and a few projects, a 2-bay or 4-bay unit with a modern Intel N-series/Pentium CPU and 8GB of RAM is the absolute sweet spot. It provides enough power for today’s needs and a little headroom for tomorrow’s, without breaking the bank.

    Ultimately, choosing your first NAS isn’t about finding the most powerful box. It’s about finding the right one for you. It’s about being honest about your needs, your budget, and how much you want to tinker. And the good news is, today you have more “it just works” options than ever before—even if you want the freedom to make it your own.

  • My Server Closet Grew Up: A Homelab Story

    My Server Closet Grew Up: A Homelab Story

    A personal story of upgrading a simple closet server into a powerful, multi-drive homelab for Plex, storage, and tinkering. See the before and after.

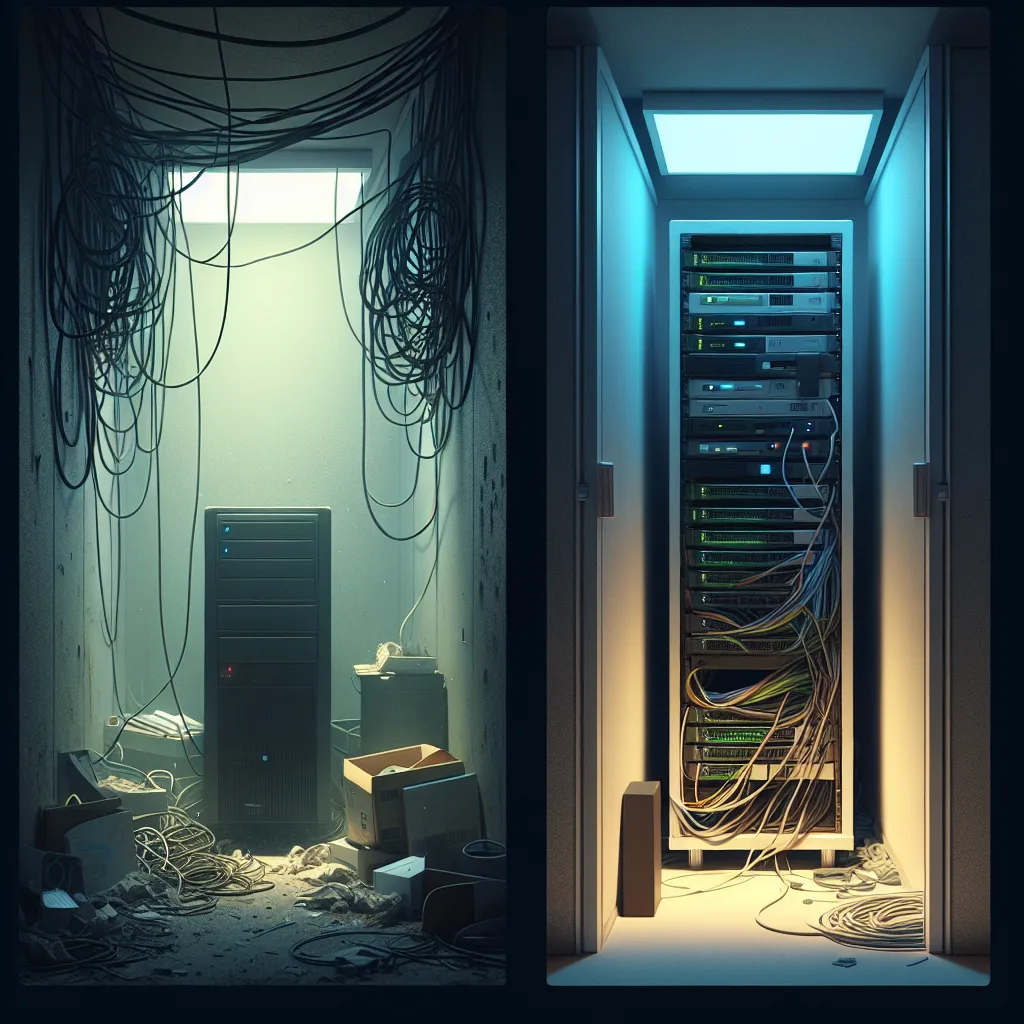
    It all started in a closet.

    That’s where the internet cable comes into the house, so it seemed like the logical place. I had an old Windows gaming PC that wasn’t doing much, so I loaded up Plex and called it a server. And for a while, it worked just fine. It was my first real “homelab,” even if it was just a single, dusty tower tucked away out of sight.

    But things change.

    That old PC was a power hog, and my electricity bill noticed. Plus, as the kids got older, their digital lives exploded. Suddenly, that makeshift server wasn’t just for my media—it needed to handle backups, photos, and all the digital odds and ends a family creates. The hardware was outdated, inefficient, and bursting at the seams. It was time for a real upgrade.

    The Spark for a Full Rebuild

    I knew I couldn’t just get a slightly newer PC. I wanted to do it right this time. I wanted something more powerful, more efficient, and much, much bigger in terms of storage. I also wanted a setup that I could tinker with and learn from.

    So, I started planning. My goal was to separate tasks onto dedicated machines for better performance and reliability. After a lot of research, I landed on a multi-device setup that felt like a huge leap forward.

    The New and Improved Homelab

    My little closet server has grown into a proper rack. It’s still in the closet, but it’s a world away from the single dusty tower I started with. Here’s a look at what’s running the show now.

    • The Brains: Mac Mini M4
      This little machine is the core of my setup. With its 10GbE network connection and a speedy 4TB SSD, it runs all my primary services. This includes Plex and Jellyfin for media streaming, Tautulli for server stats, a personal website, and a handful of other useful applications. Using a Mac Mini is a bit unconventional for a server, but it’s quiet, power-efficient, and surprisingly fun to build on.

    • The Storage Powerhouse: Aoostar WTR Max running Unraid
      This is where the serious storage lives. It’s a beast of a machine packed with six 22TB hard drives. That’s a whole lot of space for media, backups, and anything else I can think of. It’s all managed by Unraid, which is a flexible operating system for building a home NAS (Network Attached Storage). This was my first time using Unraid, and it’s been a fantastic learning experience. I also have a couple of NVMe drives inside for cache, which helps speed things up.

    • The Network Backbone: UniFi Gear
      To make sure all these devices can talk to each other at high speed, I invested in a proper network stack. A UniFi Cloud Gateway and a UniFi Pro Max switch handle all the traffic, including the PoE (Power over Ethernet) for my security cameras. It’s the glue that holds the entire system together.

    • Even More Storage: UNAS Pro
      Because you can never have too much storage, right? I also have a dedicated UNAS Pro chassis with another seven 18TB drives. This is mainly for long-term archives and secondary backups.

    A Work in Progress (As Always)

    Putting it all together was a project in itself. After getting the Aoostar box up and running, I had to completely reorganize the rack to make everything fit neatly. For the first time, it feels like a finished setup.

    Well, “finished” for now.

    Part of the fun of a homelab is the constant tinkering. I enjoyed building on the Mac, but I wanted a platform where I could really experiment with different operating systems and services. That’s why I went with the Aoostar build. I’m already debating if I should switch from Unraid to something like Proxmox to get even more flexibility.

    The journey from that one PC in a closet to this multi-machine rack has been a blast. It started as a simple solution to a simple problem and evolved into a genuine hobby. And if you’re thinking about starting your own, just remember: it’s okay to start small. You never know where it might lead.

  • My DIY Homelab: A Peek Behind the Curtain

    My DIY Homelab: A Peek Behind the Curtain

    A friendly look inside a personal homelab build, from the Proxmox cluster and pFsense firewall to network storage and UPS backups. Your guide to DIY tech.

    Okay, let’s talk about my homelab.

    But first, a small confession. The wiring is a bit of a work in progress. If you peeked behind my desk, you wouldn’t see perfectly combed cables tied down in neat bundles. It’s a bit chaotic, but it’s an honest chaos. It’s the sign of something that’s actively being built, tweaked, and improved.

    And that’s what a homelab is all about, right? It’s a journey. But with that said, the core of my setup is finally humming along, and I wanted to share what I’ve put together.

    The Brains: A Three-Node Proxmox Cluster

    The heart of my entire setup is a high-availability (HA) cluster running Proxmox.

    So what does that mean in plain English? I have three separate mini-computers that all work together as one powerful, resilient machine. Proxmox is the software that lets me run all sorts of virtual machines (VMs) and containers. Think of it as having dozens of virtual computers for different tasks—a web server, a media server, a development environment—all running on this little trio of hardware.

    The “high-availability” part is the secret sauce. If one of the three machines fails or needs to be rebooted for an update, the other two automatically take over its workload. My services stay online without a hiccup. It’s a bit of enterprise-level magic for the home.

    Here’s the hardware that makes it happen:

    • 1 x M700 Business Mini PC (i5, 32GB RAM)
    • 2 x Gmtek Nucbox Mini PCs (i9, 64GB RAM each)

    I went with mini PCs because they’re incredible. They sip power compared to traditional rack servers, they’re quiet, and they take up almost no space. Yet, they have more than enough horsepower for anything I throw at them.

    The Gatekeeper: pFsense for Routing and Security

    I stopped using the router from my internet provider a long time ago. Instead, I built my own using pFsense.

    pFsense is a powerful, open-source firewall and router software. It gives me complete control over my network traffic. I can create advanced rules, monitor for threats, and segment my network to keep my lab projects separate from my main home network. It runs on its own dedicated N100 mini PC with 16GB of RAM, so it never becomes a bottleneck.

    This connects to a Netgear CM3000 modem, which is a simple, reliable workhorse that just handles the connection to the outside world.

    Storage, Wi-Fi, and a Safety Net

    A lab needs storage, and a home needs good Wi-Fi.

    For storage, I’m using a Netgear ReadyNas 214 with 24TB of space in a RAID-5 configuration. The RAID-5 setup is key. It means my data is spread across multiple drives in a way that protects me if one of them fails. I can lose an entire drive and not lose a single file. This is where I keep my backups, media, and larger project files.

    For wireless, a Netgear AX6000 Mesh system covers the house. A mesh network is great because it uses multiple nodes to blanket the entire home in a strong signal, killing any dead zones.

    Finally, none of this would be safe without a backup power plan. The entire setup is protected by two 1500VA Cyberpower UPS (Uninterruptible Power Supply) units. These are essentially giant batteries. If the power flickers or goes out, they kick in instantly, giving me plenty of time to shut everything down gracefully. It’s the single most important piece of gear for preventing data corruption and hardware damage.

    It’s a Process

    And that’s the setup. It’s a mix of consumer, prosumer, and enterprise ideas, all scaled down to fit in the corner of my office. It’s my personal cloud, my development playground, and my ongoing hobby.

    Is it perfect? Nope. I still want to clean up those wires. But it’s powerful, it’s resilient, and it’s mine. If you’ve been thinking about starting your own lab, just start. It doesn’t have to be perfect on day one. Just get one piece, learn it, and build from there. That’s half the fun.

  • My Home Server Does Everything. Is It Time for a Breakup?

    My Home Server Does Everything. Is It Time for a Breakup?

    Is your all-in-one home server becoming a single point of failure? Learn when and how to split services for a more reliable and manageable smart home setup.

    It’s a familiar story for anyone who loves to tinker. You start with a single, powerful PC. A real workhorse. You think, “I can run a few things on this.” Before you know it, that one machine is doing everything.

    It’s your media server, streaming movies to your family. It’s the brains of your smart home, turning lights on and off. It’s even managing your home network.

    And for a while, it works beautifully. It feels efficient. One machine to rule them all.

    But then, a little thought creeps in. A quiet question you start asking yourself late at night: “Is this getting too complicated? Am I putting too many eggs in one basket?”

    If you’re asking that question, you’re probably on the right track.

    The All-in-One Dream

    Let’s be honest, the all-in-one setup is amazing at first. I once had my entire digital life running on a single Ubuntu machine with a beefy processor and a ton of RAM. It was running:

    • Home Assistant in a Docker container for all my smart home stuff.
    • Plex, Sonarr, Radarr, and the whole media suite.
    • A Unifi controller to manage my Wi-Fi.
    • A massive 18TB RAID array for storage.

    It felt powerful. It felt simple. Why fire up multiple machines when one could handle the load? It saves electricity, it’s less hardware to manage, and it’s all right there in one place. But that single point of convenience is also its greatest weakness.

    When the Dream Becomes a Headache

    The main problem with an all-in-one server is that it becomes a single point of failure. And I mean total failure.

    Think about it.

    What happens when you need to reboot the machine to install a critical security update? Suddenly, it’s not just your server that’s down.

    • The Wi-Fi goes offline (because the Unifi controller is rebooting).
    • The smart lights stop responding (because Home Assistant is offline).
    • Your partner’s movie night comes to a screeching halt (because Plex is offline).

    A simple 5-minute reboot suddenly requires a household-wide announcement. You become a lot more hesitant to touch anything. That little software update you wanted to try? Maybe later. That experimental setting you wanted to tweak? Too risky.

    Your server becomes fragile. A single rogue process that eats up all the CPU could bring down every critical service in your home. Your desire to tinker is now at war with your need for stability.

    The Smart “Breakup”: How to Separate Your Services

    So, what’s the solution? It’s not about getting rid of your powerful PC. It’s about giving it a more focused job. The idea that’s probably rattling around in your head is the right one: it’s time to strategically separate your services.

    Step 1: Identify Your “Always-On” Services

    Look at your list of services and ask one question: “What absolutely cannot go down?”

    For most people, that list is surprisingly short:
    1. Home Automation (Home Assistant): This needs to be running 24/7. It’s the core of your home’s intelligence.
    2. Network Controller (Unifi): If this is down, your internet and Wi-Fi are down. It’s non-negotiable.

    These services are critical, but they’re also very lightweight. They don’t need a 16-core CPU to run smoothly.

    Step 2: Offload to a Mini PC

    This is where a small, power-efficient machine comes in. Something like a Beelink, an Intel NUC, or even a Raspberry Pi 4 is perfect for the job.

    Move your “always-on” services—Home Assistant and your Unifi Controller—to this dedicated mini PC.

    The benefits are immediate:
    * Rock-Solid Stability: This little machine will do its job quietly in a corner, sipping power and keeping your core home infrastructure online, no matter what.
    * Low Power Consumption: It’ll use a fraction of the energy your big server does, saving you money in the long run.

    Step 3: Refocus Your Main Server

    With the critical stuff moved, your big, powerful PC is now free to do what it does best: handle the heavy lifting.

    It can now be your dedicated NAS (Network Attached Storage) and Media Server.

    Let it manage the big RAID array, run the entire Plex media suite, handle video transcoding, and run any other resource-heavy applications you want to experiment with. Now, when you need to reboot it to update Plex or tinker with a new application, you won’t take the entire house down with you. The lights will stay on, and the Wi-Fi will keep working.

    Is It the Right Path?

    Yes. Moving from a single, do-it-all machine to a more distributed setup isn’t a step backward. It’s an evolution. It’s the natural path toward building a home network that is more resilient, more manageable, and ultimately, less stressful.

    You get the best of both worlds: the raw power of your main PC for heavy tasks and the quiet, reliable stability of a mini PC for the essentials. Your home will be smarter, and your life will be easier.

  • My First Homelab: From Curious Hobbyist to Self-Host Pro

    My First Homelab: From Curious Hobbyist to Self-Host Pro

    A personal journey into building a first homelab. See the hardware, software, and lessons learned from a beginner with no IT background.

    It Starts With a Spark of Curiosity

    I’ve always been a tinkerer, but I have zero professional IT background. For me, technology was a hobby, a way to solve little problems or just learn something new. So when I first stumbled upon the world of “homelabbing” and self-hosting, I was instantly hooked. The idea of building my own little data center at home felt like the ultimate DIY project.

    It was also a little intimidating. But I decided to dive in headfirst, learn as I went, and share what the experience is really like for a total beginner.

    My main goal was simple: build a home server that was stable, secure, and actually useful in my daily life. I didn’t want a rack of blinking lights that just sat there collecting dust and running up my power bill. I wanted it to earn its keep.

    The Hardware: My First Homelab Setup

    After a lot of reading, I landed on a setup that felt powerful but wouldn’t be overwhelming. I focused on small, efficient hardware instead of big, loud servers.

    Here’s a look at the core components:

    • Mini PCs (x2): These are the heart of the lab. I installed Proxmox on them, which is a fantastic piece of software that lets you run multiple virtual computers (VMs) and lightweight containers (LXCs) on a single physical machine. It’s like having a whole fleet of computers in two tiny boxes.
    • Synology NAS: This is my central storage hub. It holds all our family photos, documents, and media. But it’s also doing double duty—I’m running my backup server in a virtual machine right on the NAS.
    • Firewalla Gold Pro: This replaced my old consumer-grade router. The difference is night and day. It gives me a crystal-clear view of what’s happening on my network and makes security much more straightforward.
    • Raspberry Pi 4B: A classic for a reason. This little guy runs smaller, dedicated tools and is perfect for experimenting.
    • Networking Gear: A simple TP-Link PoE Switch powers everything, and a UniFi AP7 Access Point provides solid Wi-Fi 6 coverage throughout the house.

    The Software: Putting the Lab to Work

    Hardware is cool, but the software is where the magic happens. This is what turns a pile of electronics into a genuinely useful home server.

    I’m running a lot of different services, but a few have already become essential.

    1. A Smarter, More Private Home

    I use Home Assistant to connect all my smart devices. My favorite automation so far is one that checks the hourly price of electricity and adjusts my Nest thermostat accordingly. On hot days, it pre-cools the house when electricity is cheap and then lets the temperature drift up a bit when prices spike. It’s a small thing, but it’s a perfect example of making the server pay for itself.

    2. Taming the Paperwork

    I set up Paperless-ngx, an incredible open-source tool for managing documents. I can scan any piece of mail or a receipt, and it automatically digitizes, tags, and files it. The best part? I connected it to Ollama, a tool that lets me run a large language model (LLM) locally. This means my Paperless instance uses a private AI to make every single one of my documents fully searchable. No more digging through filing cabinets.

    3. Making Backups Effortless

    The golden rule of IT is to back everything up. I’m running Proxmox Backup Server to automatically back up all my virtual machines and containers every night. It gives me peace of mind knowing that if I mess something up (which happens!), I can restore it with a few clicks.

    The Bumps in the Road

    It hasn’t all been smooth sailing. My initial plan included a cool little LCD screen connected to a KVM switch so I could directly access the servers without a dedicated monitor. But I hit a wall. Proxmox, the operating system on my mini PCs, doesn’t play nicely with the screen without some complex GPU passthrough configurations.

    Is it frustrating? A little. But it’s also just part of the process. My next project might be to use that Raspberry Pi to display a Grafana dashboard on the screen instead—showing me real-time stats about my lab. Every problem is just a new opportunity to learn something.

    Was It Worth It?

    Absolutely.

    Starting this project with no formal experience has been one of the most rewarding things I’ve done. It’s a hobby that grows with you. You start with a simple goal, and before you know it, you’re learning about networking, virtualization, and even a little bit of AI.

    If you’re on the fence about starting your own homelab, my advice is to just begin. Start small. Pick one problem you want to solve—whether it’s blocking ads on your network, backing up your photos, or just tracking airplanes for fun (yes, I do that too with ADSB!).

    You don’t need to be an expert. You just need to be curious.

  • How to Install a Hard Drive in an HP EliteDesk Mini (When It Seems Impossible)

    How to Install a Hard Drive in an HP EliteDesk Mini (When It Seems Impossible)

    Struggling to install a 2.5-inch HDD or SSD in your HP EliteDesk 800 G3 Mini? This simple guide shows you the two essential parts you need to make it fit.

    So you got your hands on one of those awesome little PCs, like an HP EliteDesk 800 G3 Mini. They’re fantastic little workhorses—compact, quiet, and surprisingly powerful for their size. And like many of us, you probably have a spare laptop hard drive or a 2.5-inch SSD lying around, thinking, “Perfect! I’ll just pop this in for some extra storage.”

    You grab your screwdriver, slide off the sleek metal case with a satisfying click, and then… you stop. You stare at the beautifully engineered internals, a marvel of miniaturization, and you see absolutely nowhere to put your drive. There are no obvious brackets, no empty bays screaming “install drive here.” It feels like trying to solve a puzzle with a missing piece.

    If this is you, don’t worry. You’re not crazy, and you haven’t missed something obvious. I’ve been there myself. The truth is, you’re not missing a piece of the puzzle—you’re missing two very specific, very necessary parts.

    The Secret: It’s All About the Caddy and the Cable

    Unlike big, boxy tower PCs with standardized drive cages, these Small Form Factor (SFF) and Mini PCs from brands like HP, Dell, and Lenovo rely on proprietary parts to save space. To add a standard 2.5-inch drive (the size used in laptops), you can’t just screw it directly to the chassis. You need two things:

    1. A 2.5-inch Drive Caddy: This is a custom-molded plastic or metal bracket that your hard drive or SSD screws into first.
    2. A Proprietary SATA Cable: The motherboard doesn’t have the standard SATA power and data ports you’re used to seeing. Instead, it has a single, small connector that requires a special combo cable.

    Without these two parts, that extra drive is just a paperweight. But once you have them, the installation is a breeze. Here’s how you do it.

    Step 1: Get the Right Parts

    This is the most important step. You need the specific caddy and cable for your model. For the HP EliteDesk 800 G3 Mini, you’ll want to search online marketplaces like eBay or Amazon for:

    • HP EliteDesk G3 Mini 2.5 inch drive caddy (Part number is often 912328-001)
    • HP EliteDesk G3 Mini SATA cable (Part number is often 904494-001)

    It’s crucial to get the parts designed for the G3 model, as parts from other generations might not fit. You can often find them sold together as a kit. Expect to spend around $10-$20 for both.

    Step 2: Open Up Your EliteDesk

    This is the easy part. Make sure the computer is unplugged. There’s a single thumbscrew on the back of the PC. Loosen it, and the top cover will slide right off toward the back. Set it aside.

    Step 3: Locate the Drive Bay

    Now that you’re inside, look for the main cooling fan and heatsink assembly. It looks like a black plastic shroud covering a metal fin stack. This entire assembly is usually hinged. Gently lift it up and it will pivot, revealing the space underneath. That empty spot below is where your new drive is going to live.

    Step 4: Prepare Your Drive

    Take your 2.5-inch HDD or SSD and your new drive caddy. Place the drive into the caddy. You’ll see four small screw holes that line up with the screw holes on the side of your drive. Use the small screws that likely came with the caddy to secure the drive. Don’t overtighten them—just snug is good.

    Next, take your special SATA cable. One end has the standard L-shaped connectors for data and power that plug into your drive. The other end has a small, single white or black connector. Plug the standard end into your drive.

    Step 5: Install the Drive and Connect It

    With the drive now nestled in its caddy, it’s time to put it in the PC.

    1. Slide it in: The caddy is designed to slide perfectly into the bay you just uncovered. It should click or drop into place securely.
    2. Connect the cable: Take the small end of the SATA cable and find its matching port on the motherboard. It’s usually located near the drive bay and is often labeled SATA1 or something similar. It only fits one way, so don’t force it.

    Step 6: Close Up and Power On

    That’s pretty much it for the hardware part. Gently lower the fan assembly back into place until it clicks. Slide the top cover back on and tighten the thumbscrew.

    Plug everything back in and boot up your computer. Your PC’s BIOS/UEFI should automatically detect the new drive. Once you’re in your operating system (like Windows), you’ll need to initialize and format the drive before you can use it. Just search for “Disk Management” in the Start Menu, find your new drive (it’ll show as unallocated), right-click it, and follow the prompts to create a new simple volume.

    And there you have it. That seemingly impossible task is done. It’s one of those things that feels complicated until you know the secret. Now you can enjoy all that extra storage for your games, files, or media. Happy upgrading!

  • I 3D-Printed My Homelab, and It’s Better Than Anything I Could Buy

    I 3D-Printed My Homelab, and It’s Better Than Anything I Could Buy

    Discover how a 3D printer can transform your tech space. A personal story about building a custom, organized homelab with 3D-printed parts.

    My desk used to be what I’d call “organized chaos.” Piles of tech, tangled cables, and a general sense of things being almost in the right place. I had a little homelab setup—a few mini PCs, a network switch, and some hard drives. But none of it fit together nicely. The commercial stands and racks I found online were either too expensive, too big, or just… ugly.

    So, I looked at the 3D printer sitting in the corner of my room and had an idea. What if I just made the exact parts I needed?

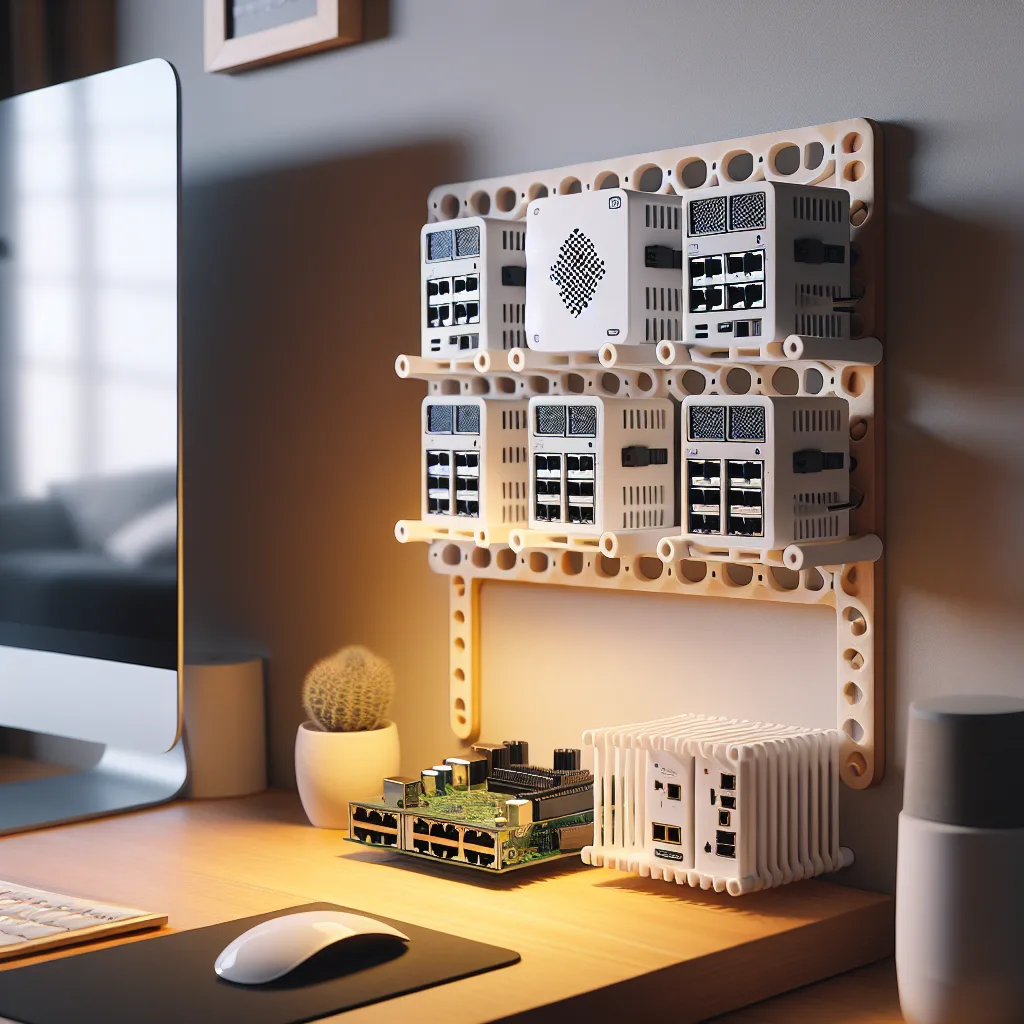
    It wasn’t a grand, master plan at first. It started with a simple problem: I had three identical mini PCs for my server cluster, and they were just stacked on top of each other, getting warm and looking messy. I couldn’t find a simple, vertical rack for them anywhere.

    So I opened up some design software (you can even find pre-made files on sites like Printables or Thingiverse) and designed a basic, slotted stand. A few hours later, I had a physical object in my hand. It was a simple, white plastic holder that cost maybe two dollars in filament to print.

    And it fit. Perfectly.

    That’s when I knew I was onto something.

    From Digital File to Physical Part

    The first successful print was a spark. Suddenly, I wasn’t just looking at my messy desk; I was seeing a collection of design challenges.

    • The awkward network switch? I designed and printed a custom bracket that lets it hang neatly under my desk, completely out of sight but still accessible.
    • The external hard drive that always vibrated? I printed a snug little case for it with vibration-dampening feet.
    • Cable management? I stopped buying flimsy clips and printed my own. I made channels that screw into the underside of my desk, guiding every cable exactly where it needs to go.

    Slowly, piece by piece, I replaced the chaos with custom-built order. My setup started to look less like a pile of electronics and more like a thought-out system. Each component had its own purpose-built home. The best part? The total cost for all these custom parts was probably less than one fancy monitor arm.

    Why Print It Yourself?

    Look, you can definitely buy solutions for all these problems. But building it yourself with a printer has a few benefits that you just can’t buy off the shelf.

    1. A Perfect Fit, Every Time. Your space and your gear are unique. With a 3D printer, you’re not limited to one-size-fits-all products. You can measure your device down to the millimeter and create a mount or stand that feels like it was made for it. Because it was.

    2. It’s Surprisingly Affordable. A roll of filament, which can last for dozens of projects like this, costs about $20-$25. The cost of printing a single bracket or mount is often less than a cup of coffee. Compare that to the specialized racks and stands sold online, and the savings add up fast.

    3. It’s Incredibly Flexible. Technology changes. You get a new device, or you want to rearrange your setup. Instead of throwing out an old stand and buying a new one, you can just tweak your design and print an updated version. It’s a sustainable and adaptable way to manage your gear.

    4. The Satisfaction is Real. There’s something deeply rewarding about solving a problem with something you created yourself. It connects you to your setup in a different way. It’s not just a collection of products you bought; it’s a system you built.

    You Don’t Have to Be an Expert

    Getting started with this is easier than you might think. You don’t need to be a mechanical engineer. The online 3D printing community is huge and incredibly generous. Thousands of free models for things like cable clips, mini PC mounts, and headphone stands are available for anyone to download and print.

    If you have a 3D printer, or you’ve been thinking about getting one, I’d encourage you to look around your own workspace. Find one small thing that annoys you—a loose cable, a wobbly device—and see if you can find a printed solution for it.

    It’s a fun, practical hobby that can bring a whole new level of custom organization to your space. My desk is no longer chaotic. It’s calm, it’s functional, and it’s uniquely mine.

  • This Tiny Server Rack Is a Big Deal for Hands-On Learning

    This Tiny Server Rack Is a Big Deal for Hands-On Learning

    Discover how a small, 3D-printed 10-inch server rack is making complex tech concepts accessible and hands-on for students and hobbyists alike.

    I love stumbling upon simple ideas that solve a real problem. No fancy tech, no million-dollar budget. Just a clever solution that makes you think, “Wow, that’s smart.”

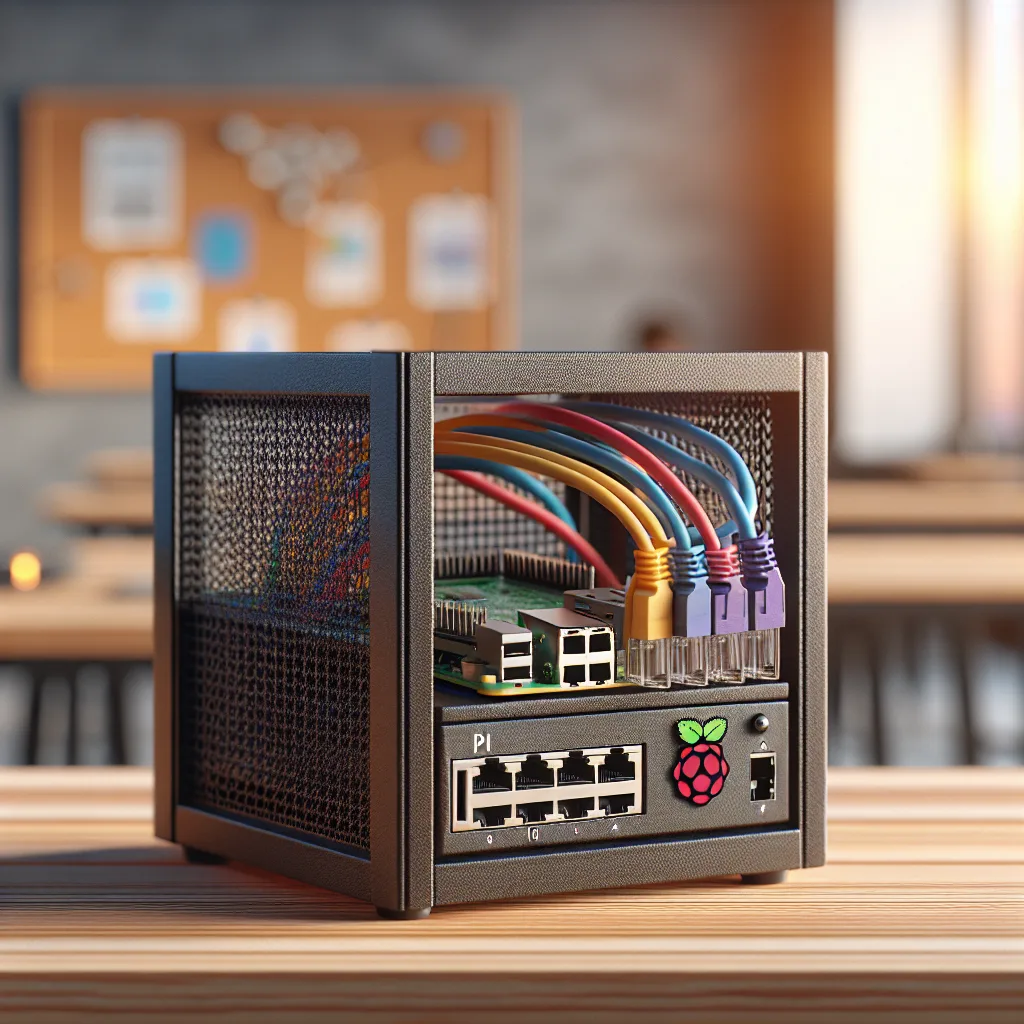
    And I saw a perfect example of this recently: a 3D-printed, 10-inch server rack.

    It’s not a full-sized, humming metal cabinet you’d see in a data center. It’s a miniature version, small enough to sit on a desk. And this particular one was built for a classroom, to help students learn about networking and IT infrastructure.

    I think that’s just brilliant.

    Making Tech Tangible

    Let’s be honest, a lot of modern technology is abstract. We talk about “the cloud,” “virtual machines,” and “networks,” but these are concepts that are hard to grasp because you can’t really see or touch them. It’s one thing to draw a network diagram on a whiteboard. It’s another thing entirely to physically plug a cable from a switch to a server.

    This is where a little rack makes a huge difference.

    Suddenly, students aren’t just reading about networking theory. They’re doing it. They can hold the components in their hands. They can mount a small device, like a Raspberry Pi or a network switch, into the rack. They can run the tiny ethernet cables and learn about cable management. They can see, with their own eyes, how the physical pieces connect to create a functioning system.

    This hands-on approach is so powerful for learning. It turns abstract ideas into concrete experiences. That’s how you create those “aha!” moments that stick with you for years.

    More Than Just a Plastic Box

    What I find most interesting is how this project bridges two different worlds: the digital and the physical.

    • On one hand, you have 3D printing. A student can literally download a file, send it to a printer, and create a physical object that solves a problem. It teaches design, patience (those prints can take a while!), and the incredible power of localized manufacturing. You don’t need to order a part from a factory thousands of miles away; you can make it right there in the classroom.
    • On the other hand, you have the fundamentals of IT. This little rack becomes the centerpiece for all sorts of lessons. You could build a tiny web server on a Raspberry Pi. You could set up a firewall. You could learn how to assign IP addresses. You could even link a few of these racks together to simulate a larger network.

    The rack itself isn’t the lesson. It’s the platform for dozens of lessons. It’s a tool that sparks curiosity and invites students to experiment. And because it’s so small and inexpensive, it’s not intimidating. No one is afraid of breaking a multi-thousand-dollar server. It’s a safe space to learn, tinker, and maybe even fail a little on the way to understanding.

    Why This Matters Outside the Classroom

    This isn’t just a great idea for schools. It’s a perfect example of a trend I’m seeing everywhere: the rise of the “homelab.”

    Tech enthusiasts are building these small-scale IT environments in their own homes to learn new skills, test software, or just have fun. That massive, noisy server rack from a decade ago is being replaced by quiet, low-power, and sometimes 3D-printed, solutions.

    It shows that you don’t need a huge budget or a dedicated room to start learning about enterprise-level tech. You can do it from your desk with a few Raspberry Pis and some creativity. It lowers the barrier to entry for everyone.

    So, while this little plastic rack might just look like a simple school project, it’s part of a much bigger idea. It’s about making technology more accessible, more hands-on, and more human. It’s a reminder that sometimes the most effective learning tools aren’t the most expensive ones, but the ones that you can build yourself.

  • So You Found a Super Cheap PC. Can It Become a Home Server?

    So You Found a Super Cheap PC. Can It Become a Home Server?

    Thinking of buying a cheap, used PC for a home server? Here’s an honest guide to know if it’s worth it for a NAS or Minecraft server.

    You’re scrolling through Facebook Marketplace, and you see it. An old office PC, listed for next to nothing. Maybe £40, maybe $50. The gears in your head start turning. You’ve been wanting to set up a small home server—something for storing files or maybe even hosting a private Minecraft world for you and your friends.

    This could be it. The perfect, cheap entry point.

    But then you hesitate. Is a machine that cheap actually any good? Or is it just a dusty box that will cause more headaches than it’s worth?

    I’ve been there, staring at that exact same kind of listing. It’s a tempting idea, but it’s smart to pause and ask if it’s the right move. So, let’s talk it through.

    The Dream vs. The Reality

    The dream is simple: you hand over a couple of notes, take the PC home, plug it in, and suddenly you have a capable server running 24/7. Your old laptop that buckled under the pressure of running a Minecraft server can finally retire.

    The reality is usually a bit more complicated.

    These super-cheap PCs are almost always old office desktops. Think Dell Optiplex or HP EliteDesk models from 5-10 years ago. They were built for running Word and browsing the internet, not for heavy lifting.

    So, what does that mean for your server plans?

    For a File Server (NAS):
    For a simple Network-Attached Storage (NAS) setup where you’re just storing and accessing files, one of these machines can actually work pretty well. The processor doesn’t need to be a powerhouse. As long as it can run a lightweight operating system (like TrueNAS or a simple Linux setup), you’re mostly good to go. The main bottleneck will be the hard drives, but we’ll get to that.

    For a Minecraft Server:
    This is where things get tricky. Minecraft, especially a server, relies heavily on single-core CPU performance. That means it needs one part of its brain to be really, really fast. Older office PCs often have CPUs with many cores that are all pretty slow.

    An underpowered CPU will lead to “tick lag,” where the game world slows down, blocks reappear after you break them, and the whole experience feels sluggish for everyone connected. It might be better than your old laptop, but it might not be the smooth experience you’re hoping for.

    The Real Cost of a “Cheap” PC

    That £40 price tag is just the entry fee. To make that old PC genuinely useful, you’ll almost certainly need to spend a bit more.

    Here are the two biggest upgrades to plan for:

    • RAM: These machines often come with a measly 4GB or 8GB of RAM. For a server doing more than one thing, you’ll want at least 16GB. Minecraft, in particular, loves to eat up RAM. You’ll need to check what kind of RAM it uses (likely older, slower DDR3) and find a compatible kit.
    • Storage: The single biggest upgrade you can make is swapping the old, slow hard disk drive (HDD) for a solid-state drive (SSD). The original hard drive is likely the slowest component in the entire system. Installing the operating system on an SSD will make the whole machine feel dramatically faster and more responsive. You can still use large, cheap HDDs for mass file storage, but the OS needs an SSD.

    Suddenly, your £40 project is closer to £100 or £120 after you buy more RAM and a new drive. It’s still not a bad deal, but it’s important to go in with your eyes open.

    So, Should You Buy It?

    Here’s my honest take.

    Yes, buy it if: You are a tinkerer at heart. If you enjoy the process of taking something old and making it useful, this is a fantastic project. It’s a low-cost way to learn about server hardware, networking, and operating systems like Linux. The satisfaction of getting it all working is a reward in itself. You’re not just buying a server; you’re buying an education.

    No, don’t buy it if: You just want something that works, right now, with minimal fuss. If your main goal is a reliable, performant Minecraft server and you get frustrated by technical troubleshooting, you might be better off saving a bit more. A slightly newer used PC (maybe a few generations younger) or a dedicated machine like an Intel NUC might cost more upfront but save you a lot of time and potential disappointment.

    A Quick Checklist Before You Buy

    If you decide to go for it, here’s what you should try to find out before handing over your cash:

    • What is the exact CPU model? This is the most important question. You can Google the model (e.g., “Intel Core i5-4570”) to see how old it is and get a rough idea of its performance.
    • How much RAM is in it? And what type (DDR3 or DDR4)? This will tell you how much you need to buy to upgrade it.
    • Does it have a hard drive? Ask if you can see it power on to make sure it’s not completely dead.
    • What’s the size? Some of these office PCs are “SFF” or Small Form Factor. They’re compact, which is nice, but they have very little room inside for extra hard drives.

    Ultimately, turning a cheap old PC into a server is a classic rite of passage for many tech enthusiasts. It’s a journey of discovery and a great lesson in the value of hardware. It won’t be a powerhouse, but it will be yours. And sometimes, that’s the whole point.