It’s super useful and looks great, but building this DIY e-paper dashboard wasn’t exactly a walk in the park. Here’s how it went.
My Quest for the Perfect, Low-Power Display
I’ve been obsessed with my smart home setup for a while now, tweaking everything in Home Assistant and running services on my Proxmox server. But I always felt like something was missing. I wanted a simple, at-a-glance view of my home’s vitals—weather, temperatures, whether my critical services were online—without having to pull out my phone or wake up a computer monitor. I was looking for a quiet, low-power, always-on display. My search led me down a fascinating rabbit hole, and I eventually decided to build my own e-paper dashboard.
E-paper, or e-ink, is the same technology you find in Kindle readers. It’s known for two things: it’s incredibly low-power (it only uses energy when the image changes) and it’s super easy on the eyes. It was the perfect candidate for my project.
The Hardware for This E-Paper Dashboard Project
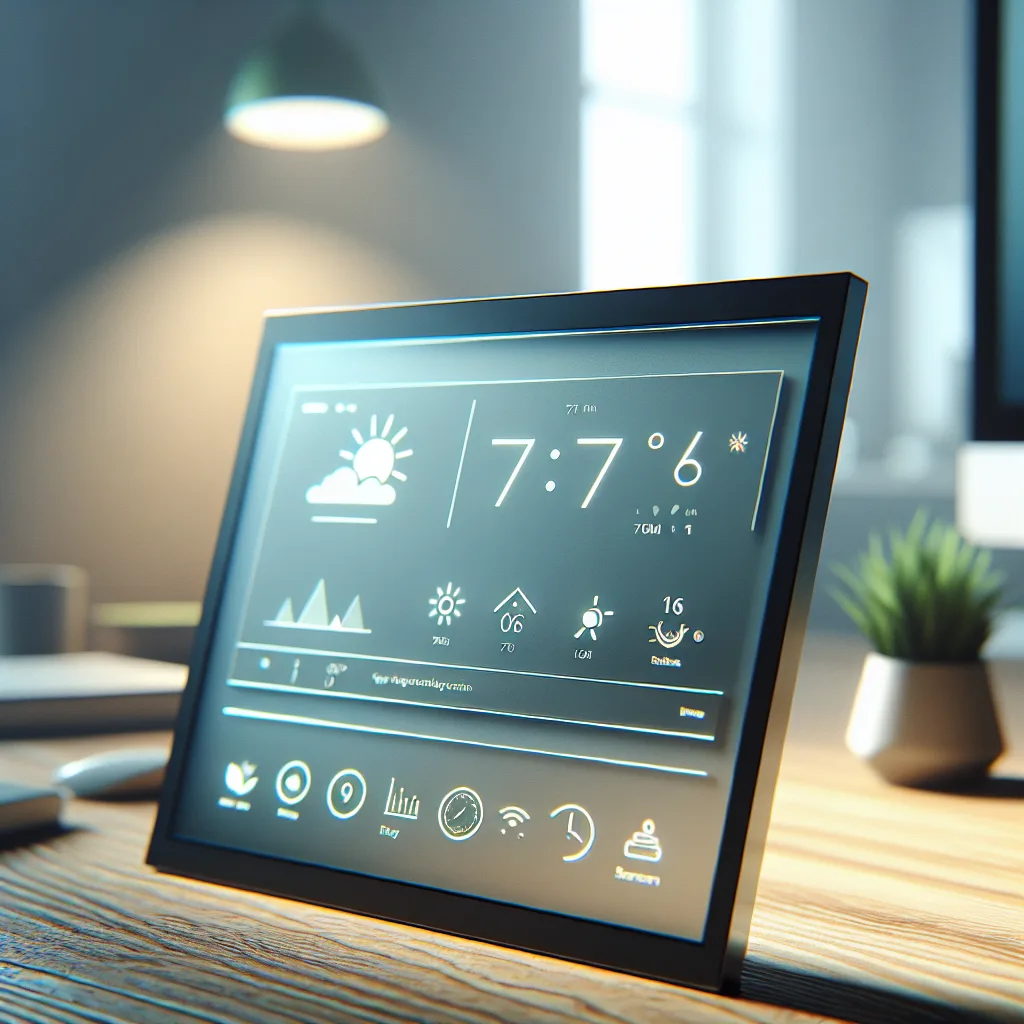
After some research, I landed on the Seeed Studio 7.5″ ePaper Panel. At around $60, it felt like a reasonable investment for a hobby project. The best part is that it comes with an ESP32-C3 chip built right in. If you’re not familiar, the ESP32 is a tiny, powerful microcontroller that’s super popular in the DIY and smart home community. Having it integrated meant I didn’t have to deal with complex wiring or soldering a separate controller to the screen. It was almost plug-and-play from a hardware perspective.
The idea was to create a display that would quietly cycle through a few different screens: one for weather, one for my Home Assistant sensor data, and another to show the resource usage of my Proxmox server containers. Simple, right?
Getting the E-Paper Dashboard on the Wall: The ESPHome Hurdle
This is where things got… interesting. To get the display talking to Home Assistant, I used ESPHome. ESPHome is a fantastic tool that lets you configure microcontrollers using simple YAML files, right from within Home Assistant. It’s usually my go-to for custom sensors and devices.
But making a graphical layout for a display with it? That was a different beast entirely. Full transparency: it was a real pain. Unlike a drag-and-drop interface, every single element on the screen—every icon, every line of text, every number—had to be manually positioned using coordinates in a YAML file.
My configuration file grew into a massive, sprawling list of entities. Want to move the temperature reading 5 pixels to the right? You have to find the right line, change the x coordinate, save it, and then upload the new firmware to the device. It’s a slow, tedious process of trial and error. There’s nothing dynamic about it. You can’t just add a new sensor in Home Assistant and have it appear on the screen. You have to go back into the code and add it manually.
Was It Worth It? The Honest Truth
So, after all that wrestling with YAML, do I regret it? Not at all. I absolutely love the final result. The e-paper dashboard sits on my desk, quietly doing its job. It sips power, the display is crisp and clean, and it gives me that perfect, at-a-glance summary I was craving. It feels like a truly custom piece of my smart home.
But it’s important to be realistic about the process.
The Good:
- It looks amazing. The high-contrast, paper-like display is just plain cool.
- Extremely low power. It can stay on 24/7 without making a dent in your electricity bill.
- The satisfaction. Building something yourself that integrates perfectly into your setup is a great feeling.
The Not-So-Good:
- The setup is tedious. Be prepared to spend hours tweaking YAML code.
- It’s not flexible. Changing the layout is a chore, so you have to be sure about what you want to display.
If you’re someone who enjoys the process, loves to tinker, and has a bit of patience, I’d say go for it. It’s a deeply rewarding project. But if you’re looking for a quick and easy, plug-and-play solution, this probably isn’t it. For now, I’m happy with how my little dashboard turned out, but I might explore other ways to do it in the future—maybe with Arduino for more flexibility. Until then, I’ll enjoy my perfectly coded, beautifully static display.