Ethernet crimping made simple with practical advice and fewer frustrations
If you’ve ever tried your hand at ethernet crimping, you probably know the struggle firsthand. Those tiny RJ45 connectors and wires can be surprisingly tricky. Ethernet crimping isn’t just about pushing wires into a plug; it’s an art that, when done right, makes your network connections reliable and tidy.
What Is Ethernet Crimping?
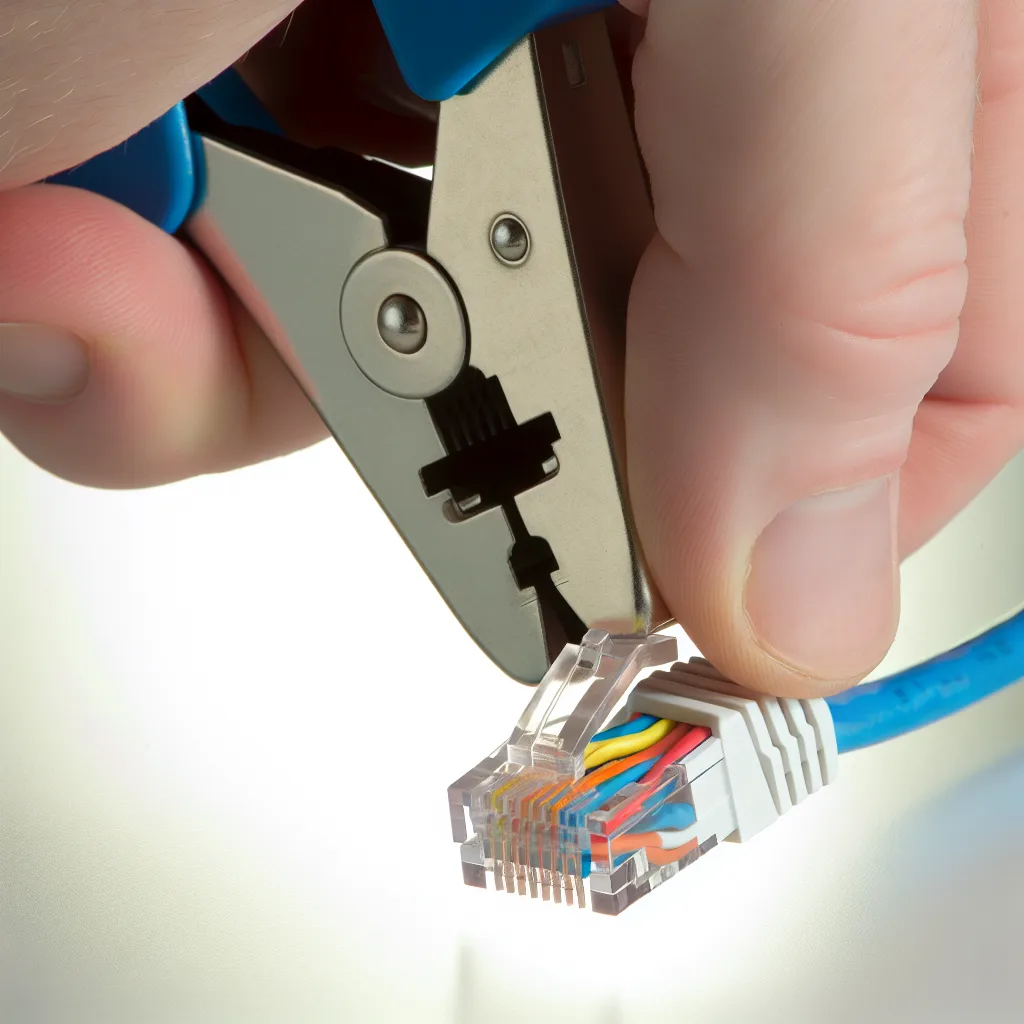
Ethernet crimping is the process of attaching an RJ45 connector to the end of a twisted-pair cable so that it can be plugged into a network device. This is essential for creating custom-length cables or repairing damaged ones. But if you don’t get it right, you end up with cables that won’t work, or worse, intermittent connections that drive you crazy.
Why Does Ethernet Crimping Throw People Off?
Honestly, it kicks my ass sometimes too! The wires are so small and need to be perfectly lined up and fully inserted before crimping. Even when you think you got it right, the little metal pins inside the connector have to make flawless contact with the wire strands.
Here are a few common issues:
– Wires not fully inserted: If a wire isn’t pushed all the way into the connector, it won’t make a good connection.
– Wrong wire order: Wiring standards like T568A and T568B have specific color orders; mixing them up results in a non-functional cable.
– Poor crimping tool: Cheap or worn-out crimpers don’t apply even pressure and can damage your connectors.
Tips for Better Ethernet Crimping
- Get the Right Tools – Invest in a decent quality crimping tool that also trims and strips cable. This makes your life so much easier.
- Use a Cable Stripper – Don’t try to strip wires with your fingernail or a knife. A cable stripper lets you peel back the jacket cleanly without damaging the wires.
-
Follow the Color Code – Before you start, choose between T568A or T568B wiring standards. Usually, T568B is more common in the US. Be consistent!
-
Double-Check Wire Lengths – Make sure all wires are trimmed evenly and reach the end of the connector.
-
Test Your Cables – Use a cable tester right after you crimp. It saves a lot of trial and error and frustration later on.
Learning from Mistakes
I remember the first time I tried crimping an ethernet cable; it was a mess. I had twisted wires, connectors half-crimped, and no internet to show for it. It took a bit of patience and a lot of YouTube tutorials to figure out the nuances.
Alright, so maybe it’s a bit finicky at first. But once you get the hang of it, making your own ethernet cables is satisfying and can actually save you money. Plus, you get that little boost of pride when your custom cable works perfectly on the first try!
Further Resources
If you want to dive deeper, check out the official Ethernet standards documentation to understand cable and connector types better. You can also find reliable guides from manufacturers like Fluke Networks which offer some great tutorials and cable testers.
Doing ethernet crimping yourself means you’re no longer stuck with pre-made cables that don’t quite fit your needs. With a bit of practice and the right tools, you can build cables tailored to your space and setup. So go on, give it a shot—you might surprise yourself!
Whether you’re setting up your home network or just fixing a broken cable, mastering ethernet crimping can be rewarding and useful. Don’t let those little crimps kick your ass anymore. With these tips, you’ll be on your way to clean, reliable wired connections.